







TL;DR
Learn how to build a 360-degree interactive product spinner using Cloud Images Toolkit (CIT) and Immersive Media Spots (IMS) Web Components. We will set up Cloudflare Images for CDN delivery, manage assets locally with CIT, and embed a framework-agnostic <ims-viewer> tag on the frontend.
Have you ever tried to showcase a complex physical product on a web page? Standard photos often fall flat, and 3D models can be expensive, uncanny, or lack the true texture of reality. This is especially true for items with fine details like jewelry, antiques, or specialized hardware. A 360-degree photo spinner provides a great middle ground, but building the pipeline to host, scale, and render dozens of high-res frames without blocking page rendering is usually a headache.
Here is how you can build a complete workflow for interactive 360-degree product views using two completely free and open-source tools:
- Cloud Images Toolkit (CIT) - for asset management
- Immersive Media Spots (IMS) - for the frontend rendering
This setup is ideal for web studios, photo studios, and professional photographers who want to provide high-end interactive content as a value-add service for their clients without the overhead of custom 3D development.
What You Need
- A sequence of 360° product photos
- An Image CDN account. We will use Cloudflare Images for this guide, but Cloudinary, ImageKit, or Bunny.net also work perfectly. If you want a free option to start, both Cloudinary and ImageKit offer generous forever-free tiers (up to 20-25GB of monthly bandwidth)!
- Node.js 20.0+ installed
Step 1: Prepare Your Image Sequence
Whether you use professional studio equipment or a smartphone with a DIY turntable, capture the object from all angles.
Important: Your files must be named sequentially (for example, IMG_0001.jpg, IMG_0002.jpg) so the toolkit sorts them automatically. Conveniently, this sequential naming usually happens by default right out of your camera or smartphone.
Step 2: Configure Your Cloudflare Images Account
To serve images at scale efficiently, we route them through a CDN.
- Copy your Cloudflare Account ID from the dashboard.
- Generate an API token with permissions to read and write Cloudflare Images.
- Set up your delivery variants in the Cloudflare dashboard (e.g.,
320,640,1024).
Step 3: Set Up Cloud Images Toolkit (CIT)
CIT acts as a bridge between your local file system and your CDN. It handles syncing, caching, and provides a local UI to configure interactive widgets.
Create a cit-config.json file in a new project folder:
[
  {
    "name": "My Photo-360 Collection",
    "cdn": "cloudflare",
    "syncDataPath": "./cit-sync-data.json",
    "imsDataFolder": "./ims-widgets/",
    "imsDataMinify": true,
    "imgSrcFolder": "./cit-store/",
    "apiKeyPath": "./CIT_API_KEY",
    "projectId": "<YOUR_CLOUDFLARE_ACCOUNT_ID>",
    "imgUrlTemplate": "https://imagedelivery.net/<YOUR_ACCOUNT_HASH>/{UID}/{VARIANT}",
    "previewUrlTemplate": "https://imagedelivery.net/<YOUR_ACCOUNT_HASH>/{UID}/{VARIANT}",
    "imsUrlTemplate": "https://<YOUR_DOMAIN>/ims/{HASH}.json",
    "variants": ["320", "640", "1024", "2048", "public"],
    "imgTypes": ["png", "jpg", "jpeg", "webp"],
    "wsPort": 8080,
    "httpPort": 8081
  }
]
Save your API token inside a file named CIT_API_KEY in the same directory.
Place your sequentially named images inside a specific subfolder within the ./cit-store/ directory. Tip: Keep your folder structure clear and ensure your folder names are as unique as possible. Because folder navigation in the CIT dashboard relies on sub-path filtering, using distinct folder names (e.g., cit-store/sneakers-red-v1/) makes it significantly easier to locate and manage your product assets.
Important: Add your API key and the images folder to your .gitignore file to prevent committing secrets or large raw images to your repository:
CIT_API_KEY
cit-store/
The remaining files, like your configuration (cit-config.json), sync data (cit-sync-data.json), and widget configs (ims-widgets/), are designed to be committed. Tracking these files allows your team to collaborate on widget configurations via Git.
Step 4: Launch the CIT Dashboard
Start the toolkit using npx:
npx cloud-images-toolkit
This command boots up a local web application. CIT will automatically detect your local files, sync them to Cloudflare Images, and make them available via your CDN.
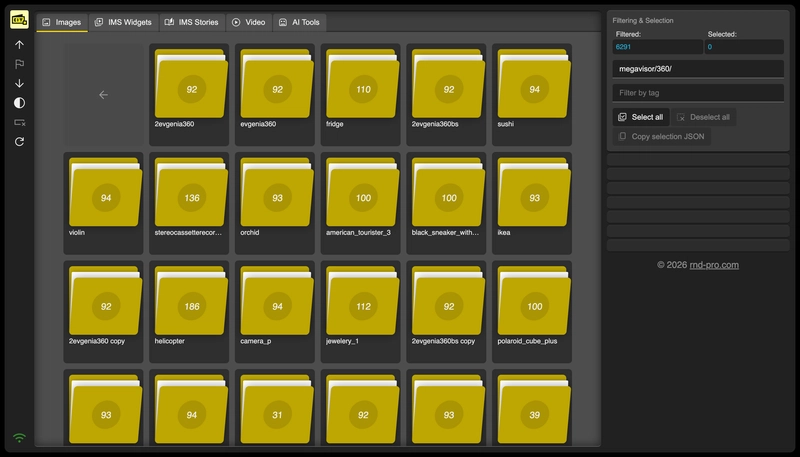
Step 5: Configure the Spinner Widget
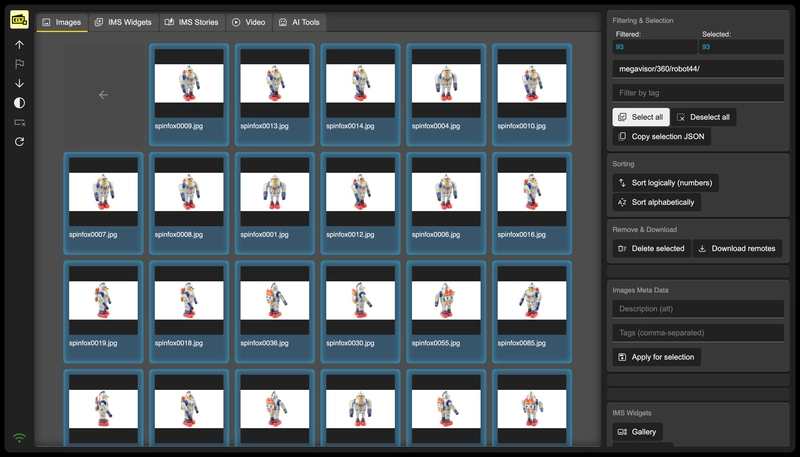
- Open the CIT web interface in your browser.
- Navigate to your newly synced image folder.
- Select all the frames for your product using the "Select All" button in the right sidebar.
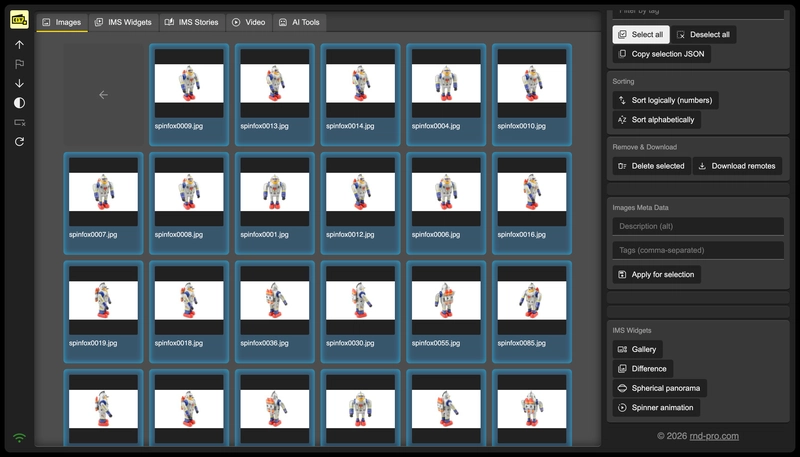
- Scroll down the sidebar and select the Spinner animation widget type.
The widget editor will open. Here you can tweak settings like rotation direction, speed, autoplay, and inertia. You will see a live interactive preview of exactly how the spinner behaves.
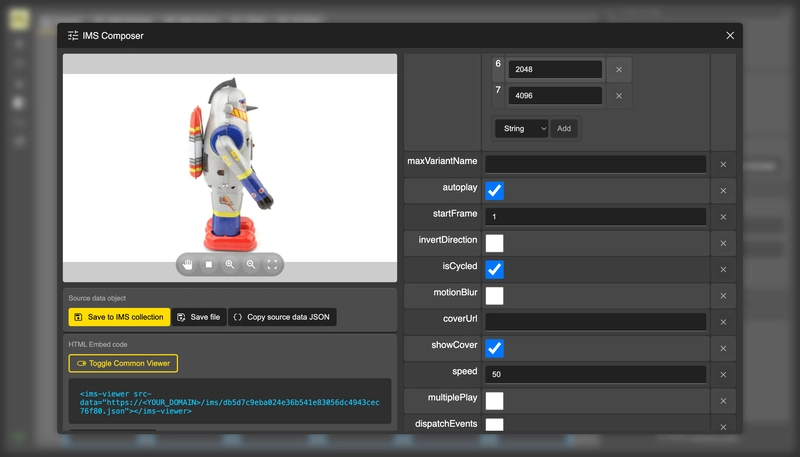
Once you are happy with the behavior, click Save File. CIT generates a lightweight .json configuration file named after its content hash and places it in your ./ims-widgets/ directory.
Step 6: Embed on Your Website
Upload the generated JSON file to your web server so it is publicly accessible via HTTPS.
Now, we use Immersive Media Spots (IMS) to render it. IMS provides framework-agnostic web components that work in vanilla HTML, React, Vue, or any other stack. Add the IMS viewer script to your page:
<script type="module" src="https://cdn.jsdelivr.net/npm/immersive-media-spots@latest/viewer/+esm"></script>
Finally, place the viewer component wherever you want the 360° spinner to appear, pointing src-data to your JSON config URL:
<ims-viewer src-data="https://yourdomain.com/ims/abcdef123456.json"></ims-viewer>
(Optional) If you prefer not to host the JSON file separately, the CIT editor also provides a Base64 encoded string that you can embed directly into the src-data attribute.
Step 7: Customize with CSS
IMS widgets are entirely themeable via CSS custom properties. Because there is no CSS framework lock-in, you can easily tweak colors, dimensions, and transitions to match your brand directly in your stylesheet:
ims-viewer {
  /* Example customizations */
  width: 800px;
  aspect-ratio: 4 / 3;
  background-color: #fff;
  box-shadow: 0 0 10px rgba(0, 0, 0, .2);
  border-radius: 12px;
}
The Result
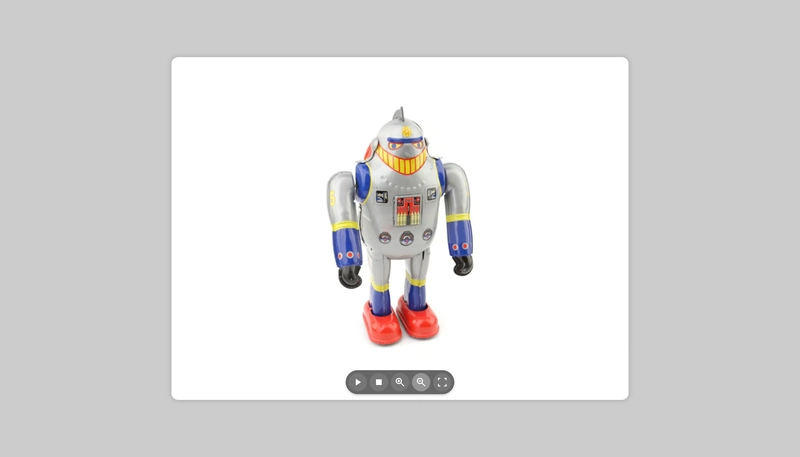
Interactive Demo (you can inspect the page source code)
Under the Hood
What makes this setup performant is how the <ims-viewer> handles loading. Built on top of Symbiote.js, it dynamically imports only the specific widget code (the spinner logic) when it is actually needed. It uses the IntersectionObserver to defer initialization until the element scrolls into the viewport. Furthermore, it automatically selects the most optimal image resolution variant based on the container size and device DPI, while the CDN automatically detects and serves the most efficient image format (such as WebP or AVIF) supported by the user's browser.
You get a scalable, performant 360-degree product viewer without writing complex frontend logic or managing massive image payloads manually. By delegating asset processing to CIT and rendering to IMS, you keep your main web application bundle small and your workflows clean.
Check out the Cloud Images Toolkit and Immersive Media Spots repositories on GitHub to explore the source code or set up your own asset pipeline.