






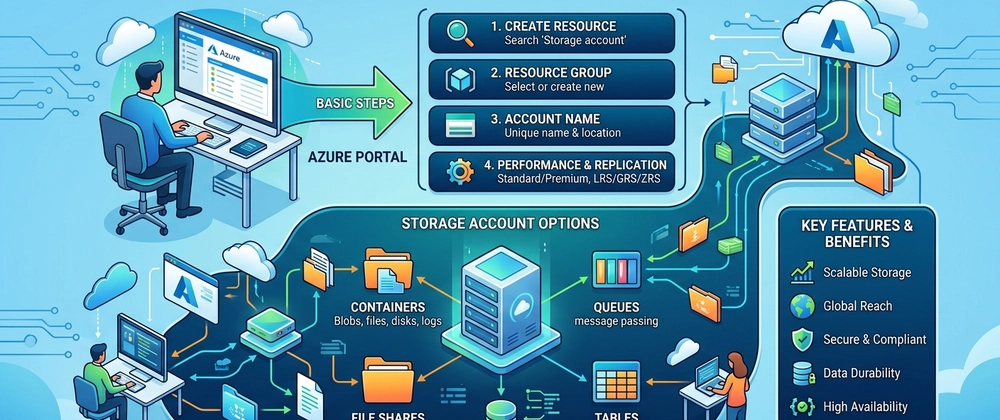

Introduction
Starting with Azure can feel overwhelming. There are so many options, settings, and configurations that it's hard to know where to begin. But here's the good news: setting up a storage account doesn't have to be complicated.
I recently went through the process of creating my first Azure Storage Account for a learning project, and I want to share what I learned. This guide will walk you through each step in plain language.
We'll create a storage account that's perfect for learning and testing i.e one that's secure, won't rack up unexpected charges, and follows good practices from the start. No prior Azure experience needed!
Step 1: Creating a Resource Group
What's a Resource Group?
Think of a resource group like a folder on your computer. Just like you'd put all your vacation photos in one folder, you put all your related Azure resources in one resource group. It makes everything easier to organize and manage.
The cool part? When you delete the resource group later, everything inside gets deleted too. No hunting down individual items. Perfect for learning projects!
Let's Create One quickly
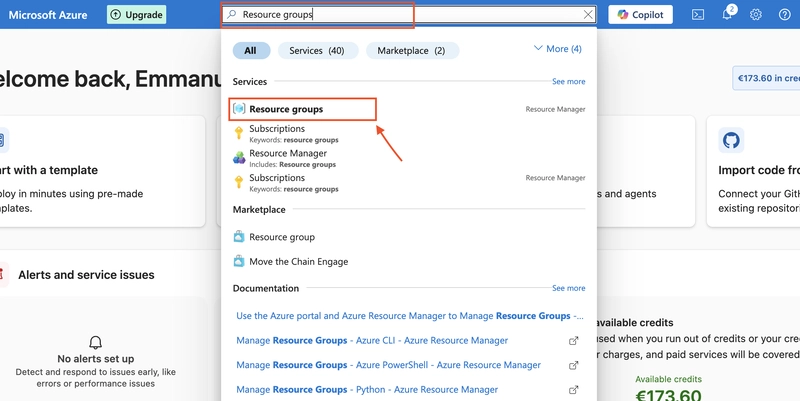
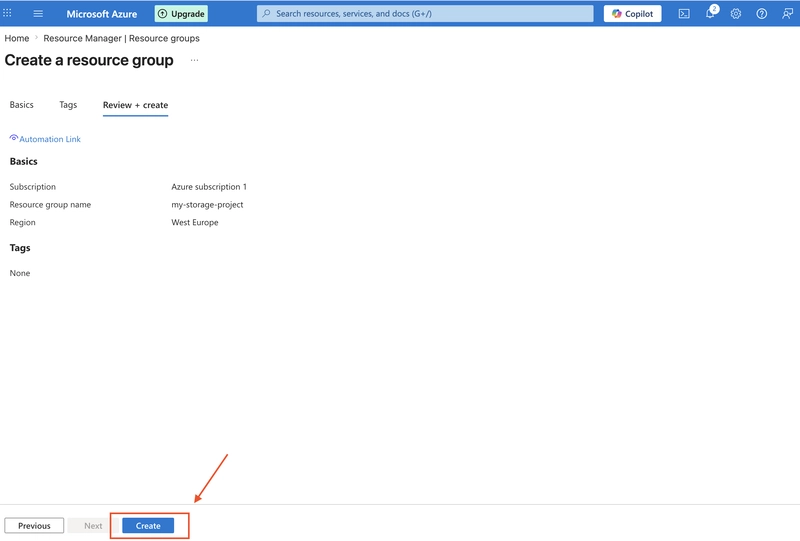
- Open the Azure Portal and type Resource groups in the search bar
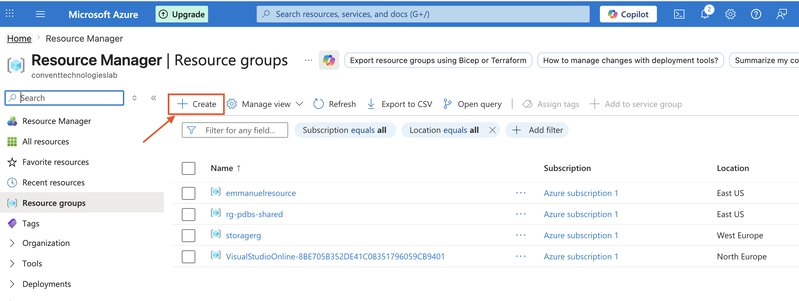
- Click the + Create button
- Give it a simple name like my-storage-project or learning-storage
- Pick a region (like East US or West Europe)just choose one close to you
- Click Review and create
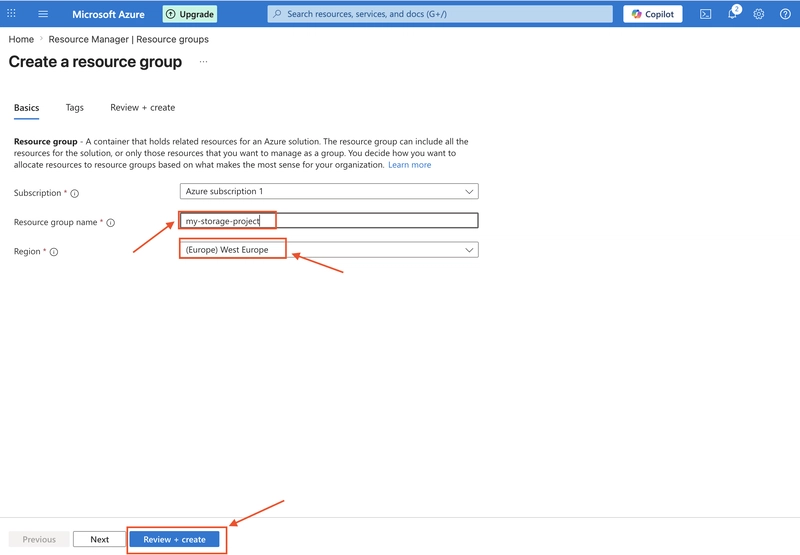
- then Create
Creating Your Storage Account
Now let's create the actual storage account
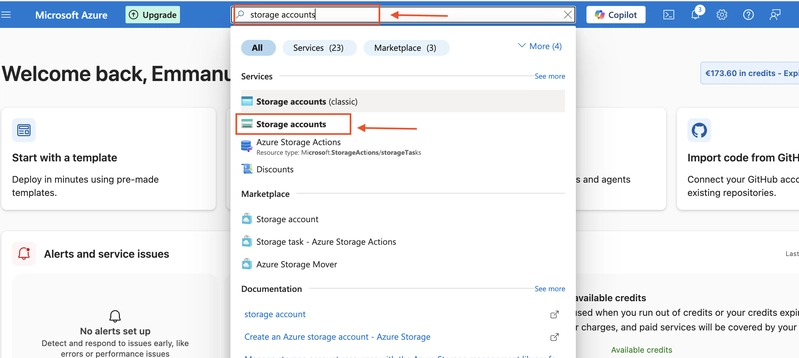
- Search for Storage accounts in the Azure Portal
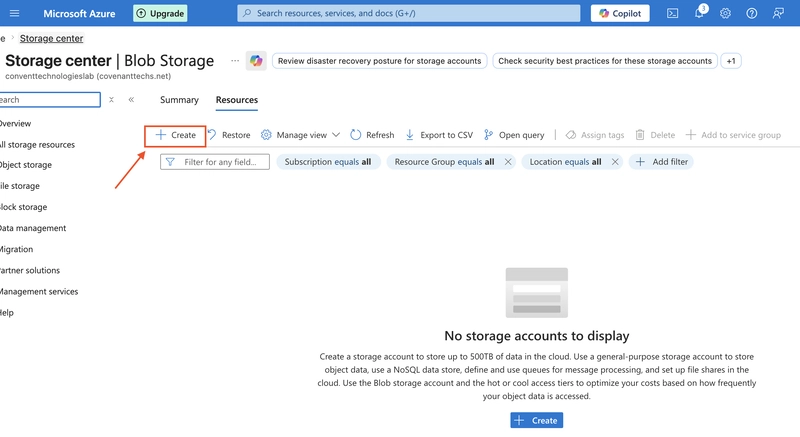
- Click + Create
- Select the resource group you just created
- Give your storage account a name (it needs to be unique across all of Azure, so try something like mystoragelearn123)
- Keep Performance set to Standard (this is the cheaper option and perfect for learning)
- Click Review + Create
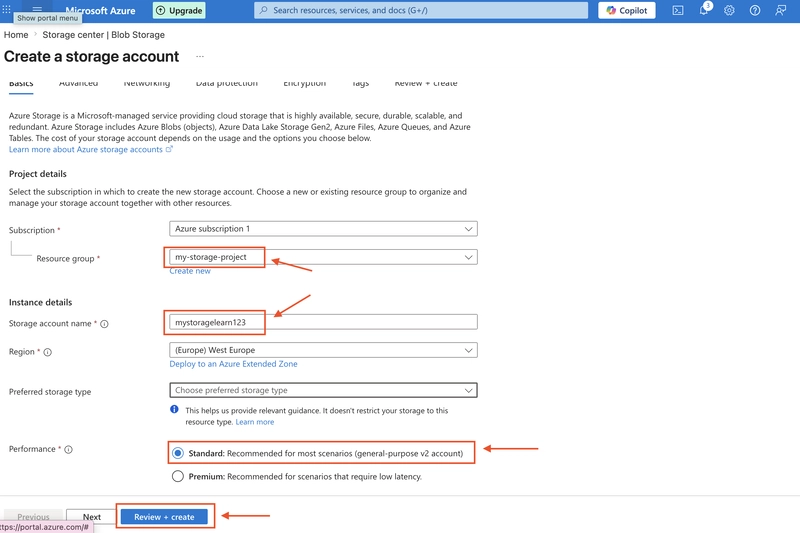
- Then Create
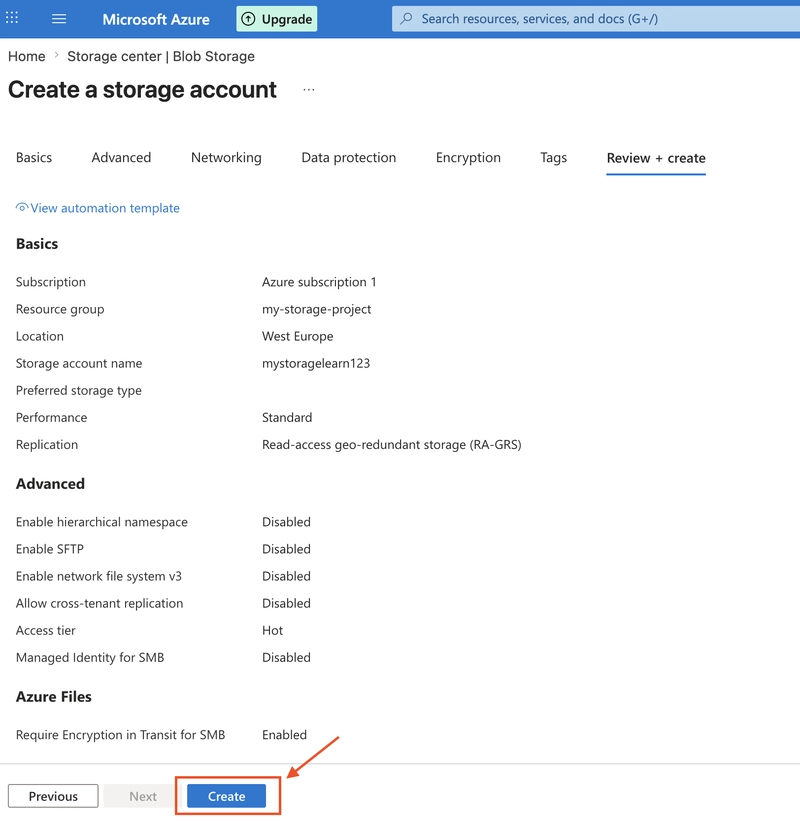
Wait a minute for it to deploy, then click Go to resource
Done! You now have your own storage account in the cloud.
Step 2: Choosing How Your Data is Stored
What's Redundancy?
When you store data in Azure, it automatically makes copies in case something goes wrong. The question is: how many copies do you need?
LRS **(Locally Redundant Storage): Makes 3 copies in one location - cheapest option
**ZRS, GRS, GZRS: More copies in more places - costs more money
For learning and testing, LRS is perfect. You save money and still have backup copies.
Setting it to LRS
- In your storage account, find Data management on the left menu, then click Redundancy
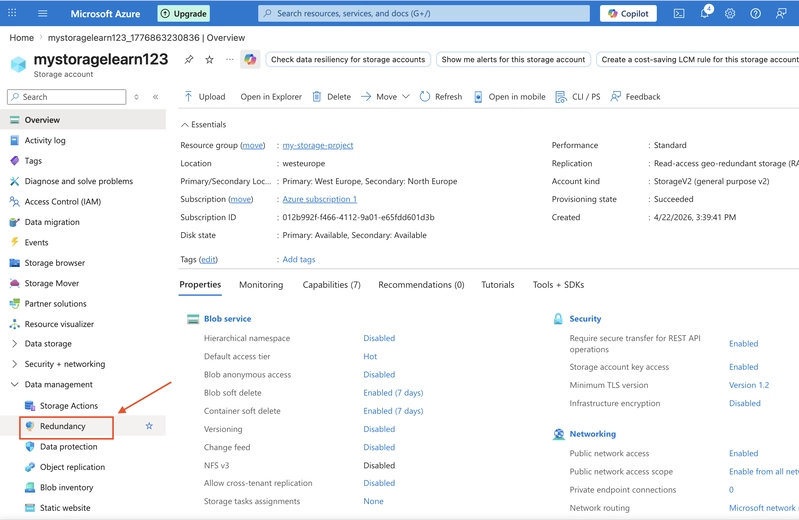
- Change the dropdown to Locally-redundant storage (LRS)
- Click Save
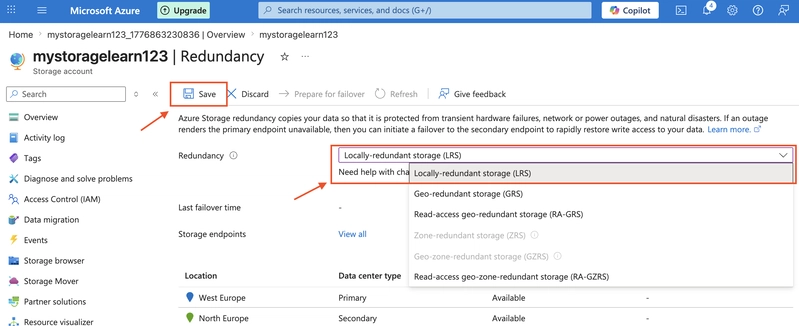
That's it! You just cut your storage costs significantly.
Step 3: Making It Secure
Now let's make sure your storage is secure. Don't worry, it's just a few simple settings.
-
Use HTTPS (Keep Your Data Safe in Transit)
You want all your data to travel securely over the internet, like using HTTPS on a website.- Go to Settings → Configuration
- Make sure Secure transfer required says Enabled
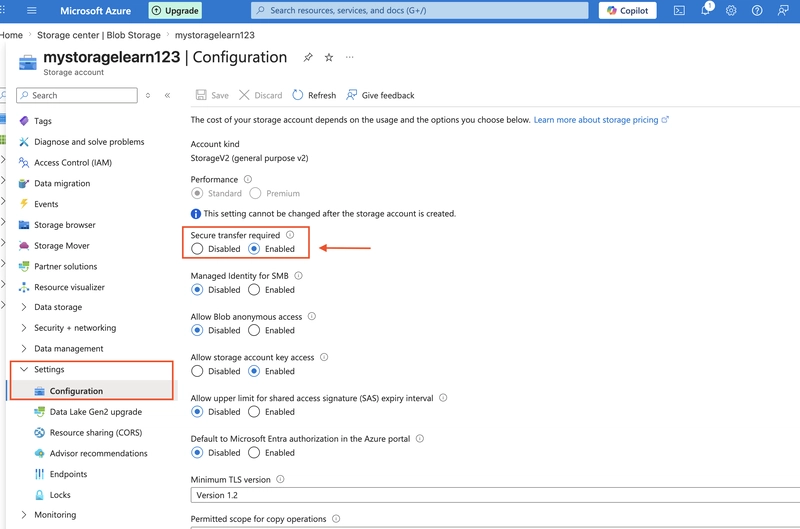
That's it. Now all your data travels encrypted.
-
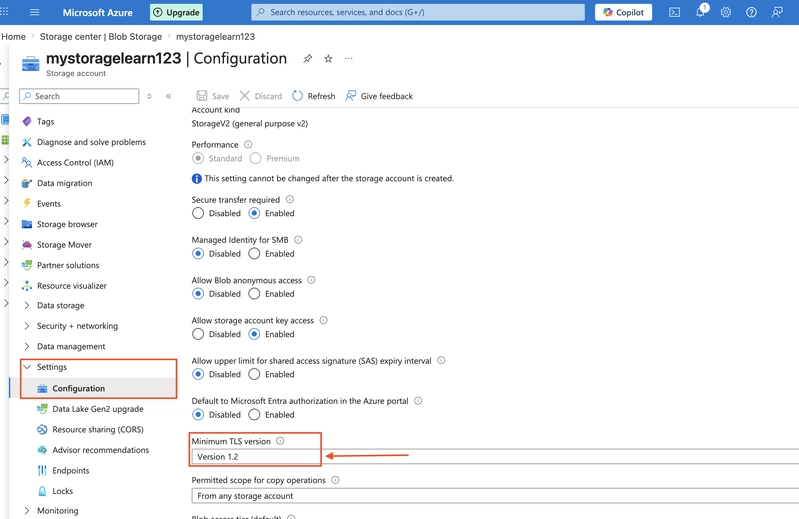
Use Modern Security (TLS 1.2)
This is like saying "only let in people with new security badges,not old ones that can be faked."
- Still in Settings → Configuration
- Check that Minimum TLS version is set to Version 1.2
-
Control Who Can Access It
If you're not using the storage right now, you can turn off access:- In Settings → Configuration
- Find Allow storage account key access and set it to Disabled
- Click Save
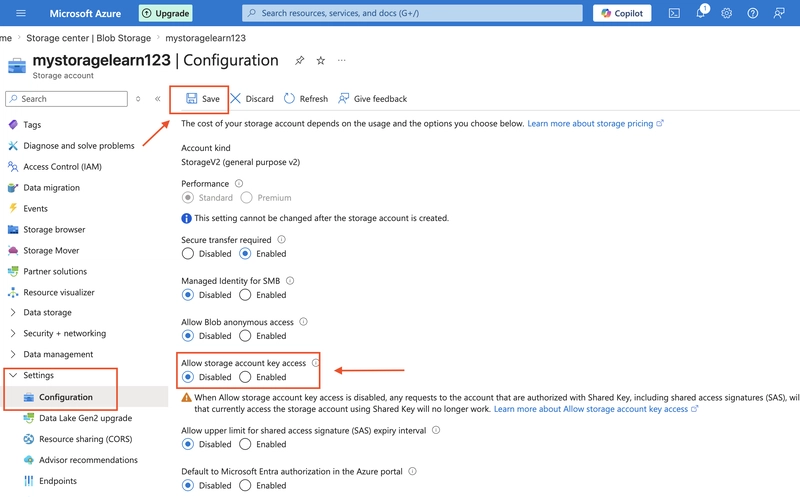
You can always turn this back on when you need it.
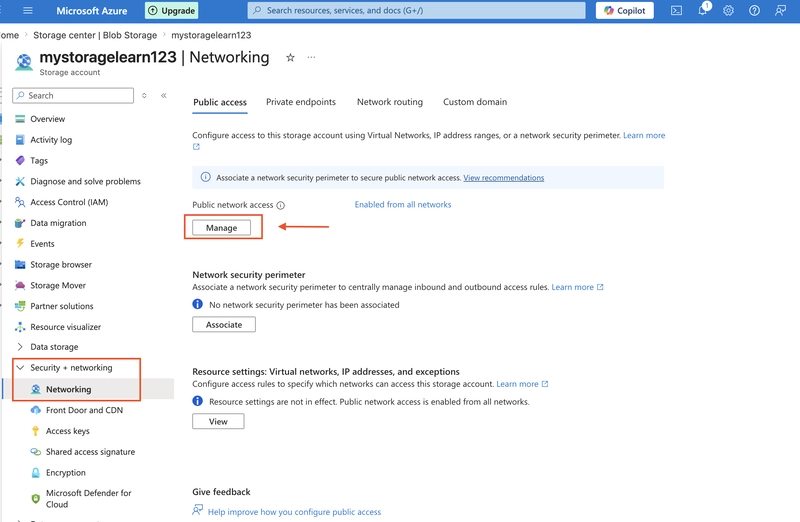
Step 4: Allow Network Access
- Go to Security + networking → Networking
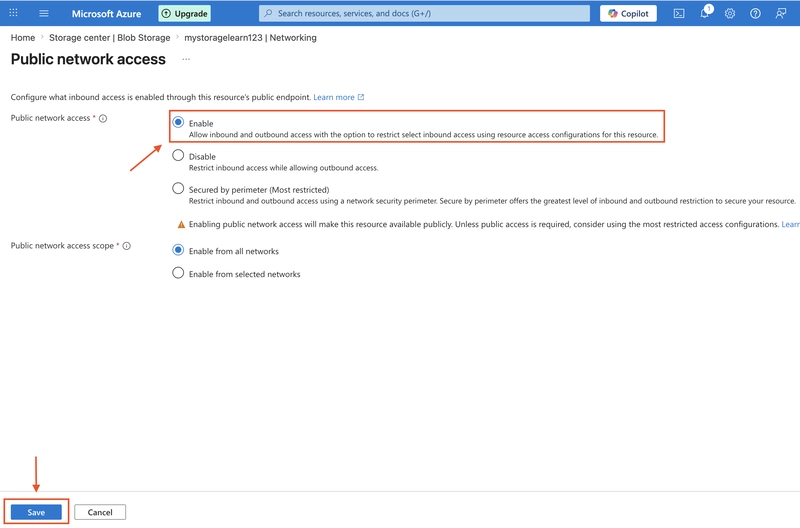
- Make sure Public network access is set to Enabled from all networks
- Click Save
Congratulations! You just set up your first Azure Storage Account. I know it might have seemed like a lot of steps, but you did it!
Did this guide help you? Drop a comment and let me know how your setup went! And if you got stuck anywhere, ask away. we're all learning together.
Helpful Links
What is Azure Storage? - Official Microsoft docs
Azure Free Account - Get free credits to practice with