









Or: How I Learned to Stop Worrying and Love the XPC Services
If you’ve ever tried to implement automatic updates in a sandboxed macOS app using Sparkle, you know it can feel like trying to solve a Rubik’s cube while wearing oven mitts. After creating way too many beta releases and spending countless hours debugging cryptic authorization errors, I finally cracked the code. Here’s my step-by-step guide to code signing, notarization, and Sparkle auto-updates in sandboxed macOS apps.
The Setup: Vibe Meter Meets Sparkle
Vibe Meter is a sandboxed macOS menu bar app that tracks AI service spending. When I decided to add automatic updates using Sparkle 2.x, I thought it would be straightforward. After all, Sparkle is the de facto standard for macOS app updates, right?
Oh, sweet summer child.
I’d already mastered code signing and notarization (its own nightmare), so I just told Claude: “Look at this repository and do what we did there.” It nailed the signing and notarization process.
My first attempts seemed promising. The app built, signed, and notarized successfully. But when users tried to update, they were greeted with:
Error: Failed to gain authorization required to update targetThis error is Sparkle’s polite way of saying “I can’t talk to my XPC services, and I have no idea why.”
Act 2: The Entitlements Enigma
After digging through Sparkle’s documentation and Console logs, I discovered my first issue: missing mach-lookup entitlements. In a sandboxed app, Sparkle uses XPC services to perform privileged operations, and these services need special permissions to communicate.
The Missing Piece
My entitlements file was missing a critical entry:
<key>com.apple.security.temporary-exception.mach-lookup.global-name</key>
<array>
    <string>com.steipete.vibemeter-spks</string>
    <string>com.steipete.vibemeter-spki</string>
</array>
But here’s the kicker - I initially only added -spks, thinking it stood for “Sparkle Server.” Turns out, you need BOTH:
-spks: Sparkle Server (for the InstallerLauncher.xpc service)-spki: Sparkle Installer (for the Installer.xpc service)
Missing either one results in the dreaded authorization error.
Act 3: The Code Signing Circus
Next came the code signing adventures. My notarization script was doing what seemed logical:
codesign --deep --force --sign "Developer ID" VibeMeter.appBut Sparkle’s documentation specifically warns against using --deep. Why? Because it can mess up the XPC services’ signatures. Instead, you need to sign components in a specific order.
Here’s the correct approach from my codesign script:
# Sign XPC services first
codesign -f -s "$SIGN_IDENTITY" -o runtime \
    "$APP_BUNDLE/Contents/Frameworks/Sparkle.framework/Versions/B/XPCServices/Installer.xpc"

# Preserve entitlements for Downloader.xpc (Sparkle 2.6+)
codesign -f -s "$SIGN_IDENTITY" -o runtime --preserve-metadata=entitlements \
    "$APP_BUNDLE/Contents/Frameworks/Sparkle.framework/Versions/B/XPCServices/Downloader.xpc"

# Sign other Sparkle components
codesign -f -s "$SIGN_IDENTITY" -o runtime \
    "$APP_BUNDLE/Contents/Frameworks/Sparkle.framework/Versions/B/Autoupdate"

# Then sign the framework
codesign -f -s "$SIGN_IDENTITY" -o runtime \
    "$APP_BUNDLE/Contents/Frameworks/Sparkle.framework"

# Finally, sign the app WITHOUT --deep
codesign --force --sign "$SIGN_IDENTITY" --entitlements VibeMeter.entitlements \
    --options runtime VibeMeter.app
Act 4: The Bundle ID Bamboozle
At one point, I thought I was being clever (or rather, Claude Code thought…) by trying to manually modify the XPC services’ bundle identifiers. Big mistake.
For sandboxed apps, Sparkle requires specific bundle ID suffixes:
- Use
-spkssuffix for the InstallerLauncher service - Use
-spkisuffix for the Installer service
The framework expects these exact suffixes. Use anything else, and you’ll get cryptic XPC connection errors that will make you question your career choices.
Act 5: The Build Number Blues
Even after fixing all the sandboxing issues, I hit another snag. Users were seeing “You’re up to date!” when updates were clearly available. The culprit? My appcast1 generation script was defaulting build numbers to “1”.
Sparkle uses build numbers (CFBundleVersion), not version strings, to determine if an update is available. If your build numbers don’t increment, Sparkle thinks there’s nothing new.
My appcast generation script now properly handles this:
# Extract build number from Info.plist
BUILD_NUMBER=$(plutil -extract CFBundleVersion raw "$INFO_PLIST")

# Ensure build numbers increment correctly
if [[ "$BUILD_NUMBER" -le "$PREVIOUS_BUILD_NUMBER" ]]; then
    echo "Error: Build number must be greater than previous release"
    exit 1
fi
The Grand Finale: It Works!
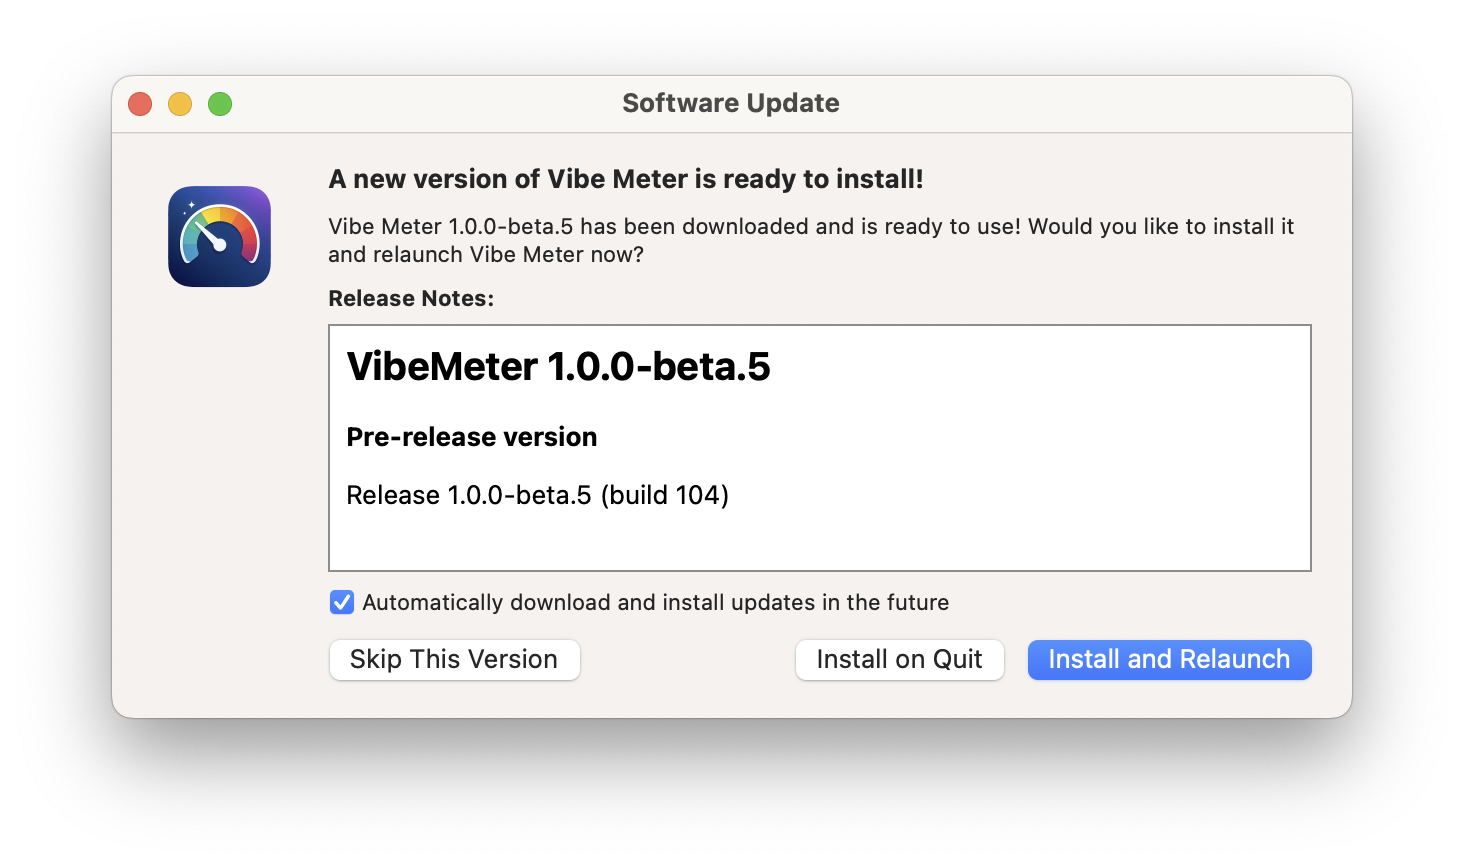
After two days of intense debugging, I finally had a working setup. My complete automation pipeline is now rock-solid, with comprehensive scripts that handle every aspect of the process.
The Magic Recipe
- Entitlements: Include BOTH
-spksand-spkimach-lookup exceptions - Bundle IDs: Never change Sparkle’s XPC service bundle IDs
- Code Signing: Sign XPC services individually, never use
--deep - Build Numbers: Always increment them, and verify your appcast
- Info.plist: Set
SUEnableInstallerLauncherService = trueandSUEnableDownloaderService = false2
The Working Configuration
The XPC services themselves keep their original Sparkle bundle IDs (org.sparkle-project.InstallerLauncher and org.sparkle-project.Downloader). What we configure in the entitlements are the mach-lookup communication channels:
<!-- VibeMeter.entitlements -->
<key>com.apple.security.app-sandbox</key>
<true/>
<key>com.apple.security.network.client</key>
<true/>
<key>com.apple.security.temporary-exception.mach-lookup.global-name</key>
<array>
    <string>com.steipete.vibemeter-spks</string>
    <string>com.steipete.vibemeter-spki</string>
</array>
The Scripts That Saved My Sanity
My complete build pipeline consists of several specialized scripts:
- preflight-check.sh: Validates environment and prerequisites
- codesign-app.sh: Handles the complex code signing process
- notarize-app.sh: Manages notarization and stapling
- create-dmg.sh: Creates and signs distribution DMGs
- generate-appcast.sh: Generates Sparkle appcast files
- release.sh: Orchestrates the entire release process
Look at this beauty! Now even Claude can do releases without messing up 🎉 I just tell it “Create a new beta release, see release.md” and it handles everything.
# Now create the release
./scripts/release.sh stable        # For stable 1.1.0
# OR
./scripts/release.sh beta 1        # For 1.1.0-beta.1

# Use the version script to bump versions
./scripts/version.sh --minor       # 1.0.0 -> 1.1.0
./scripts/version.sh --major       # 1.0.0 -> 2.0.0
./scripts/version.sh --set 1.1.0   # Set specific version
Everything happens automatically - from building to GitHub release creation. These scripts are tuned for Tuist and can easily be adapted for simpler setups.
The Notarization Nightmare
Apple’s notarization process adds another layer of complexity. Notarization verifies your app is safe - you upload it to Apple’s servers for scanning, and if approved, they “staple” a ticket to your app. The process typically takes a few minutes in Apple’s notarization queue (officially called the “processing queue”). The notarization script uses the modern notarytool approach:
# Create ZIP for notarization (not DMG!)
ditto -c -k --keepParent "$APP_BUNDLE" "$ZIP_PATH"

# Submit for notarization
xcrun notarytool submit "$ZIP_PATH" \
    --key "$API_KEY_PATH" \
    --key-id "$API_KEY_ID" \
    --issuer "$ISSUER_ID" \
    --wait

# Staple the ticket
xcrun stapler staple "$APP_BUNDLE"

# Verify everything worked
spctl -a -t exec -vv "$APP_BUNDLE"
xcrun stapler validate "$APP_BUNDLE"
Of course this needs certificates from Apple. Luckily Claude is smart enough to guide you through the whole process of downloading those files and adding them to the keychain and your environment.
Pretty Changelogs in Sparkle
One challenge I hadn’t anticipated was making the update dialogs actually useful. Sparkle can display rich HTML changelogs, but getting from my Markdown changelog to properly formatted HTML required some creativity.
The changelog-to-html.sh script extracts version-specific sections from CHANGELOG.md and converts them to HTML with what I call the “Poor Man’s Markdown Parser”:
# Extract version section and convert Markdown to HTML
awk "/^## \\[$version\\]/{flag=1;next}/^## \\[/{flag=0}flag" CHANGELOG.md | \
sed 's/^### \(.*\)/<h3>\1<\/h3>/' | \
sed 's/^- \(.*\)/<li>\1<\/li>/' | \
sed 's/\*\*\([^*]*\)\*\*/<strong>\1<\/strong>/g'
The result? Users see properly formatted changelogs with headers, lists, and styled text instead of raw Markdown. Note: This parser has limitations - it doesn’t handle nested lists, images, or links. Keep your changelogs simple or extend the parser for more complex formatting.
The Complete Architecture
What emerged is a surprisingly elegant zero-infrastructure solution that leverages GitHub’s existing services:
GitHub-Centric Distribution
- Releases: GitHub releases host the actual DMG files
- Appcast Hosting: Raw GitHub URLs serve the XML feeds
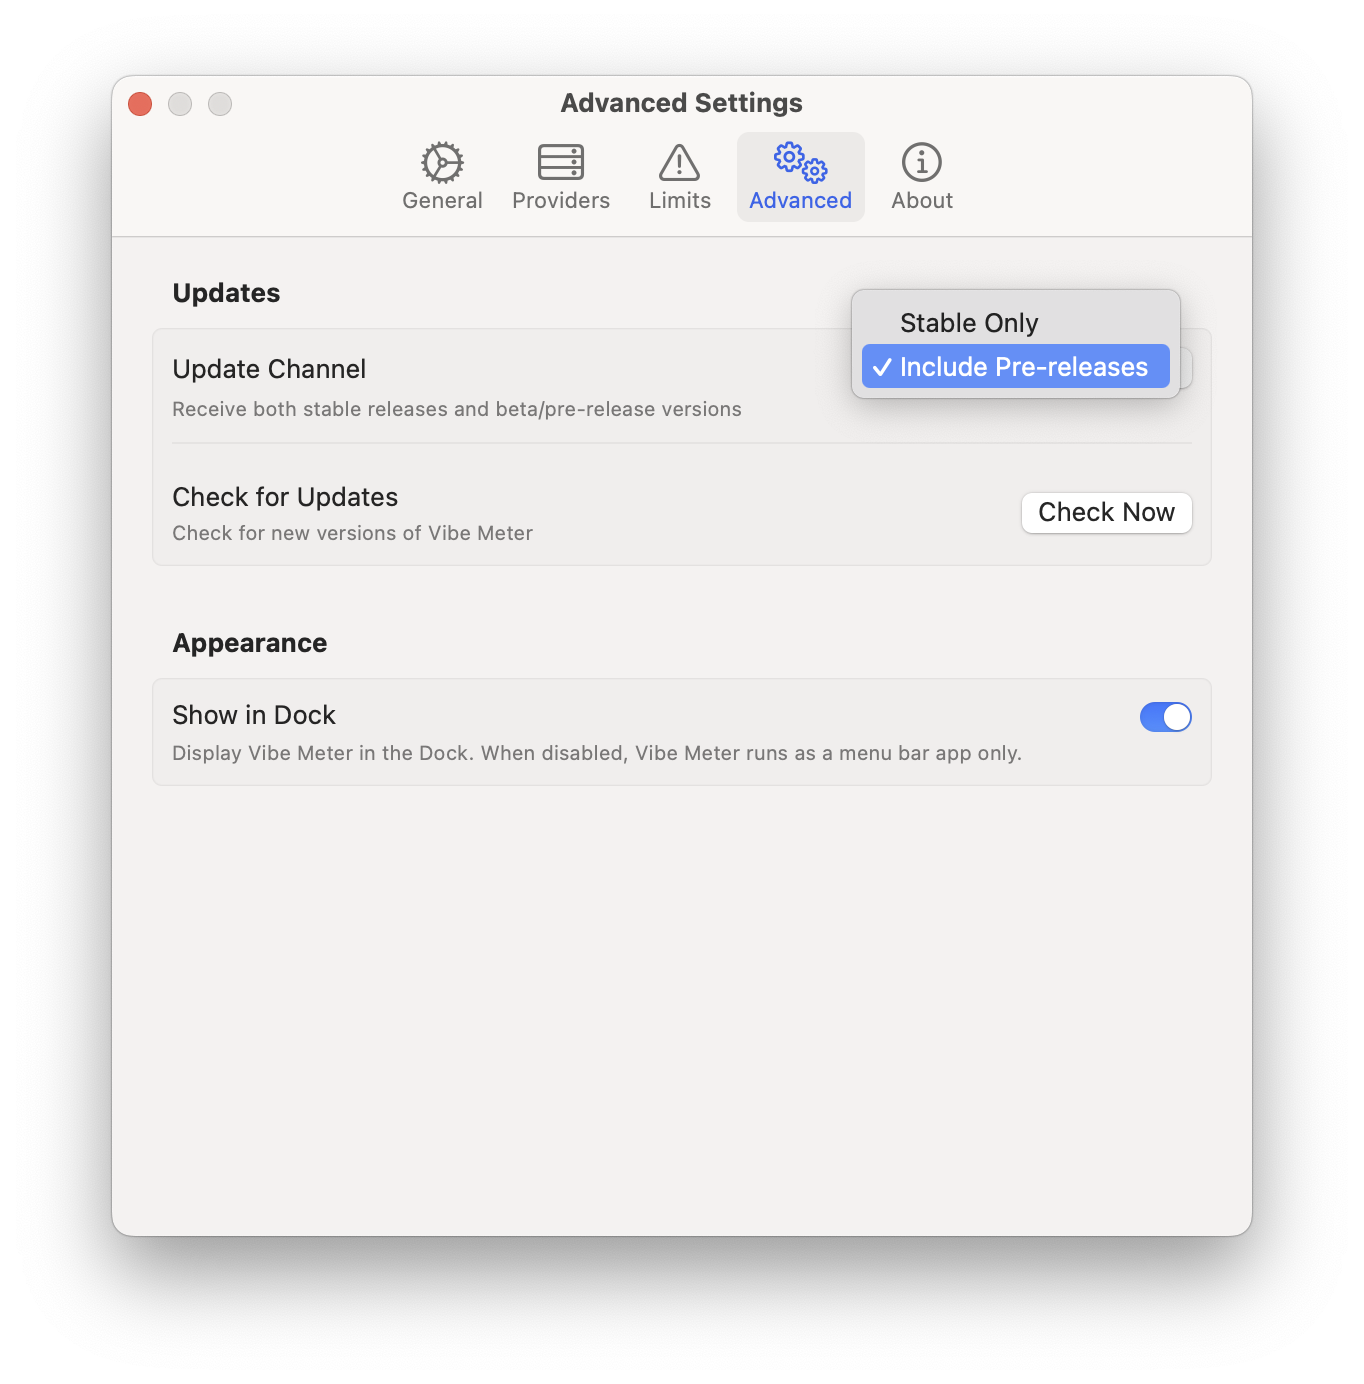
- Dual Feeds: Separate appcasts for stable and pre-release channels
- Version Control: Appcast files are versioned alongside the code
Dynamic Channel Switching
The app includes runtime logic to switch between update channels without reinstallation. Users can choose “stable” for production releases or “pre-release” for beta access, and the app dynamically points to the appropriate appcast URL.
Automated Everything
The release.sh script orchestrates the entire pipeline:
- Build and sign the app
- Create GitHub release with DMG
- Generate both appcast files with proper signatures
- Commit and push everything
No separate hosting, no Jekyll setup, no additional infrastructure - just GitHub doing what it does best. The key is that release.sh is the master orchestrator that calls most other scripts in sequence for a complete automated release.
View the complete script flow architecture
🚀 Main Release Flow (release.sh)

release.sh
├── 1. preflight-check.sh ────────────── Validates everything ready
├── 2. generate-xcproj.sh ────────────── Generates Xcode project
├── 3. build.sh ──────────────────────── Builds app with IS_PRERELEASE_BUILD flag
├── 4. sign-and-notarize.sh ──────────── Signs & notarizes app
│   ├── codesign-app.sh ─────────────── Code signs app bundle
│   └── notarize-app.sh ─────────────── Notarizes signed app
├── 5. create-dmg.sh ─────────────────── Creates & signs DMG
├── 6. GitHub CLI (gh) ───────────────── Creates GitHub release
├── 7. generate-appcast.sh ───────────── Updates appcast XML files
└── 8. verify-appcast.sh ─────────────── Validates appcast (optional)

✅ Verification Flow

preflight-check.sh ───────────────────── Pre-release validation
└── verify-prerelease-system.sh ──────── IS_PRERELEASE_BUILD system check

verify-app.sh ────────────────────────── Post-build verification
verify-appcast.sh ────────────────────── Appcast validation

🔐 Manual Signing Flow

sign-and-notarize.sh
├── codesign-app.sh ──────────────────── Code sign app
├── notarize-app.sh ──────────────────── Notarize app
└── create-dmg.sh ────────────────────── Create distribution DMG

🛠️ Utility Scripts (Called by others)

- changelog-to-html.sh ← Called by update-appcast.sh
- version.sh ← Standalone version management
Lessons Learned
- Read the documentation carefully - But also know that it might not cover every edge case
- Console.app is your friend - Filter by your process name and watch for XPC errors
- Don’t be clever - Follow Sparkle’s conventions exactly
- Test updates, not just builds - A successful build doesn’t mean updates will work
- Automate everything - Manual processes lead to human errors
- Version control your scripts - Build automation is as important as your app code
Final Thoughts
Implementing Sparkle in a sandboxed app is like solving a puzzle where the pieces keep changing shape. But once you understand the rules - respect the XPC services, get your entitlements right, and sign everything properly - it works beautifully.
The irony? The final solution is actually quite simple. It’s getting there that’s the adventure. I don’t know how anyone manages to ship working macOS apps at all, honestly.
Now go download Vibe Meter and read my dev diary on how I built it with Claude Code: Vibe Meter: Monitor Your AI Costs.
Resources
- Sparkle Sandboxing Documentation
- Apple’s Code Signing Guide
- VibeMeter Source Code
- VibeMeter Build Scripts
Special thanks to the Sparkle team and Claude Code - without them, this automation pipeline wouldn’t exist.
P.S. Just steal my scripts. It’ll save you days of debugging. ☕️
-
An appcast is an RSS-like XML feed that Sparkle uses to check for updates. It contains information about available versions, download URLs, and release notes. See Sparkle’s documentation on appcasts for more details. ↩
-
The Downloader service is only needed if your app doesn’t have network access. Since Vibe Meter includes the
com.apple.security.network.cliententitlement, we can disable SUEnableDownloaderService. This simplifies the setup and avoids the Downloader service’s limitations. See Sparkle’s sandboxing documentation for details. ↩