









Table of contents

Editing PDFs in a Blazor application requires a reliable and efficient tool. PDFsharp(opens in a new tab), an open source .NET library, is a perfect candidate for editing PDFs. In the first part of this blog post, we’ll guide you through setting up a Blazor project in Visual Studio and implementing PDF editing using PDFsharp. In the second part, you’ll learn how to edit PDFs using PSPDFKit’s Blazor PDF library, which provides an extensive set of features for working with PDFs in a Blazor application.
Prerequisites
Setting Up Your Blazor Project with Visual Studio
Before diving into PDF editing functionalities, you’ll set up a Blazor Server project in Visual Studio.
- To create a new project for your application, open Visual Studio and select File > New Project….
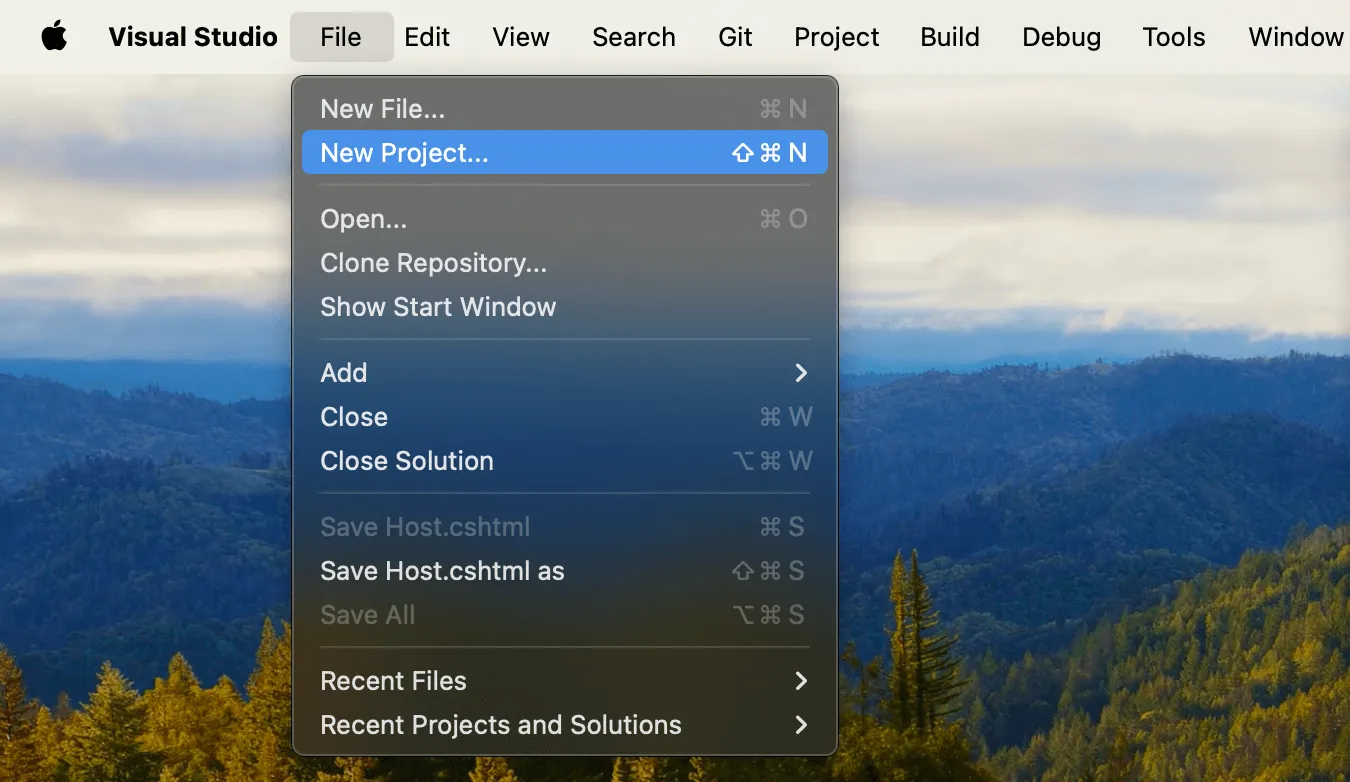
- Choose the Blazor Server App project template. Press Continue.
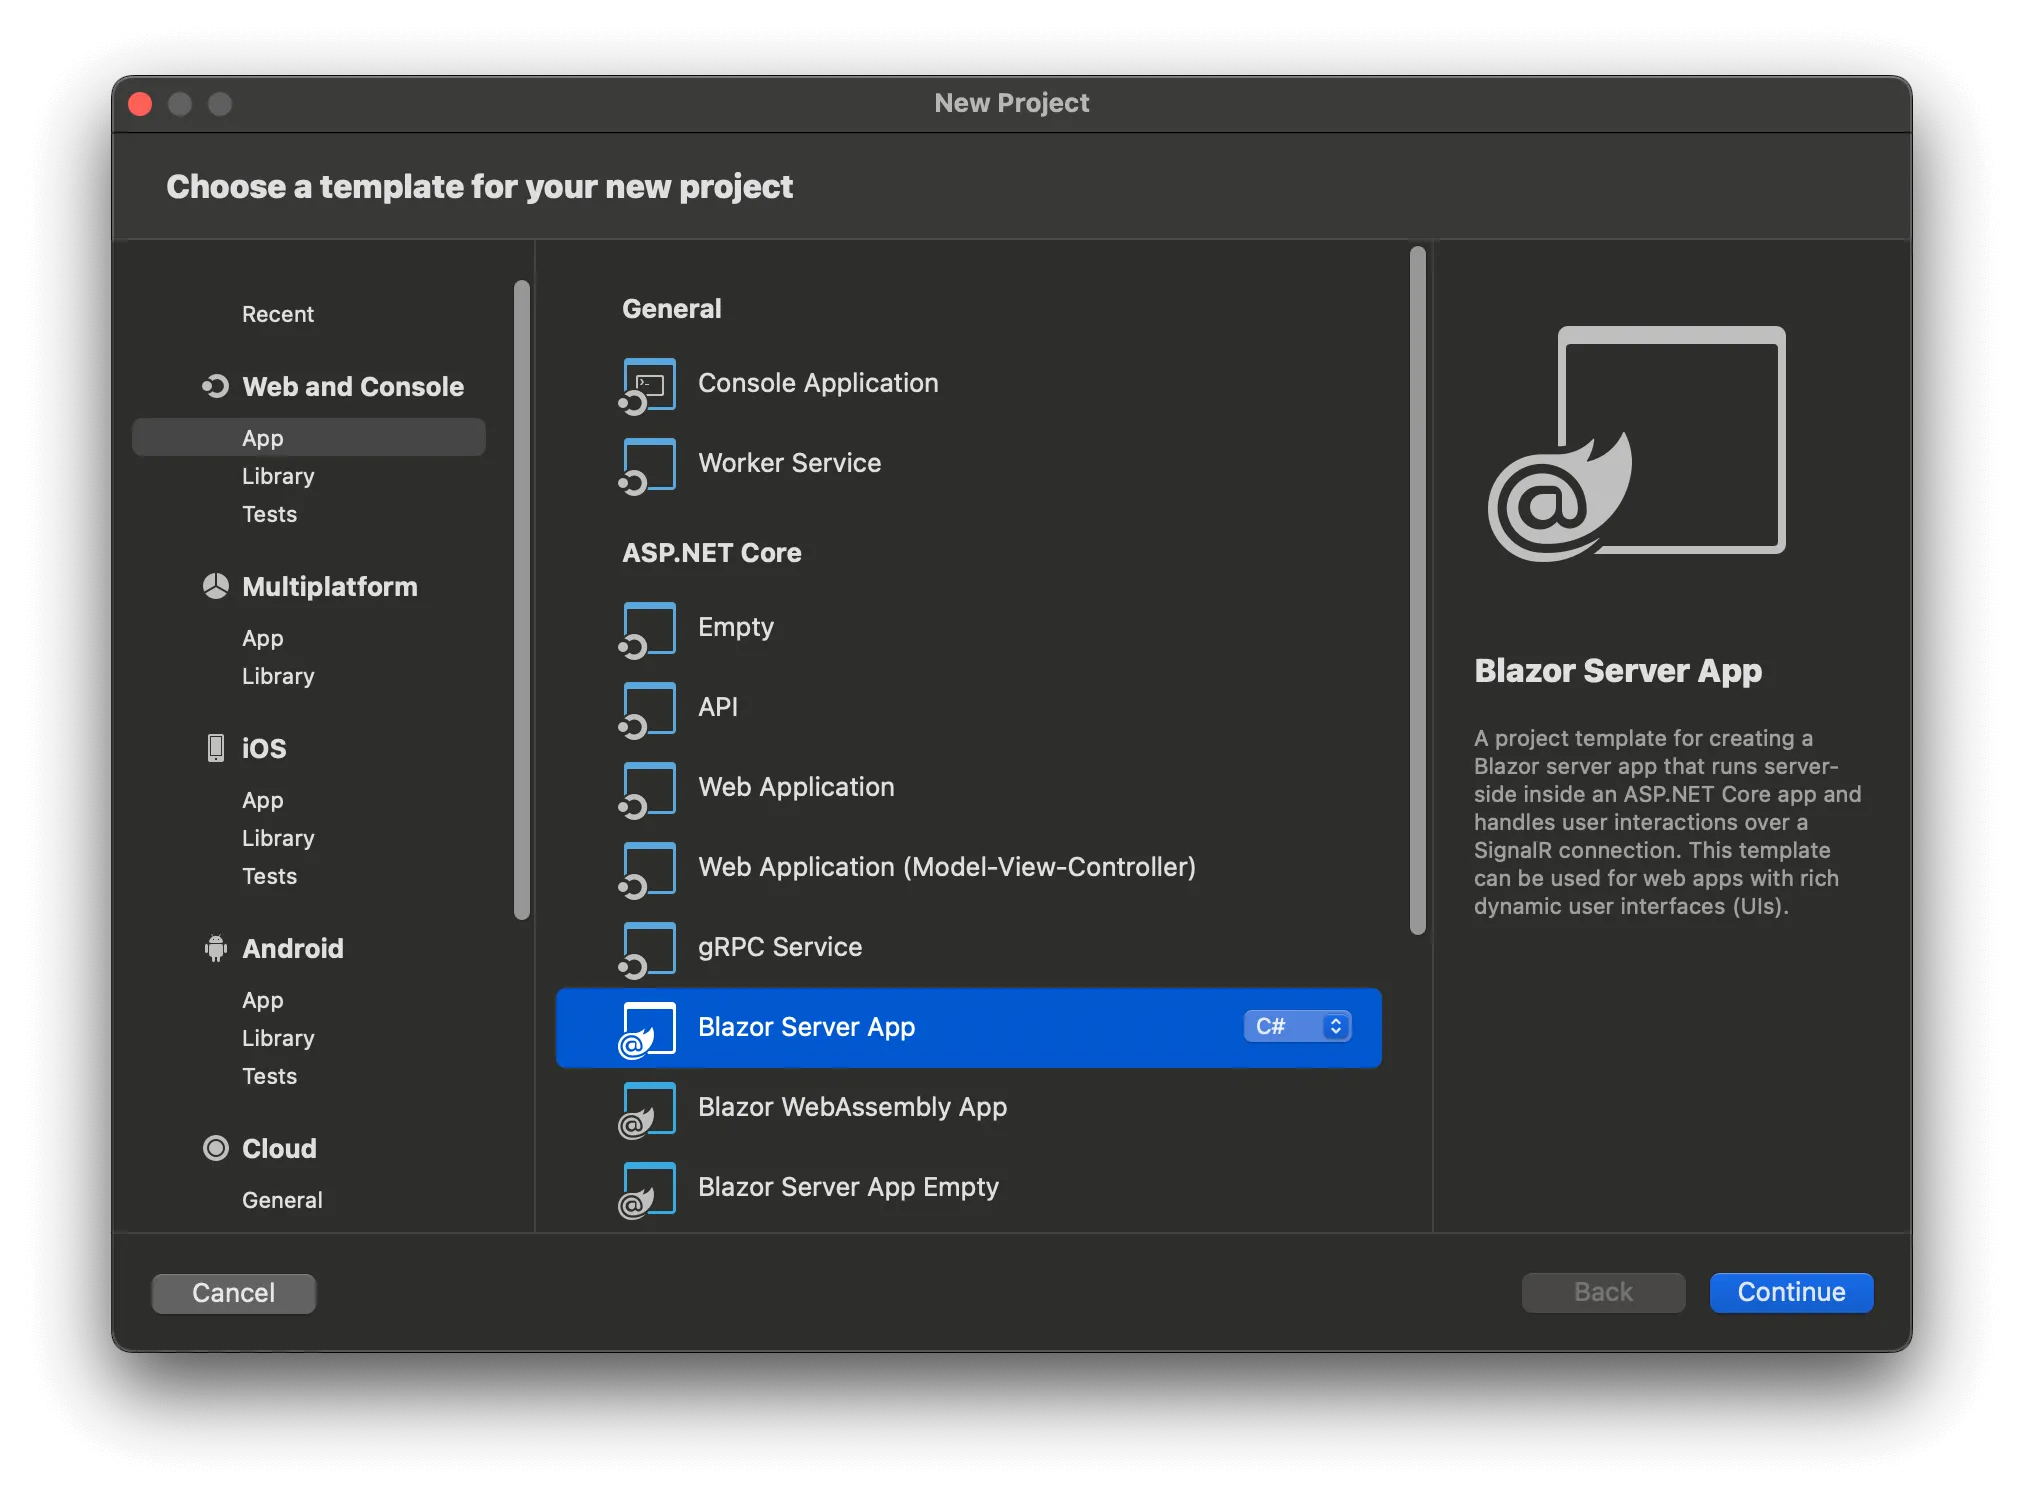
Choose .NET 7.0 for the target framework. Press Continue.
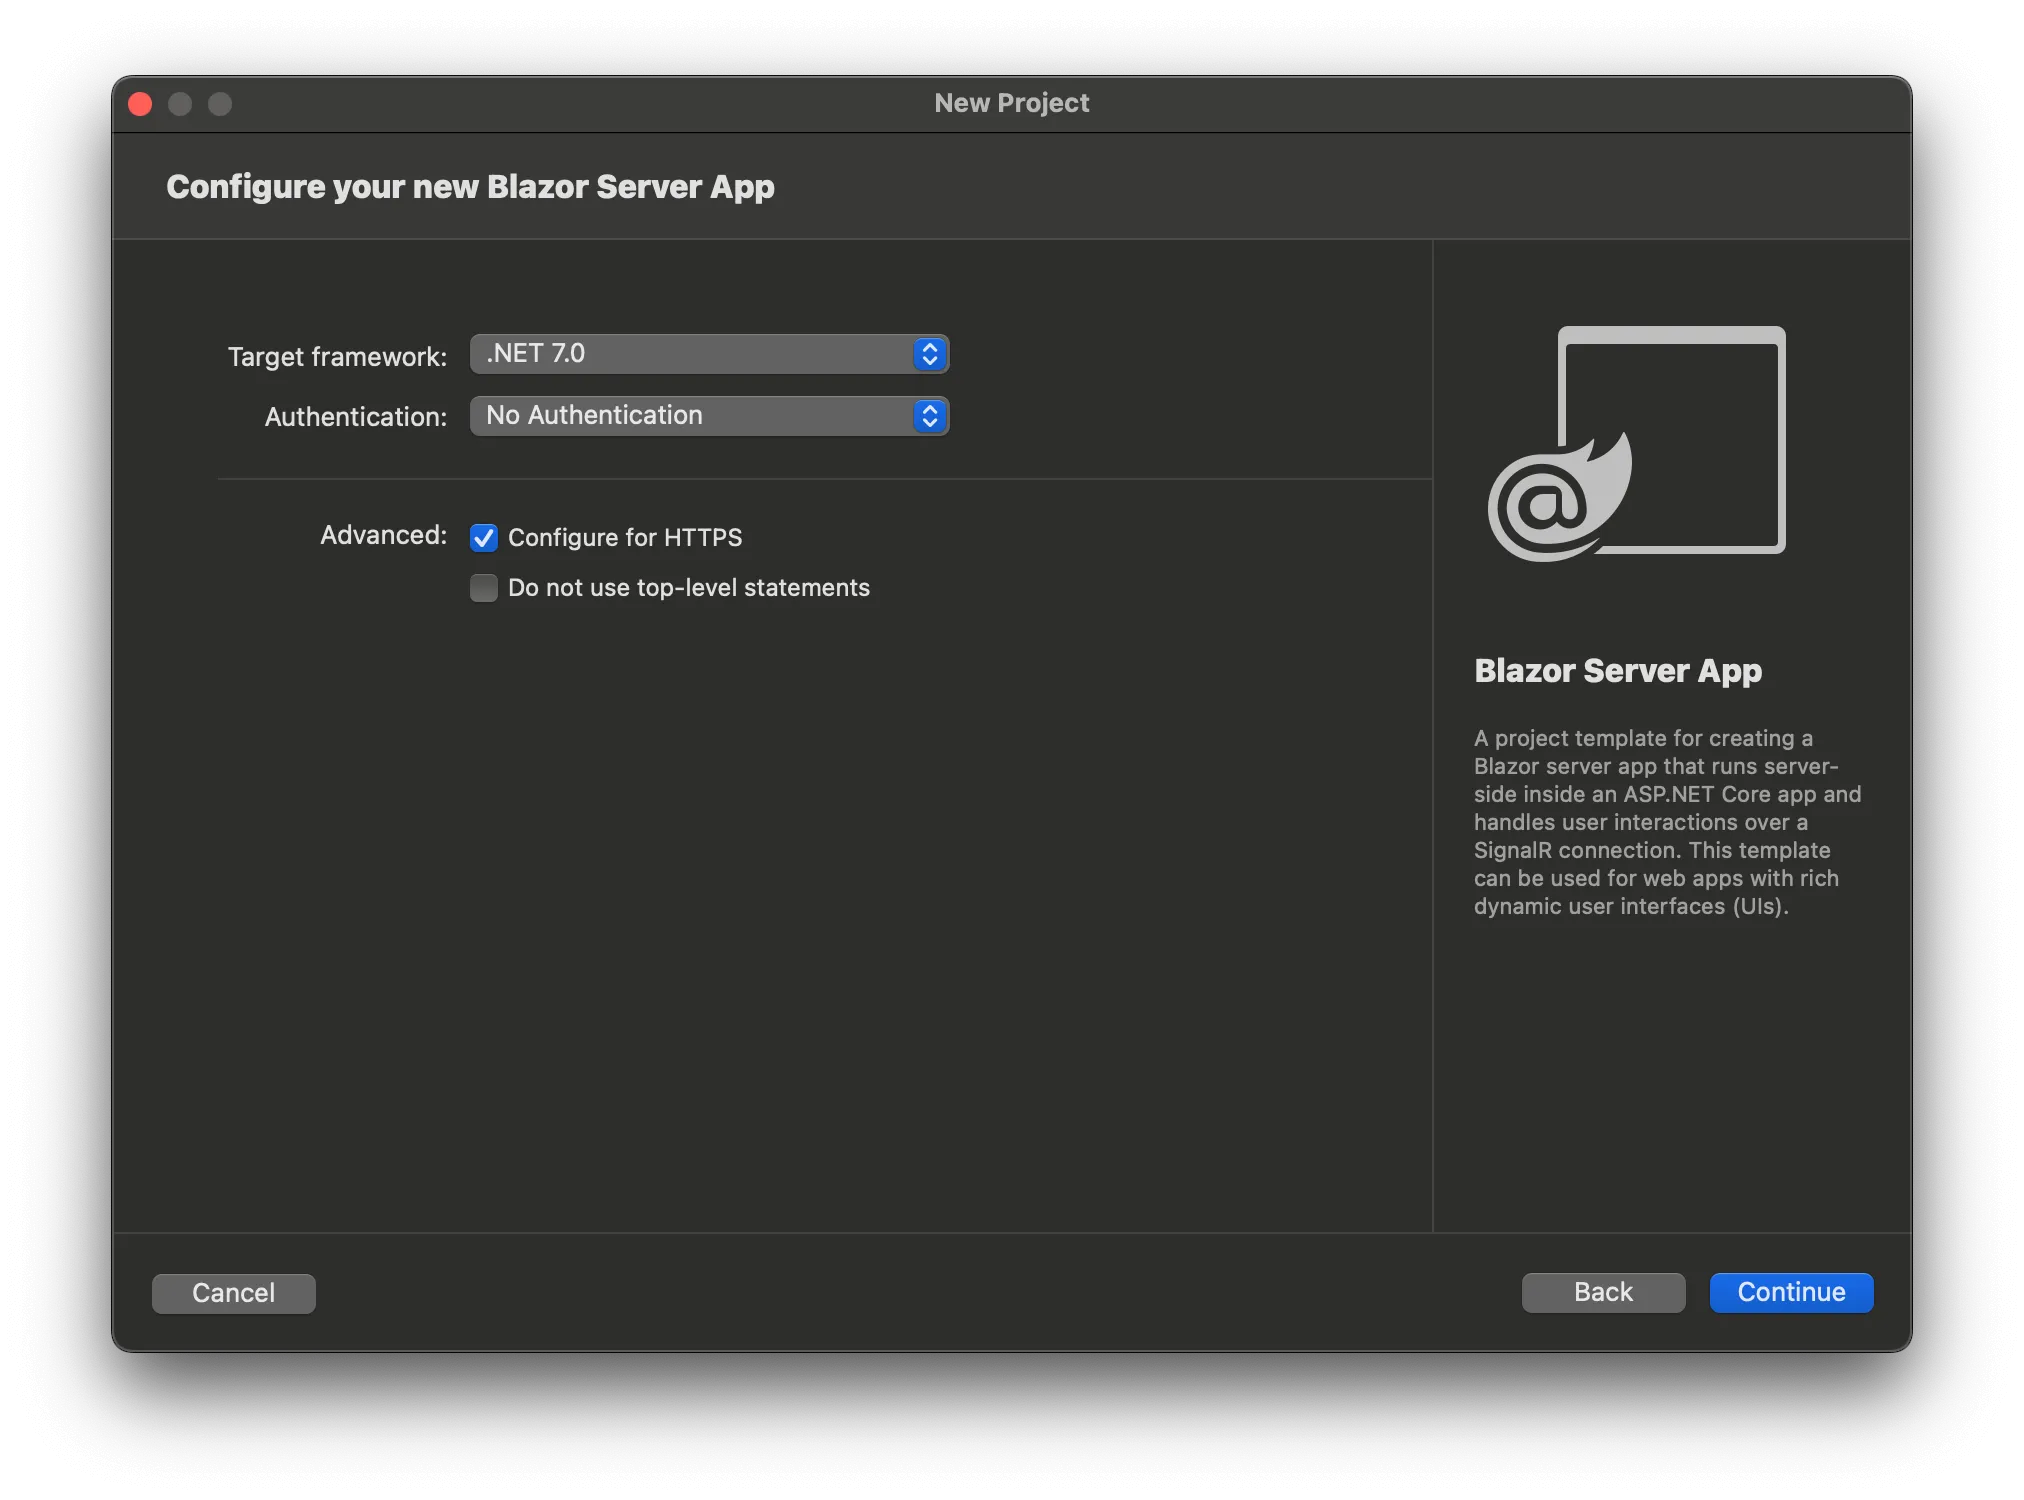
When prompted, choose your app name (
EditPDFBlazor), and use the default options. Then press Create.
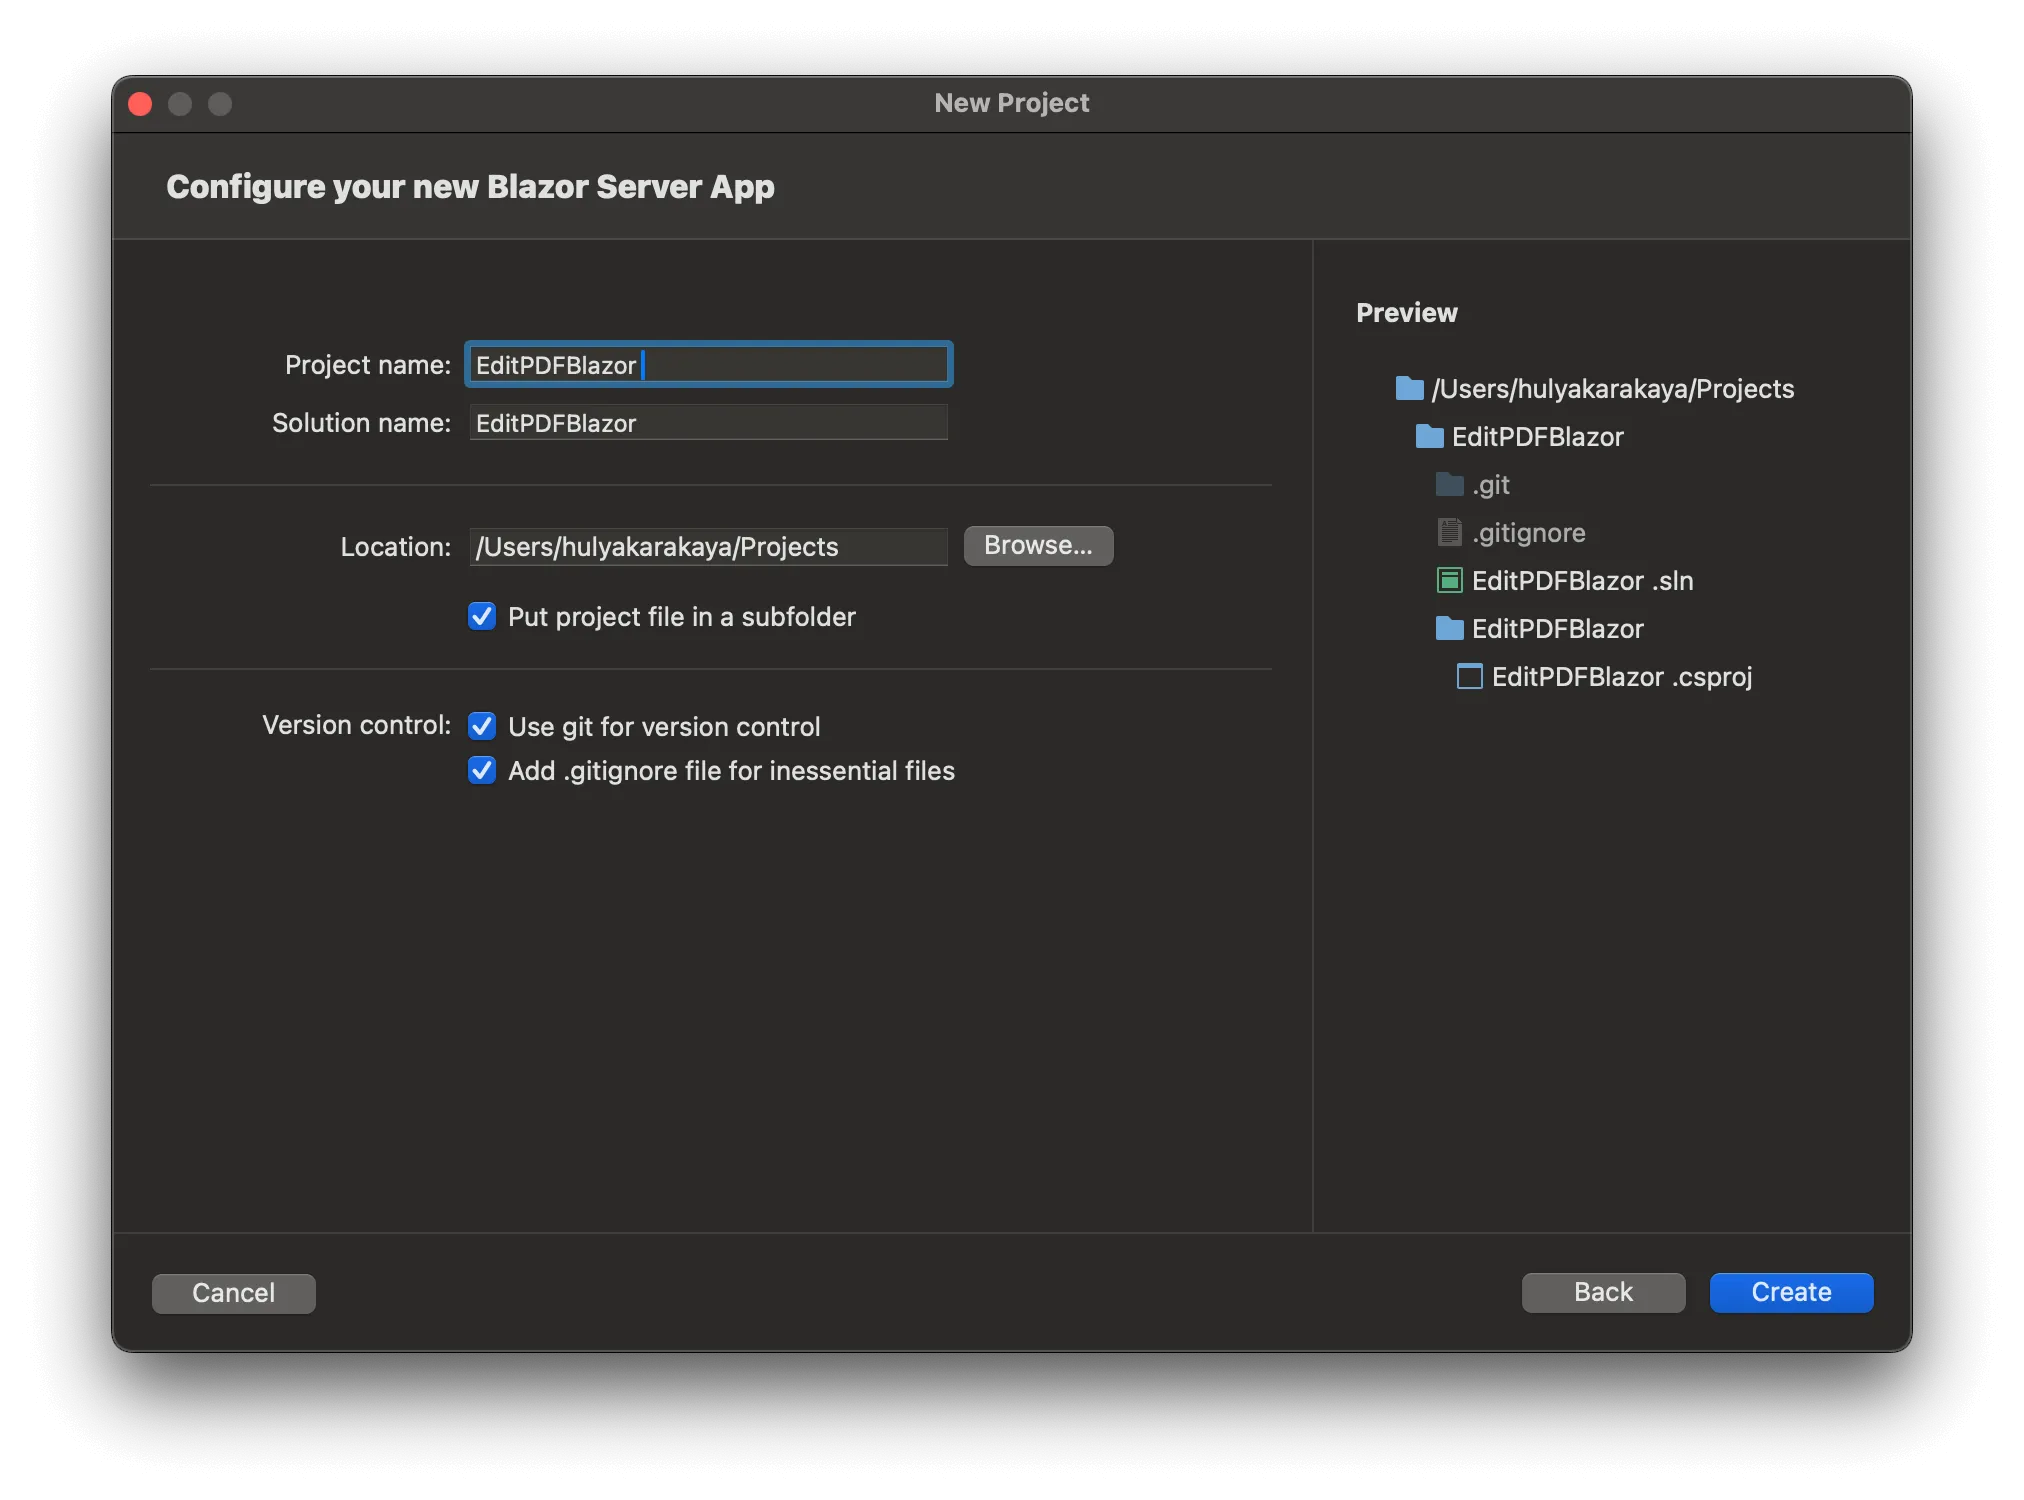
For platform-specific instructions (Windows/Linux/macOS), refer to the Microsoft documentation(opens in a new tab) on creating a Blazor Server App.
Adding PDFsharp to Your Project
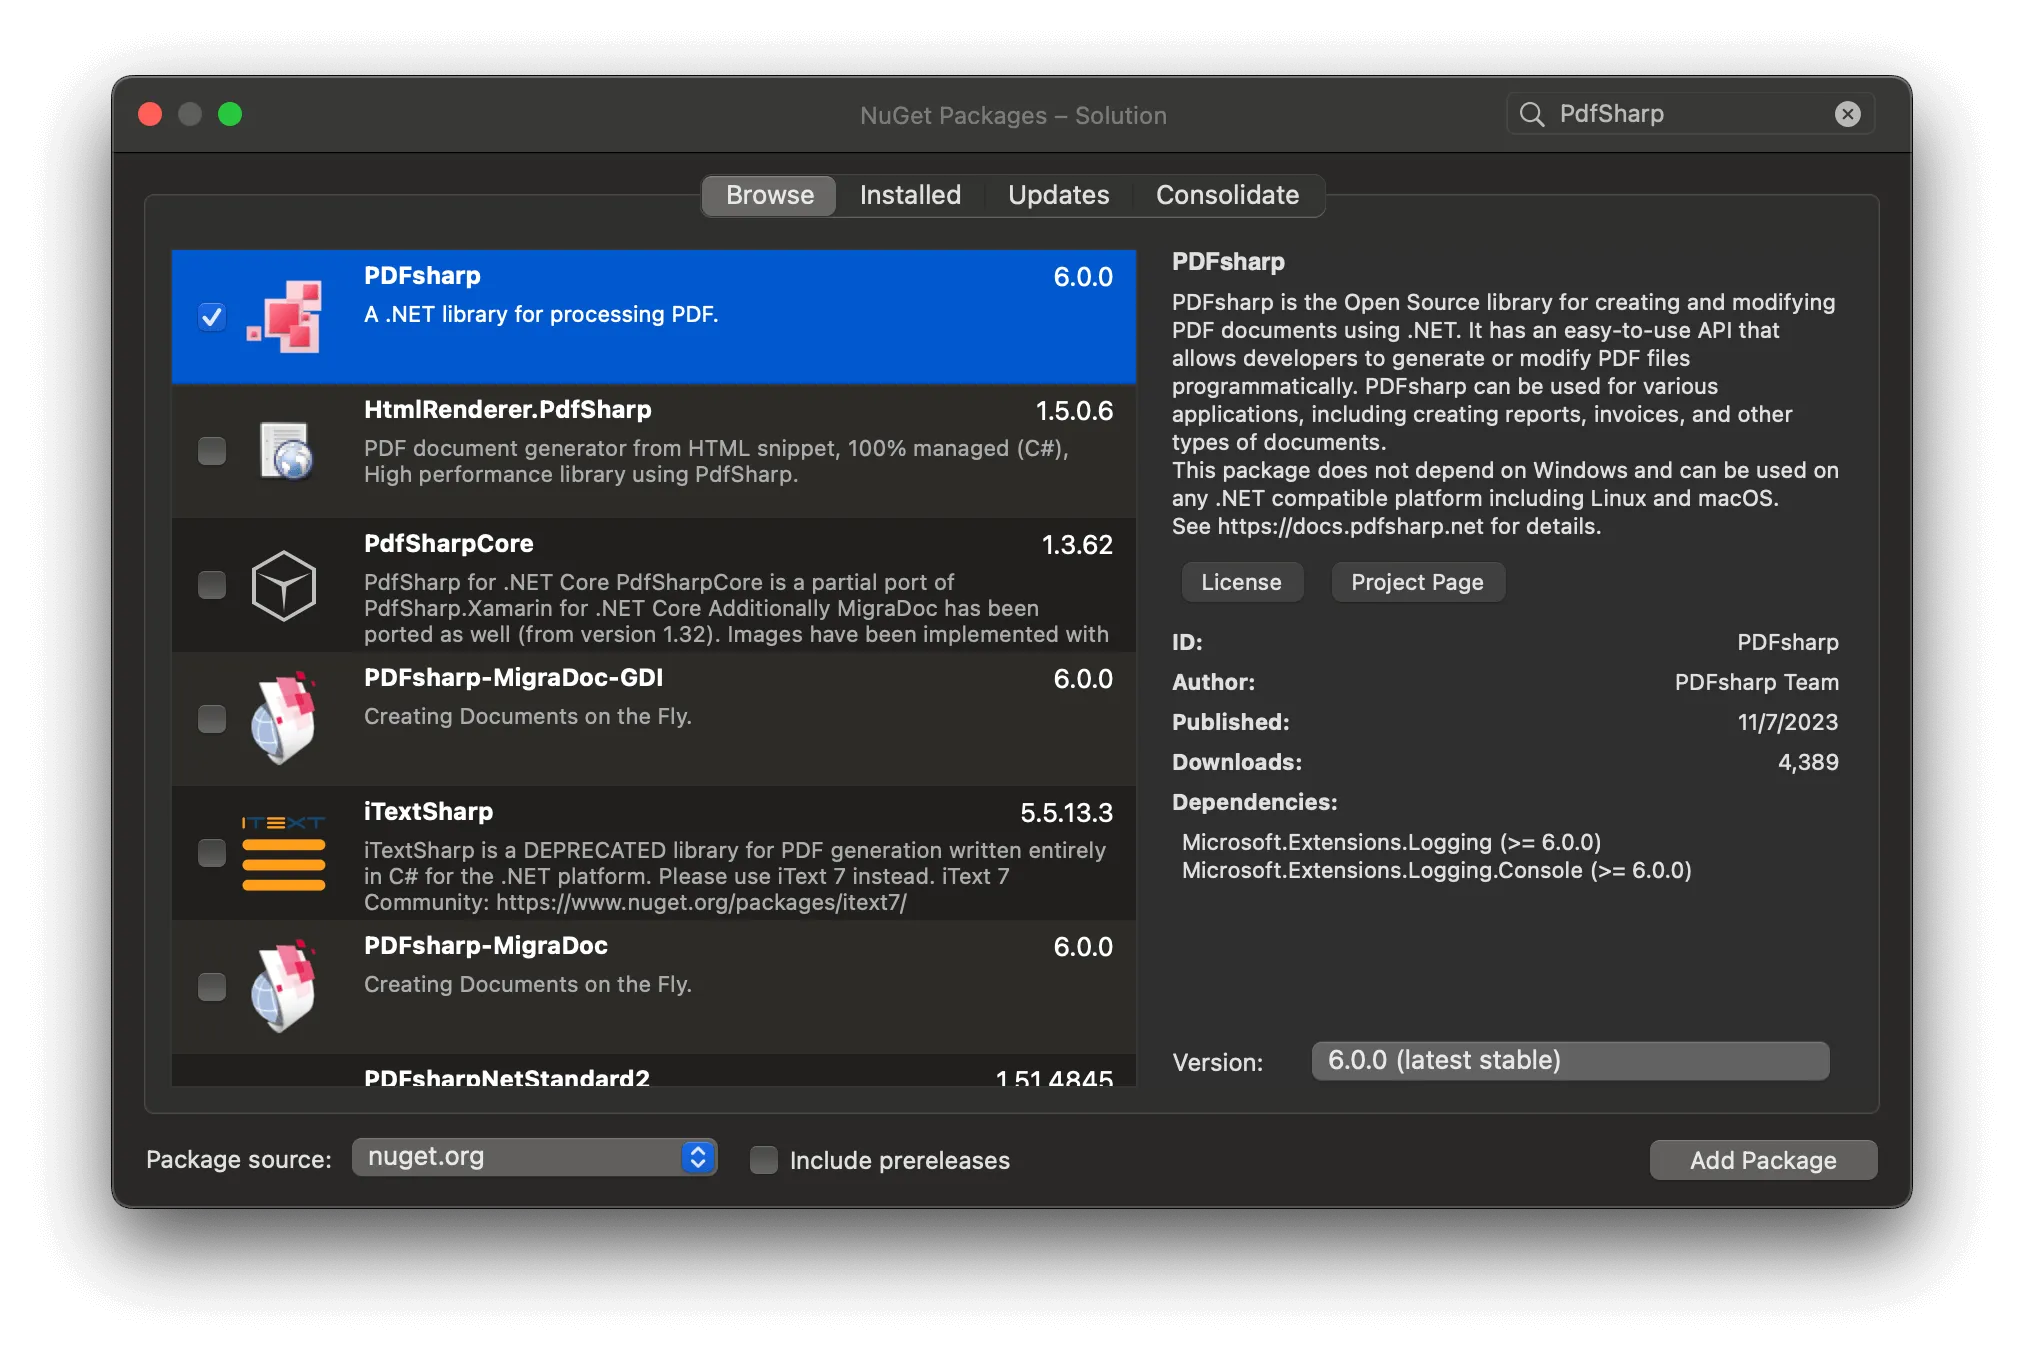
Once your project is created, go to the Solution Explorer. Right-click on your project and choose Manage NuGet Packages…. Click the Browse tab, search for PDFsharp, and install it.
Implementing PDF Editing with PDFsharp
Now that your project is set up, you’ll implement the PDF editing functionality.
Adding the PdfEditor Class
- Right-click on your project in Solution Explorer.
- Choose Add > New Class… and name it
PdfEditor.cs. - Implement the editing logic in your
PdfEditor.cs(opens in a new tab) file:
using PdfSharp.Pdf;
using PdfSharp.Pdf.IO;
using PdfSharp.Drawing;
using PdfSharp.Fonts;
using PdfSharp.Snippets.Font;
using PdfSharp;
public class PdfEditor
{
static PdfEditor()
{
if (Capabilities.Build.IsCoreBuild)
GlobalFontSettings.FontResolver = new FailsafeFontResolver();
}
public void EditPdf(string filePath)
{
PdfDocument document = PdfReader.Open(filePath, PdfDocumentOpenMode.Modify);
PdfPage page = document.Pages[0];
XGraphics gfx = XGraphics.FromPdfPage(page);
XFont font = new XFont("Verdana", 20, XFontStyleEx.Bold);
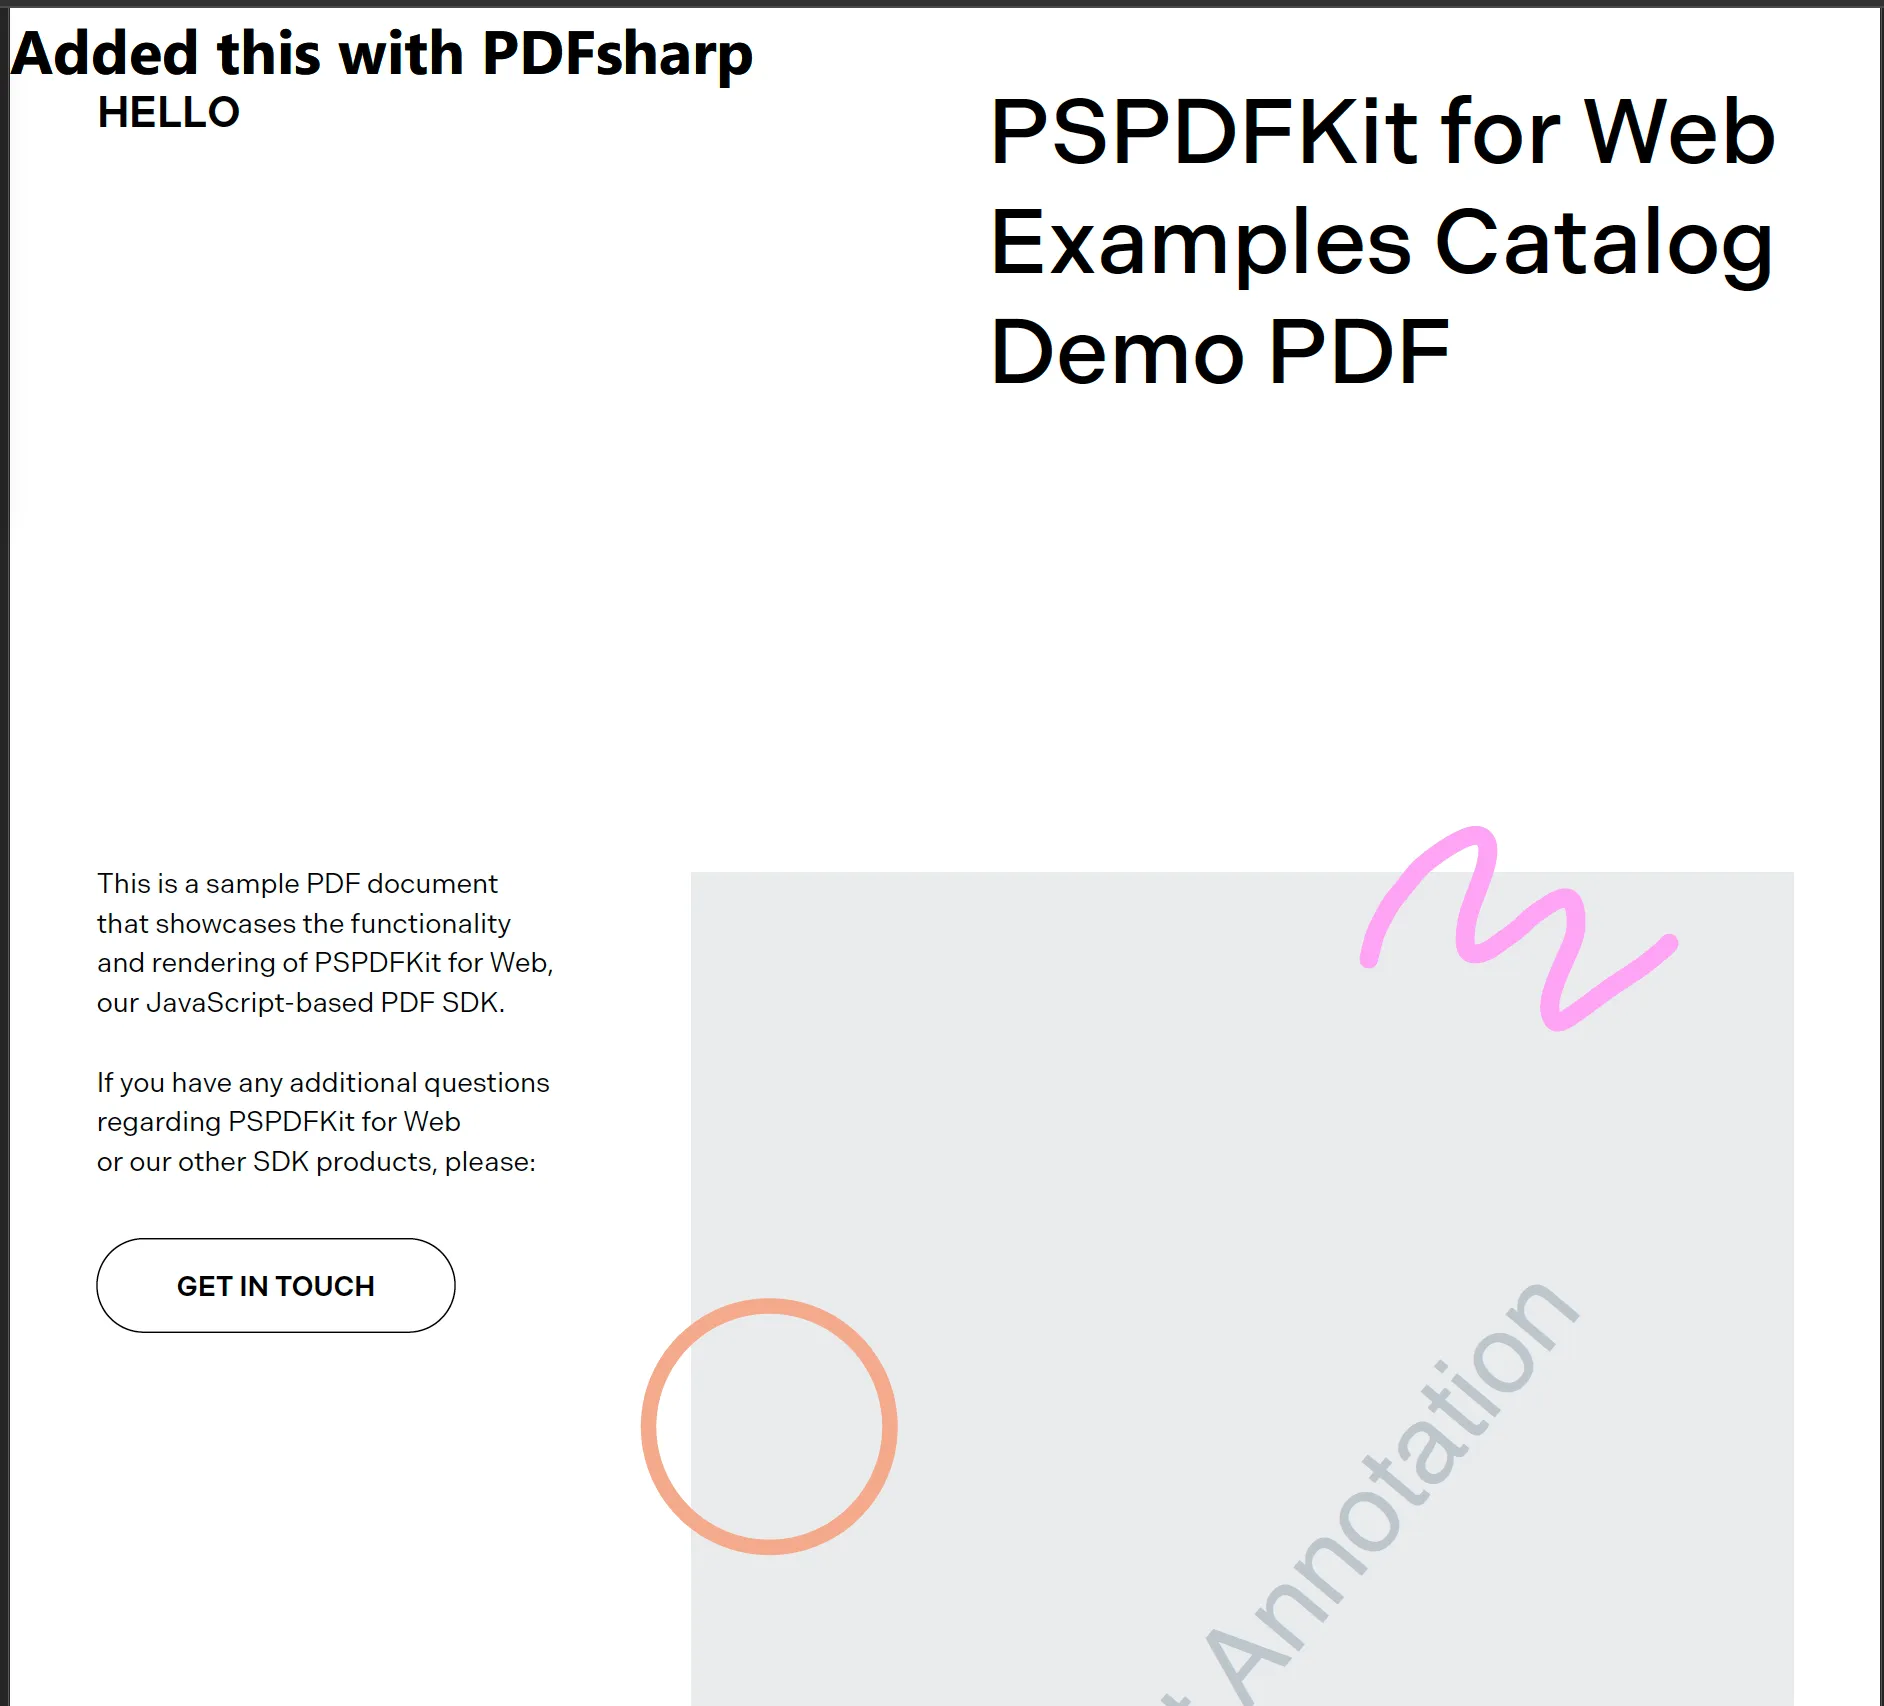
gfx.DrawString("Added this with PDFsharp", font, XBrushes.Black, new XRect(0, 0, page.Width, page.Height), XStringFormats.TopLeft);
document.Save(filePath);
}
}
In the static constructor, set the font resolver, ensuring that this setup runs only once when the class is first used. The EditPdf method opens a specified PDF file, adds text to the first page, and saves the changes.
Updating the Razor Component
Open the Index.razor(opens in a new tab) file from the Pages directory. Inject the PdfEditor class and add a button to trigger PDF editing:
@page "/"
@inject PdfEditor pdfEditor
<button class="btn btn-primary" @onclick="EditPdfDocument">Edit PDF</button>
@code {
private void EditPdfDocument()
{
pdfEditor.EditPdf("wwwroot/document.pdf"); // Add your PDF file to the wwwroot directory
}
}
Clicking this button calls EditPdfDocument, which in turn uses PdfEditor to edit the specified PDF file.
Make sure to add your PDF file to the wwwroot directory. You can use our demo document as an example.
Configuring the PdfEditor Service
Add the PdfEditor class as a singleton service in the Program.cs(opens in a new tab) of your Blazor application:
// Add `PdfEditor` as a singleton service.
builder.Services.AddSingleton<PdfEditor>();
Registering PdfEditor as a singleton ensures that it’s available throughout the application’s lifecycle.
Running Your Application
Press F5, or click Start in Visual Studio to run your application. Once running, navigate to the main page and click the Edit PDF button to test your PDF editing functionality. Or, you can run the following command in the terminal:
You can find the full source code for this tutorial in our GitHub repository.(opens in a new tab)
PSPDFKit Blazor PDF Viewer
We offer a commercial Blazor PDF viewer library that can easily be integrated into your web application. It comes with 30+ features that let you view, annotate, edit, and sign documents directly in your browser. Out of the box, it has a polished and flexible UI that you can extend or simplify based on your unique use case.
- A prebuilt and polished UI for an improved user experience
- 15+ prebuilt annotation tools to enable document collaboration
- Support for more file types with client-side PDF, MS Office, and image viewing
- Dedicated support from engineers to speed up integration
If you prefer a video tutorial, you can watch our step-by-step guide below. Otherwise, keep reading.

Creating a New Blazor WASM Project
- For this tutorial, you’ll install the Blazor WebAssembly template using the .NET CLI(opens in a new tab) (command-line interface). Open your terminal, navigate to the directory you want to create your project in, and run the following command:
dotnet new blazorwasm -o PSPDFKit_BlazorWASM
This command creates your new Blazor app project and places it in a new directory inside your current location called PSPDFKit_BlazorWASM.
- Change your directory into the newly created project:
blazorwasm is a template that creates the initial files and directory structure for a Blazor WebAssembly project.
Adding PSPDFKit to Your Project
PSPDFKit for Web library files are distributed as an archive that can be extracted manually.
- Download the framework here(opens in a new tab). The download will start immediately and will save a
.tar.gzarchive likePSPDFKit-Web-binary-2022.2.1.tar.gzto your computer. - Once the download is complete, extract the archive and copy the entire contents of its
distfolder to your project’swwwrootfolder. - Make sure your
wwwrootfolder contains thepspdfkit.jsfile and apspdfkit-libdirectory with the library assets.
Displaying a PDF
- Add the PDF document you want to display to the
wwwrootdirectory. You can use our demo document as an example. - Navigate to the
Shared/MainLayout.razorfile. The layout component inherits fromLayoutComponentBase(opens in a new tab), and it adds a@Body(opens in a new tab) property to the component, which contains the content to be rendered inside the layout. During rendering, the@Bodyproperty will be replaced with the content of the layout:
@inherits LayoutComponentBase
@Body
- Now you’ll start working on the
Homeroute. Navigate to your project’sPages/index.razorfile, and replace the contents of the file with the following:
@page "/"
@inject IJSRuntime JS
<div id='container' style='background: gray; width: 100vw; height: 100vh; margin: 0 auto;'></div>
@code {
protected override async void OnAfterRender(bool firstRender)
{
if (firstRender) {
await JS.InvokeVoidAsync("loadPDF", "#container", "document.pdf");
}
}
}
Here, the @page directive is pointing to the Home (/) route.
To invoke JavaScript functions from .NET, inject the IJSRuntime(opens in a new tab) abstraction and call the InvokeVoidAsync(opens in a new tab) method, which doesn’t return a value.
The div element is used to display the PDF document.
- Load the PSPDFKit SDK loading code to
wwwroot/index.htmlbefore the</body>tag:
<script src="dist/pspdfkit.js"></script>
<script>
function loadPDF(container, document) {
PSPDFKit.load({
container,
document,
});
}
</script>
Serving the Application
- Start the app in the root directory of your project:
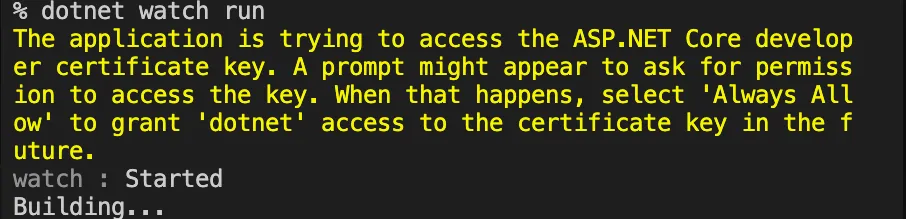
If you get a prompt asking for permissions, type your keychain and click Always Allow.
The server will start and will automatically restart when changes are made to the project.
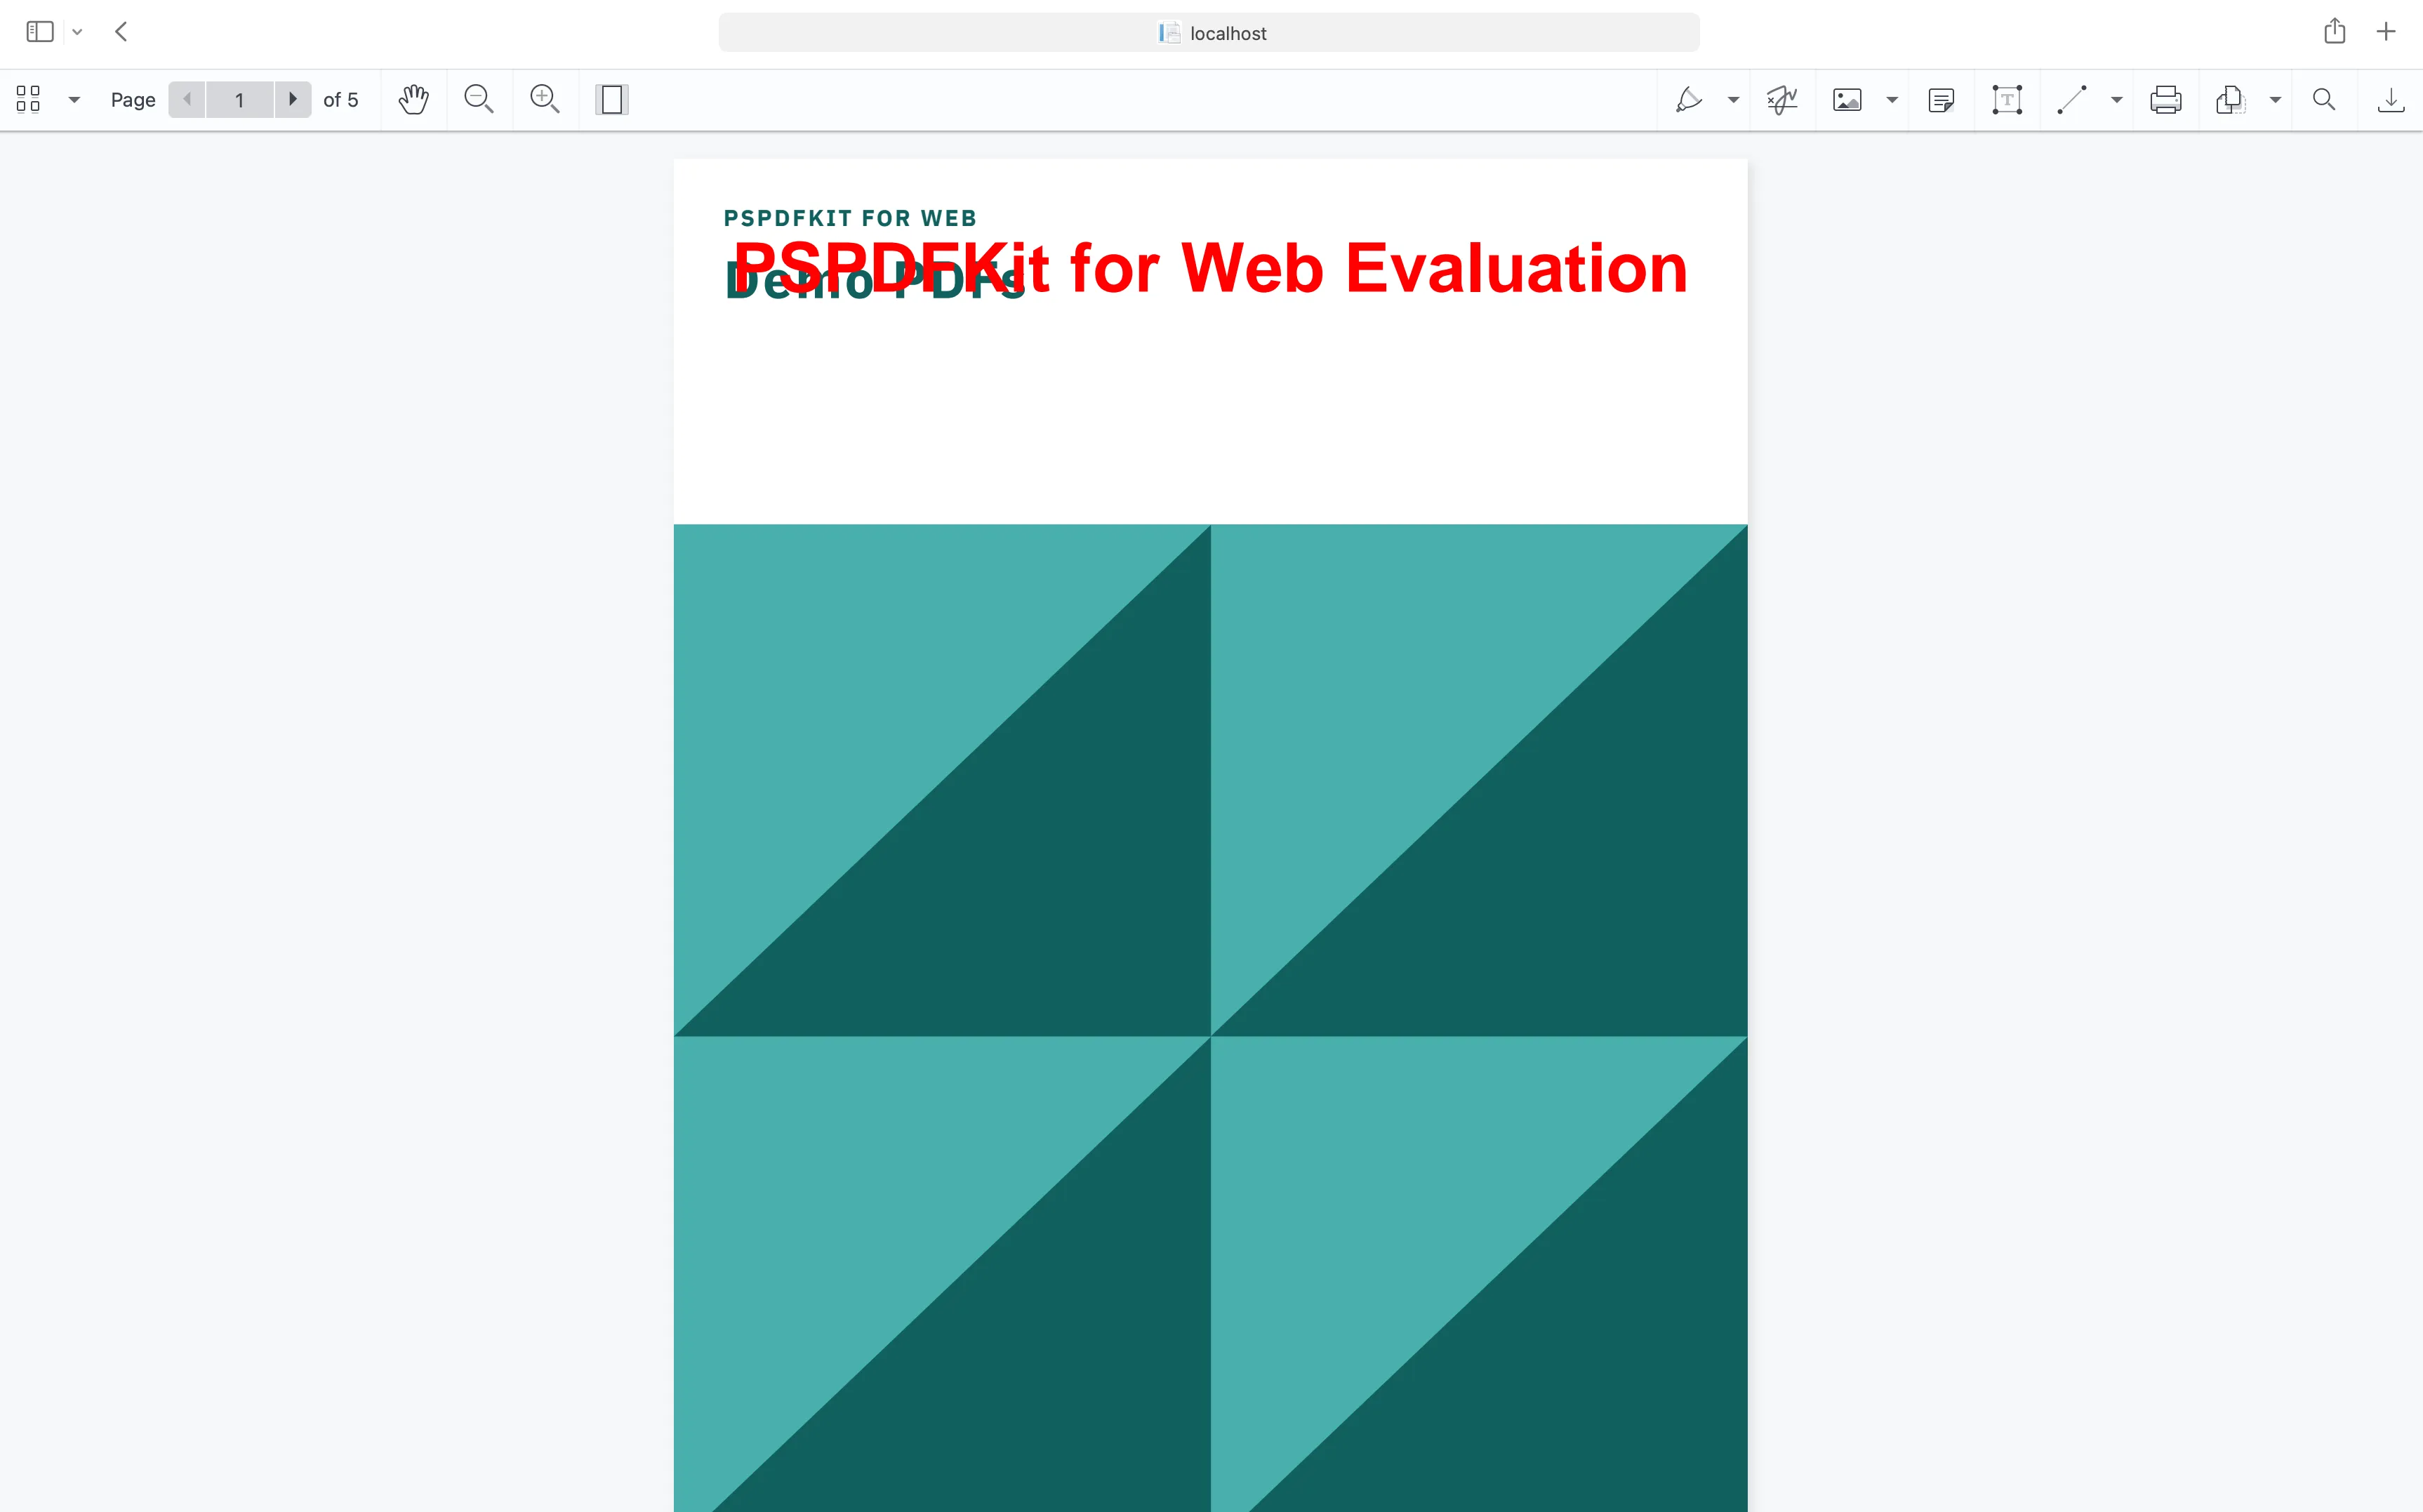
You can access the source code for this tutorial on GitHub(opens in a new tab); just navigate to the wasm folder. If you’re looking for the Blazor Server example, you can find the example project under the server folder or follow our getting started guide here.
PDF Editing with PSPDFKit for Blazor
This next section outlines how to edit documents using PSPDFKit for Blazor.
Editing Text in a PDF Document
To enable content editing in the PSPDFKit instance after loading the document, modify your loadPDF JavaScript function to set the interaction mode to PSPDFKit.InteractionMode.CONTENT_EDITOR using the setViewState method:
<script>
function loadPDF(container, document) {
PSPDFKit.load({
container,
document,
}).then((instance) => {
instance.setViewState((v) =>
v.set(
'interactionMode',
PSPDFKit.InteractionMode.CONTENT_EDITOR,
),
);
return instance;
});
}
</script>
This function will load the PDF document and immediately switch the interaction mode to content editing mode when the document finishes loading.
Page Manipulation
This next section will cover different ways of manipulating pages in PDFs.
Rotating PDF Pages
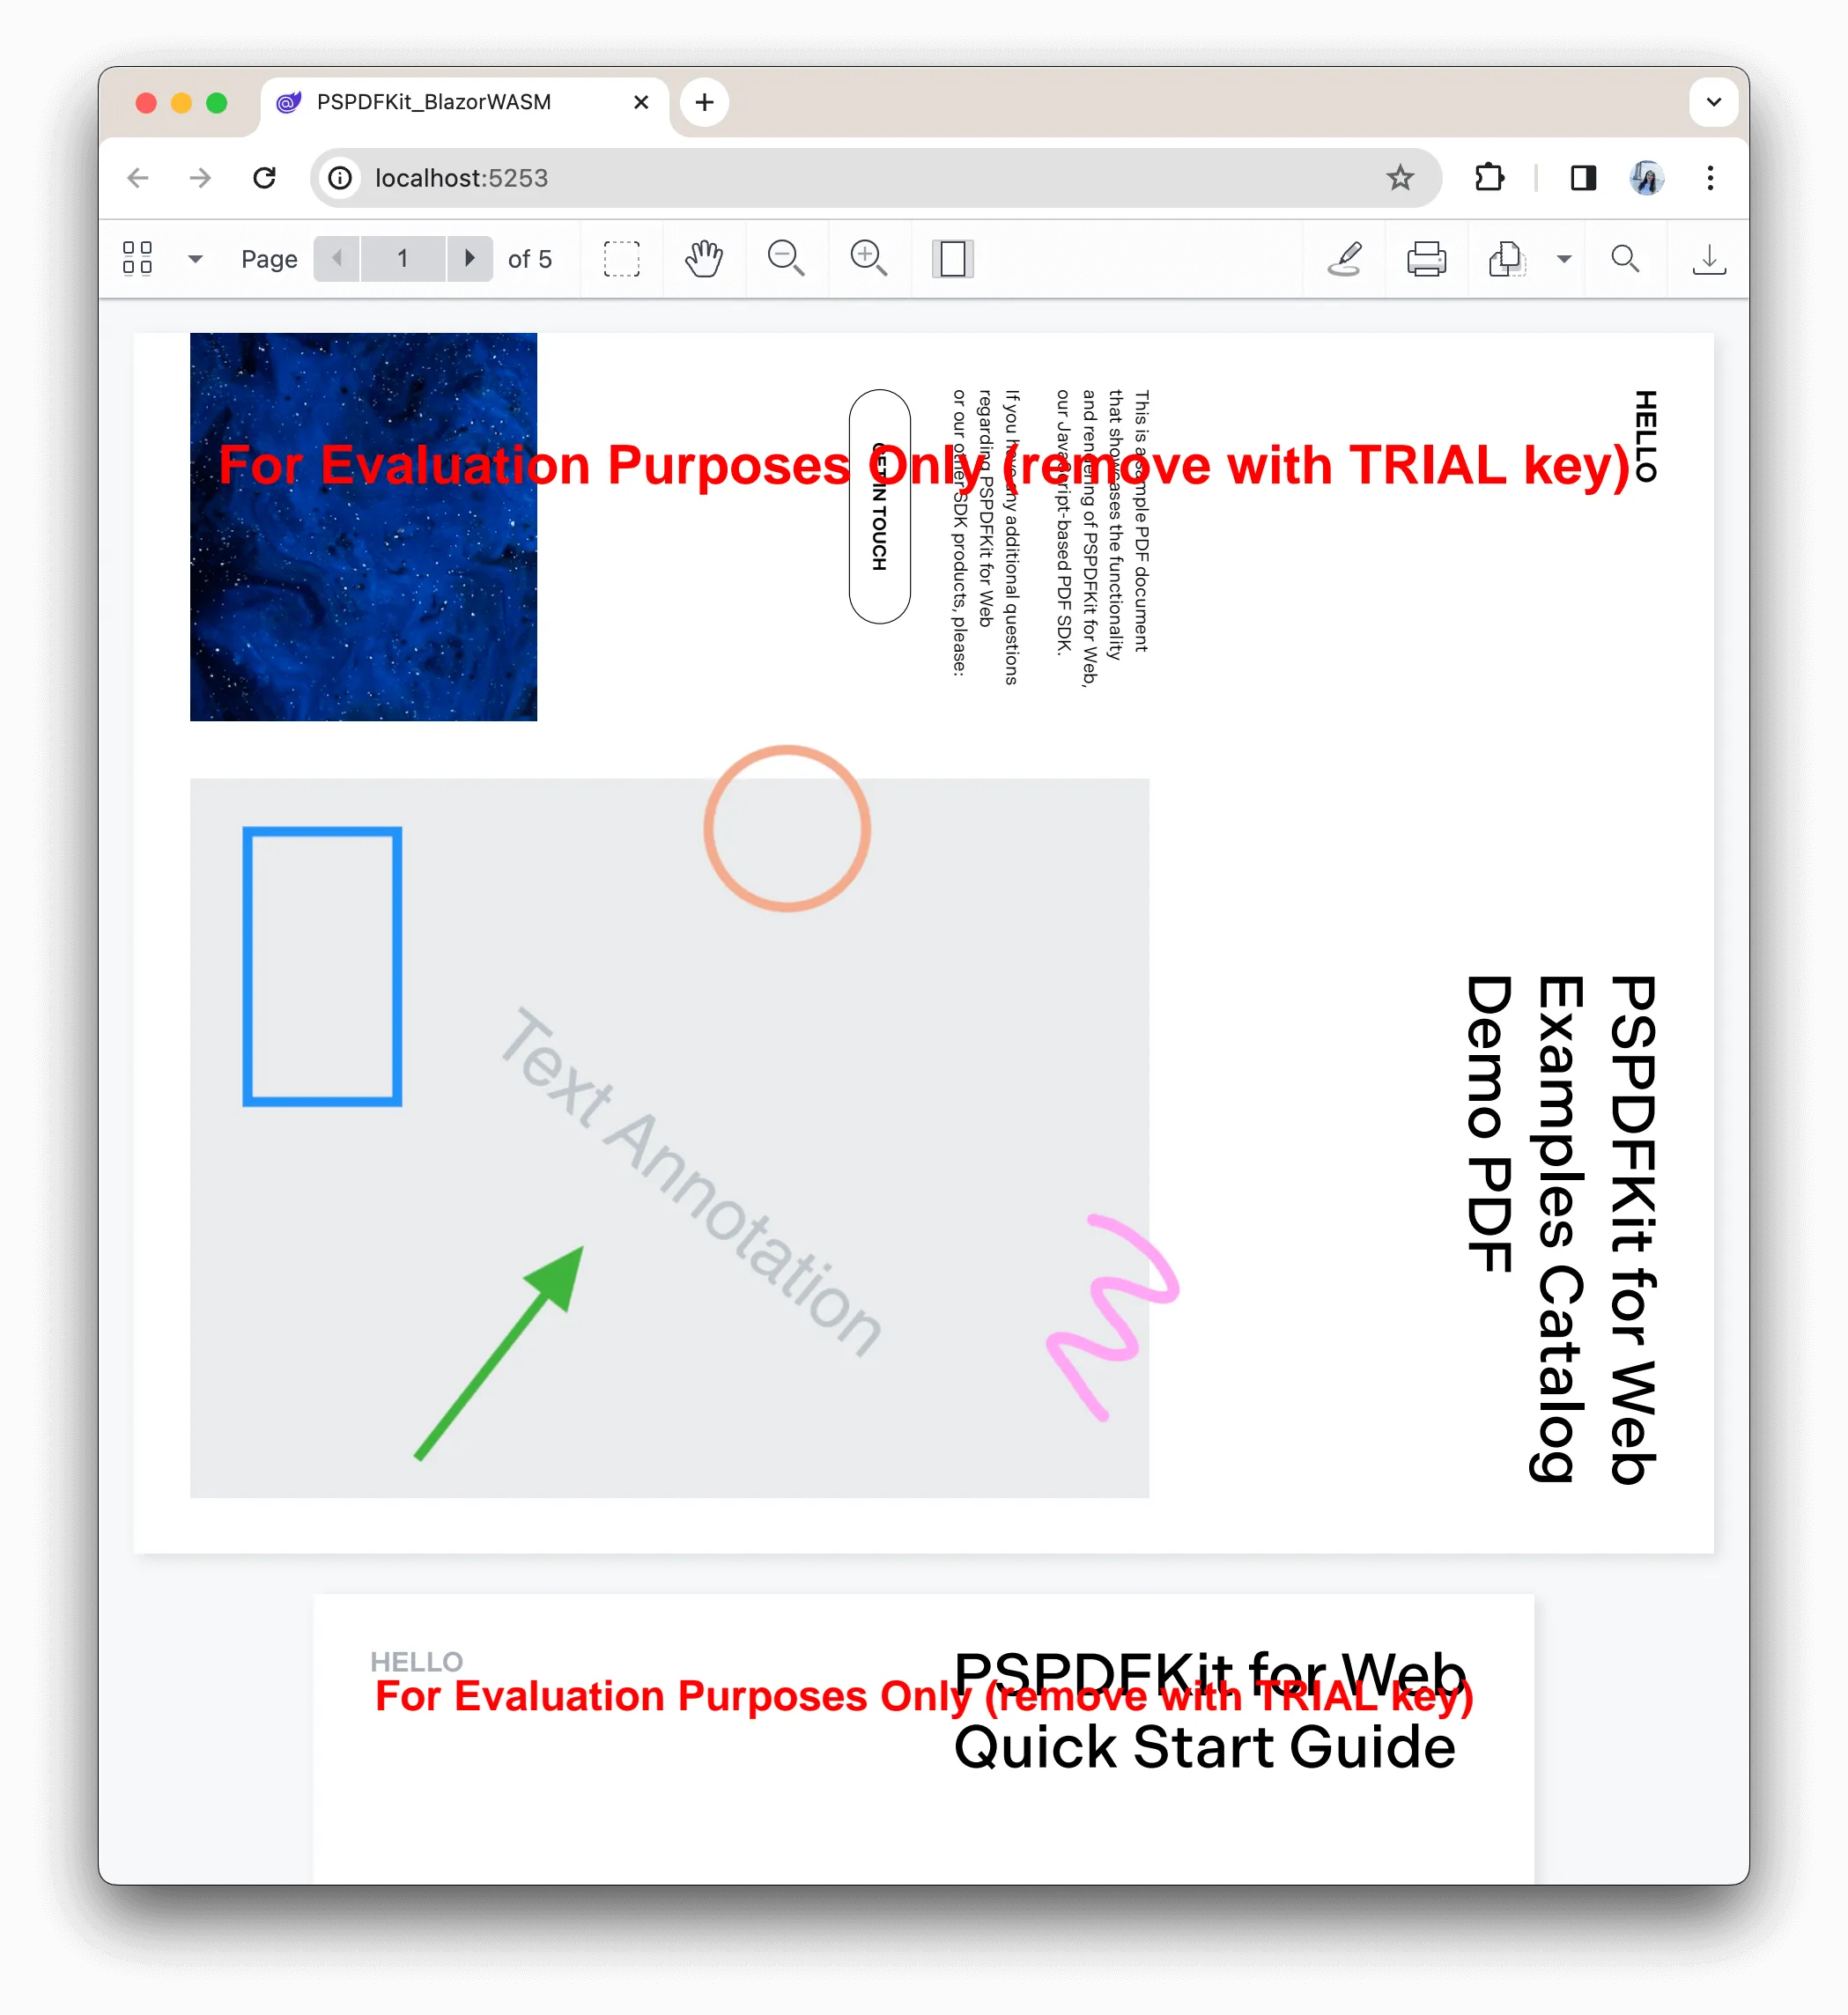
To perform page rotation in PSPDFKit within your Blazor application, you’ll need to define an operations object with the following properties:
type— Indicates the type of operation you want to execute.pageIndexes— Specifies which page or pages you intend to rotate.rotateBy— Sets the angle by which you want to rotate the page.
Only multiples of 90, up to 360, are allowed as values.
Here’s an example of how to structure the operations object:
{
type: "rotatePages",
pageIndexes: [0], // This will rotate page 1.
rotateBy: 90 // Rotate the page 90 degrees clockwise.
}
To apply this operation, pass the operations object to the PSPDFKit.Instance.applyOperations method:
<script>
function loadPDF(container, document) {
PSPDFKit.load({
container,
document,
}).then((instance) => {
// Define the rotation operation.
const rotationOperation = {
type: 'rotatePages',
pageIndexes: [0], // Rotate page 1.
rotateBy: 90, // Rotate page 90 degrees clockwise.
};
// Apply the rotation operation.
instance.applyOperations([rotationOperation]);
return instance;
});
}
</script>
Cropping PDFs
You can crop specific pages within a PDF document using the PSPDFKit library in your Blazor application. To perform cropping, you’ll need to define an operations object with the following properties:
type— Specifies the type of operation you wish to perform.pageIndexes— Targets the page or pages you want to crop.cropBox— Defines the crop window as a rectangle.
Here’s an example of how to structure the operations object for cropping:
{
type: "cropPages",
pageIndexes: [1, 2], // Crop pages 2 and 3 (0-based index).
cropBox: new PSPDFKit.Geometry.Rect({
left: 10,
top: 10,
width: 100,
height: 100
})
}
To apply this cropping operation, pass the operations object to the PSPDFKit.Instance.applyOperations method, as demonstrated below:
<script>
function loadPDF(container, document) {
return PSPDFKit.load({
container,
document,
}).then((instance) => {
// Define the cropping operation.
const croppingOperation = {
type: 'cropPages',
pageIndexes: [1, 2], // Crop pages 2 and 3 (0-based index).
cropBox: new PSPDFKit.Geometry.Rect({
left: 10,
top: 10,
width: 100,
height: 100,
}),
};
// Apply the cropping operation.
instance.applyOperations([croppingOperation]);
return instance;
});
}
</script>
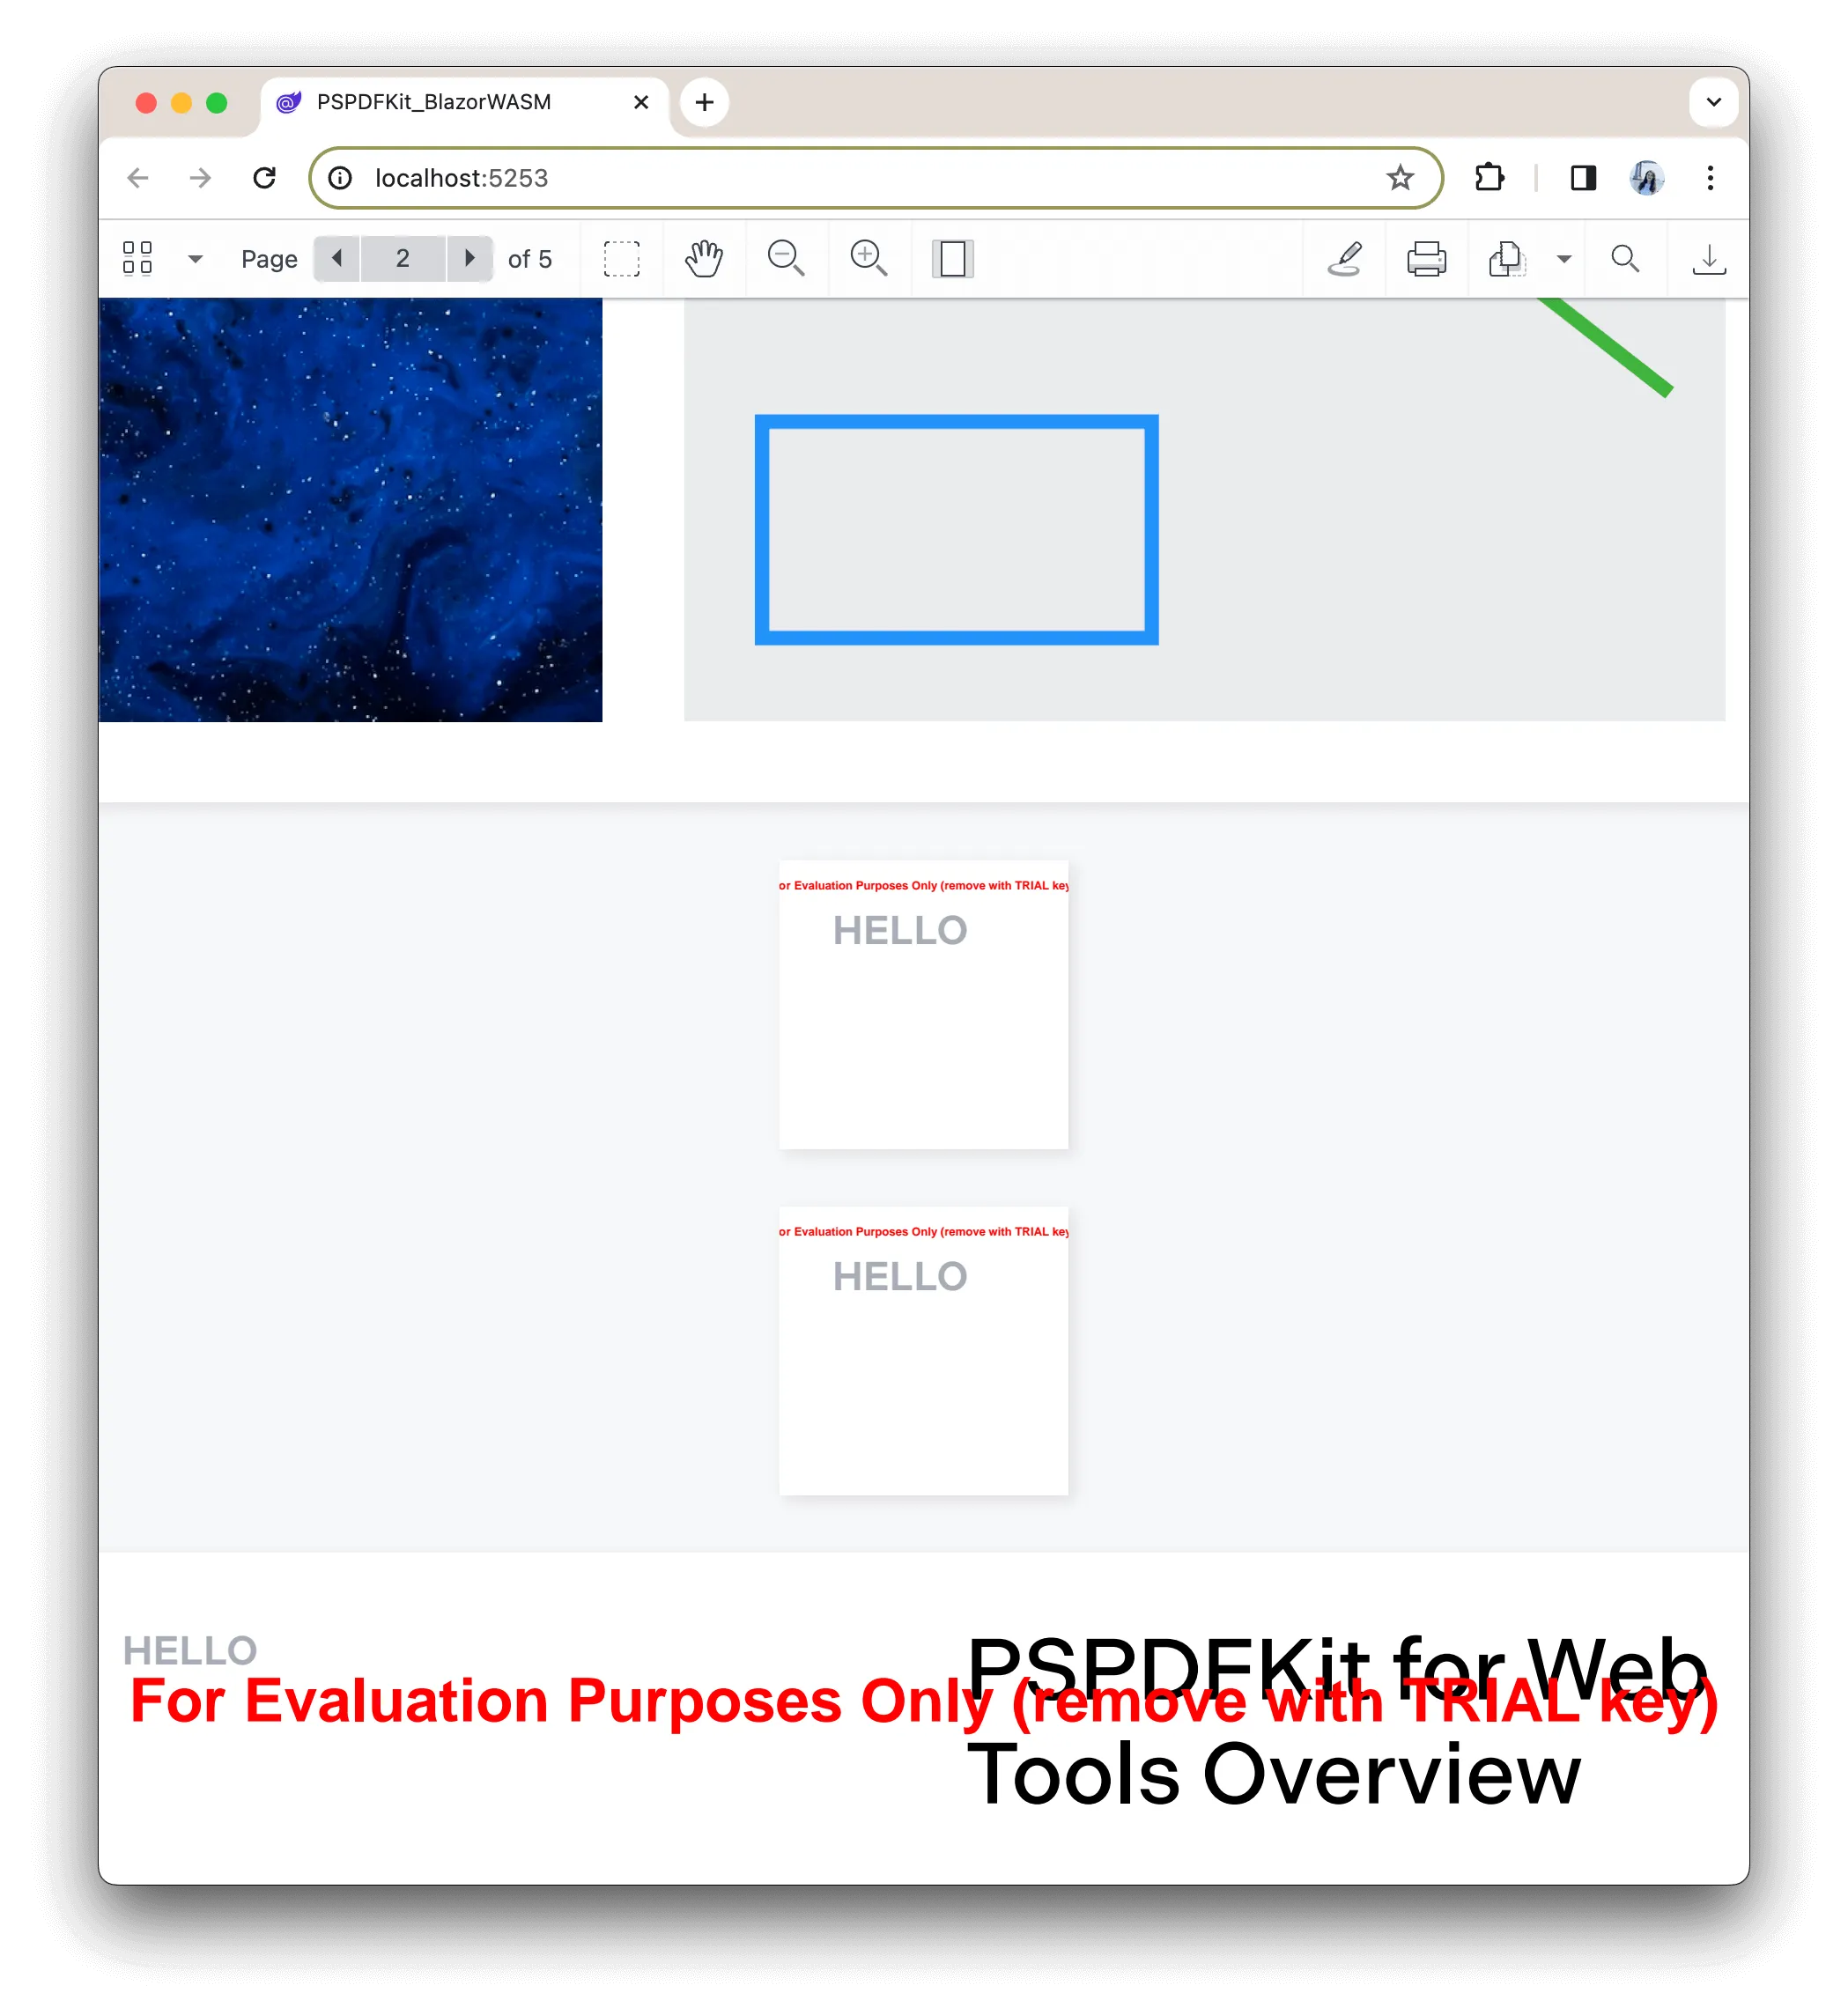
If you omit the
pageIndexesproperty from the code above, all the PDF document’s pages will be cropped.
Moving a Page within a Document
Move a page using the following operations object definition:
type— The type of operation you want to perform.pageIndexes— Targets the page(s) you want to move.beforePageIndex— Moves the targeted page(s) before the page specified here.afterPageIndex— Moves the targeted page(s) after the page specified here.
Here’s an example of how to structure the operations object for page movement:
{
type: "movePages",
pageIndexes: [0, 4], // Move pages 1 and 5.
afterPageIndex: 3 // The specified pages will be moved after page 3.
}
Apply this configured operations object by passing it to the PSPDFKit.Instance.applyOperations method:
<script>
function loadPDF(container, document) {
return PSPDFKit.load({
container,
document,
}).then(async (instance) => {
// Define the page movement operation.
const pageMovementOperation = {
type: 'movePages',
pageIndexes: [0, 4], // Move pages 1 and 5.
afterPageIndex: 3, // Move the specified pages after page 3.
};
// Apply the page movement operation.
await instance.applyOperations([pageMovementOperation]);
return instance;
});
}
</script>
Copying a Page
To copy a page/pages, define the operations object like so:
type— The type of operation you want to perform (in this case, duplicating pages).pageIndexes— Targets the page(s) you want to duplicate and inserts each duplicate after the original page.
{
type: "duplicatePages",
pageIndexes: [0, 4] // Duplicate pages 1 and 5, inserting each duplicate after the original page.
}
Apply these copying instructions by passing the operations object to the PSPDFKit.Instance.applyOperations method:
<script>
function loadPDF(container, document) {
return PSPDFKit.load({
container,
document,
}).then(async (instance) => {
// Define the page copying operation.
const pageCopyingOperation = {
type: 'duplicatePages',
pageIndexes: [0, 4], // Duplicate pages 1 and 5, inserting each duplicate after the original page.
};
// Apply the page copying operation.
await instance.applyOperations([pageCopyingOperation]);
return instance;
});
}
</script>
Removing Pages from a PDF
You can remove pages from a PDF using the following operations object definition:
type— The type of operation you want to perform (in this case, removing pages). ThekeepPagestype keeps the pages specified usingpageIndexes. The opposite can be achieved with theremovePagestype.pageIndexes— Targets the page(s) you want to remove or keep.
{
type: "removePages",
pageIndexes: [0, 1, 2] // Remove pages 1, 2, and 3.
}
Apply these removal instructions by passing the operations object to the PSPDFKit.Instance.applyOperations method:
<script>
function loadPDF(container, document) {
return PSPDFKit.load({
container,
document,
}).then(async (instance) => {
// Define the page-removing operation.
const pageRemovingOperation = {
type: 'removePages',
pageIndexes: [0, 1, 2], // Remove pages 1, 2, and 3.
};
// Apply the page-removing operation.
await instance.applyOperations([pageRemovingOperation]);
return instance;
});
}
</script>
Adding a Page to a PDF Document
To add a page to a document, define the operations object like so:
type— The type of operation you want to perform.afterPageIndex— The new page is added after the index specified here.backgroundColor— Applies a background color to the new page.pageWidth— Width of the new page.pageHeight— Height of the new page.rotateBy— Rotation for the new page.
Here’s an example of how to structure the operations object for adding a page:
{
type: "addPage",
afterPageIndex: 1, // Add a new page after page 2.
backgroundColor: new PSPDFKit.Color({ r: 100, g: 200, b: 255 }), // Set the new page background color.
pageWidth: 750,
pageHeight: 1000,
rotateBy: 0 // No rotation.
}
Apply these addition instructions by passing the operations object to the PSPDFKit.Instance.applyOperations method:
<script>
function loadPDF(container, document) {
return PSPDFKit.load({
container,
document,
}).then(async (instance) => {
// Define the page addition operation.
const pageAdditionOperation = {
type: 'addPage',
afterPageIndex: 1, // Add a new page after page 2.
backgroundColor: new PSPDFKit.Color({
r: 100,
g: 200,
b: 255,
}), // Set the new page background color (optional).
pageWidth: 750,
pageHeight: 1000,
rotateBy: 0, // No rotation.
};
// Apply the page addition operation.
await instance.applyOperations([pageAdditionOperation]);
return instance;
});
}
</script>
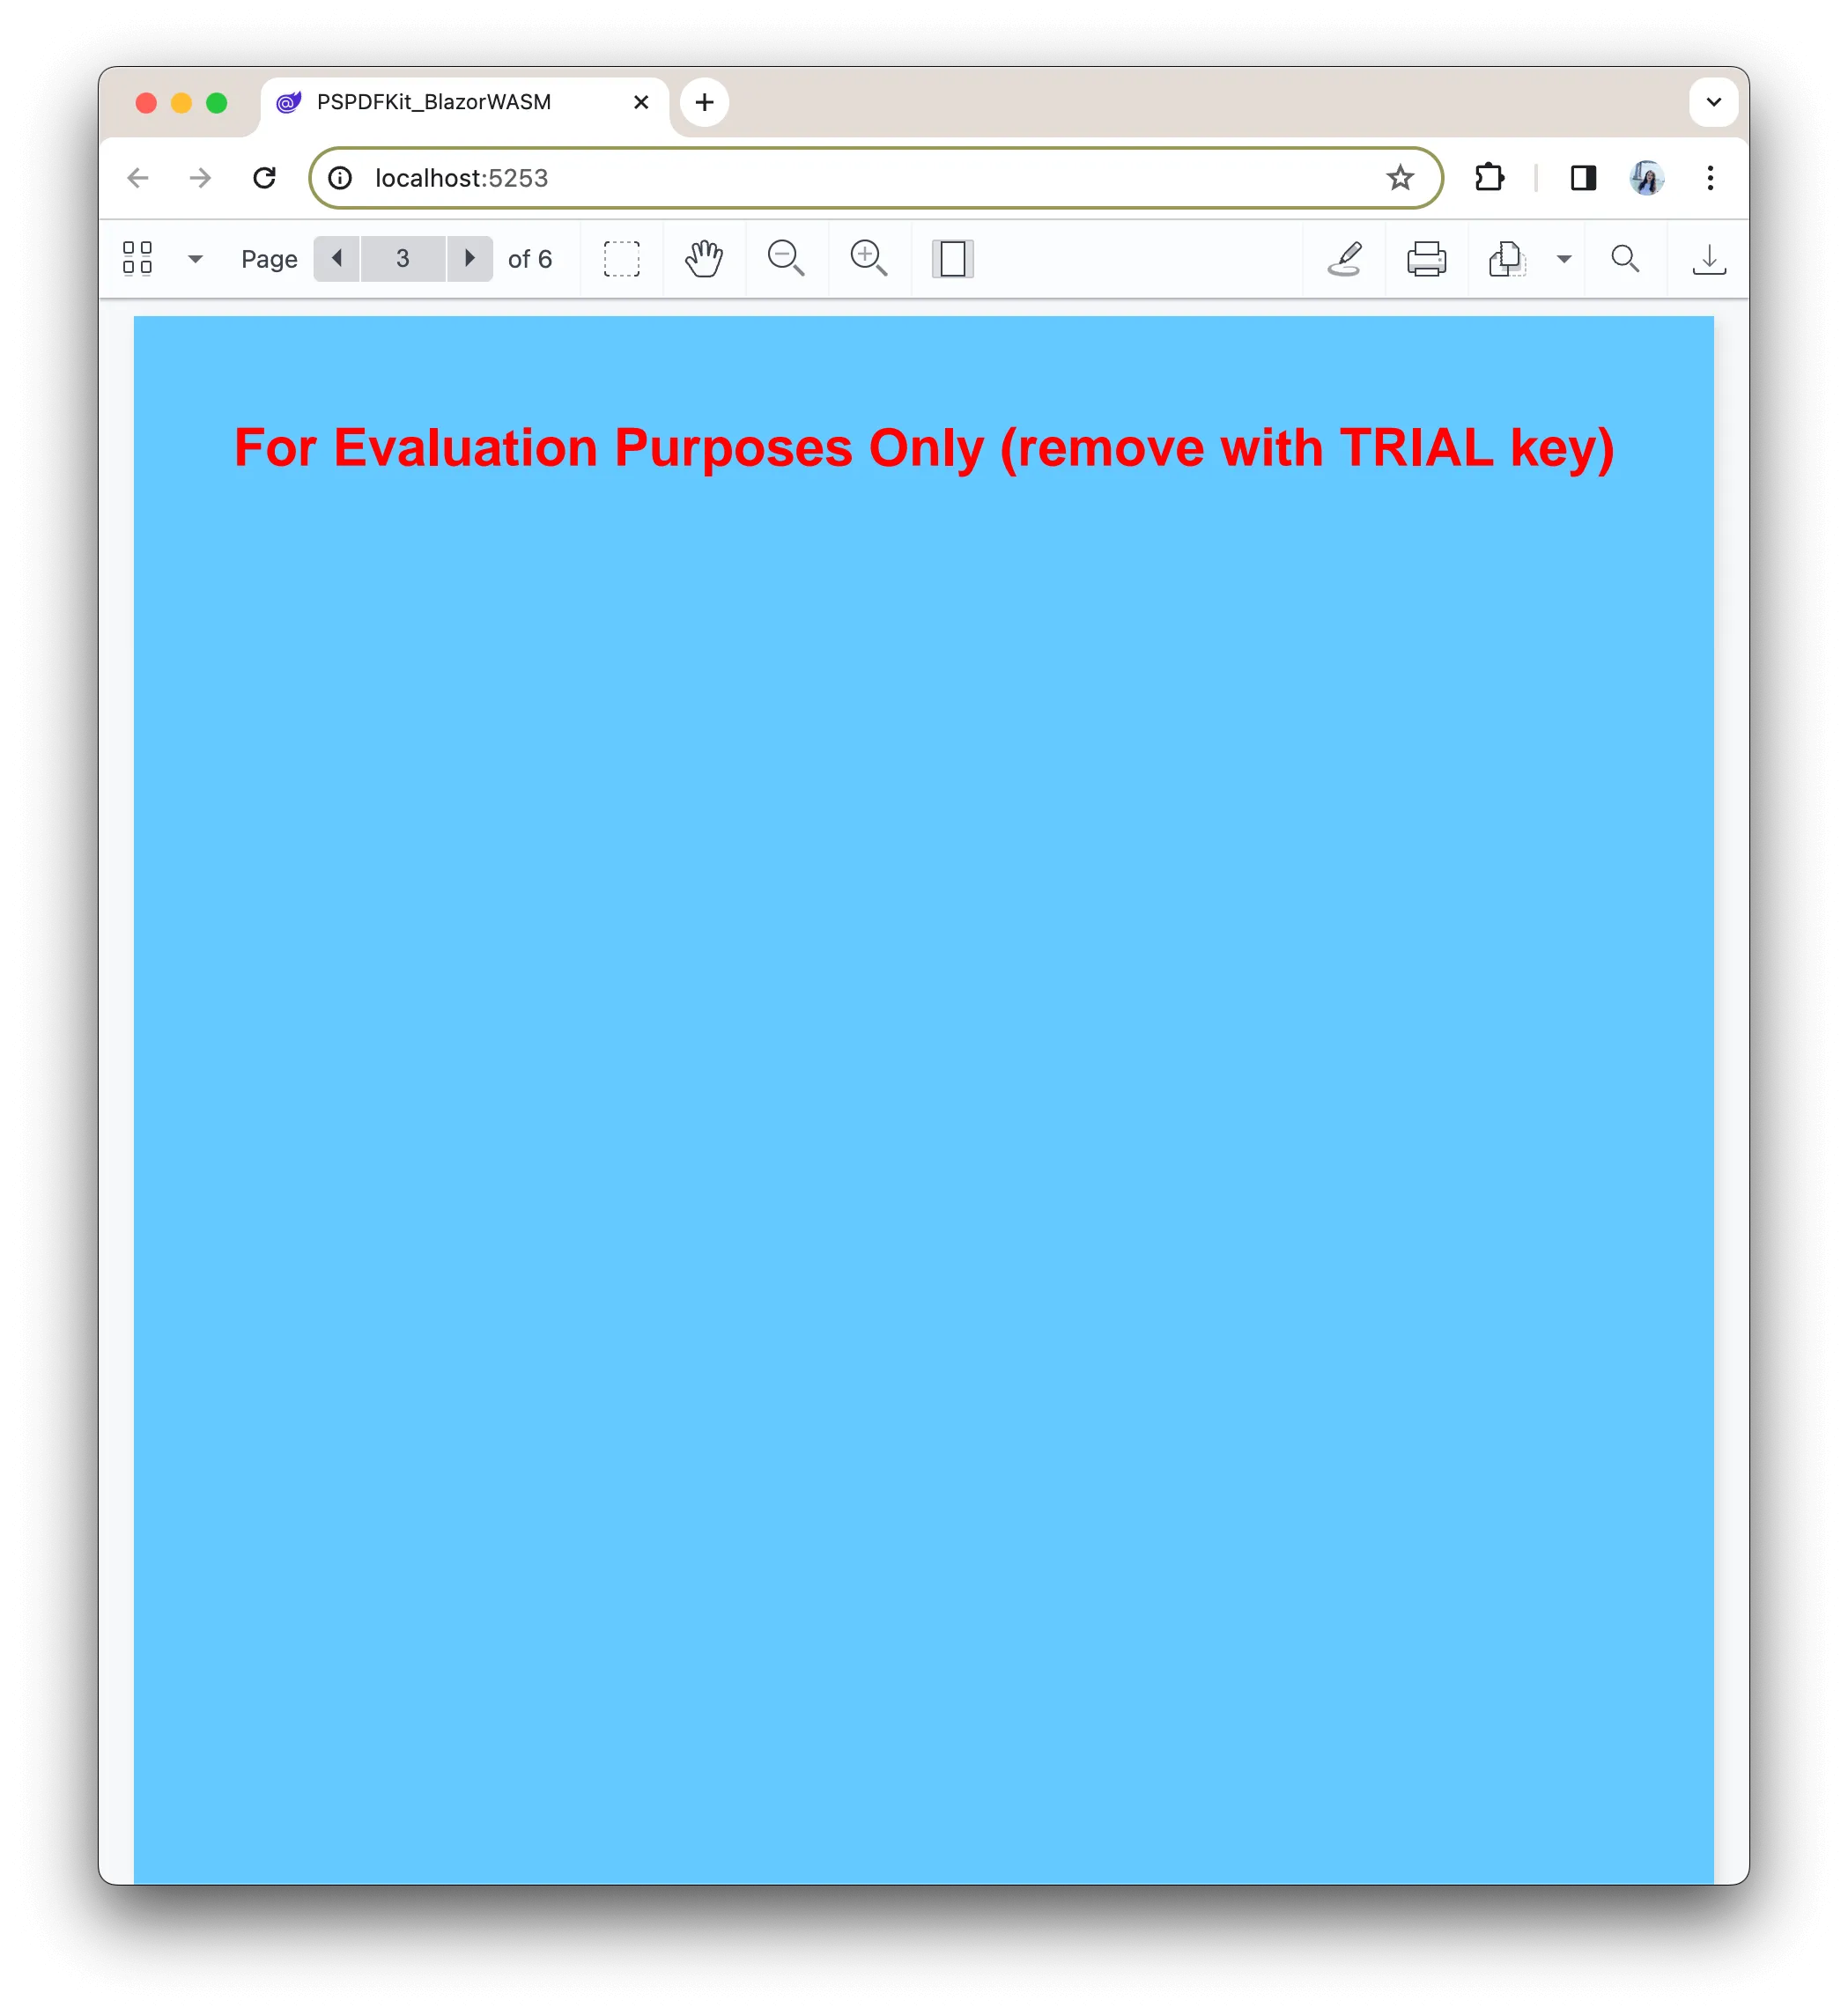
With this modification, the loadPDF function will now perform a page addition operation. It’ll add a new page after page 2 with the specified settings, including background color, page dimensions, and rotation.
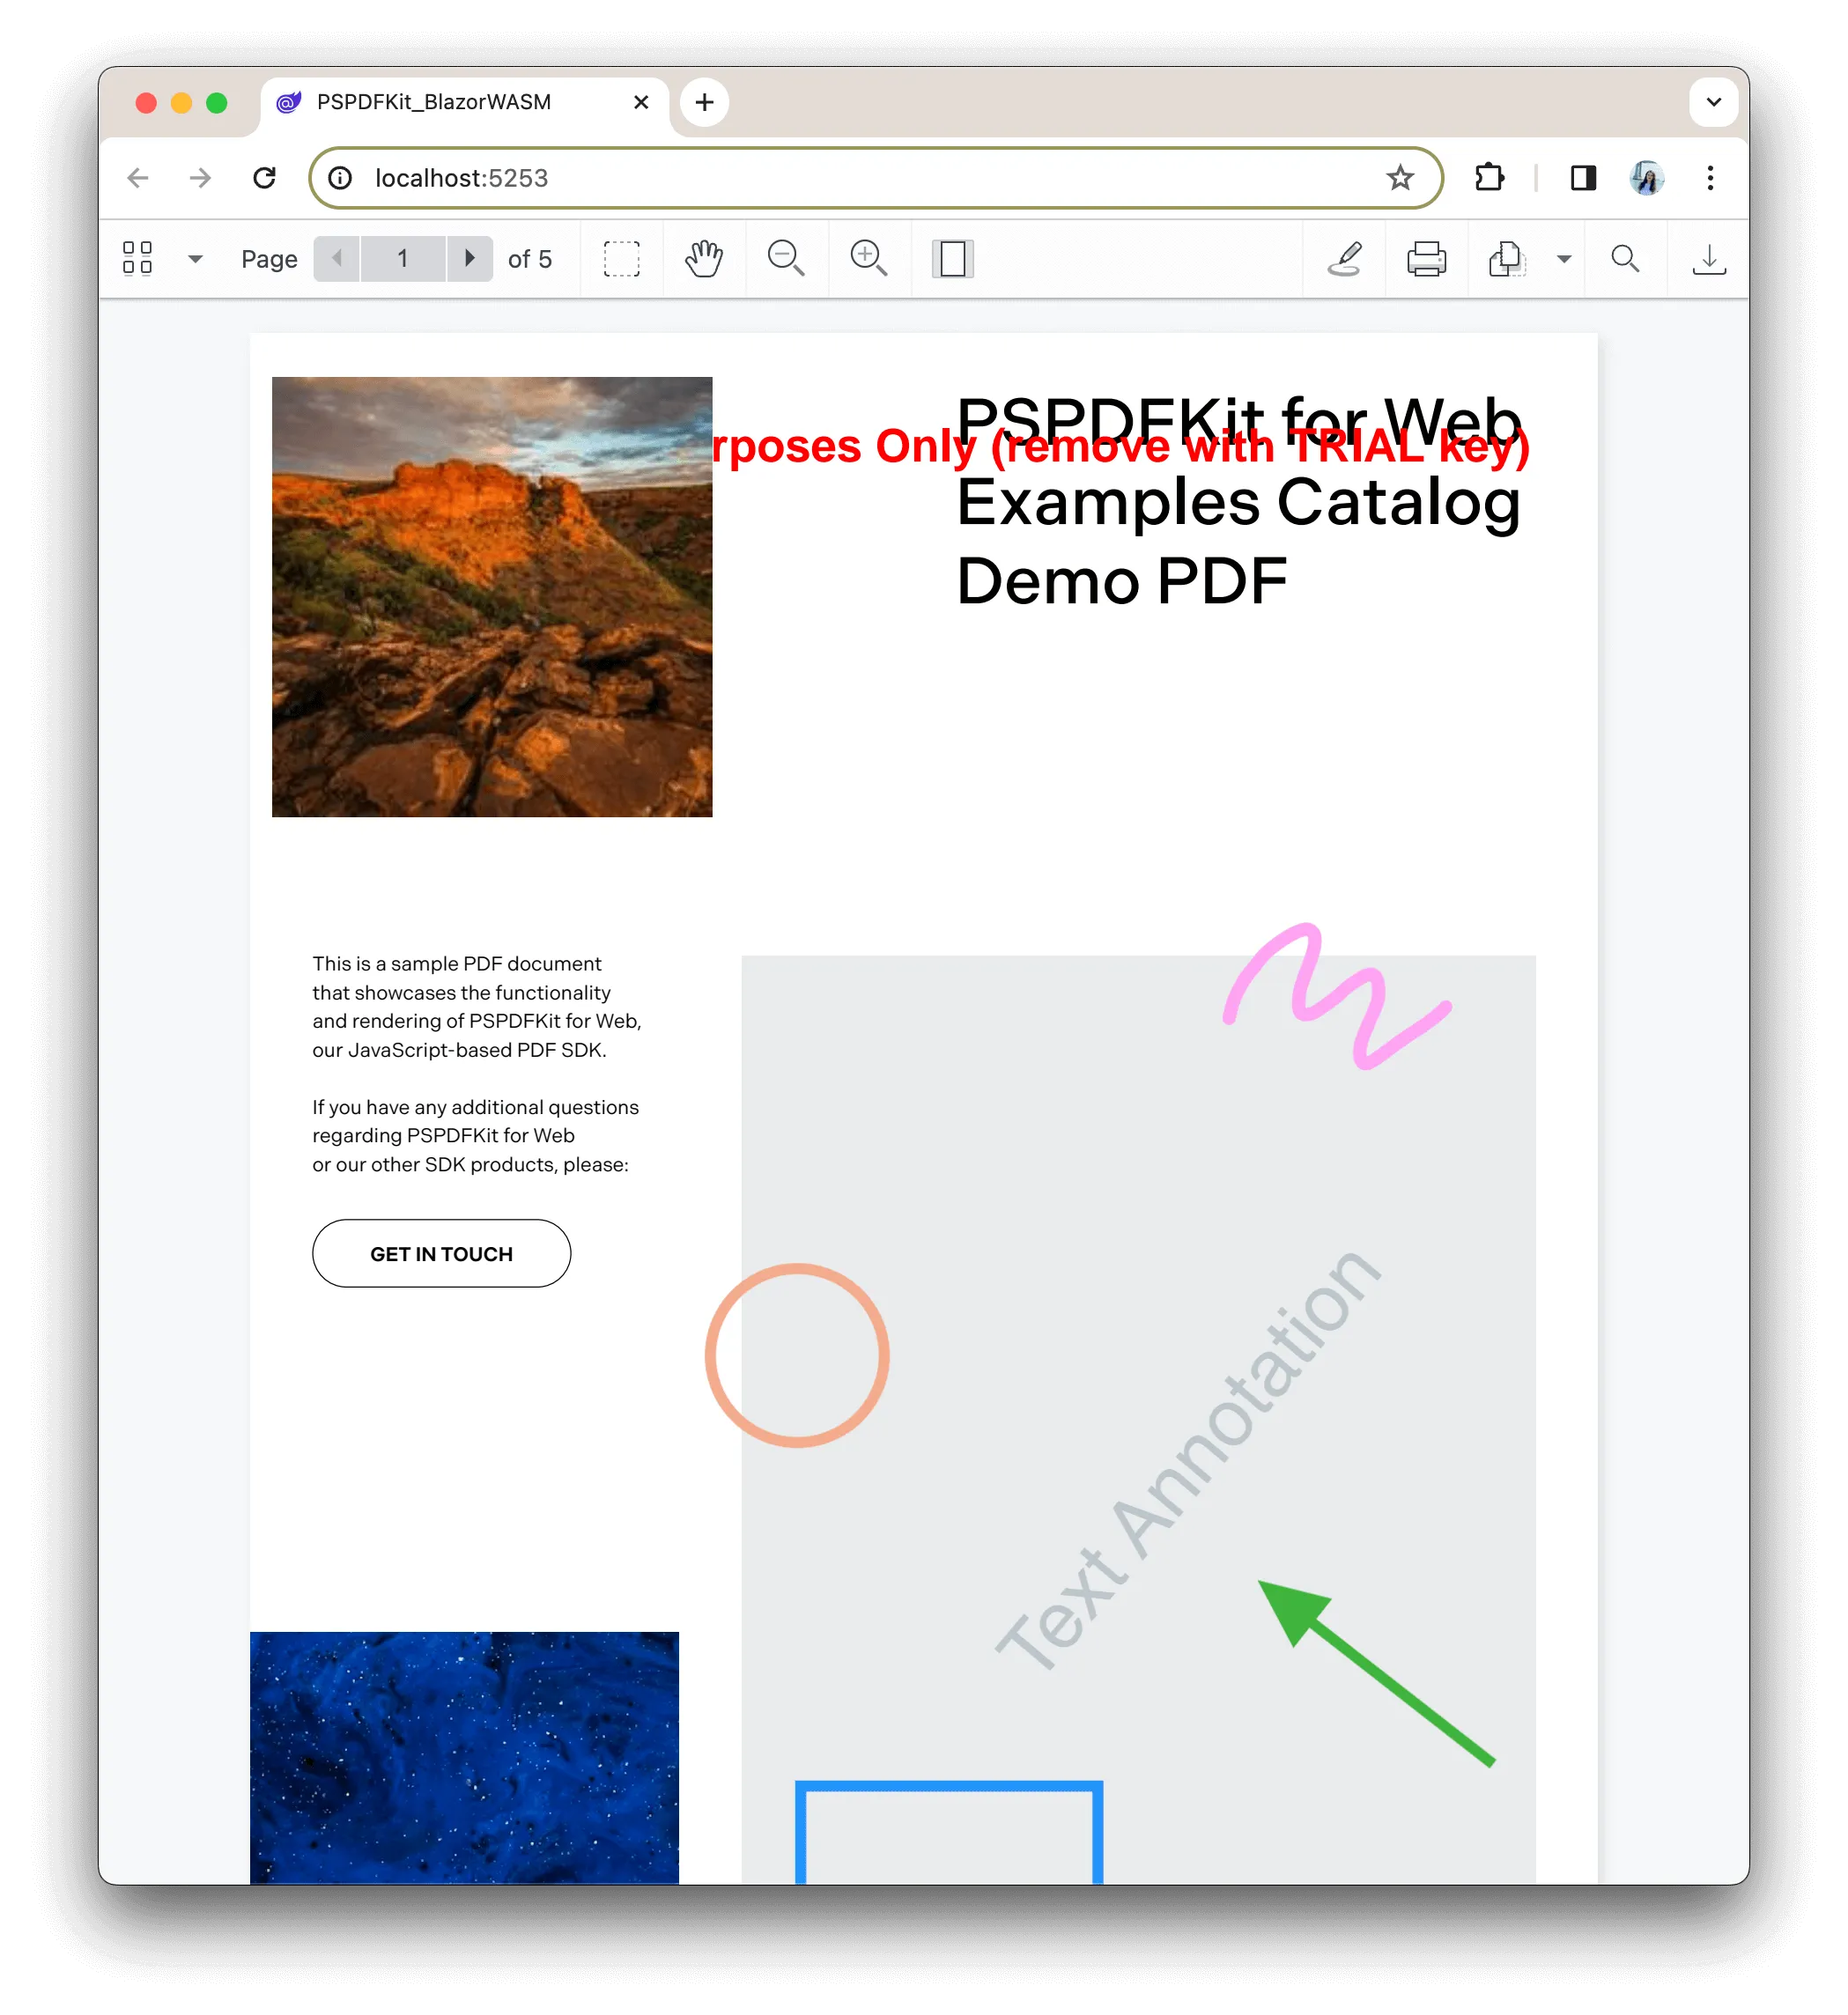
Adding Images to a PDF Document
You can add images to your document using the image annotation API.
- Fetch the image you want to include in your PDF and convert it into a
Blob. You can use thefetchAPI to do this:
const request = await fetch('https://picsum.photos/200');
const blob = await request.blob();
- Utilize the
instance#createAttachmentmethod to transform the imageBlobinto an attachment, effectively storing the image within your PDF:
const imageAttachmentId = await instance.createAttachment(blob);
- To display this image attachment within the PDF document, create an image annotation. Configure the annotation with the following properties:
pageIndex— Specify the page index where you want to place the image.contentType— Define the image’s content type (e.g. JPEG).imageAttachmentId— Attach the image using the attachment ID obtained earlier.description— Provide a description for the image.boundingBox— Specify the position and dimensions of the image on the page.
const annotation = new PSPDFKit.Annotations.ImageAnnotation({
pageIndex: 0, // Page index where you want to add the image.
contentType: 'image/jpeg', // Image content type (e.g. JPEG).
imageAttachmentId, // Attach the image using the attachment ID.
description: 'Example Image Annotation', // Description for the image.
boundingBox: new PSPDFKit.Geometry.Rect({
left: 10,
top: 20,
width: 200,
height: 200,
}), // Position and dimensions of the image on the page.
});
Finally, create the image annotation within the PDF using the instance.create method:
instance.create(annotation);
Here’s the complete code for adding an image to a PDF document:
<script>
async function loadPDF(container, document) {
const instance = await PSPDFKit.load({
container,
document,
});
// Fetch the image you want to add to the PDF.
const request = await fetch('https://picsum.photos/200');
const blob = await request.blob();
// Convert the image into an attachment in the PDF.
const imageAttachmentId = await instance.createAttachment(blob);
// Create an image annotation with the desired properties.
const annotation = new PSPDFKit.Annotations.ImageAnnotation({
pageIndex: 0, // Specify the page index where you want to add the image.
contentType: 'image/jpeg', // Specify the image content type (e.g. JPEG).
imageAttachmentId, // Attach the image using the attachment ID.
description: 'Example Image Annotation', // Provide a description for the image.
boundingBox: new PSPDFKit.Geometry.Rect({
left: 10,
top: 20,
width: 200,
height: 200,
}), // Define the position and dimensions of the image on the page.
});
// Create the image annotation.
instance.create(annotation);
return instance;
}
</script>
Editing Page Labels in a PDF
To edit a page label, define the operations object like so:
type— The type of operation you want to perform.pageIndexes— Targets the page(s) for label editing.pageLabel— Defines the label.
{
type: "setPageLabel",
pageIndexes: [0], // Target page index 0 for label editing.
pageLabel: "New page label" // Define the new page label.
}
Apply the label editing operation to your PDF document using the instance.applyOperations method:
instance.applyOperations([
{
type: 'setPageLabel',
pageIndexes: [0],
pageLabel: 'New page label',
},
]);
Here’s the code for editing a page label in your PDF document using PSPDFKit for Blazor:
<script>
async function loadPDF(container, document) {
const instance = await PSPDFKit.load({
container,
document,
});
// Define the page label editing operation.
const pageLabelEditingOperation = {
type: 'setPageLabel',
pageIndexes: [0], // Specify the page index for label editing (e.g. page 1).
pageLabel: 'New page label', // Define the new page label.
};
// Apply the page label editing operation.
await instance.applyOperations([pageLabelEditingOperation]);
return instance;
}
</script>
Splitting a PDF Document
To split a PDF document into two separate PDFs in a Blazor WebAssembly application, follow the steps outlined below.
- Create a JavaScript utility file (
downloadUtils.js) in thewwwrootdirectory.
In this file, define a utility function called downloadPdf. This function will handle the download of PDF files. Here’s an explanation of the function:
// Create a utility function to handle PDF downloads.
function downloadPdf(blob) {
const a = document.createElement('a');
a.href = window.URL.createObjectURL(blob);
a.download = 'split_document.pdf';
a.style.display = 'none';
document.body.appendChild(a);
a.click();
document.body.removeChild(a);
}
The downloadPdf function creates an anchor element (<a>) to facilitate the download of a PDF file. It sets the href attribute to the URL of the PDF data, assigns a download attribute to specify the file name, and handles the download process.
- Include the
downloadUtils.jsfile in yourwwwroot/index.htmlfile:
<script src="downloadUtils.js"></script>
Then, define a Blazor JavaScript function named loadPDF. This function loads the PDF document using PSPDFKit, applies the page-removal operation to split the document, exports the resulting PDF, and uses the downloadPdf function to make the split document available for download:
<script>
async function loadPDF(container, document) {
const instance = await PSPDFKit.load({
container,
document,
headless: true,
});
// Define the page-removal operation to split the document.
const pageRemovalOperation = {
type: 'removePages',
pageIndexes: [2, 3, 4], // Remove pages 3, 4, and 5 to split the document.
};
// Apply the page-removal operation and export the resulting PDF.
const buffer = await instance.exportPDFWithOperations([
pageRemovalOperation,
]);
// Convert the PDF buffer into a downloadable file using the utility function.
downloadPdf(new Blob([buffer], { type: 'application/pdf' }));
return instance;
}
</script>
In this Blazor code, call the downloadPdf function from the JavaScript utility file after performing the PSPDFKit operations. This approach allows you to encapsulate the DOM-related download functionality in JavaScript, where it’s permitted, and then invoke it from your Blazor code.
Conclusion
PDF editing in Blazor with PDFsharp is a straightforward process, especially for basic modifications like adding text or images. PDFsharp is a versatile open source library for creating and manipulating PDF documents in C#, while PSPDFKit provides a commercial Blazor PDF viewer with advanced features for working with PDFs in a web application.
To learn more about PSPDFKit for Web, start your free trial. Or, launch our demo to see our viewer in action.