


In the healthcare industry, the efficient digitization of patient records is crucial for providing timely and accurate care. This user guide focuses on leveraging the Aquaforest PDF Connector for Power Automate, specifically utilizing the “OCR PDF or Images” action. This action empowers healthcare professionals to enhance efficiency by digitizing patient records and making them searchable through OCR technology.
Manual Information Retrieval:
Limited Accessibility:
Data Silos and Inefficiencies:
Follow these step-by-step instructions to implement the “OCR PDF or images” action for healthcare records digitization:
Step 1. Configure Aquaforest PDF Connector.
Add the Aquaforest PDF Connector to your Power Automate workflow. First you choose the type of the flow and the trigger.
For this example, we will choose the “Automated cloud flow” and set a trigger “When a file is created (properties only)”. This trigger is activated when an item is created, or modified in a library. As it returns only the properties stored in the library columns you need to add a “Get file content” step and use the “Identifier” property returned by this action to get to the contents of the file.
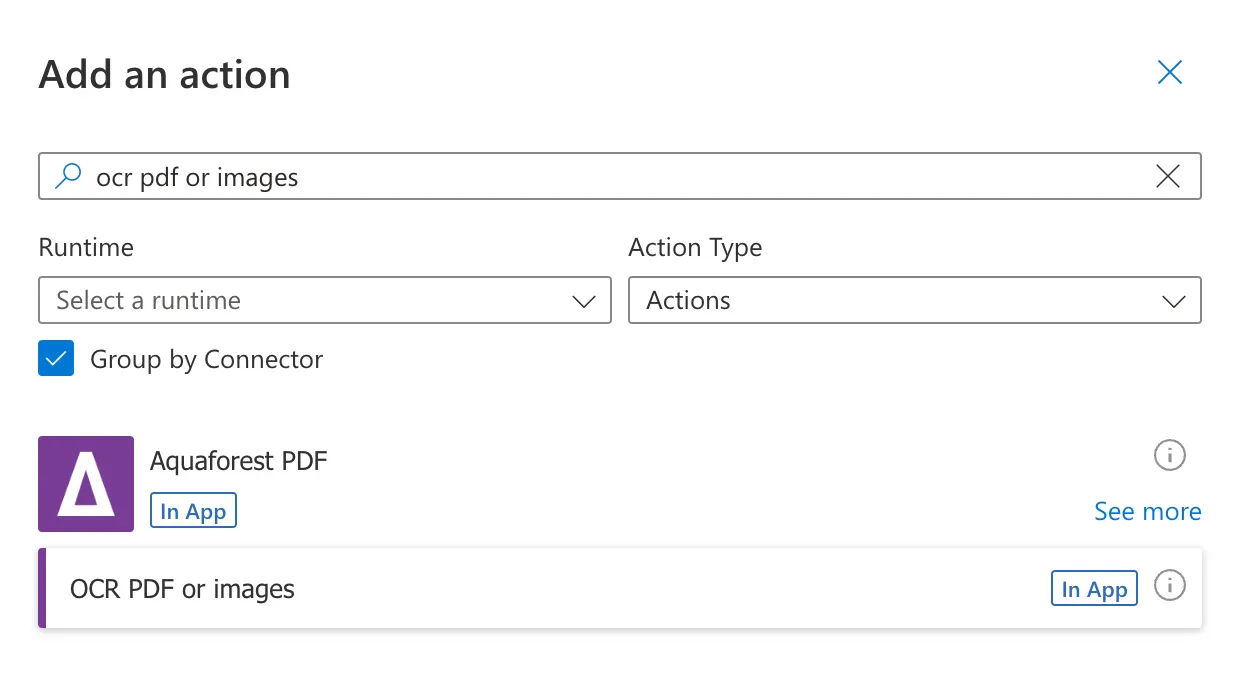
Click on the + button to add a new action, and in the search bar type “OCR PDF or images” action.
As a next step, you will be asked for a Connection Name and an API Key. Give your connection a name and use the primary key generated upon signing up for PDF Connector(opens in a new tab). If you need assistance, read the getting started guide, particularly Generate API key section.
Step 2. Provide Input Parameters.
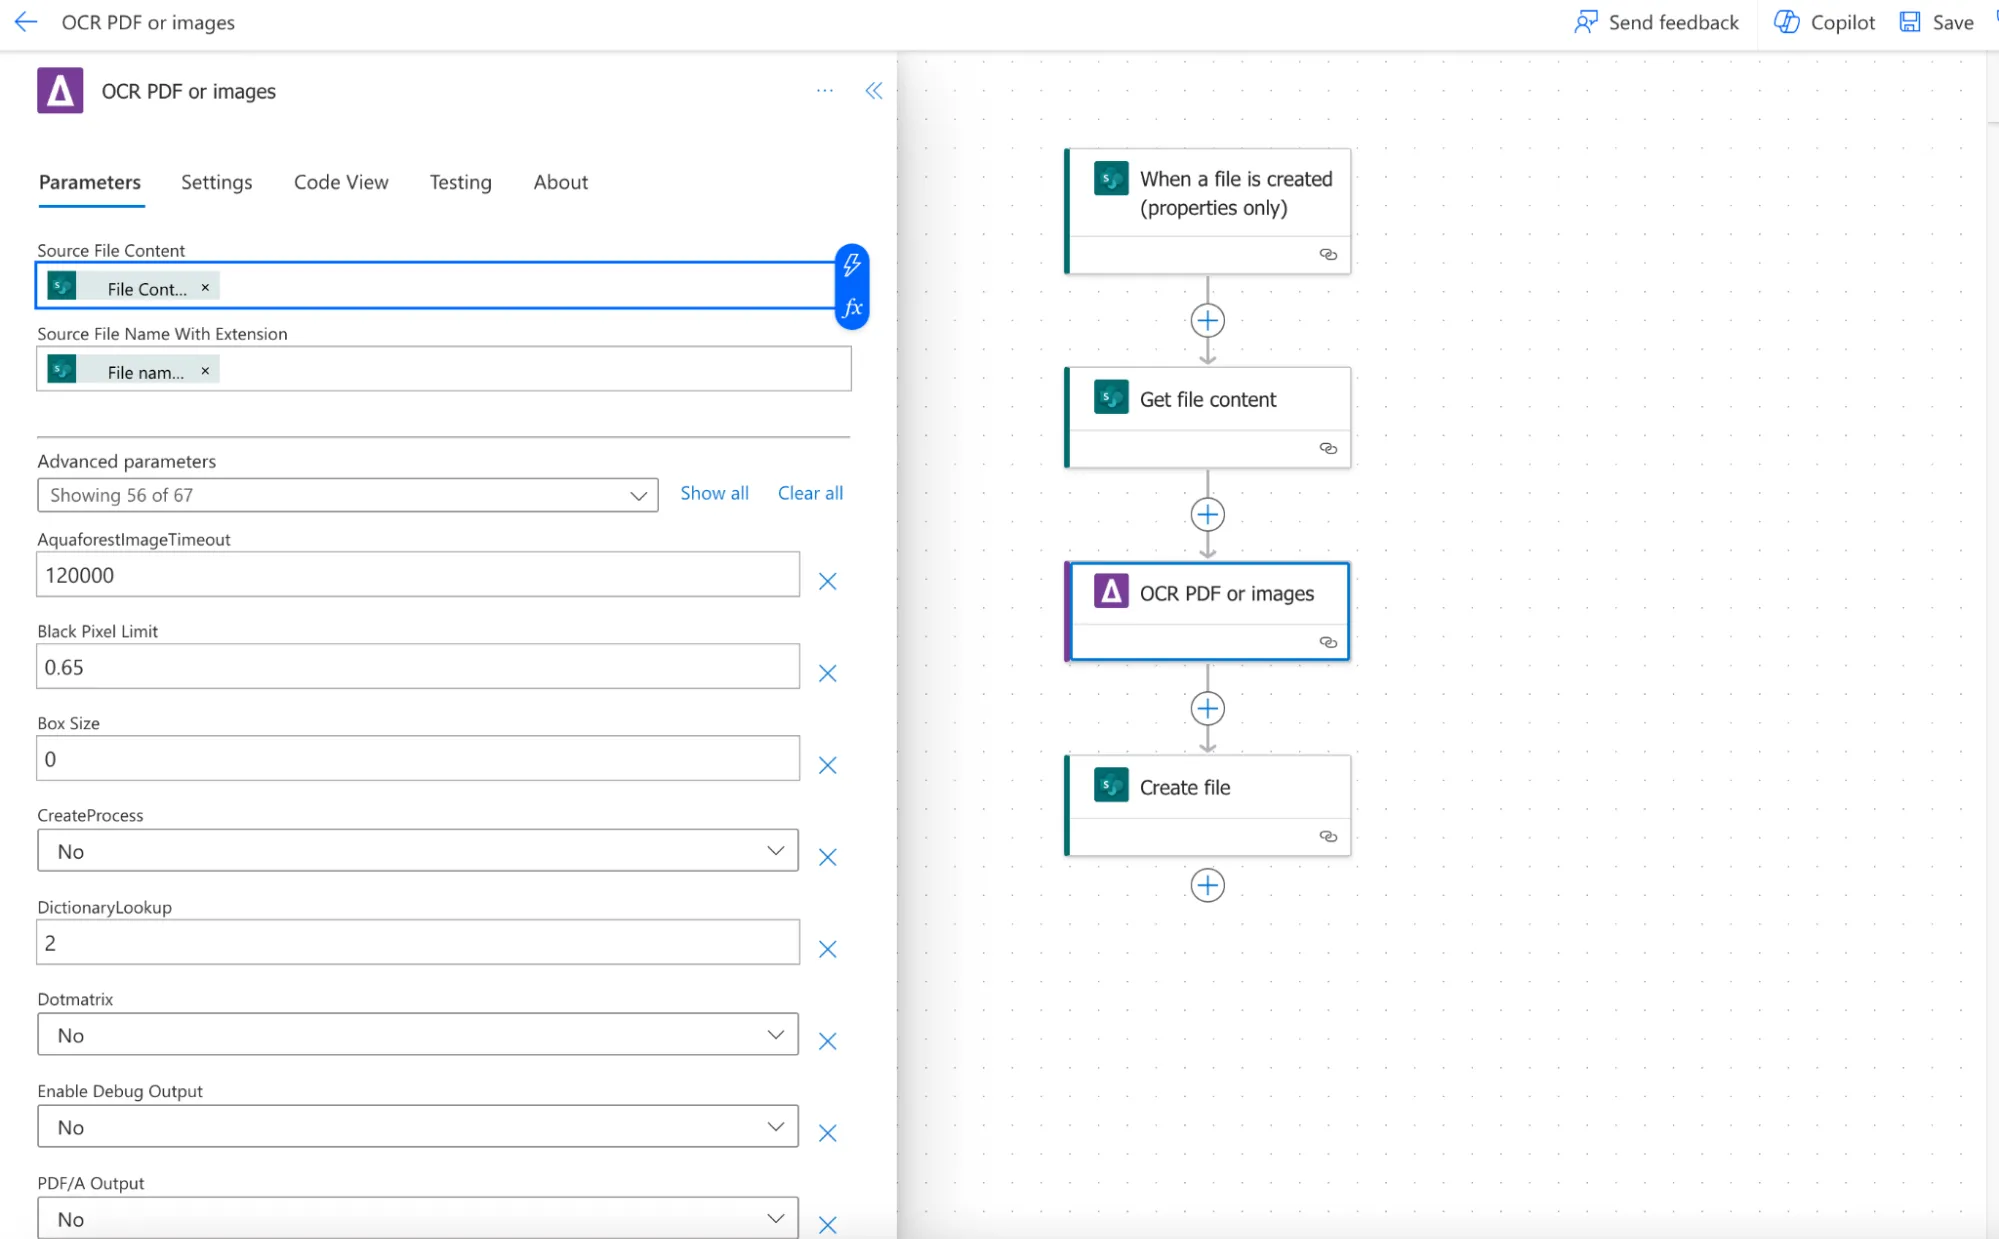
Enter the source file name or content for the patient record to be digitized.
Step 3. Configure advanced parameters.
The two parameters above are mandatory but there are many other optional parameters. Check out here for more details. Define OCR settings, such as language preferences, auto-rotate, binarize, and more.
Step 4. Create file action.
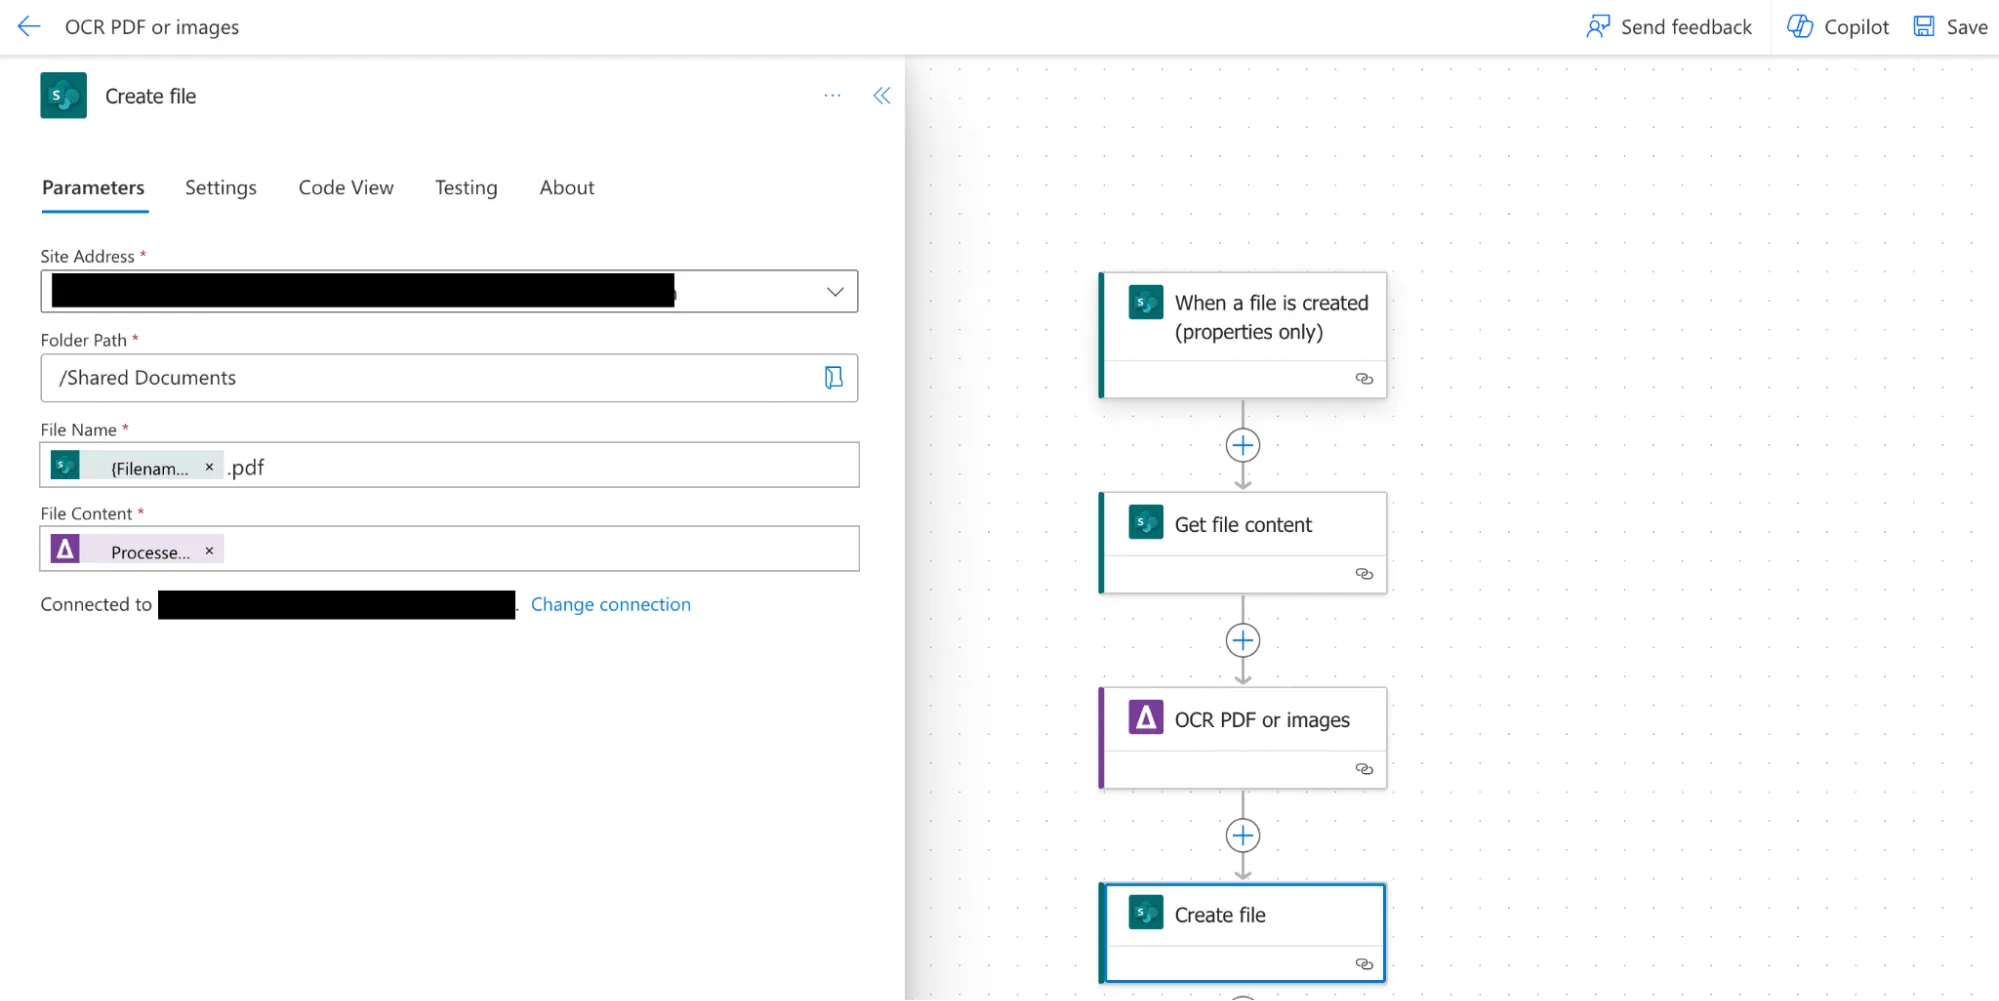
Add the create file action and configure following the details below:
Site address: The URL of your SharePoint site.
Folder path: The location of your SharePoint library where the output file will be stored. You need to store the OCRed PDF file into a different folder, or otherwise it will create an indefinite loop and the flow will be running all the time.
File name: The name of the OCRed PDF file. Click on the thunder sign and open Dynamic content. Type “File name with extension” in the search bar and click on Add. Then add “.pdf” value as well.
File content: Click on the thunder sign and open Dynamic content. Click on See More to show all the output parameters and then click on Processed file content and confirm by clicking on the Add button.
You can also check other output parameters:
Step 5. Execute the Action.
Click on the Save button and run the Power Automate workflow to execute the “OCR PDF or Images” action.
Step 6. Review Output.
Check the output for the OCR-processed patient record, now in a searchable format, including the extracted text.
By incorporating the Aquaforest PDF Connector(opens in a new tab)’s “OCR PDF or Images” action into healthcare workflows, you can significantly enhance efficiency and accessibility in managing patient records. This user guide provides a comprehensive walkthrough of the action, empowering healthcare professionals to embrace OCR technology for improved patient care.
此内容由惯性聚合(RSS阅读器)自动聚合整理,仅供阅读参考。 原文来自 — 版权归原作者所有。