



Table of contents
This tutorial shows you how to build a DOCX editor in a React app using Vite and Nutrient’s Document Authoring SDK. You’ll start with a basic container and progressively add support for file upload, document editing, and export, entirely in the browser.
TL;DR
If you need to build a DOCX editor in a React web app, Nutrient’s Document Authoring SDK provides a browser-based WYSIWYG editor that works with .docx and .pdf files. It supports full editing capabilities, runs client-side, and integrates cleanly using ref and standard React patterns. You can import .docx files, attach the editor to a DOM node, and export the edited content.
Editing .docx files in the browser has traditionally been a challenge, especially when trying to preserve formatting or avoid server-side processing. Nutrient’s Document Authoring SDK offers a practical solution: a JavaScript-based DOCX editor that can be integrated directly into a React application. The editor is fully client-side, offers a Word-like interface, and works well in modern React applications.
Try the live DOCX editor demo
Want to see how the Nutrient Document Authoring SDK works before integrating it? You can interact with a live version of the editor below. It’s fully browser-based and shows how .docx files are rendered and edited with high fidelity.
Overview
Nutrient’s Document Authoring SDK is a browser-based, fully client-side WYSIWYG editor designed for structured .docx document editing — ideal for workflows involving contracts, proposals, and reports. It works seamlessly with modern frontend frameworks like React, where the editor attaches to a DOM node via a ref.
Key features include:
- DOCX import/export
- PDF export
- Word-style WYSIWYG editing (headers, tables, lists)
- Page layout, sections, headers/footers
- Editor UI customization (toolbars, commands, styles)
Unlike generic rich text editors, this SDK preserves the structure and fidelity of Word documents, which is ideal when exact layout matters.
Prerequisites
Make sure you have:
- Node.js ≥ 16 installed
- A package manager like npm or yarn
1. Create a new React project with Vite
Start by scaffolding a React project using Vite(opens in a new tab), which is a modern and fast alternative to Create React App:
npm create vite@latest docx-editor-vite -- --template react
cd docx-editor-vite
npm install
This creates a minimal React project and installs dependencies.
2. Install the Nutrient Document Authoring SDK
Next, add the SDK that powers the DOCX editing capabilities:
npm install @nutrient-sdk/document-authoring
This gives you access to the DocAuth API for creating the editor and importing documents.
3. Add a sample DOCX file
To test the editor, place a .docx file inside your public/ folder. This makes it accessible at runtime via /example.docx.
4. Set up the editor container
Start by creating a file called DocxEditor.jsx:
Then add the basic layout and SDK initialization logic:
import { useEffect, useRef } from "react";
import DocAuth from "@nutrient-sdk/document-authoring";
function DocxEditor() {
const editorRef = useRef(null);
useEffect(() => {
async function init() {
const system = await DocAuth.createDocAuthSystem();
// Load a document in the next step.
}
init();
}, []);
return (
<div>
<h2>React DOCX Editor</h2>
<div
ref={editorRef}
style={{
height: "850px",
border: "1px solid #ccc",
position: "relative",
marginBottom: "1rem",
}}
/>
</div>
);
}
export default DocxEditor;
You created a div that will serve as the editor container and initialized the SDK. Nothing is rendered yet, but you’ll fix that next.
5. Load and render a sample DOCX file
Update your init() function to fetch and display a DOCX document from the public/ folder:
const response = await fetch("/example.docx");
const arrayBuffer = await response.arrayBuffer();
const document = await system.importDOCX(arrayBuffer);
await system.createEditor(editorRef.current, { document });
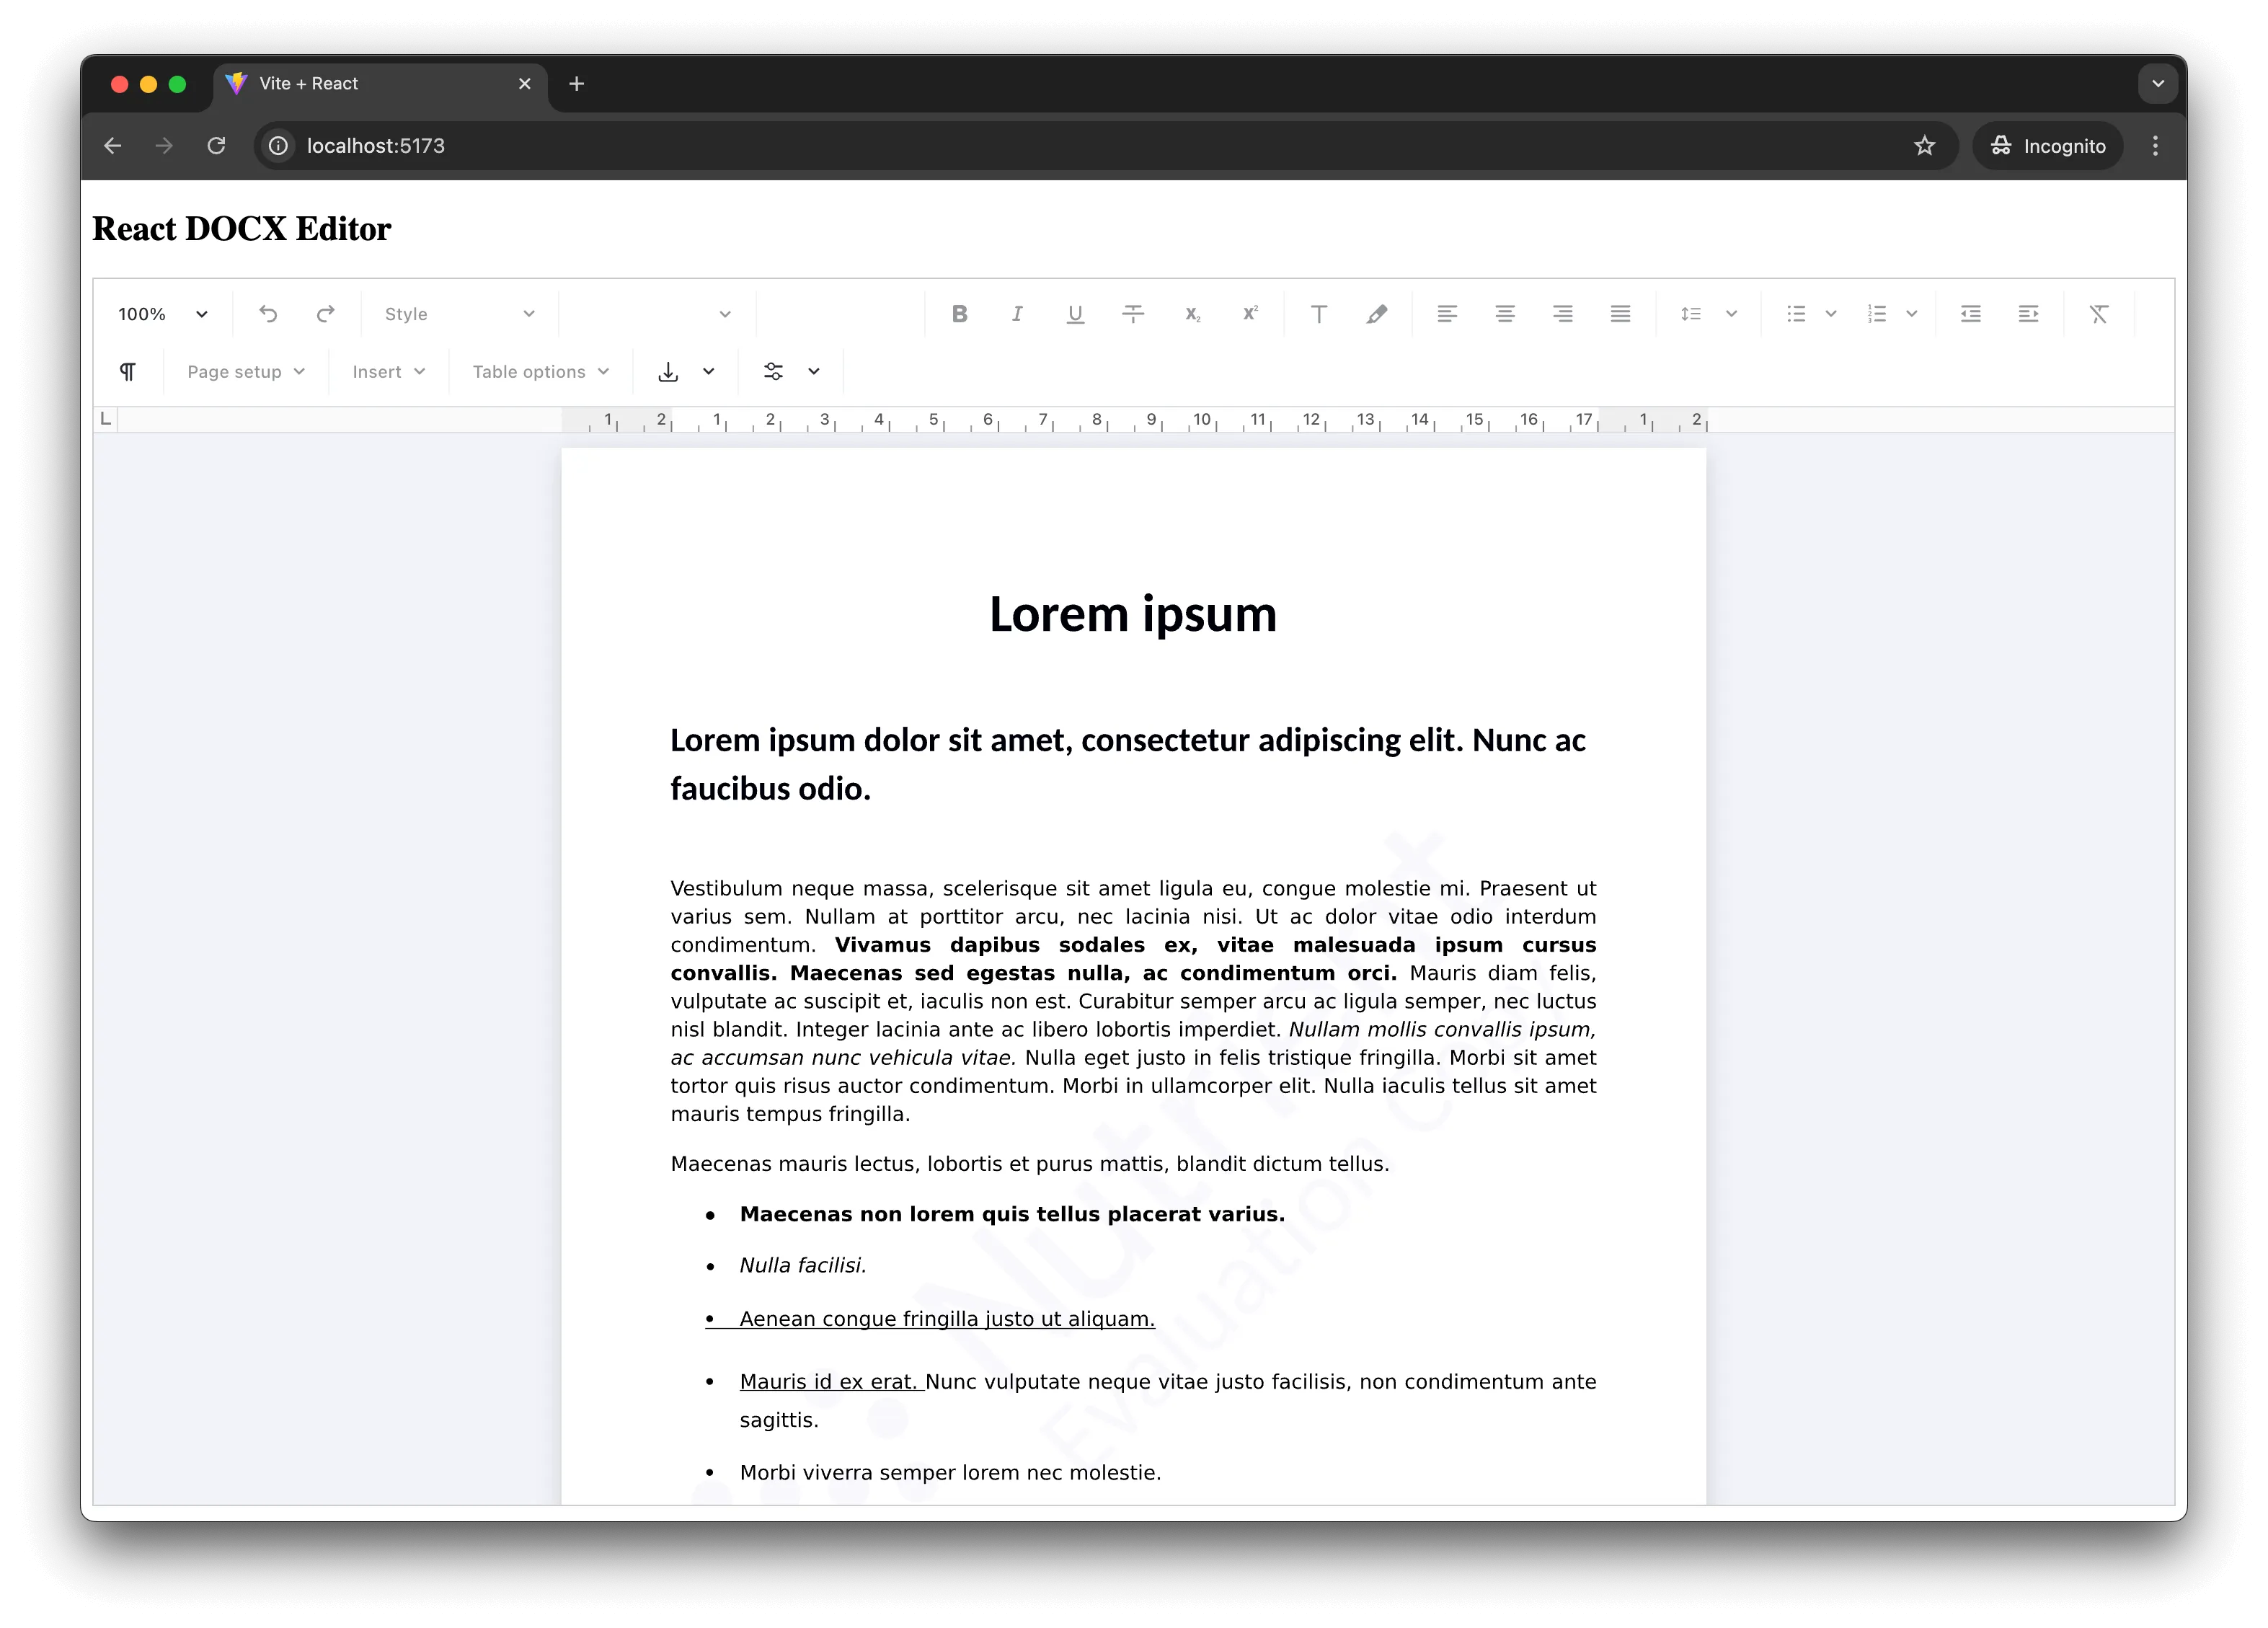
You should now see a Word-style editor inside the div. The document is fully editable in the browser.
6. Enable export as DOCX and PDF
To allow downloading the edited document, store the editor instance in state and add export functions.
First, update your imports and state:
import { useEffect, useRef, useState } from "react";
const [editor, setEditor] = useState(null);
Update the editor creation logic:
const createdEditor = await system.createEditor(editorRef.current, {
document,
});
setEditor(createdEditor);
Now, add two export functions and a helper:
const exportDocx = async () => {
const buffer = await editor.currentDocument().exportDOCX();
downloadFile(
buffer,
"edited.docx",
"application/vnd.openxmlformats-officedocument.wordprocessingml.document",
);
};
const exportPdf = async () => {
const buffer = await editor.currentDocument().exportPDF();
downloadFile(buffer, "edited.pdf", "application/pdf");
};
const downloadFile = (buffer, filename, mimeType) => {
const blob = new Blob([buffer], { type: mimeType });
const link = document.createElement("a");
link.href = URL.createObjectURL(blob);
link.download = filename;
link.click();
};
Add buttons to the UI:
<button onClick={exportDocx} disabled={!editor}>Export as DOCX</button>
<button onClick={exportPdf} disabled={!editor} style={{ marginLeft: "1rem" }}>Export as PDF</button>
7. Add support for file uploads
Now you’ll enable users to upload their own .docx files with a simple file input.
First, track the SDK instance:
const [docAuthSystem, setDocAuthSystem] = useState(null);
Initialize it once:
useEffect(() => {
async function init() {
const system = await DocAuth.createDocAuthSystem();
setDocAuthSystem(system);
}
init();
}, []);
Then define the handler:
const handleFileChange = async (e) => {
const file = e.target.files[0];
if (!file || !docAuthSystem) return;
const buffer = await file.arrayBuffer();
const doc = await docAuthSystem.importDOCX(buffer);
const editorInstance = await docAuthSystem.createEditor(editorRef.current, {
document: doc,
});
setEditor(editorInstance);
};
Finally, add the input above the editor:
<input
type="file"
accept=".docx"
onChange={handleFileChange}
style={{ marginBottom: "1rem" }}
/>
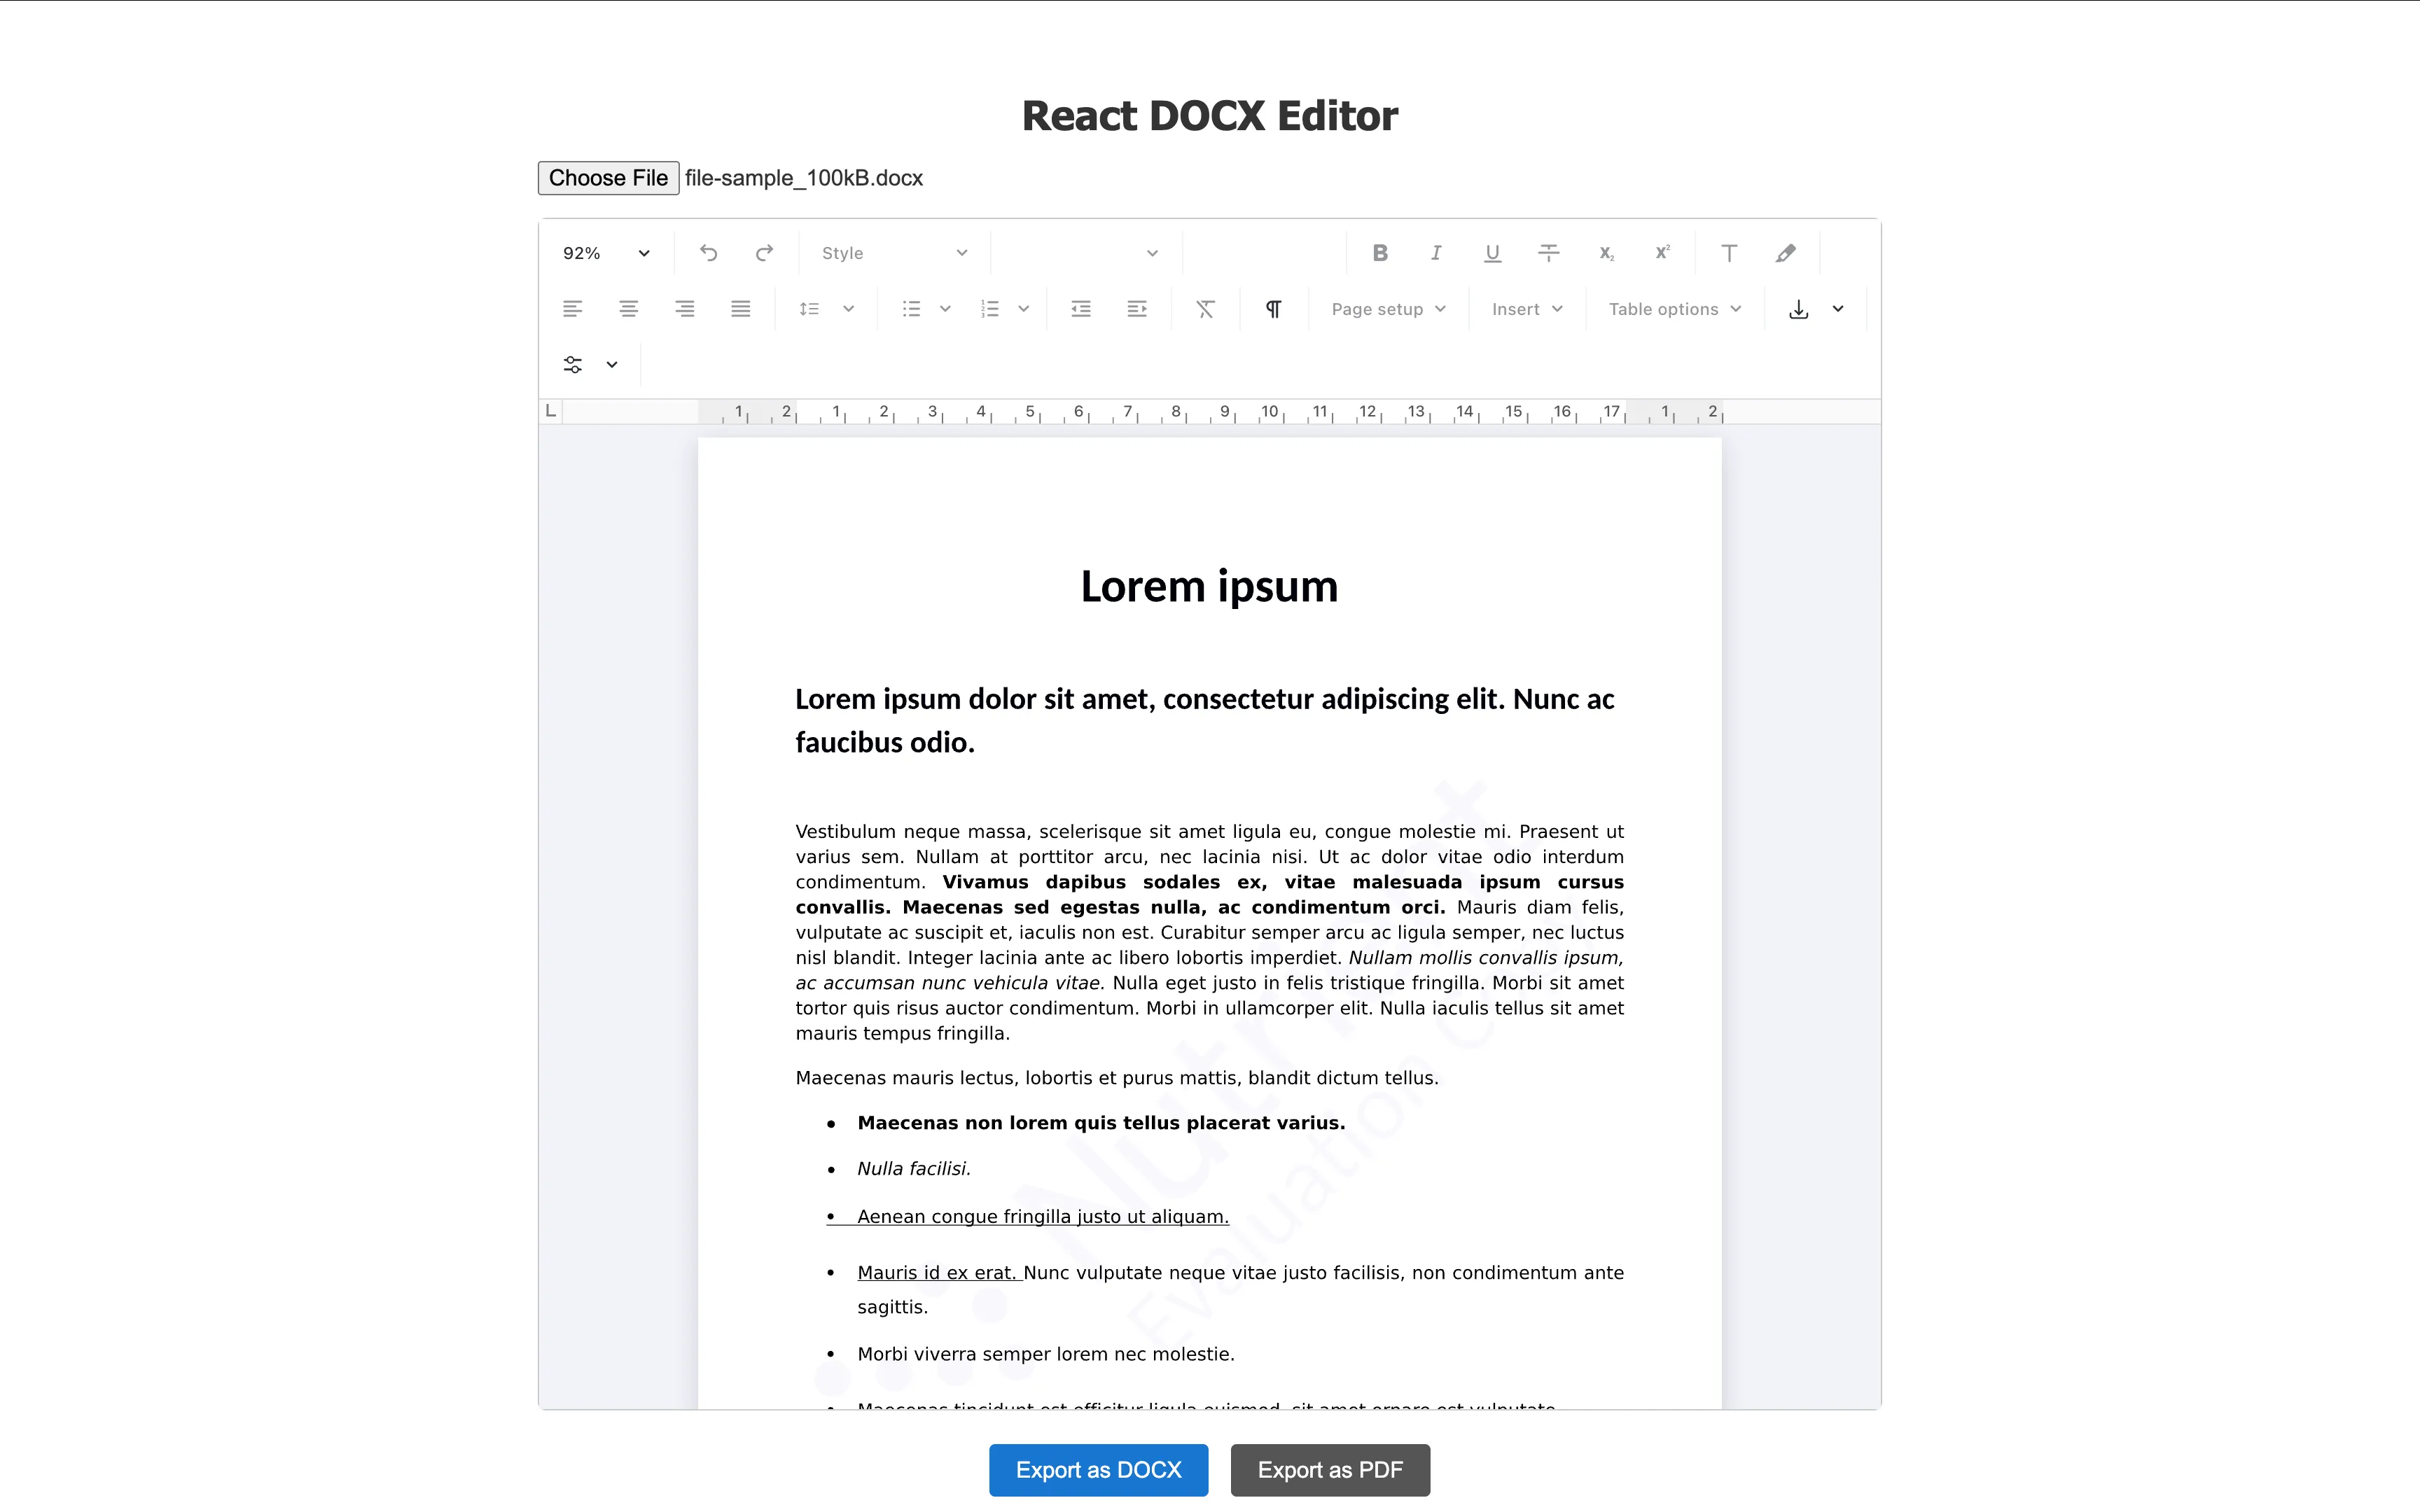
You now support both default loading and manual file uploads.
Final code: Complete DocxEditor.jsx
Here’s the complete version of the component you just built step by step:
import { useEffect, useRef, useState } from "react";
import DocAuth from "@nutrient-sdk/document-authoring";
function DocxEditor() {
const editorRef = useRef(null);
const [docAuthSystem, setDocAuthSystem] = useState(null);
const [editor, setEditor] = useState(null);
useEffect(() => {
async function init() {
const system = await DocAuth.createDocAuthSystem();
setDocAuthSystem(system);
// Optional: Load a default DOCX file on startup
const response = await fetch("/example.docx");
const buffer = await response.arrayBuffer();
const doc = await system.importDOCX(buffer);
const defaultEditor = await system.createEditor(editorRef.current, {
document: doc,
});
setEditor(defaultEditor);
}
init();
}, []);
const handleFileChange = async (e) => {
const file = e.target.files[0];
if (!file || !docAuthSystem) return;
const buffer = await file.arrayBuffer();
const doc = await docAuthSystem.importDOCX(buffer);
const uploadedEditor = await docAuthSystem.createEditor(editorRef.current, {
document: doc,
});
setEditor(uploadedEditor);
};
const exportDocx = async () => {
const buffer = await editor.currentDocument().exportDOCX();
downloadFile(
buffer,
"edited.docx",
"application/vnd.openxmlformats-officedocument.wordprocessingml.document",
);
};
const exportPdf = async () => {
const buffer = await editor.currentDocument().exportPDF();
downloadFile(buffer, "edited.pdf", "application/pdf");
};
const downloadFile = (buffer, filename, mimeType) => {
const blob = new Blob([buffer], { type: mimeType });
const link = document.createElement("a");
link.href = URL.createObjectURL(blob);
link.download = filename;
link.click();
};
return (
<div>
<h2>React DOCX Editor</h2>
<input
type="file"
accept=".docx"
onChange={handleFileChange}
style={{ marginBottom: "1rem" }}
/>
<div
ref={editorRef}
style={{
height: "850px",
border: "1px solid #ccc",
position: "relative",
marginBottom: "1rem",
}}
/>
<button onClick={exportDocx} disabled={!editor}>
Export as DOCX
</button>
<button
onClick={exportPdf}
disabled={!editor}
style={{ marginLeft: "1rem" }}
>
Export as PDF
</button>
</div>
);
}
export default DocxEditor;
Summary so far
By now, your editor supports:
- Loading a default DOCX from
/public - Uploading
.docxfiles via an input - Editing them directly in the browser
- Exporting the result as
.docxor.pdf
This brings your React DOCX editing experience much closer to a fully featured in-browser document tool.
What you can do next
- Add toolbar customization to limit formatting options
- Save edited documents to your backend
- Support template-based document creation
- Wrap this editor in a modal or wizard-style layout
Limitations and notes
- Only
.docxis supported for import. Other formats, like.odtor.rtf, aren’t currently handled. - Requires a modern browser with
ArrayBuffer,Blob, and async/await support. - The SDK is designed to run entirely client-side, but document buffers can be streamed to a backend if needed.
Conclusion
Nutrient’s Document Authoring SDK provides a direct way to handle .docx editing in React without complex integration layers. If you’re building tools for document workflows, contracts, or reporting, this SDK simplifies the frontend side considerably.
For more information, refer to the official docs and Document Authoring integration guide.
Have a unique use case or need help with integration? Contact our Sales team to explore tailored support and pricing options.
FAQ
Yes. You can load user-provided .docx files by reading them as an ArrayBuffer using the File API, and then passing that buffer into importDOCX():
const file = input.files[0];
const buffer = await file.arrayBuffer();
const document = await docAuthSystem.importDOCX(buffer);
The SDK supports multiple editor instances, but each one needs to be managed in its own container and React lifecycle. Use unique refs for each editor, and ensure you create separate editor instances.
Yes, but only on the client side. Ensure the editor code runs inside a useEffect() or similar browser-only hook, and wrap any use of window or document in client-side guards.
This SDK is purpose-built for .docx files and maintains compatibility with Word’s document model. Unlike HTML-based editors, it preserves section layout, headers/footers, styles, and other Word-specific structures.
Use exportDOCX() to generate an ArrayBuffer. Then wrap it in a Blob and trigger a download via a temporary anchor:
const buffer = await editor.currentDocument().exportDOCX();
const blob = new Blob([buffer], {
type: "application/vnd.openxmlformats-officedocument.wordprocessingml.document",
});
const link = document.createElement("a");
link.href = URL.createObjectURL(blob);
link.download = "edited.docx";
link.click();