
惯性聚合 高效追踪和阅读你感兴趣的博客、新闻、科技资讯
阅读原文 在惯性聚合中打开

推荐订阅源

B
Blog RSS Feed
C
CERT Recently Published Vulnerability Notes
P
Proofpoint News Feed
Y
Y Combinator Blog
T
The Blog of Author Tim Ferriss
云风的 BLOG
云风的 BLOG
H
Help Net Security
Recorded Future
Recorded Future
The Register - Security
F
Full Disclosure
N
Netflix TechBlog - Medium
Cyber Security Advisories - MS-ISAC
酷 壳 – CoolShell
酷 壳 – CoolShell
H
Hackread – Cybersecurity News, Data Breaches, AI and More
爱范儿
爱范儿
Security Archives - TechRepublic
Simon Willison's Weblog
Cisco Talos Blog
Cisco Talos Blog
I
InfoQ
T
Tenable Blog
T
Tor Project blog
人人都是产品经理
人人都是产品经理
D
DataBreaches.Net
NISL@THU
NISL@THU
Google DeepMind News
博客园 - 叶小钗
B
Blog
V
V2EX
Jina AI
Jina AI
L
LangChain Blog
月光博客
月光博客
W
WeLiveSecurity
U
Unit 42
AWS News Blog
AWS News Blog
C
Cyber Attacks, Cyber Crime and Cyber Security
博客园 - 聂微东
V
Visual Studio Blog
A
Arctic Wolf
T
Tailwind CSS Blog
The Cloudflare Blog
SecWiki News
SecWiki News
S
SegmentFault 最新的问题
Hacker News - Newest:
Hacker News - Newest: "LLM"
宝玉的分享
宝玉的分享
MyScale Blog
MyScale Blog
cs.CL updates on arXiv.org
S
Securelist
www.infosecurity-magazine.com
腾讯CDC
雷峰网
雷峰网

Comments for Steve Bennett blogs

Comment on 10 things I hate about Git by Paul Comment on 10 things I hate about Git by CDSRV TechSupport Comment on 10 things I hate about Git by genius Comment on 10 things I hate about Git by Andrew Finnell Comment on 10 things I hate about Git by Usuck Reallybad Comment on 10 things I hate about Git by TLL You might not need PostGIS: streamlined vector tile processing for big map visualisations You might not need PostGIS: streamlined vector tile processing for big map visualisations Terrain in TileMill: a walkthrough for non-GIS types 10 things I hate about Git 10 things I hate about Git 10 things I hate about Git 10 things I hate about Git 10 things I hate about Git 10 things I hate about Git 10 things I hate about Git 10 things I hate about Git 10 things I hate about Git 10 things I hate about Git 10 things I hate about Git 10 things I hate about Git 10 things I hate about Git 10 things I hate about Git 10 things I hate about Git 10 things I hate about Git 10 things I hate about Git 10 things I hate about Git 10 things I hate about Git 10 things I hate about Git 10 things I hate about Git
Terrain in TileMill: a walkthrough for non-GIS types
steveko · 2013-09-11 · via Comments for Steve Bennett blogs

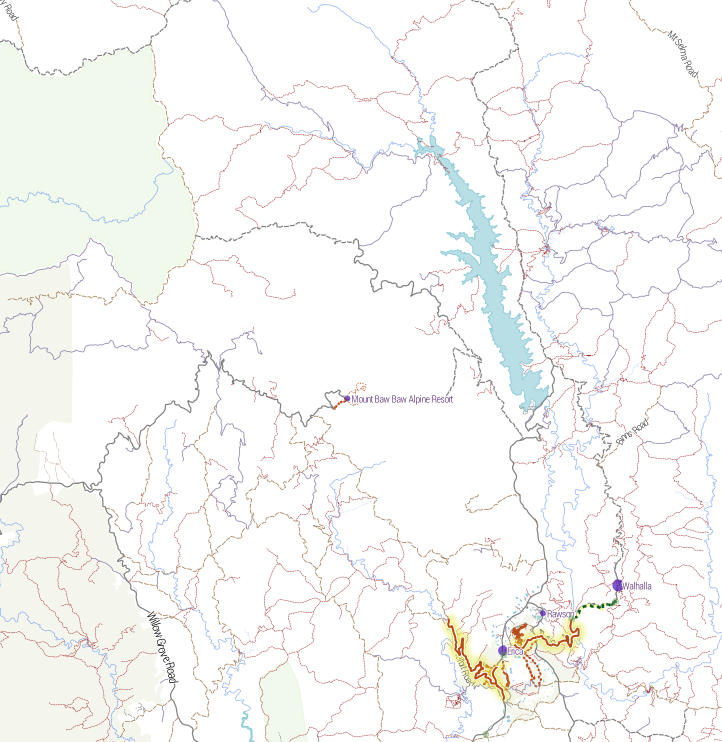
I created a basemap for http://cycletour.org with TileMill and OpenStreetMap. It looked…ok.
Image

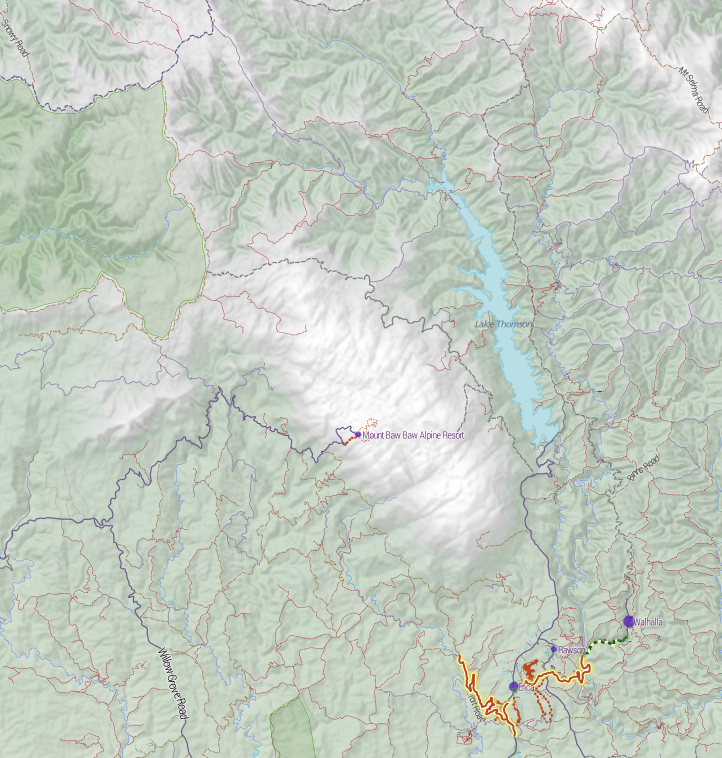
But it felt like there was something missing. Terrain. Elevation. Hills. Mountains. I’d put all that in the too hard basket, until a quick google turned up two blog posts from MapBox, the wonderful people who make TileMill. “Working with terrain data” and “Using TileMill’s raster-colorizer“. Putting these two together, plus a little OCD, led me to this:
Image

Slight improvement! Now, I felt that the two blog posts skipped a couple of little steps, and were slightly confusing on the difference between the two approaches, so here’s my step by step. (MapBox, please feel free to reuse any of this content.)

My setup is an 8 core Ubuntu VM with 32GB RAM and lots of disk space. I have OpenStreetMap loaded into PostGIS.

1. Install the development version of TileMill

You need to do this if you want to use the raster-colorizer. You want this while developing your terrain style, if you want the “snow up high, green valleys below” look. Without it, you have to pre-render the elevation color effect, which is time consuming. If you want to tweak anything (say, to move the snow line slightly), you need to re-render all the tiles.

Fortunately, it’s pretty easy.

  1. Get the “install-tilemill” gist (my version works slightly better)
  2. Probably uncomment the mapnik-from-source line (and comment out the other one). I don’t know whether you need the latest mapnik.
  3. Run it. Oh – it will uninstall your existing TileMill. Watch out for that.
  4. Reassemble stuff. The dev version puts projects in ~/Documents/<username/MapBox/project which is weird.

2. Get some terrain data.

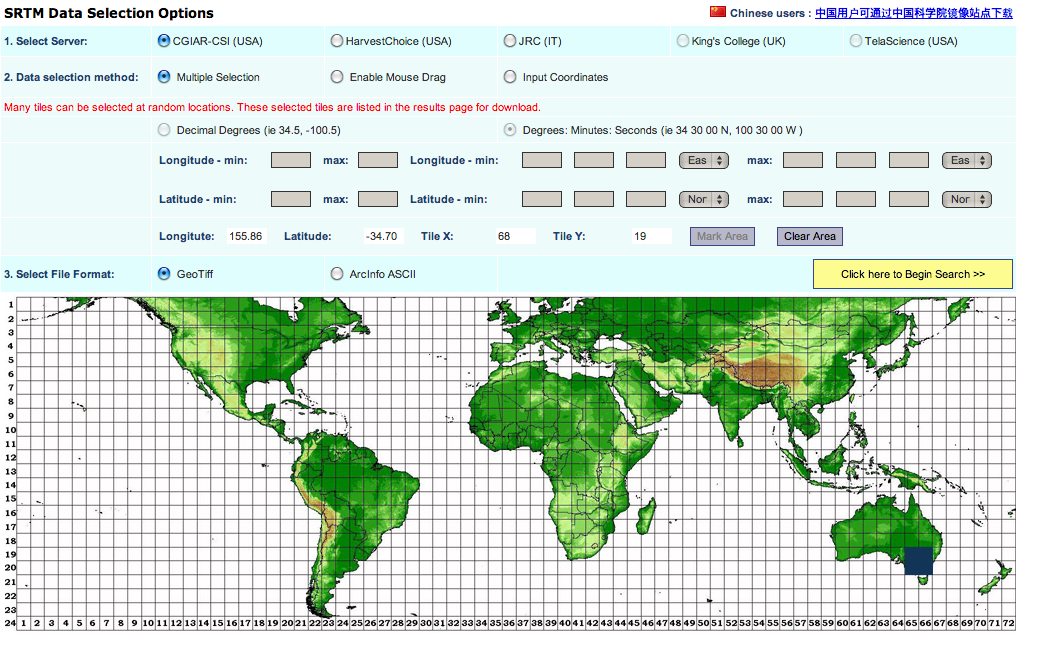
The easiest place is the ubiquitous NASA SRTM DEM (digital elevation model) data. You get it from CGIAR. The user interface is awful. You can only download pieces that are 5 degrees by 5 degrees, so Victoria is 4 pieces.
Screen shot 2013-09-11 at 10.46.00 PM

If you’re downloading more than about that many, you’ll probably want to automate the process. I wrote this quick script to get all the bits for Australia:

for x in {59..67}; do
for y in {14..21}; do
echo $x,$y
if [ ! -f srtm_${x}_${y}.zip ]; then
wget http://droppr.org/srtm/v4.1/6_5x5_TIFs/srtm_${x}_${y}.zip
else
echo "Already got it."
fi
done
done
unzip '*.zip'


3. Process SRTM .tifs with GDAL.

To have any fun with terrain mapping in TileMill, you need to produce separate layers from the terrain data:
  1. The heightmap itself, so you can colour high elevations differently from low ones.
  2. A “hillshading” layer, where southeast facing slopes are dark, and northwest ones are light. This is what produces the “terrain” illusion.
  3. A “slopeshading” layer, where steep slopes (regardless of aspect) are dark. I’m ambivalent about how useful this is, but you’ll want to play with it.
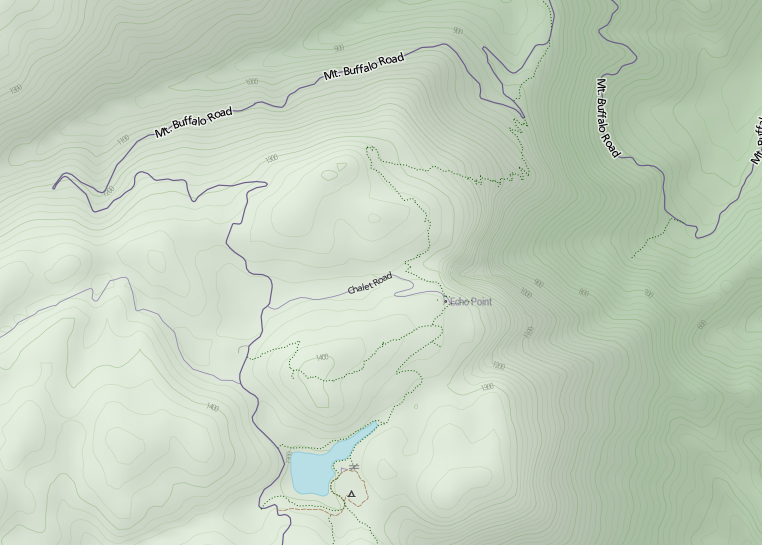
  4. Contours. These can make your map look AMAZING.

Screen shot 2013-09-11 at 10.53.41 PM

Contours – they’re the best.

In addition, you’ll need some extra processing:

  1. Merge all the .tif’s into one. (I made the mistake of keeping them separate, which makes a lot of extra layers in TileMill). Because they’re GeoTiffs, GDAL can magically merge them without further instruction.
  2. Re-project it (converting it from some random ESPG to Google Web Mercator – can you tell I’m not a real GIS person?)
  3. A bit of scaling here and there.
  4. Generating .tif “overviews”, which are basically smaller versions of the tifs stored inside the same file, so that TileMill doesn’t explode.

Hopefully you already have GDAL installed. It probably came with the development version of TileMill.

Here’s my script for doing all the processing:

#!/bin/bash
echo -n "Merging files: "
gdal_merge.py srtm_*.tif -o srtm.tif
f=srtm
echo -n "Re-projecting: "
gdalwarp -s_srs EPSG:4326 -t_srs EPSG:3785 -r bilinear $f.tif $f-3785.tif

echo -n "Generating hill shading: "
gdaldem hillshade -z 5 $f-3785.tif $f-3785-hs.tif
echo and overviews:

gdaladdo -r average $f-3785-hs.tif 2 4 8 16 32
echo -n "Generating slope files: "
gdaldem slope $f-3785.tif $f-3785-slope.tif
echo -n "Translating to 0-90..."
gdal_translate -ot Byte -scale 0 90 $f-3785-slope.tif $f-3785-slope-scale.tif
echo "and overviews."
gdaladdo -r average $f-3785-slope-scale.tif 2 4 8 16 32
echo -n Translating DEM...
gdal_translate -ot Byte -scale -10 2000 $f-3785.tif $f-3785-scale.tif
echo and overviews.
gdaladdo -r average $f-3785-scale.tif 2 4 8 16 32
#echo Creating contours
gdal_contour -a elev -i 20 $f-3785.tif $f-3785-contour.shp

Take my word for it that the above script does everything I promise. The options I’ve chosen are all pretty standard, except that:

  • I’m exaggerating the hillshading by a factor of 5 vertically (“-z 5”). For no particularly good reason.
  • Contours are generated at 20m intervals (“-i 20”).
  • Terrain is scaled in the range -10 to 2000m. Probably an even lower lower bound would be better (you’d be surprised how much terrain is below sea levels – especially coal mines.) Excessively low terrain results in holes that can’t be styled and turn up white.

4. Load terrain layers into TileMill

Now you have four useful files, so create layers for them. I’d suggest creating them as layers in this order (as seen in TileMill):

  1. srtm-3785-contour.shp – the shapefile containing all the contours.
  2. srtm-3785-hs.tif – the hillshading file.
  3. srtm-3785-slope-scale.tif – the scaled slope shading file.
  4. srtm-3785.tif – the height map itself. (I also generate srtm-3785-scale.tif. The latter is scaled to a 0-255 range, while the former is in metres. I find metres makes more sense.)

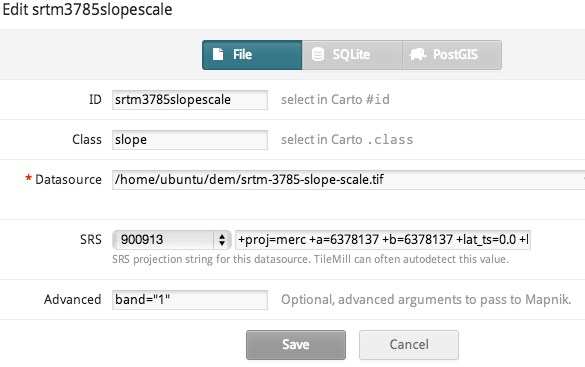
For each of these, you must set the projection to 900913 (that’s how you spell GOOGLE in numbers). For the three ‘tifs’, set band=1 in the “advanced” box. I gather that GeoTiffs can have multiple bands of data, and this is the band where TileMill expects to find numeric data to apply colour to.
Screen shot 2013-09-11 at 11.06.39 PM

5. Style the layers

Mapbox’s blog posts go into detail about how to do this, so I’ll just copy/paste my styles. The key lessons here are:

  • Very slight differences in opacity when stacking terrain layers make a huge impact on the appearance of your map. Changing the colour of a road doesn’t make that much difference, but with raster data, a slight change can affect every single pixel.
  • There are lots of different raster-comp-ops to try out, but ‘multiply’ is a good default. (Remember, order matters).
  • Carefully work out each individual zoom level. It seems to work best to have hillshading transition to contours around zoom 12-13. The SRTM data isn’t detailed enough to really allow hillshading above zoom 13

My styles:

.hs[zoom <= 15] {
[zoom>=15] { raster-opacity: 0.1; }
[zoom>=13] { raster-opacity: 0.125; }
[zoom=12] { raster-opacity:0.15;}
[zoom<=11] { raster-opacity: 0.12; }
[zoom<=8] { raster-opacity: 0.3; }

raster-scaling:bilinear;
raster-comp-op:multiply;
}

// not really convinced about the value of slope shading
.slope[zoom <= 14][zoom >= 10] {
raster-opacity:0.1;
[zoom=14] { raster-opacity:0.05; }
[zoom=13] { raster-opacity:0.05; }
raster-scaling:lanczos;
raster-colorizer-default-mode: linear;
raster-colorizer-default-color: transparent;

// this combo is ok
raster-colorizer-stops:
stop(0, white)
stop(5, white)
stop(80, black);
raster-comp-op:color-burn;

}

// colour-graded elevation model
.dem {
[zoom >= 10] { raster-opacity: 0.2; }
[zoom = 9] { raster-opacity: 0.225; }
[zoom = 8] { raster-opacity: 0.25; }
[zoom <= 7] { raster-opacity: 0.3; }
raster-scaling:bilinear;
raster-colorizer-default-mode: linear;
raster-colorizer-default-color: hsl(60,50%,80%);
// hay, forest, rocks, snow

// if using the srtm-3785-scale.tif file, these stops should be in the range 0-255.
raster-colorizer-stops:
stop(0,hsl(60,50%,80%))
stop(392,hsl(110,80%,20%))
stop(785,hsl(120,70%,20%))
stop(1100,hsl(100,0%,50%))
stop(1370,white);
}
.contour[zoom >=13] {
line-smooth:1.0;
line-width:0.75;
line-color:hsla(100,30%,50%,20%);
[zoom = 13] {
line-width:0.5;
line-color:hsla(100,30%,50%,15%);
}

[zoom >= 16],
[elev =~ “.*00”] {
l/text-face-name:’Roboto Condensed Light’;
l/text-size:8;
l/text-name:'[elev]’;
[elev =~ “.*00”] { line-color:hsla(100,30%,50%,40%); }
[zoom >= 16] { l/text-size: 10; }
l/text-fill:gray;
l/text-placement:line;
}
}

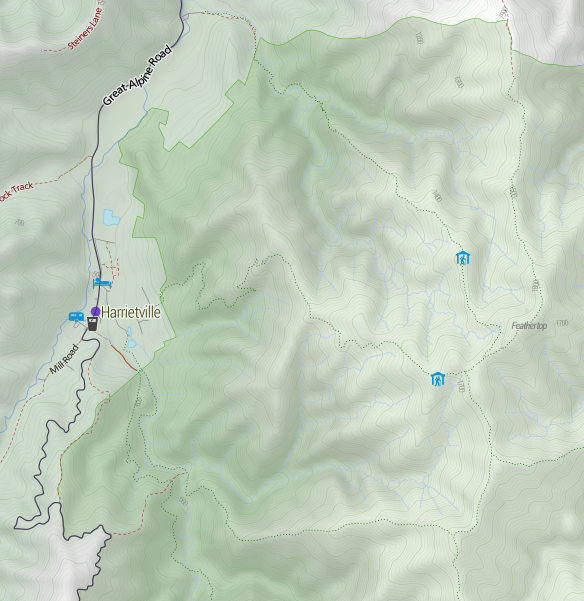
And finally a gratuitous shot of Mt Feathertop, showing the major approaches and the two huts: MUMC Hut to the north and Federation Hut further south. Terrain is awesome!
Screen shot 2013-09-11 at 11.25.23 PM