






CoreDNS is a DNS server that can also provide service discovery for microservice-based applications. It’s the default DNS server in Kubernetes, providing name resolution and service discovery for the services operating in the cluster. CoreDNS is easily customizable, so you can define how it should act on each request beyond simply executing a DNS lookup. Datadog is pleased to announce that with our new integration, you can now monitor CoreDNS metrics to better understand the activity in your Kubernetes clusters.
Along with Kubernetes metrics you’re already monitoring, CoreDNS metrics can help you see what’s happening inside your cluster. A simple request rate metric like coredns.request_count will show you how busy CoreDNS is, and you can look deeper to understand how requests are being resolved.
The screenshot below illustrates two metrics you can monitor to see how CoreDNS is responding to requests. The graph on the left shows the percentage of requests resolved from the CoreDNS cache. If this is low, even while overall traffic is high, you should consider raising the TTL value in the CoreDNS cache plugin configuration to keep records cached longer. The graph on the right shows the breakdown of requests forwarded by CoreDNS to two different upstream DNS servers. In this example, the forward plugin sends all requests to either 8.8.8.8 or 9.9.9.9.

If any of your configured upstream servers are missing from this graph, they may not be responding. In this case, you can revise the forward section of your Corefile, using health_check and expire values to tune the performance of the plugin.
You can also use Datadog to monitor your CoreDNS latency. If CoreDNS is slow to resolve requests, your users could encounter poor performance even if your backend services are all responding quickly. In a case like this, the coredns.request_duration.seconds.sum metric can show you how much DNS latency is contributing to overall, user-facing response time.
When CoreDNS encounters an error, it returns an rcode—a standard DNS error code. Errors like NXDomain and FormErr can reveal a problem with the requests CoreDNS is receiving, while a ServFail error could indicate an issue with the function of the CoreDNS server itself. When you monitor the coredns.response_code_count metric, you can reveal trends in your error rates and create alerts to automatically notify you if error rates cross an acceptable threshold. This metric includes a tag for each rcode present, and you can use those tags to create a graph that shows the count of each rcode value. You can then see at a glance how many errors of each type have been reported over a given time interval.
Resource usage metrics show you how your CoreDNS server is using its available infrastructure resources. To spot resource constraints, you can collect metrics showing how CoreDNS is consuming host resources like memory and processor time, and OS resources like file descriptors.
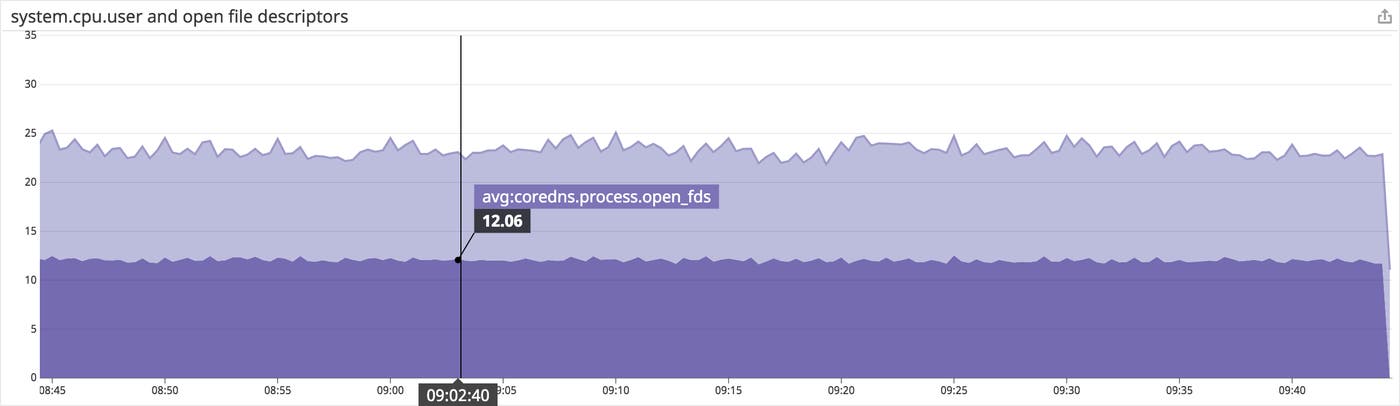
If you see CoreDNS using more and more resources on your host, you can scale out and load balance your DNS across multiple CoreDNS instances. If your graphs show you’re running out of file descriptors, you may need to modify your server configuration to increase the available limit. (See man limits.conf for information about how to do this on a Linux host.) By setting an alert on these metrics, you can receive an automated notification in time to make the necessary changes before your cluster’s performance is affected.
You can customize your CoreDNS server by adding any number of plugins—functions that process each DNS query and extend the functionality of CoreDNS. You can choose from a collection of plugins built into CoreDNS, external plugins contributed by the community, and custom plugins you write yourself. Some plugins emit metrics, so you can monitor the particular function they provide. (By convention, a plugin’s README.md file will include a section describing its metrics.) When you create your own plugins, you can build in telemetry that is useful to you. See the example plugin from the CoreDNS project for plugin code that emits a simple metric.
To configure the CoreDNS integration to collect plugin metrics, add those metrics to the list in the conf.d/coredns.d/conf.yaml file in the Agent’s configuration path. Once you’re collecting metrics from your CoreDNS plugins, you can monitor them in your Datadog dashboards and alerts alongside your traffic, error, and resource metrics for a detailed view of your DNS activity.
You can use Datadog to monitor your Kubernetes clusters in EKS, AKS, GKE, or on self-managed infrastructure, and now you can add CoreDNS monitoring to learn more about the performance of your clusters. To start monitoring CoreDNS, first enable the prometheus plugin. This will expose Prometheus metrics at the endpoint defined in the plugin’s configuration. When you’re seeing Prometheus metrics at that URL, you’re ready to configure the integration to send metrics to your Datadog account. See our integration documentation for details. If you’re not already using Datadog, sign up for a free 14-day trial and start monitoring CoreDNS and more than1,000 other technologies in one place.
此内容由惯性聚合(RSS阅读器)自动聚合整理,仅供阅读参考。 原文来自 — 版权归原作者所有。