


Web server logs and other access logs from technologies such as NGINX, Apache, and AWS Elastic Load Balancing (ELB) provide a wealth of key performance indicators (KPIs) for monitoring the health and performance of your application and understanding your users’ experience. These logs tell you how long pages take to load, where errors are occurring, which parts of your application are requested the most, and much more.
Being able to search, analyze, and use all of these verbose, data-rich log events is great when you need to troubleshoot a specific issue or perform deep historical analysis. But even relatively small environments can potentially generate millions of log events every day. Storing all of that data in such a way that you can actively search and analyze it can be expensive and difficult to maintain. In addition to the expense, searching through even a week’s worth of high-volume log events can be cumbersome. All of this makes it difficult to use logs to track overall trends and perform long-term historical analysis. Ideally, you could instead ingest all of your high-volume logs—indexing only the most important ones—and use the information they contain to generate metrics that you can store efficiently and use to track long-term trends.
The challenges of storing and analyzing large volumes of web access logs apply even if you are only interested in using specific parts of your log events (e.g., latency or URL path) to monitor high-level trends. Instead, generating metrics from your logs lets you visualize what’s going in your environment and identify issues while reducing the headaches and costs of indexing large volumes of logs. Log-based metrics let you cut through the noise of high-volume logs to see overall trends in application activity.
In this post, we will cover some best practices for generating log-based metrics so that you can use your logs to get even better visibility into your applications. Specifically we’ll cover how to create the right metrics by identifying what information in your high-volume logs you want to monitor. Then, we’ll look at what metrics you might generate based on that information to give you the exact insight you need.
The first step to distilling important information from your logs into log-based metrics is to determine which KPIs you want to track.
For example, if we look at a single NGINX access log—like the one below in JSON format—we can determine which attributes are most valuable to monitor.
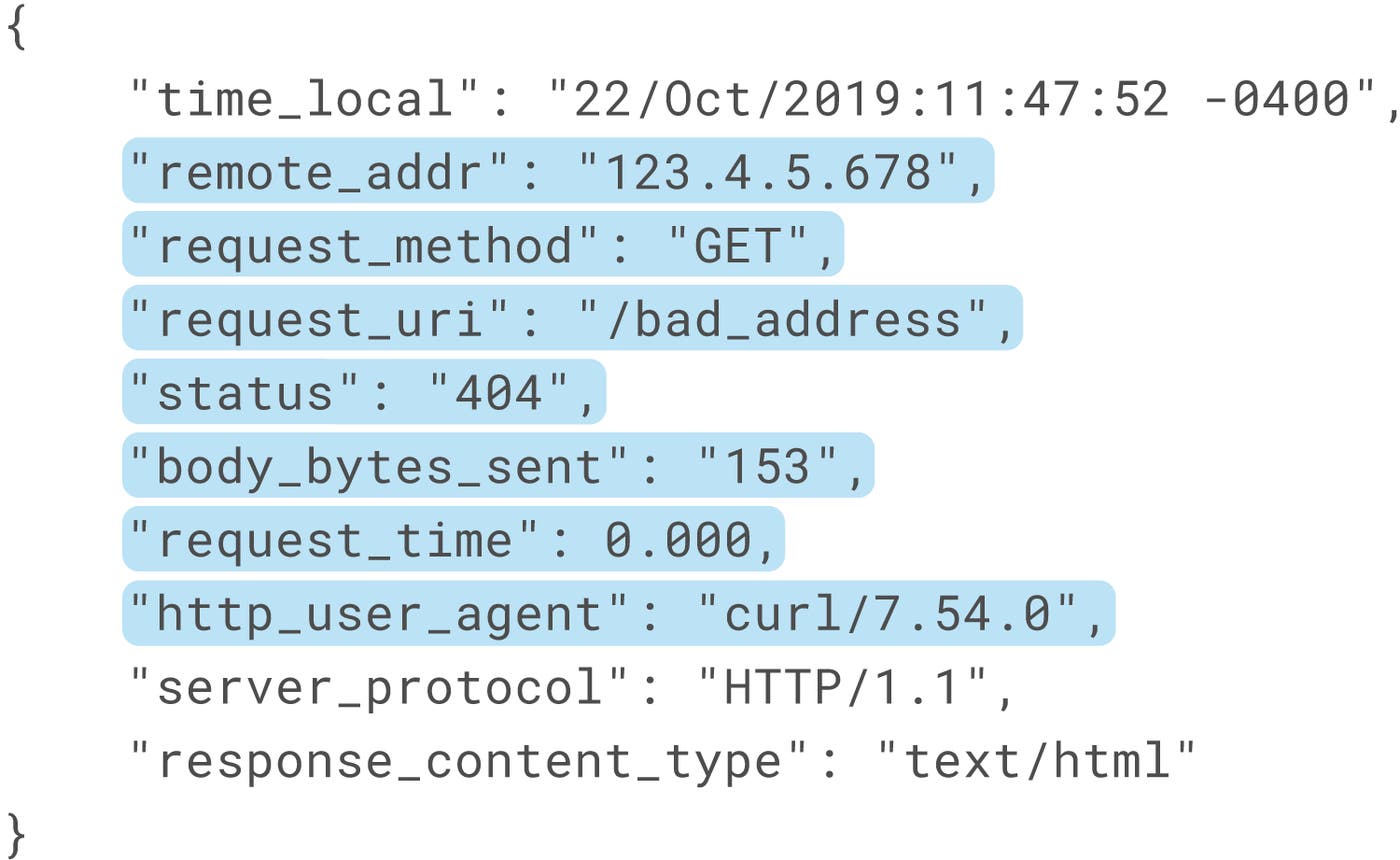
Information that we might want to track includes:
the client IP
the requested URL path and method
the response status code
the request processing time
client browser information
This information gives us insight into general trends about how our application is performing. If we generate metrics from these log attributes, we can then visualize, alert on, and correlate them with request traces and infrastructure metrics. Generating metrics to monitor trends also means we don’t need to index all those logs, which can quickly become expensive.
Once you have identified what KPIs you want to monitor, you can use the attributes in your logs to query for information that you need. You can also convert other attributes into tags, which allows you to filter and aggregate your log-based metrics across those dimensions.
There are a couple different ways you might want to create metrics from logs. One way is to track the number of log events that match a specific query. For example, you can use the log’s status code attribute to create a metric that helps you monitor the frequency of NGINX server-side error logs (i.e., NGINX access logs that include a 5xx response code). Tagging this metric with other log attributes—like URL path or geographic location—would give you insight into which endpoints of your web application or which regions are emitting the most errors.
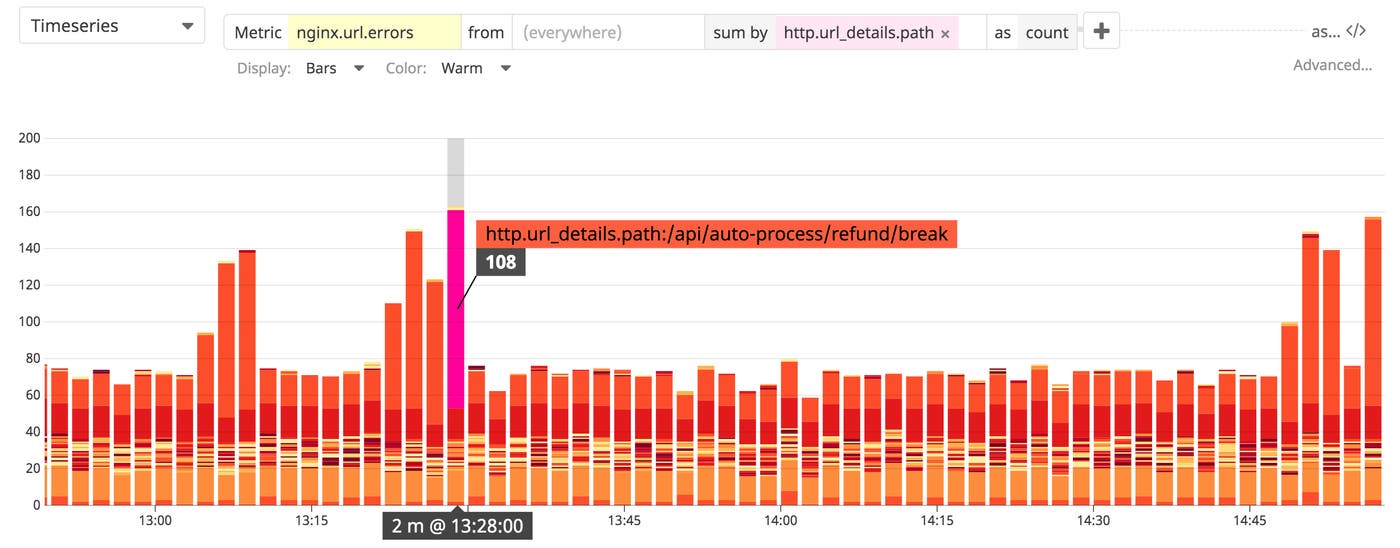
You could also use a plain-text search term to look for logs that contain a specific message or phrase. You might, for example, look for logs that include the phrase login failed to track failed logins by user.
In addition to creating metrics that track the frequency of certain types of logs, you can also generate metrics that track changes in the value of specific log attributes. Examples of this might be monitoring response time, or the amount of data sent or received in a request. Grouping these metrics in various ways can surface, for example, which URL paths or clients experience the highest latency.
For technologies that emit lots of logs, log-based metrics essentially give you a summary of the information those logs contain that is most important to you. With a centralized monitoring platform—such as Datadog—you can then use them just as you would any other metric.
Datadog’s log processing and analytics already made it easy to enrich your logs by automatically parsing out attributes as tags that you can use to query and categorize logs from all sources in your environment. Now you can use these same queries to create log-based metrics that you can then dashboard, alert on, and correlate with your other infrastructure metrics and traces.
You can create a log-based metric from your log analytics queries by selecting the Generate new Metric option from your graph.
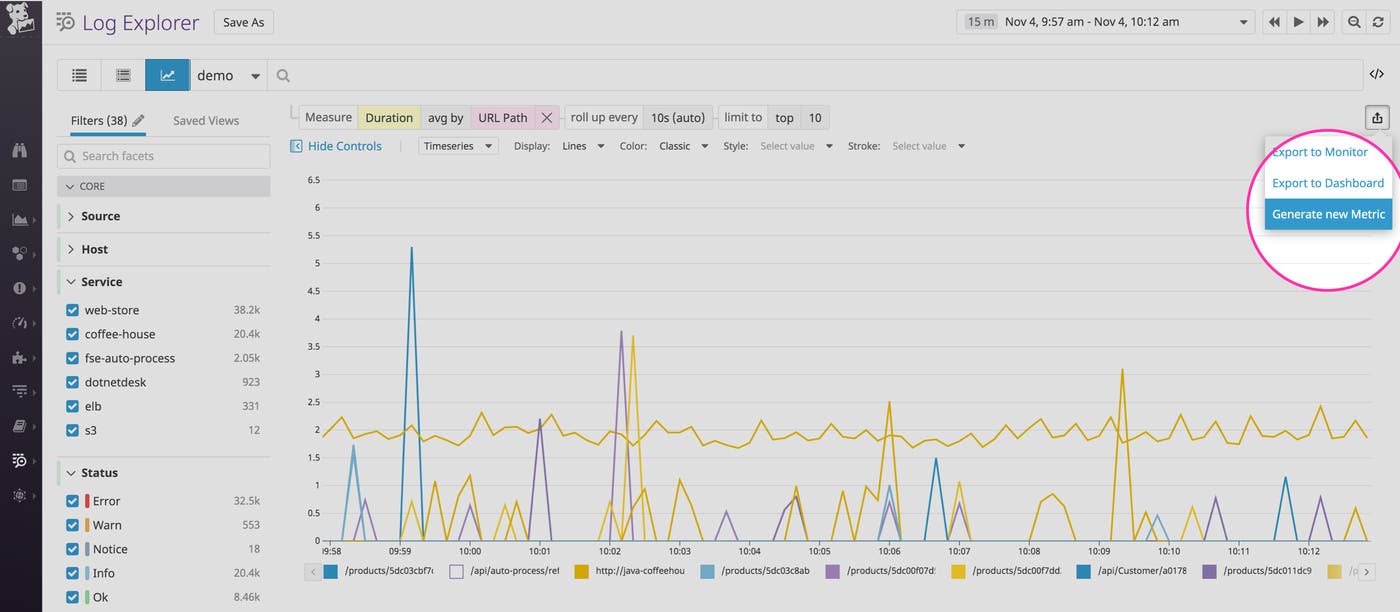
Alternatively, navigate to the Generate Metrics tab of the logs configuration section in the Datadog app to create a new query. Any metric you create from your logs will appear in your Datadog account as a custom metric.
As with any other metric, Datadog stores log-based metrics at full granularity for 15 months. This means that, unlike with log events that are usually stored for days or maybe weeks, you can retain the information for historical analysis. This lets you track long-term trends, which you can then use for anomaly detection and forecasting. You can also use your metrics as SLIs in order to monitor important organizational SLOs.
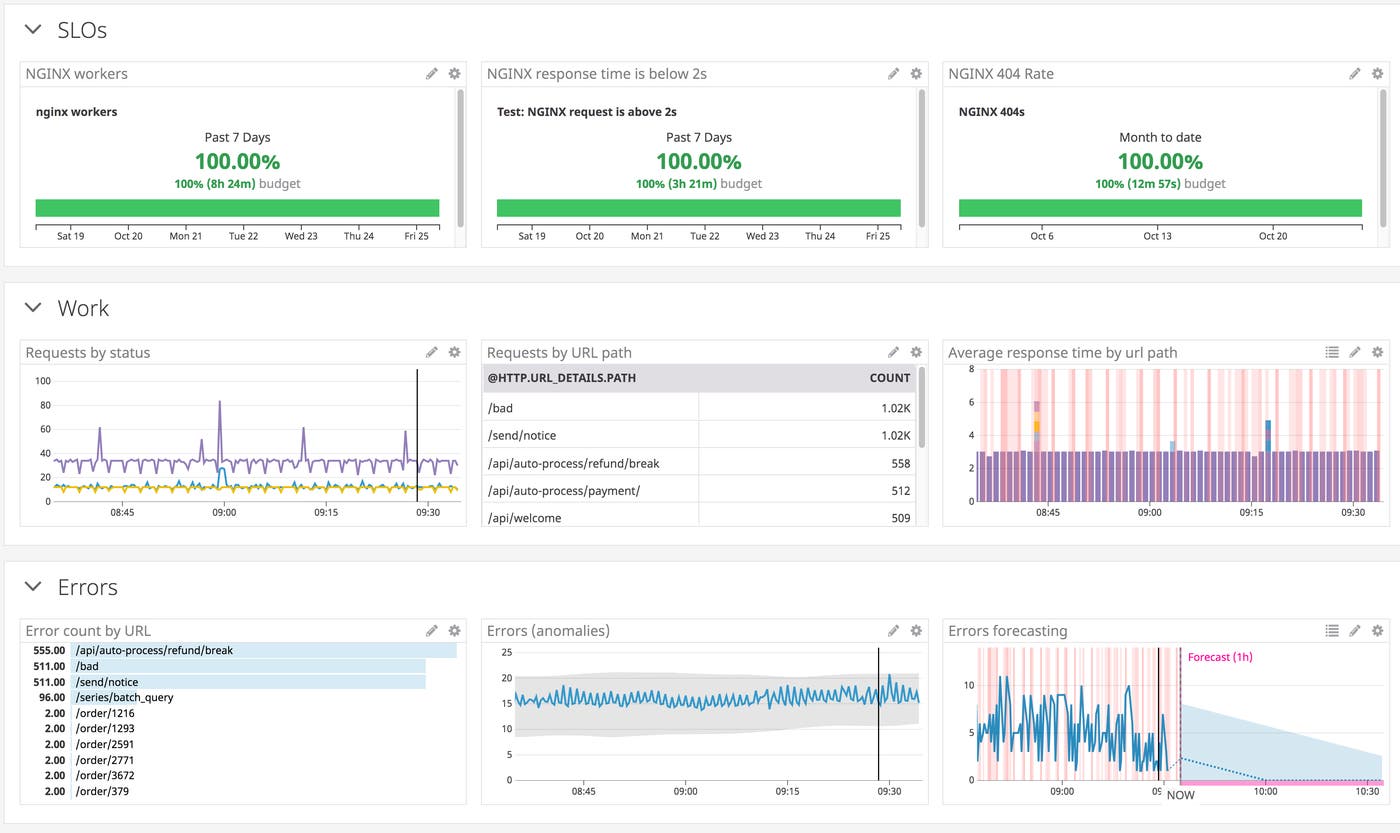
Having easy long-term access to this data in metric form also means that you can limit the number of logs you index, reducing log storage costs while still getting visibility into trends.
We’ve already seen how log-based metrics can help you monitor trends within your systems without needing to index all of the logs you are ingesting. But, you still should index a portion of logs even if you are generating metrics from them. This lets you get greater context around issues by, for example, correlating logs with your request traces.
Datadog’s exclusion filters limit which of your ingested logs you want to index. You can use the Log Patterns view to group your logs and track which log sources are emitting the highest volume of events. This helps identify which types of logs you might want to apply exclusion filters to.
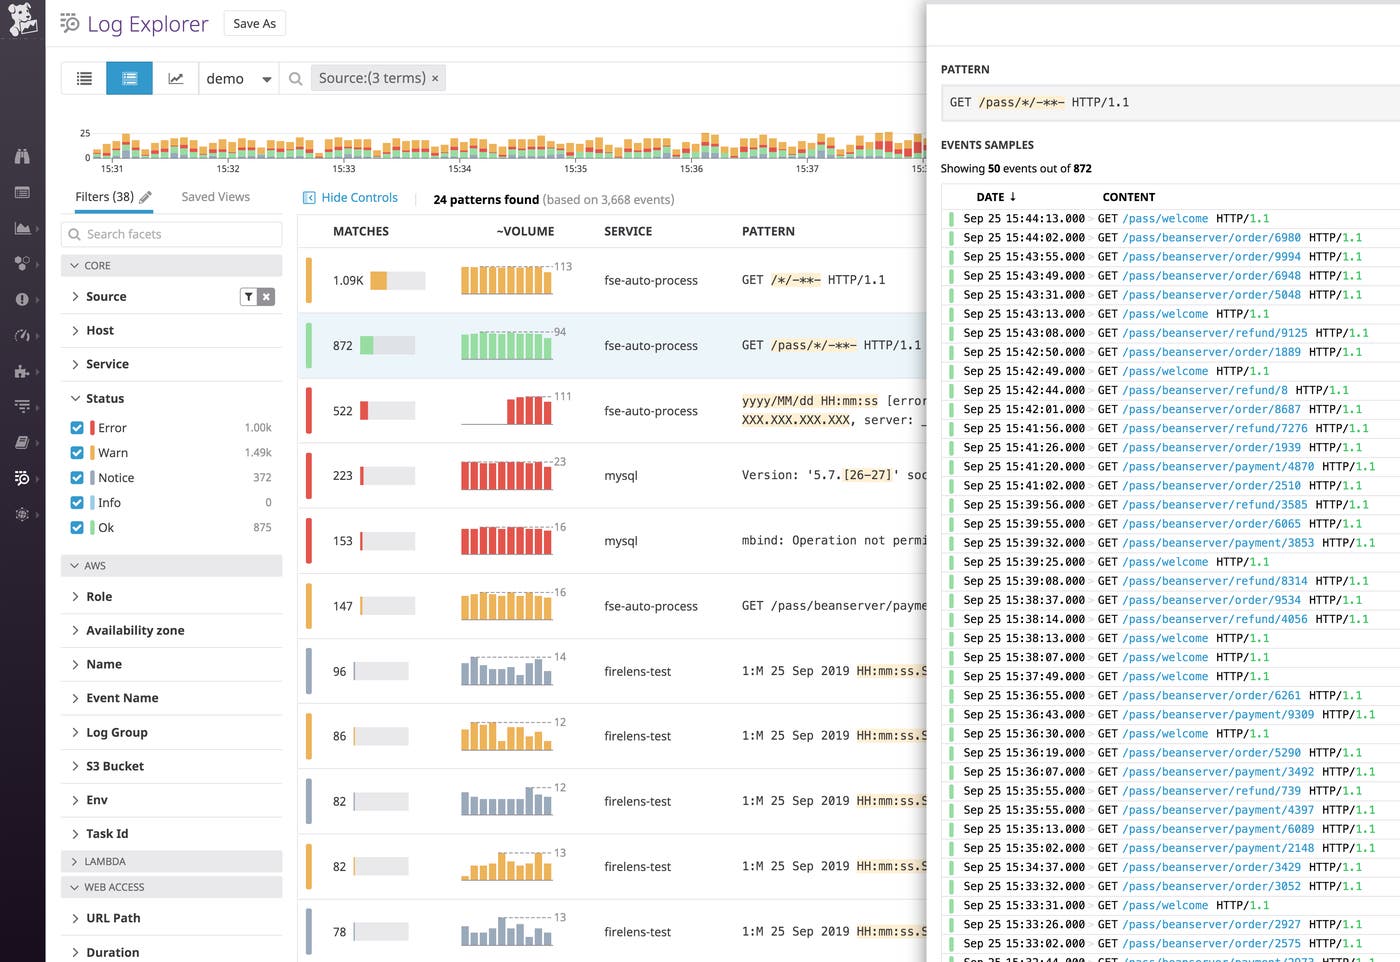
For example, above we can see that we are ingesting a lot of NGINX logs, many of which record successful requests. We can create a filter so that Datadog indexes only 1 percent of them.
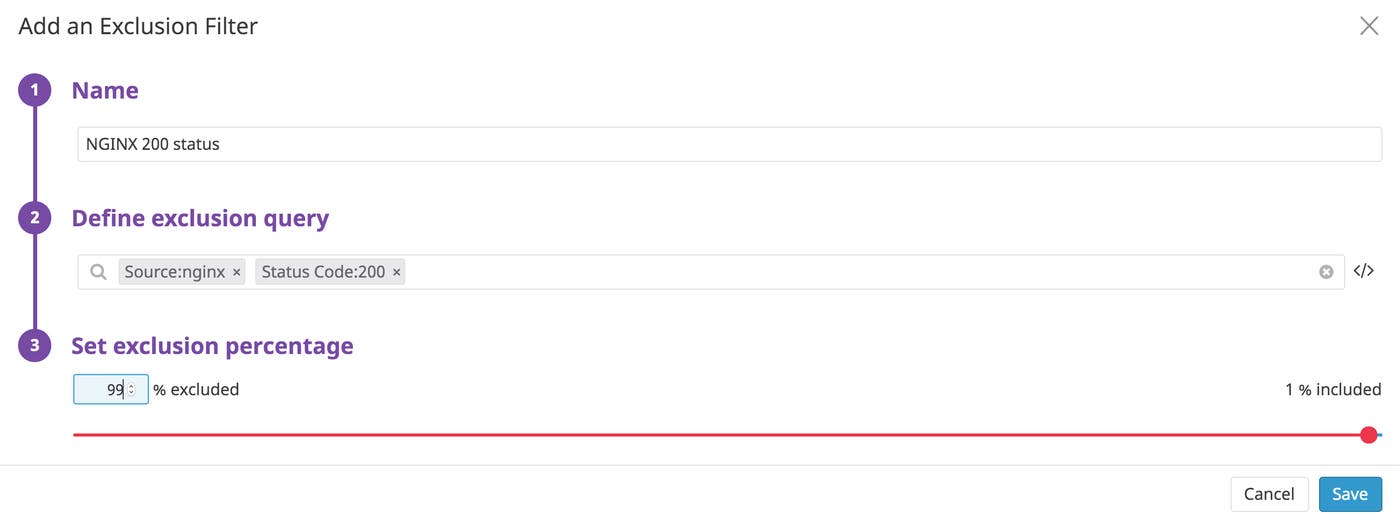
Datadog generates metrics before filters are applied, so you can track your full set of data points regardless of whether you want to index all the log events they are based on.
Datadog’s Logging without Limits™ means that all logs—including the ones you didn’t index—are still archived. If you need them later for root cause analysis or troubleshooting, Datadog’s Log Rehydration™ lets you easily retrieve logs from cold storage so that you can query, search, and add them to dashboards.
For extremely high-volume logs such as those from NGINX, ELB, and Apache, log-based metrics are a powerful way of extracting valuable information while solving many of the problems associated with storing and retaining them. With log-based metrics, you can still get insight into your infrastructure by visualizing general trends while avoiding the cost of indexing hundreds of thousands or millions of log events per day that you don’t need.
You can start creating metrics from your logs in Datadog immediately. Simply go to the Generate Metrics tab of your log configuration. See our documentation for more information on getting started. If you are not a customer, sign up for a 14-day free trial.
此内容由惯性聚合(RSS阅读器)自动聚合整理,仅供阅读参考。 原文来自 — 版权归原作者所有。