惯性聚合 高效追踪和阅读你感兴趣的博客、新闻、科技资讯
阅读原文 在惯性聚合中打开

推荐订阅源

H
Help Net Security
Cyber Security Advisories - MS-ISAC
博客园 - 【当耐特】
Microsoft Azure Blog
Google DeepMind News
Apple Machine Learning Research
有赞技术团队
有赞技术团队
Y
Y Combinator Blog
H
Hackread – Cybersecurity News, Data Breaches, AI and More
爱范儿
爱范儿
L
LangChain Blog
IT之家
IT之家
酷 壳 – CoolShell
酷 壳 – CoolShell
MongoDB | Blog
MongoDB | Blog
Hugging Face - Blog
Hugging Face - Blog
G
Google Developers Blog
T
Tailwind CSS Blog
Engineering at Meta
Engineering at Meta
奇客Solidot–传递最新科技情报
奇客Solidot–传递最新科技情报
宝玉的分享
宝玉的分享
博客园 - 三生石上(FineUI控件)
D
DataBreaches.Net
Recent Announcements
freeCodeCamp Programming Tutorials: Python, JavaScript, Git & More

Runpod Blog.

New Runpod datacenter now live: AP-IN-1 Track GPU spend across your team with Cost Centers The GPU supply supercycle is here. Here’s what AI builders need to know. Community Spotlight: One-click AI image and video generation on Runpod with SwarmUI | Runpod Blog Community Spotlight: LoRA Pilot Data Prep to Inference Introducing the Runpod Assistant: Manage Your Cloud GPU Resources with Natural Language OpenAI's Parameter Golf: Train the Best Language Model That Fits in 16MB on Runpod LLM inference optimization: techniques that actually reduce latency and cost Pruna P-Video and Vidu Q3 public endpoints now available on Runpod Runpod brand spelling guide Quickstart - Runpod Documentation The AI market looks nothing like the narrative Training StyleGAN3 with Vision-Aided GAN on Runpod KoboldAI – The Other Roleplay Front End, And Why You May Want to Use It How to Connect Cursor to LLM Pods on Runpod for Seamless AI Dev Community Spotlight: How AnonAI Scaled Its Private Chatbot Platform with Runpod Prompt Scheduling with Disco Diffusion on Runpod Runpod's Latest Innovation: Dockerless CLI for Streamlined AI Development Run Your Own AI from Your iPhone Using Runpod Introducing Flash: Run GPU workloads on Runpod Serverless: No Docker required Use Claude Code with your own model on Runpod: No Anthropic account required Avoid Errors by Selecting the Proper Resources for Your Pod What hackers built on Runpod at TreeHacks 2026 Easily Back Up and Restore Your Pod with Cloud Sync + Backblaze B2 The Complete Guide to GPU Requirements for LLM Fine-Tuning AI Guides, Tutorials & GPU Infrastructure Insights | Runpod Your first Claude Code project within Runpod: a complete setup guide 10 billion Serverless requests and counting Building for resilience: Runpod’s response to the AWS us-east-1 outage How to Connect Google Colab to Runpod
Run Hugging Face spaces on Runpod!
River Snow · 2023-05-17 · via Runpod Blog.

Hugging Face Spaces are interactive demos that showcase AI models directly on the Hugging Face platform. They're great for experimenting with AI capabilities, but what if you want more computing power or need to run these models in your own environment? Or you want to use them as much as you want to without being rate limited?

Good news! Every Hugging Face Space can now be run using Docker, which means you can deploy them on platforms like Runpod to leverage powerful GPUs. In this guide, we'll walk through deploying Kokoro TTS (a Text-to-Speech model) via Gradio from Hugging Face to Runpod.

What is Gradio?

Gradio is a popular Python library that creates user-friendly interfaces for machine learning models. Many Hugging Face Spaces, including Kokoro TTS, use Gradio to provide an interactive web interface where you can test the model's capabilities through your browser. By the end of this tutorial, you'll have this same interface running on your Runpod instance.

Why Kokoro TTS?

We've chosen Kokoro TTS for this example because it's a powerful text-to-speech model that benefits from GPU acceleration. This makes it a perfect candidate to demonstrate how to move from Hugging Face Spaces to Runpod's more flexible, accessible computing environment.

Prerequisites

  • A Hugging Face account (to generate an access token)
  • A Runpod account with payment method set up

Setup

First, go to the Kokoro TTS Space on Hugging Face. In the upper right you'll see a pullout menu with three dots. Click Run Locally to get more info about the Docker image that drives the Space.
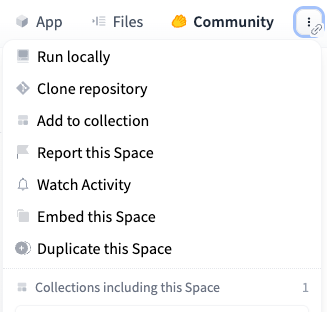
Hugging Face Space options menu with Run locally, Clone repository, and Duplicate this Space

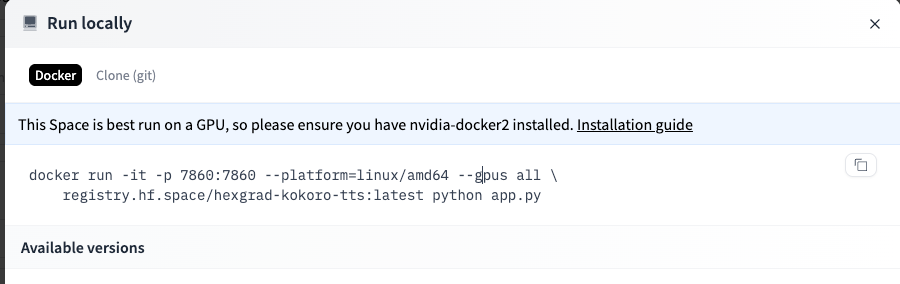
Hugging Face Run locally dialog with a docker run command for the Kokoro TTS Space image

Copy this Docker command down, as it contains variables that we will need later.

In addition, you will need an access token, which you can get from your Settings page.

  1. Log in to your Hugging Face account.
  2. Go to https://huggingface.co/settings/tokens
  3. Click New Token
  4. Name your token (e.g., "Runpod Access") and select appropriate permissions
  5. Click Generate Token and copy the generated token to a secure location

Configure your Template

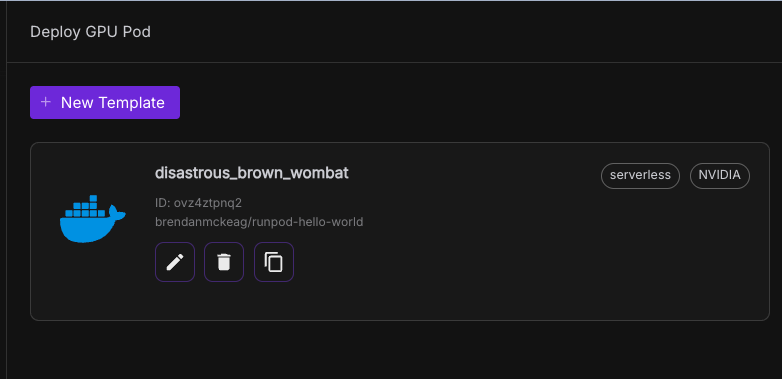
Now, go to Templates in the nav bar on Runpod, and click New Template.
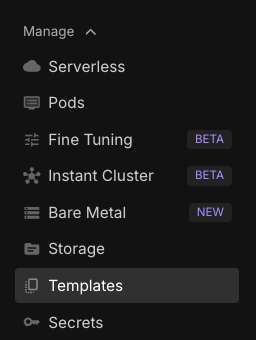
Runpod console sidebar with Templates selected under the Manage menu

Runpod Deploy GPU Pod page showing a custom template card and a New Template button

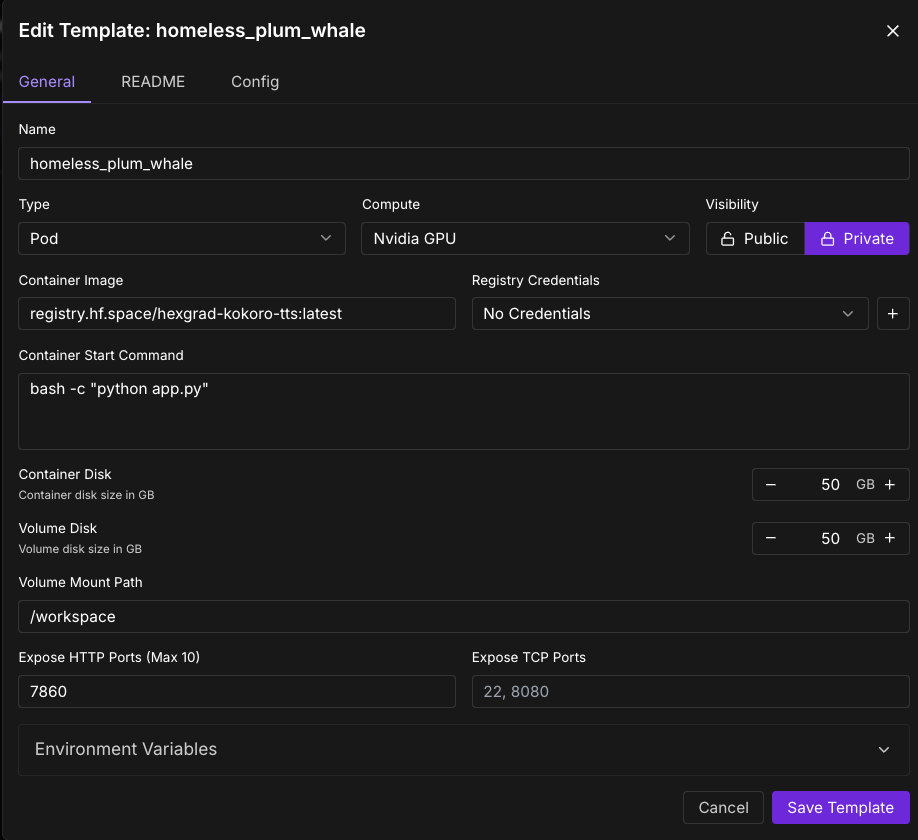
  1. Set the Container image as the container image specified in the docker container. In our case this is registry.hf.space/hexgrad-kokoro-tts:latest, which we got from point 3 above
  2. Set the "Expose HTTP Ports" to 7860, since that's the port being exposed in the Docker command above.
  3. Enter bash -c "python app.py" as your container start command.
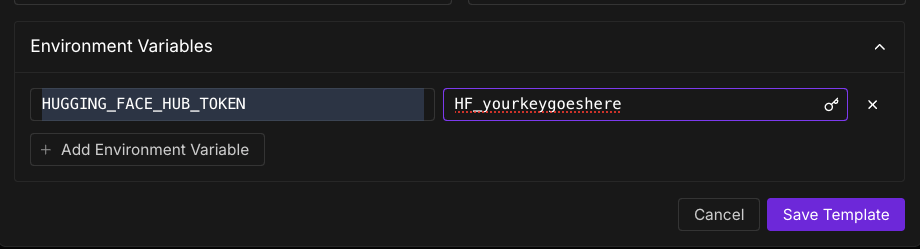
  4. Open "Environment variables" in the bottom of the template, and set it to:
    - key : HUGGING_FACE_HUB_TOKEN
    - value : (your huggingface hub token)

Runpod template editor with the Kokoro TTS container image and HTTP port 7860 configured

Template environment variables section with HUGGING_FACE_HUB_TOKEN set to a placeholder key

Deploy a Pod with Your Template

  1. Navigate to the Pods section in the left navigation bar
  2. Click the Deploy button
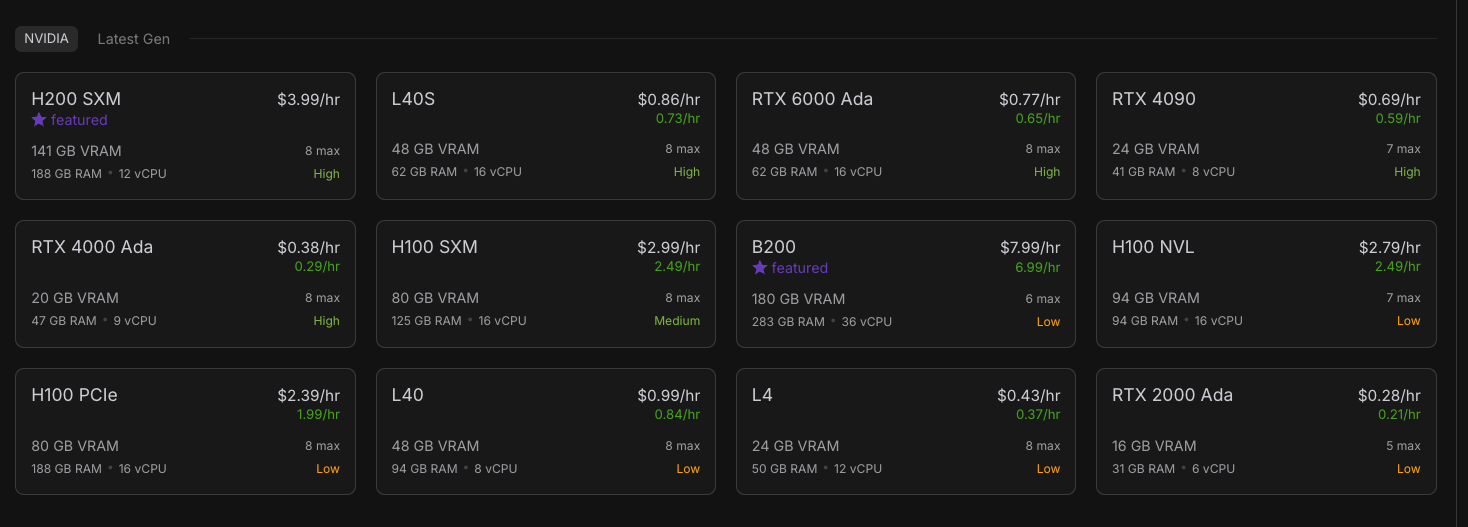
  3. Select a GPU type (H100 works well due to high VRAM, but you can experiment with less expensive options)
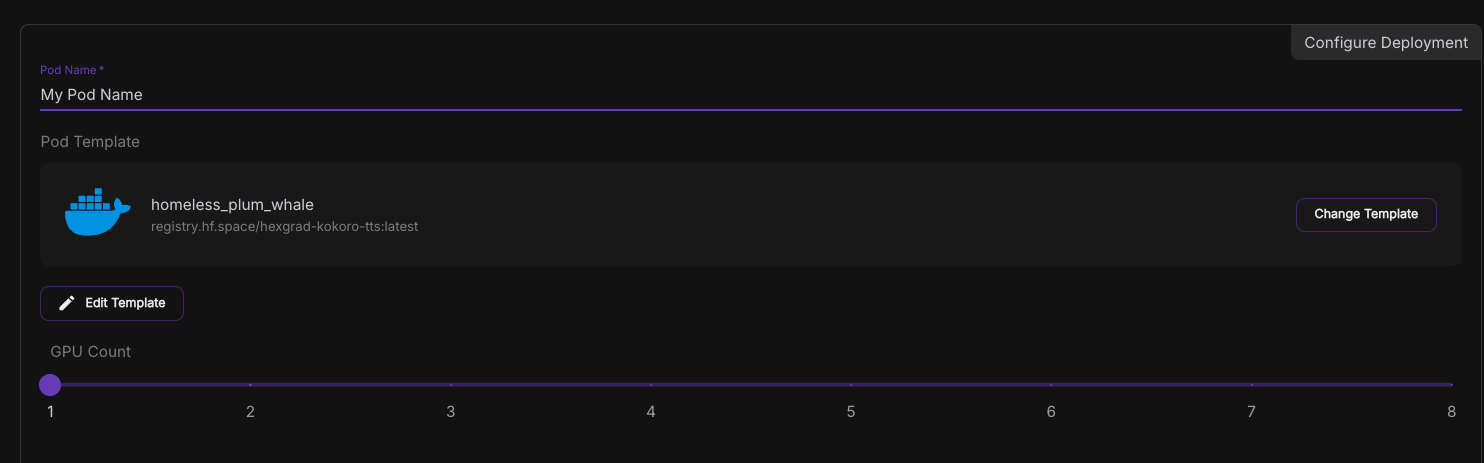
  4. Scroll down and click Change Template
  5. Select the template you just created ("Kokoro TTS")
  6. Review your settings and click Deploy at the bottom

Runpod GPU selection grid listing NVIDIA GPUs like H200 SXM and RTX 4090 with hourly prices and availability

Runpod pod deployment configuration with a template selected and the GPU count slider set to 1

Connect to your Pod

  • After deploying, you'll be taken to the Pods screen
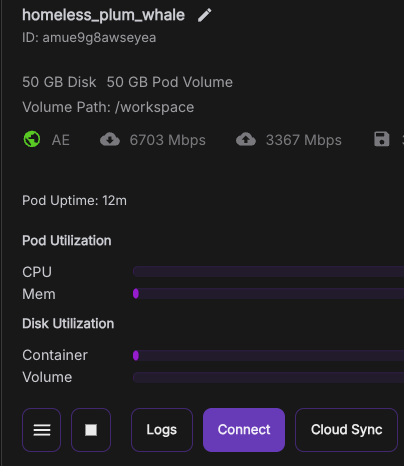
  • Click on your newly created pod to view details
  • Check the Logs tab to monitor startup progress
  • Wait until you see a message indicating the service is running on port 7860
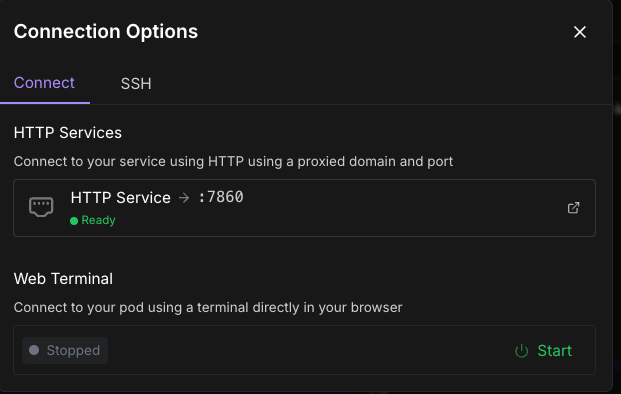
  • Once ready, click the Connect button on your pod
  • Select the HTTP Service option (usually has port 7860)

Review the logs in your deployed pods under the Pods screen, and wait for a notification to appear that the image is up and running on port 7860.
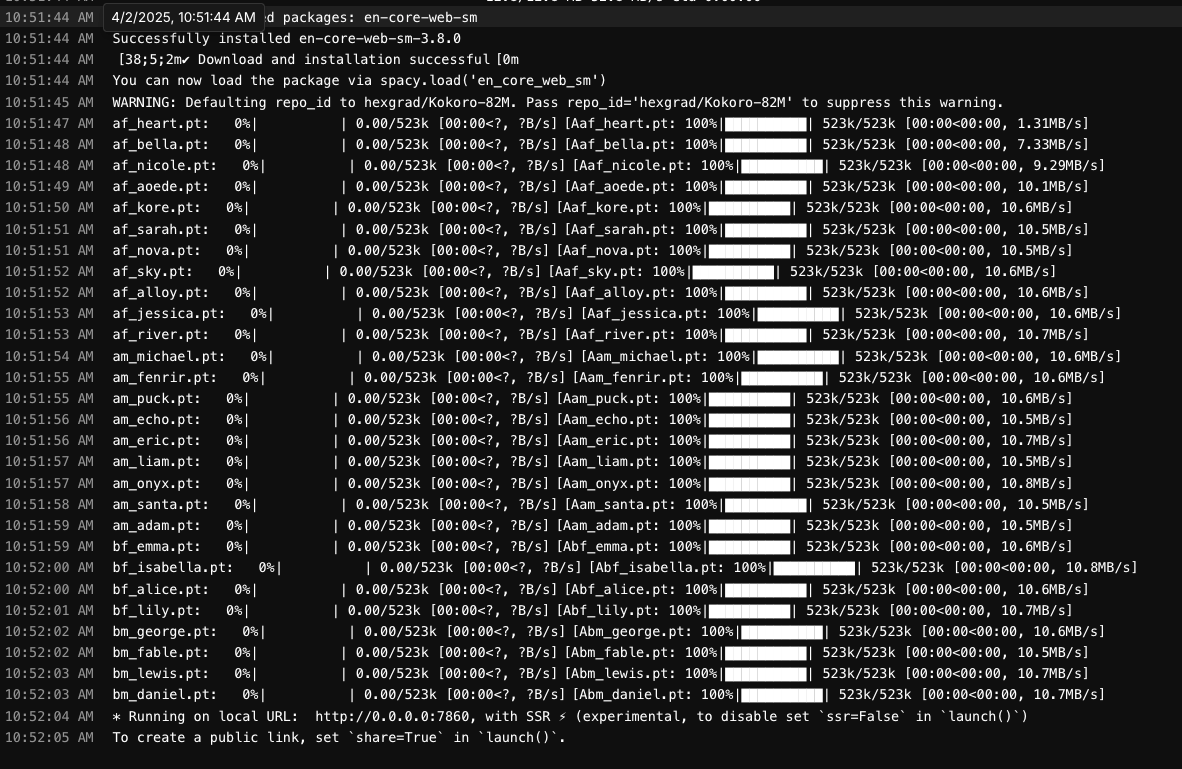
Pod logs showing Kokoro TTS voice files downloading and the app starting on port 7860

Runpod pod details panel showing disk size, utilization bars, and a Connect button

Runpod connection options with an HTTP service ready on port 7860 and a stopped web terminal

And ta-da!, you should see your deployment within Runpod!
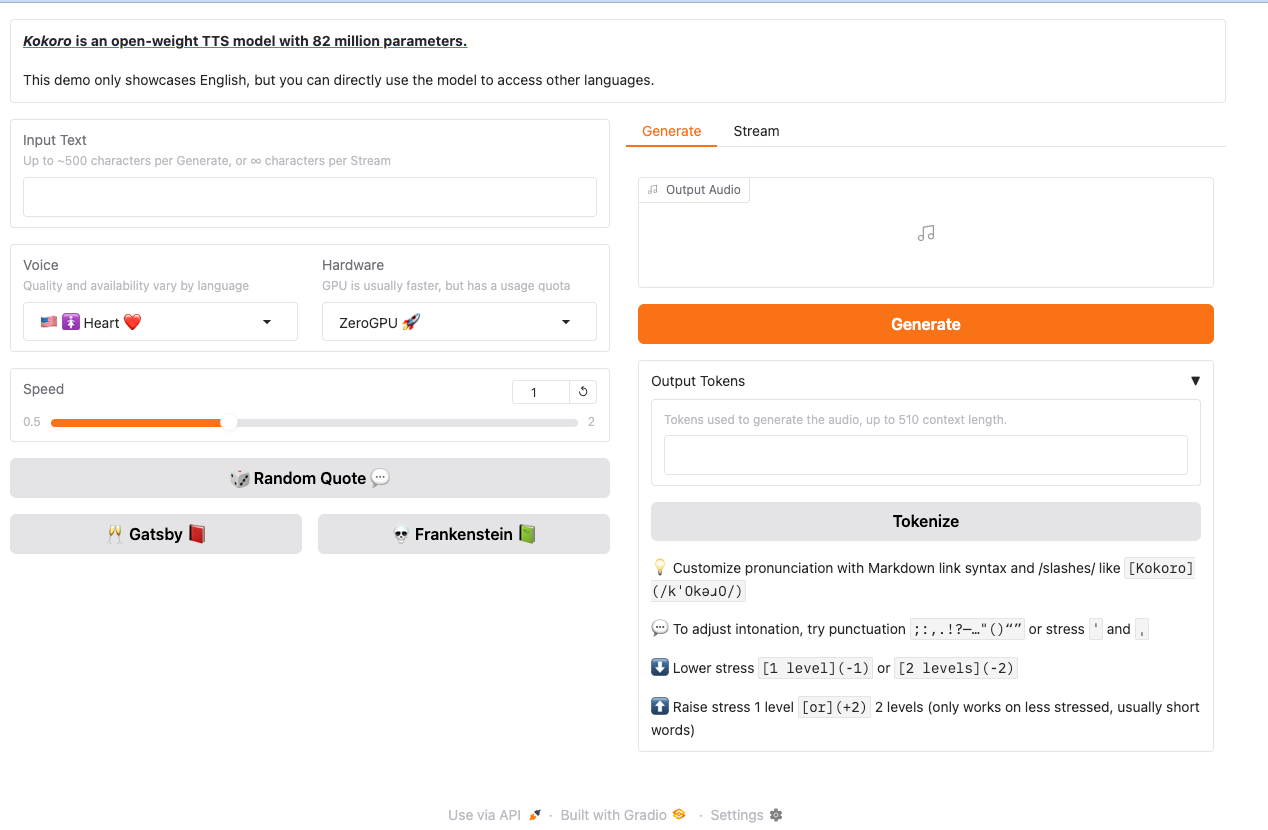
Kokoro TTS demo on Hugging Face Spaces with text input, voice and speed controls, and a Generate button

Conclusion

You've successfully deployed a Hugging Face Space on Runpod! This approach works for virtually any Hugging Face Space - just repeat these steps with the appropriate Docker image and port. Runpod gives you the flexibility to choose more powerful hardware when needed, allowing you to run more demanding models than what's possible directly on Hugging Face.

Author profile: River Snow