I often see on places such as Facebook that an Amiga owner will show a fault they have with their machine, and the immediate response you’ll see is “recap it”. Now, I’m not saying that recapping isn’t needed, for the SMD caps used in Amigas, it always is. But that isn’t always the problem either. A bad recap can make things worse. Which leads me to today’s story…
Recapping is the process of removing the capacitors on the motherboard and replacing them with new ones. It is important on the SMD soldered models of Amigas such as the A600, A1200, A4000 and CD32. This is because they are essentially a ticking time-bomb. They may be fine now, but they will leak corrosive material over the motherboard.
The through-hole capacitors are usually fine, apart from a majority of CD32 machines where they were soldered on backwards. The reverse polarity causes stress, so they are prone to failure.
You can usually tell when leakage has started with SMD capacitors, because the solder joints start to become tarnished. You can see the tarnish on the A600 below, and the burn the other side? The corrosion caused a short-circuit and a small fire (I managed to repair this in another blog post).
The Amiga 1200 came in with another one from a regular customer. The other one just needed a recap and was fully functional. This one was bought faulty, just showing a black screen, and he wondered if I could fix it.
I powered up the machine and I could even hear a hard drive spin up, but sure enough, there was a black screen and flashing power LED. Disconnecting the drives didn’t help either.
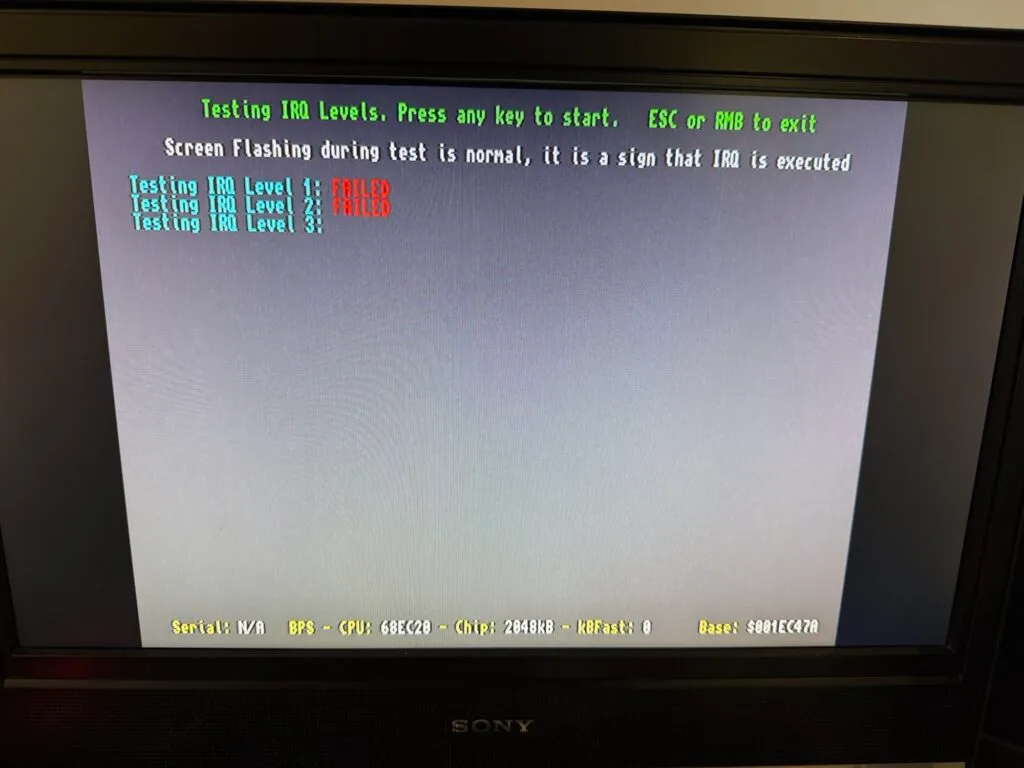
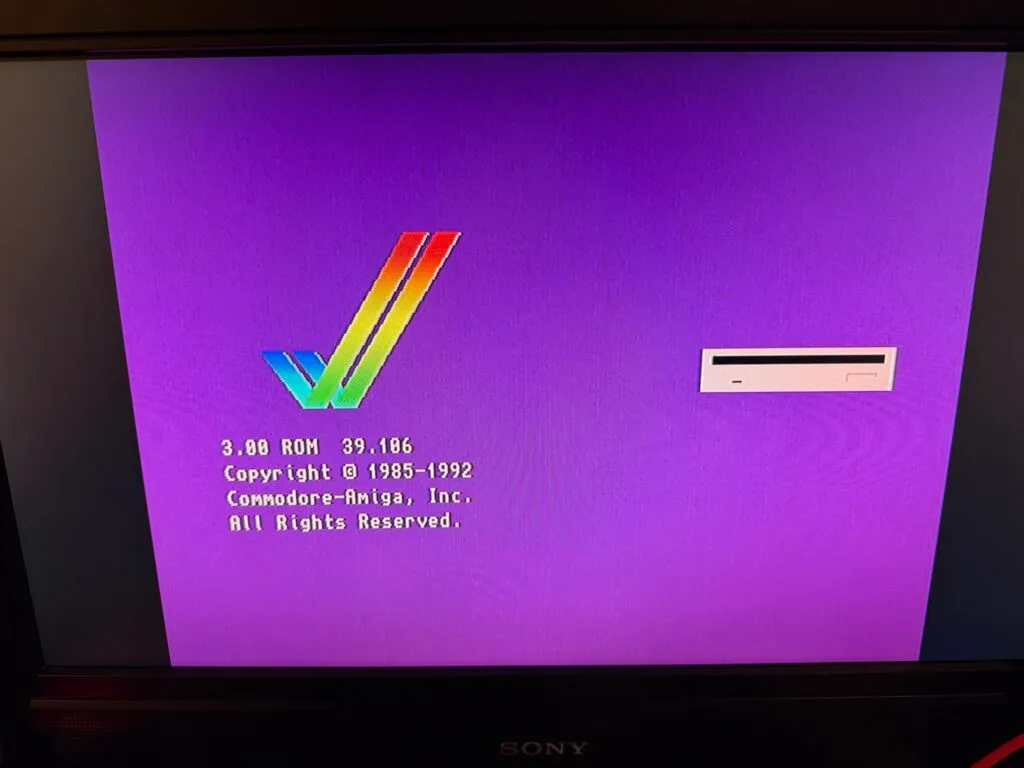
I popped DiagROM in, and that worked, but IRQ tests crashed and the audio wasn’t functioning. So, time to investigate the motherboard further.
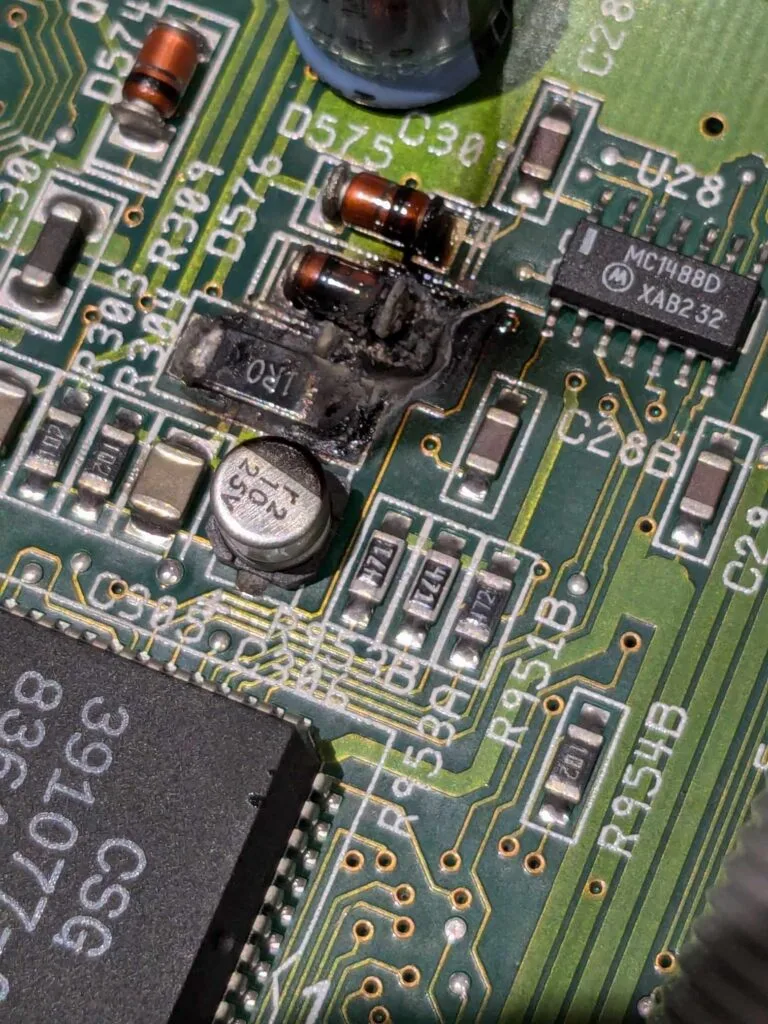
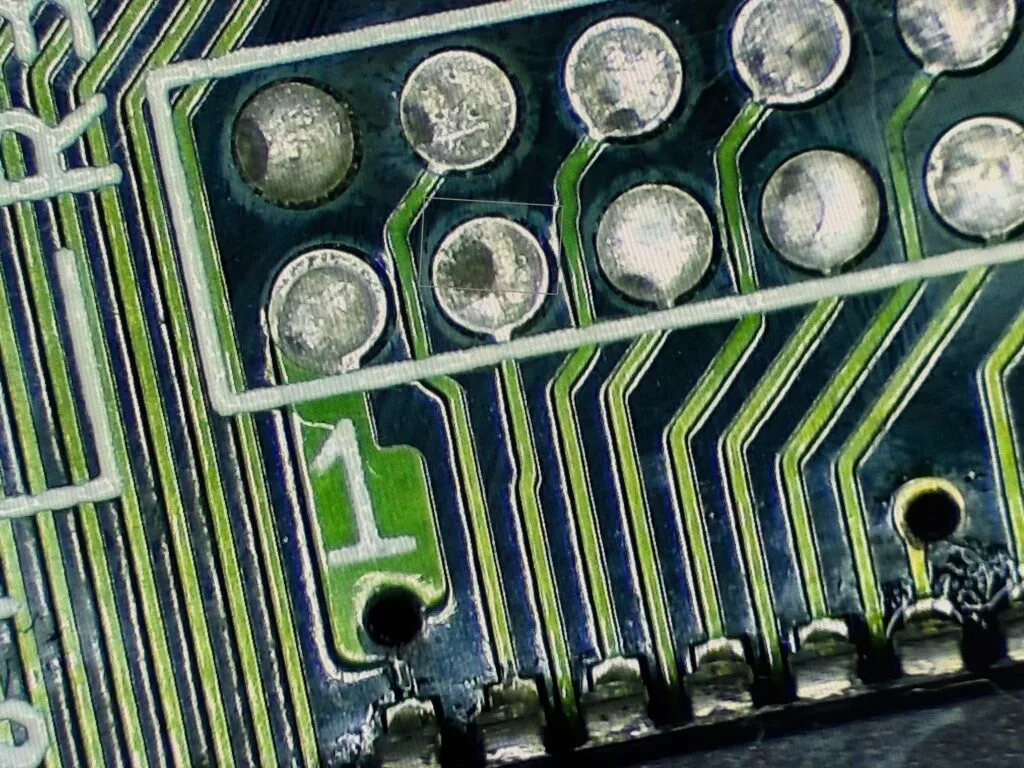
The motherboard had been recapped, badly. The decoupling capacitor next to Paula was actually not attached on one pad. I fixed this, and then spotted a much bigger problem. So obvious that I completely missed it the first time.
Can you see it? Almost every SMD capacitor was soldered backwards! My first job was to replace them all. I don’t know how long in total it has been powered on this way, but it is possible that the life of these capacitors has been significantly reduced. It could also cause them to vent or explode.
Was all this the cause of the Paula and audio issues? Maybe, it is difficult to say at this stage, but I need to fix this before I continue.
I went ahead and replaced them with new capacitors which are the right way around. I left the through-hole capacitors because they were the right way around, but I did touch-up the soldering of them a little bit to make sure they were fine.
Now that I had a situation I was more comfortable with, I tried DiagROM again.
IRQ test still fails, and the audio is silent. Unfortunately, it looks like there are still problems to solve. I checked with the thermal camera to make sure there was nothing getting too hot.
Nothing unexpected with the temperatures, top and bottom of the board. I also couldn’t spot anything else visually wrong. So, time to test Paula outside of the board.
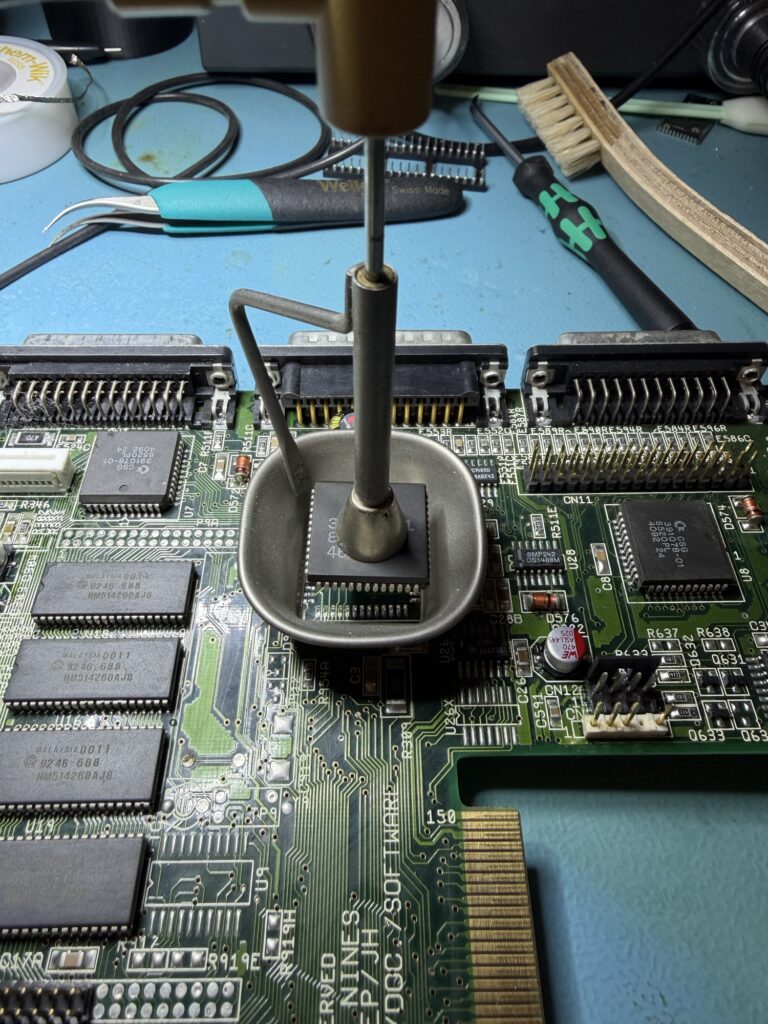
I used my JBC hot air kit to desolder Paula. This has a sprung tripod which, using a light vacuum, holds onto the chip. Running a hot-air gun around it melts the solder, and when it is molten, the chip pops up clear from the board.
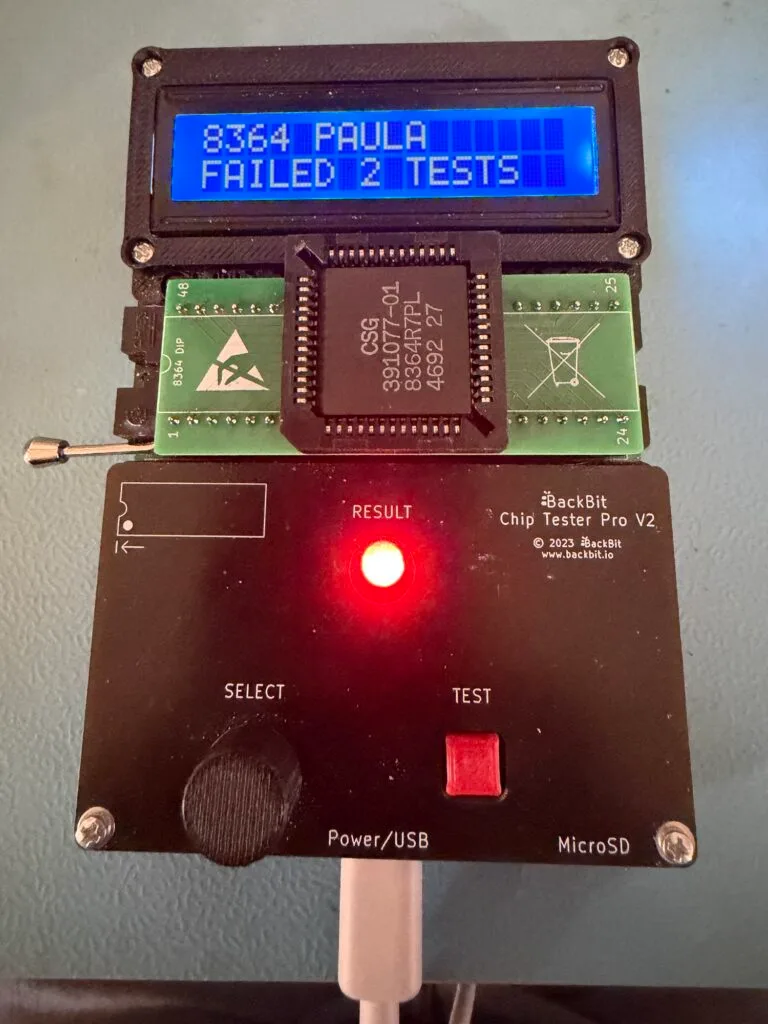
Now that is off the board, let’s test it.
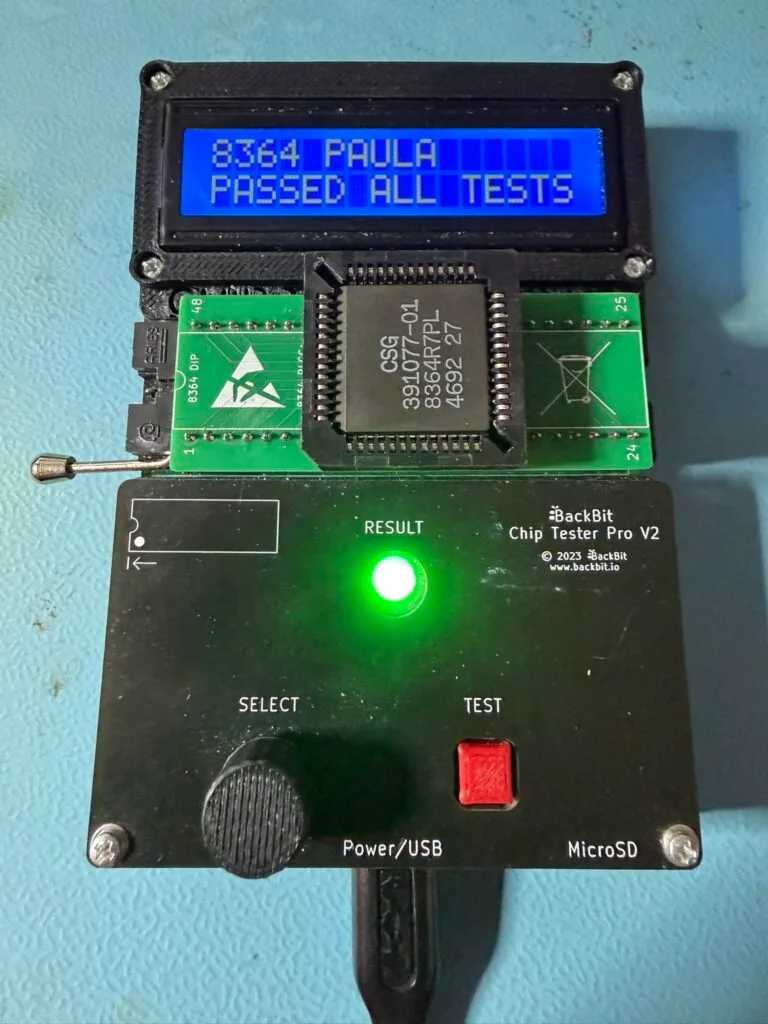
Bingo! As I suspected, Paula is also bad. I soldered a socket to the motherboard, popped in a known working Paula and tested again. It failed in the same way again. Maybe it wasn’t Paula?
Well, that is frustrating. The pins must have been dirty the first time. I popped the original back in and figured I should start probing the data bus lines for Paula, and at first everything looked good. Then, more by chance than anything else, I found an issue.
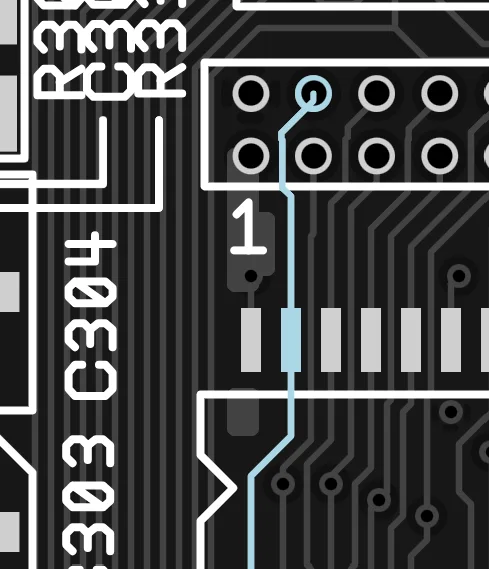
The problem was DRD_31, this goes several places, but relevant to us is that it goes through the RAM chips, through an unused expansion port and to Paula. I found a break, whilst I can’t see it, even under a microscope, it is broken between the RAM and the unused connector.
I patched this line, tested again, and… Success!
Audio worked, IRQs worked, every test passed!
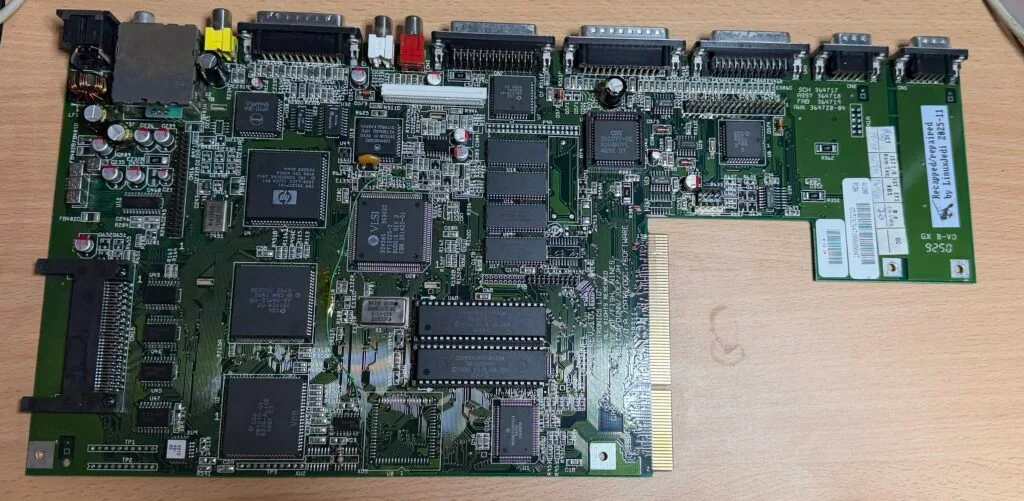
To finish up the board, I moved the clock port pins. This revision of the Amiga 1200 has them soldered into the wrong holes, making it unusable. I then ultrasonic cleaned the board.
Looking almost new now.
My working theory is that the original owner had a fault, people said “recap it”. The owner bought a kit, but didn’t really have the skill to do it themselves. This led to the machine being sold as faulty.
Yes, recapping the board is important, but if something is wrong, other diagnostics should be done as well. It is not a panacea for all problems.
此内容由惯性聚合(RSS阅读器)自动聚合整理,仅供阅读参考。 原文来自 — 版权归原作者所有。