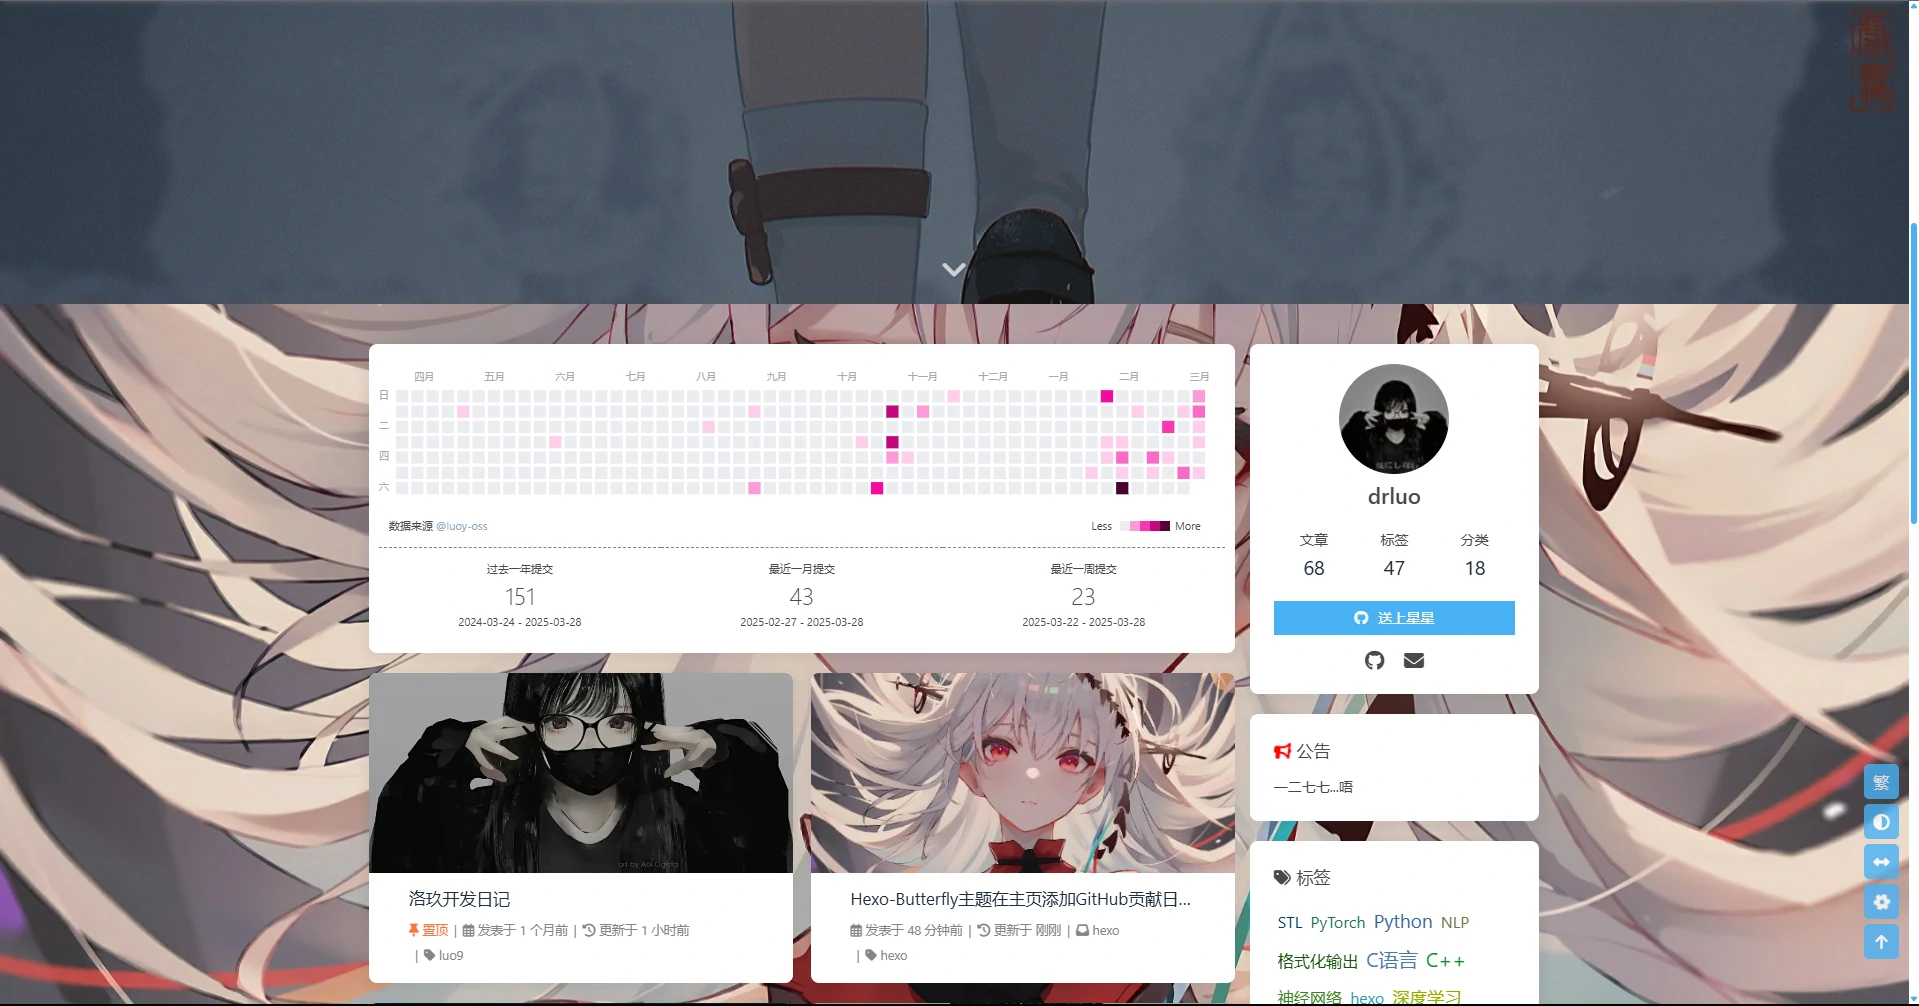
本文介绍如何在博客添加GitHub贡献日历,效果如下:

需要用到的插件及API :
注:该插件来自博主 百里飞洋 基于原开源插件 hexo-github-calendar 、API python_github_calendar_api 改造
前端Hexo插件:https://github.com/Barry-Flynn/hexo-github-calendar
后端API部署:https://github.com/Barry-Flynn/python_github_calendar_api
作者: 百里飞洋 Barry-Flynn
链接: https://blog.meta-code.top/2022/03/15/2022-41/
来源: 百里飞洋
安装依赖
1
| npm i @barry-flynn/hexo-github-calendar --save
|
或者 使用 cnpm ,速度更快
1
| cnpm i @barry-flynn/hexo-github-calendar --save
|
添加配置
在 Hexo 项目根目录的 _config.yml 文件最后面添加如下配置
注意:在 Hexo 的配置文件中添加,而不是主题的配置文件
1 2 3 4 5 6 7 8 9 10 11 12 13 14 15 16 17 18 19 20 21
| # hexo-github-canlendar # 贡献度热力图插件 https://github.com/Barry-Flynn/hexo-github-calendar githubcalendar: enable: true # 是否启用本插件 enable_page: / # 要生效的页面,如 / 首页,/about/ 介绍页等 user: luoy-oss # GitHub 用户名 layout: type: id name: recent-posts index: 0 githubcalendar_html: '<div class="recent-post-item" style="width:100%;height:auto;padding:10px;"><div id="github_loading" style="width:10%;height:100%;margin:0 auto;display: block"><svg xmlns="http://www.w3.org/2000/svg" xmlns:xlink="http://www.w3.org/1999/xlink" viewBox="0 0 50 50" style="enable-background:new 0 0 50 50" xml:space="preserve"><path fill="#d0d0d0" d="M25.251,6.461c-10.318,0-18.683,8.365-18.683,18.683h4.068c0-8.071,6.543-14.615,14.615-14.615V6.461z" transform="rotate(275.098 25 25)"><animateTransform attributeType="xml" attributeName="transform" type="rotate" from="0 25 25" to="360 25 25" dur="0.6s" repeatCount="indefinite"></animateTransform></path></svg></div><div id="github_container"></div></div>' pc_minheight: 280px mobile_minheight: 0px # 贡献统计的梯度色卡值,可自行调整 color: "['#ebedf0', '#fdcdec', '#fc9bd9', '#fa6ac5', '#f838b2', '#f5089f', '#c4067e', '#92055e', '#540336', '#48022f', '#30021f']" api: https://github-calendar.drluo.top/api # 推荐填写你自建的API接口,公用api随时可能会失效 api: https://github-calendar.drluo.top/api # 推荐下载后使用本地文件 calendar_js: /js/hexo_githubcalendar.js # 本地文件,请下载到主题文件夹的source目录下 plus_style: ""
|
下载 hexo_githubcalendar.js 到你的主题文件夹的 source目录,如 themes\butterfly\source\js
然后执行hexo三连
1
| hexo clean && hexo g && hexo s
|
完成部署
不绑定自己的域名
可以直接不进行api配置,这时会使用默认的api
1 2
| githubcalendar: # api: 注释掉api部分
|
绑定自己的域名
如果追求稳定性,可以选择绑定自己的域名:
1. 自建API接口
由于公共API随时可能失效,所以推荐自建API接口,使用Vercel部署。
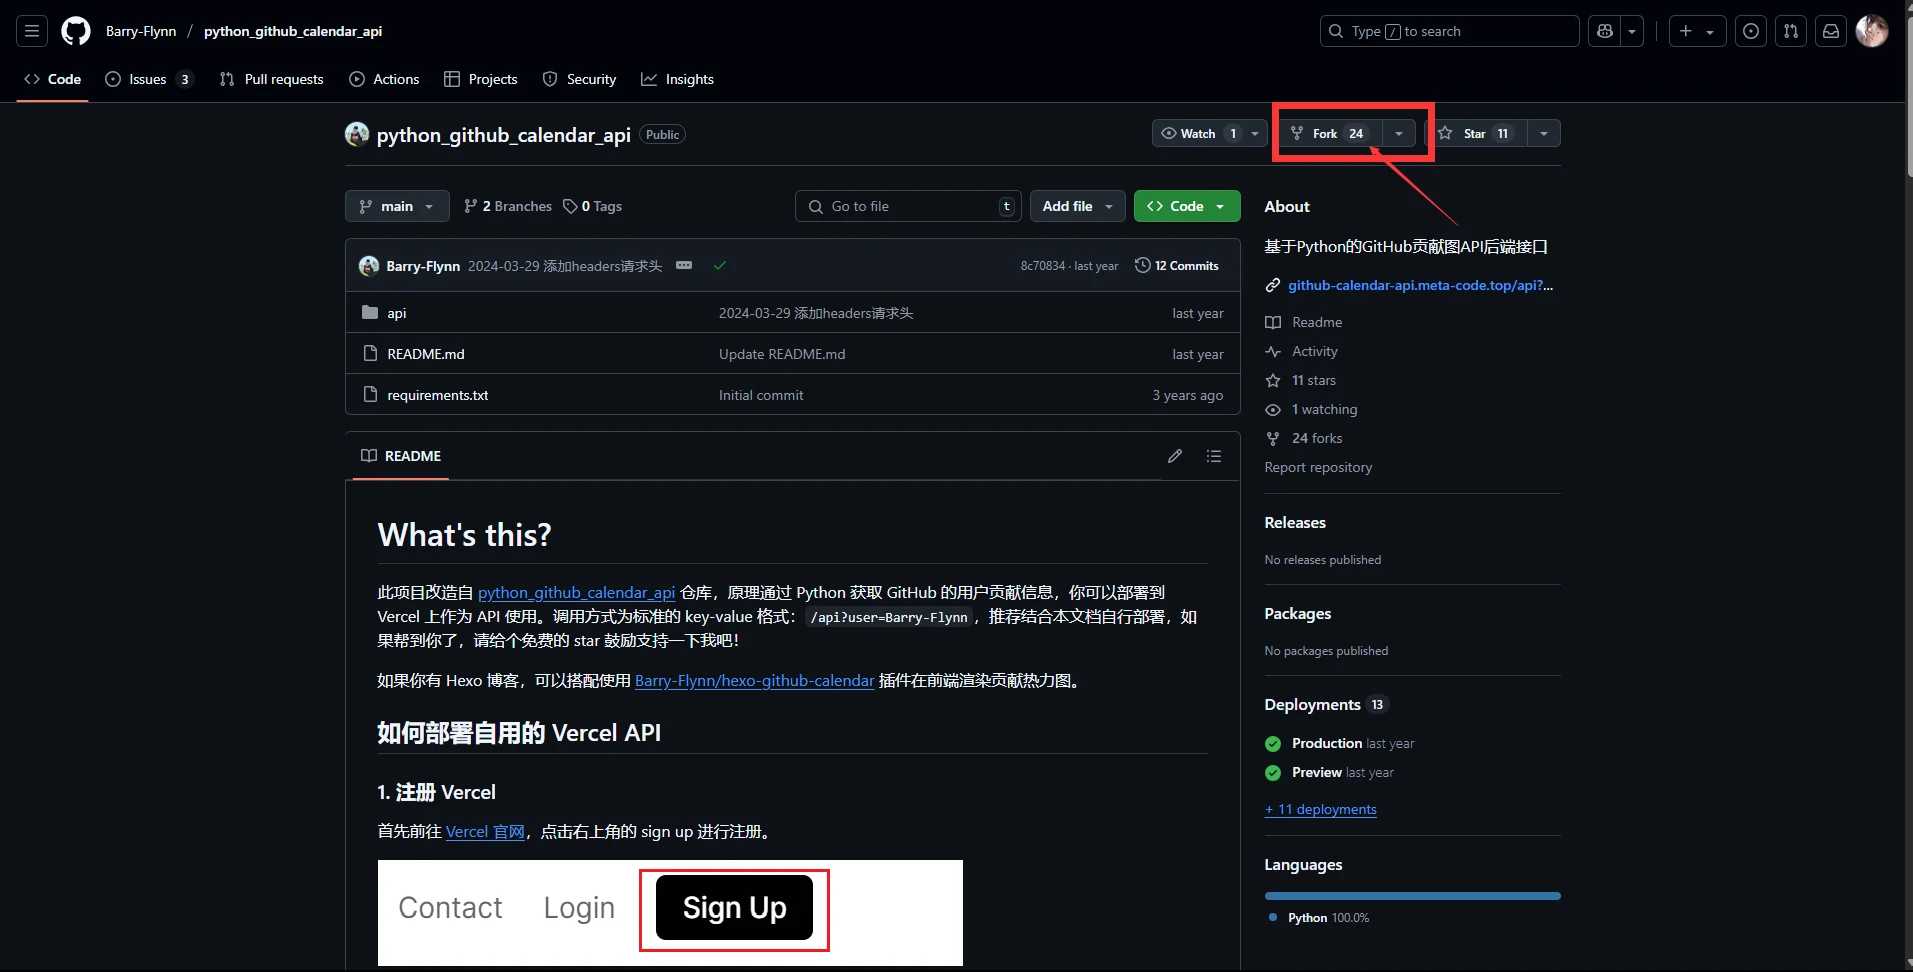
先将 python_github_calendar_api By Barry-Flynn Fork 到自己的Github

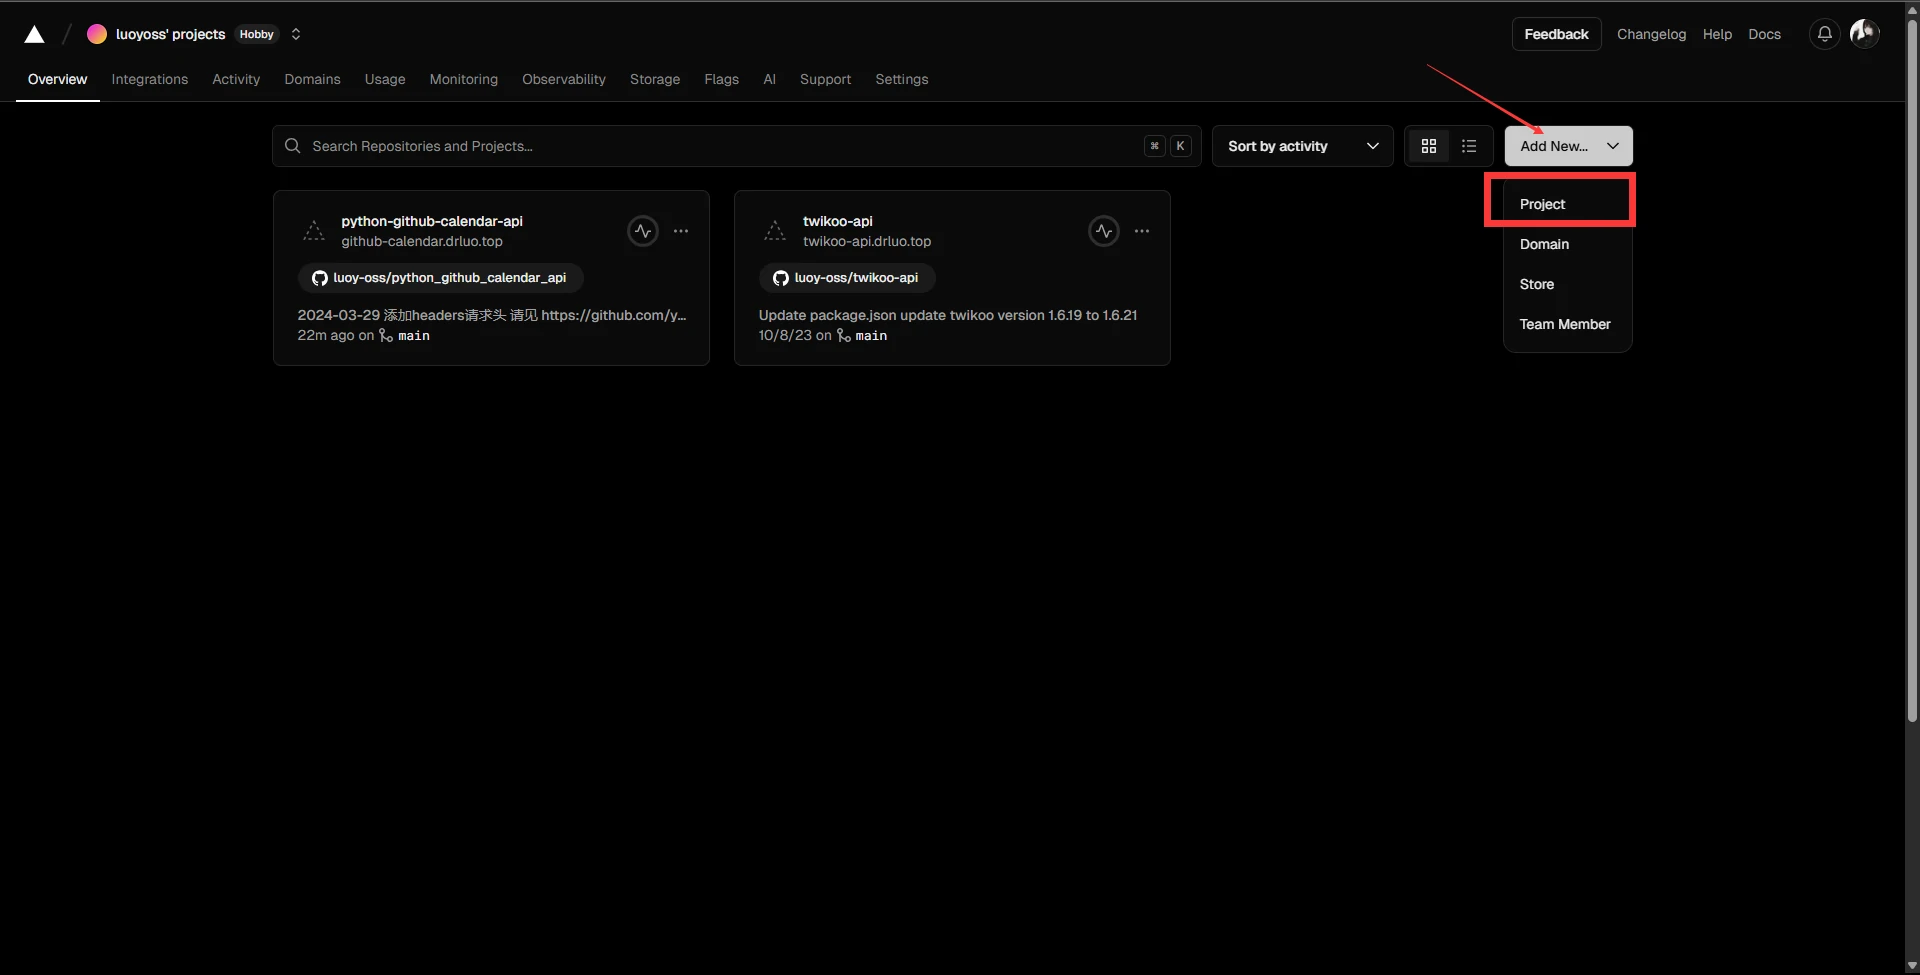
登录 Vercel 后,点击Add New.. => Project

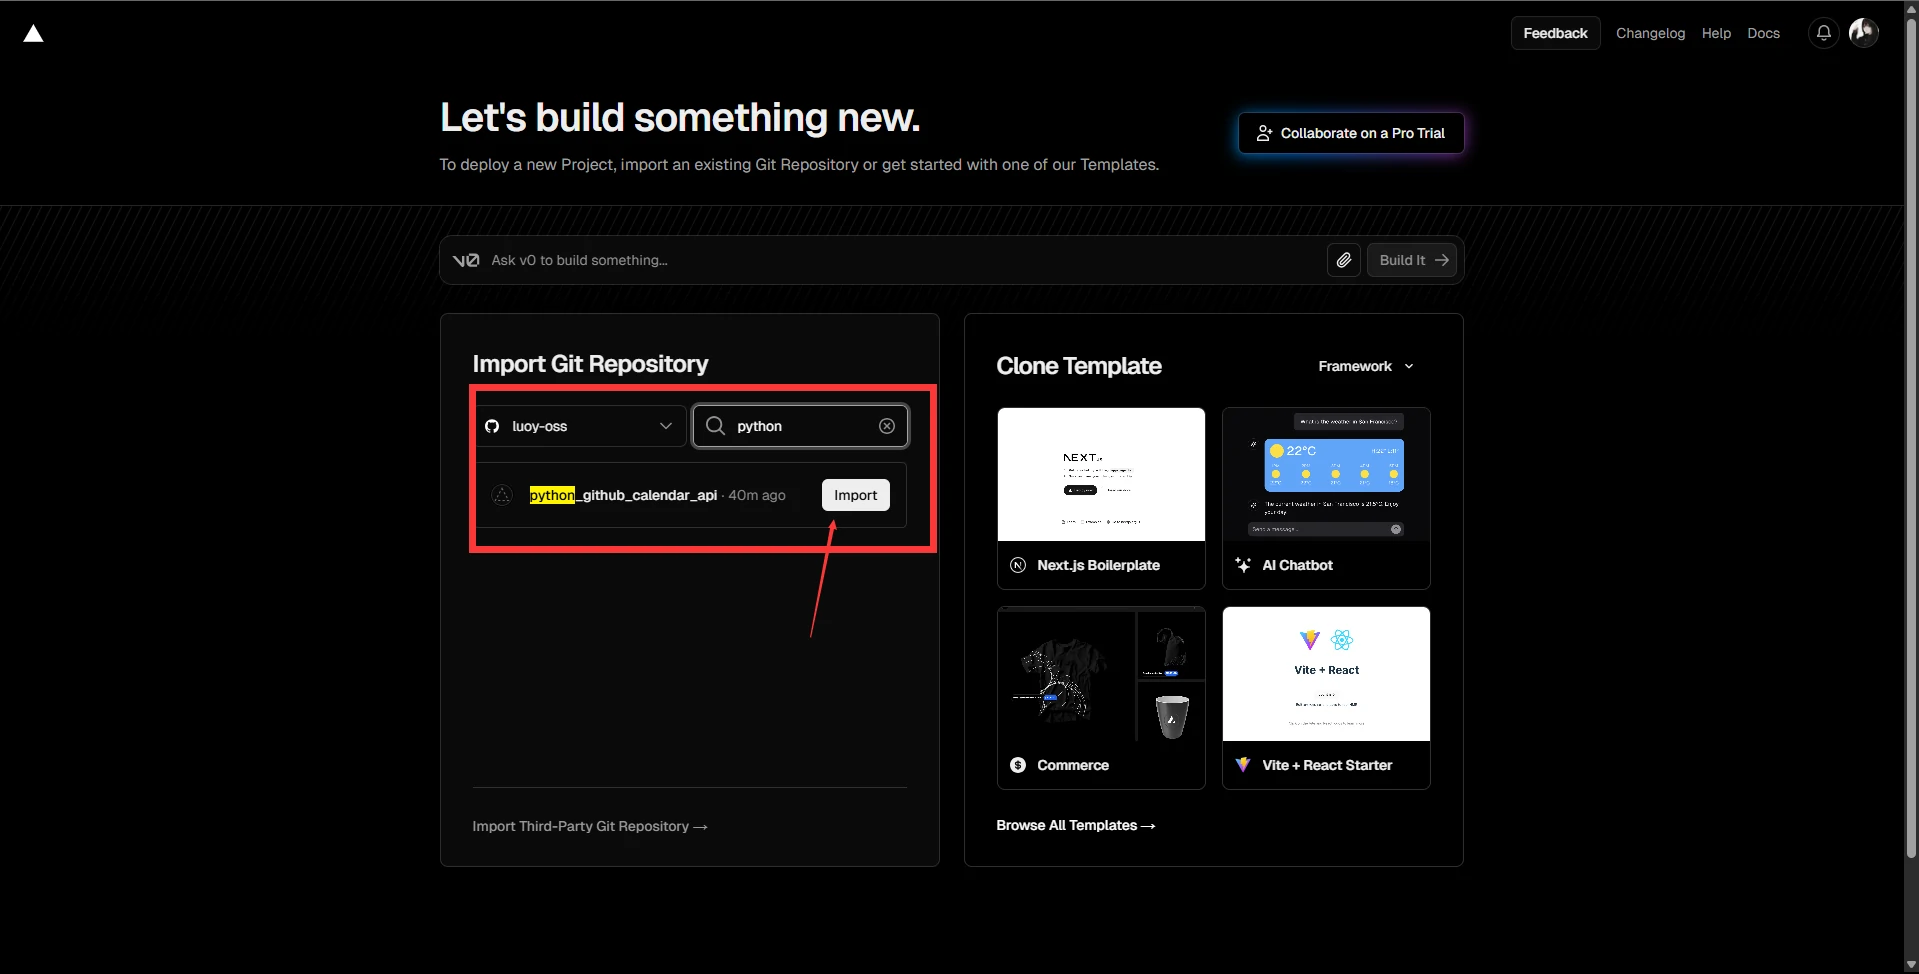
选择导入的项目,当然如果仓库不是很多的话可以直接看到最近创建的仓库,点击 import导入

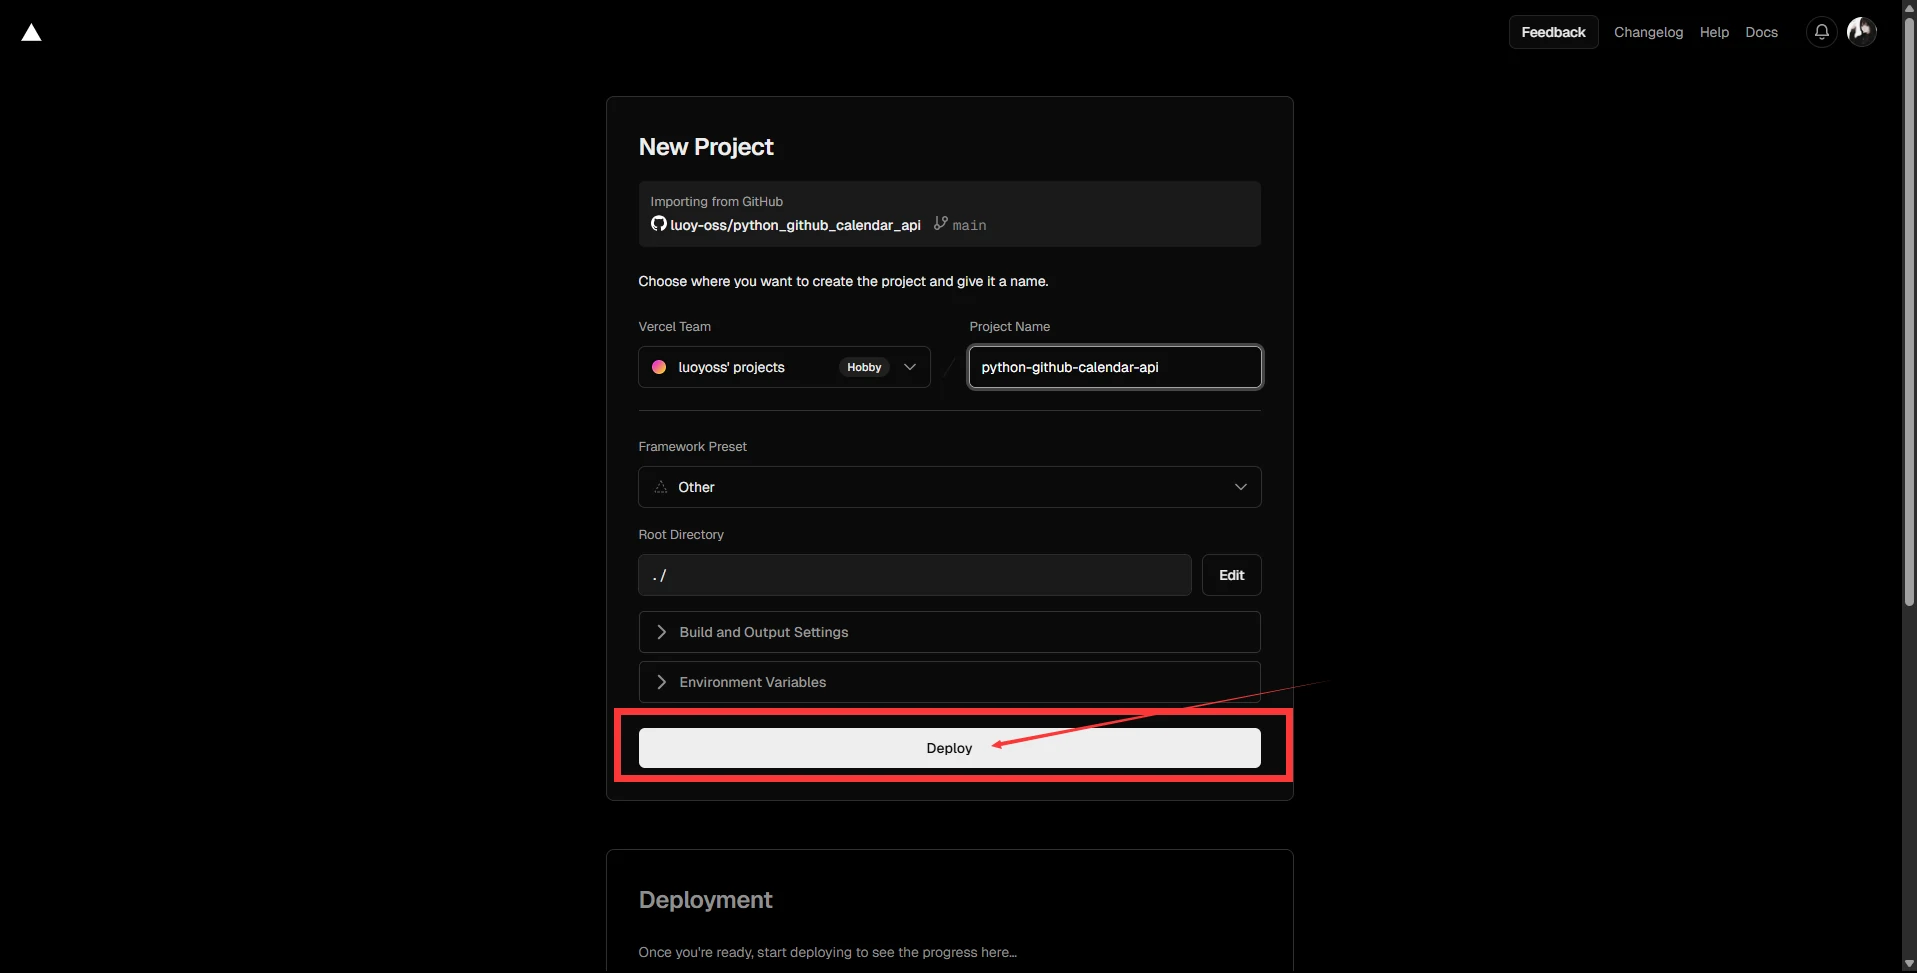
然后点击Deploy 进行部署

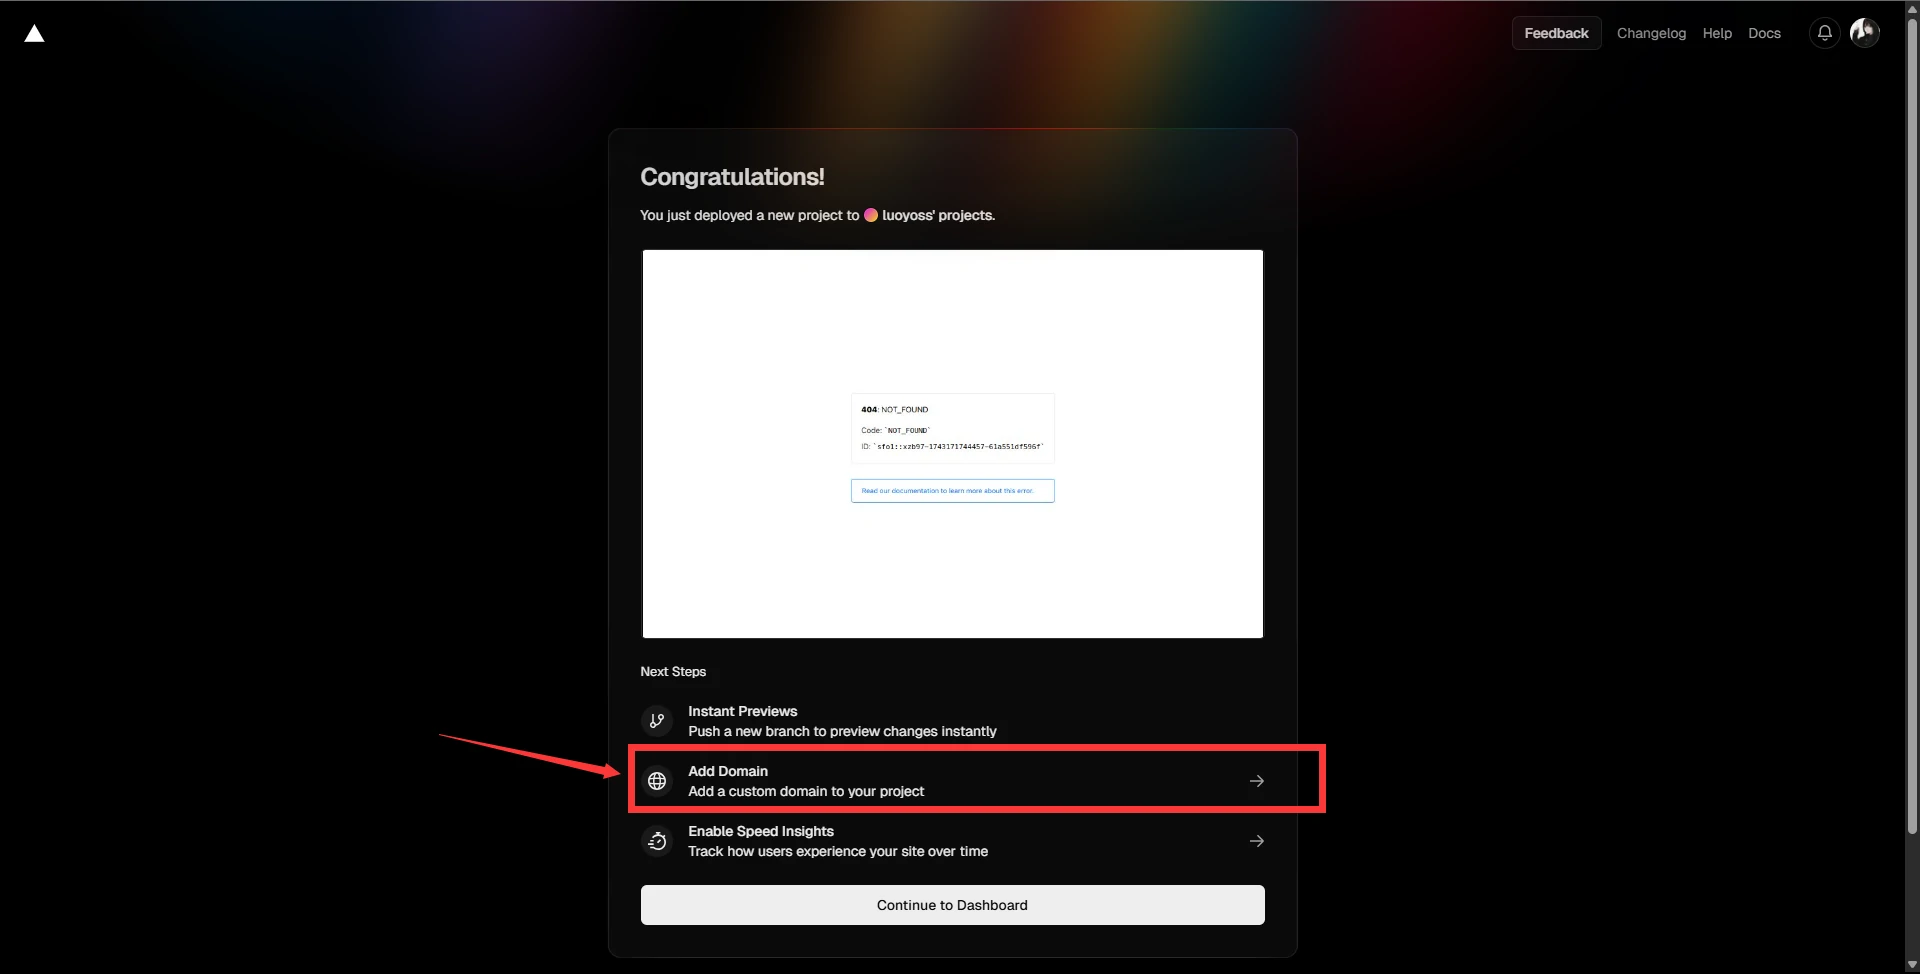
直接点击 Add Domain

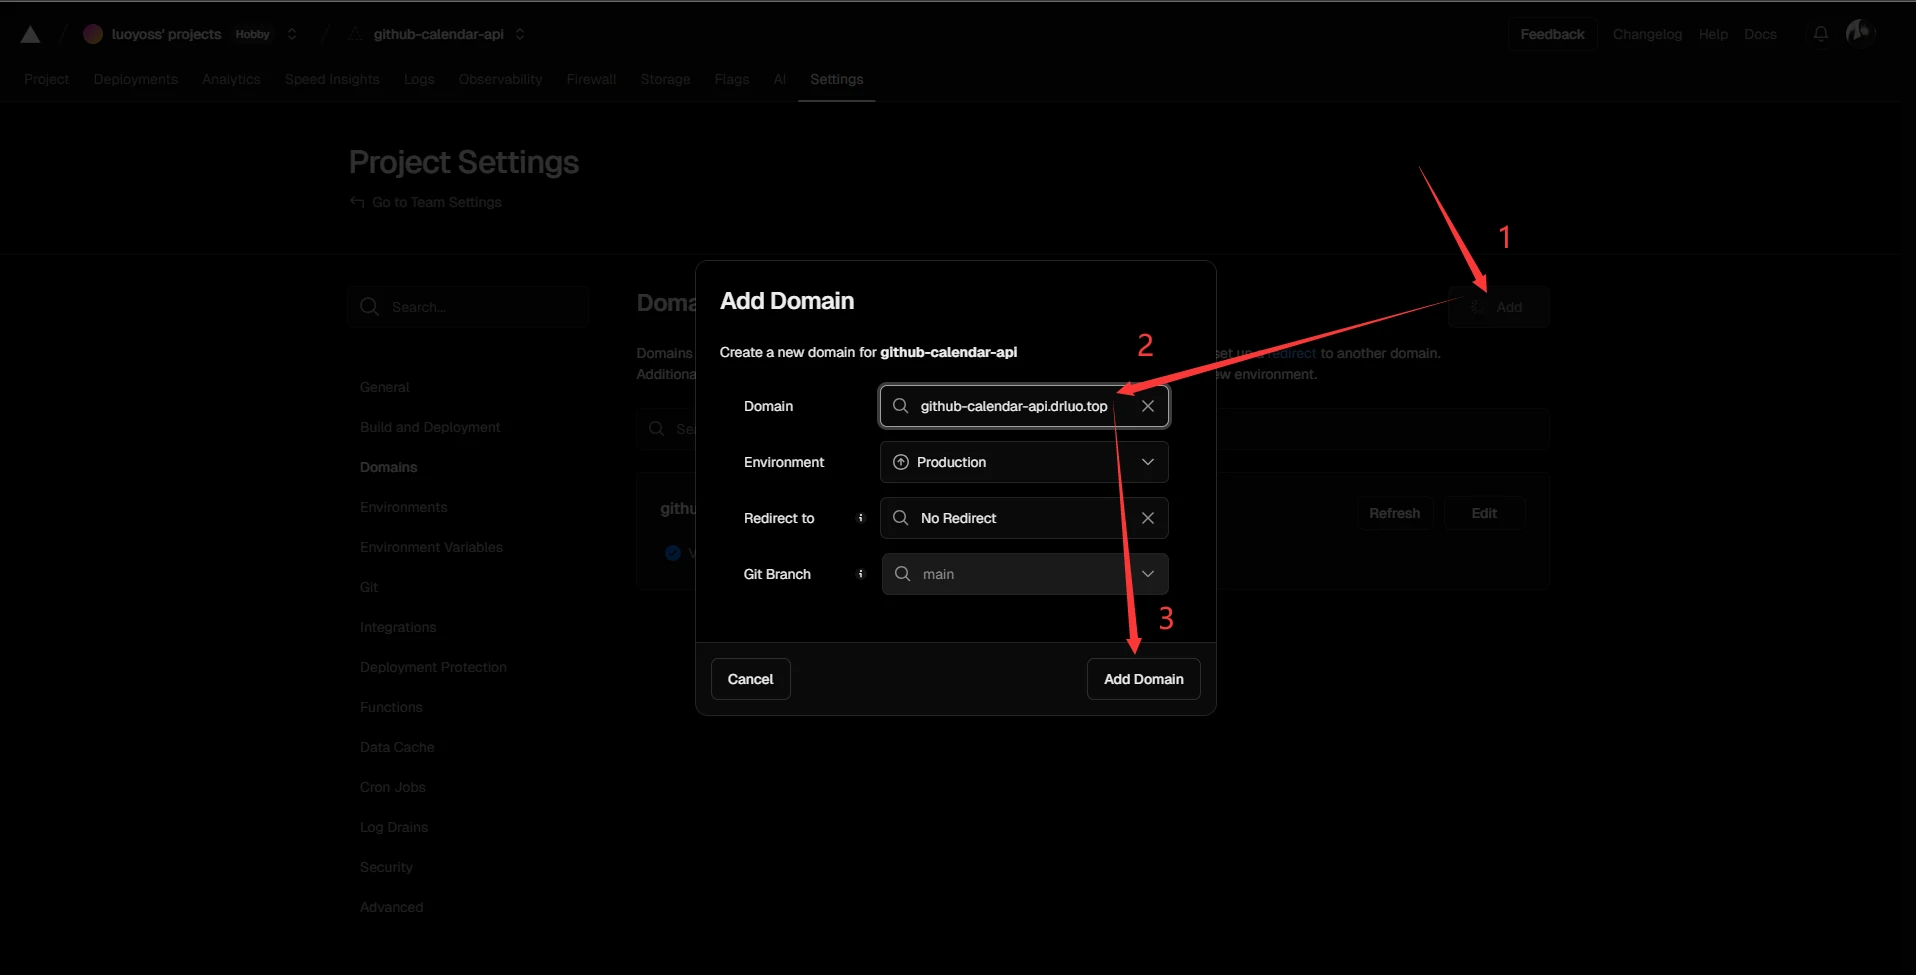
添加你想要的域名,例如此处我要添加的域名为 github-calendar-api.drluo.top

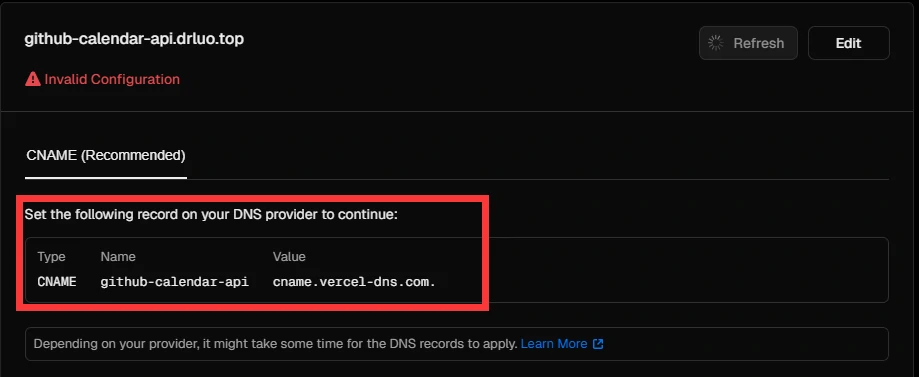
添加后出现提示,要求添加一条CNAME记录,指向cname.vercel-dns.com

按照提示添加一条CNAME记录:

为了提升访问速度也可以使用加速节点 vercel.cdn.yt-blog.top 或者 vercel.cdn.cyfan.top

关于加速节点的介绍可参考文章 推一下 Vercel 加速节点
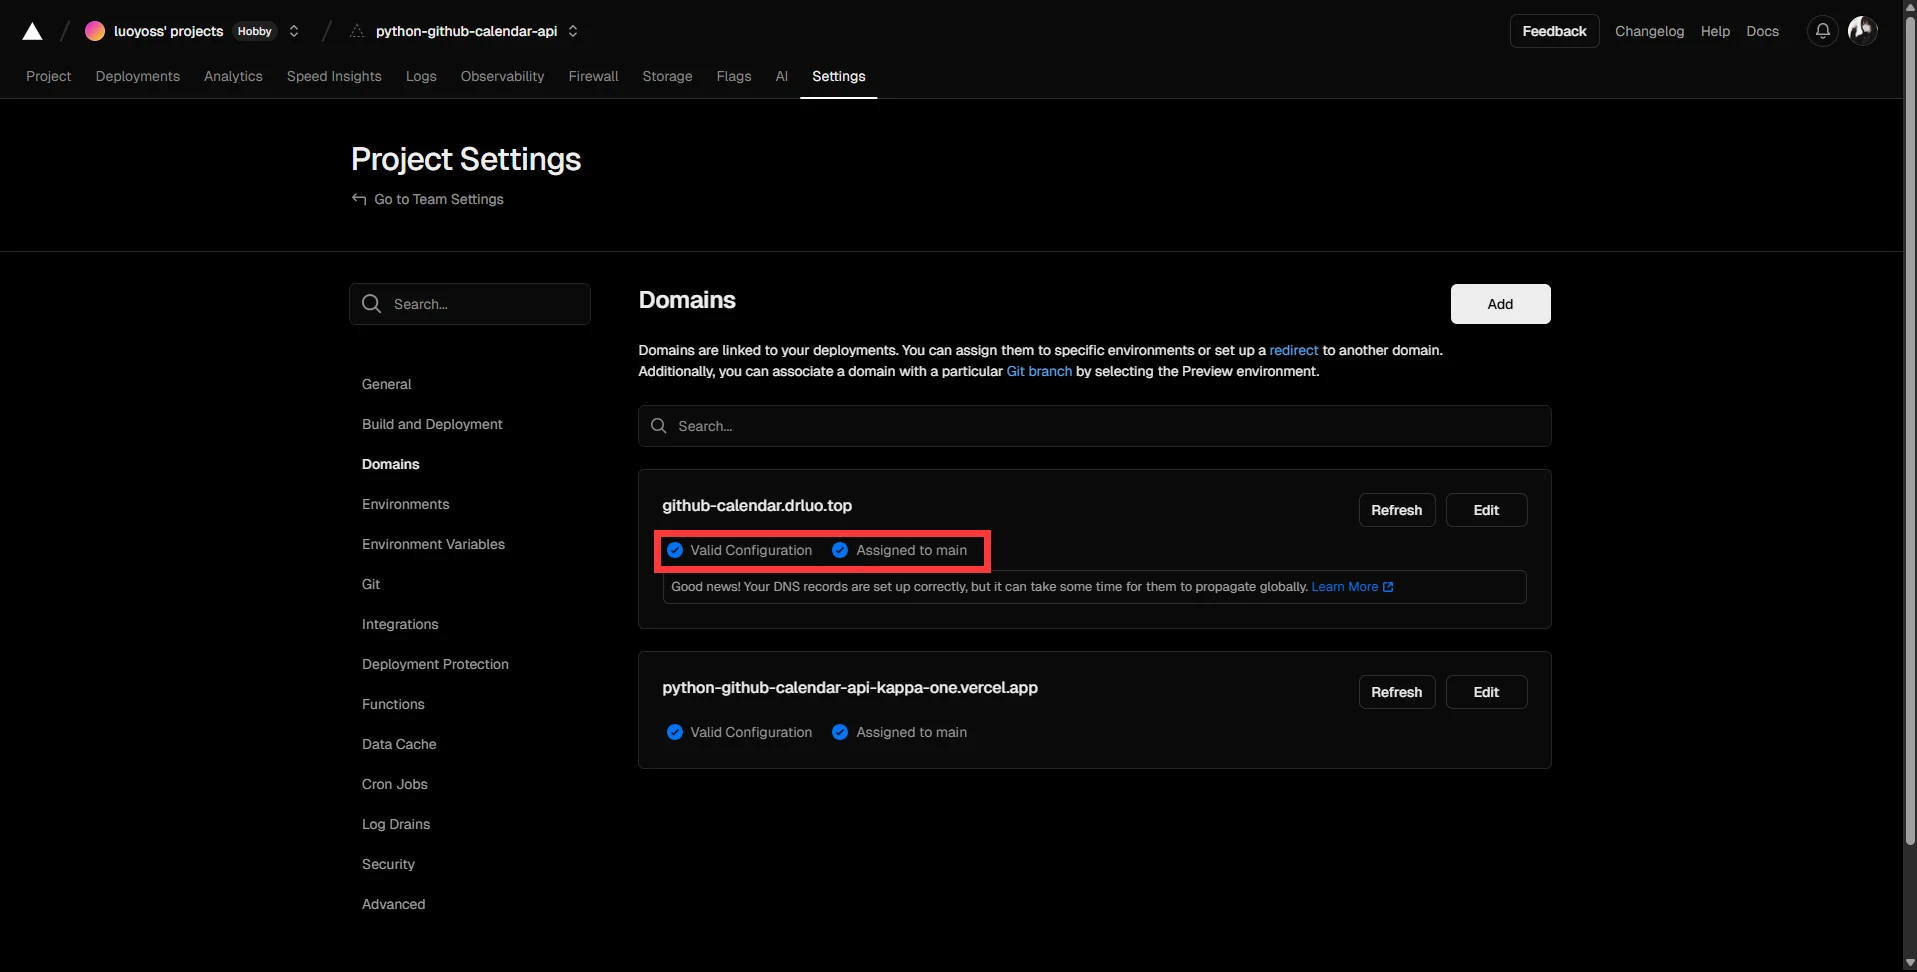
添加解析记录后页面会自动刷新,等待片刻校验即可通过

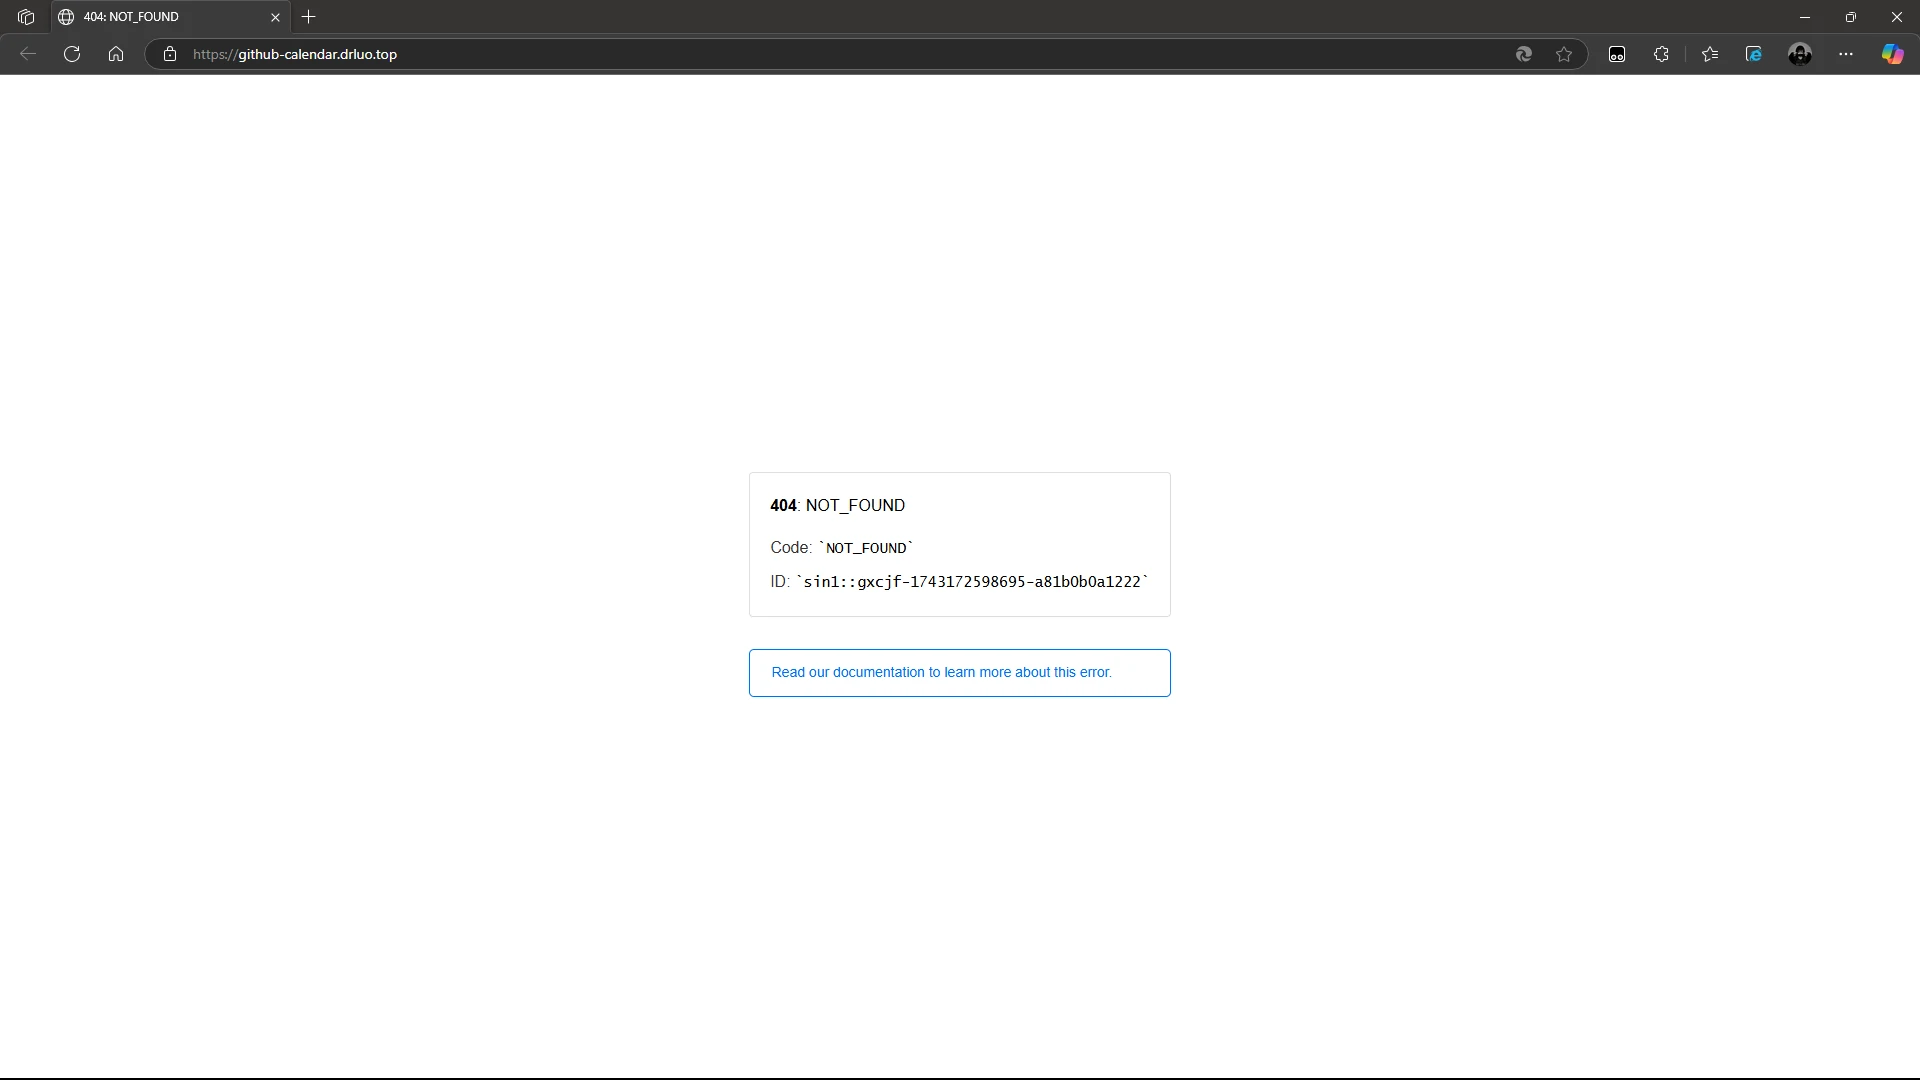
检验通过后可直接点击域名进行预览(提示404错误页面,可以忽略,我们实际访问的路径其实是 /api?user=xxxxx):

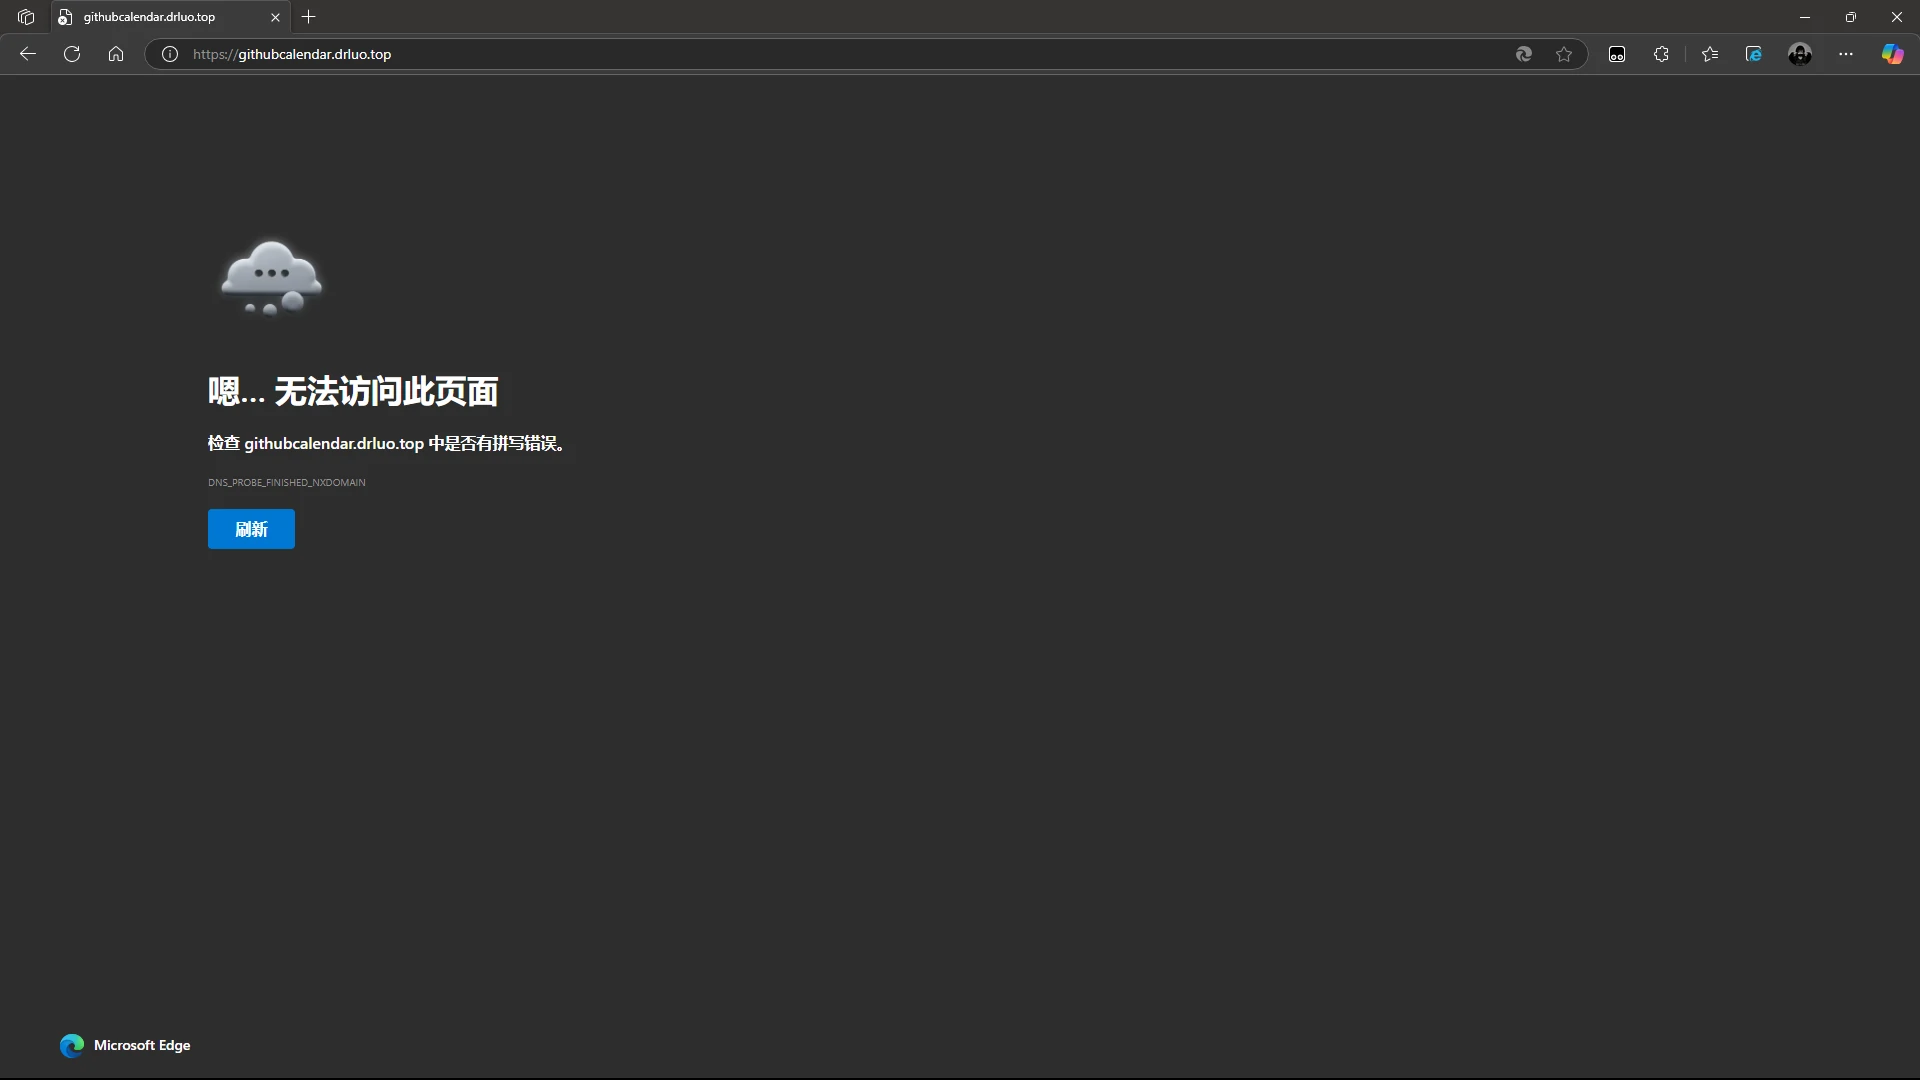
如果刷新多次访问均提示无法访问可尝试更换其他域名

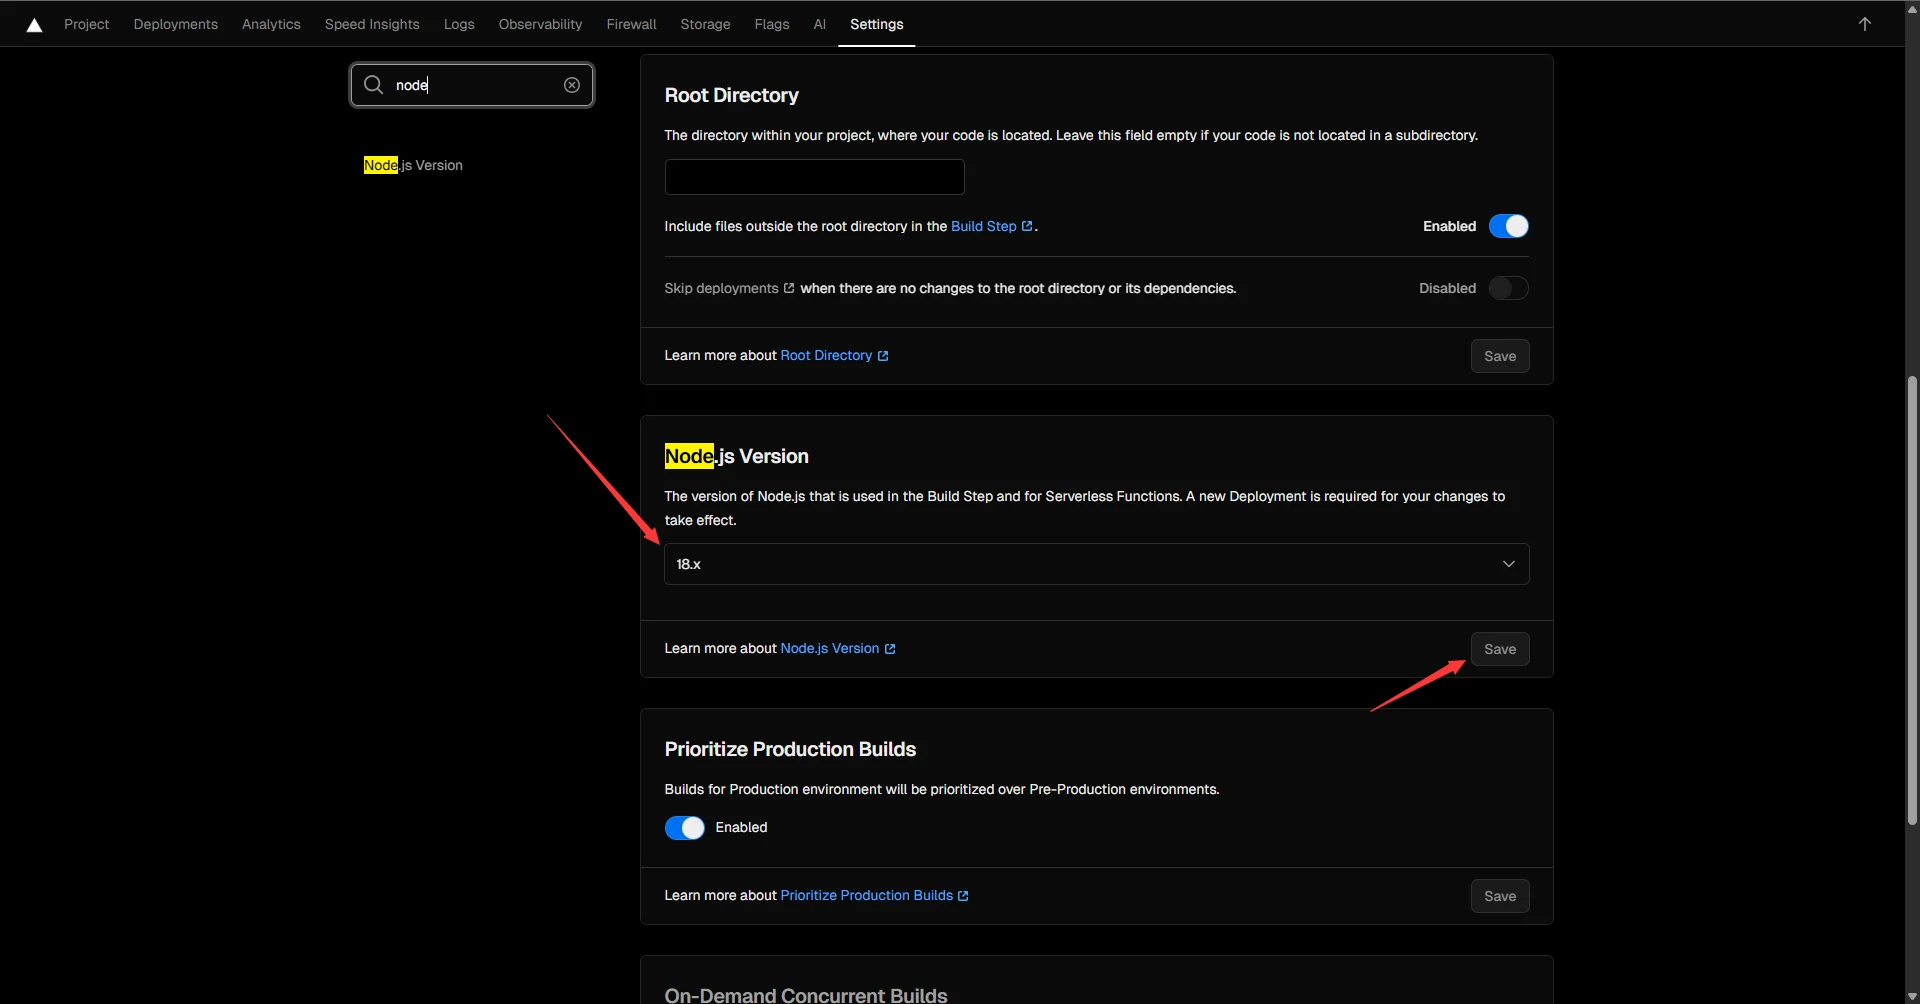
如果依然提示 INTERNAL_SERVER_ERROR 500错误,错误码 FUNCTION_INVOCATION_FAILED则说明当前
Node的版本不支持。
将默认Node版本从20.x 改为 18.x:

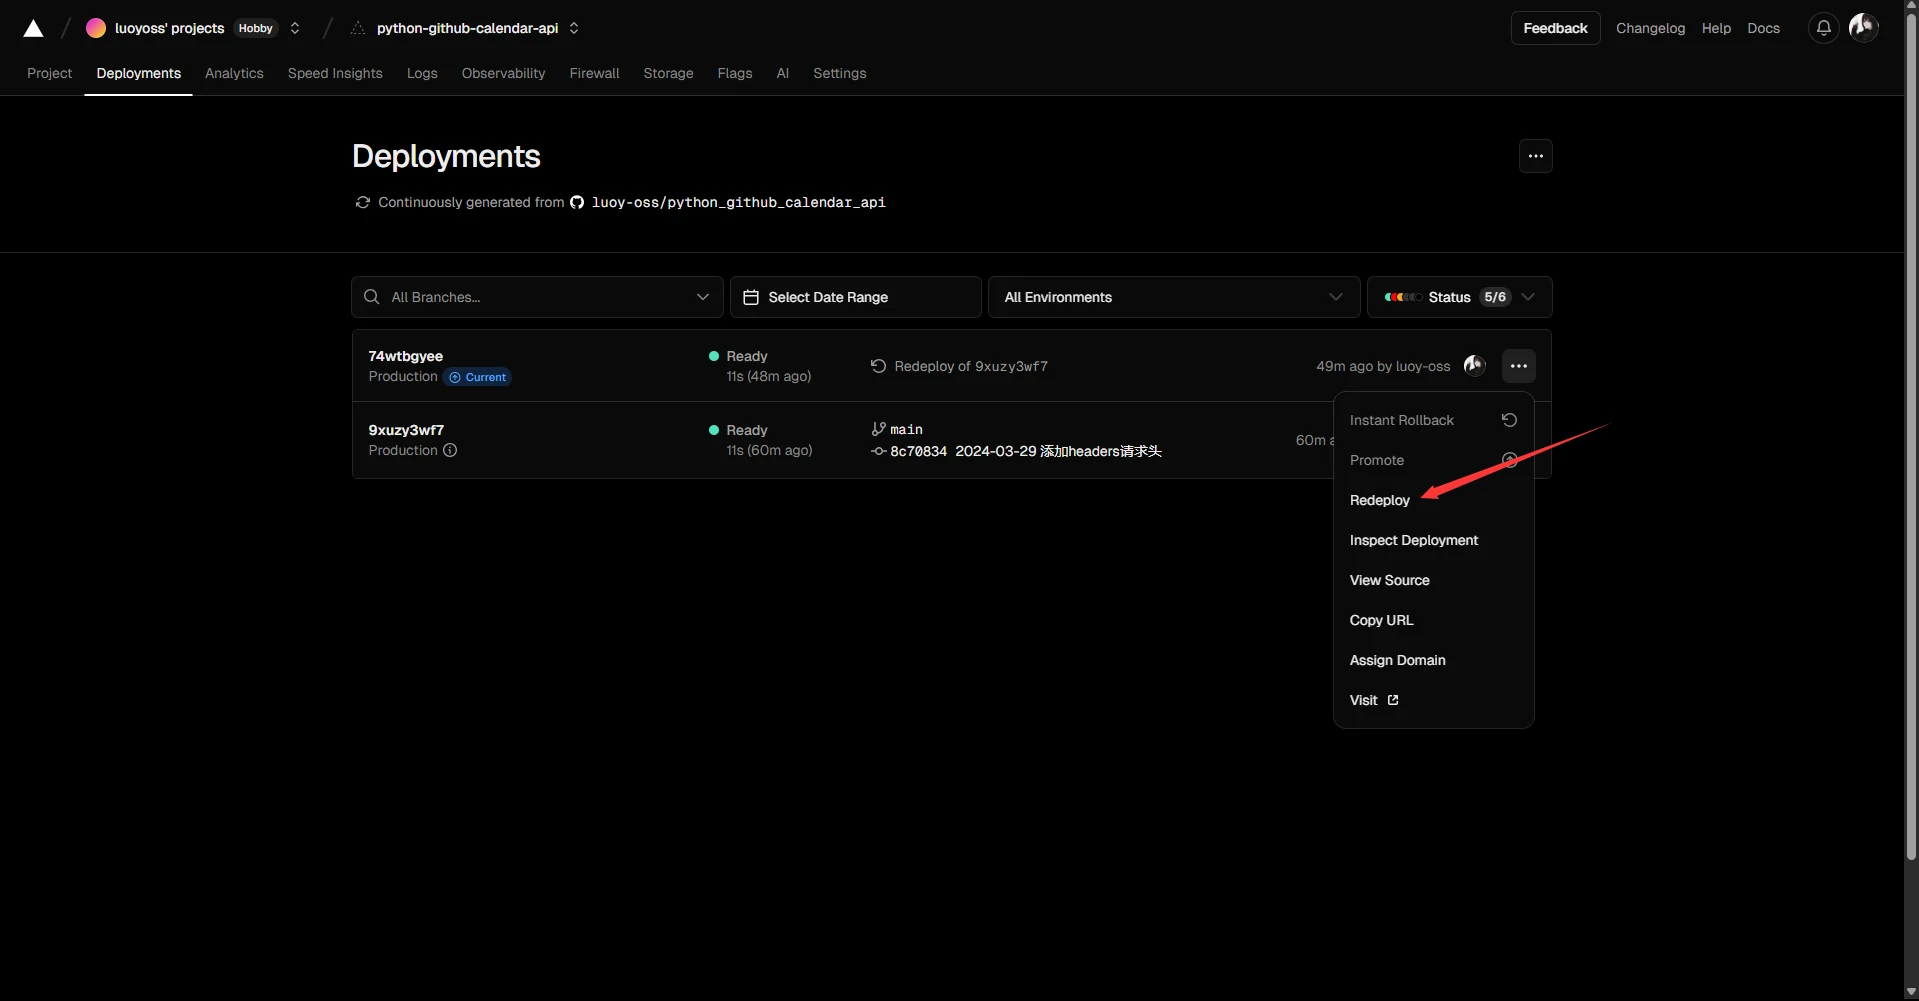
保存后 打开 Deployments 页面 选择 Redeploy 进行重新部署

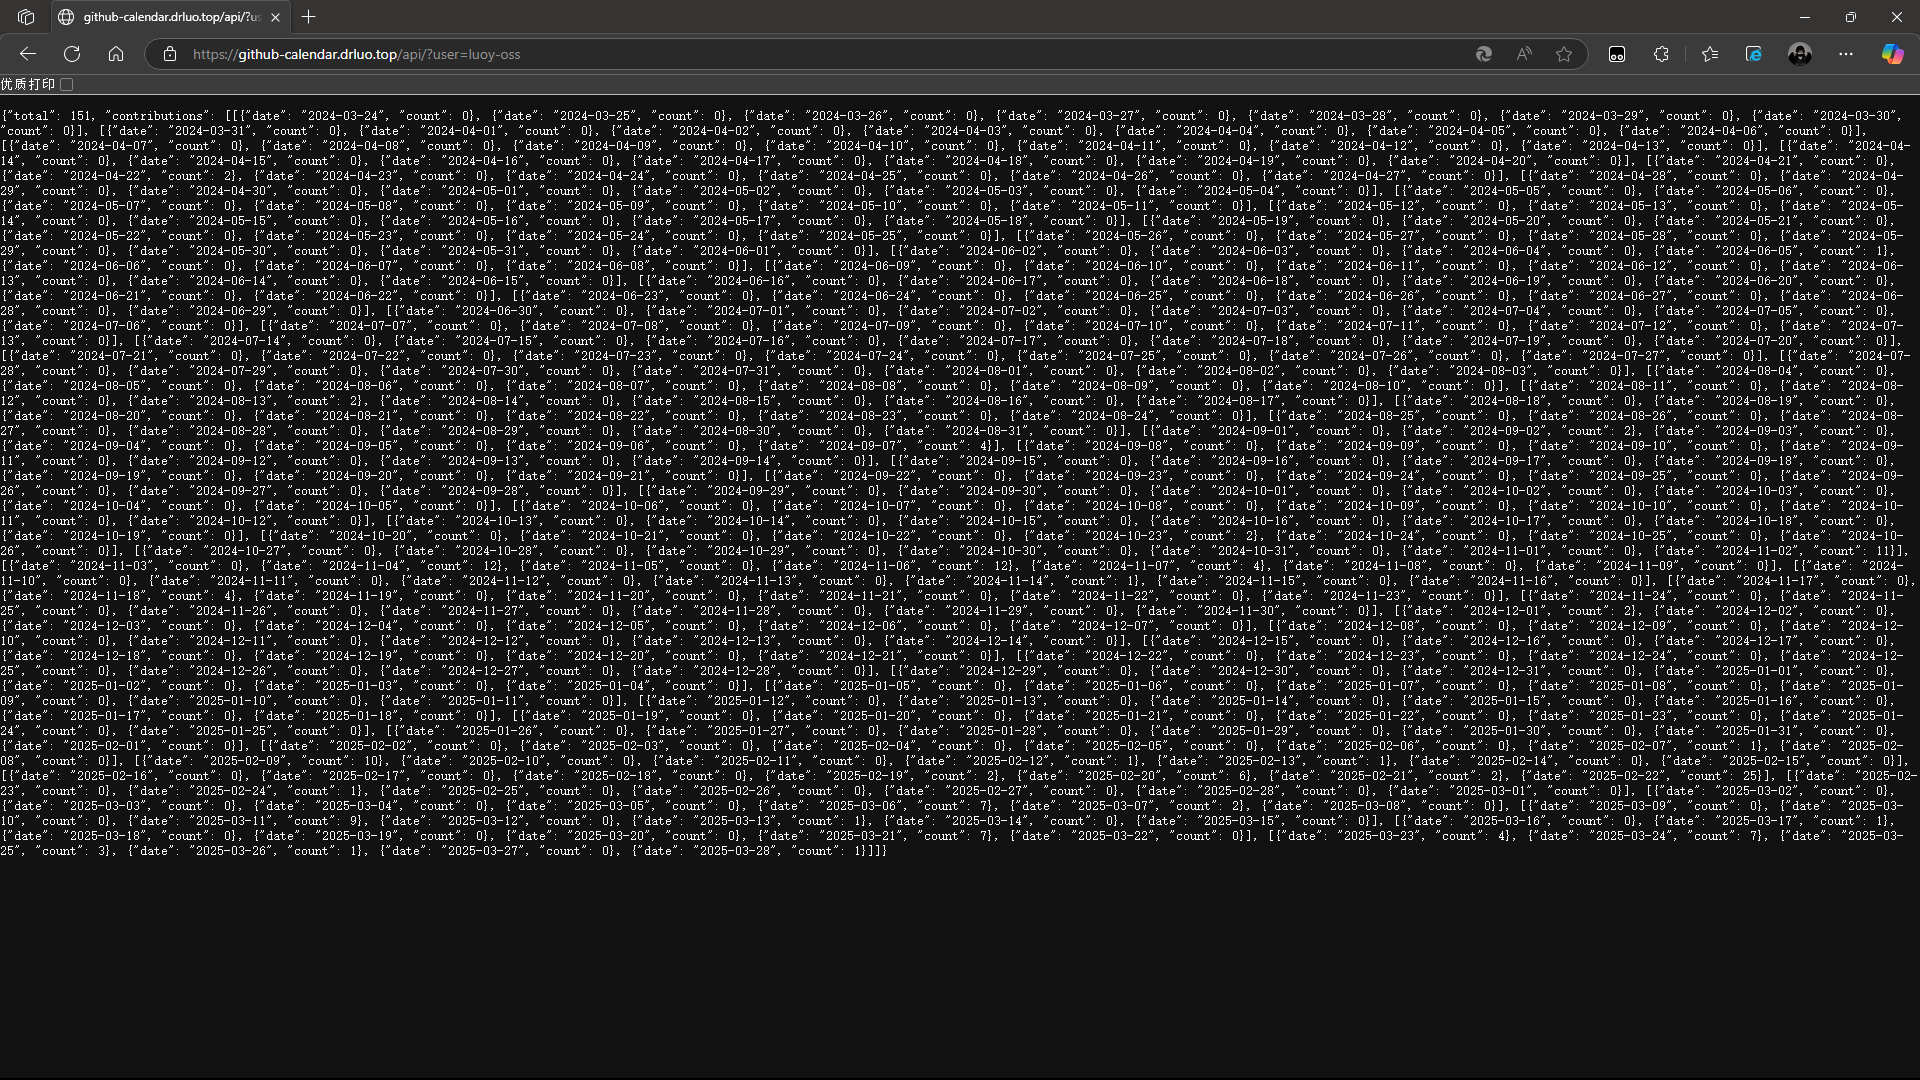
重新部署成功后再次刷新刚才的页面(注意添加user参数,例如:github-calendar.drluo.top/api/?user=luoy-oss)
访问后可以显示数据即代表部署完成:

然后修改配置文件就可以使用你自己的API了
1 2
| githubcalendar: api: https://github-calendar.drluo.top/api
|
最后
有什么不懂的,欢迎加群询问哦!