


I’ve recently upgraded my home WiFi setup with Ubiquiti (UniFi) access points (I bought a U7 Pro AP). All is good, except that UniFi doesn’t support WPS. On the other hand, my old Canon TS3150 printer can only be setup using WPS. Now, it wouldn’t have been an issue, had I not changed the SSID. The easiest workaround seems to be setting up a WiFi that has the same SSID and password, and supports WPS (so the printer can connect to it).
Some people on the Internet have suggested buying a cheap router/AP that supports WPS, which seems like a waste to me. Not only it costs minimally £30 or so, but also it’ll literally become an e-waste one minute later. Bad for the environment!
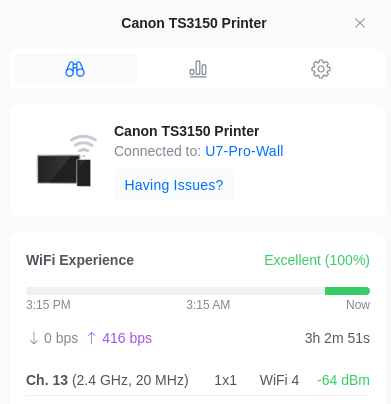
With the help of Gemini 2.0, and this post on StackExchange, I’ve managed to open a Hotspot by using SoftAP via hostapd that supports WPS (WiFi Protected Setup), and my printer is now happily connected to the WiFi network created by my UniFi AP.
I’m using Fedora Kinoite on my desktop, and hostapd is not Flatpak’d, therefore rpm-ostree is needed to get hostapd installed:
sudo rpm-ostree install hostapdThen create this hostapd.conf file:
interface=wlo1  # check the actual device name, ip link
ieee80211d=1  # make sure the frequency conforms to the regulation
country_code=GB  # United Kingdom
eap_server=1
ap_setup_locked=1
ssid=<ACTUAL SSID>
channel=1
hw_mode=g
wpa=2
wpa_key_mgmt=WPA-PSK
rsn_pairwise=CCMP
wpa_passphrase=<ACTUAL PASSWORD>
wps_state=2
ap_max_inactivity=300
auth_algs=3
ctrl_interface=/var/run/hostapd
config_methods=label virtual_display virtual_push_button keypad
Now you need to first switch off the AP/WiFi so there is no conflict. Then stop NetworkManager and start hostapd,
sudo systemctl stop NetworkManager
sudo hostapd hostapd.conf
In a different Terminal window/tab,
sudo hostapd_cli wps_pbcImmediately, press the WPS button on the printer (or other devices that need to be setup in this way). You can query whether WPS has been successful by running
sudo hostapd_cli wps_get_statusA successful setup should have a message like:
Selected interface 'wlo1'
PBC Status: Disabled
Last WPS result: Success
Peer Address: 34:XX:XX:XX:XX:00
Once it’s done, you can turn off the SoftAP (pressing Ctrl+C in the terminal window where hostapd is running), switch back the normal AP/WiFi, and start NetworkManager again – sudo systemctl start NetworkManager
此内容由惯性聚合(RSS阅读器)自动聚合整理,仅供阅读参考。 原文来自 — 版权归原作者所有。