








fastapi集成google auth登录
流程设计
1. 启动 Google 登录流程
- 前端:用户点击 Google 登录按钮。
- 请求:前端发起请求到
/user/login/google。
2. 后端处理 /user/login/google 请求
- 后端生成一个重定向到 Google 认证服务器的 URL
- 后端将此 URL 发送给前端。
3. 前端重定向
- 前端接收到 URL 后,重定向用户到 Google 的登录页面。
4. 用户登录并授权
- 用户在 Google 页面上授权你的应用。
5. Google 重定向回你的应用
- Google 将用户重定向回你的应用,并在查询参数中附加一个授权码(code)。
6. 前端发送授权码
- 前端:捕获此授权码并发送到
/user/auth/google?code=${code}。 - 请求:
POST /user/auth/google?code=${code}。
7. 后端处理 /user/auth/google?code=${code} 请求
- 后端接收授权码,并使用它向 Google 请求访问令牌。
- 使用此令牌,后端可以从 Google 获取用户信息(如用户名、邮箱等)。
- 后端检查此用户是否已在数据库中。如果不在,创建一个新用户。
- 后端生成一个会话或令牌(如 JWT),并将其发送回前端。
8. 前端接收令牌
- 前端接收令牌并存储在本地(如 localStorage、sessionStorage 或 cookie 中)。
9. 前端使用令牌
- 对于后续请求,前端将此令牌附加到请求的授权头中,以验证用户身份。
10. 后端验证令牌
- 对于需要身份验证的后续请求,后端验证传入的令牌,以确认用户的身份。
获取google密钥
创建项目
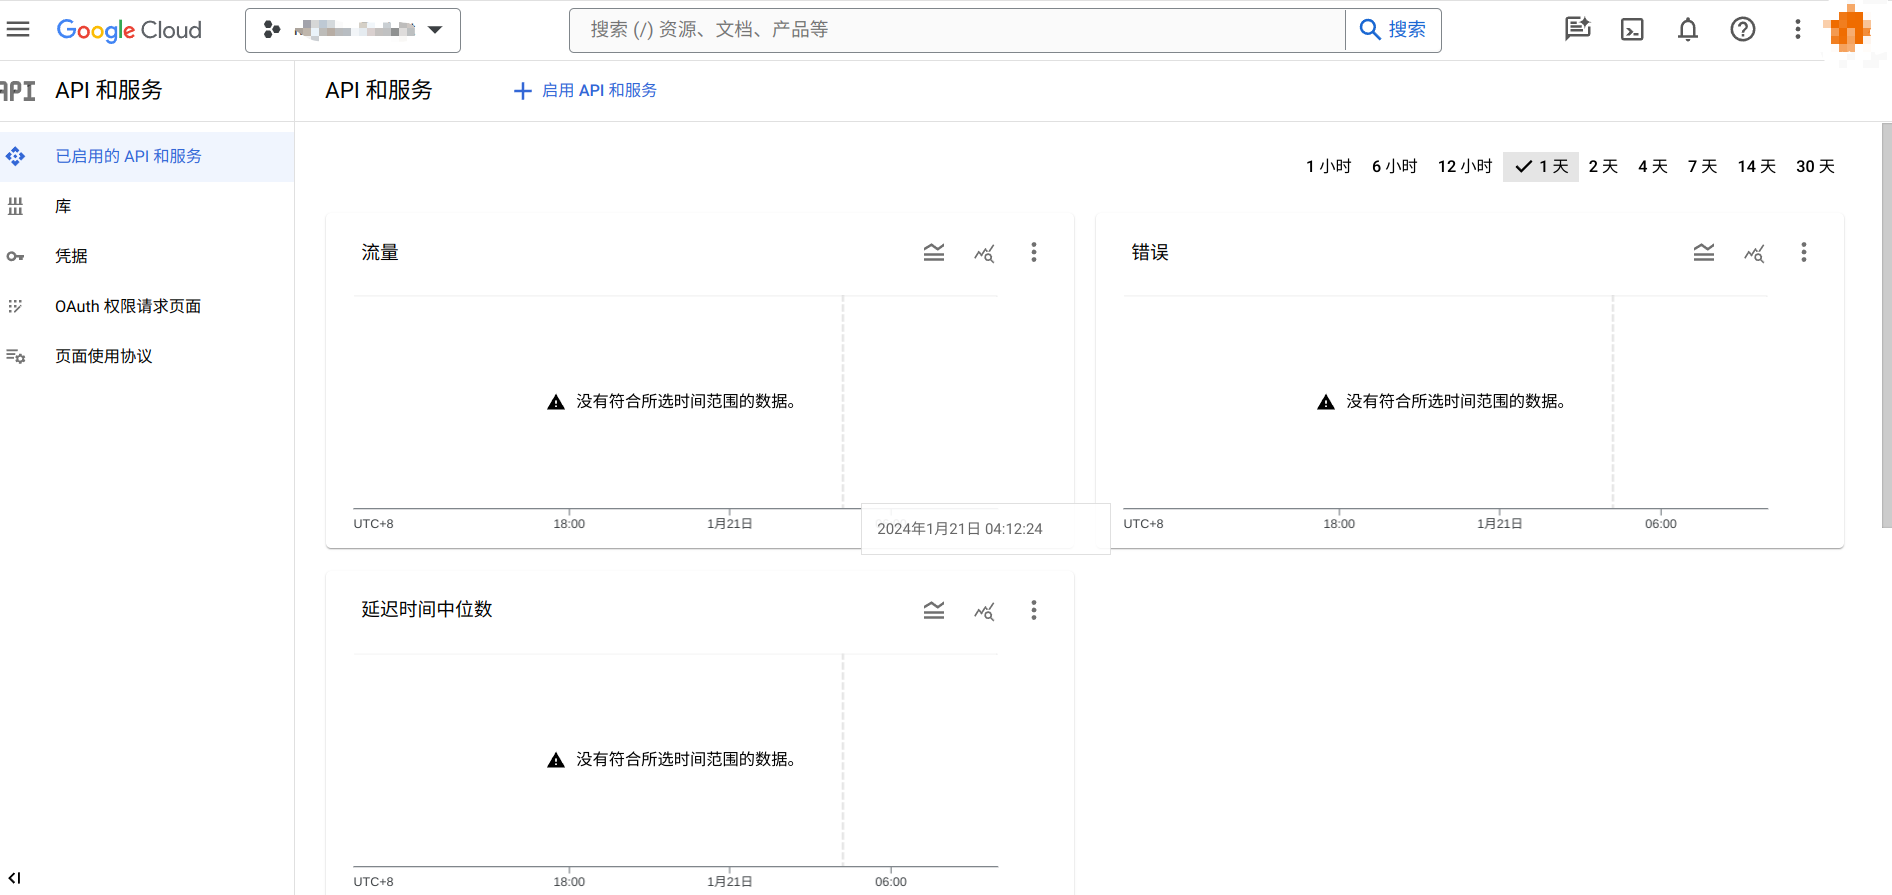
首先前往Google Cloud Console ( https://console.cloud.google.com/ ) 并创建一个新项目(如果尚未创建),然后在“API 和服务 > 仪表板”部分中启用“Google+ API”。你会在这样一个界面。
如果找不到的话,请先找到初始页面,选择一个项目,然后你会看到这样一个页面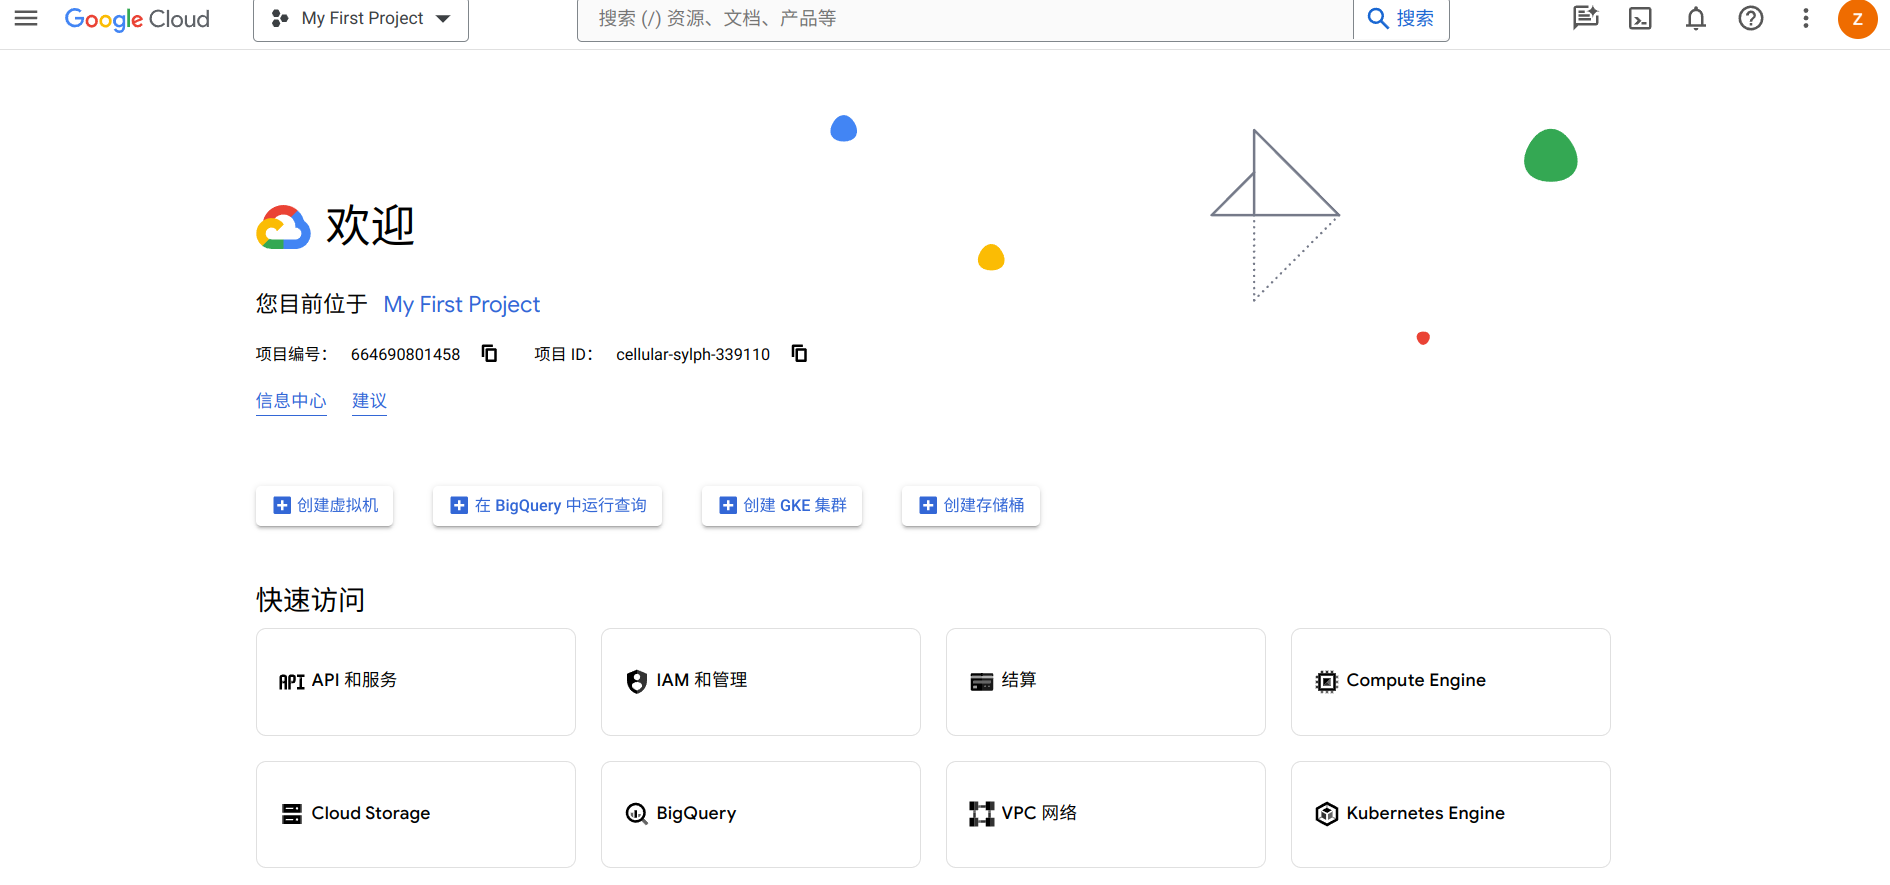
创建OAuth权限
按照如图顺序点击
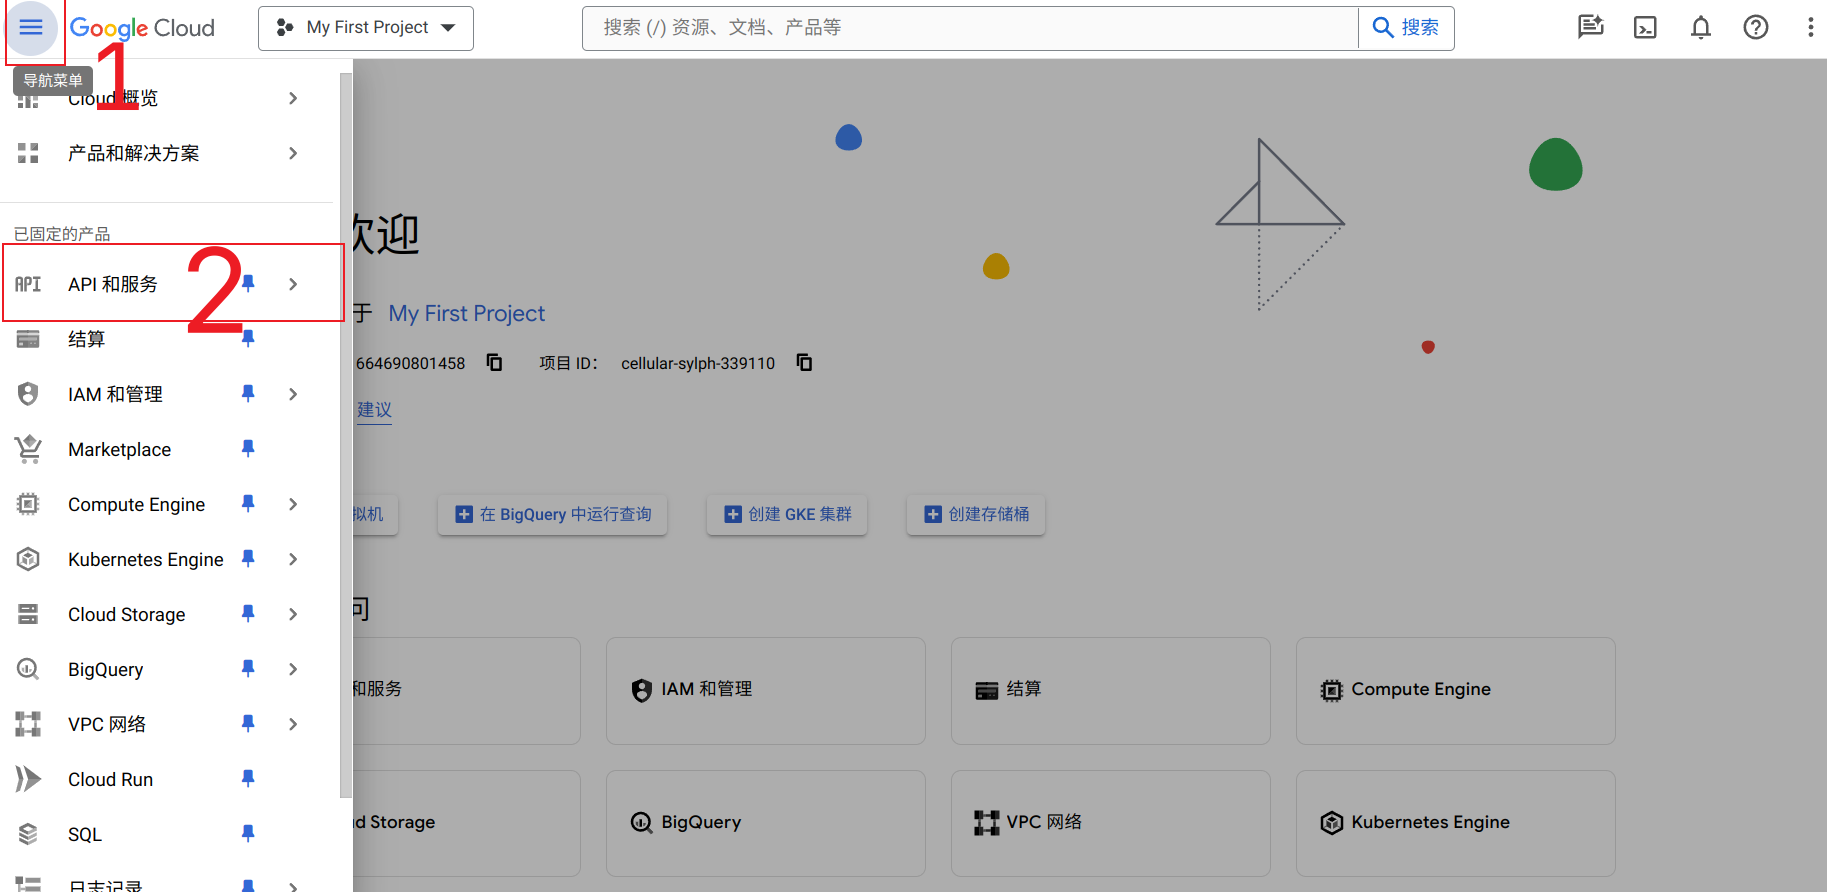
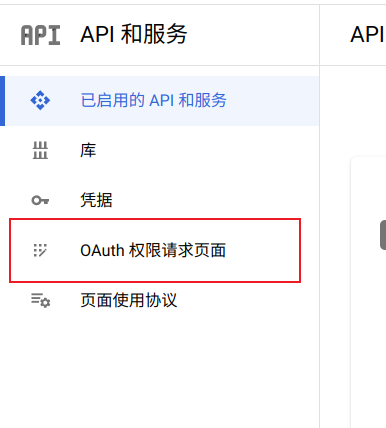
进入之后就到了前面的页面,然后点击 OAuth权限请求页面
 接下来我们会进入注册应用界面,首先填入的应用名称还有你的邮箱
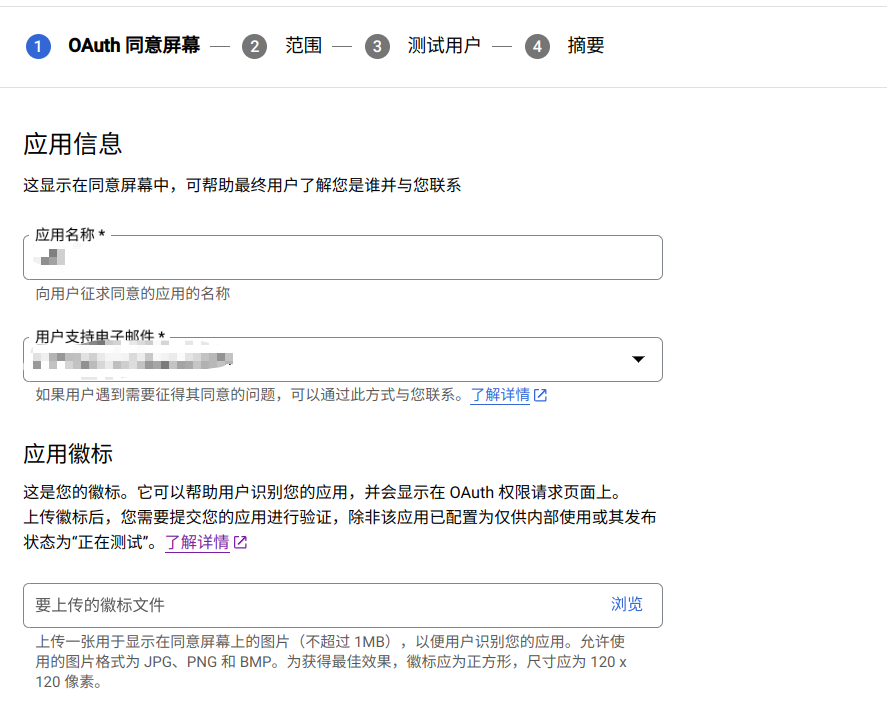 在最下面填上你的开发者信息,保存并继续
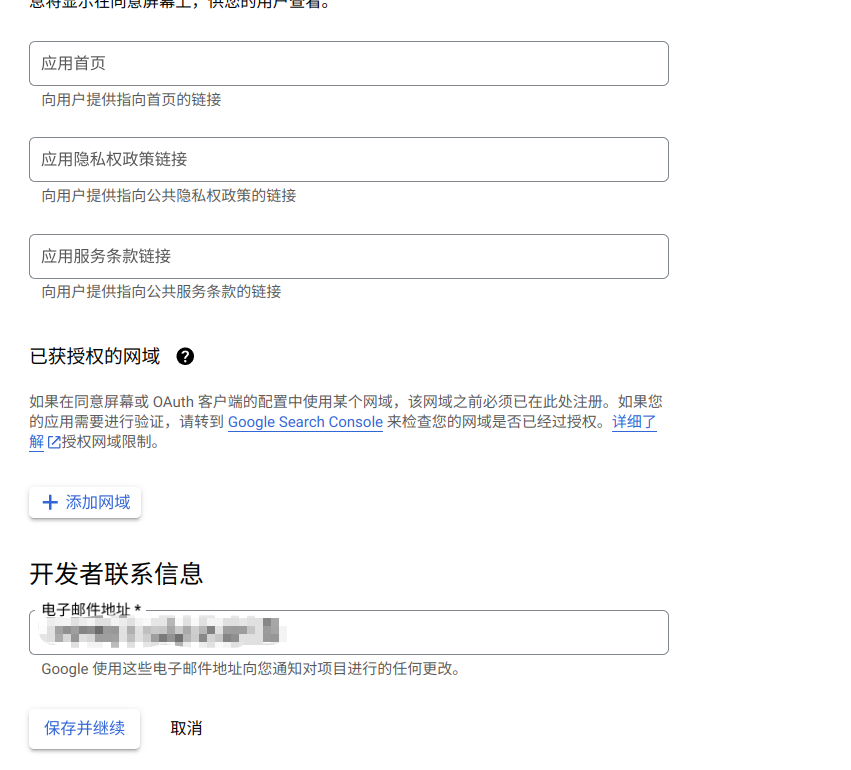
一路向下,可以填入一些限制,我就直接继续了。下面添加测试用户,填入google账号的邮箱即可
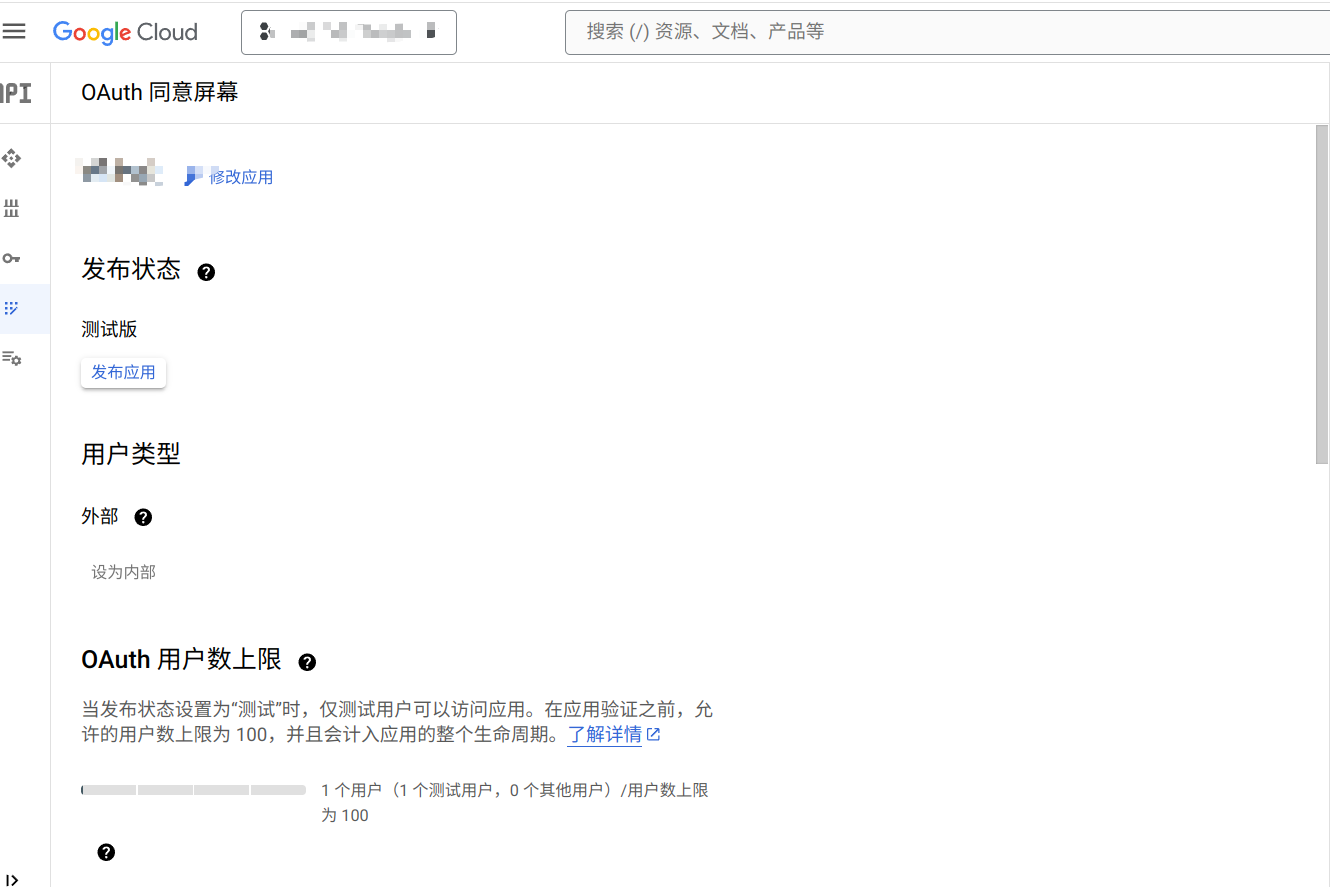
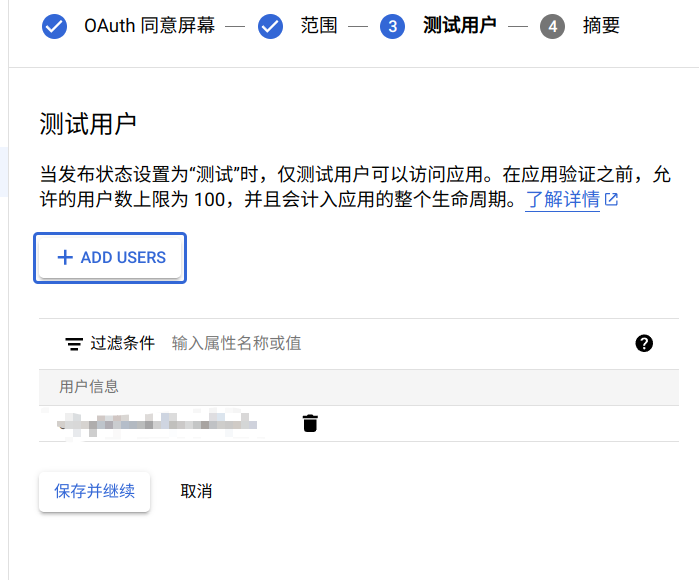 保存,在摘要再检查一遍以后保存创建即可。接下来你会看到这样的页面,这样子我们的OAuth就设置好了。
创建凭据
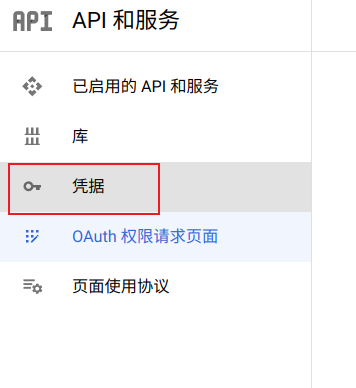
我们下面创建应用,点击凭据
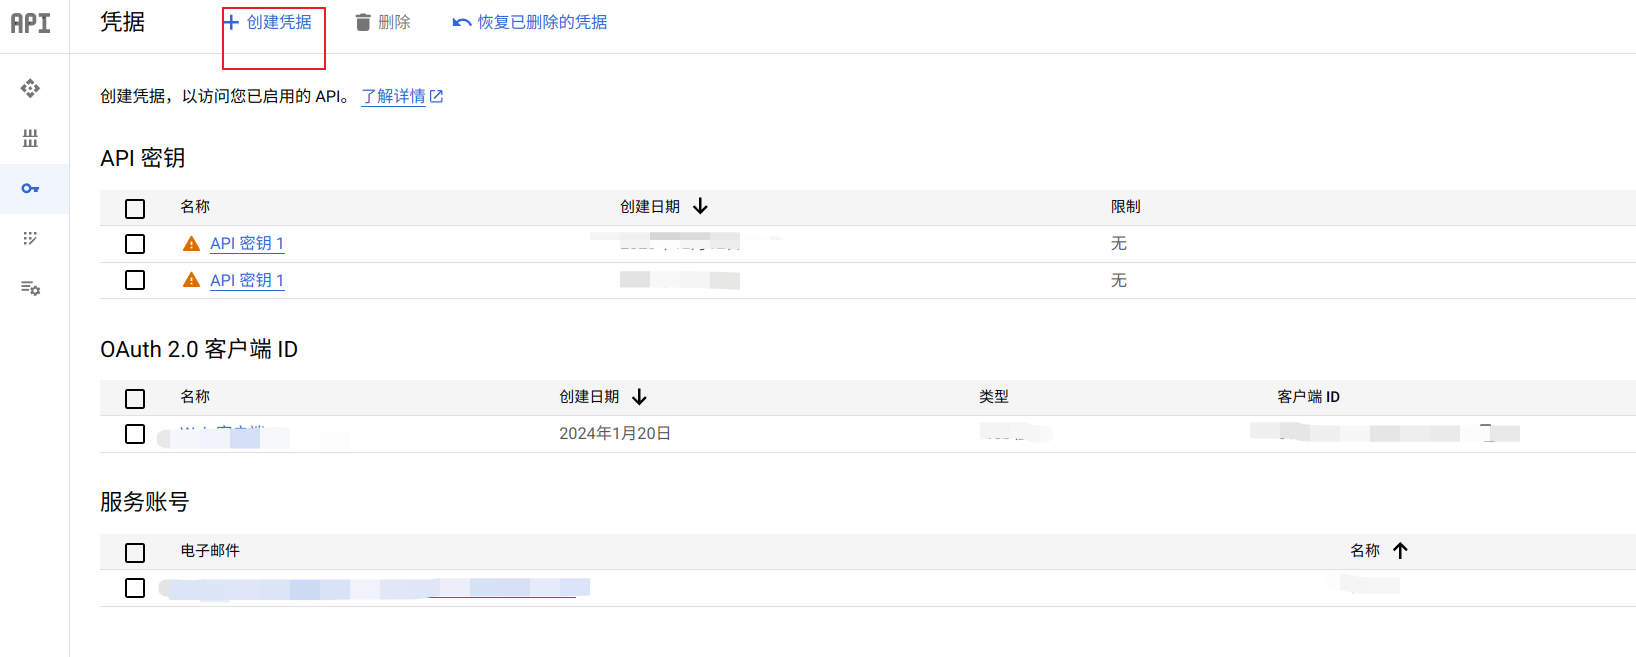
 点击创建凭据
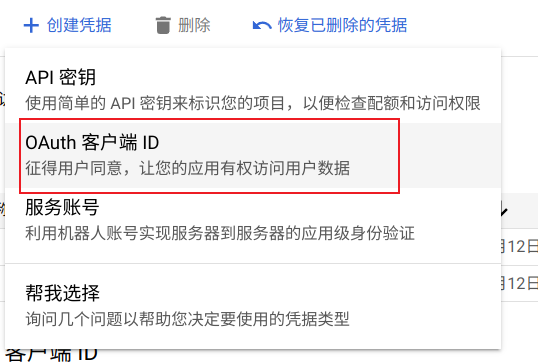
 选择OAuth客户端ID
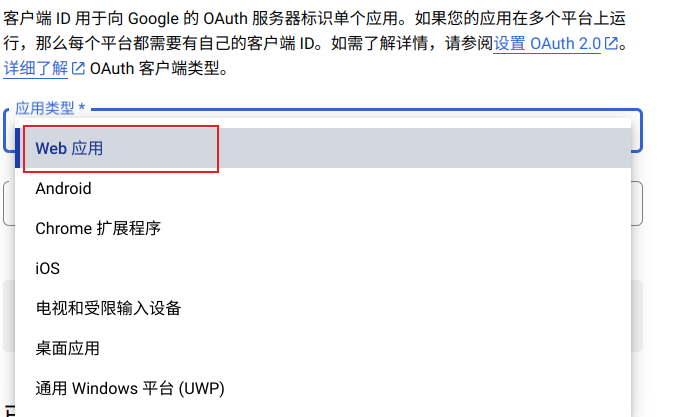
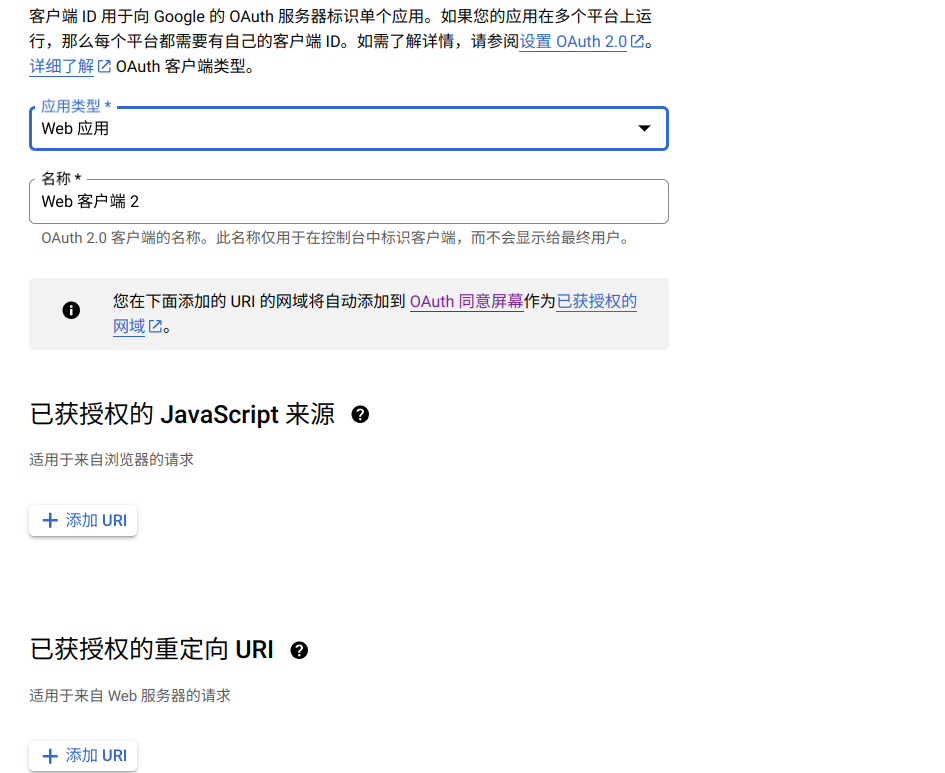
选择应用类型web应用
填写名称,已获授权的 JavaScript 来源,已获授权的重定向 URI。已获授权的 JavaScript 来源 写的是你的开发,测试还有正式环境的域名,例如http://localhost:8000。已获授权的重定向 URI 写的是你的重定向地址例如http://localhost:8000/user/auth/google
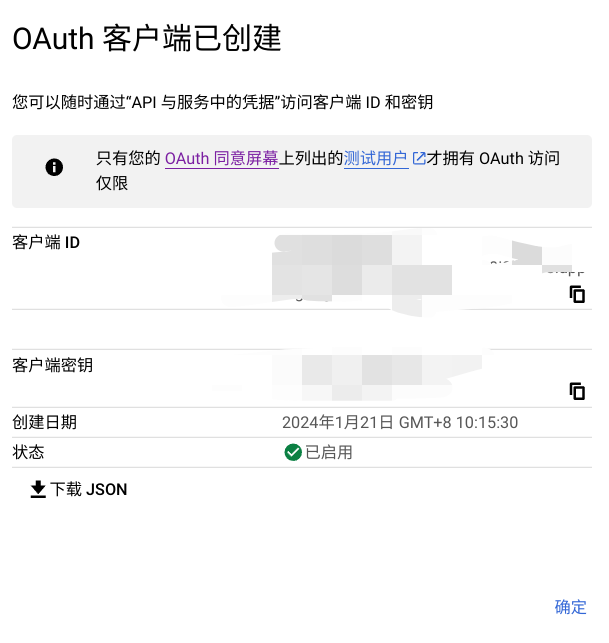
你会看到这样一个页面,保存你的客户端 ID和客户端密钥
代码实践
创建一个.env文件

我们创建一个fastapi的后端
from fastapi import FastAPI, Depends
from fastapi.security import OAuth2PasswordBearer
from fastapi.middleware.cors import CORSMiddleware

import requests
from jose import jwt
import os
from dotenv import load_dotenv

load_dotenv()


app = FastAPI()

app.add_middleware(
    CORSMiddleware,
    allow_origins=["*"],  # Allows all origins
    allow_credentials=True,
    allow_methods=["*"],  # Allows all methods
    allow_headers=["*"],  # Allows all headers
)


# Replace these with your own values from the Google Developer Console
GOOGLE_CLIENT_ID = os.environ.get("GOOGLE_CLIENT_ID")
GOOGLE_CLIENT_SECRET = os.environ.get("GOOGLE_CLIENT_SECRET")
GOOGLE_REDIRECT_URI = "http://localhost:8000/auth/google"


@app.get("/login/google")
async def login_google():
    return {
        "url": f"https://accounts.google.com/o/oauth2/auth?response_type=code&client_id={GOOGLE_CLIENT_ID}&redirect_uri={GOOGLE_REDIRECT_URI}&scope=openid%20profile%20email&access_type=offline"
    }

@app.get("/auth/google")
async def auth_google(code: str):
    token_url = "https://accounts.google.com/o/oauth2/token"
    data = {
        "code": code,
        "client_id": GOOGLE_CLIENT_ID,
        "client_secret": GOOGLE_CLIENT_SECRET,
        "redirect_uri": GOOGLE_REDIRECT_URI,
        "grant_type": "authorization_code",
    }
    response = requests.post(token_url, data=data)
    access_token = response.json().get("access_token")
    user_info = requests.get("https://www.googleapis.com/oauth2/v1/userinfo", headers={"Authorization": f"Bearer {access_token}"})
    print(user_info.json())
    return user_info.json()

if __name__ == "__main__":
    import uvicorn
    uvicorn.run(app, host="0.0.0.0", port=8000)
同时我们需要一个前端,这里我们只有一个按钮来用于google登陆
<!DOCTYPE html>
<html>
<head>
    <title>Login with Google</title>
    <script>
        async function handleLogin() {
            const response = await fetch('http://localhost:8000/login/google');
            const data = await response.json();
            window.location.href = data.url;
        }

        async function handleRedirect() {
            const urlParams = new URLSearchParams(window.location.search);
            const code = urlParams.get('code');
            if (code) {
                const response = await fetch(`http://localhost:8000/auth/google?code=${code}`);
                const userData = await response.json();
                document.getElementById('user-info').textContent = JSON.stringify(userData, null, 2);
            }
        }
    </script>
</head>
<body onload="handleRedirect()">
    <button onclick="handleLogin()">Login with Google</button>
    <pre id="user-info"></pre>
</body>
</html>
点击按钮你会进入平时你看到的google登陆的流程,流程成功后你会在前端页面看到用户的信息
就像这样
{"id":"13","email":"a1@gmail.com","verified_email":true,"name":"a ","given_name":"a","family_name":"a","picture":"https://lh3.googleusercontent.com/a/ACLXM=s96-c","locale":"zh-CN"}同时后端也会在控制台打印出这个信息,我们已经成功通过了google的身份验证。我们可以再将他结合到自己的程序中