







This Post was updated in June of 2024 to remove the requirement to install VMAgent on each Proxmox VE node, and update the screenshots to reflect updates in VictoriaMetrics Cloud and Grafana.
In this blog post we’re going to walk you through how to monitor Proxmox VE via VictoriaMetrics Cloud, including a step by step guide on how to setup, configure, and visualize this environment.
Proxmox VE is a complete, open-source server management platform for enterprise virtualization. It tightly integrates the KVM hypervisor, Linux Containers (LXC), software-defined storage, and, software defined networking in a single platform. All of these features can be managed via a web GUI, CLI, and infrastructure as code tools such as Ansible and Terraform. All of these interfaces support managing virtual machines, containers, high availability for clusters, and configuring disaster recovery.
VictoriaMetrics Cloud allows users to run VictoriaMetrics on AWS without the need to perform typical DevOps tasks such as proper configuration, monitoring, logs collection, access protection, software updates, backups, etc.
The guide covers:
Preconditions:
If you don’t have the VictoriaMetrics Cloud account yet, just sign up here – it’s free.
To read more about VictoriaMetrics Cloud see the announcement blog post.
Open https://console.victoriametrics.cloud/deployments and click start sending metrics if you don’t already have an existing deployment.
Configure the deployment with parameters that best suit your case and click Create.
For this demo I chose the starter instance, in the region closest to me with 13 months of retention.
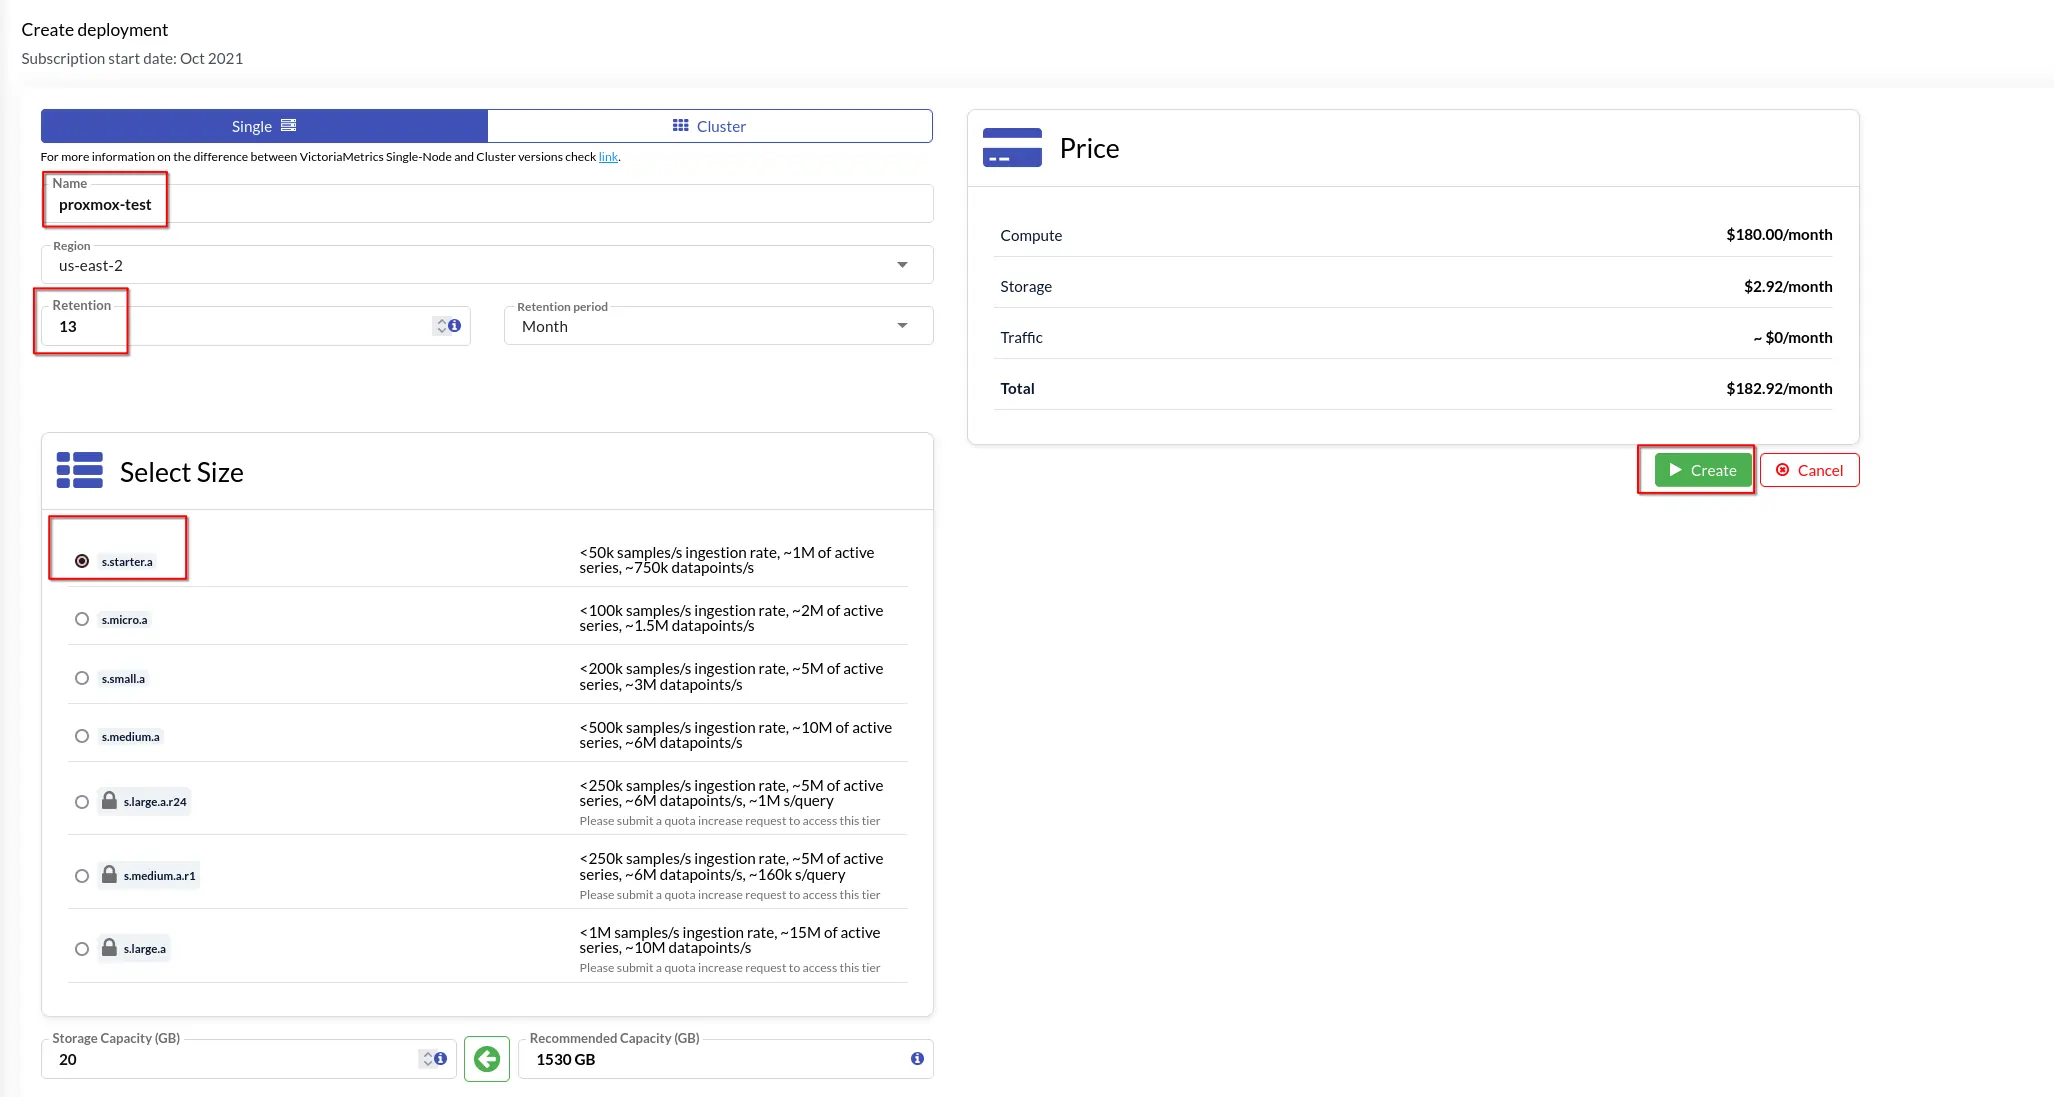 New deployment creation
Once the deployment is created and provisioned, you will get an email notification. Click on the created deployment to see configuration details, and the status should say running:
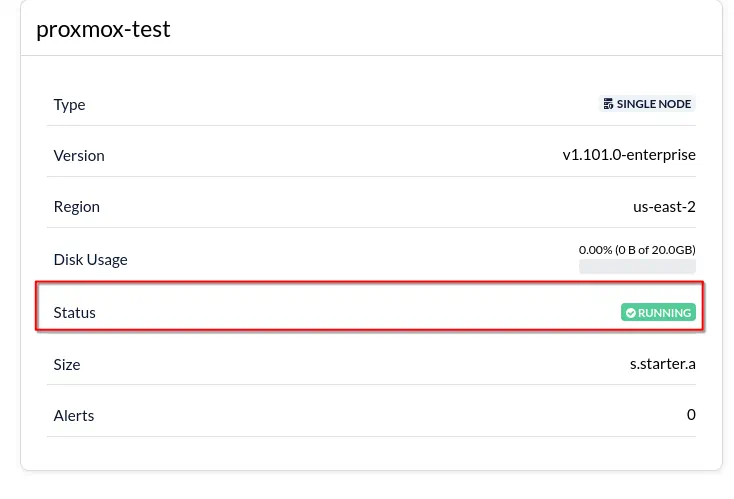 Deployment is in Running state
Now we need to generate a token that will allow us to write data to our VictoriaMetrics Cloud instance.
Go to the “Access” tab, type proxmox in the name box and set the token type to write, and click generate.
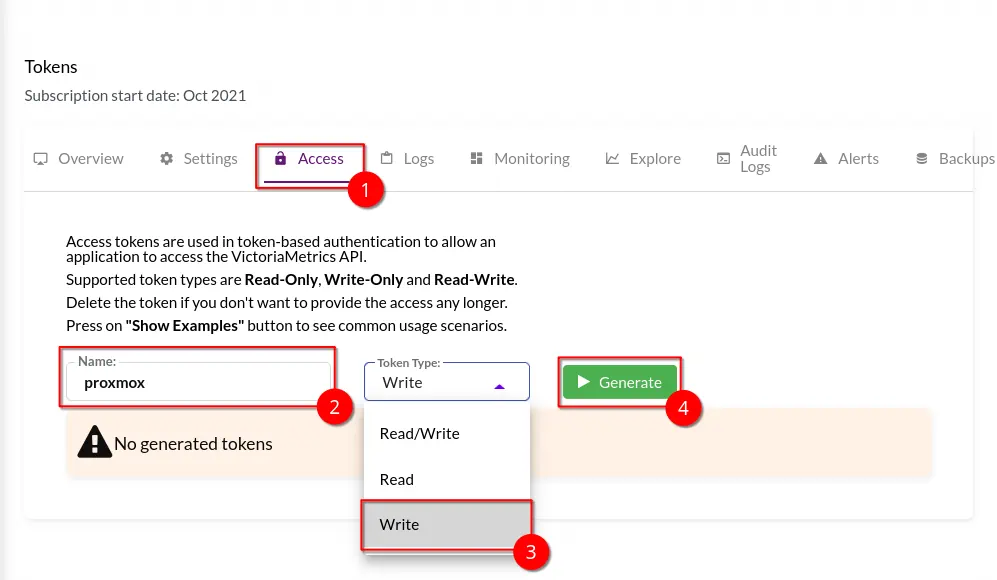 Generating Write Token
Then we will need to copy the hostname of your VictoriaMetrics Cloud instance, and the token you just generated.
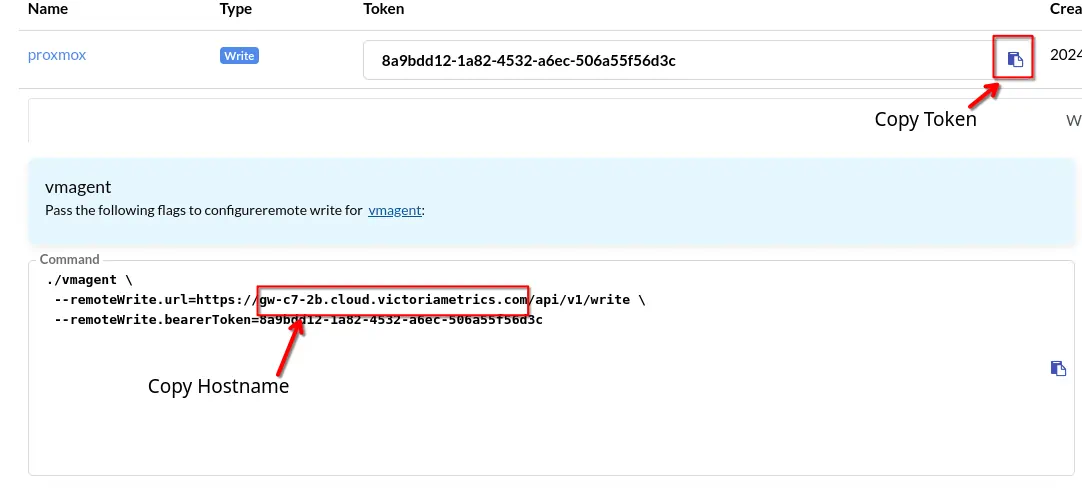 Getting Hostname and Token
Please, do not share the generated access tokens with untrusted parties.
Login as a root@PAM or user@pve with Administrator permissions to Proxmox VE:
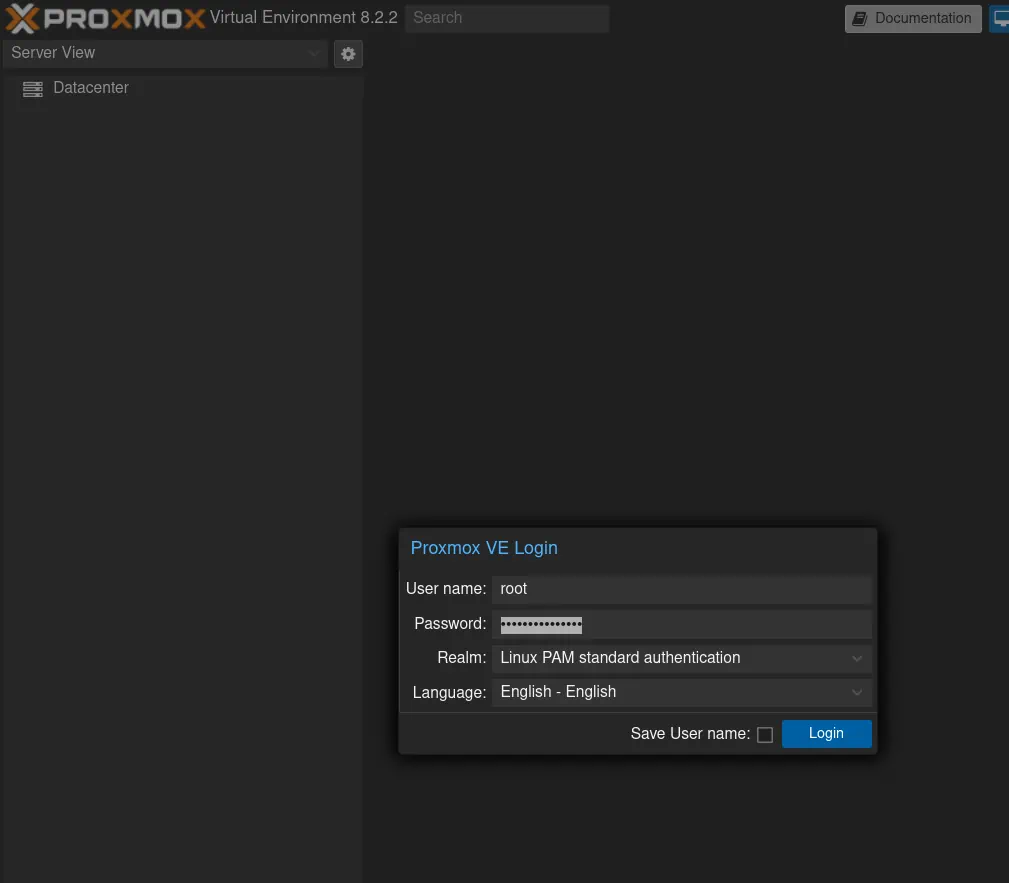 Login to Proxmox Web UI
Click on Datacenter in the Proxmox UI, then click on Metric Server, click add, and click InfluxDB:
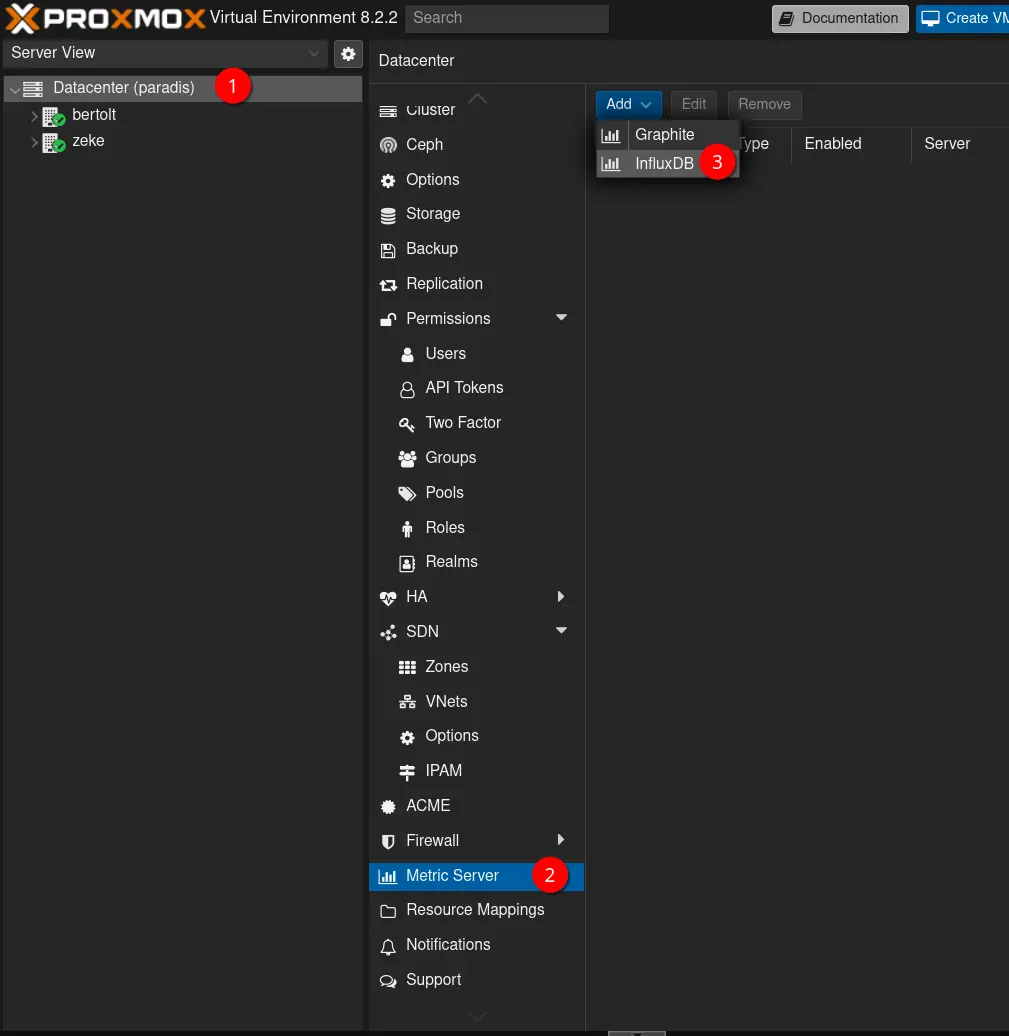 Adding new Metric Server on Proxmox PVE
Set parameters to match this screenshot replacing the Token with token you generated in step 1 and Server with the hostname mentioned in step 1:
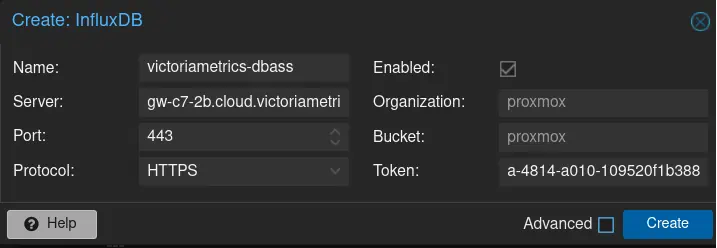 Configure parameters for Metric Server
Go to your VictoriaMetrics Cloud deployment and click explore and run the following query system_uptime{object="nodes"}.
You should see 1 time series per ProxmoxVE node in your cluster.
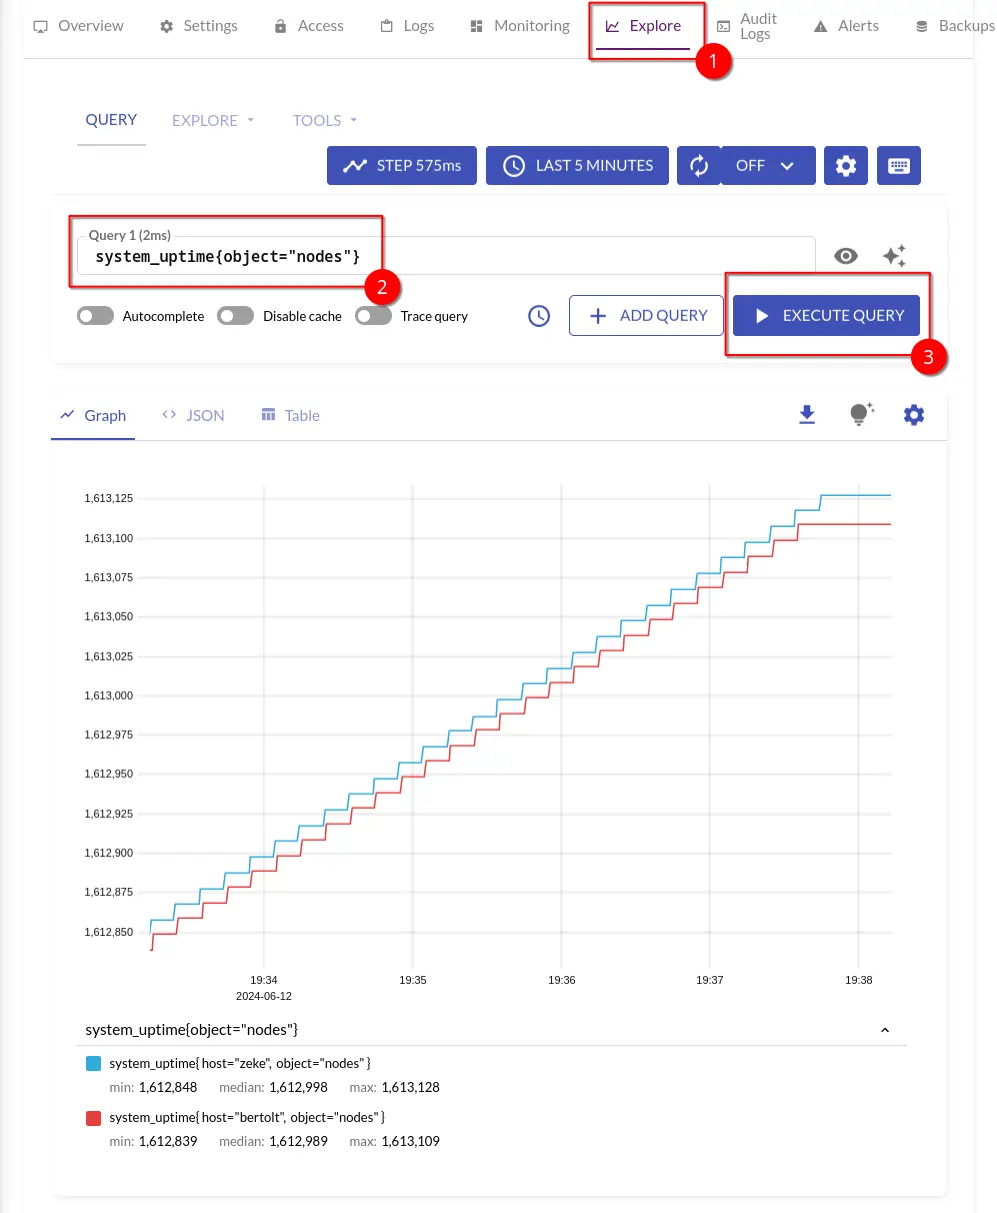 Victoriametrics Data in VictoriaMetrics Cloud
Before adding our VictoriaMetrics Cloud to Grafana we need a read only access token.
Go to the Access section of your VictoriaMetrics Cloud deployment, type grafana in the name box, set the Token Type to read, and click generate.
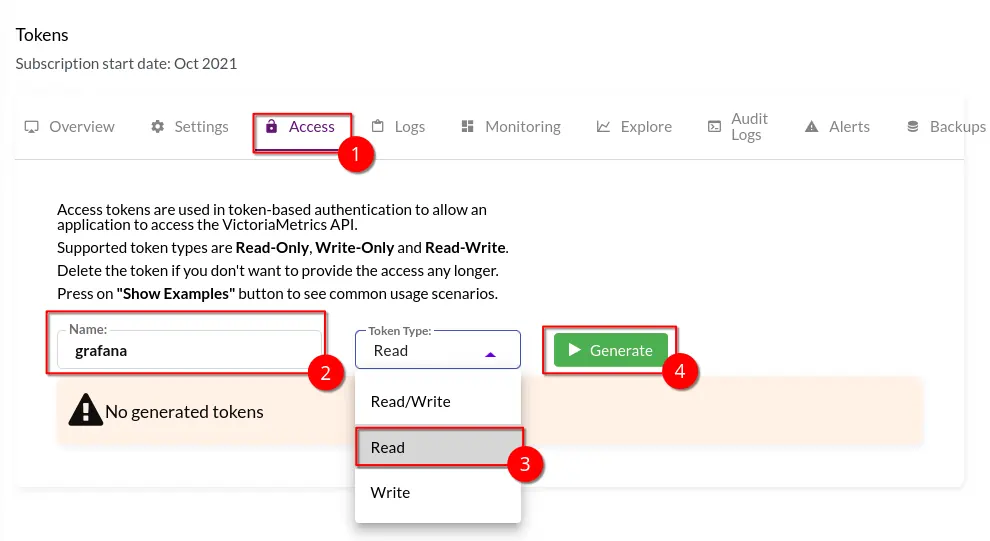 Generating Grafana Token
Click Show Examples on the token we just created and copy the values for Grafana
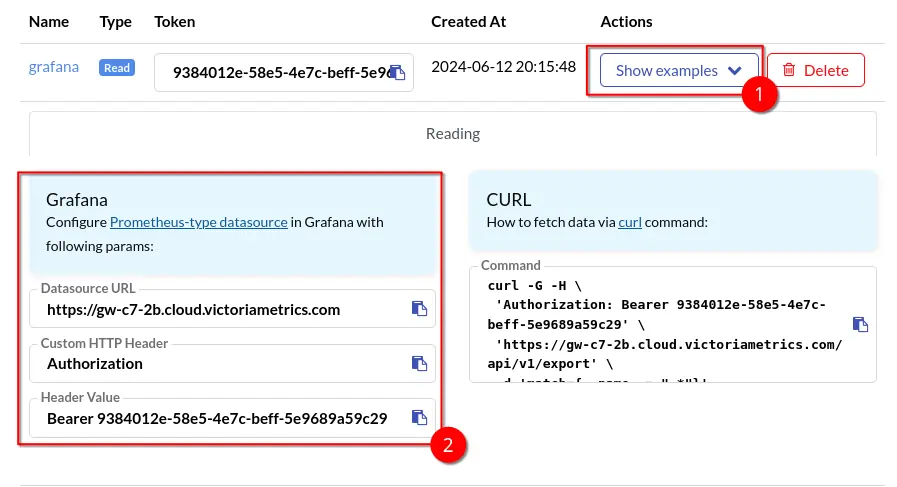 Getting credential for VictoriaMetrics Cloud
To add VictoriaMetrics Cloud as a datasource in Grafana, login to Grafana as an admin, click the hamburger menu in the top left of the screen, click Connections, then click Data sources, and click Add new data source.
On the next page select Prometheus as the datasource type.
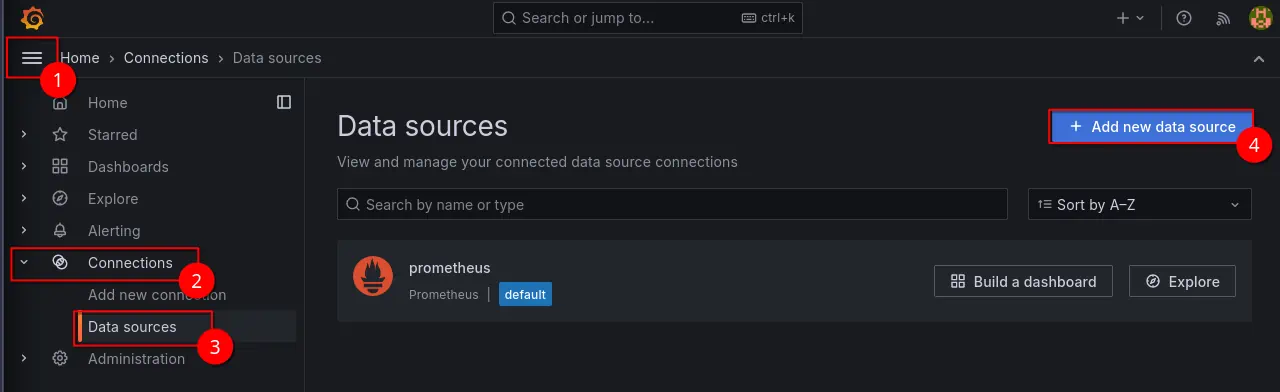 Adding Connection in Grafana
To configure the datasource change the following options:
Name to vm-dbaasPrometheus server URL to the Data Source URL shown in example above.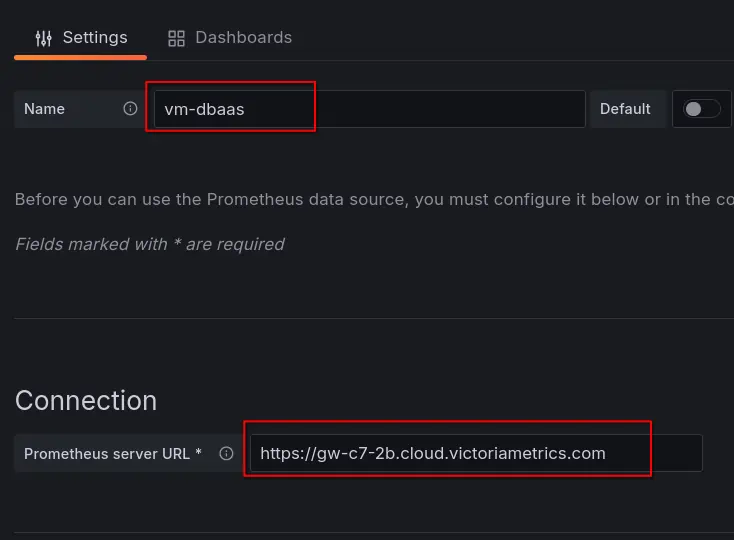 Adding VictoriaMetrics datasource in Grafana
Header Value in the example above.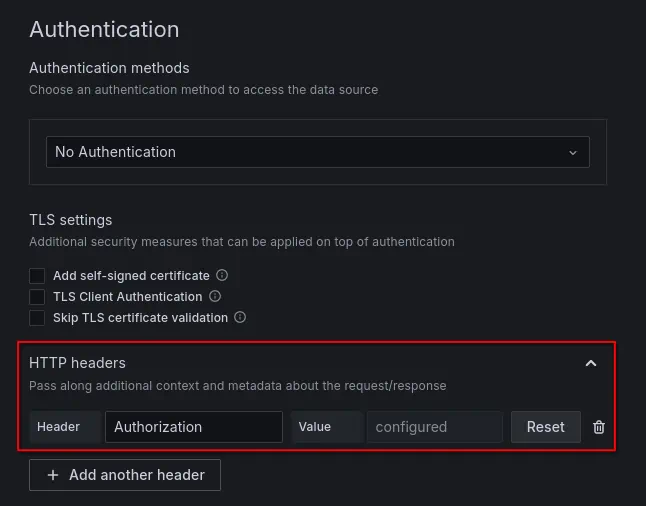 Setting Auth Header on Grafana Datasource
After changing these settings click save and test at the bottom.
If You see a Green check mark saying Successfully queried the Prometheus API then everything is working.
To import a Proxmox dashboard click the hamburger menu in the upper left, click dashboards, click the blue button that says New on the right side of the screen, and press Import on the drop down:
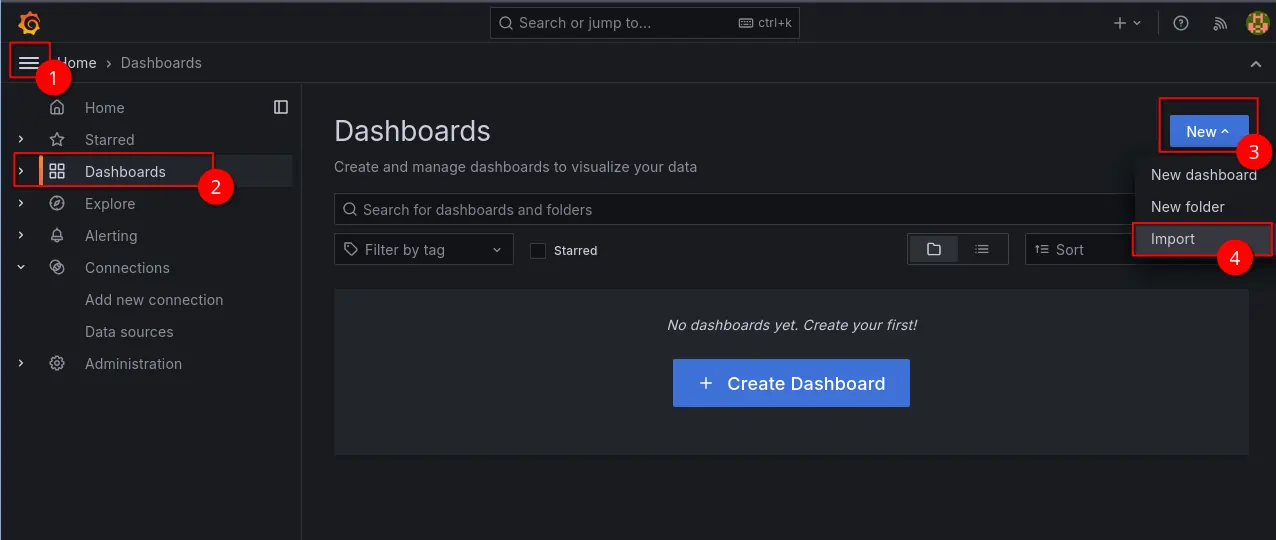 Adding new dashboard to Grafana
Enter dashboard’s ID 16060 and press the Load button on the right:
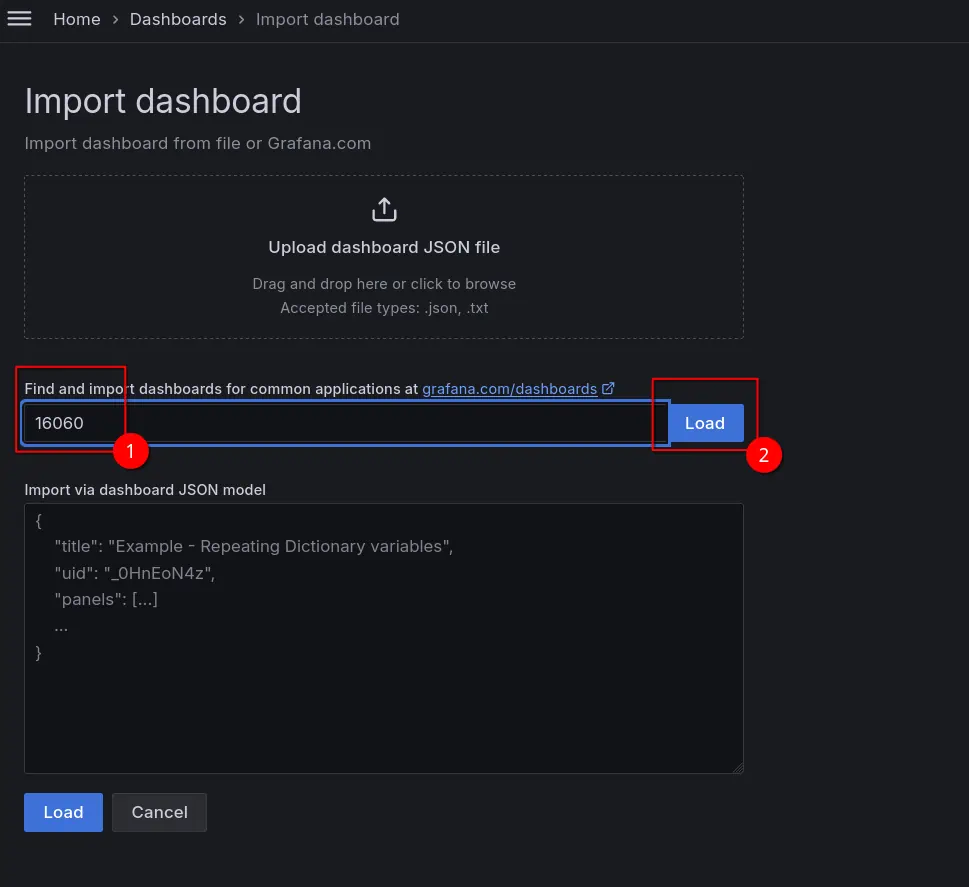 Importing Proxmox dashboard
Choose vm-dbaas as a datasource and press the Import button.
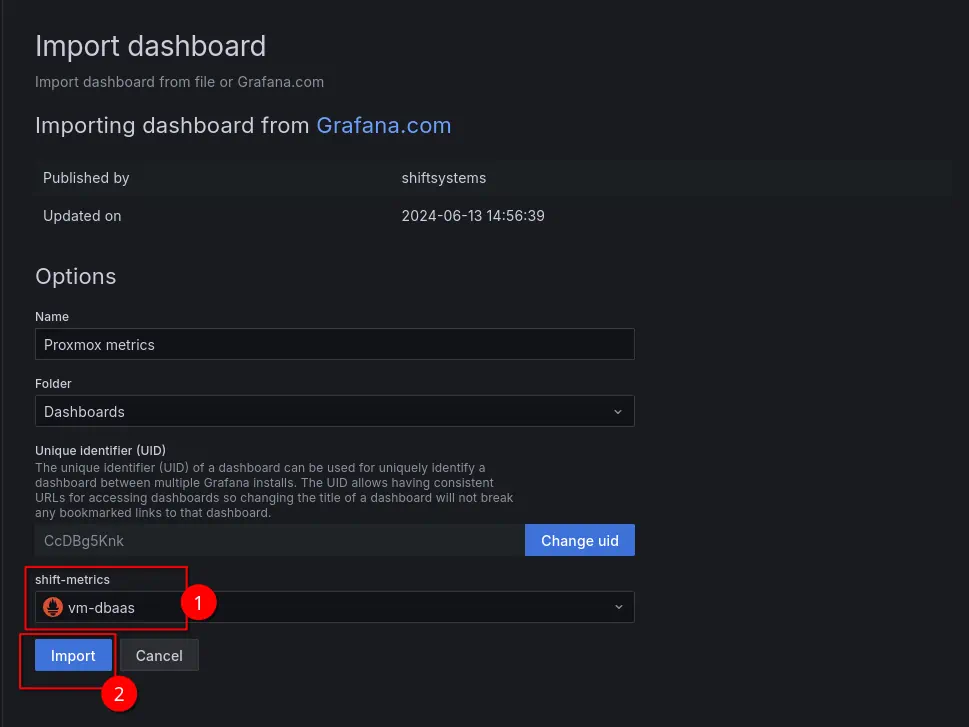 Importing Proxmox dashboard
The expected result will resemble the following screenshot:
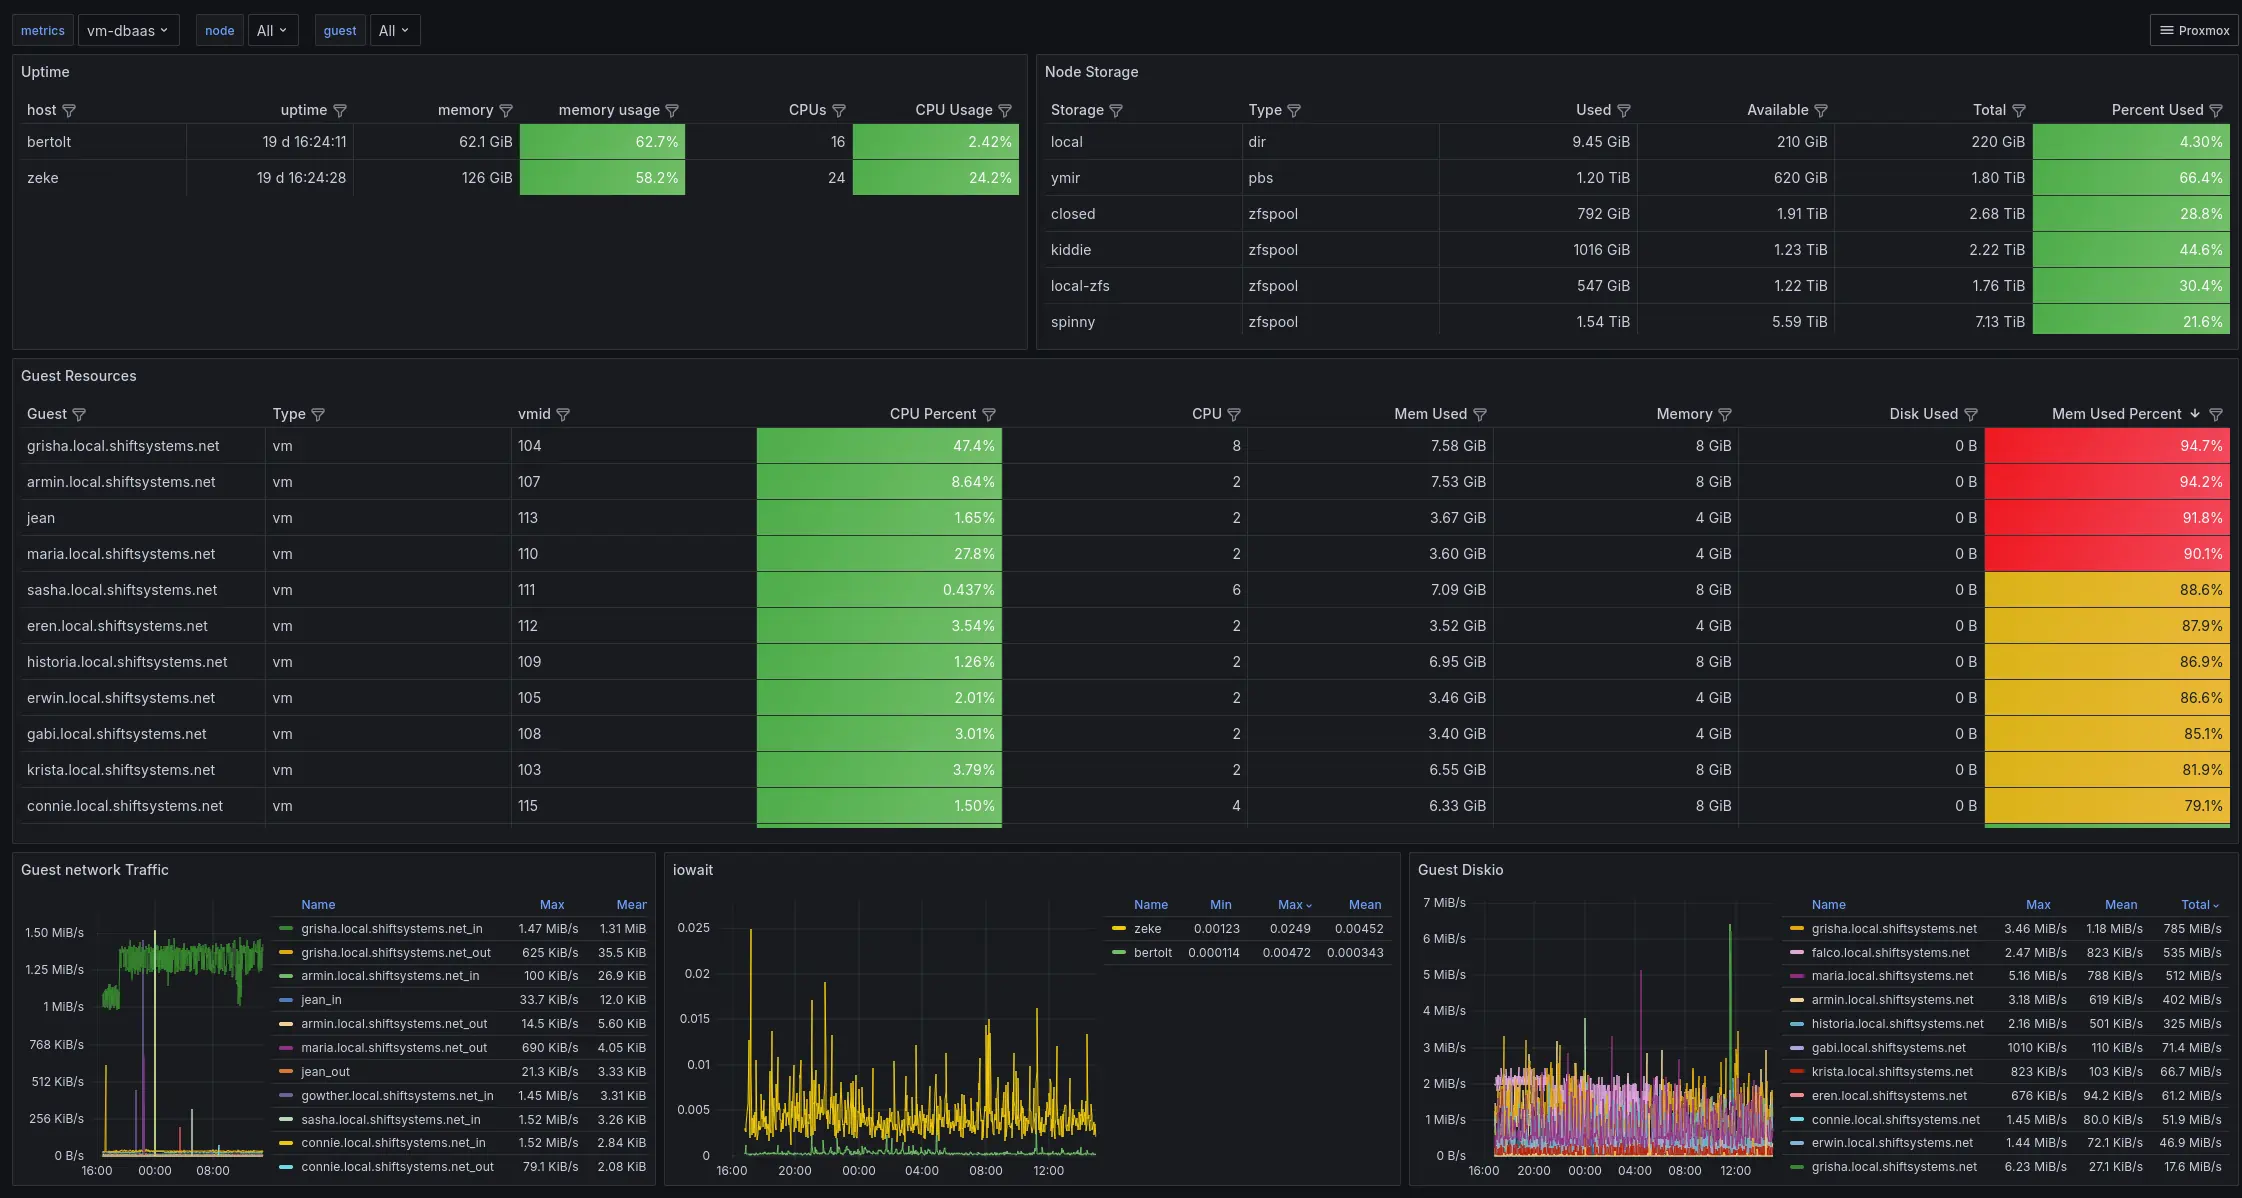 Full Proxmox dashboard
If this is what you see, then everything is working and you can observe the data on the dashboard!
Please comment below if you have any questions, or feel free to contact us.
此内容由惯性聚合(RSS阅读器)自动聚合整理,仅供阅读参考。 原文来自 — 版权归原作者所有。