


Portainer is an open-source, lightweight management UI that allows us to quickly build and manage containers in Docker, Docker Swarm, Kubernetes, and Azure ACI. It will enable us to manage the creation and deletion of Swarm services, user authentication, authorizations, connecting, executing commands in the console of running containers, and viewing containers’ logs.
Portainer consists of a single container that can run on any cluster. It can be deployed as a Linux container or a Windows native container.
It is the most widely adopted container management platform in the world, with over 650,000 users and 21,700 stars on GitHub.
Portainer’s goal is to deliver a world-class container-native application deployment and management tool that is truly platform agnostic. They have made the underlying container management platform (e.g., Kubernetes) invisible to the engineers who want to manage their apps. If you use Portainer, we can CONSUME the container platform without being an expert in it.
With Portainer, engineers can deploy and see the state of individual containers, restart them and debug them when necessary – all without needing to use the command line. Portainer also provides deep visibility into what’s running, where it's running, and how it's running, which helps engineers optimize app performance.
And because Portainer connects to all your hosts and platforms, you get complete visibility on a single web page, eliminating the need to connect to each container to check on its state. This saves time, and lets engineers focus on what’s important.
Technology leaders need to be able to manage apps in a secure, repeatable, and scalable manner. Portainer provides a structured framework that enables this to happen and enables teams to work collaboratively. This reduces risk to your business and helps you be compliant in deploying and managing your applications.
Identity and Access Management (IAM) is a problem in native container platform management, and it’s a problem Portainer solves. It allows you to assign specific roles with pre-set functionality limits to users and teams and even nest roles to create fine-grained access rights.
And also, Portainer automatically logs all actions taken around container management, capturing details on who created, maintained, or even deleted containers – helping you trace any issues that might occur across your organization.
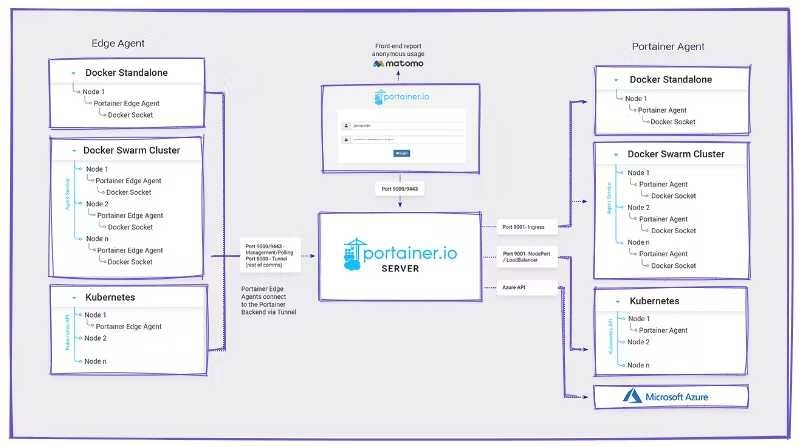
Portainer consists of two elements: the Portainer Server and the Portainer Agent.
Both Portainer Server and Portainer Agent run as lightweight containers on your existing containerized infrastructure.
The Portainer Agent should be deployed to each node in your cluster and configured to report back to the Portainer Server container. A single Portainer Server will accept connections from any number of Portainer Agents, allowing one to manage multiple clusters from one centralized interface. To do this, the Portainer Server container requires data persistence.
The Portainer Agents are stateless, with data being shipped back to the Portainer Server container.
Application Deployment - Manage the deployment of containerized applications through a manual GUI or Simple GitOps.
Observability & Triage - Monitor the performance and behavior of containerized applications.
Centralized IAM - Control who can do what, when, and why inside your environment.
Platform Management - Set up and configure your environment - on-prem, in the cloud, or at the edge.
Portainer is available in two versions: Community Edition (CE) and Business Edition (BE).
💥 Portainer CE
It is an open source software intended for personal use and supported by vibrant and growing community users.
Portainer Community Edition (CE) is the foundation. With over half a million regular users, CE is a powerful, open-source toolset that allows you to quickly build and manage containers in Docker, Docker Swarm, Kubernetes, and Azure ACI.
💥 Portainer BE
Portainer BE is a commercially licensed and supported product. It adds enterprise features to CE to support enterprise requirements and is intended for professional use.
Portainer Business Edition (BE) is the commercial offering. With features geared towards businesses and larger organizations such as Role-Based Access Control, registry management, and dedicated support, Portainer BE is a powerful toolset that allows you to easily build and manage containers in Docker, Docker Swarm, Kubernetes and Azure ACI.
Check out the official documentation for Portainer installation according to your requirements.
💥 In this blog post, I will be using helm to install Portainer.
ServiceAccount and ClusterRoleBinding for it to access the Kubernetes cluster.StorageClass configured.So, let's get started 🚀🥳
👉 Check if you have a default StorageClass by running the following command on your cluster:
📌 If the storage class is not set as default, then we can use the below command to set a default storage class.
kubectl patch storageclass <storage-class-name> -p '{"metadata": {"annotations":{"storageclass.kubernetes.io/is-default-class":"true"}}}'
📌 replacing <storage-class-name> with the name of your StorageClass. Alternatively, if you are installing using our Helm chart, you can pass the following parameter in your helm install command to specify the StorageClass to use for Portainer:
--set persistence.storageClass=<storage-class-name>
📌 In my case, it's already set as default.

👉 Now, add the Portainer Helm repository by running the following commands:
helm repo add portainer https://portainer.github.io/k8s/
helm repo update

👉 Install the helm chart:
helm install --create-namespace -n portainer portainer portainer/portainer
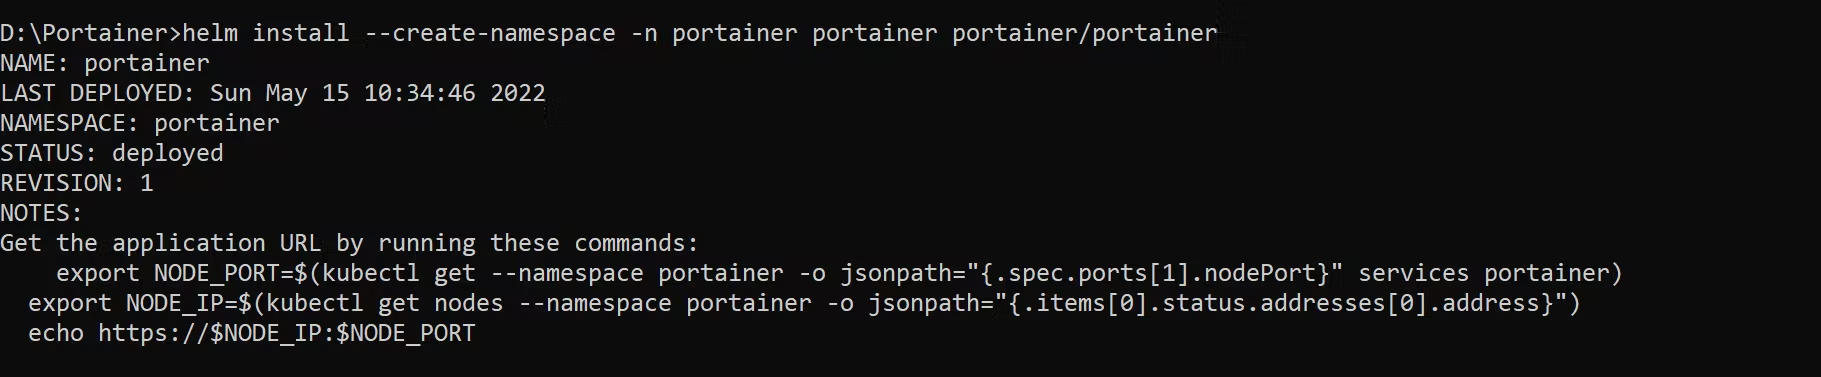
👉 Check the service
kubectl get svc -n portainer

👉 To access the portainer service from the local environment on port 30777, traffic can be forwarded to your local system using the port-forward command:
kubectl port-forward -n portainer svc/portainer 30777:9000

👉 Open a web browser and navigate to the following URL:
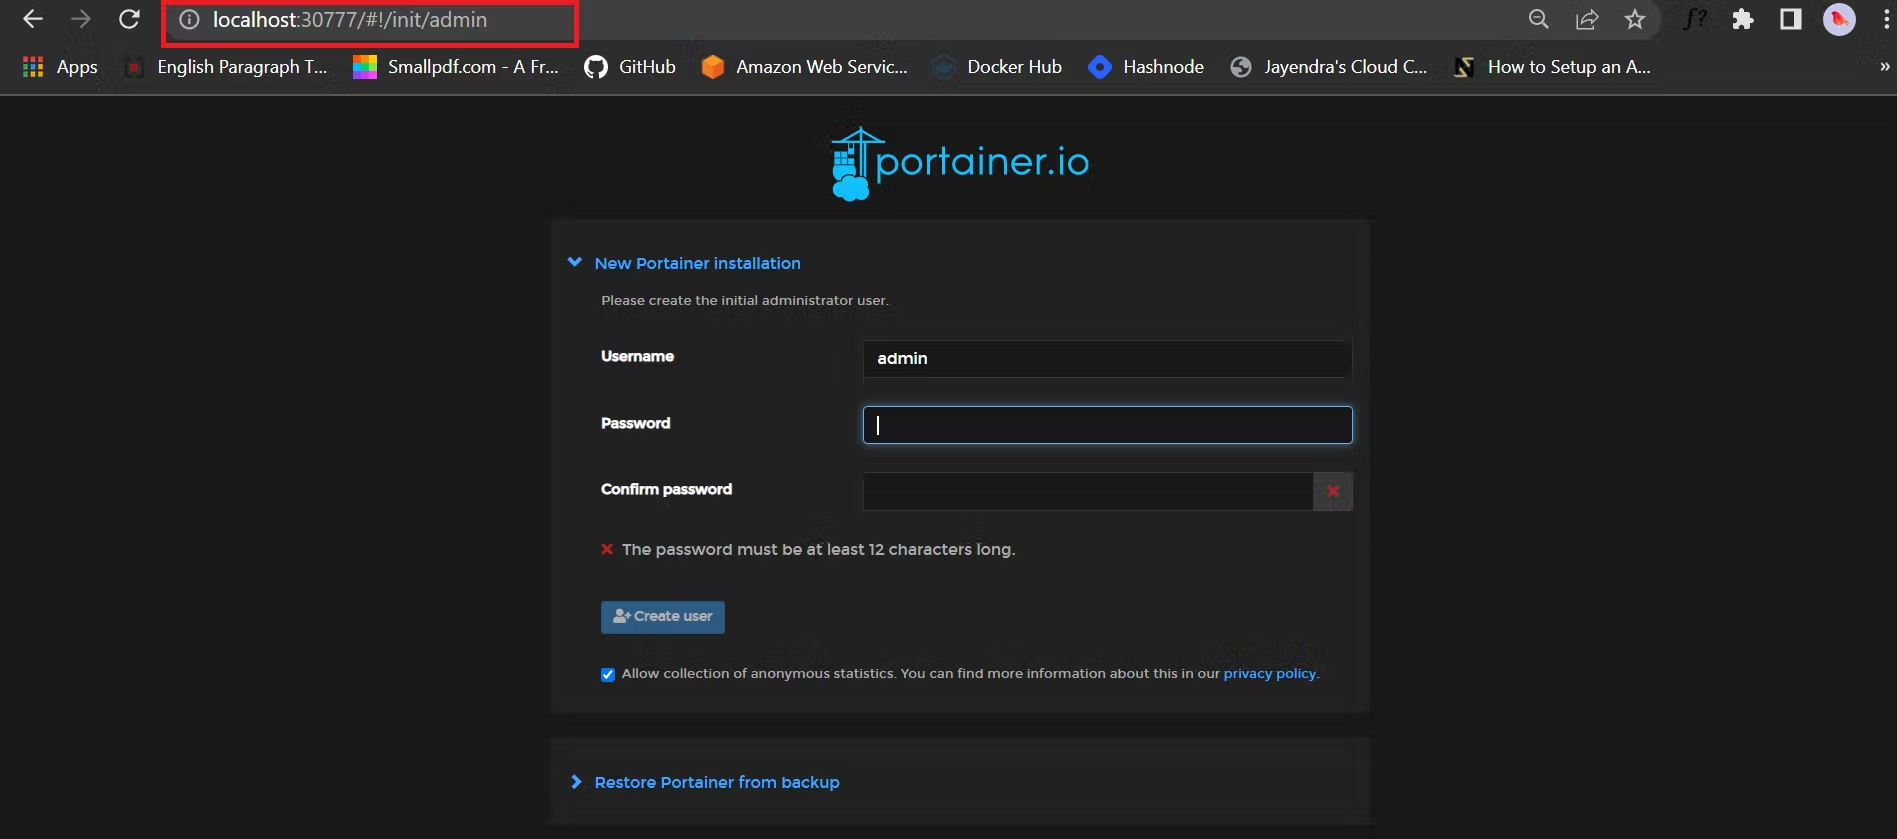
📌 Now, set the username and password, then click on Create user.
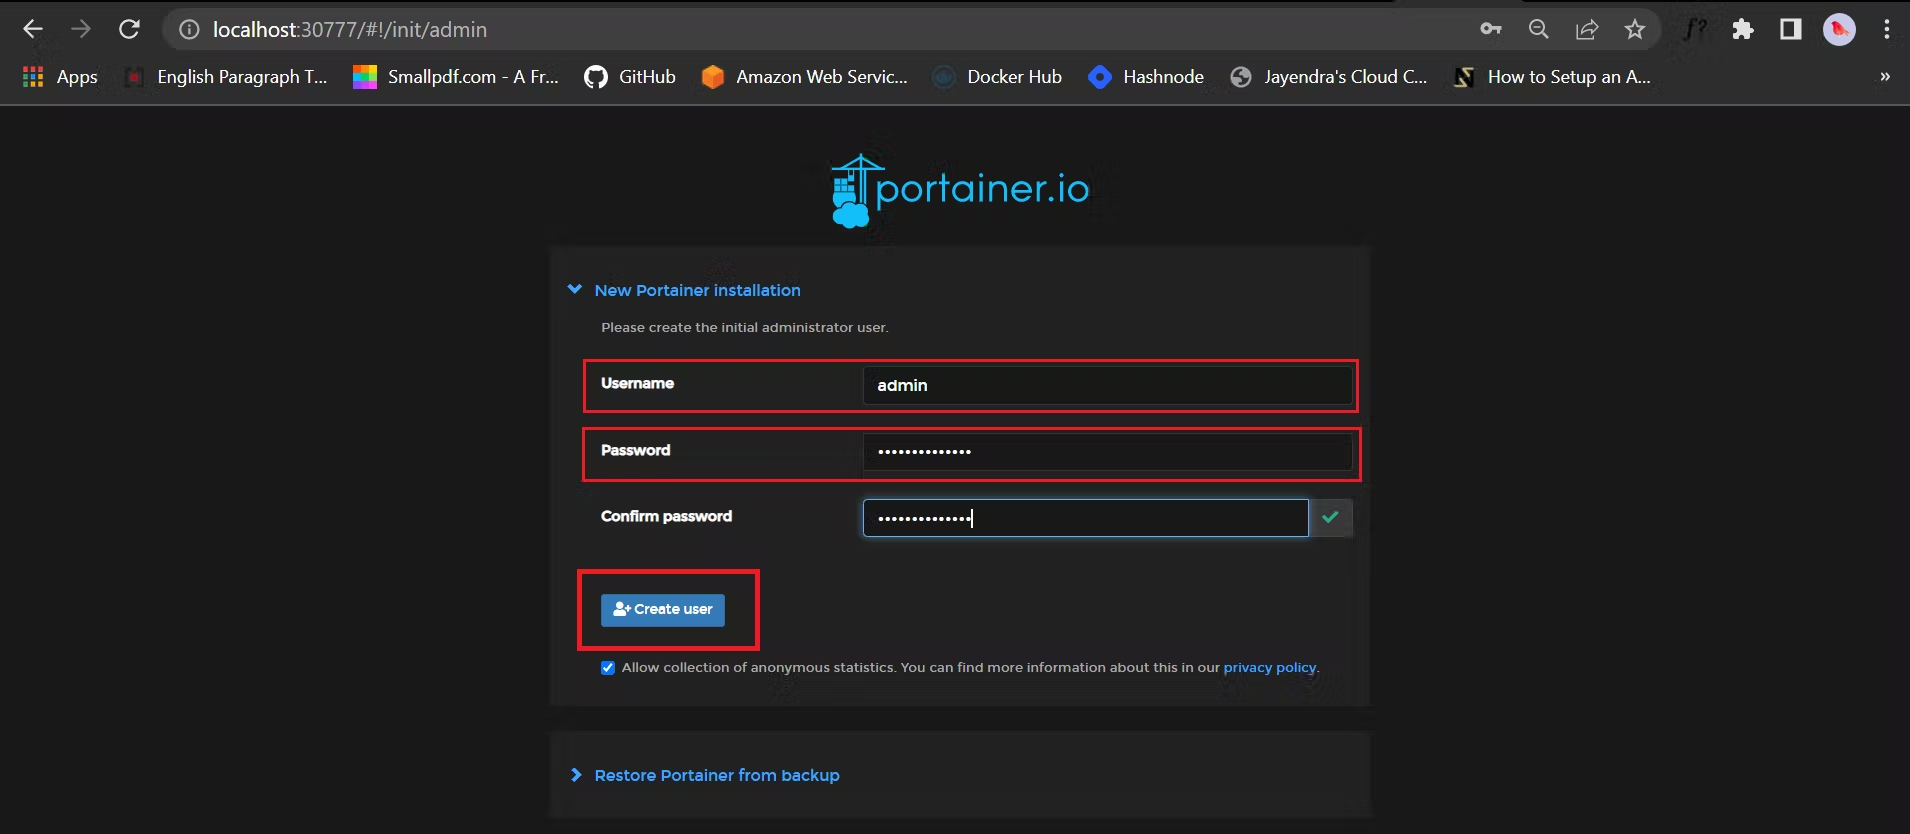
📌 Click on Get started
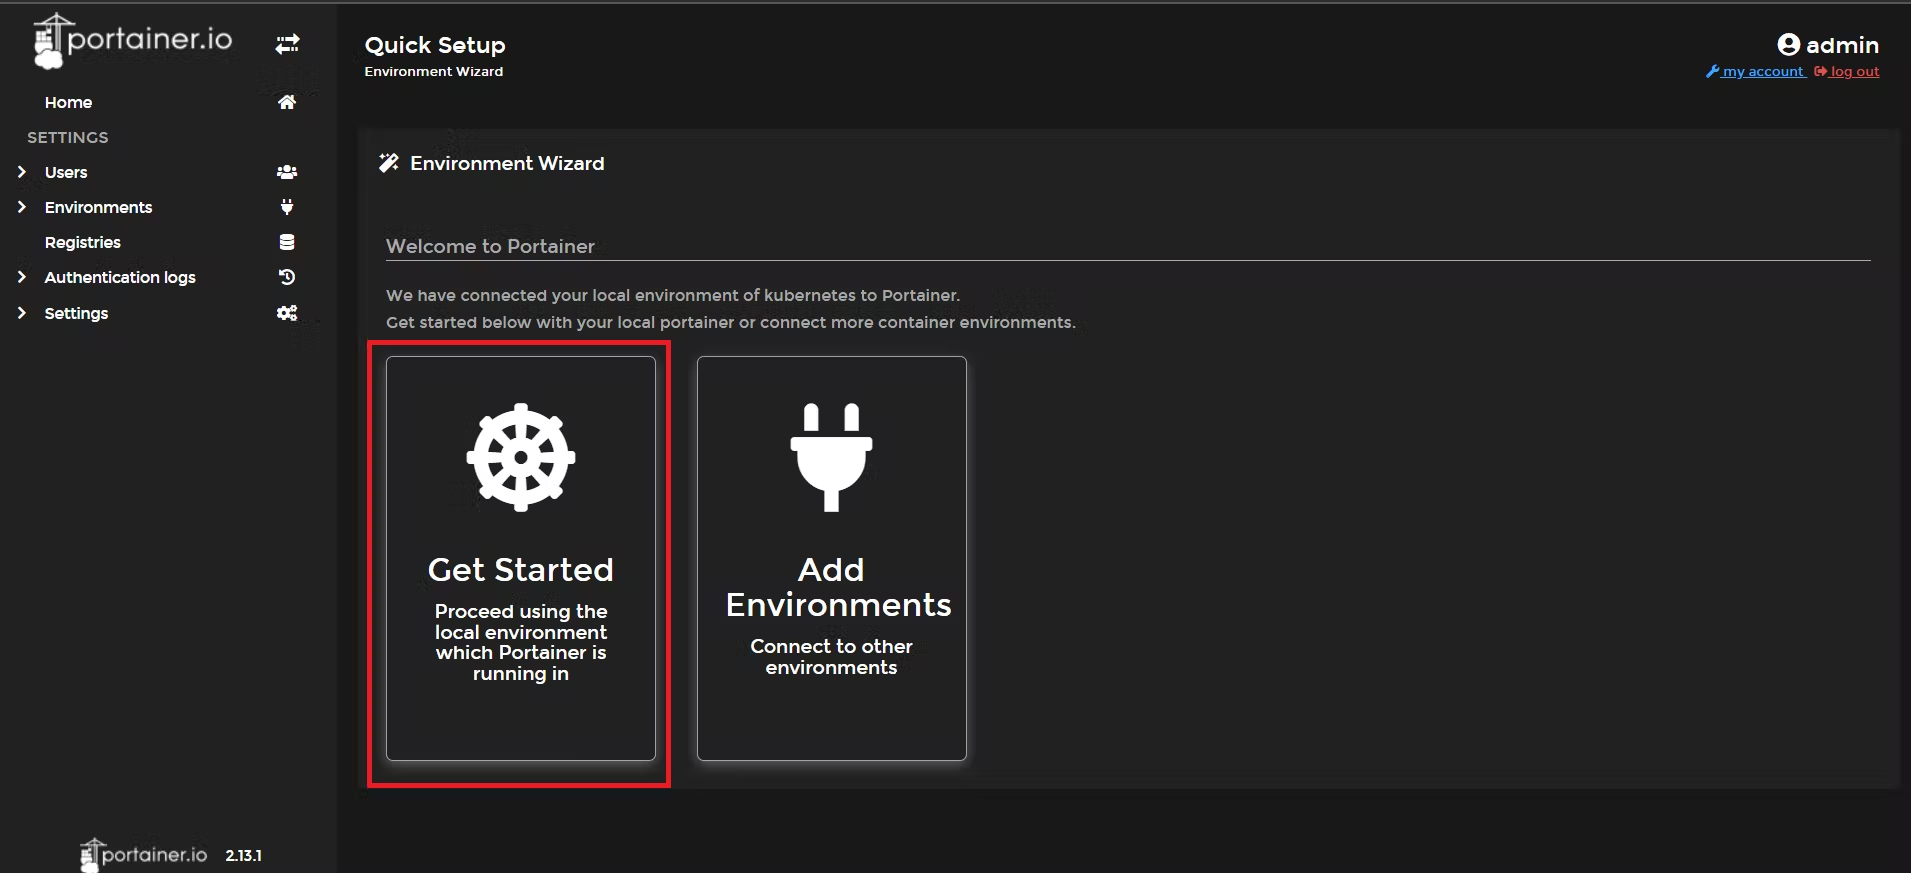
Now, we are all set to explore the Portainer UI 🥳
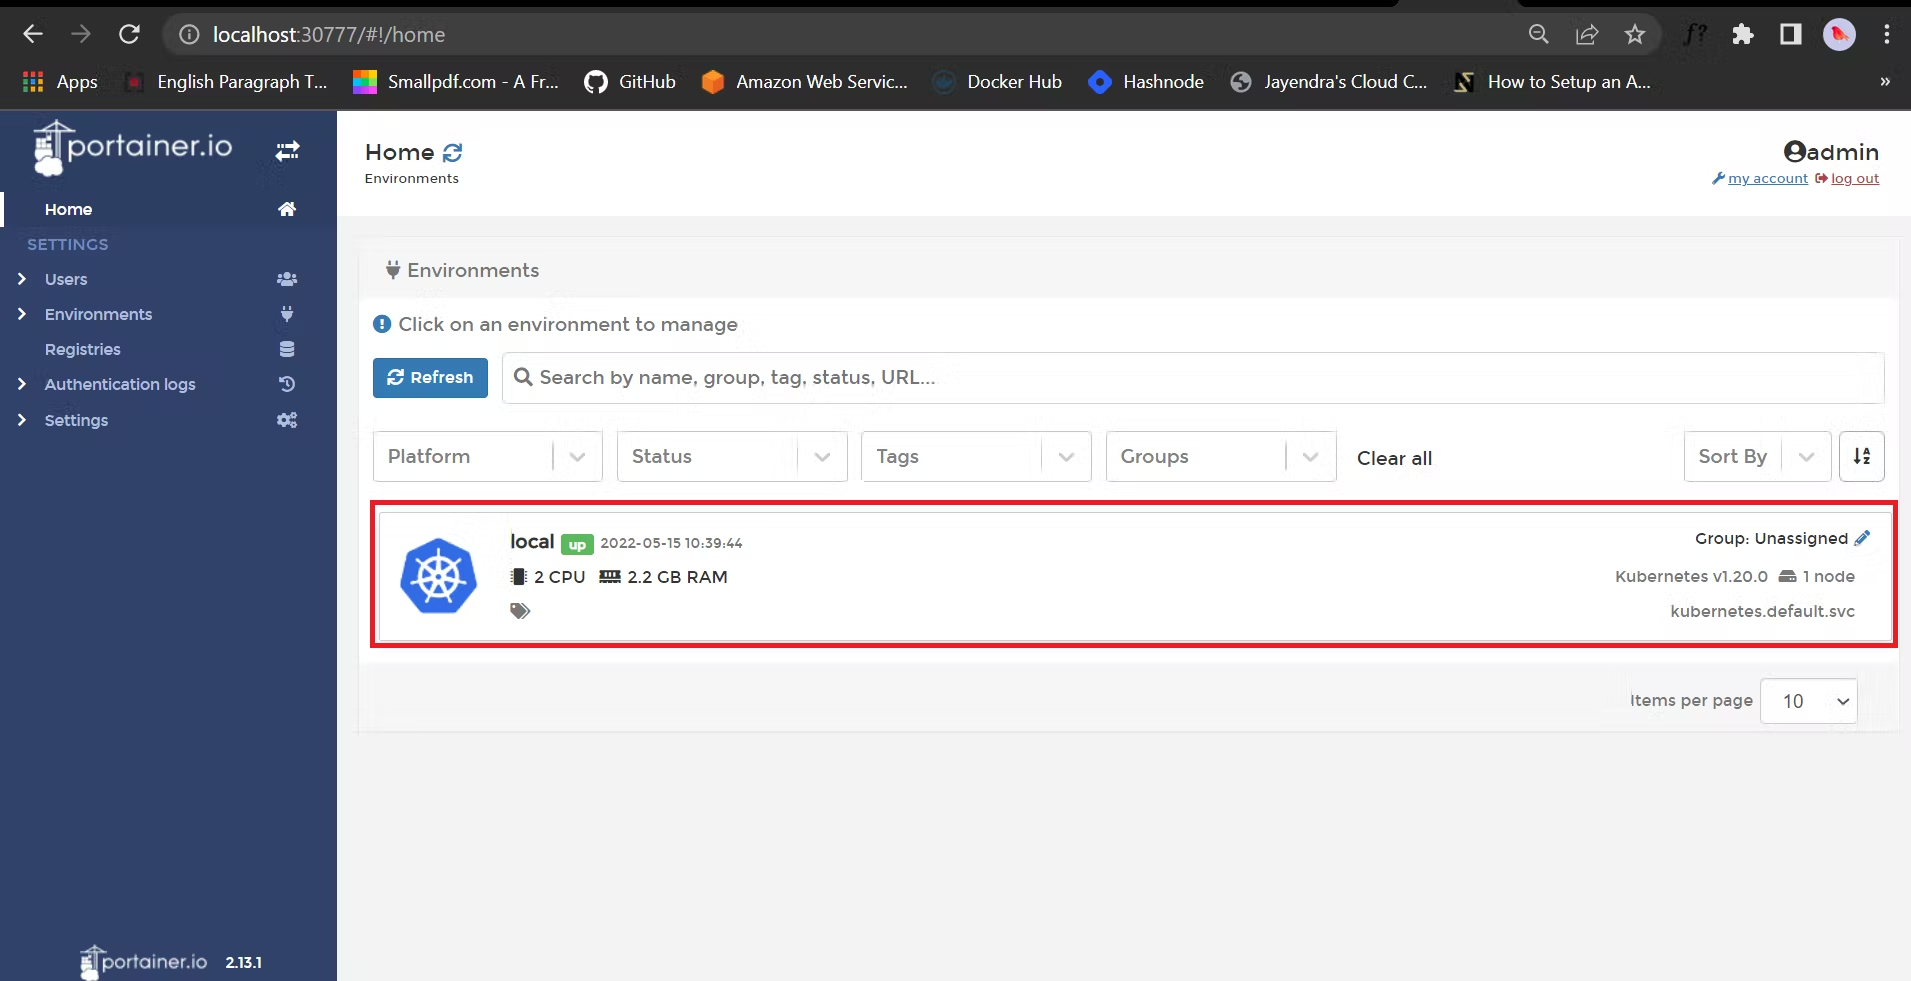
🔰 Choose our environment, and then we will land on the dashboard from where we can manage the cluster.
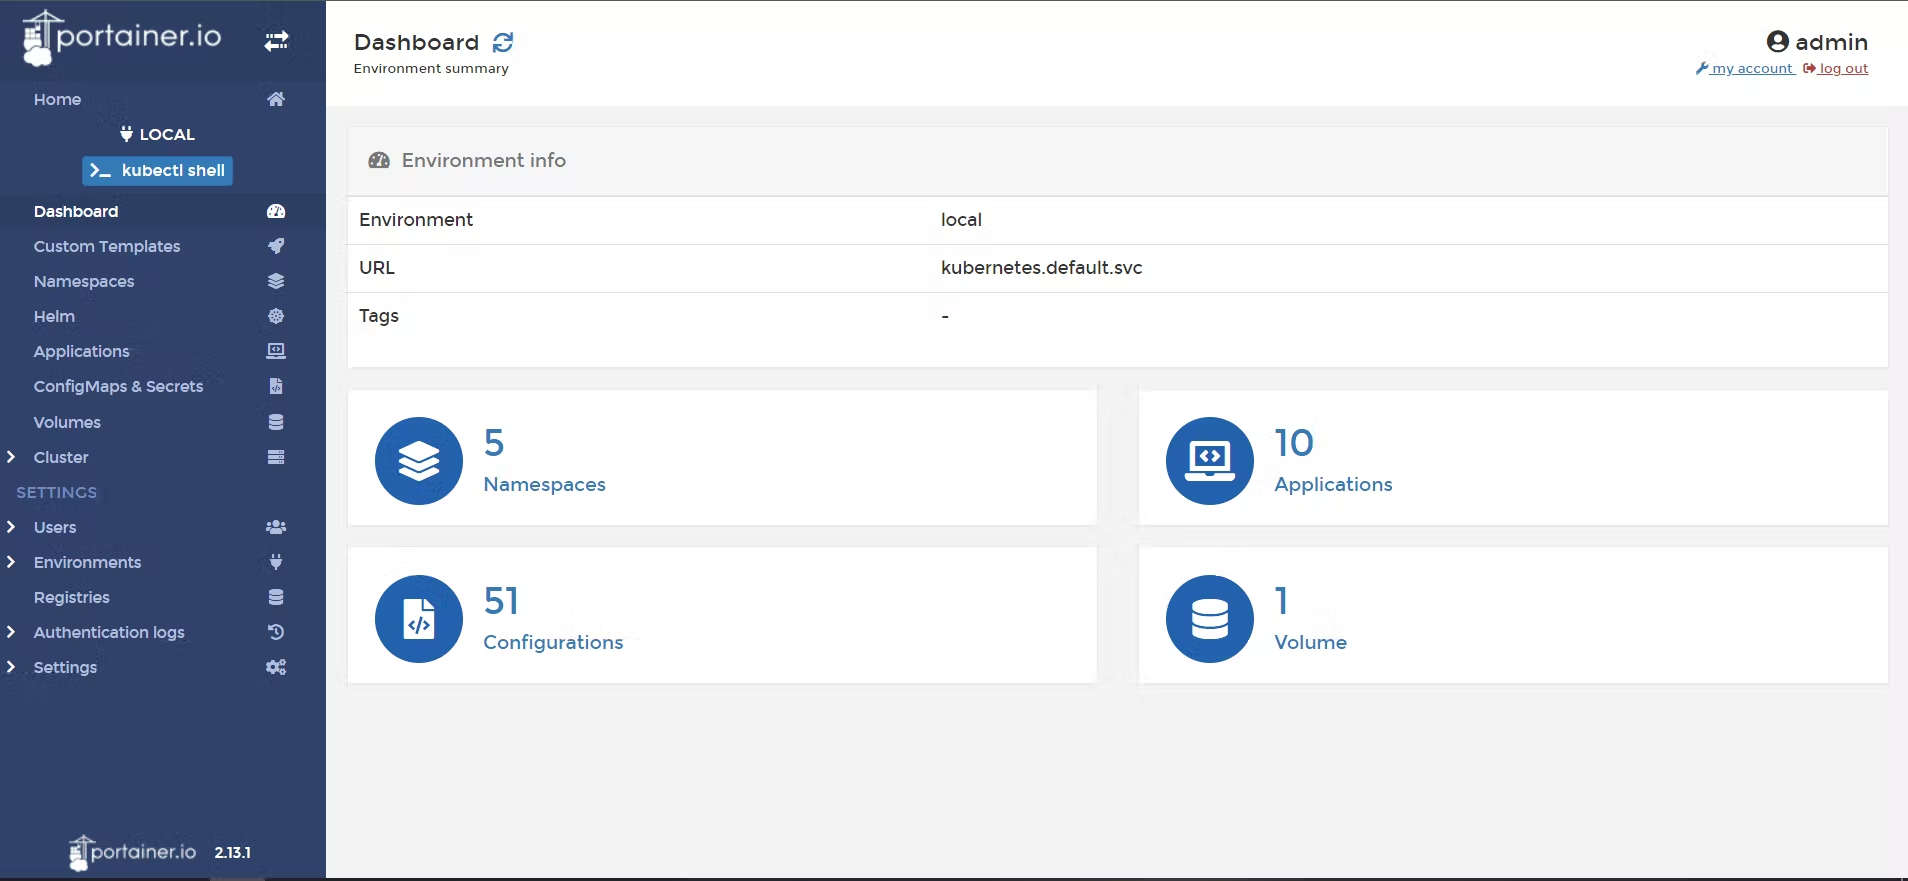
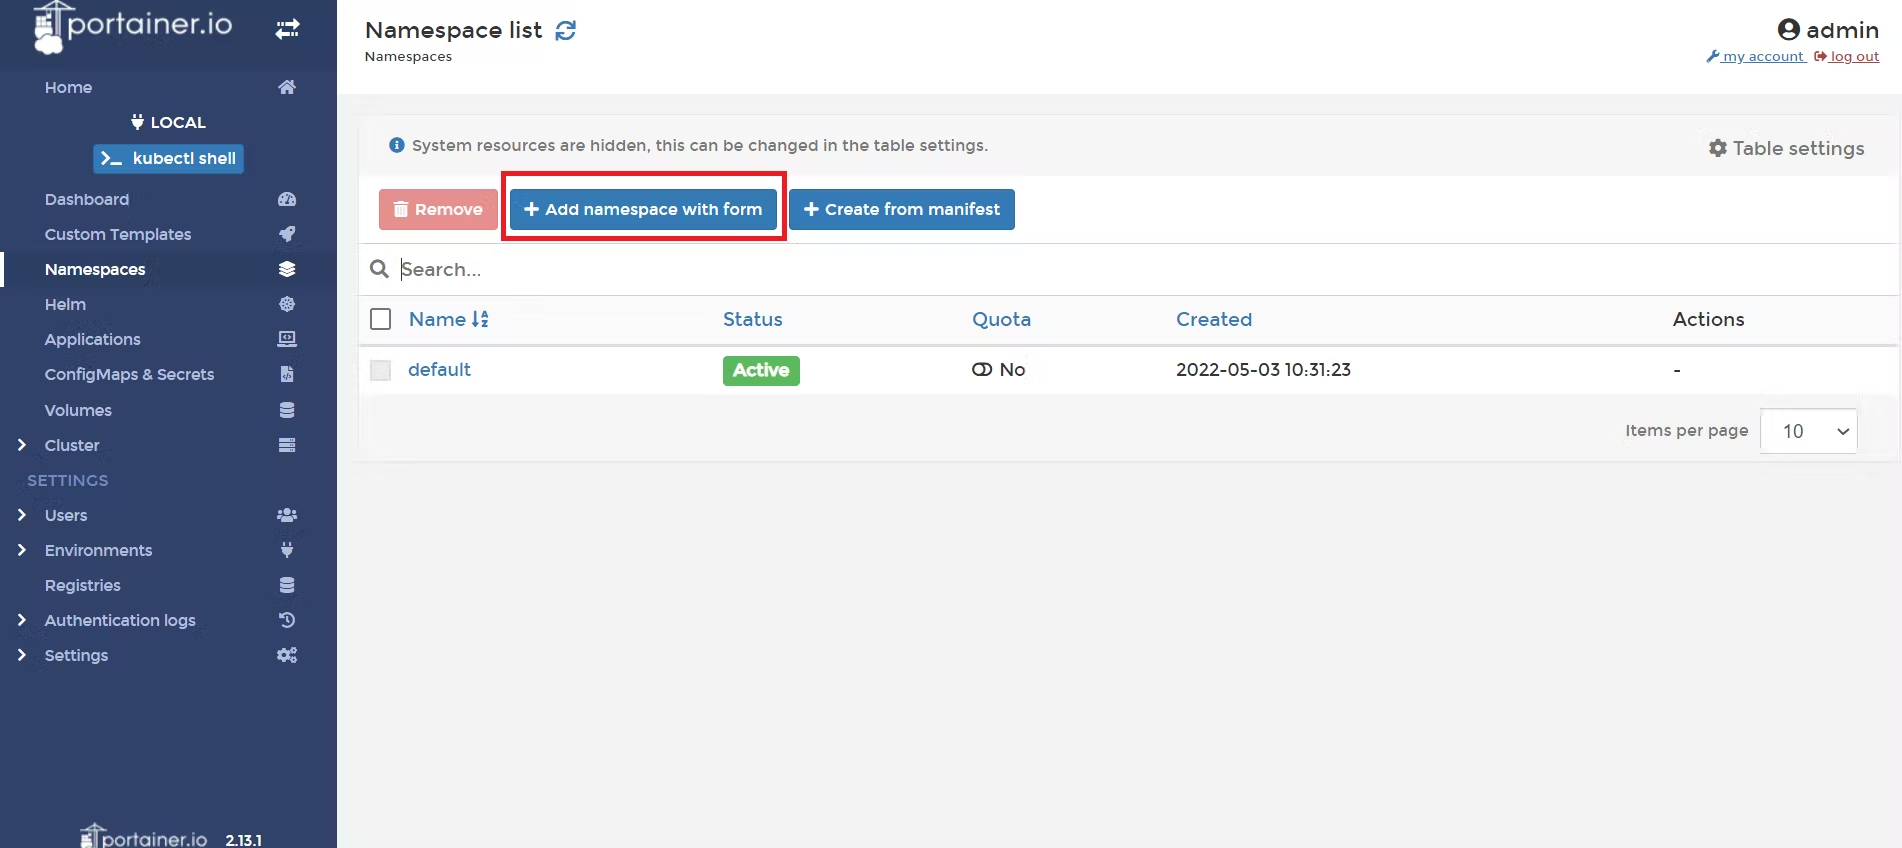
📌 Click on the Namespace, you will see the default namespace
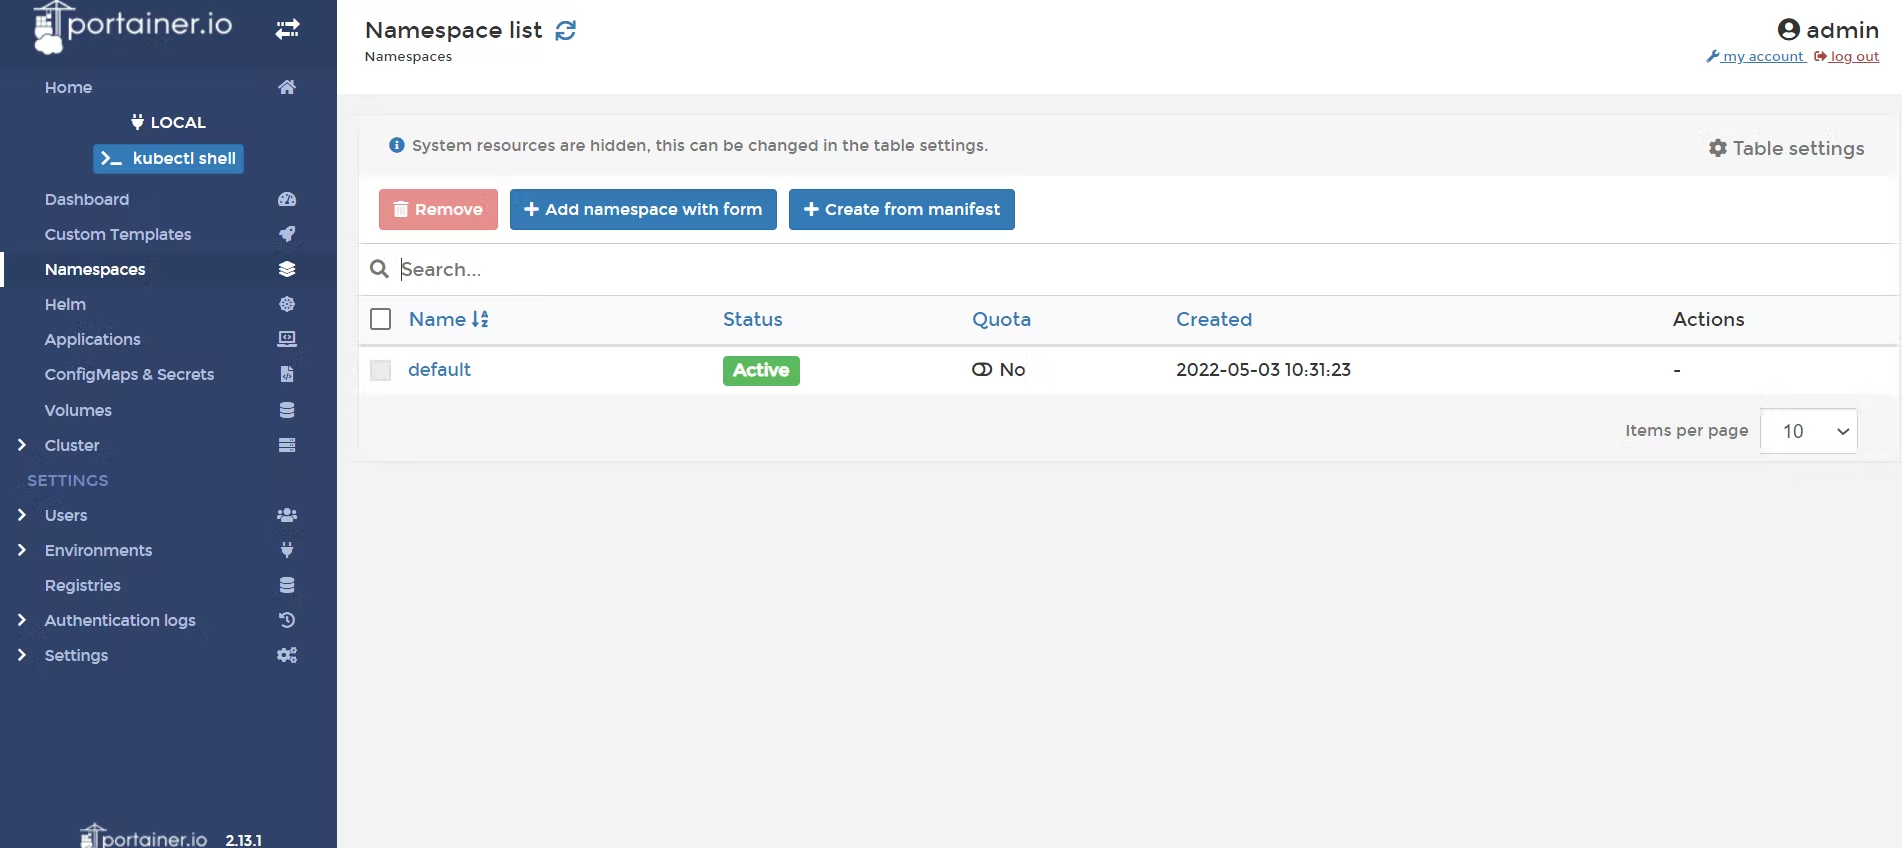
📌 Click on the Add Namespace with form button
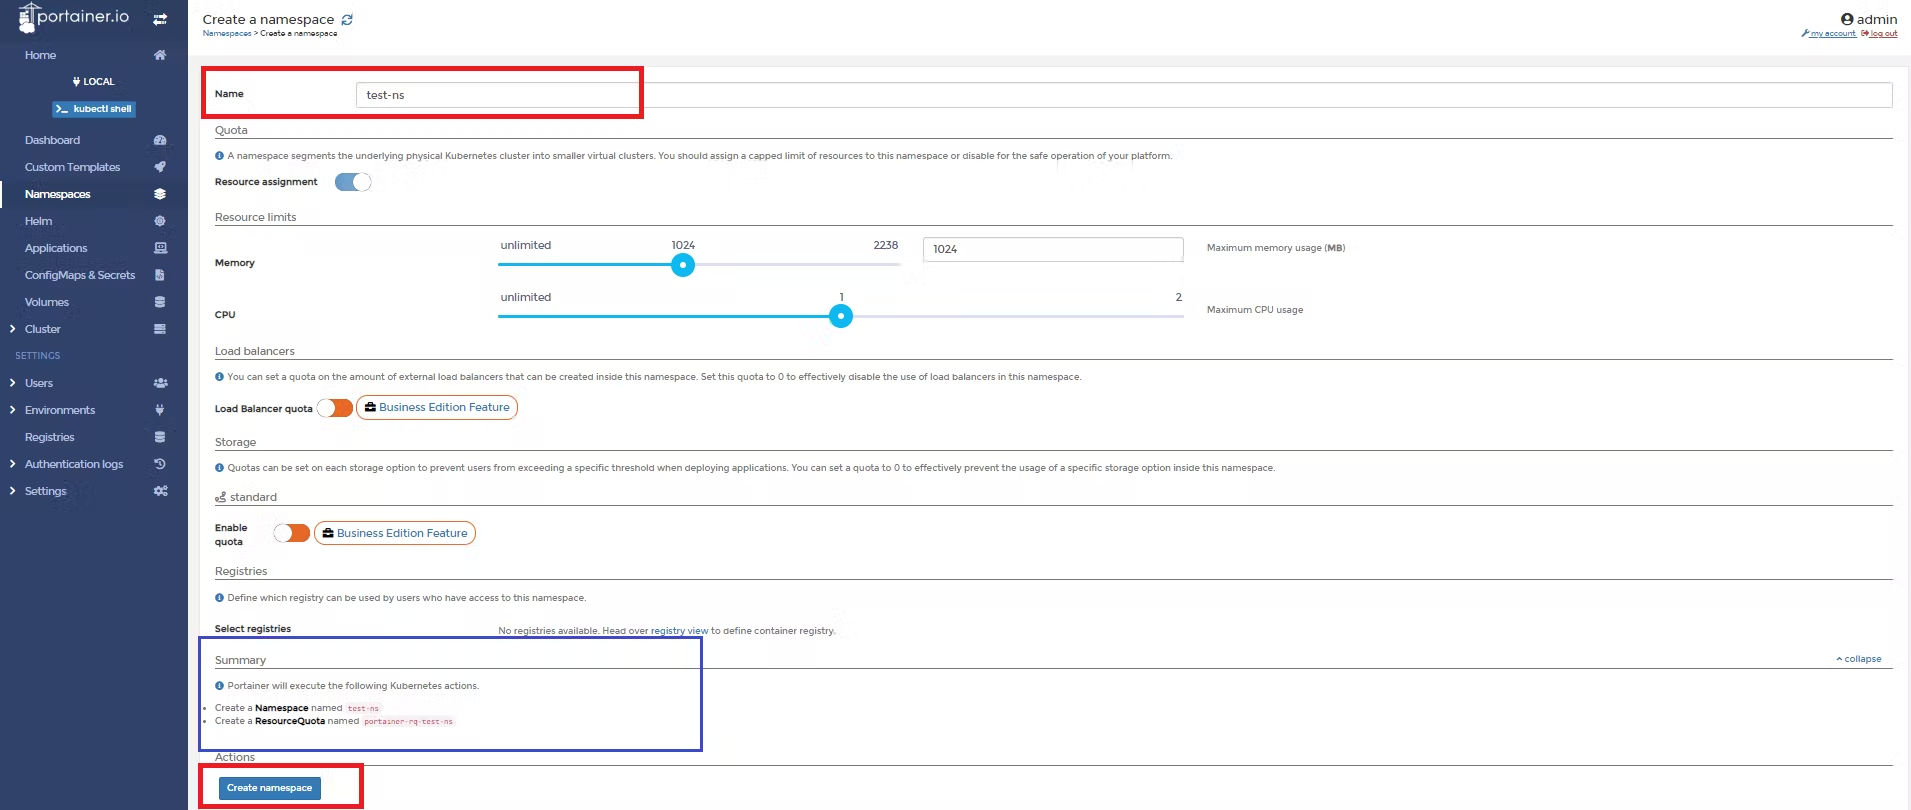
📌 Give the name, set the memory and CPU limits, and then click on the Create namespace
📌 Let's see the namespace list
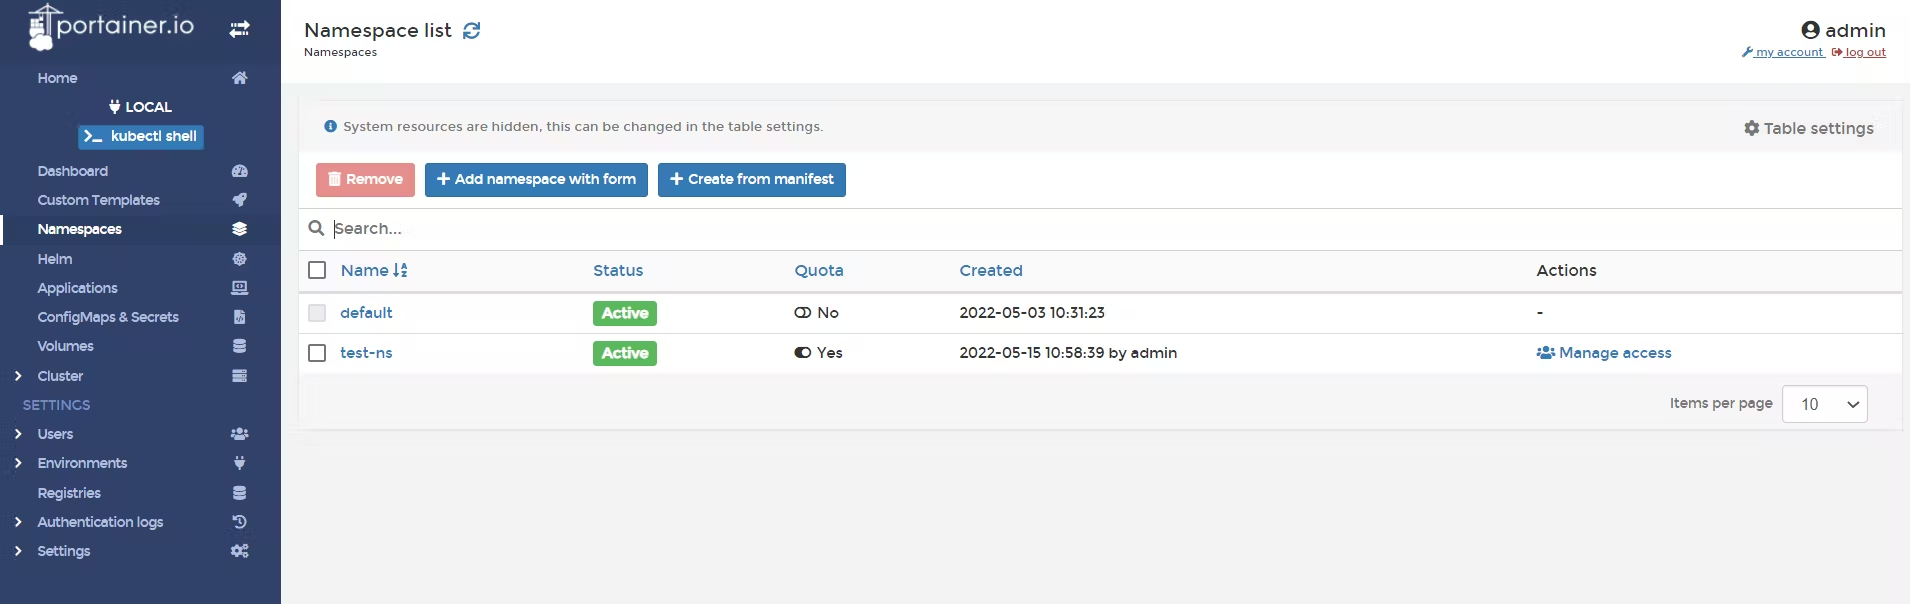
So, we have successfully created our namespace 🤩!
👉Now, let's create an application in our namespace that we created above.
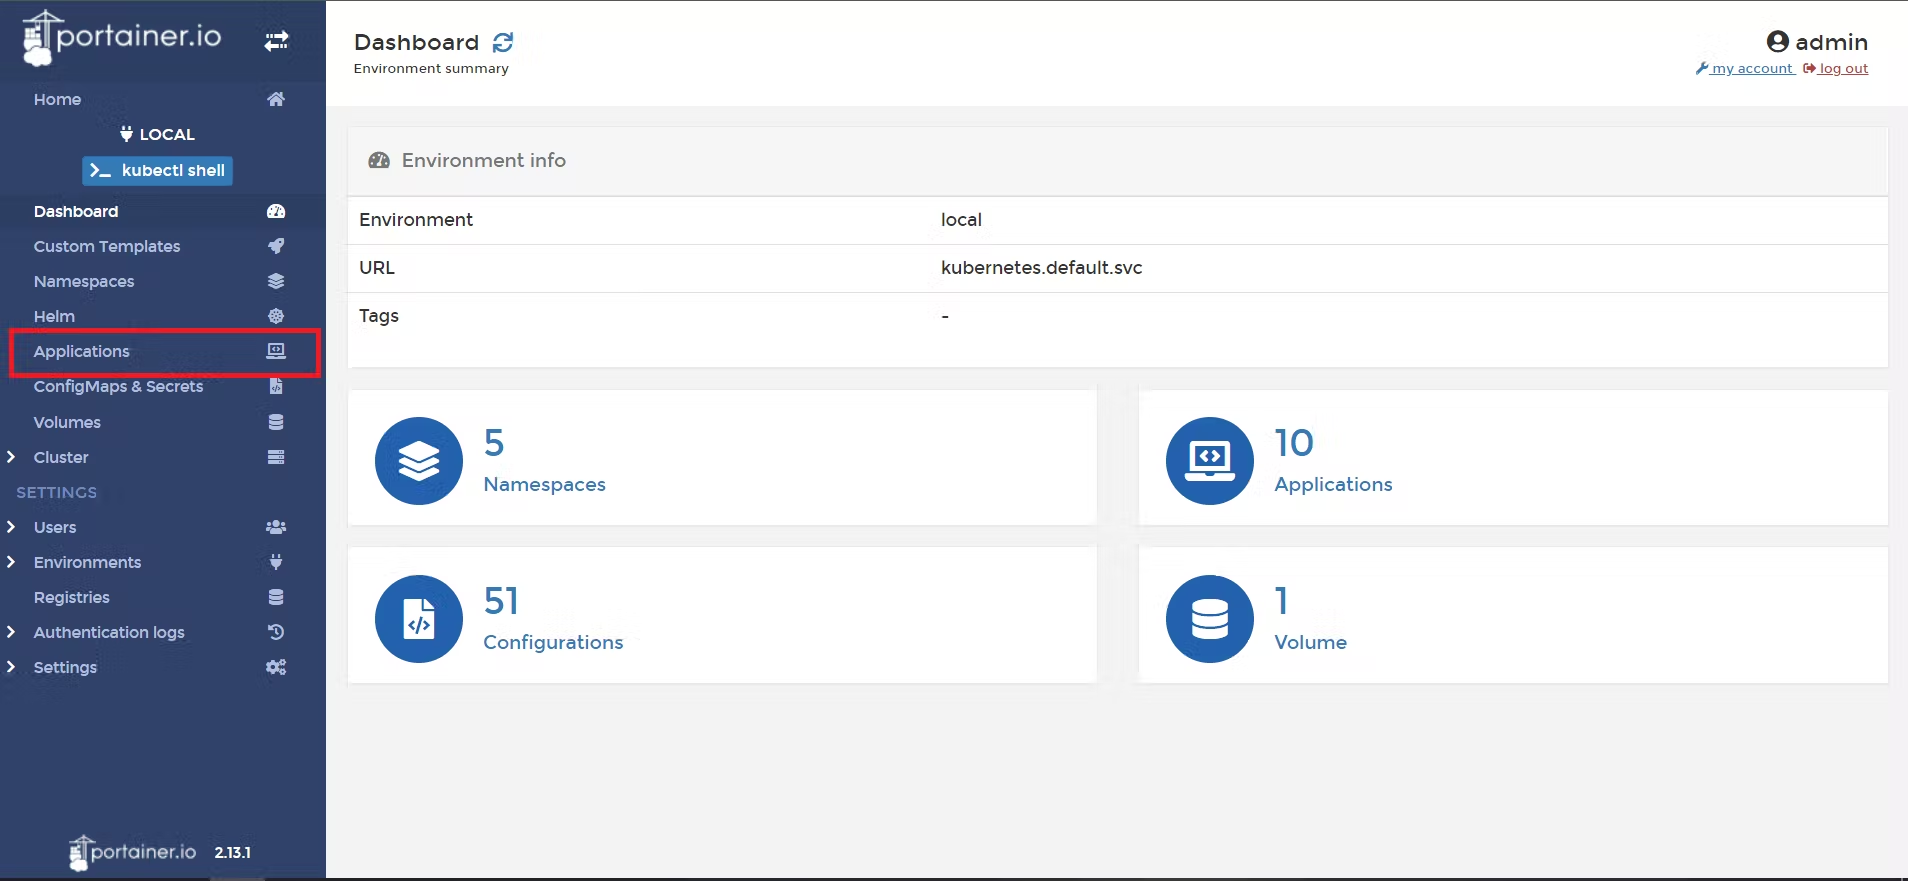
📌 Click on Applications
📌 Click on Add application with form
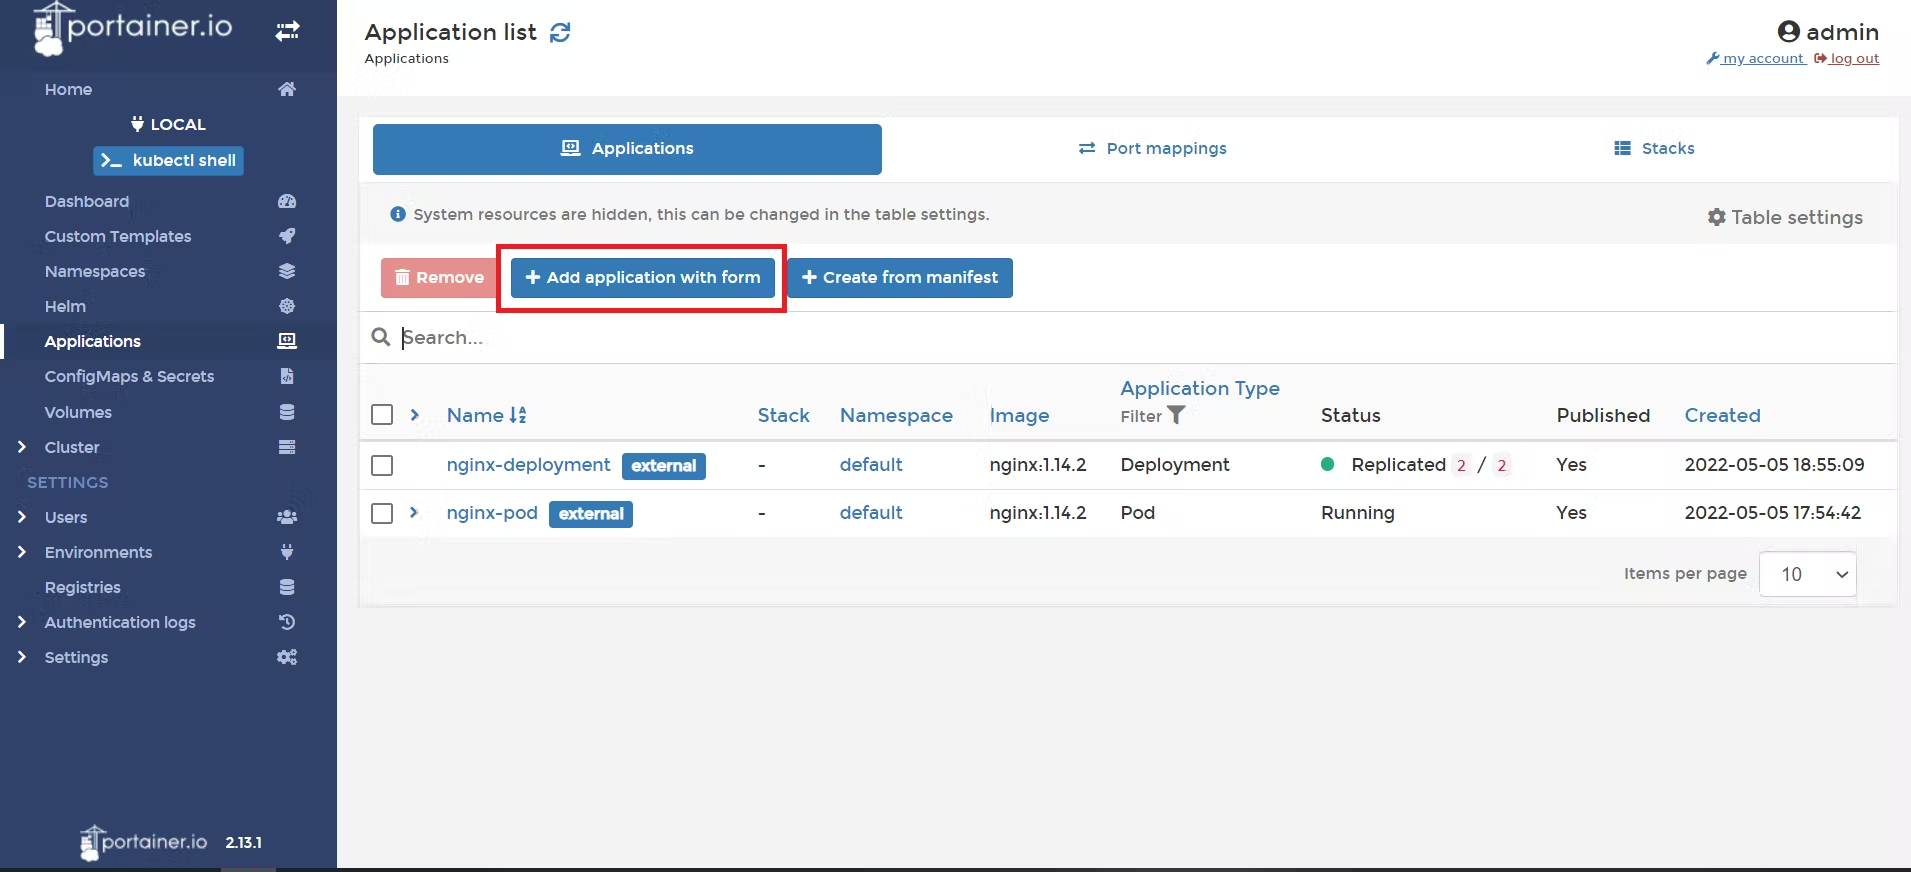
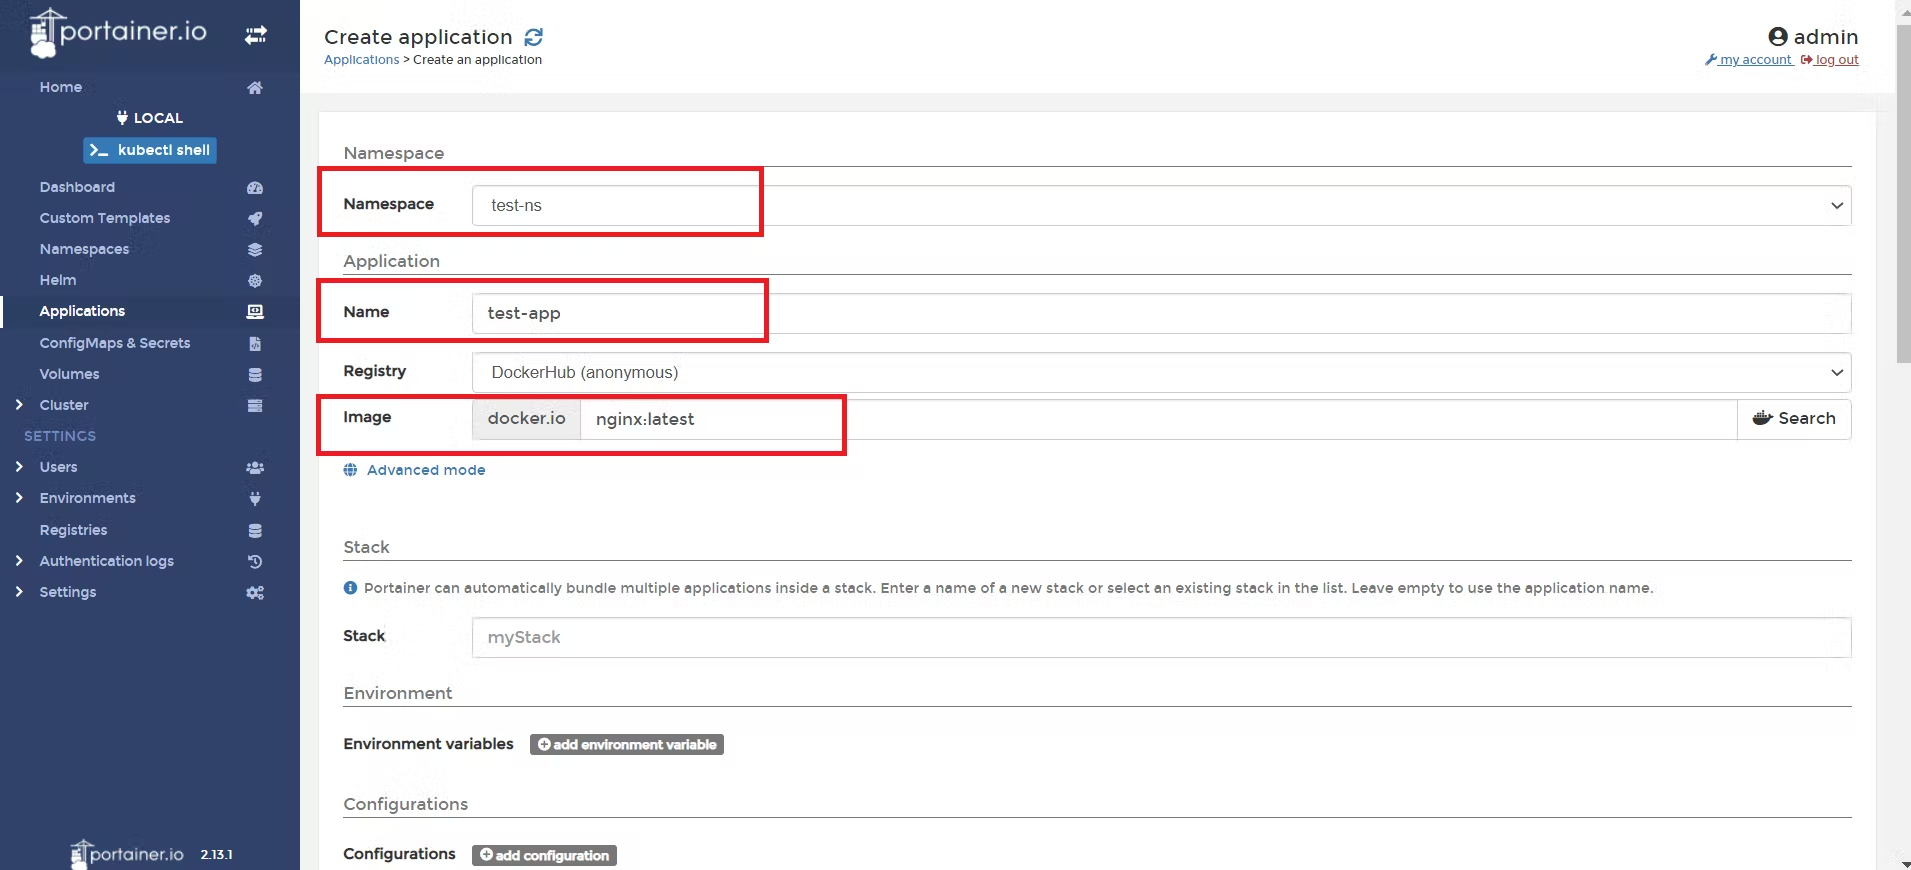
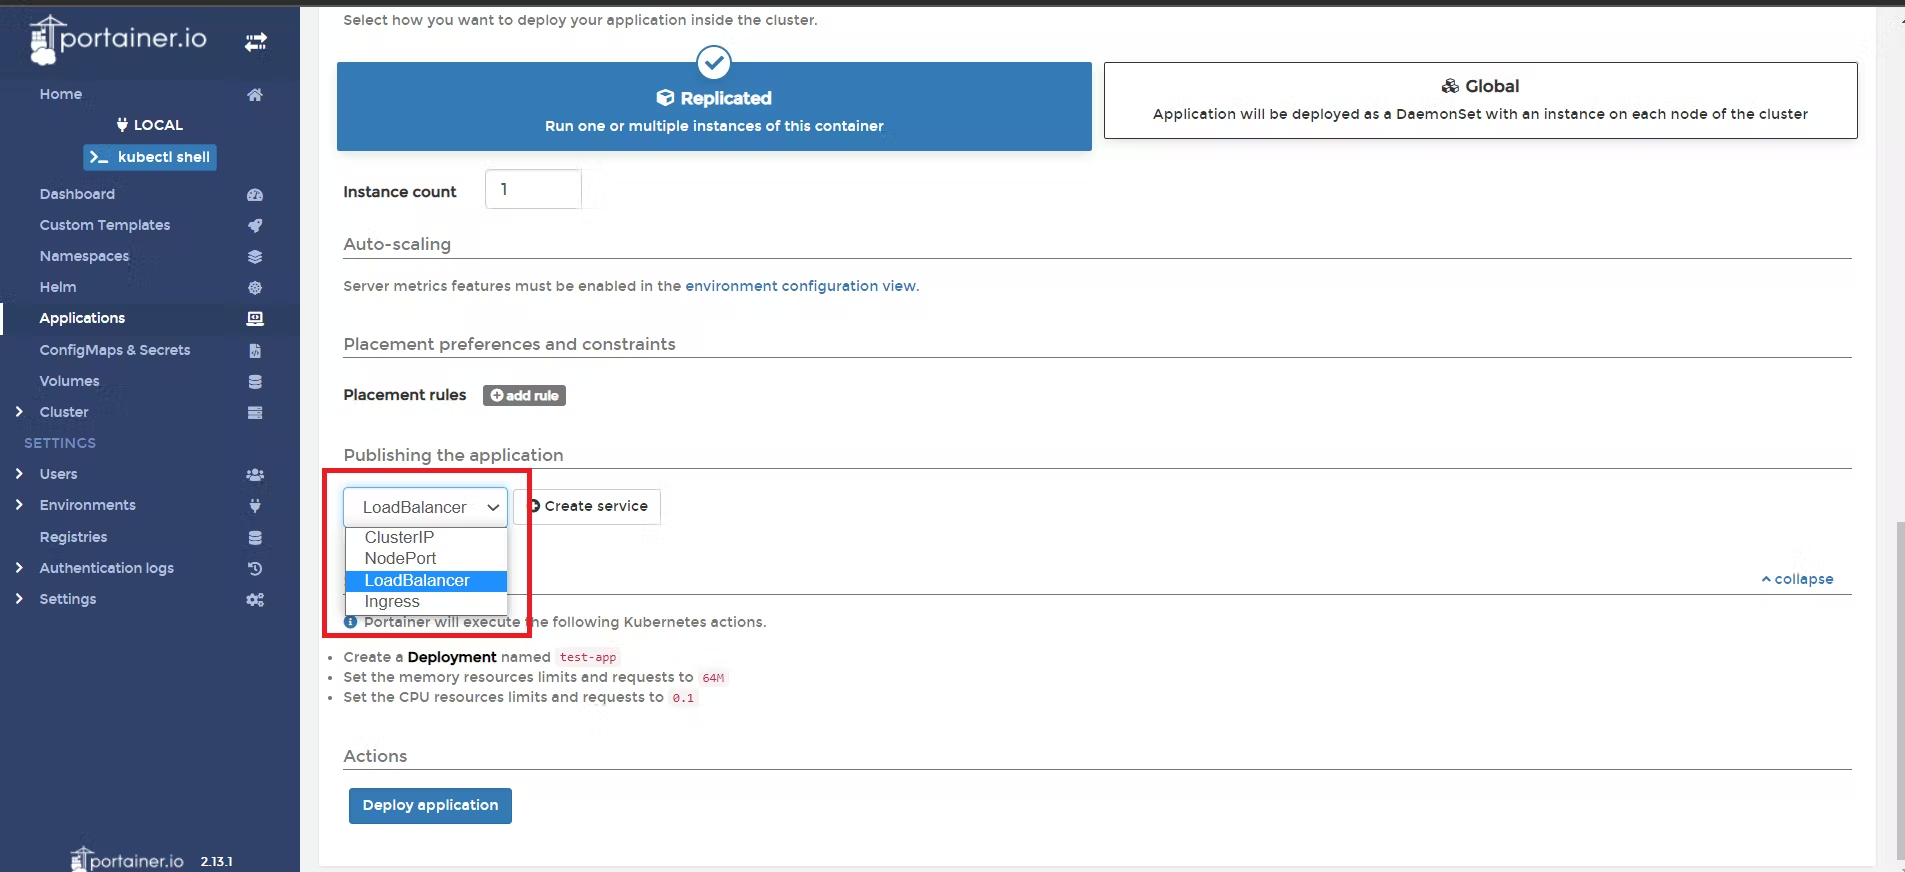
📌 Select the namespace we created from the dropdown, provide the application name (nginx:latest), image name (test-app), and select service type (LoadBalancer).
📌 Let's see the application list
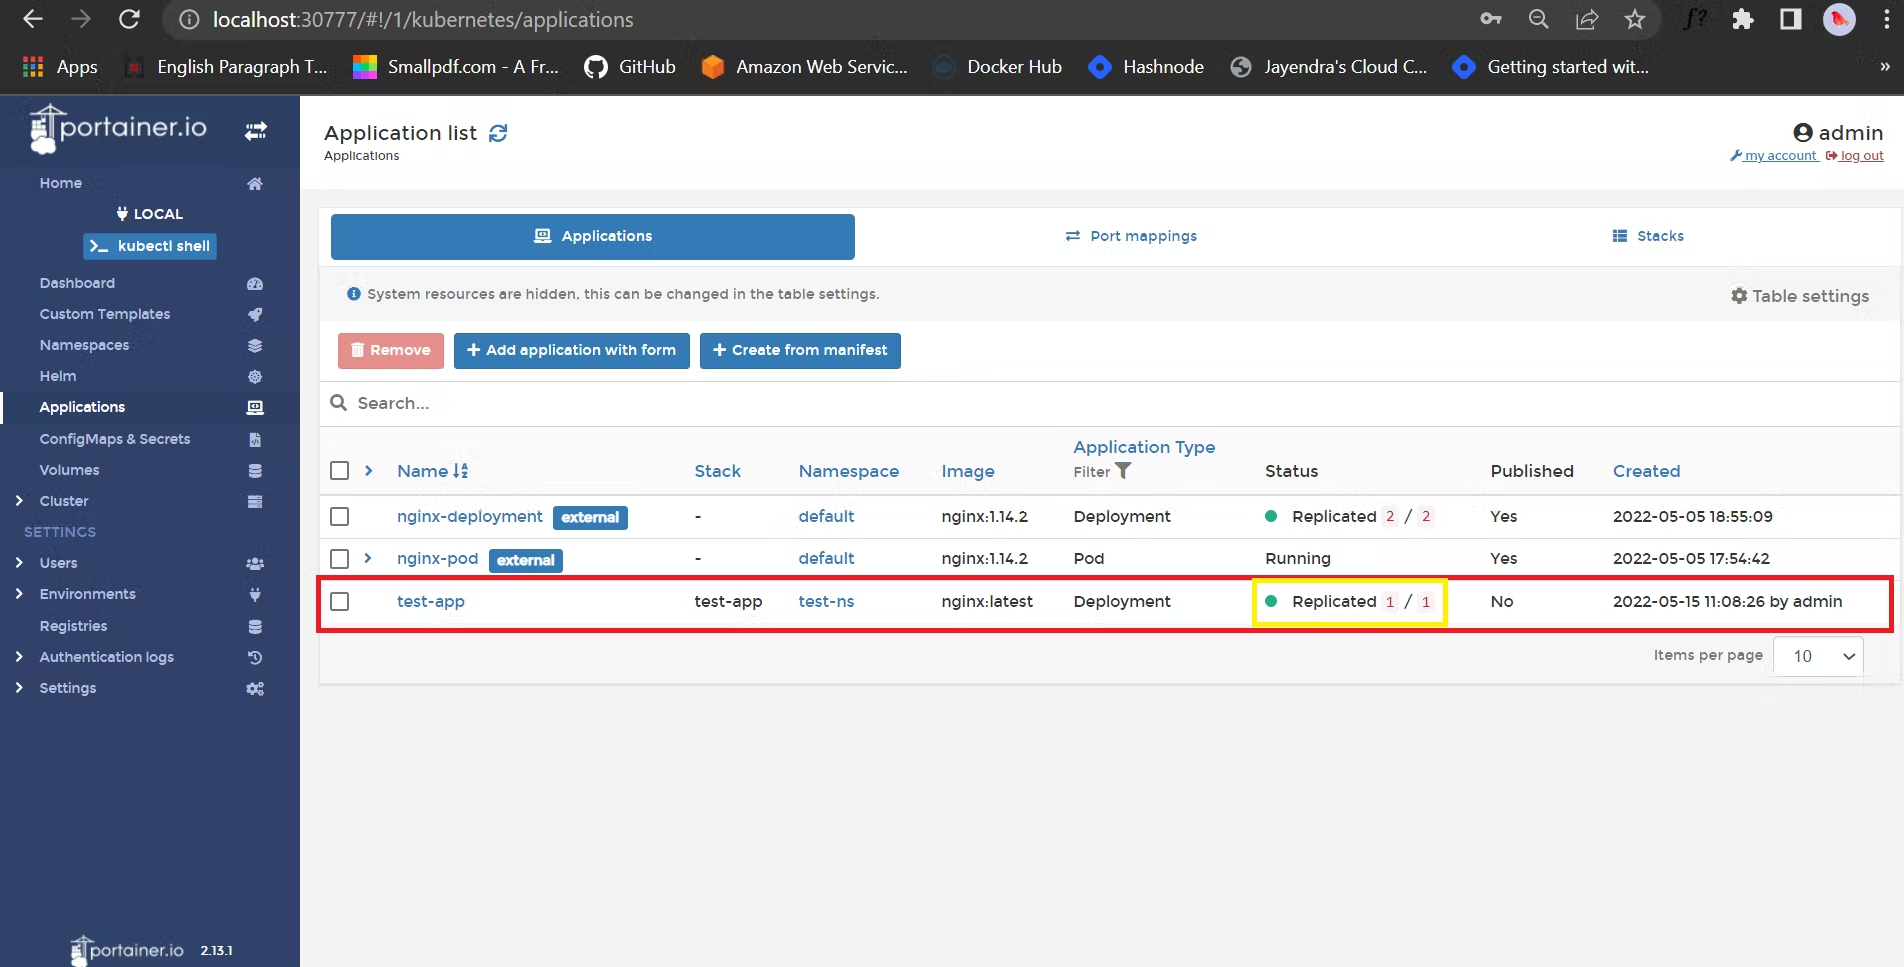
Wooooh, we have successfully created our application 🥳
Portainer is a great tool that can be used to manage Docker containers, Swarm services, and other resources from a simple and intuitive web user interface. Portainer provides several free features and paid plugins to enhance the user experience for managing Docker clusters. On the other hand, some paid plugins still have some restrictions or missing features that could improve the product.
💥 I hope this blog will help you understand how Portainer manages containers.
此内容由惯性聚合(RSS阅读器)自动聚合整理,仅供阅读参考。 原文来自 — 版权归原作者所有。