


本文将向您展示如何在 OCI Ampere A1 上准备和启动计算密集的 AI 应用程序。使用 Ampere A1,我们将发挥 Ampere Altra 处理器和 Ampere AIO 一流的 AI 推理性能。
我将使用此 Github 中的演练/脚本(请注意,这些脚本也将在我们将创建的实例上)。此外,如果您想继续,您需要 Ampere A1 实例 - 可以在 OCI 上免费创建。
首先,我将创建 Ampere A1 的单个实例。该实例使用 VM.Standard.A 1.Flex 并具有 4 个 OCPU 和 24 GB 内存。
Note
根据 Oracle 的定价页,Oracle CPU (OCPU) 计费单元实际上是处理器的一个物理内核。一个开启超线程的 CPU,对应的是两个硬件执行线程,即所谓的 vCPU。。而对于 A1 实例,一个 OCPU 就是一个 vCPU。
打开导航菜单并选择计算和实例以创建计算实例,您可以选择“Running Hugo”文章中使用的相同的隔层或在实例页面上创建新隔层。
单击创建实例按钮打开创建页面,创建新实例。创建页面上有多个部分。但是,我们只会更改其中的几个。
首先,您可以将随机生成的名称更改为更易于使用的名称,例如 ai- vm。以下内容是 Placement——我们可以在此处保留默认值,但您可以为实例选择不同的可用性域(AD) 和故障域(FD)。最后,将默认设置 Always Free-eligible 可用性域。
下一部分称为 Image and Shape(图像和形状),我们将在这里选择实例形态(实例形态是 GCP 中的机器类型和 Azure 中的 VM 大小)和计算实例的操作系统映像。
单击 Change shape 按钮以选择不同的 VM 实例形态,确保您已选择虚拟机的实例类型。您可以在下一行中选择形态系列。我们正在寻找包含基于 ARM 的处理器和名为 VM.Standard.A 1.Flex 的形态名称的 Ampere 系列(它应该是此视图中唯一可用的形状)
选择VM.Standard.A 1.Flex,将 OCPU 数量调整为 4,并将内存量调整为 24 GB。完成此项操作后,我们将能够永久免费使用这一规格。
单击Select shape按钮以确认选择。
单击Change image按钮。然后让我们为形状获取正确的镜像。

选择镜像
在下拉菜单中选择Partner Image。然后在搜索框中,输入Ampere。您将看到可用于 Ampere A1 形状的可用镜像。
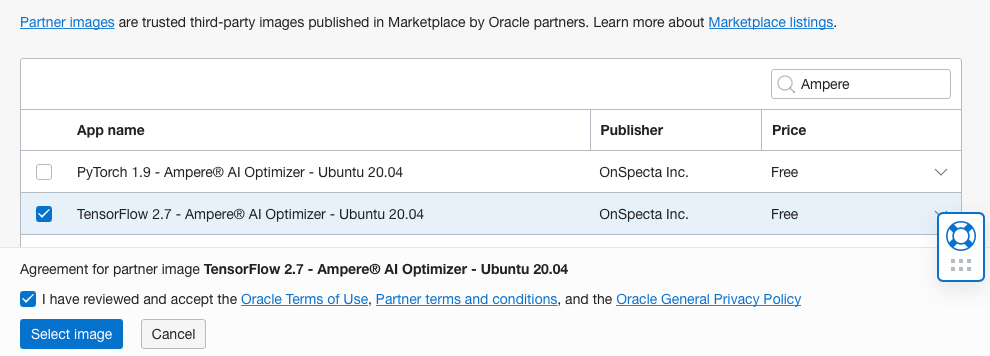
Ampere Tensorflow Image
选中 Tensorflow 2.7 – Ampere AI Optimizer – Ubuntu 20.04 框和以下复选框以同意“Terms of Use(使用条款)”。然后,单击 Select Image 按钮。您应该会看到选定的 shape 和 image 框,如下图所示。
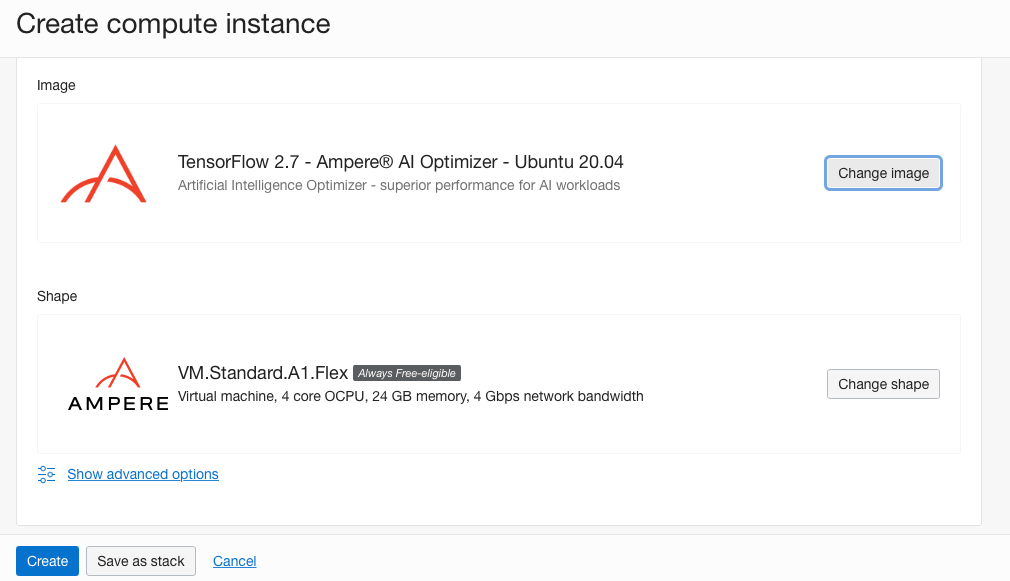
Tensorflow 2.7 – Ampere AI Optimizer – 已选择 Ubuntu 20.04 镜像
我们还想稍后使用 SSH 密钥连接到实例。您可以选择创建新的 SSH 密钥对或上传/粘贴一个或多个现有公钥文件。
如果您正在生成新的 SSH 密钥对,请确保单击 Save Private Key按钮以保存生成的密钥。
Note
注意:您必须将 SSH 密钥文件的权限设置为 400。您可以运行
chmod 400 <keyfile>来执行此操作。
我们不会更改任何其他设置,因此让我们单击 Create 按钮来创建实例。
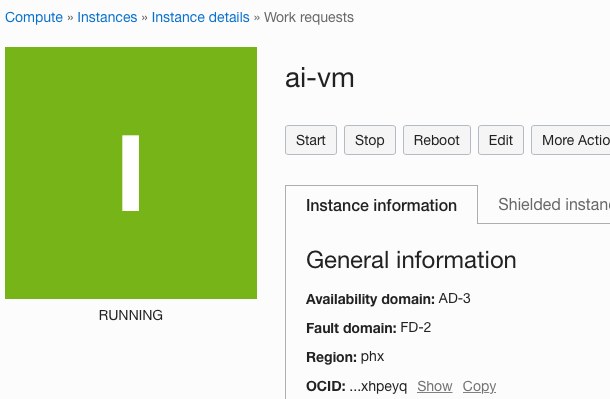
创建 AI 实例
几分钟后,OCI 会创建实例,并且实例的状态会从配置变为运行。
要连接到实例,我们将使用实例的公共 IP 地址和我们设置的 SSH 密钥。
您可以从实例页面获取公共 IP 地址,然后使用 ubuntu 用户名通过 SSH 连接到机器。
$ ssh -i <keyfile> ubuntu@<public ip address>
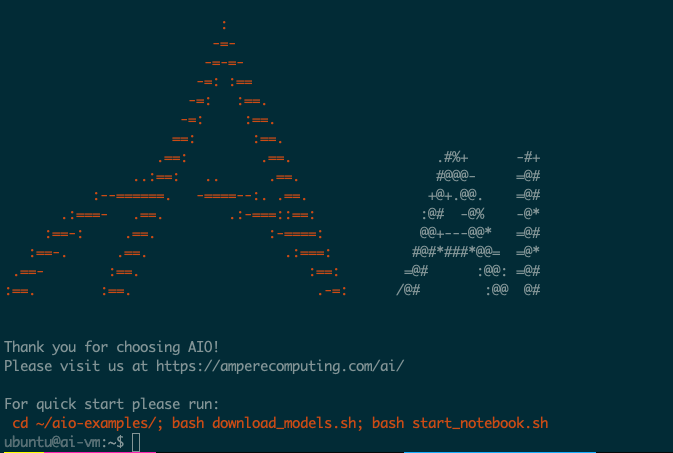
AI虚拟机登录画面
请注意,您可能会看到重新启动 VM 的消息 - 为此,只需运行sudo reboot 并在一分钟后再次登录。
TensorFlow 是一个用于机器学习的开源平台。它拥有一系列工具、库和资源,可让您轻松构建和部署基于 ML 的应用程序。
我们在创建实例时选择的 TensorFlow 镜像包含简单的 TensorFlow 示例。为了准备运行示例,让我们先下载模型:
$ cd ~/aio-examples
$ ./download_models.sh
模型文件被下载到 ~/aioi-examples 和多个文件夹(例如classifications、 object_detection)。这些模型用来执行一些常用的 AI 推理计算机视觉任务,如图像分类和对象检测。
让我们从一个使用 Tensorflow resnet_50_v15 模型进行分类的示例开始:
Note
resnet50 模型是什么?这是一个流行的模型,是 MLCommon 基准组件之一。您可以在这里读更多关于它的内容
cd classifications/resnet_50_v15
Note
对于 Ampere A1 实例,一个 OCPU 对应一个物理的 Ampere Altra 处理核心。它不同于 AMD (E3/E4)或 Intel Standard3(S3)中,一个 OCPU 对应一个超线程(HT)内核(一个物理内核对应两个 HT 内核)。
我们使用 4 个 Altra 内核来运行这个示例。同时选择 FP32(全精度浮点)模型来运行此示例:
export AIO_NUM_THREADS=4
python run.py -m resnet_50_v15_tf_fp32.pb -p fp32
Note
在内存中,FP32 或全精度浮点是一种 32 位的数字格式。
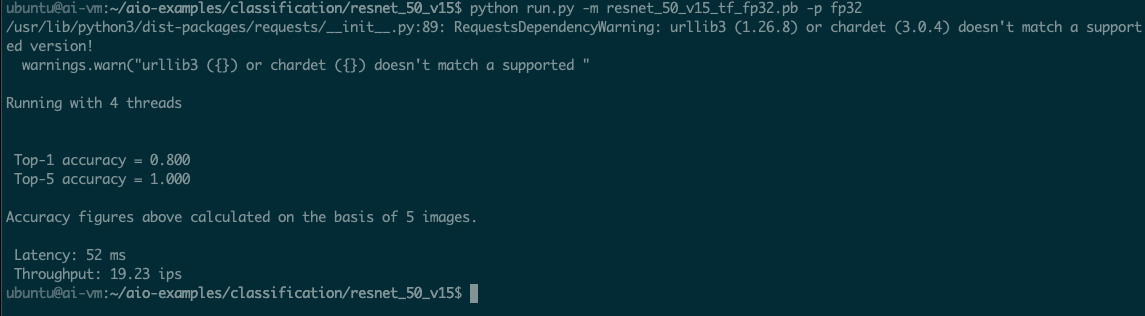
Processing images with 4 cores
可以看到,使用四个核心,resnet_50_v15 每秒可以处理 19.23 张图像(ips)。
Ampere A1 在硬件中提供对 FP16 计算的原生支持。半精度(FP16)模型可提供比 FP32 多 2 倍的额外性能,同时也不会影响模型的精确度。AMD E4 和 Intel S3 都没有对 FP16 提供原生支持,因此运行 FP16 会异常缓慢。
Note
FP16 是一种半精度浮点计算机数字格式,在内存中占用 16 位。
让我们尝试在 Ampere A1 上运行 FP16:
python run.py -m resnet_50_v15_tf_fp16.pb -p fp16
ubuntu@ai-vm:~/aio-examples/classification/resnet_50_v15$ python run.py -m resnet_50_v15_tf_fp16.pb -p fp16

/usr/lib/python3/dist-packages/requests/__init__.py:89: RequestsDependencyWarning: urllib3 (1.26.8) or chardet (3.0.4) doesn't match a supported version!
  warnings.warn("urllib3 ({}) or chardet ({}) doesn't match a supported "

Running with 4 threads


 Top-1 accuracy = 0.800
 Top-5 accuracy = 1.000

Accuracy figures above calculated on the basis of 5 images.

 Latency: 28 ms
 Throughput: 36.29 ips
使用 FP16 时,我们每秒可以处理 36.29 张图像。
我们可以通过在 AMD 和 Intel Flex 形状上运行相同的脚本来比较这些数字。运行此模型和应用程序每秒的形状和图像的成本如下表所示。
对于 FP32 resnet_50_v15 模型:
| OCI Shape | $ / hr | Images per second | Performance (ips) / price |
|---|---|---|---|
| Ampere A1 | 0.04 | 19.23 | 480 |
| AMD E4 | 0.05 | 15.43 | 308 |
| Intel Standard3 | 0.08 | 18.24 | 228 |
对于 FP16 resnet_50_v15 模型:
| OCI Shape | $ / hr | Images per second | Performance (ips) / price |
|---|---|---|---|
| Ampere A1 | 0.04 | 36.29 | 907 |
在相同的成本下,运行 resnet_50_v15 FP32 模型的 Ampere A1 形状可提供超过 AMD 最佳 E4 实例 1.5 倍的性能,以及超过英特尔 Standard3 实例 2 倍的性能。
利用 Ampere Altra 对 FP16 的原生支持,在相同的成本下,Ampere A1 形状达到的性能超过 AMD E4 的 2.8 倍和 Intel Standard3 的 3.8 倍!
此外,Ampere A1 形状的性能比 AMD/Intel 更好。例如,如果使用更高核心数的 VM,与运行 FP32 模型的 E4 相比,Ampere A1 可提供额外 2 倍的性能增益。
首先,让我们在 VM 上启动 Jupyter Notebook 服务器
Jupyter Notebook 通常用于在浏览器上轻松实现编辑、调试和可视化 Python 应用程序的需求。我们使用的 VM 图像包括一个 Jupyter Notebook 示例。
cd ~/.aio-examples
./start_notebook.sh
buntu@ai-vm:~/aio-examples$ ./start_notebook.sh
On your local system please open a new terminal window and run:
ssh -N -L 8080:localhost:8080 -i ./your_key.key your_user@xxx.xxx.xxx.xxx

After that open one of the links printed out below in your local browser

[I 23:08:01.841 NotebookApp] Writing notebook server cookie secret to /home/ubuntu/.local/share/jupyter/runtime/notebook_cookie_secret
[I 23:08:02.270 NotebookApp] Serving notebooks from local directory: /home/ubuntu/aio-examples
[I 23:08:02.270 NotebookApp] Jupyter Notebook 6.4.8 is running at:
[I 23:08:02.270 NotebookApp] http://localhost:8080/?token=fd98a68431793485bb9dbf8590ad6f571dbabbfa96757b37
[I 23:08:02.270 NotebookApp]  or http://127.0.0.1:8080/?token=fd98a68431793485bb9dbf8590ad6f571dbabbfa96757b37
[I 23:08:02.270 NotebookApp] Use Control-C to stop this server and shut down all kernels (twice to skip confirmation).
[C 23:08:02.274 NotebookApp]

    To access the notebook, open this file in a browser:
        file:///home/ubuntu/.local/share/jupyter/runtime/nbserver-1367-open.html
    Or copy and paste one of these URLs:
        http://localhost:8080/?token=fd98a68431793485bb9dbf8590ad6f571dbabbfa96757b37
     or http://127.0.0.1:8080/?token=fd98a68431793485bb9dbf8590ad6f571dbabbfa96757b37
接下来,我们将通过本地主机打开一个用于浏览器连接的通道。在第二个终端窗口中,运行以下命令:
ssh -N -L 8080:localhost:8080 -i ./your_key.key your_user@xxx.xxx.xxx.xxx
然后,使用上一步中的链接在浏览器中打开 Jupyter Notebook(例如http://localhost:8080/?token=....)。
您会看到如下图所示的页面。
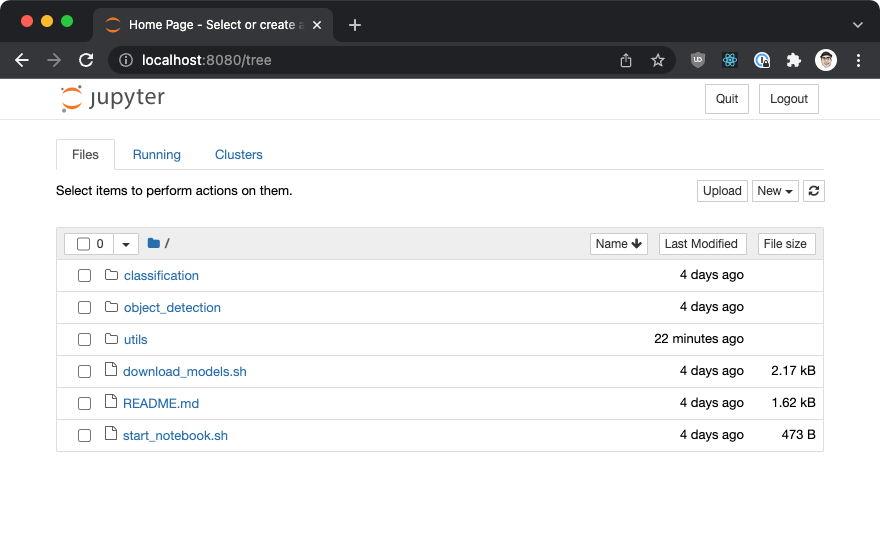
连接到Ampere 上的Jupyter服务器
我们将使用 object_detection 文件夹中的对象检测示例。双击文件夹的名称,然后单击 examples.ipynb 项目。
单击“运行”按钮来逐步执行该示例。您会看到对象检测的结果以及 AIO 对 Tensorflow 的加速情况。
您会注意到启用或禁用 AIO 时的延迟差异。例如,当以 FP16 精度运行已启用 AIO 的模型时,延迟约为 44 毫秒。在禁用 AIO 的情况下运行相同的模型,延迟为 3533ms!这是一个明显的区别。
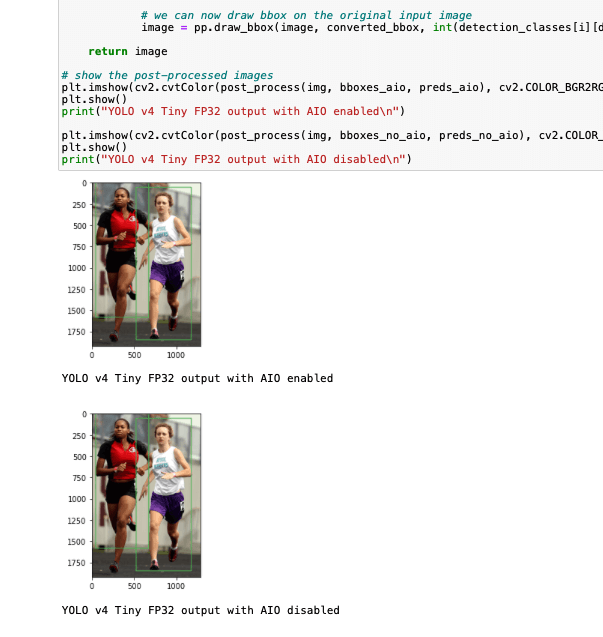
运行示例
您也可以用相同的方式运行分类示例——单击classifications文件夹,然后单击examples.ipynb项目。
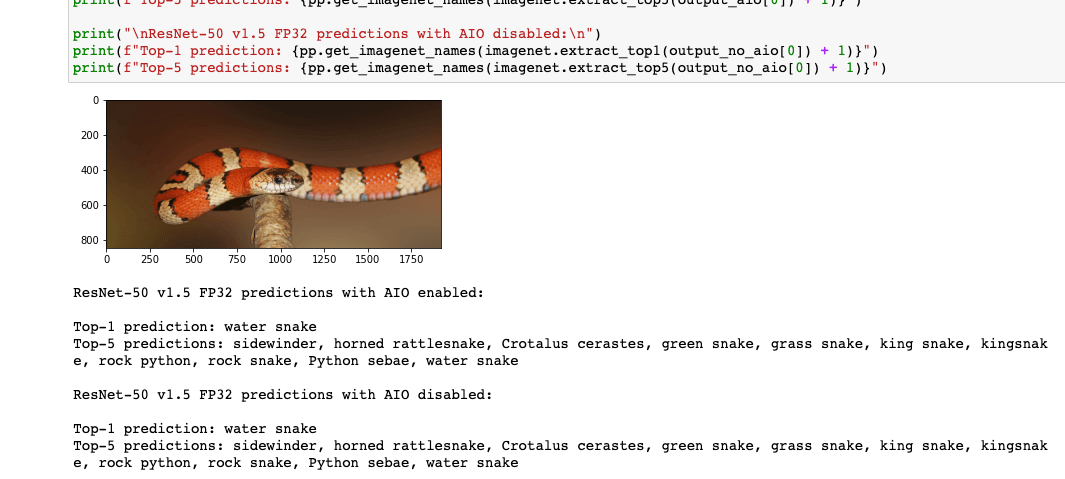
分类示例
恭喜!您已完成在 Ampere A1 形状上运行通用 AI 应用程序的全过程。
运行这些示例相当简单——不用进行任何转换或更改应用程序代码就能在 Ampere A1 上运行 API 应用程序。
像 TensorFlow 等的标准框架会自动加速。我们可以很轻松地以相同的成本达到比其他形状高 2 到 4 倍的性能增益。
您可以在Github repo中查看本文中使用的脚本——这些脚本与我们在所使用的示例图像上自动下载的脚本相同。
此内容由惯性聚合(RSS阅读器)自动聚合整理,仅供阅读参考。 原文来自 — 版权归原作者所有。