


Meshery is a multi-service mesh management plane that offers lifecycle, configuration and performance management of service meshes and applications running on top of those meshes.
Meshery uses a common service mesh performance specification to describe and capture performance benchmarks and results. The spec contains general information about the performance test (e.g. start/end times), service mesh and proxy build numbers, Kubernetes cluster details (nodes, type of nodes, memory information) and the actual results.
One of the ideas behind Meshery is to be a vendor and project-neutral tool that can benchmark the performance of different service meshes. So, if you ever wondered which service mesh performs better - Meshery can answer those questions for you.
You can use Brew to install mesheryctl.
brew tap layer5io/tap
brew install mesheryctl
Once Meshery is installed, you can run mesheryctl start. The start command pulls down all images needed by Meshery, runs them and opens the Meshery dashboard in your browser. There are other installation options as well (Windows) and you can even install Meshery directly on your Kubernetes cluster. For more information on the Kubernetes install, check the Meshery readme.
Note
Note: you can run
docker psto see all containers running as part of Meshery as shown in figure below

In your browser (navigate to http://localhost:9081), you will see the initial screen of Meshery. First time you run/open the dashboard you will have to pick your provider. There are two options:
At the time of writing both options were free, but I went with the Local provider though. Once you confirm the provider selection, you should see the dashboard as in the figure below.
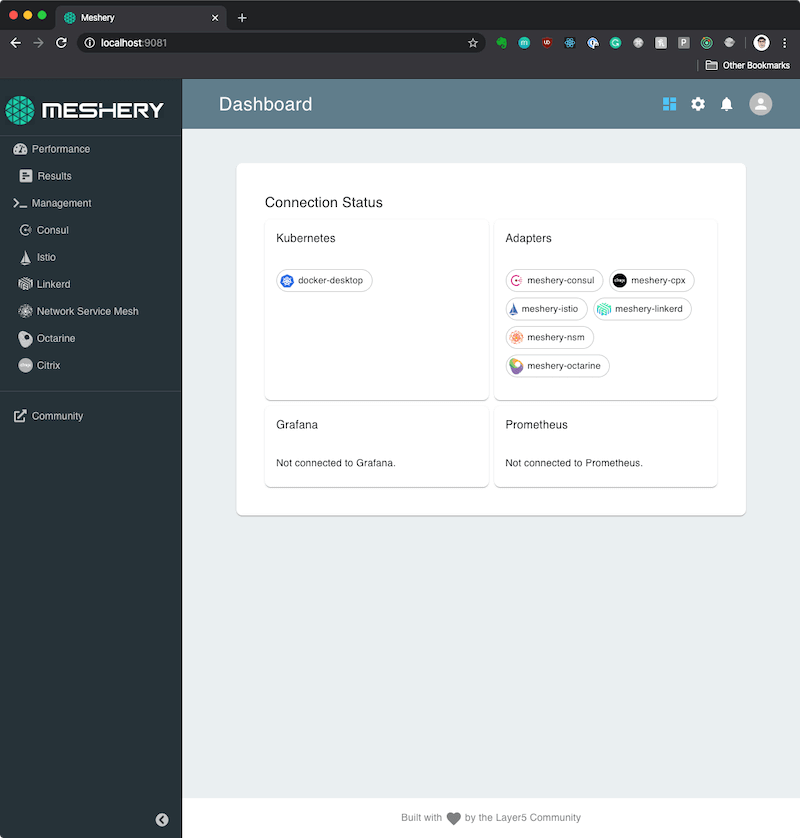
On the main dashboard you will get the connection status information, that includes connection to your Kubernetes cluster(s) and Meshery adapters for different service meshes.
In addition to doing performance benchmarks, Meshery can also be used to install and manage different service meshes. I've tried the Linkerd and Istio installations, togther with sample applications and it worked great. You don't need to know about the istioctl nor linkerd CLIs as Meshery does that for you.
From the sidebar on the left, you can click on service mesh (Consul, Istio, Linkerd, ...) and that gives you an option to deploy that mesh.
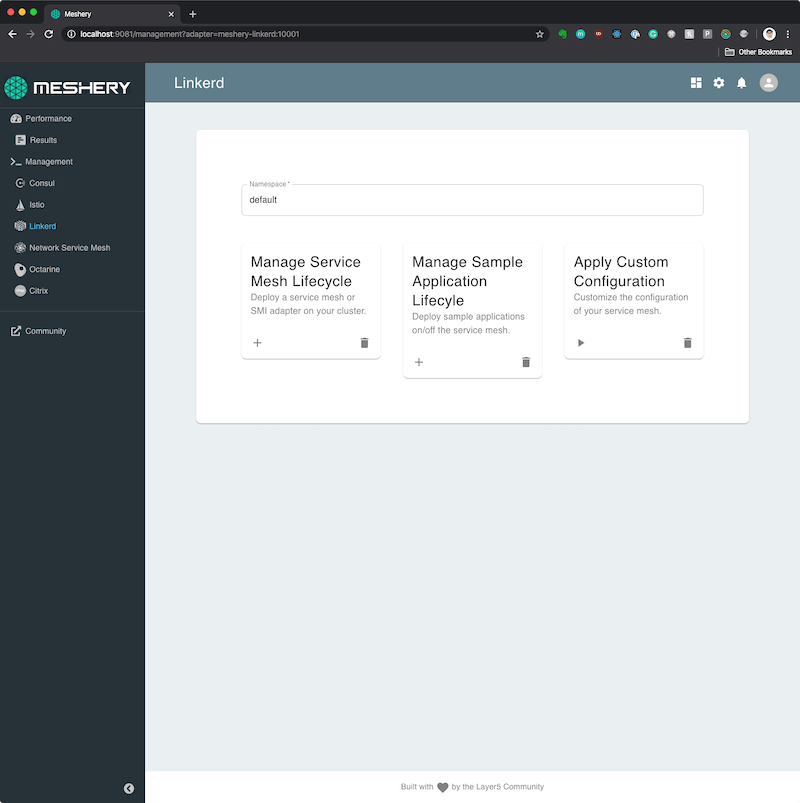
Let's try and install Linkerd:
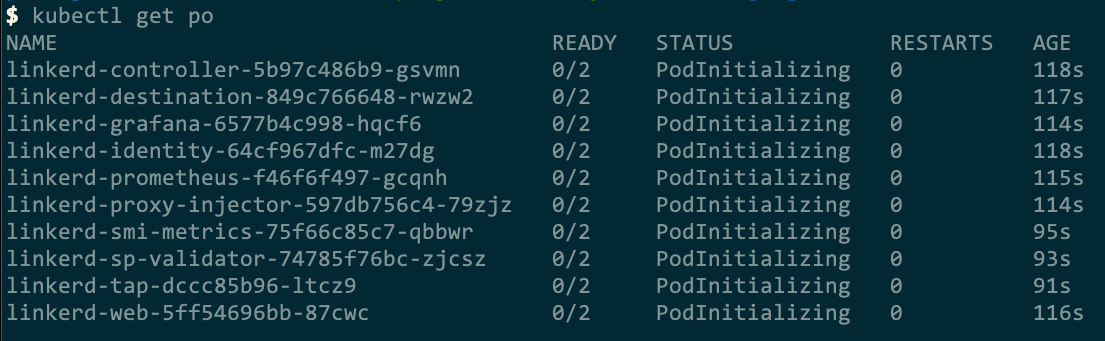
linkerd in the namespace text boxThis triggers the Linkerd installation and you should see a message in the top right corner saying "Operation executing". If you go back to your terminal and run kubectl get pods -n linkerd you will see Linkerd pods initializing.
One thing that I missed on this page is that there was no clear indication of any service meshes you might already have installed. For example, I already had Istio installed, but when I clicked on the Istio option in the sidebar, there was not indication telling me that Istio is already installed.
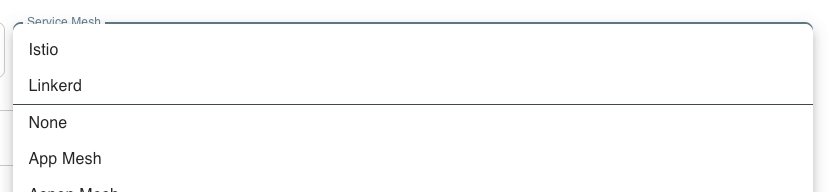
However, going to the Performance page and clicking the Service Mesh drop down, I did see the installed service meshes (Istio and Linkerd):
The next step would be to install a sample application you want to use for the performance test. A nice feature from Meshery here is that it can do that for you, so you don't have to go and search for examples and deal with YAML files or Kubernetes CLI directly.
Since I've installed Linkerd, I will go with Linkerd's Emojivoto application.
emojivoto in the namespace text boxJust like before, this triggers the installation to your cluster and the namespace you picked from Meshery.
Same as before - it would be nice to see when the installation completes and/or some indication that application is already deployed.
I did have to fix one thing and that is the Istio ingress gateway service. Since I was running Meshery against my local cluster, the Istio ingress gateway was using the localhost "external IP", however Emojivoto application also tries to expose the web-svc service on localhost.
With the load balancer issue fixed (I removed Istio), I was able to open http://localhost and get to the Emojivoto application.

You can click any of the emojis to vote for them or view the leaderboard. Part of the applicaiton is a vote-bot that periodically votes for emojis. If you look at the leaderboard and refresh the page, you should see the changes.
In addition to Emojivoto, you can also deploy the Istio Book Info application, Linkerd Books Application or HTTPbin application.
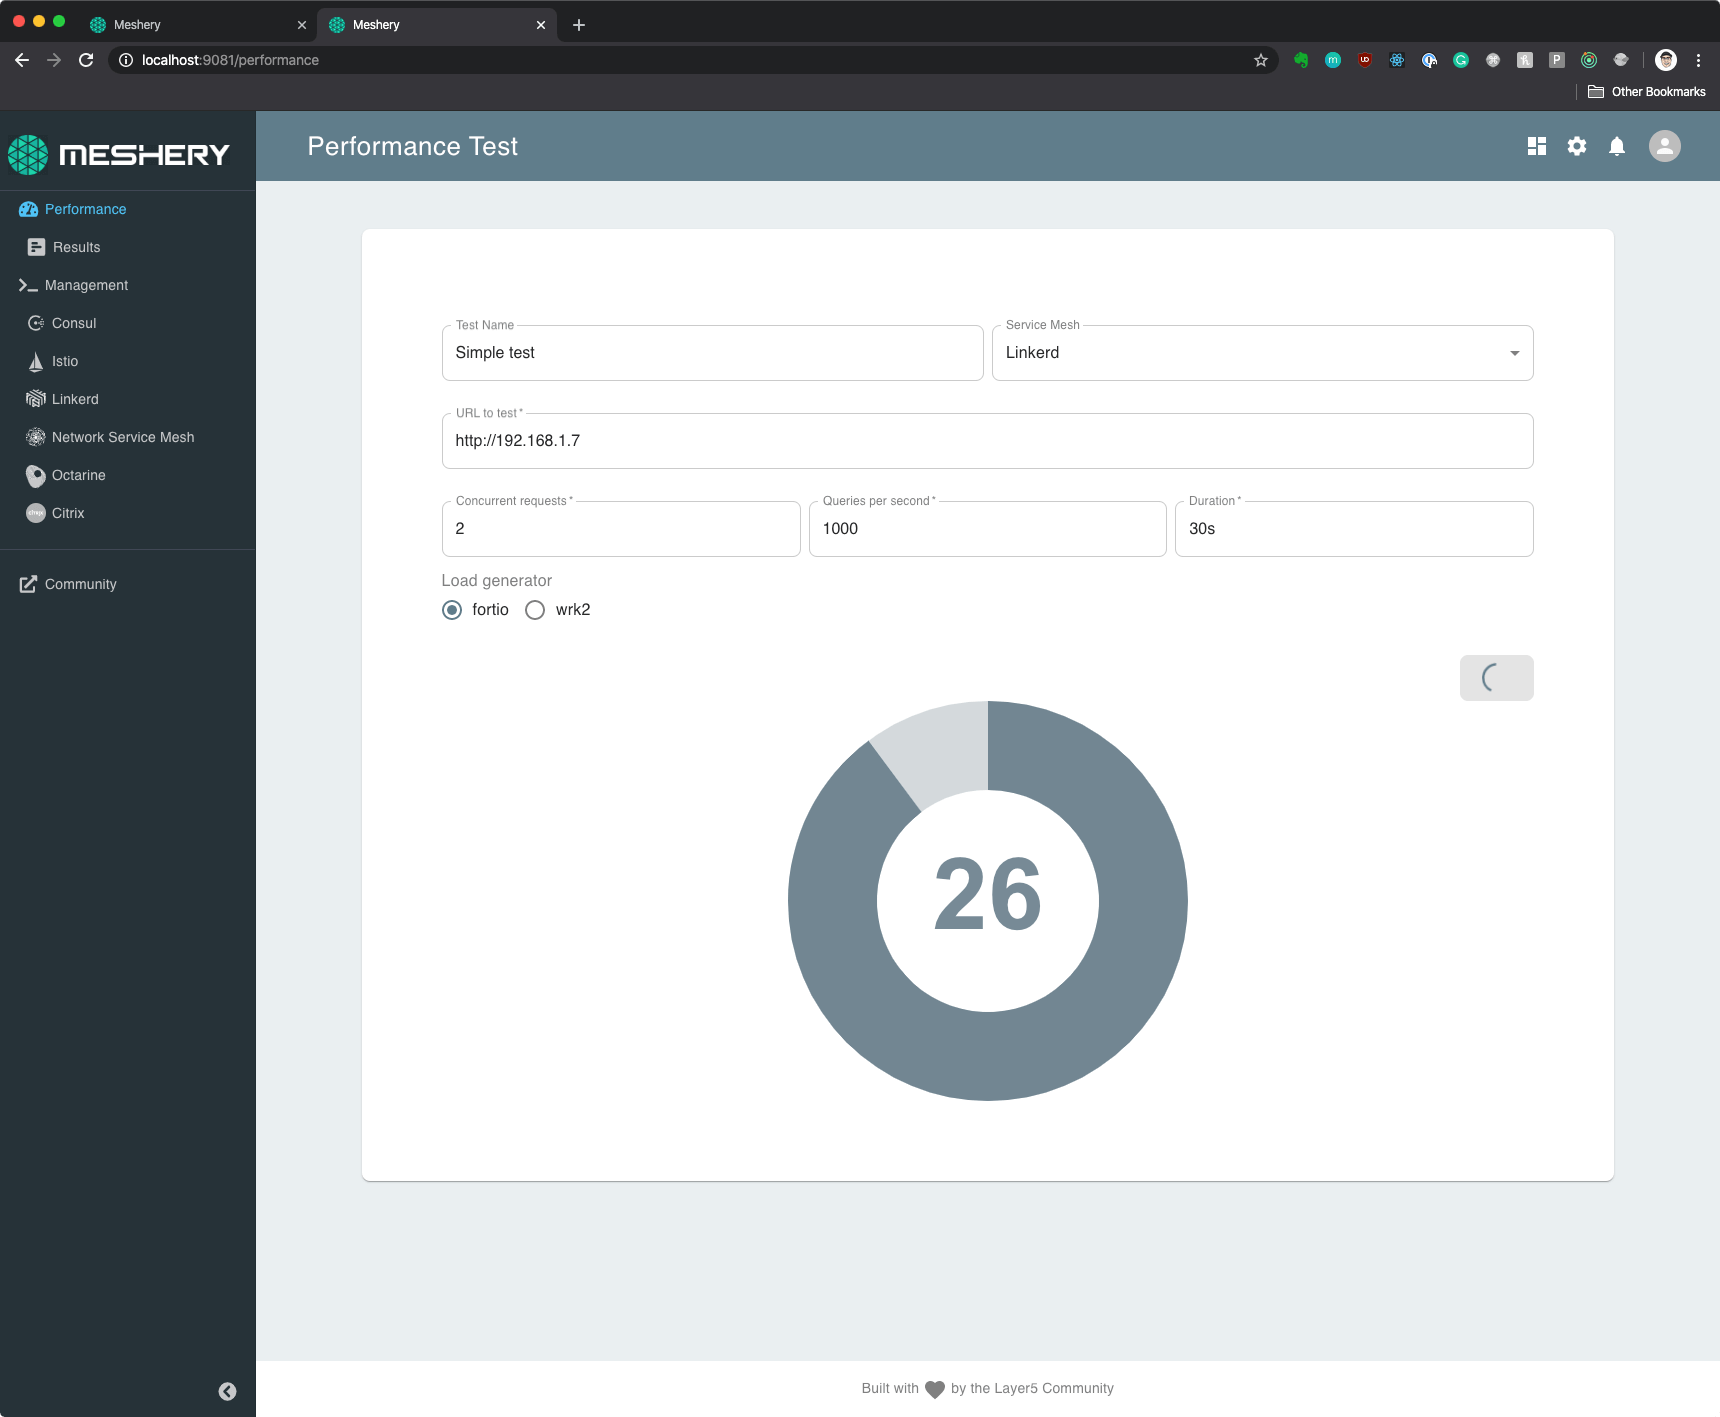
To run a simple performance test, click the Performance option from the sidebar. On this page you have to provide some basic information, such as the name of your test, pick the service mesh you want to use (e.g. Linkerd) and provide the URL as well as the number of concurrent requests, queries per second and the duration of the test. Finally, have an option of picking either Fortio or wkr2 as your benchmarking tool.
Note that since you're running Meshery on Docker you won't be able to use http://localhost as your target URL. However, you can get use an IP address of your comptures NIC. Run:
$ ifconfig en0
en0: flags=8863<UP,BROADCAST,SMART,RUNNING,SIMPLEX,MULTICAST> mtu 1500
        options=400<CHANNEL_IO>
        ether 98:01:a7:a0:f8:dd
        inet6 fe80::c6c:bff3:c3e9:7886%en0 prefixlen 64 secured scopeid 0x4
        inet 192.168.1.7 netmask 0xffffff00 broadcast 192.168.1.255
        nd6 options=201<PERFORMNUD,DAD>
        media: autoselect
        status: active
In my case, I used http://192.168.1.7. Once you entered all the information, you can click the Run Test button to start the performance test.
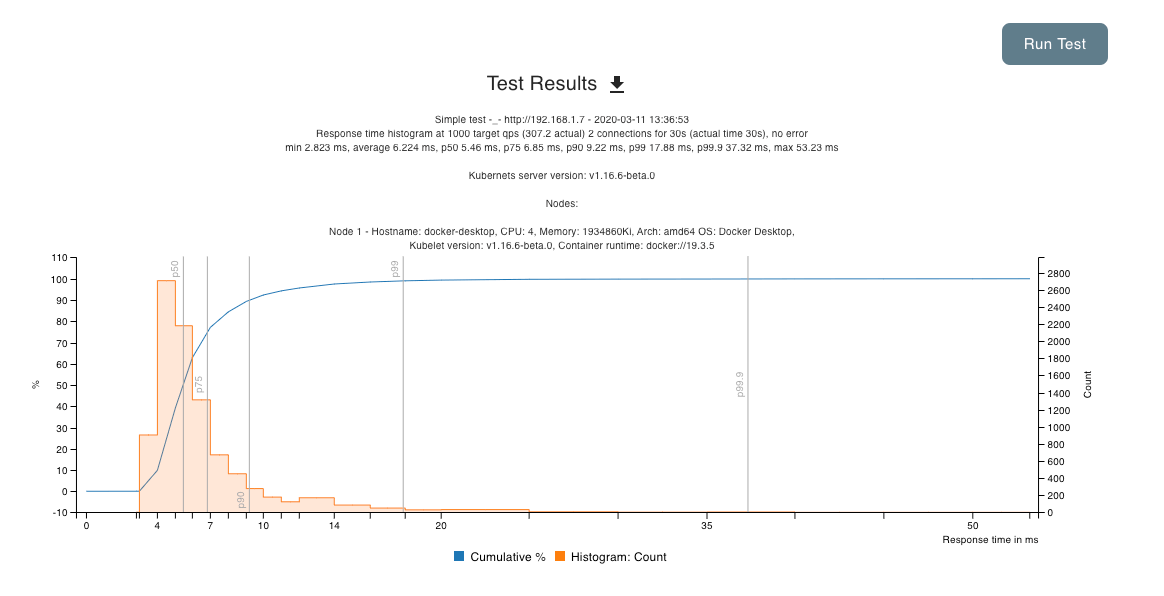
When the test completes you will be presented with results and a graph.
You can also start the performance tests using the mesheryctl CLI. For example, to run a pefrormance test using Linkerd against the same URL, you could use:
mesheryctl perf --mesh linkerd --url http://192.168.1.7
The above command will auto-generate the test name and use the default values for QPS, duration and concurrent requests. You can also view all results from within the Meshery dashboard.
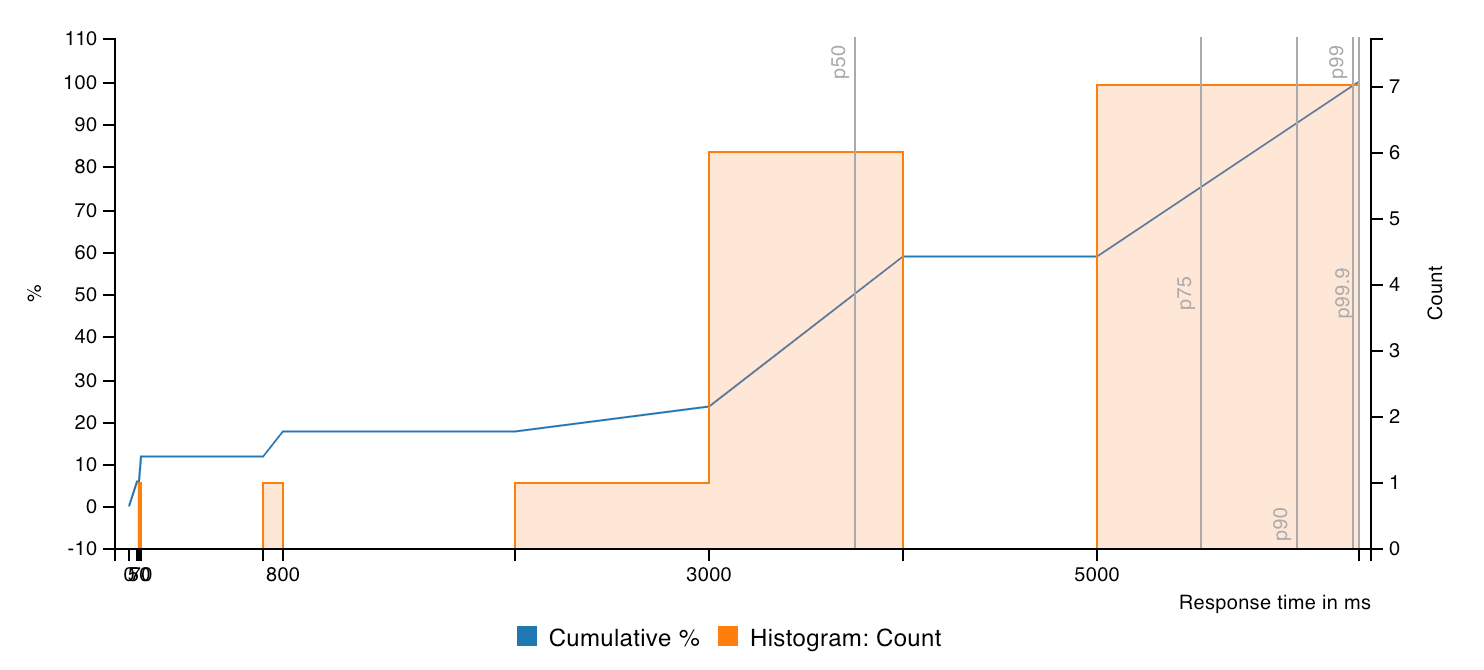
I also installed Istio and the Bookinfo application to run another performance test. This time I injected a delay 7 second delay to the ratings service. You can also apply service mesh configuration through Meshery - it has a couple of pre-defined configurations. This time the results looked a bit different (as it was expected with the injected delay).
Just like you deployed a mesh or application you can also use Meshery to remove it from your cluster. One thing to note here is that you will have to enter the namespace where your mesh/application was deployed in. For example, if you deployed Linkerd to linkerd namespace, you have to make sure to enter linkerd in the namespace text box and then click the delete icon.
In addition to Linkerd, you can also install a couple of other service meshes:
The steps are similar to the Linkerd installation above - you pick the service mesh from the sidebar, click the + icon on the Manage Service Mesh Lifecycle tile and choose from available options.
There are additional options available for some of the meshes. For example, for Istio you can install it with or without mTLS as well as install the Service Mesh Interface (SMI) Istio adapter. You can also apply different configurations - for example if you installed BookInfo application, you can apply different configurations that contain traffic routing (i.e. route 50% of the traffic to v3 of Reviews) or inject a delay and similar.
Meshery gives you a really convenient and fast way to quickly install different service meshes and sample applications with some pre-defined configurations. I can definitely see this being useful either for people who want to try out different meshes as well as anyone who wants to see the impact each mesh has on performance.
Note that the performance tests I ran were against a Kubernetes cluster running on my laptop which is not a realistic representation of anything. If you want to get more realistic results you might want to use an actual, on-premise or cloud managed cluster to do so.
此内容由惯性聚合(RSS阅读器)自动聚合整理,仅供阅读参考。 原文来自 — 版权归原作者所有。