





Init containers allow you to separate your application from the initialization logic and provide a way to run the initialization tasks such as setting up permissions, database schemas, or seeding data for the main application, etc. The init containers may also include any tools or binaries that you don't want to have in your primary container image due to security reasons.
The init containers are executed in a sequence before your primary or application containers start. On the other hand, any application containers have a non-deterministic startup order, so you can't use them for the initialization type of work.
The figure below shows the execution flow of the init containers and the application containers.
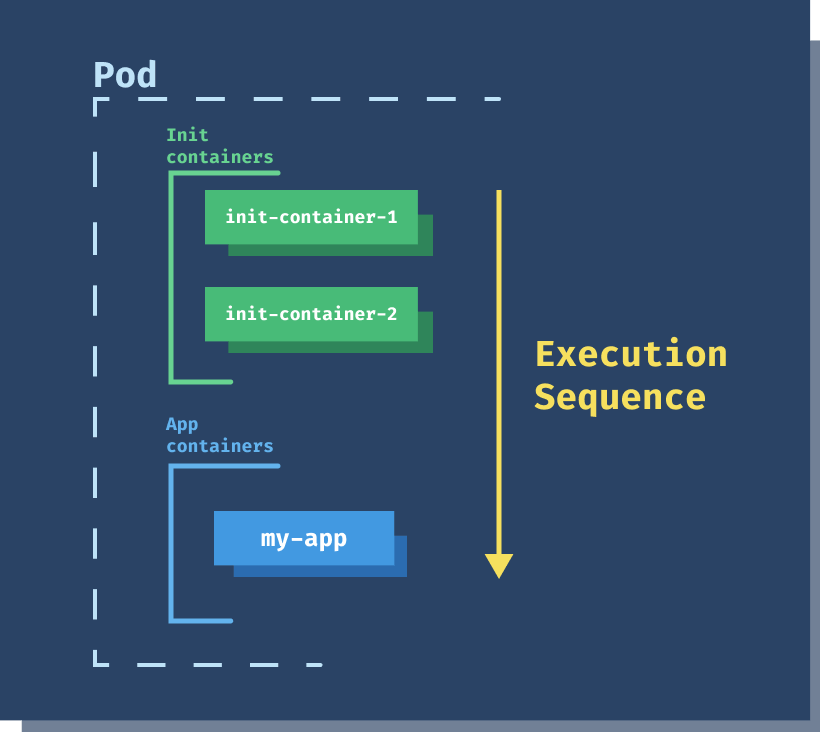
The application containers will wait for the init containers to complete successfully before starting. If the init containers fail, the Pod is restarted (assuming we didn't set the restart policy to RestartNever), which causes the init containers to run again. When designing your init containers, make sure they are idempotent, to run multiple times without issues. For example, if you're seeding the database, check if it already contains the records before re-inserting them again.
Since init containers are part of the same Pod, they share the volumes, network, security settings, and resource limits, just like any other container in the Pod.
Let's look at an example where we use an init container to clone a GitHub repository to a shared volume between all containers. The Github repo contains a single index.html. Once the repo is cloned and the init container has executed, the primary container running the Nginx server can use index.html from the shared volume and serve it.
You define the init containers under the spec using the initContainers field, while you define the application containers under the containers field. We define an emptyDir volume and mount it into both the init and application container. When the init container starts, it will run the git clone command and clone the repository into the /usr/share/nginx/html folder. This folder is the default folder Nginx serves the HTML pages from, so when the application container starts, we will be able to access the HTML page we cloned.
apiVersion: v1
kind: Pod
metadata:
  name: website
spec:
  initContainers:
    - name: clone-repo
      image: alpine/git
      command:
        - git
        - clone
        - --progress
        - https://github.com/peterj/simple-http-page.git
        - /usr/share/nginx/html
      volumeMounts:
        - name: web
          mountPath: '/usr/share/nginx/html'
  containers:
    - name: nginx
      image: nginx
      ports:
        - name: http
          containerPort: 80
      volumeMounts:
        - name: web
          mountPath: '/usr/share/nginx/html'
  volumes:
    - name: web
      emptyDir: {}
Save the above YAML to init-container.yaml and create the Pod using kubectl apply -f init-container.yaml.
If you run kubectl get pods right after the above command, you should see the status of the init container:
$ kubectl get po
NAME      READY   STATUS     RESTARTS   AGE
website   0/1     Init:0/1   0          1s
The number 0/1 indicates a total of 1 init containers, and 0 containers have been completed so far. In case the init container fails, the status changes to Init:Error or Init:CrashLoopBackOff if the container fails repeatedly.
You can also look at the events using the describe command to see what happened:
Normal  Scheduled  19s   default-scheduler  Successfully assigned default/website to minikube
Normal  Pulling    18s   kubelet, minikube  Pulling image "alpine/git"
Normal  Pulled     17s   kubelet, minikube  Successfully pulled image "alpine/git"
Normal  Created    17s   kubelet, minikube  Created container clone-repo
Normal  Started    16s   kubelet, minikube  Started container clone-repo
Normal  Pulling    15s   kubelet, minikube  Pulling image "nginx"
Normal  Pulled     13s   kubelet, minikube  Successfully pulled image "nginx"
Normal  Created    13s   kubelet, minikube  Created container nginx
Normal  Started    13s   kubelet, minikube  Started container nginx
You will notice as soon as Kubernetes schedules the Pod, the first Docker image is pulled (alpine/git), and the init container (clone-repo) is created and started. Once that's completed (the container cloned the repo) the main application container (nginx) starts.
Additionally, you can also use the logs command to get the logs from the init container by specifying the container name using the -c flag:
$ kubectl logs website -c clone-repo
Cloning into '/usr/share/nginx/html'...
remote: Enumerating objects: 6, done.
remote: Counting objects: 100% (6/6), done.
remote: Compressing objects: 100% (4/4), done.
remote: Total 6 (delta 0), reused 0 (delta 0), pack-reused 0
Receiving objects: 100% (6/6), done.
Finally, to actually see the static HTML page can use port-forward to forward the local port to the port 80 on the container:
$ kubectl port-forward pod/website 8000:80
Forwarding from 127.0.0.1:8000 -> 80
Forwarding from [::1]:8000 -> 80
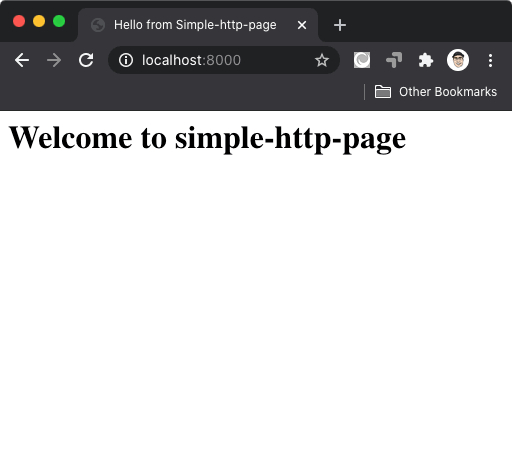
You can now open your browser at http://localhost:8000 to open the static page as shown in figure below.
Lastly, delete the Pod by running kubectl delete po website.
此内容由惯性聚合(RSS阅读器)自动聚合整理,仅供阅读参考。 原文来自 — 版权归原作者所有。