惯性聚合 高效追踪和阅读你感兴趣的博客、新闻、科技资讯
阅读原文 在惯性聚合中打开

推荐订阅源

cs.AI updates on arXiv.org
L
LINUX DO - 最新话题
OSCHINA 社区最新新闻
OSCHINA 社区最新新闻
Forbes - Security
Forbes - Security
博客园 - 司徒正美
Hugging Face - Blog
Hugging Face - Blog
W
WeLiveSecurity
Jina AI
Jina AI
钛媒体:引领未来商业与生活新知
钛媒体:引领未来商业与生活新知
N
News and Events Feed by Topic
V
V2EX
Stack Overflow Blog
Stack Overflow Blog
Engineering at Meta
Engineering at Meta
PCI Perspectives
PCI Perspectives
Martin Fowler
Martin Fowler
T
The Exploit Database - CXSecurity.com
F
Full Disclosure
WordPress大学
WordPress大学
S
Security Affairs
K
KPMG report finds enterprise disconnect between AI and its ROI | CIO
S
SegmentFault 最新的问题
P
Privacy International News Feed
IT之家
IT之家
M
MIT News - Artificial intelligence
G
GRAHAM CLULEY
Hacker News: Ask HN
Hacker News: Ask HN
D
DataBreaches.Net
奇客Solidot–传递最新科技情报
奇客Solidot–传递最新科技情报
Google Online Security Blog
cs.CV updates on arXiv.org
C
Check Point Blog
美团技术团队
Security Latest
Security Latest
Cyberwarzone
Cyberwarzone
N
News and Events Feed by Topic
MyScale Blog
MyScale Blog
H
Help Net Security
宝玉的分享
宝玉的分享
The Hacker News
The Hacker News
The Last Watchdog
The Last Watchdog
The Cloudflare Blog
Cyber Security Advisories - MS-ISAC
爱范儿
爱范儿
cs.CL updates on arXiv.org
I
Intezer
Threat Intelligence Blog | Flashpoint
AI
AI
I
InfoQ
N
News | PayPal Newsroom
TaoSecurity Blog
TaoSecurity Blog

blog.smartere

Floppy Disks: the best TV remote for kids Upgrading the Olimex A20 LIME2 to 2GB RAM, by learning to BGA solder and deep diving into the U-Boot bootloader process Making a too cheap LED lamp safe to use Giv mig nu bare elprisen.somjson.dk! (en historie om det måske værste datasæt i åbne energidata) World’s Longest Multi-Cutter Blade: 30 cm Reparation af Nordlux IP S12 badeværelseslampe der ikke lyser længere Fantus-button part 2: the physical button build and the network communication Fantus-button part 1: Reverse engineering the DRTV Chromecast App Floating Solid Wood Alcove Shelves Quick and dirty guide to Lithium battery-powered Wemos D1 Mini Olimex A20-OLinuXino-LIME2 – 8 years in service, 2 PSUs and 1 SD-card down Grundfos Alpha 2 pumpe går i stykker og flimrer: reparer den med en kondensator til nogle få kr Reparation af Aduro-tronic II Sniffing Philips Hue Zigbee traffic with Wireshark Dør jeg af partikelforurening fra min moderne brændeovn? 18650 Lithium-ion battery packs – 1S80P Olimex A20-OLinuXino-LIME2 – A review after 4 years in service Reparation af DUKA/PAX Passad 30 Ventilator der kører uregelmæssigt Ford 3000 Tractor Instrument Voltage Stabilizer – Mechanical PWM! Reverse engineering Aduro Smart Response Hvorfor korrelerer min DC-spænding med solen? Measuring high DC supply voltage with an Arduino Brother DS-620 on Linux Stupid sys-admin’ing, and hooray for LVM and unnecessary partitions Making objdump -S find your source code Et lille slag for ytringsfriheden WordPress – mildly impressed
Roomba 500-series Easy Scheduling using an Arduino
Mads Chr. Ol · 2015-06-17 · via blog.smartere

Posted on onsdag, juni 17, 2015 in Hal9k, Planet Ubuntu-DK, Planets
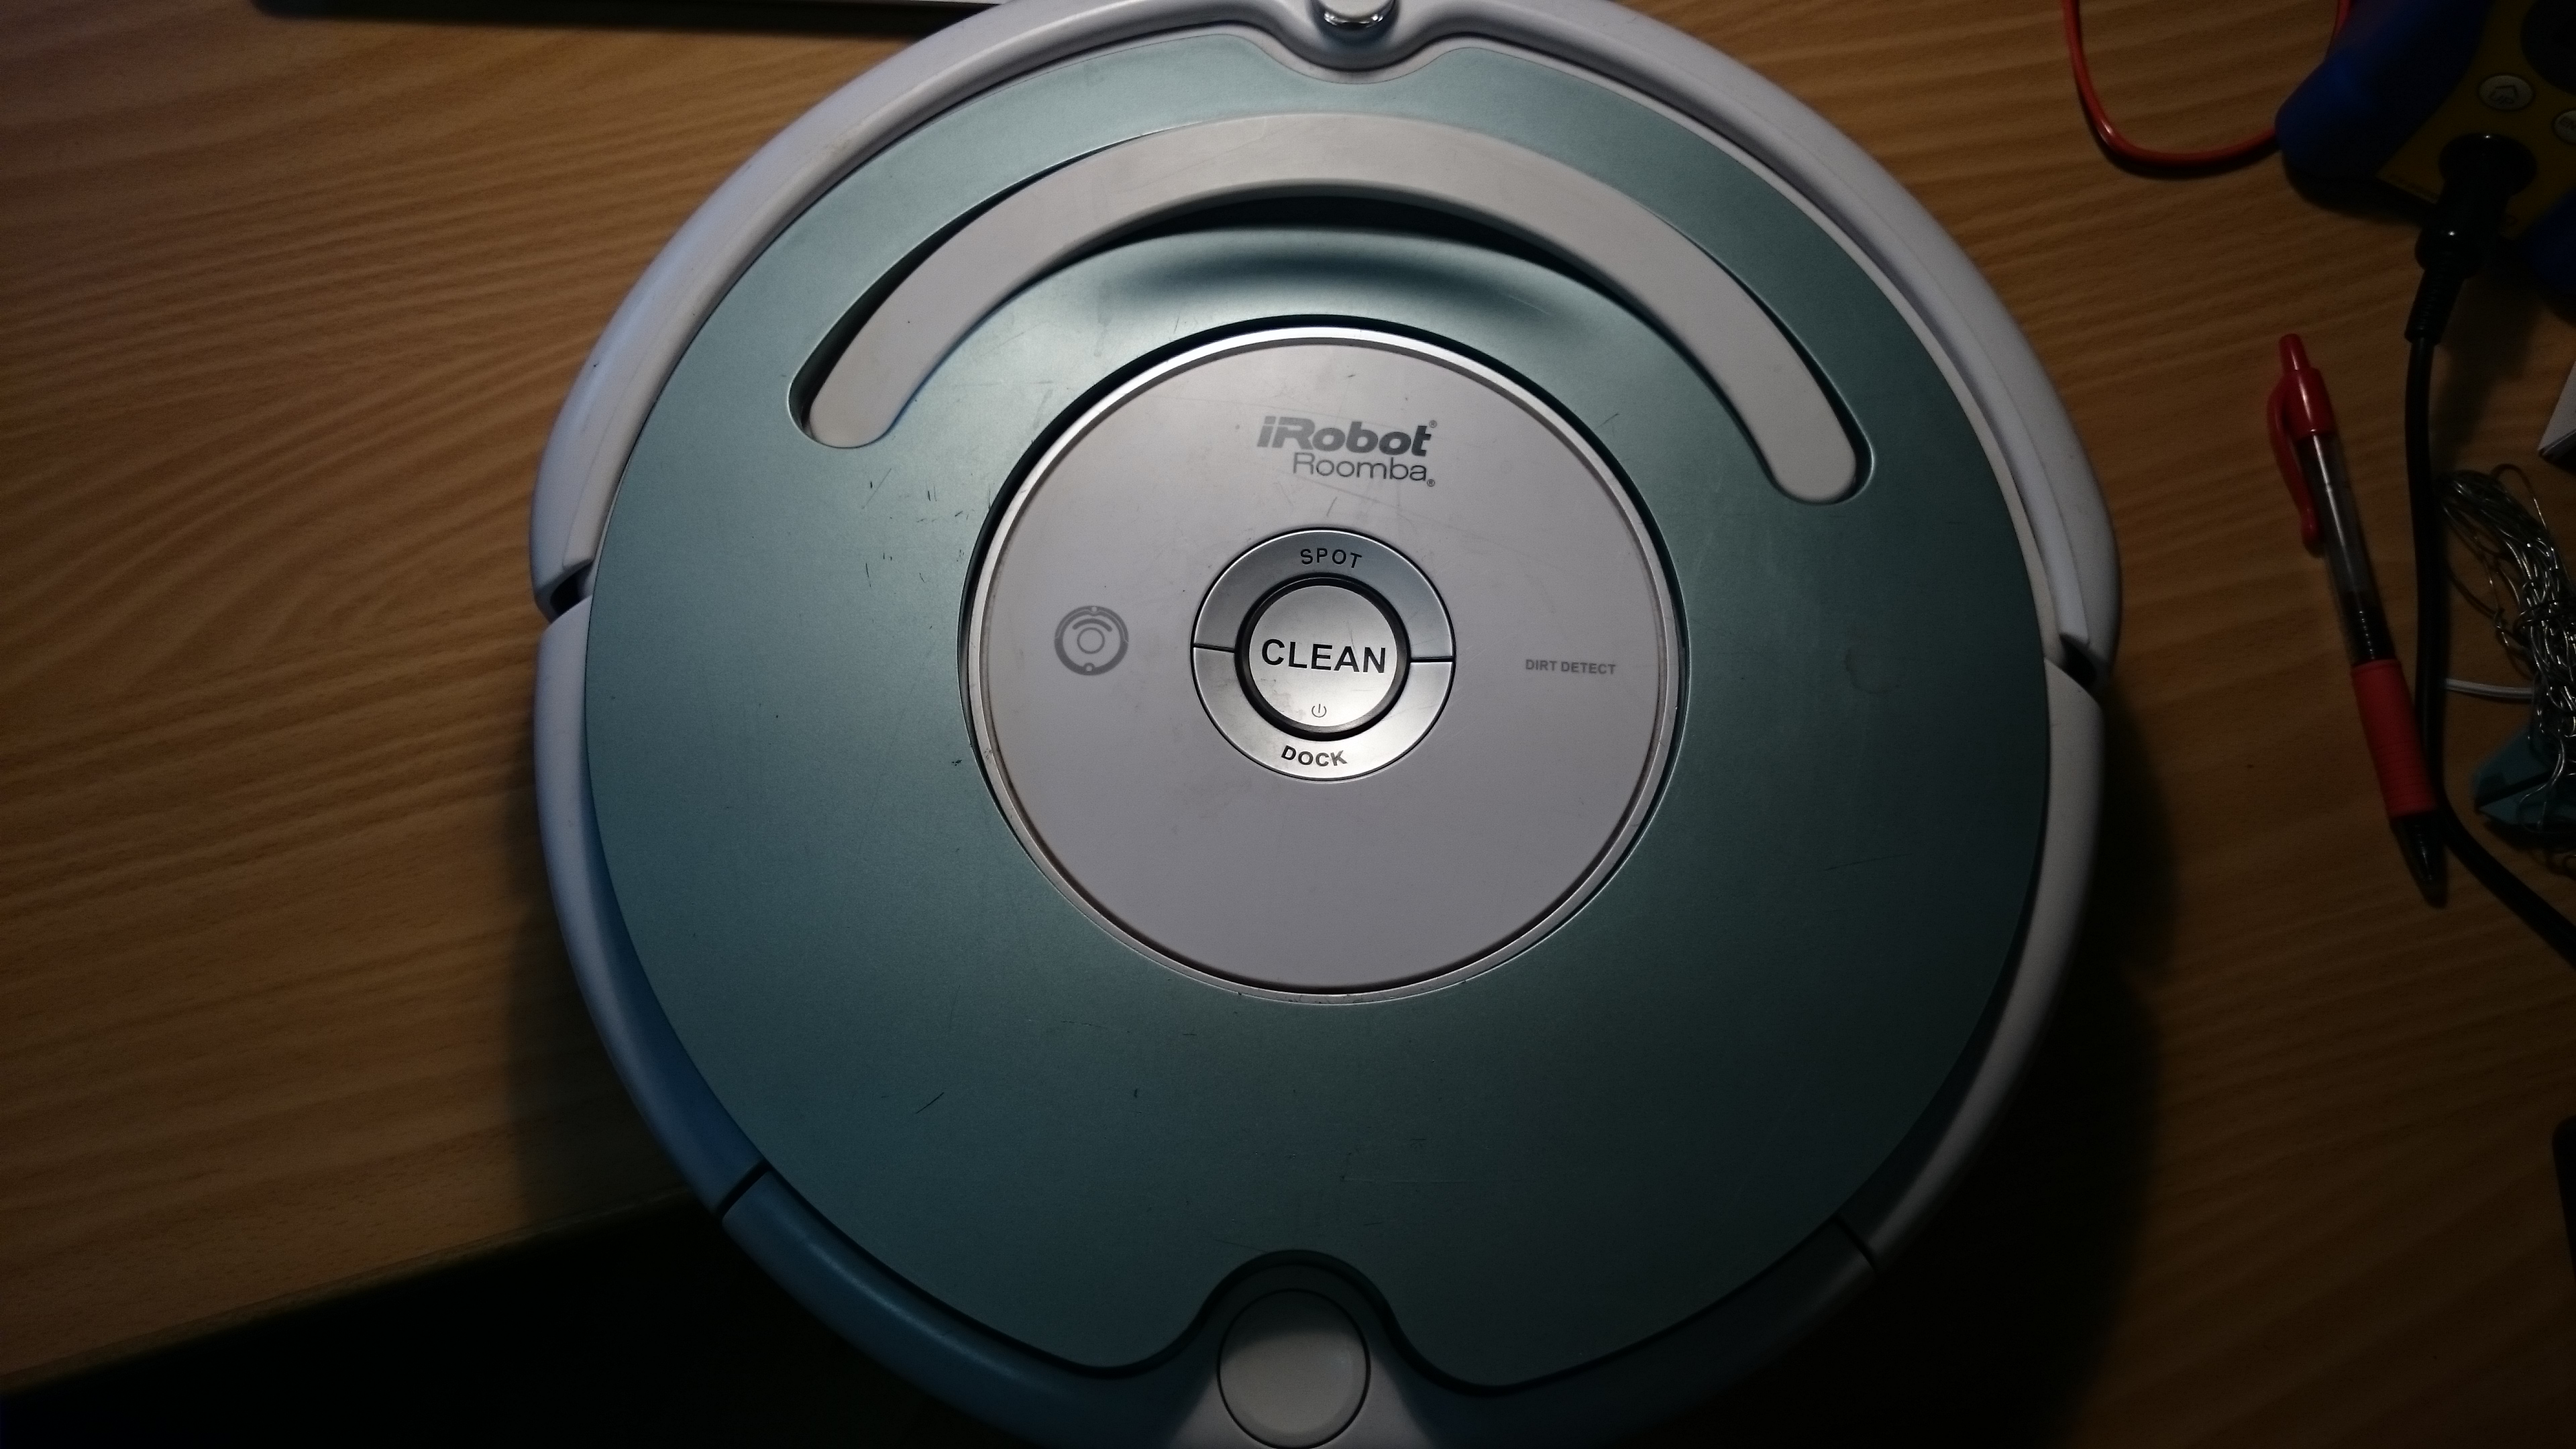
DSC_0879
I have a iRobot Roomba 500-series vacuum cleaner robot, but without any remote, or command center or anything; alas, I have to push a button everytime I want the cleaning revolution to start 🙁

But no more! It turns out the Roomba can be programmed, quite easily, to schedule automatically, and all you need is:

  • 1 Arduino
  • 2 wires

The Roomba actually supports a serial protocol, the iRobot Roomba 500 Open Interface Specification, that allows remote control, driving, sensoring, and scheduling.

Finding the serial port

Remove the plastic cover. It is easiest to remove the vacuum bin, and carefully pry it off with a screwdriver.
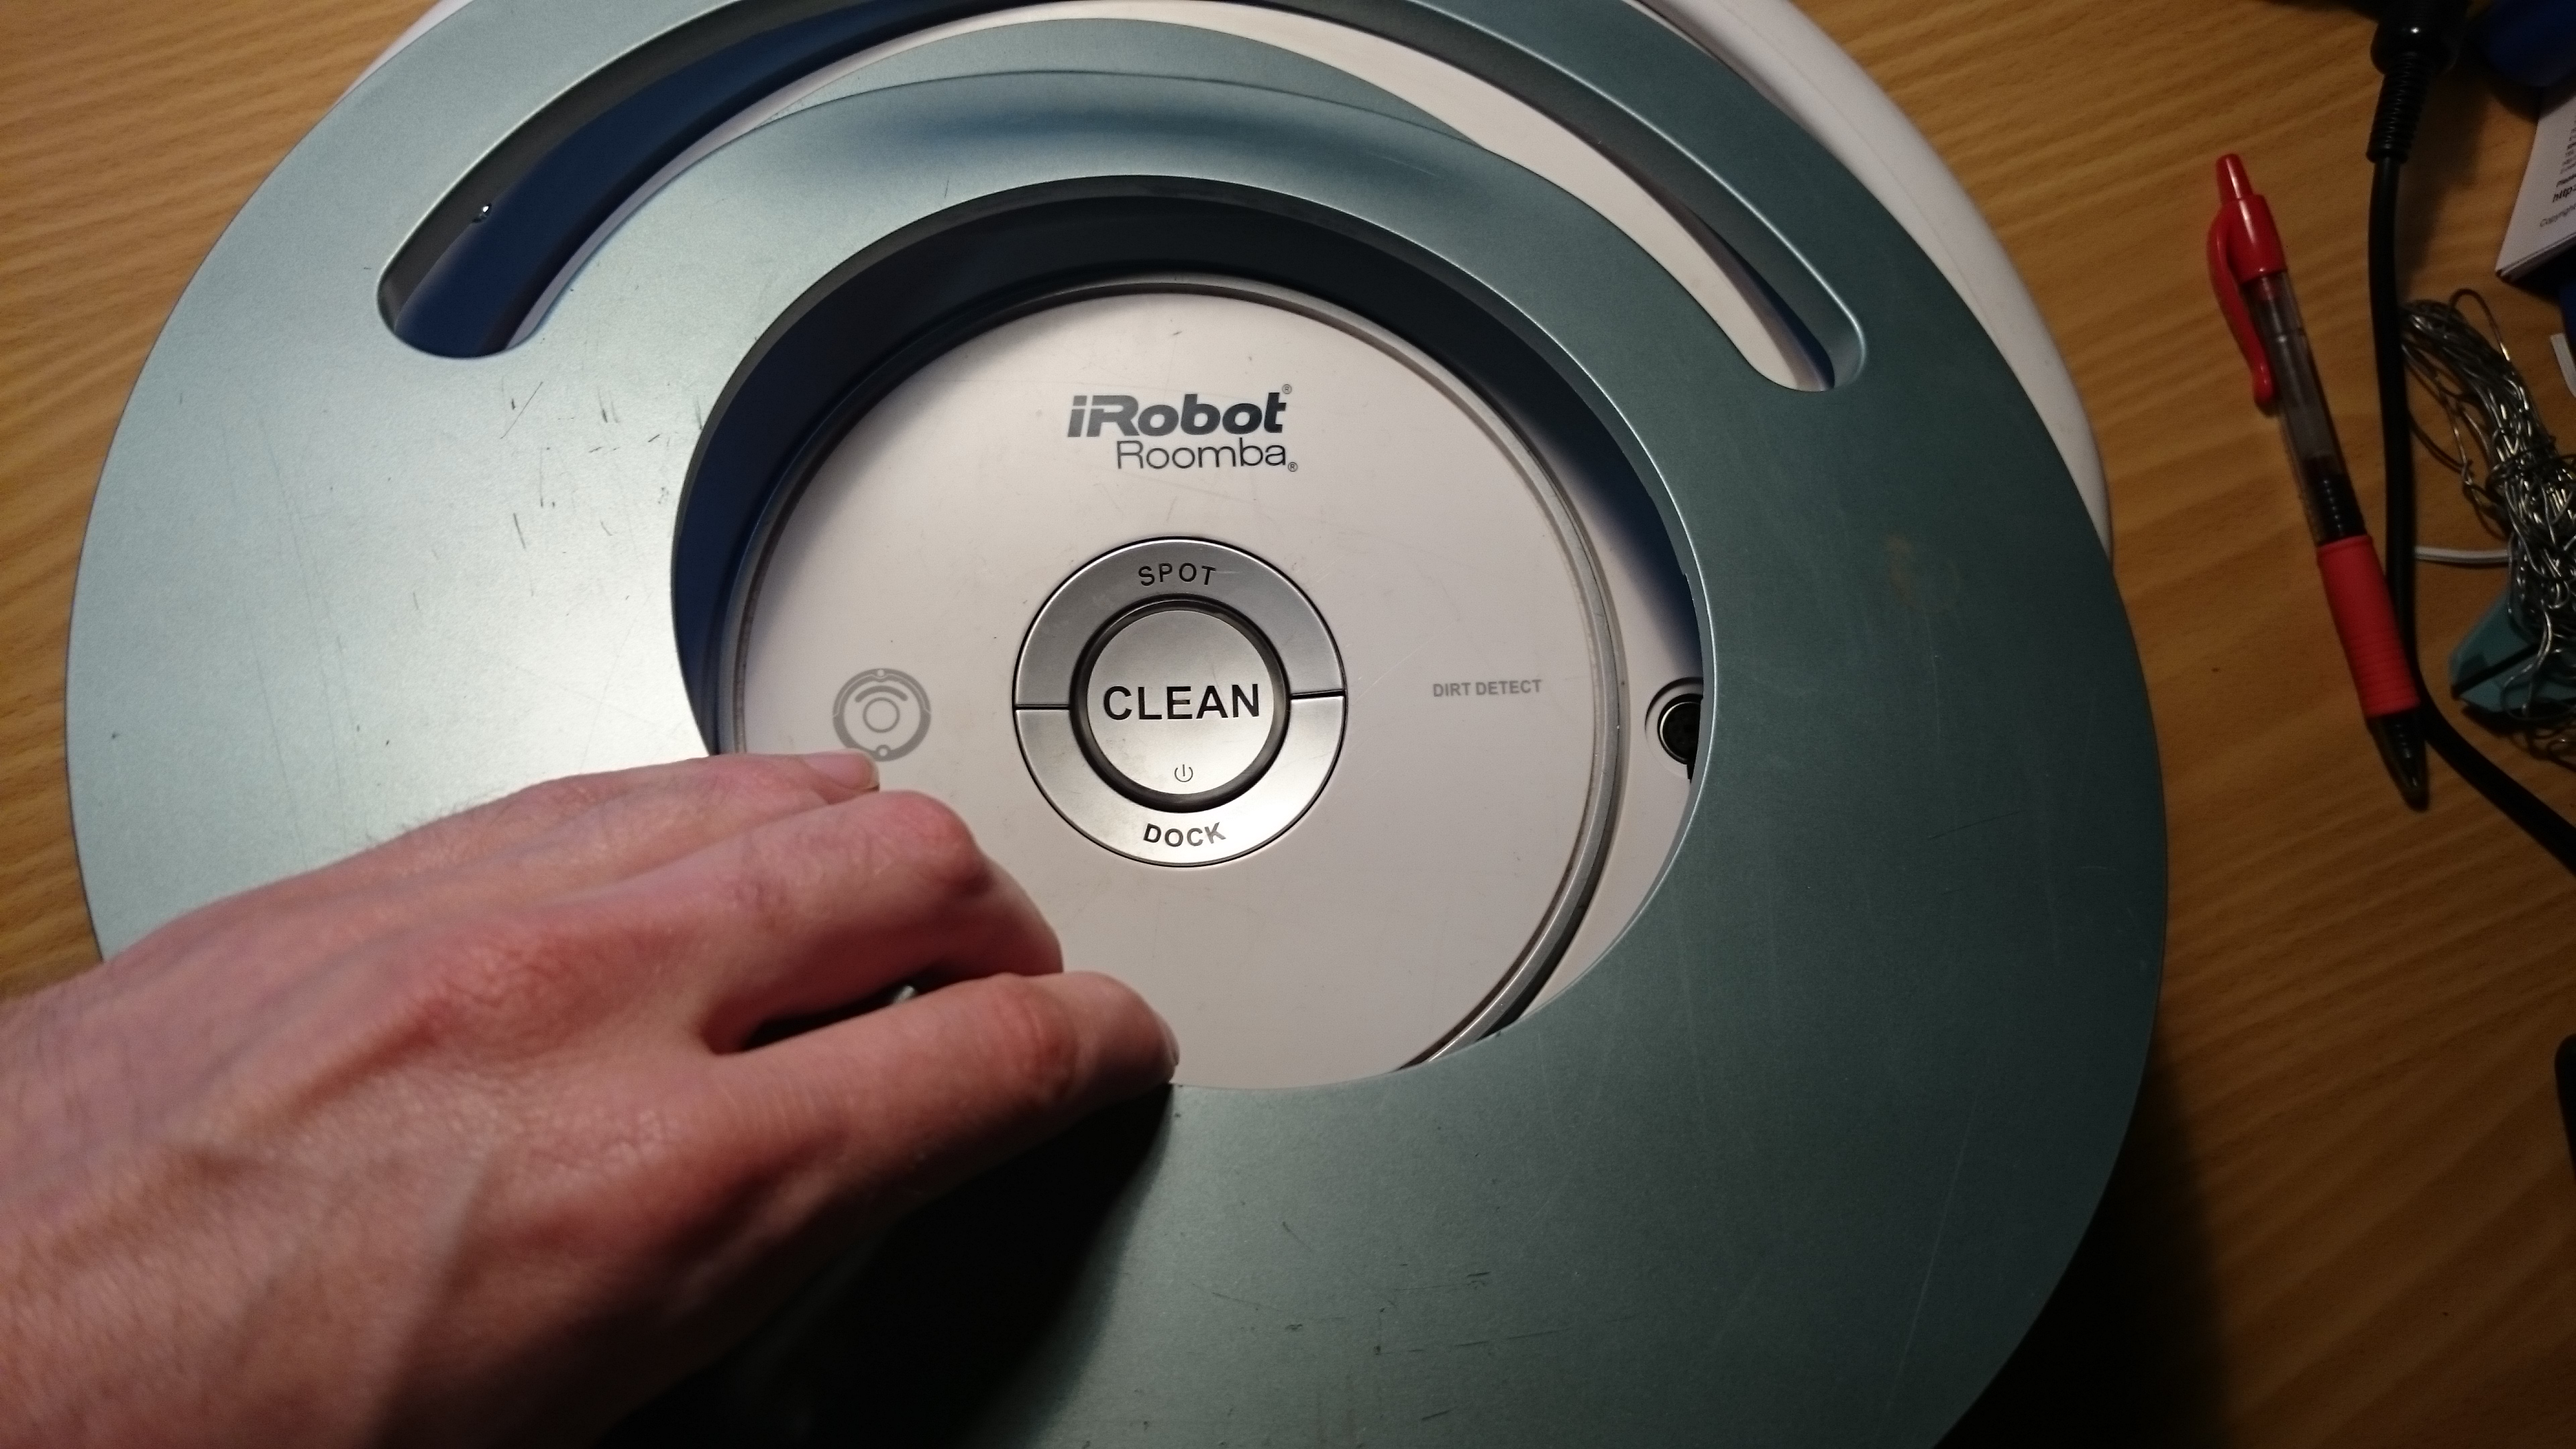
DSC_0882DSC_0884

There should be a 7-pin plug, on the right side. It has the following pinout:
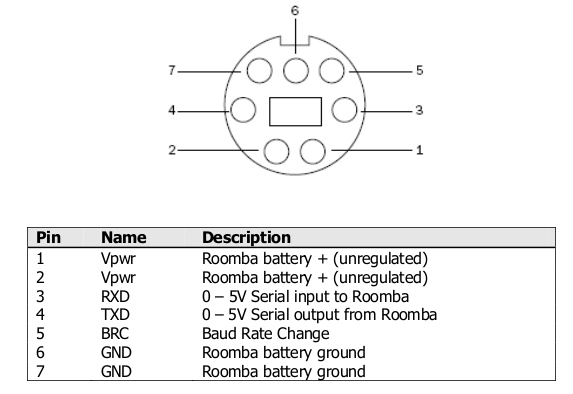
Roomba serial pinout

Roomba serial pinout

Program the Arduino

Use this sketch (download: roombaschedule.ino):


/*
Set a schedule on an iRobot Roomba 500 series, using just an Arduino.
Mads Chr. Olesen, 2015.
*/

const byte currentDay = 3;
// 0: Sunday, 1: Monday, 2: Tuesday, 3: Wednesday, 4: Thursday, 5: Friday, 6: Saturday
const byte currentHour = 2;
const byte currentMinute = 58;

// Schedule
const byte SUNDAY = 0x01, MONDAY = 0x02, TUESDAY = 0x04, WEDNESDAY = 0x08, THURSDAY = 0x10, FRIDAY = 0x20, SATURDAY = 0x40;

const byte daystorun = SUNDAY | MONDAY | WEDNESDAY | FRIDAY;
const byte times[14] = {
3, 0, // Sunday time
3, 0, // Monday time
3, 0, // Tuesday time
3, 0, // Wednesday time
3, 0, // Thursday time
3, 0, // Friday time
3, 0, // Saturday time
};

const int ledPin = 13;

void setup() {
Serial.begin(115200);
pinMode(ledPin, OUTPUT);
digitalWrite(ledPin, 0);

Serial.write(128); //Start
delay(1000);
Serial.write(131); //Safe mode, turns off Roomba light
delay(1000);
Serial.write(128); //Start, back to passive mode
delay(500);

//Set day time
Serial.write(168);
Serial.write(currentDay);
Serial.write(currentHour);
Serial.write(currentMinute);
delay(500);

//Set schedule
Serial.write(167);
Serial.write(daystorun);
for (int i = 0; i < 14; i++) {
Serial.write(times[i]);
}
}

void loop() {
digitalWrite(ledPin, 1);
delay(1000);
digitalWrite(ledPin, 0);
delay(1000);
}

You need to modify the variables at the top: set currentDay, currentHour, currentMinute according to the present time.
The pre-programmed schedule is to clean at 03:00 on Sunday, Monday, Wednesday and Friday. You can change this if you wish, by altering the daystorun and times variables.

If you don’t modify the schedule, the Roomba should start automatically after 2 minutes.

Put it all together

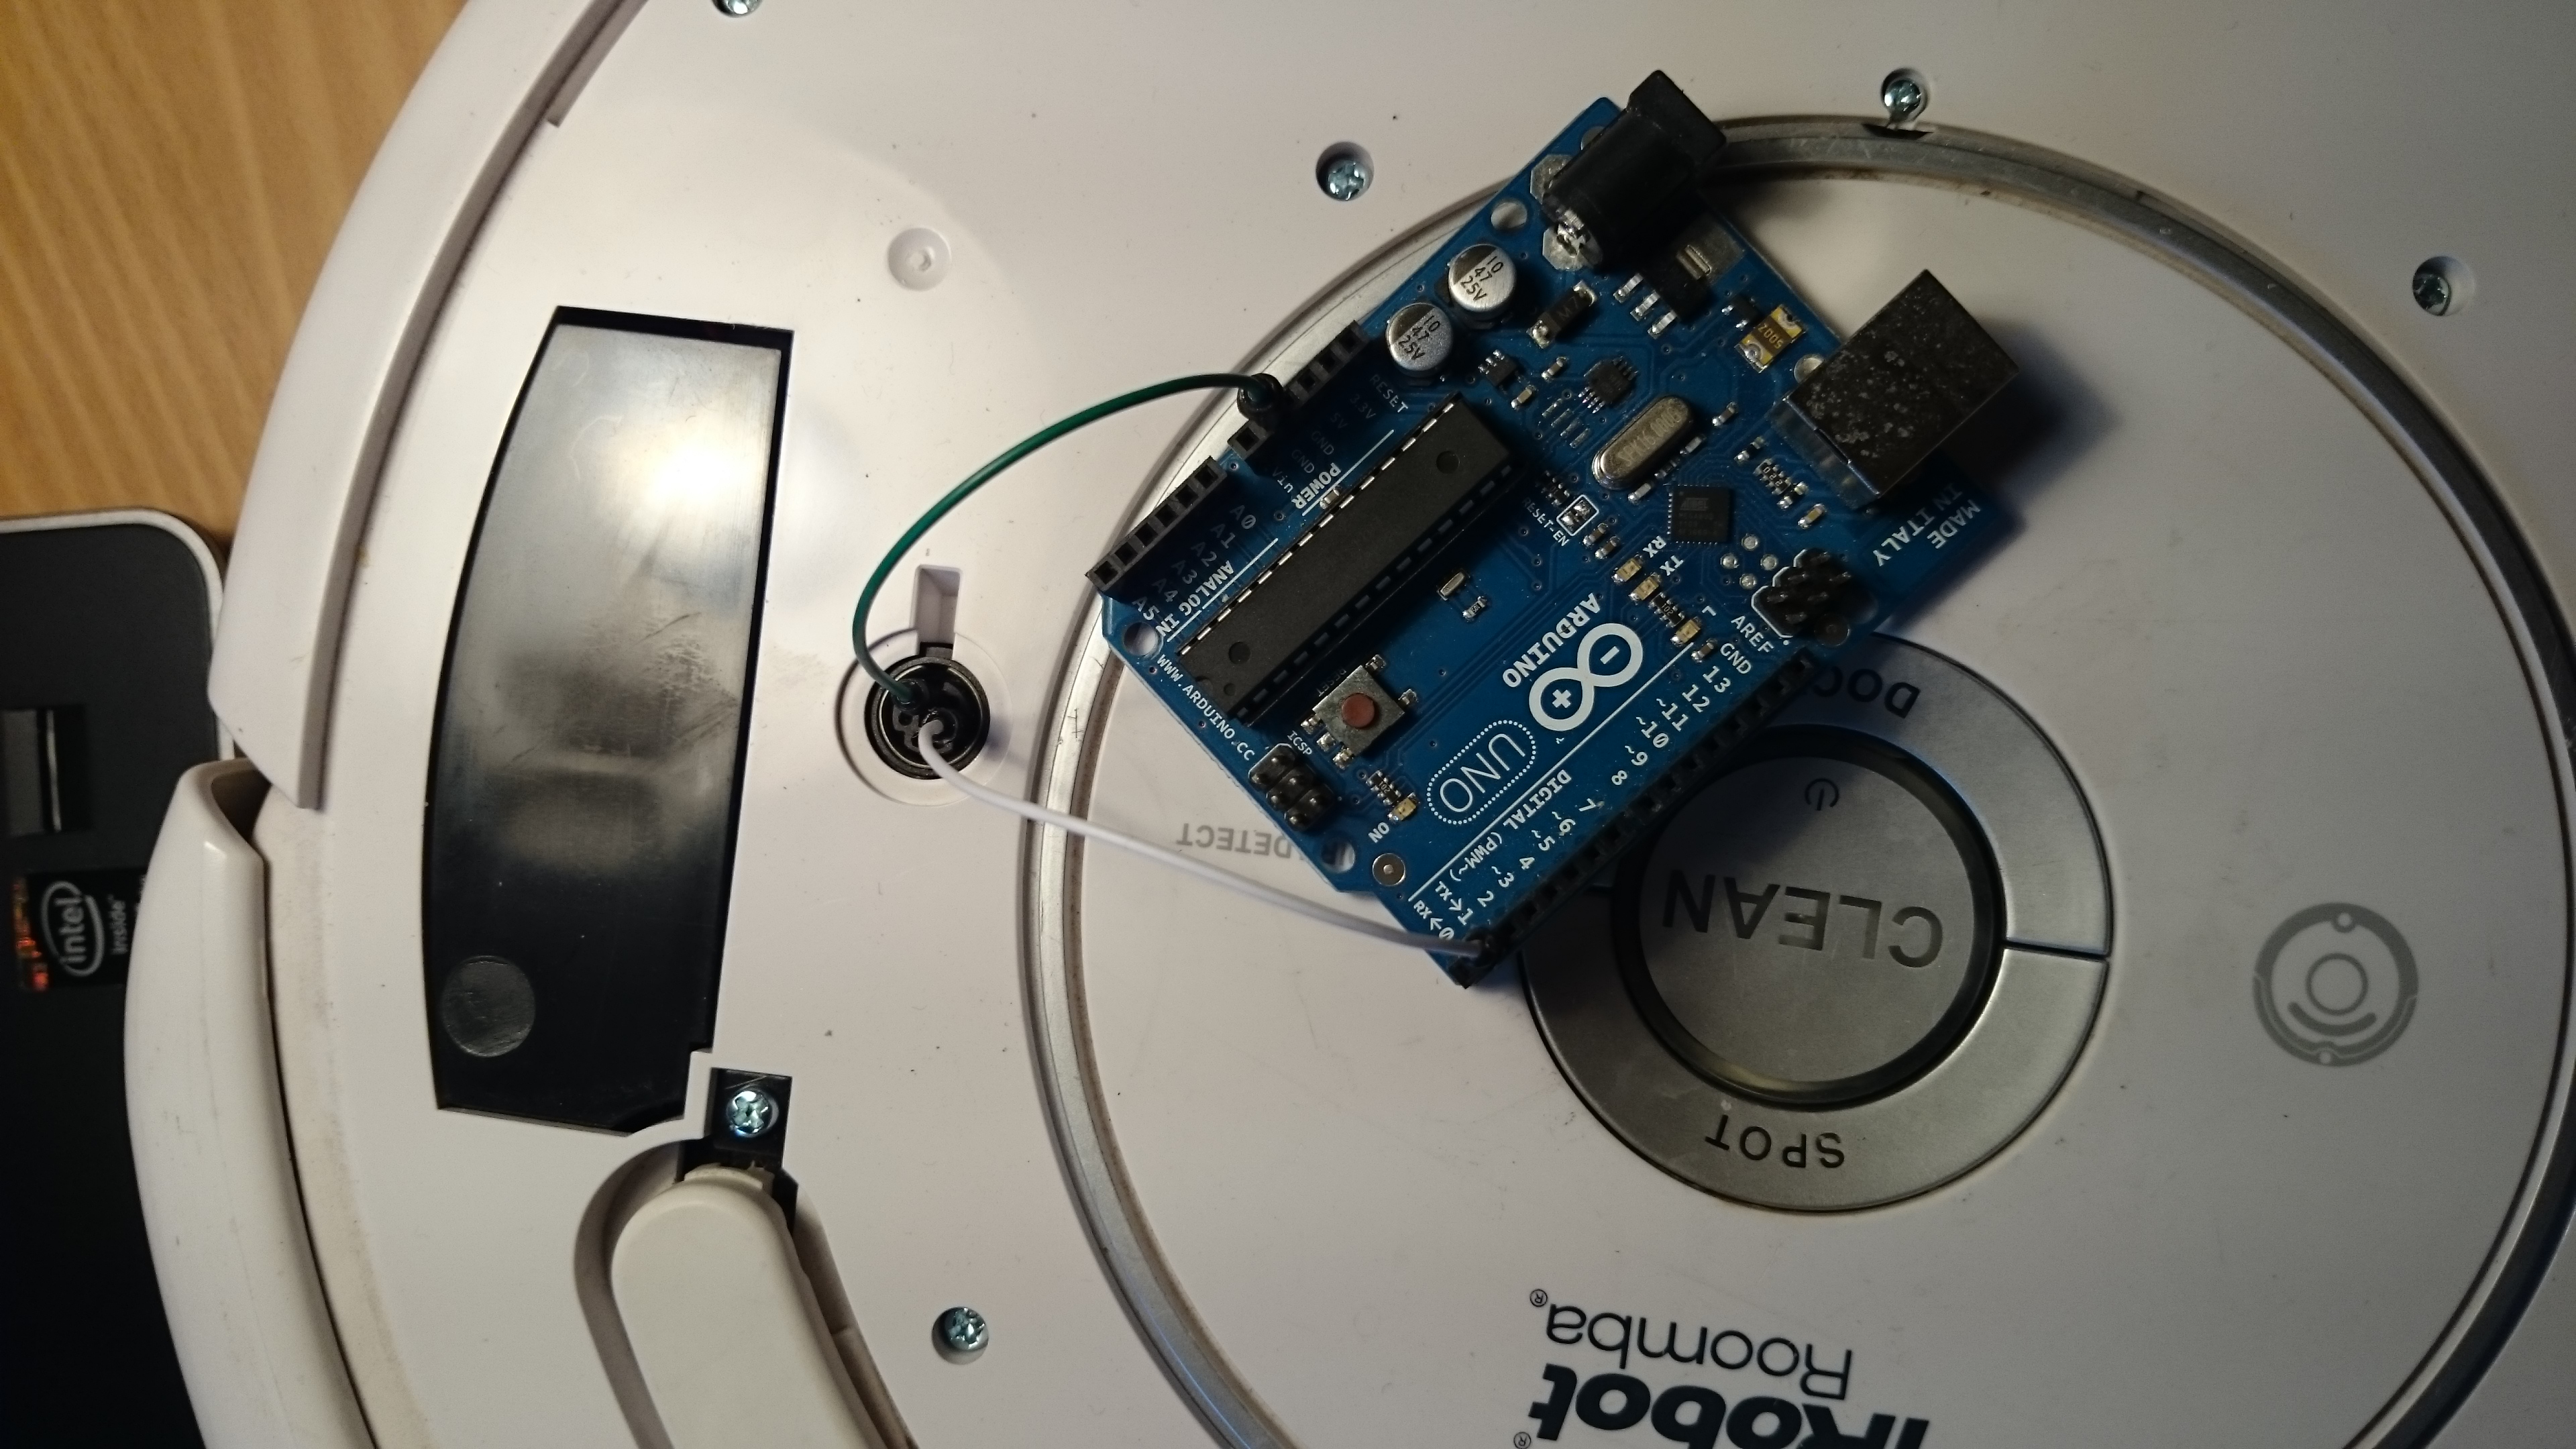
You should now have a partially undressed Roomba, and a programmed Arduino. Now it is time to connect them. With both unpowered, connect the following:

  • Arduino GND to Roomba ground (pin 6)
  • Arduino TX (pin 1 on e.g. Uno) to Roomba RX (pin 3)

It should look like this:

DSC_0886

Now, the moment of truth. Press the “CLEAN” button on the Roomba, the light should go on. Plug in the USB for the Arduino. The Roomba light should turn off briefly, and after a few seconds the Arduino should blink it’s LED. The schedule is now programmed, all done!