惯性聚合 高效追踪和阅读你感兴趣的博客、新闻、科技资讯
阅读原文 在惯性聚合中打开

推荐订阅源

奇客Solidot–传递最新科技情报
奇客Solidot–传递最新科技情报
Jina AI
Jina AI
博客园 - Franky
Apple Machine Learning Research
酷 壳 – CoolShell
酷 壳 – CoolShell
阮一峰的网络日志
阮一峰的网络日志
量子位
雷峰网
雷峰网
宝玉的分享
宝玉的分享
V
Visual Studio Blog
博客园_首页
小众软件
小众软件
The Cloudflare Blog
让小产品的独立变现更简单 - ezindie.com
大猫的无限游戏
大猫的无限游戏
博客园 - 聂微东
S
SegmentFault 最新的问题
博客园 - 【当耐特】
OSCHINA 社区最新新闻
OSCHINA 社区最新新闻
博客园 - 叶小钗
月光博客
月光博客
博客园 - 三生石上(FineUI控件)
人人都是产品经理
人人都是产品经理
WordPress大学
WordPress大学

Sealos Blog

Build a Full-Stack App with Claude Code + InsForge — Zero Backend Code | Sealos Blog InsForge vs Supabase: Which Backend for AI-Powered Development? | Sealos Blog Kubernetes NodePort Exhaustion: SSH Gateway Solution | Sealos Blog Claude Code Metrics Dashboard: Grafana Setup (2026) | Sealos Blog What Is RustFS? Apache 2.0 MinIO Alternative (2026) | Sealos Blog Claude Code Mobile: iPhone, Android & SSH (2026) | Sealos Blog Eaglercraft Server Hosting: Fast Setup (2026) | Sealos Blog An Honest Review: Migrating a Complex Microservice App from Heroku to Sealos | Sealos Blog The Ultimate Guide to Kubernetes Audit Logging for Security and Compliance | Sealos Blog Cost Optimization Shootout: Sealos Autonomous FinOps vs. Kubecost Manual Reports | Sealos Blog For CTOs: How to Cut Your Cloud Bill by 50% Without Sacrificing Performance | Sealos Blog Building Resilient Systems: A Deep Dive into Sealos High-Availability and Auto-Failover | Sealos Blog Building a Scalable Event-Driven Architecture with Sealos Managed Kafka | Sealos Blog Beyond kubectl apply: 5 GitOps Best Practices for Production-Ready CI/CD on Sealos | Sealos Blog Advanced RAG Pipelines: Why Your Choice of Vector Database (like Milvus) Matters | Sealos Blog Advanced MLOps: How to Monitor and Evaluate LLM Applications in Production | Sealos Blog A Developer's Guide to Kubernetes RBAC: Securing Your Cluster the Easy Way with Sealos | Sealos Blog A CISO's Guide to Cloud Development: Securing the CI/CD Pipeline with Sealos DevBox | Sealos Blog What is Kubernetes Multi-Tenancy? A Guide for Platform Engineers | Sealos Blog What is Infrastructure from Code (IfC)? The Next Step After Infrastructure as Code (IaC) | Sealos Blog What is GitOps? A Beginner's Guide to "Push-to-Deploy" Workflows | Sealos Blog What is eBPF? The Future of Kubernetes Networking and Security | Sealos Blog What is an "AI-Native" Platform? (And Why You Need One for MLOps) | Sealos Blog What is an Agentic Workflow? Building the Next Generation of AI Apps | Sealos Blog What is a Kubernetes Chargeback Model (And How Does it Save You Money?) | Sealos Blog What is a "Headless" Development Environment? (And How it Works with VS Code) | Sealos Blog What is a Graph-Based Vector Database? (And When to Use It Over Milvus) | Sealos Blog What is a "Cloud Operating System"? The Next Evolution of PaaS Explained | Sealos Blog The Real Cost of EKS: How Sealos Delivers a Simpler, Cheaper Kubernetes Experience | Sealos Blog The 3 Types of Kubernetes Autoscaling (HPA, VPA, CA) and How Sealos Manages Them for You | Sealos Blog
The Ultimate Step-By-Step Guide To Creating Your Own MCP ...
Sealos · 2025-04-11 · via Sealos Blog

With the growing popularity of Machine Context Protocol (MCP), developers increasingly want to create custom MCP servers to extend AI capabilities. Sealos DevBox offers a streamlined solution, allowing you to develop and deploy your own MCP server in minutes. This comprehensive guide walks you through the entire process, from initial setup to deployment.

Want to get started straight away? Deploy an MCP server with DevBox.

You can also follow along with the video tutorial:

Machine Context Protocol (MCP) servers extend AI capabilities by connecting large language models to external tools and services. By developing your own MCP server, you can create custom integrations that empower AI models to perform specialized tasks. If you want to learn more checkout: What is MCP?
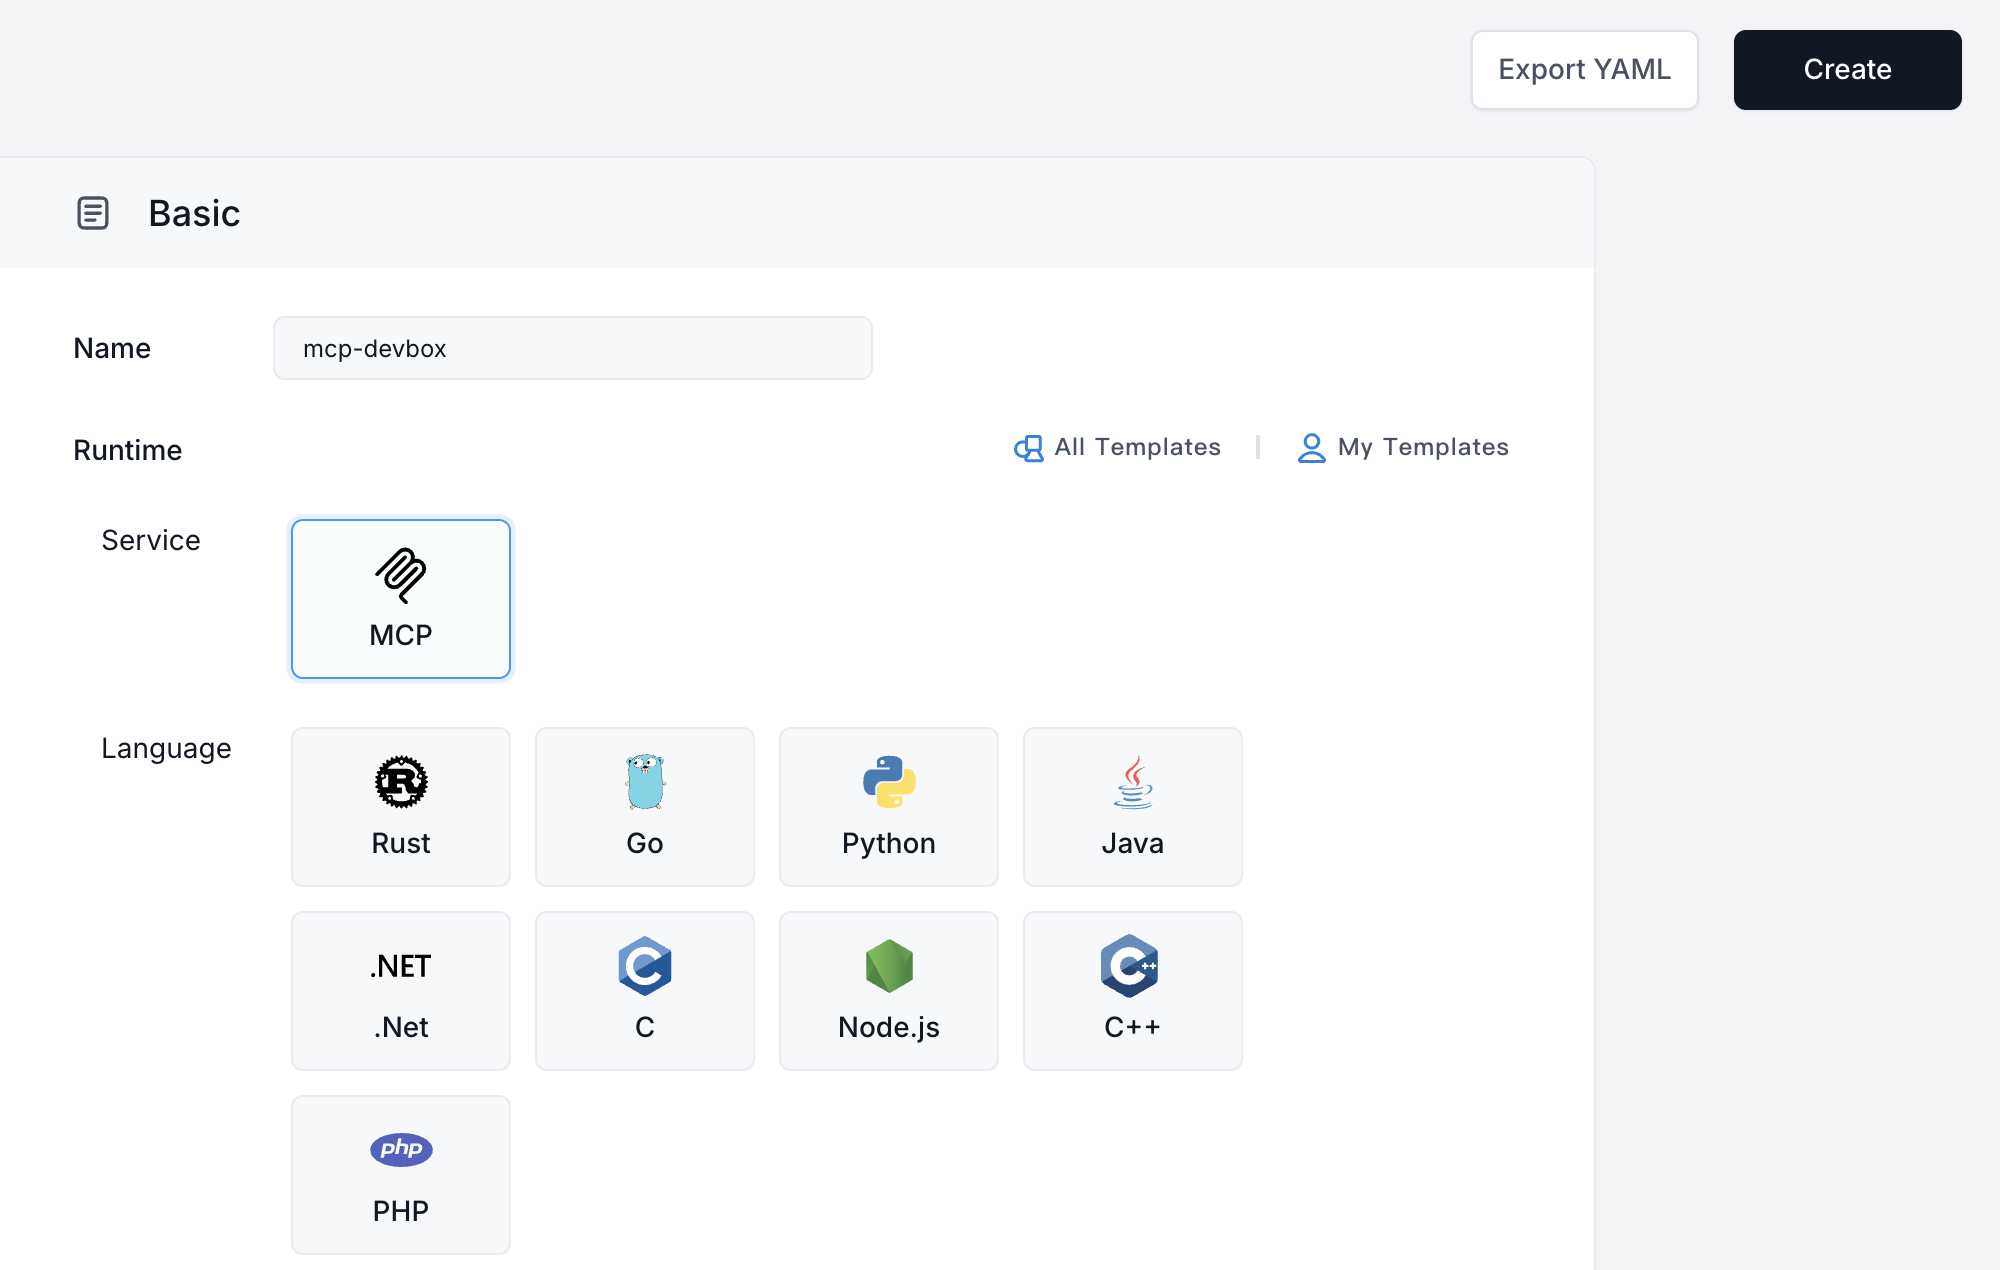
Step 1: Create Your Development Environment

  1. Visit Sealos Cloud
  2. Click on the DevBox icon and select "New Project"
  3. In the configuration settings, choose "MCP Service" as your development framework
  4. Select your preferred programming language (Python, JavaScript, Go, etc.)
  5. Click "Create" to finish setting up your project

Create a new DevBox project using the MCP templateCreate a new DevBox project using the MCP template
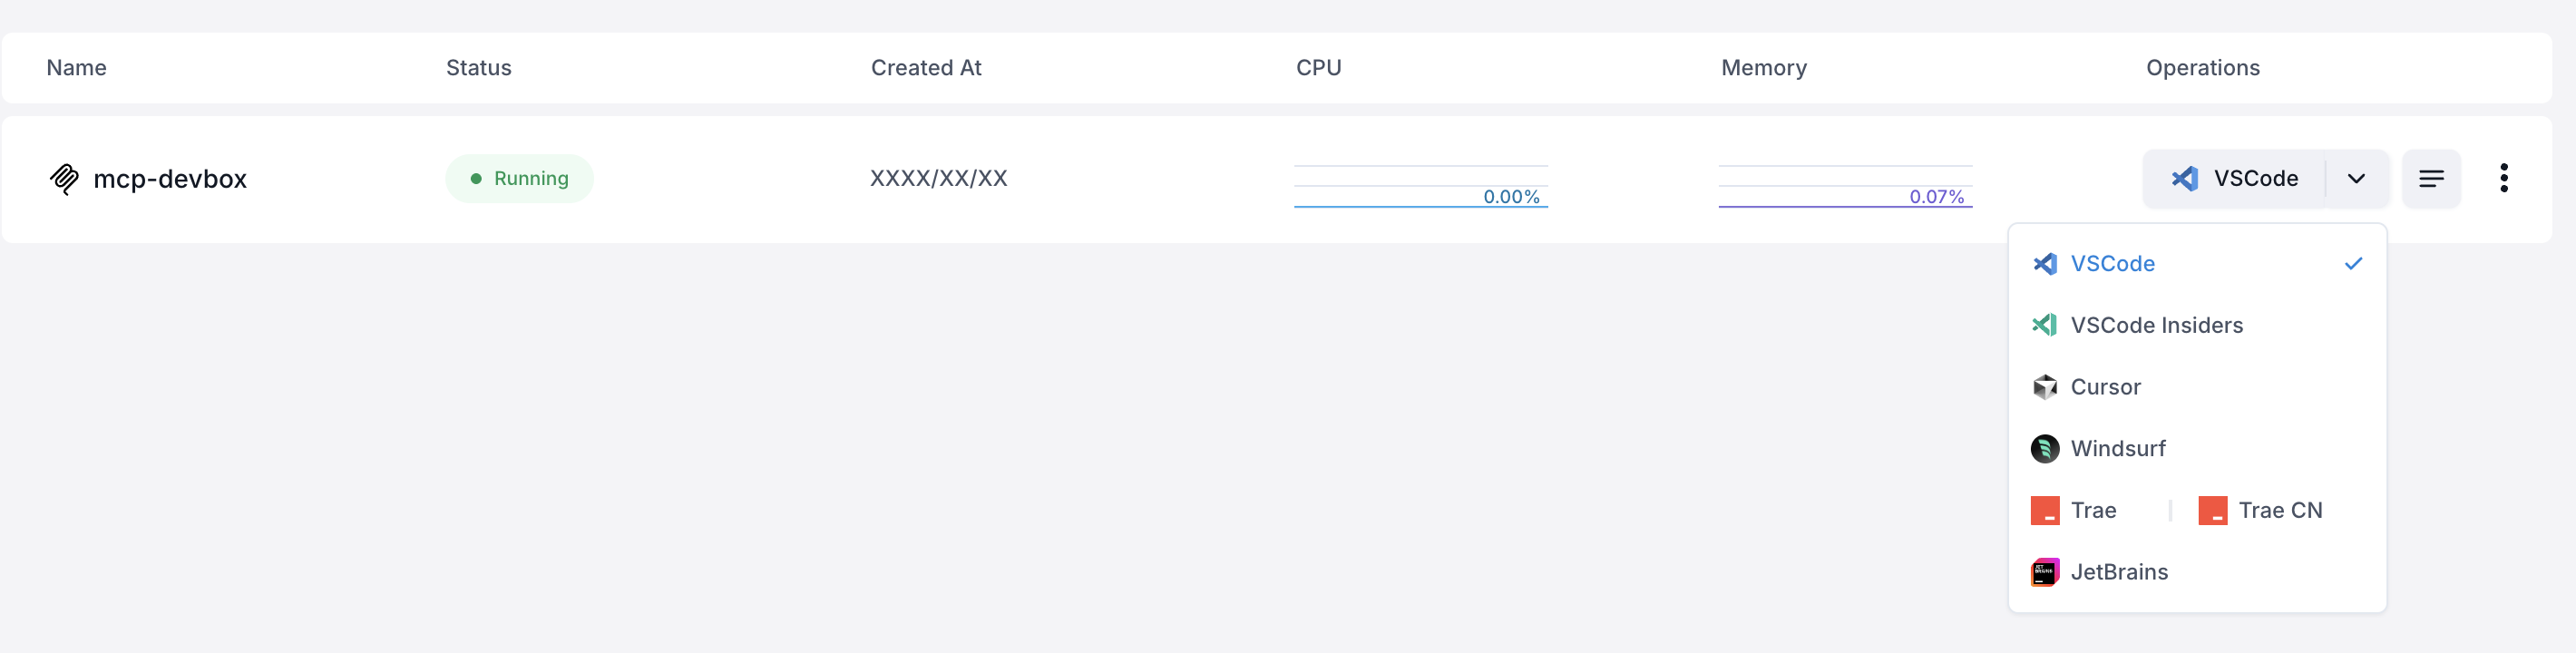
Step 2: Connect to Your Development Environment

  1. In the project list, find your newly created project
  2. Click the dropdown arrow next to the IDE icon
  3. Select your preferred IDE (VS Code, JetBrains, etc.)
  4. Follow the prompts to install the DevBox plugin for secure SSH connection
  5. Your IDE will automatically establish a remote connection

Connect to your DevBox directly from your IDE with 1-clickConnect to your DevBox directly from your IDE with 1-click

Step 3: Understanding the Project Structure

Once connected, you'll see a basic project structure. In this example we will go other the Python deployment - so the file names and contents may vary slightly. In the Python version you will find:

  • .venv: Contains all project dependencies (MCP-related dependencies are pre-installed)
  • entrypoint.sh: Contains project startup commands
  • manage.py: Your main program file (for Python projects)

The template includes three main components:

1. MCP Service Initialization

This initializes your MCP service with a specified name.

2. SSE Communication Logic

The template includes pre-configured Server-Sent Events (SSE) communication code to handle client connections, so you don't need to modify this part.

3. Tool Implementation

This is where you'll implement your MCP server's functionality.

Let's create an MCP server that retrieves geographical information based on IP addresses.

First let's add the dependency httpx towards the top of the file import httpx and then we can add our main function:

This function accepts an IP address parameter, queries an external geolocation API, and returns the results in JSON format.

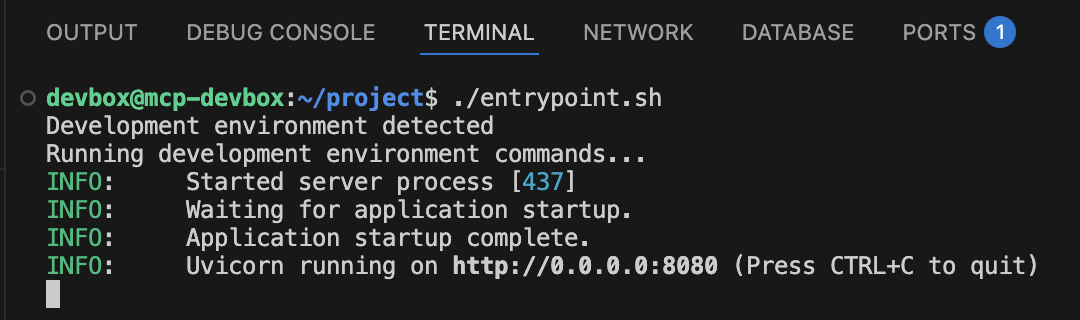
  1. Execute ./entrypoint.sh to start your project
  2. In VSCode Network tab, you can see your public URL
  3. This URL is your MCP server's public endpoint that anyone can access

Run your DevBox project from the entrypoint scriptRun your DevBox project from the entrypoint script

You can connect to your MCP server using any SSE-compatible client. Let's go with Cherry Studio as an example:
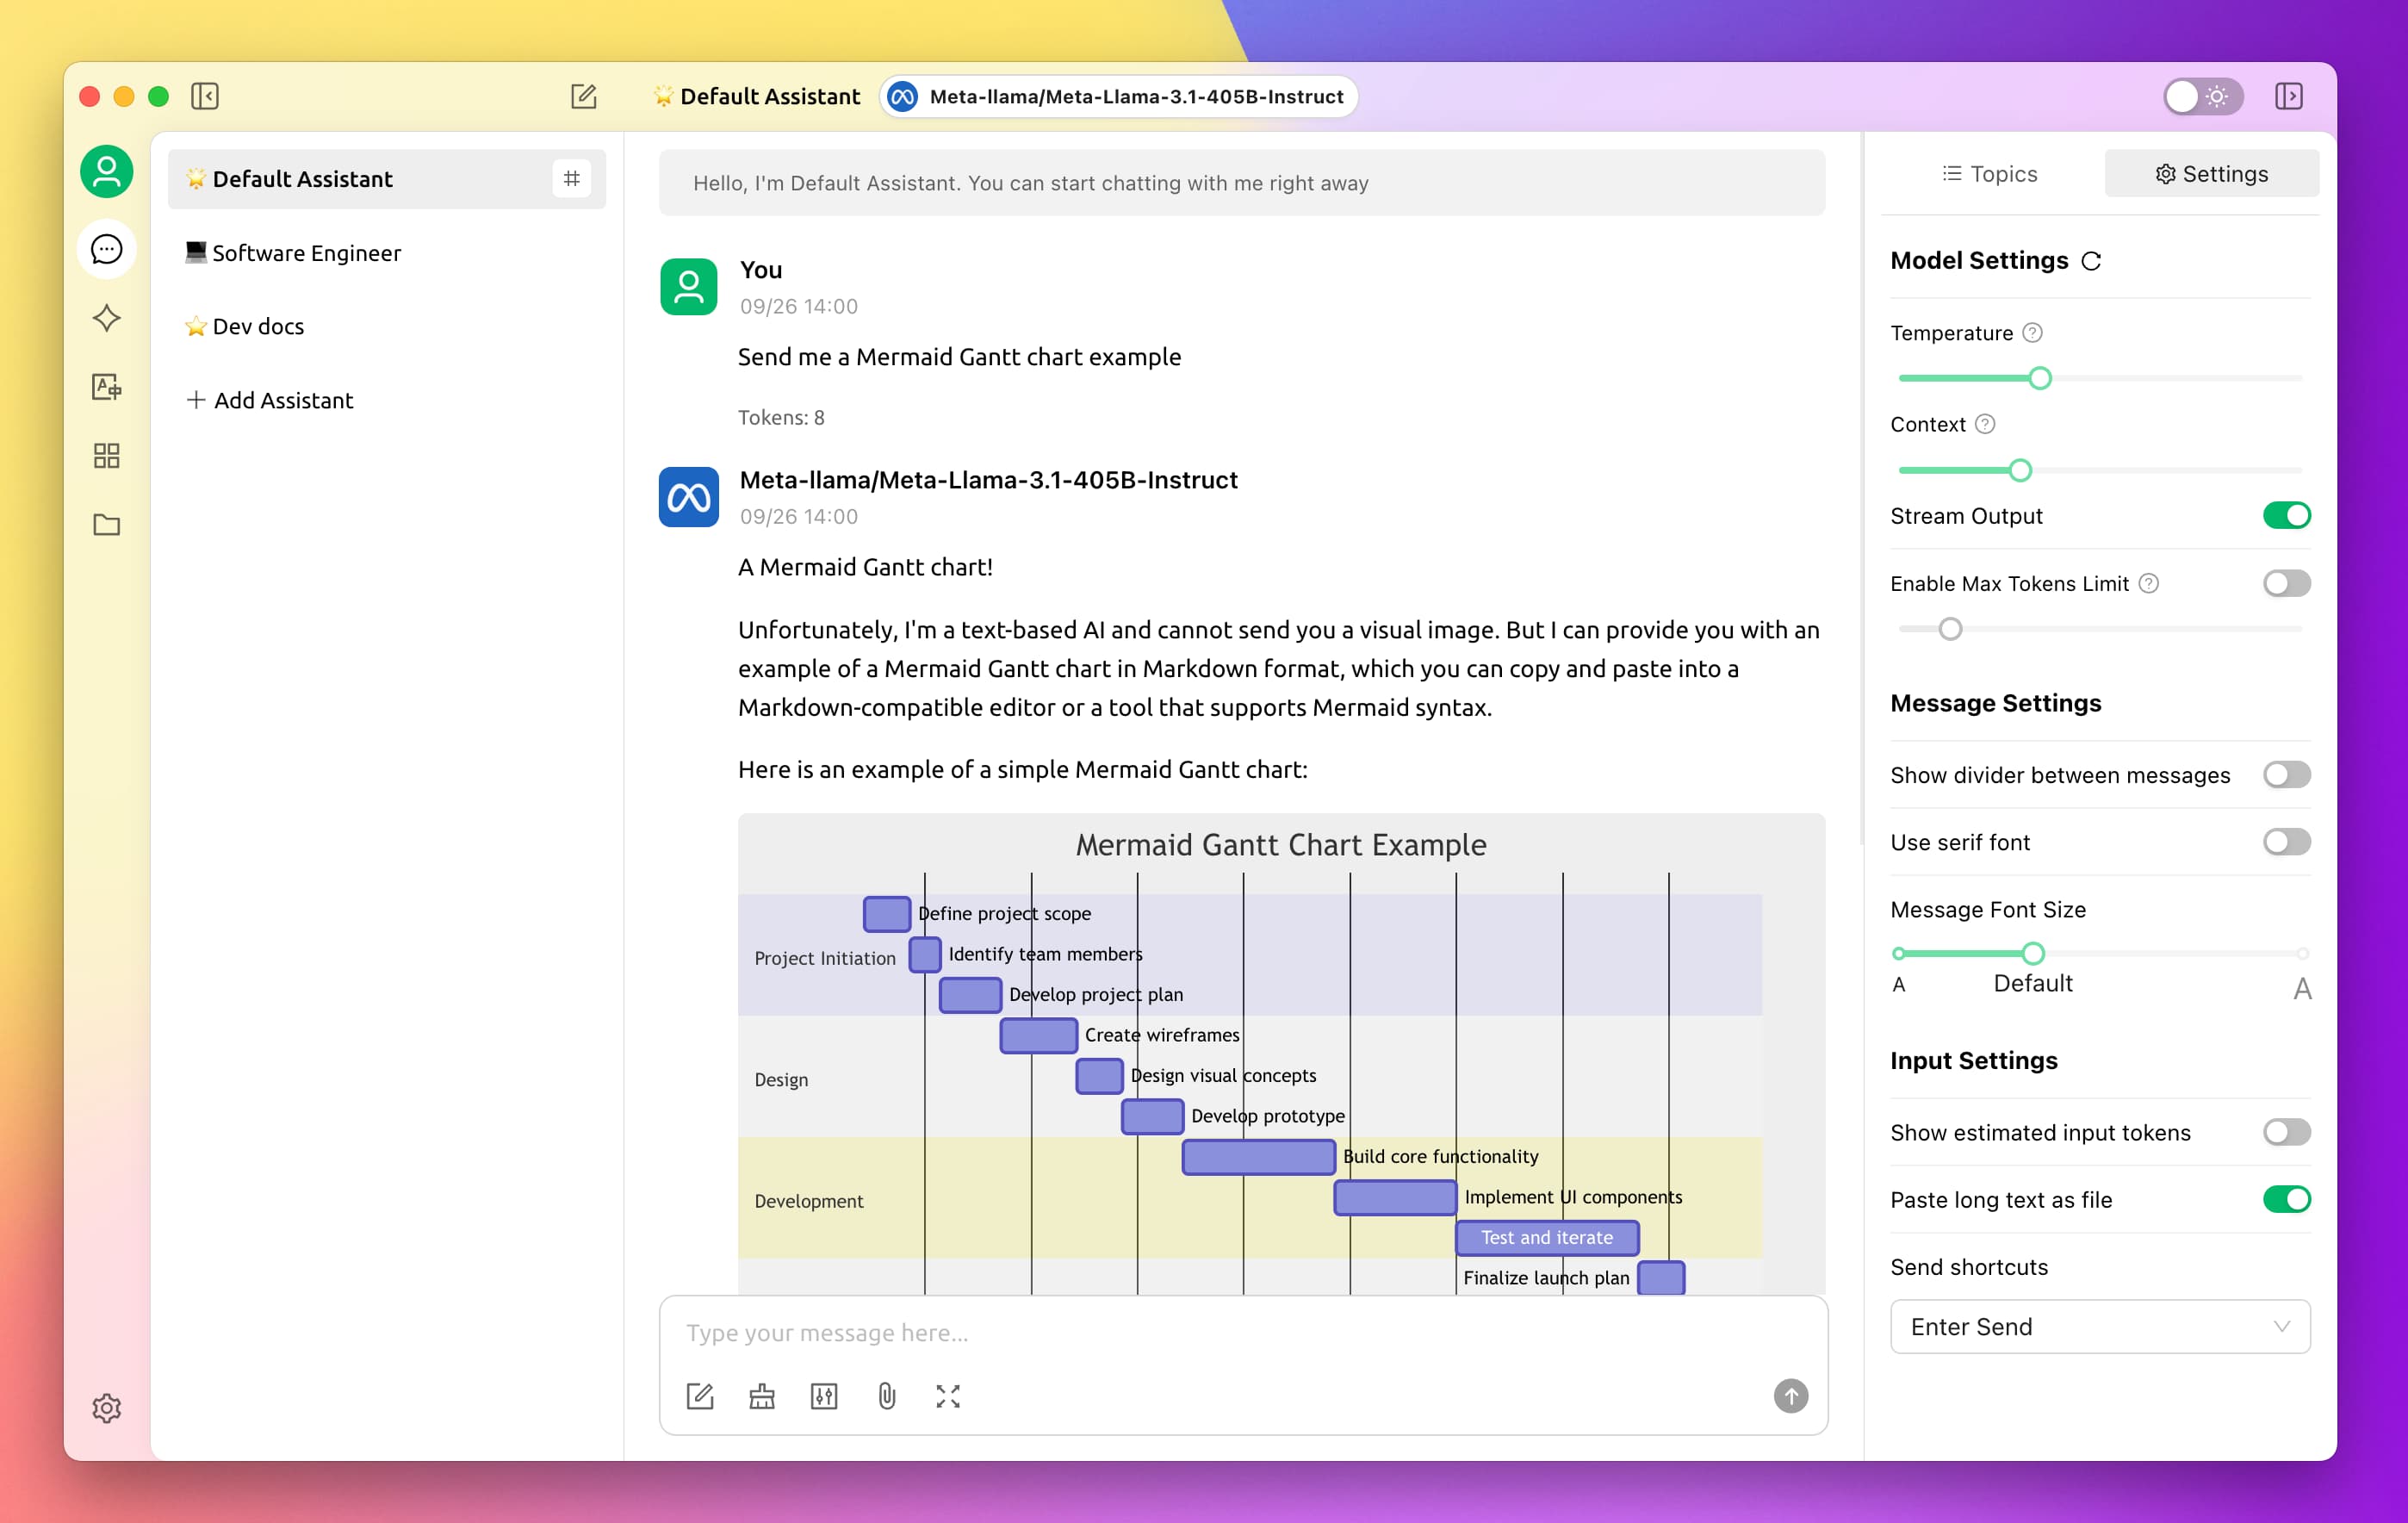
  1. Install Cherry Studio
  2. Add your preferred AI model (like OpenAI or DeepSeek)
  3. Add your MCP server:
    • Type: SSE
    • URL: Your public URL + "/sse" path
  4. Enable tool calling in your model's settings
  5. In the chat interface, enable your MCP server
  6. Test by asking the AI to look up an IP address

Cherry Studio is an SSE-compatible clientCherry Studio is an SSE-compatible client

Once development and testing are complete:
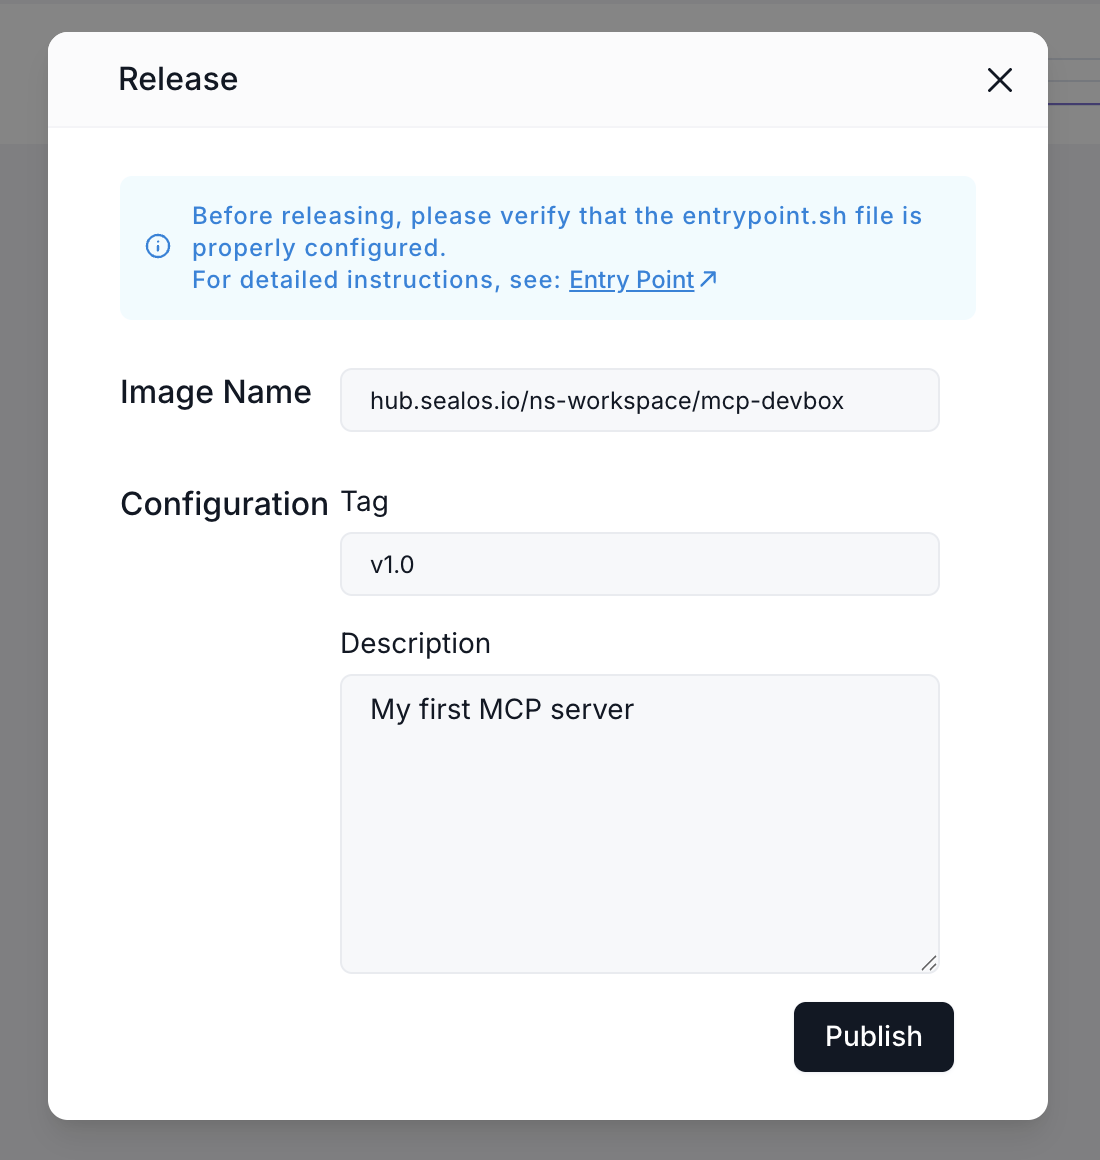
  1. Navigate to the "Version History" section in your project details
  2. Click "Publish Version"
  3. Fill in the required information:
    • Image name (auto-filled)
    • Version number (e.g., v1.0)
    • Description
  4. Click "Release" and then "Deploy"
  5. The system will redirect you to Sealos Application Management
  6. Click "Deploy Application" (default configurations are usually sufficient)
  7. When the status shows "running," your deployment is complete
  8. Copy the public address and update it in your client application

Once ready you can publish your DevBoxOnce ready you can publish your DevBox

With Sealos DevBox, developing and deploying MCP servers becomes remarkably simple and accessible. As the MCP protocol continues to evolve, AI capabilities will become increasingly powerful and diverse, lowering development barriers further.

The ease of development means your creativity, not technical constraint, will define what's possible. Whether you're building tools for data analysis, content generation, or specialized industry applications, Sealos DevBox provides the infrastructure to bring your ideas to life quickly.

Start building your own MCP server today and join the growing ecosystem of developers extending AI capabilities!