





HTMX is a promising technology that simplifies many things when building web applications/systems. Mainly:
(if you are interested, I have described HTMX in more detail here, and also how it pairs nicely with Web Components here)
That is great when it comes to local development and simple experiments, but what about Production? Let's find out!
We have three main components:
They are built and run in Docker. We deploy them all to a single Virtual Machine - Droplet, on the DigitalOcean infrastructure, generate required secrets (database passwords and JSON Web Token secret key) and set up a certificate to have HTTPS. It is all automated by a few, simple Bash/Python scripts.
Simple app that has users and allows them to add notes to every day, and also to browse their history. This is how it looks:
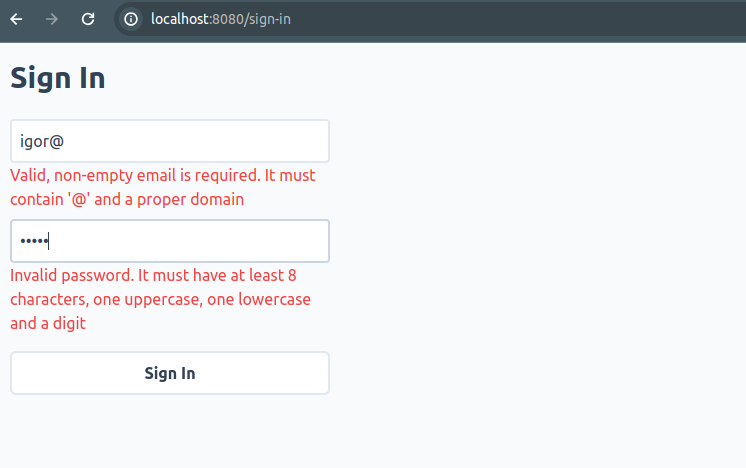
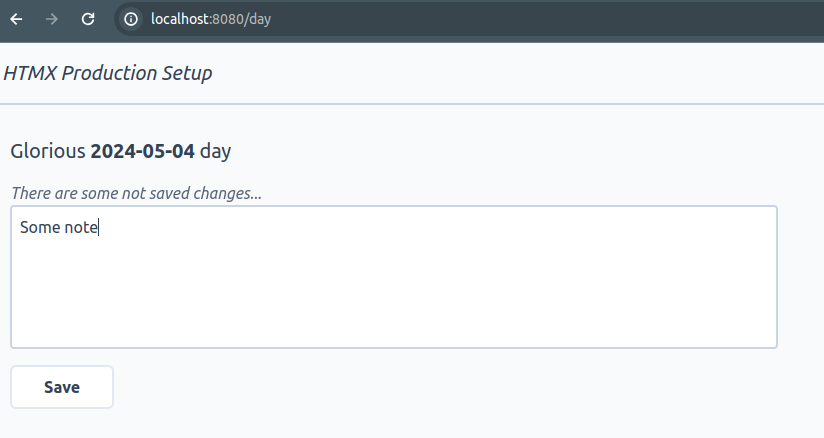
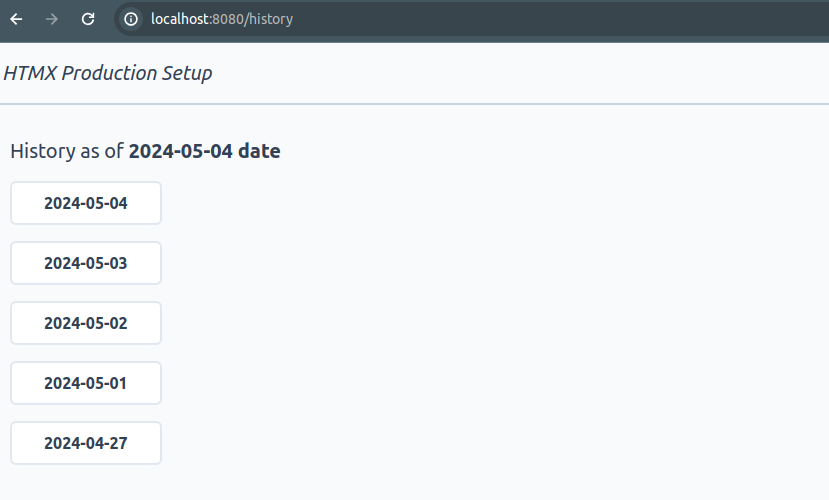
It is written in Java 21 with the help of Spring Boot framework, but these are secondary details, because the setup rests only on the assumptions that an app:
http://0.0.0.0:16083 format, which is needed for zero downtime deploymentsAUTH_TOKEN_KEY environment variable, in the Base64 format; it should also store them in the Cookie and refresh, when possible and necessaryThese assumptions can be met by virtually any programming language. We just need to have an HTTP server, started on chosen by us port, and serve both static and dynamic content; we also need to have a relational database client and generate some kind of auth tokens, preferably JWT.
Getting back to our app implementation, for frontend-related things we have:
app/static dir app/static/styles.css and app/tailwind.config.js files*Controller.java and HTMX.java filesTranslations.java file; they are used to render HTML in a language set by the user
For authentication/authorization, we generate a single JSON Web Token, for every user login, valid for 48 hours (configurable). We store it in the HTTP cookie and regenerate automatically every hour (also configurable). If there is no cookie with a valid token or it has expired, we just redirect users to the /sign-in page (check out SecurityFilter.java for more details). Thanks to this approach, we do not need to write any client-side JavaScript code to handle auth flow nor configure anything in HTMX; and when signing out, we just remove this cookie and the token is gone.
PostgreSQL - simple, good relational database. One thing worth mentioning here is that the app is a modular monolith; as a consequence, every module has its own database schema to have proper module separation. Schemas are created and managed by App, but essentially we just have two tables:
CREATE SCHEMA "user";

CREATE TABLE "user"."user" (
  id UUID PRIMARY KEY,
  email TEXT UNIQUE,
  name TEXT NOT NULL,
  password TEXT NOT NULL,
  language TEXT NOT NULL,
  created_at TIMESTAMP NOT NULL DEFAULT NOW()
);

CREATE SCHEMA day;

CREATE TABLE day.day (
  user_id UUID NOT NULL,
  date DATE NOT NULL,
  note TEXT,

  PRIMARY KEY(user_id, date)
);
Reverse proxy for the app. From the outside, it supports only HTTPS communication and it runs on the same machine as App, so the communication between these two components is always on the localhost. It has the following functions:
current_url.txt file with the url of a current App instancecurrent_url.txt filecurrent_url.txt file, so that it always points to the latest app instanceWe have a Droplet (Virtual Machine), running on DigitalOcean's infrastructure. This setup is not DigitalOcean-specific though; all we need is a linux-based machine with:
Needless to say, if you choose not to use DigitalOcean, you have to automate or set it up on your own. We do use it, and we have a single script that sets this all up for us.
We also have HTTPS setup with auto-renewable certificates - for that, you need to have a domain.
Lastly, required secrets are generated and stored on our remote machine as plain text files, in a dedicated directory. Before starting App, we simply do:
export AUTH_TOKEN_KEY=$(cat /home/deploy/.secrets/auth-token-key.txt)
export DB_PASSWORD=$(cat /home/deploy/.secrets/db-password.txt)
...to read them and have available as environment variables.
No production setup is complete without a great local development experience. What do we need in our case?
app/static dir and HTML is generated dynamicallyI wanted to avoid having a package.json file and Node.js environment only because we use Tailwind. Therefore, in the repo we have tailwindcss executable, downloaded according to the official docs (there is tailwindcss-linux-x64 version; in case of problems, download a version compatible with your OS). This is required because of how Tailwind works: it scans configured files to find out what CSS classes are needed; it then generates a target CSS file. To have it live-generated, from app dir run:
bash start_tailwindcss_watch.bash

Rebuilding...

Done in 473ms.
According to tailwind.config.js, we watch for any changes in Java files, where the HTML is created, and static files; when changes occur, a new CSS file as static/live-styles.css is generated. This changing file is returned by App started with the dev profile - more on that below.
To start Postgres database locally, go to db dir and run:
bash build_and_run_locally.bash
In config_local.env file, we have a variable:
export DATABASE_VOLUME="/tmp/htmx-production-setup-db-volume"
This is where local database volume will be created. It is a temporary directory, so we will lose data everytime we reboot our local machine; if this behavior is not desired, we should change this path to a persistent one.
To run the app locally and see changes quickly, we need to have Java 21 + compatible Maven version. If we just want to build and run App locally, having Docker is enough, since the app can be built inside it; however, for every change we would need to recompile it all inside Docker, which is quite slow. For the optimal local development experience, set up Java 21 with a compatible Maven version. Once you have it, in your IDE of choice, just start HtmxProductionSetupApp.java with:
app: needed to serve content of static dir locally, from files, not a classpath as we do in productionSPRING_PROFILES_ACTIVE=devThat is all - it will make App serve static resources from static directory live, without any cache; it will also connect to the local database on localhost:5432 address, without a password; JWT tokens will be signed with hardcoded secret from application-dev.yml file. To edit some HTML and see changes, just go to any of *Controller.java files; change something there, rebuild and restart the app in your IDE - the whole cycle should take no more than 4 to 5 seconds. To be honest, most of the overhead comes from using Spring Boot framework, but it simplifies many things; by switching to a more lightweight alternative, we would just wait 1 to 2 seconds, instead of 4 to 5. In any case, I have concluded that waiting these additional ~ 3 seconds is a price worth paying for all the ready-to-use solutions that this framework brings.
As said, to follow through and have everything automated by a few scripts, you need to have a DigitalOcean account and a domain. If you do not have the former, you need to prepare a compatible Virtual Machine that is mostly described by prepare_infra.py and init_machine.bash scripts. Assuming that we have a DigitalOcean account and a domain, let's prepare the infrastructure!
From scripts directory, run:
bash init_python_env.bash
# activate venv environment
source venv/bin/activate
export DO_API_TOKEN="<your DigitalOcean API token>"
export SSH_KEY_FINGERPRINT="<ssh key fingerprint of your local machine, uploaded to DigitalOcean>"
python3 prepare_infra.py
This will create our machine and prepare it by installing Docker, creating the deploy user with required permissions, mostly passwordless sudo and Docker access, and setting up the firewall. After all of that is done, which should take just a few minutes, we are able to ssh into this new machine, deploy our applications and scripts, and perform any needed operation there.
First and foremost, set up a DNS A record - it should point to the IP address of previously created Droplet/Virtual Machine.
Then, in the root dir, we have config_prod.env file with variables:
export DOMAIN="htmx-nonexistentdomain.com"
export DOMAIN_EMAIL="[email protected]"
Make sure to change them to your domain and email address accordingly! Email is required by Certbot to notify us about the state of our certificates.
Assuming that we have the DNS A record and have changed DOMAIN and DOMAIN_EMAIL values, we can create HTTPS certs with the help of Let's Encrypt and Certbot. From scripts dir, let's run:
bash set_up_https_cert.bash
This will:
At this point, we have a ready-to-be-used HTTPS certificate, in /etc/letsencrypt directory, with auto-renewal taken care of by Certbot.
We are now ready to deploy our target Nginx; go to scripts again and run:
export ENV=prod
export APP=nginx
bash build_and_package_app.bash
In nginx/dist directory, we have a deployable package - just gzipped Docker image and a bunch of bash scripts to coordinate the whole deployment process. On the target machine (our Droplet), generated scripts will:
current_url.txt file with the information about App url exists (we always start it on a random port), we use this information to update Nginx config/actuator/health for us) a few times, through NginxWe will repeat a very similar process when deploying App and Db. For now, the last step will fail because we have not deployed the app just yet; Nginx is ready for that and will start nevertheless, with appropriate information about its inability to proxy the app. To see this in action, let's do (also from scripts):
export APP=nginx
bash deploy_app.bash

...

Dirs prepared, copying package, this can take a while...

...

Package copied, loading and running app, this can take a while...
Loading htmx-production-setup-nginx:latest image, this can take a while...
Loaded image: htmx-production-setup-nginx:latest
Image loaded, running it...
Removing previous container...
Error response from daemon: No such container: htmx-production-setup-nginx

Starting new htmx-production-setup-nginx version...

Current app url file doesn't exist, skipping!
4b96b1240562b3e05dea6a304a71788a18be02e8f43eca3335250d79e941895c
Checking proxied app connection...
curl: (7) Failed to connect to 0.0.0.0 port 80 after 5 ms: Connection refused
Warning: Problem : connection refused. Will retry in 1 seconds. 10 retries left.
curl: (22) The requested URL returned error: 502
Warning: Problem : HTTP error. Will retry in 1 seconds. 9 retries left.

...

Warning: Problem : HTTP error. Will retry in 1 seconds. 1 retries left.
curl: (22) The requested URL returned error: 502

Proxied connection checked, see if it is what it should be!
As said, 502 Bad Gateway errors are there because we have not deployed App yet, which is hidden behind Nginx; we will do this in the next steps. For now, we can verify that HTTPS works:
curl https://<your-domain>
{ "error": "AppUnavailable", "message": "App is not available" }
We can also check that the certificate is auto-renewable:
ssh deploy@<your-domain>

sudo certbot renew --dry-run

Saving debug log to /var/log/letsencrypt/letsencrypt.log

- - - - - - - - - - - - - - - - - - - - - - - - - - - - - - - - - - - - - - - -
Processing /etc/letsencrypt/renewal/<your-domain>.conf
- - - - - - - - - - - - - - - - - - - - - - - - - - - - - - - - - - - - - - - -
Simulating renewal of an existing certificate for <your-domain>

- - - - - - - - - - - - - - - - - - - - - - - - - - - - - - - - - - - - - - - -
Congratulations, all simulated renewals succeeded:
  /etc/letsencrypt/live/<your-domain>/fullchain.pem (success)
- - - - - - - - - - - - - - - - - - - - - - - - - - - - - - - - - - - - - - - -
Hook 'post-hook' ran with output:
 2024/05/01 18:40:43 [notice] 28#28: signal process started
As a post-hook we have:
docker exec ${nginx_container} nginx -s reload 2>&1
...that just makes Nginx reload its config and use a newly generated certificate.
We right now have Nginx with HTTPS setup. Before deploying the app, let's take care of two last pieces of our infrastructure - database and secrets.
Let's build Db; from scripts:
export ENV=prod
export APP=db
bash build_and_package_app.bash
As with Nginx, in db/dist directory, we have a deployable package - just gzipped Docker image and a bunch of bash scripts.
Let's deploy it:
export APP=db
bash deploy_app.bash
We right now have a working database; let's change its default passwords and set up a secret for JWT tokens that App will issue. From scripts, run:
python3 generate_secrets.py

Go to needed directory and simply run:

echo "xHToxjzEiiL0lGMCE9Hy1YMfNeNi++64o3IucthTwXM=" > auth-token-key.txt
echo "zpfEX7FR4UvZzkve0VmdH4SkGnirSruNzWc06iBRpxFbwrfo" > db-root-password.txt
echo "wCBytG25v69CAfzoIHOuQ0uDiciAlCtQLPOXpz4qaRpRvnh3" > db-password.txt
As the output suggests, we need to go to a desired directory and just copy-paste these commands there:
ssh deploy@<your-domain>

# secrets path from config_prod.env
mkdir /home/deploy/.secrets
cd /home/deploy/.secrets

<copy-paste commands from the generate_secrets.py output>

ls -l
total 12
-rw-rw-r-- 1 deploy deploy 45 May 1 18:49 auth-token-key.txt
-rw-rw-r-- 1 deploy deploy 49 May 1 18:49 db-password.txt
-rw-rw-r-- 1 deploy deploy 49 May 1 18:49 db-root-password.txt
Now, as we have secrets, let's change db passwords by running db/change_db_passwords.bash on our remote machine:
# just copy-paste these commands and run them from /home/deploy/.secrets dir

new_root_db_password=$(cat db-root-password.txt)
app_db_user="htmx_app"
app_db_name="htmx_app"
app_db_password=$(cat db-password.txt)

connect_to_db="docker exec -it htmx-production-setup-db psql -U postgres -d postgres -c"
$connect_to_db "ALTER USER postgres WITH password '$new_root_db_password'"
$connect_to_db "ALTER USER ${app_db_user} WITH password '$app_db_password'"
We now have both a working db and secrets prepared - everything is ready to deploy App!
Let's build App; from scripts:
export ENV=prod
export APP=app

# To build everything inside Docker, run:
# export BUILD_IN_DOCKER=true

bash build_and_package_app.bash
As with Nginx and Db, in app/dist directory, we have a deployable package - just gzipped Docker image and a bunch of bash scripts. In this case, they are a little more complicated, since we need to coordinate zero downtime deployment - more on that below.
Let's deploy it:
export APP=app
bash deploy_app.bash
We should see something like this:
Dirs prepared, copying package, this can take a while...
current_url.txt                                                                                                                                  100%   21     0.7KB/s   00:00
htmx-production-setup-app.tar.gz                                                                                                                 100%  191MB   5.4MB/s   00:35
load_and_run_app.bash                                                                                                                            100%  271     9.0KB/s   00:00
run_app.bash

...

App started, will check if it is running after 5s...
App is running, checking its health-check...

...

curl: (7) Failed to connect to 0.0.0.0 port 13307 after 7 ms: Connection refused
Warning: Problem : connection refused. Will retry in 3 seconds. 10 retries left.

...

{"status":"UP"}

htmx-production-setup-app app is healthy!

Replacing config with new app url: http://0.0.0.0:13307...
Config updated!

Reloading nginx config..

2024/05/01 19:07:10 [notice] 34#34: signal process started

Nginx is running with new app url (http://0.0.0.0:13307)!

Checking proxied app connection...
{"status":"UP"}

Proxied app is healthy!

Nginx updated and running with new app version, cleaning previous after a few seconds!

Stopping previous htmx-production-setup-app-backup container...
htmx-production-setup-app-backup
Removing previous container...
htmx-production-setup-app-backup
New htmx-production-setup-app container is up and running!

App loaded, checking its logs and status after 5s...


  .   ____          _            __ _ _
 /\\ / ___'_ __ _ _(_)_ __  __ _ \ \ \ \
( ( )\___ | '_ | '_| | '_ \/ _` | \ \ \ \
 \\/  ___)| |_)| | | | | || (_| |  ) ) ) )
  '  |____| .__|_| |_|_| |_\__, | / / / /
 =========|_|==============|___/=/_/_/_/
 :: Spring Boot ::                (v3.2.4)

2024-05-01T19:06:57.400Z  INFO 1 --- [htmx-production-setup-app] [           main] c.b.h.HtmxProductionSetupApp             : Starting HtmxProductionSetupApp v1.0-SNAPSHOT using Java 21.0.2 with PID 1 (/htmx-production-setup-app.jar started by root in /)
2024-05-01T19:06:57.408Z  INFO 1 --- [htmx-production-setup-app] [           main] c.b.h.HtmxProductionSetupApp             : The following 1 profile is active: "prod"
2024-05-01T19:07:01.574Z  INFO 1 --- [htmx-production-setup-app] [           main] o.s.b.w.embedded.tomcat.TomcatWebServer  : Tomcat initialized with port 13307 (http)

...

App status:
running
App deployed!
In case of problems you can rollback to the previous deployment: /home/deploy/deploy/app/previous
From now on, we can deploy app changes with zero downtime. We touched on it briefly when describing Nginx, but let's expand on it:
app-backup containerapp-backupapp-backup nowapp-backup container back to app and fail the deployment; old version was running and used by Nginx all this time, so that is all we have to doIt is all defined in template_run_zero_downtime_app.bash and in template_update_app_url.bash; versions with specific values are available after building App and Nginx as app/dist/run_app.bash and nginx/dist/update_app_url.bash accordingly.
We can right now go to https://<your-domain> and sign in as (DemoDataInitializer.java):
[email protected]:ComplexPassword12
[email protected]:ComplexOtherPassword12
Then, make any visible change in the *Controller.java files, where HTML responses are generated. After that, build and deploy the app, as we did above: while deploying, keep refreshing App in the browser and see - we do not have any downtime!
As we have seen, HTMX is absolutely ready to be used in Production:
Taking it all into consideration, I highly recommend using HTMX in production, as a tool to build simpler and more maintainable systems.
此内容由惯性聚合(RSS阅读器)自动聚合整理,仅供阅读参考。 原文来自 — 版权归原作者所有。