





In this guide, we’ll learn how to create a virtual webcam on a Linux device using an Android device’s camera. We’ll go through the installation of key packages like adb, v4l2loopback, and scrcpy, allowing us to utilize an Android device’s camera as a virtual webcam.
adbadb, which stands for Android Debug Bridge, is a versatile command-line tool used for communicating with Android devices directly from your computer. 1
v4l2loopbackv4l2loopback is a kernel module (software program) for Linux that allows you to create virtual video devices. 2
$ sudo apt install v4l2loopback-dkms
Load the kernel module, setting the exclusive_caps option to 1, and label it as “Virtual Webcam.”
Note: Setting exclusive_caps to 1 is important for Chromium/WebRTC-based tools like Google Meet or Zoom,
which requires a webcam device with only capture capabilities
# Load the `v4l2loopback` kernel module
# and set `exclusive_caps` option to `1`
# (important for Chromium/WebRTC-based tools like Google Meet or Zoom,
# which require a webcam device with only capture capabilities)
$ sudo modprobe -v v4l2loopback exclusive_caps=1 card_label="Virtual Webcam"
Verify the creation of the virtual webcam device:
$ v4l2-ctl --list-devices    # or you may `ls /dev/video*`
Dummy video device (0x0000) (platform:v4l2loopback-000):
  /dev/video0
scrcpyscrcpy stands for “screen copy” and is a free and open-source tool that allows you to mirror and control your Android device from your computer. It works on Linux, Windows, and macOS, making it a cross-platform solution. 3
# Install pre-requisites for Debian/Ubuntu
sudo apt install ffmpeg libsdl2-2.0-0 adb wget \
                 gcc git pkg-config meson ninja-build libsdl2-dev \
                 libavcodec-dev libavdevice-dev libavformat-dev libavutil-dev \
                 libswresample-dev libusb-1.0-0 libusb-1.0-0-dev
$ git clone --depth 1 --branch v2.3.1 https://github.com/Genymobile/scrcpy
$ cd scrcpy
$ ./install_release.sh  # may ask for your sudo password
adbALLOW to grant USB debugging access.
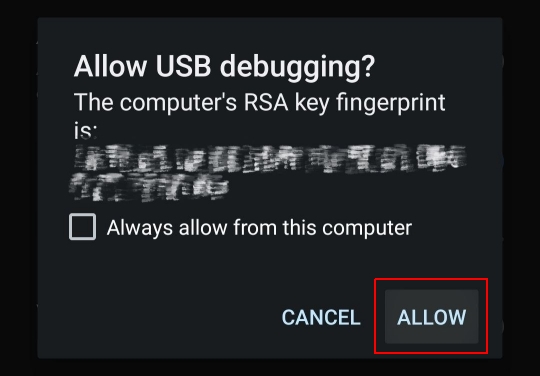
$ adb devices
List of devices attached
978a27c9  device
scrcpyNow that our device is connected properly we can list the cameras 4 we can utilize:
Example output:
scrcpy 2.3.1 <https://github.com/Genymobile/scrcpy>
INFO: ADB device found:
INFO:     -->   (usb)  978a27c9                        device  DEVICEX
/usr/local/share/scrcpy/scrcpy-server: 1 file pushed. 0.6 MB/s (66007 bytes in 0.100s)
[server] INFO: Device: [make] make DEVICEX (Android 12)
[server] INFO: List of cameras:
    --camera-id=0    (back, 4608x3456, fps=[10, 15, 28, 30])
    --camera-id=1    (front, 3264x2448, fps=[15, 30])
    --camera-id=2    (back, 3264x2448, fps=[15, 28, 30])
    --camera-id=3    (back, 1600x1200, fps=[15, 30])
    --camera-id=4    (back, 1600x1200, fps=[15, 27])
    --camera-id=5    (back, 4608x3456, fps=[10, 15, 28, 30])
    --camera-id=6    (back, 4608x3456, fps=[10, 15, 28, 30])
Start scrcpy with the desired camera source and output to the virtual webcam device:
$ scrcpy --video-source=camera --no-audio --camera-facing=front \
    --v4l2-sink=/dev/video0
v4l2-sink outputs the received video stream into v4l2 device /dev/video0, which we had created earlier.Example output:
scrcpy 2.3.1 <https://github.com/Genymobile/scrcpy>
INFO: Video orientation is locked for v4l2 sink. See --lock-video-orientation.
INFO: Camera video source: control disabled
INFO: ADB device found:
INFO:     -->   (usb)  978a27c9                        device  DEVICEX
/usr/local/share/scrcpy/scrcpy-server: 1 file pushed. 6.9 MB/s (66007 bytes in 0.009s)
[server] INFO: Device: [make] make DEVICEX (Android 12)
INFO: Renderer: opengl
INFO: OpenGL version: 4.6 (Compatibility Profile) Mesa 23.3.2-blah-blah
INFO: Trilinear filtering enabled
[server] INFO: Using camera '1'
INFO: v4l2 sink started to device: /dev/video0
INFO: Texture: 3264x2448
# A new window will pop up which will serve as a viewfinder.
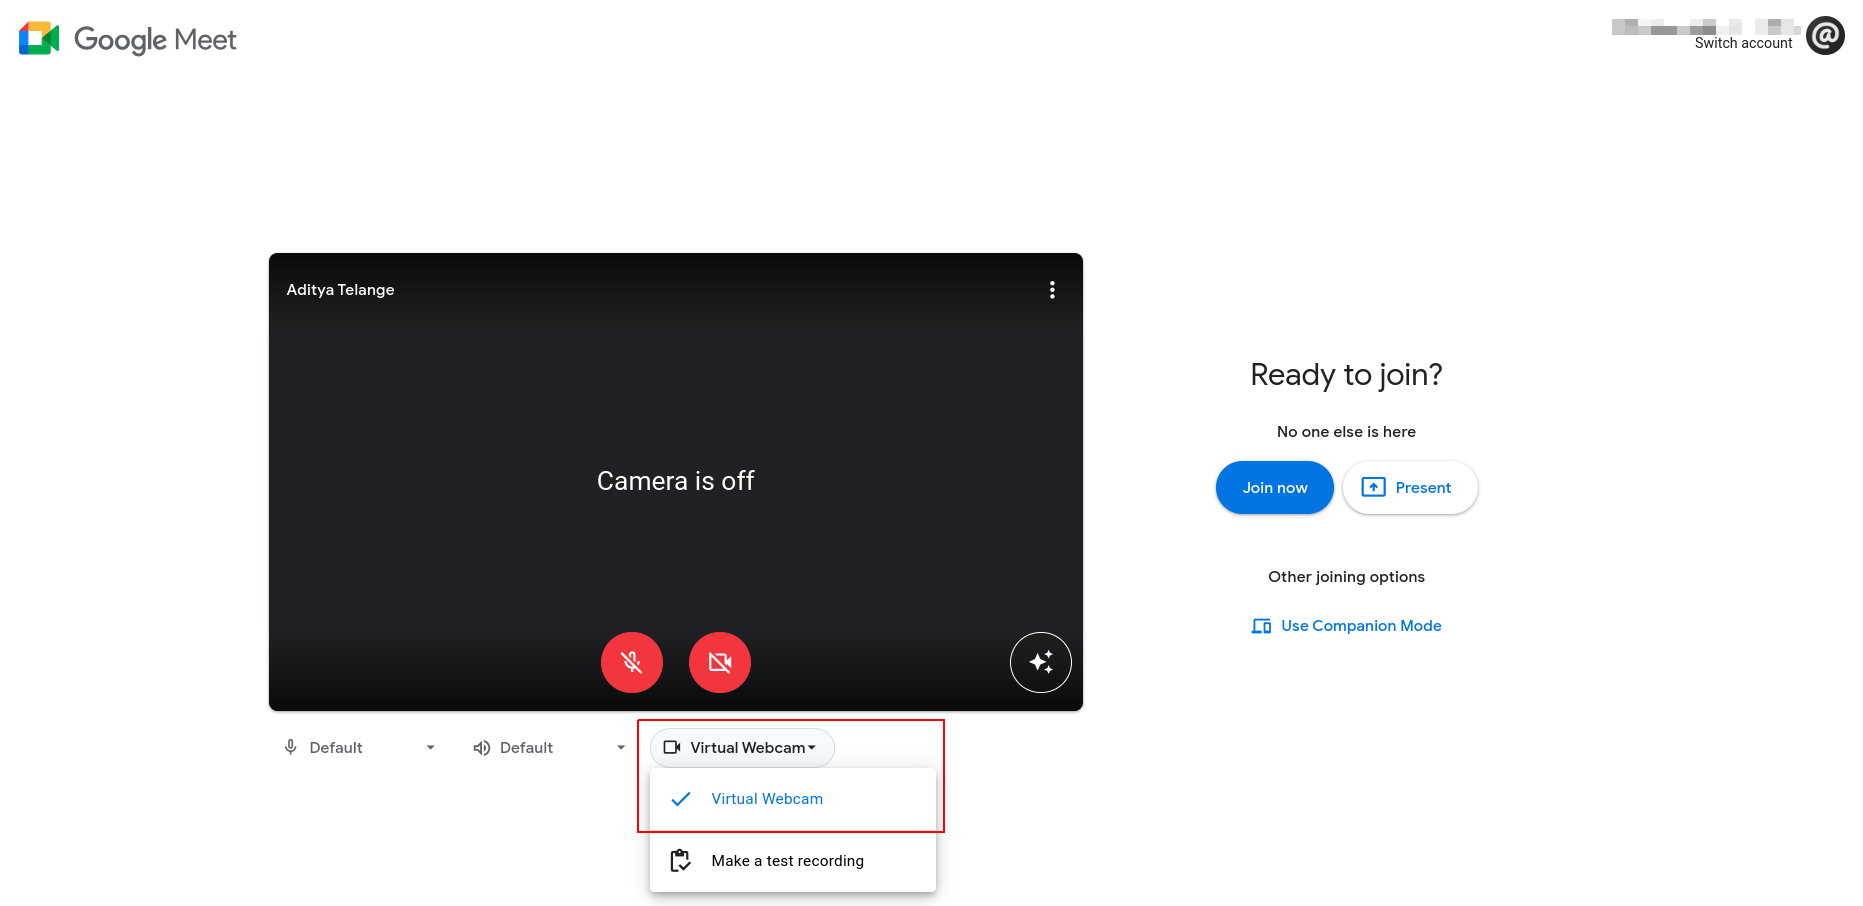
We can now use our newly added Virtual Webcam for video calls and conferences. 🎉
此内容由惯性聚合(RSS阅读器)自动聚合整理,仅供阅读参考。 原文来自 — 版权归原作者所有。