





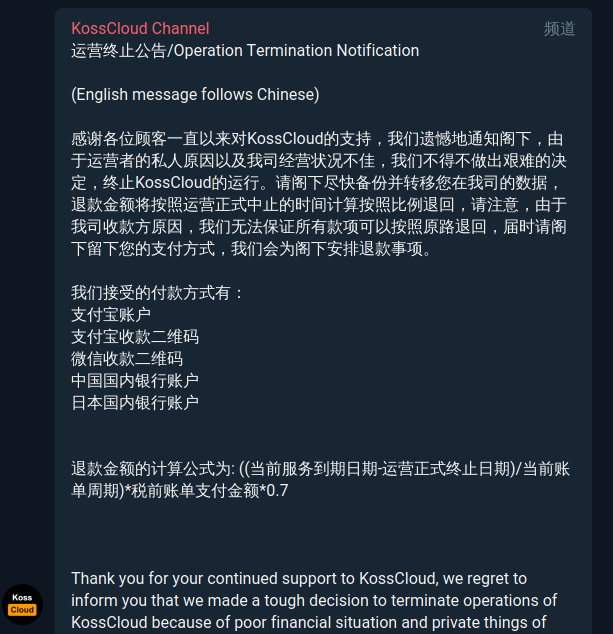
今天算是把博客迁移过来了。自从 Kosscloud 发布运营中止公告以来,这个博客如何迁移便是最大的问题了。
由于没有经验,加上是从 Ubuntu 迁移到 CentOS,因此过程中遇到了挺多麻烦事。不过好在本身的迁移是相当简单的,因此最后也算是完美迁移成功了。这篇文章也算是记录一下成果吧(
ToC
- 准备迁移
- 数据转移
- 安装与简单配置
caddy- 226/NAMESPACE
- 203/EXEC
phpmariadb
- 数据恢复
- 站点数据
- 数据库
- 站点上线
- Caddy
- 修改解析
- 配置防火墙
准备迁移
我们需要准备的内容是 wordpress 目录和数据库。目录我们通过 tar 打包:
tar czvf ~/wordpress.tar.gz ./wordpress/*
而数据库,我们则通过 mysqldump 导出:
sudo mysqldump -uroot --databases wp_site > ~/db.sql
就此,第一步就算是完成了。
数据转移
这一步是两台服务器之间的操作,把数据拖到新服务器上就行了。具体怎么拖随你便(
安装与简单配置
caddy
我们依然是以 caddy 作为服务器(因为有上台服务器的现成配置可以抄)。首先是安装:
curl https://getcaddy.com | bash -s personal http.webdav,tls.dns.cloudflare,http.filter,http.cors,tls.dns.godaddy
然后是用户,我们给 caddy 单独分配一个用户和用户组:
sudo useradd -s /sbin/nologin -M caddy
sudo groupmems -a caddy -g caddy
然后,我们配置 service:
sudo vim /etc/systemd/system/caddy.service
写入如下内容:
[Unit]
Description=Caddy HTTP/2 web server
Documentation=https://caddyserver.com/docs
After=network-online.target
Wants=network-online.target systemd-networkd-wait-online.service
; Do not allow the process to be restarted in a tight loop. If the
; process fails to start, something critical needs to be fixed.
StartLimitIntervalSec=14400
StartLimitBurst=20
[Service]
Restart=on-abnormal
; User and group the process will run as.
User=caddy
Group=caddy
; Letsencrypt-issued certificates will be written to this directory.
Environment=CADDYPATH=/etc/ssl/caddy
Environment=CLOUDFLARE_EMAIL=xxx
Environment=CLOUDFLARE_API_KEY=xxx
Environment=GODADDY_API_KEY=xxx
Environment=GODADDY_API_SECRET=xxx
; Always set "-root" to something safe in case it gets forgotten in the Caddyfile.
ExecStart=/usr/local/bin/caddy -log stdout -log-timestamps=false -agree=true -conf=/etc/caddy/Caddyfile -root=/var/tmp
ExecReload=/bin/kill -USR1 $MAINPID
; Use graceful shutdown with a reasonable timeout
KillMode=mixed
KillSignal=SIGQUIT
TimeoutStopSec=5s
; Limit the number of file descriptors; see `man systemd.exec` for more limit settings.
LimitNOFILE=1048576
; Unmodified caddy is not expected to use more than that.
LimitNPROC=512
; Use private /tmp and /var/tmp, which are discarded after caddy stops.
PrivateTmp=true
; Use a minimal /dev (May bring additional security if switched to 'true', but it may not work on Raspberry Pi's or other devices, so it has been disabled in this dist.)
PrivateDevices=false
; Hide /home, /root, and /run/user. Nobody will steal your SSH-keys.
ProtectHome=false
; Make /usr, /boot, /etc and possibly some more folders read-only.
ProtectSystem=full
; … except /etc/ssl/caddy, because we want Letsencrypt-certificates there.
; This merely retains r/w access rights, it does not add any new. Must still be writable on the host!
ReadWritePaths=/etc/ssl/caddy
ReadWriteDirectories=/etc/ssl/caddy
; The following additional security directives only work with systemd v229 or later.
; They further restrict privileges that can be gained by caddy. Uncomment if you like.
; Note that you may have to add capabilities required by any plugins in use.
;CapabilityBoundingSet=CAP_NET_BIND_SERVICE
;AmbientCapabilities=CAP_NET_BIND_SERVICE
;NoNewPrivileges=true
[Install]
WantedBy=multi-user.target
最后启动:
sudo systemctl start caddy
sudo systemctl enable caddy
在启动过程中可能遇到如下的问题:
226/NAMESPACE
需要自行新建 /etc/ssl/caddy 目录,并将其 chown 给 caddy 用户。
203/EXEC
可能是 SELinux 原因。
php
新系统中我们想要安装 php-7.4,但 CentOS 8 默认只给到 php-7.2(怎么和 1804 一样),因此我们需要自己动手(
sudo dnf -y install dnf-utils
sudo yum -y install https://dl.fedoraproject.org/pub/epel/epel-release-latest-8.noarch.rpm
sudo yum -y install https://rpms.remirepo.net/enterprise/remi-release-8.rpm
sudo dnf module install php:remi-7.4
至此,php 算是装好了,但配置还不大行。我们需要让 caddy 用户组的成员能够使用 php-fpm,因此我们需要去修改 php-fpm:
sudo vim /etc/php-fpm.d/www.conf
找到 listen.acl_users,它应该是长这个样子的:
listen.acl_users = apache,nginx
在后面加上 caddy 就可以了:
listen.acl_users = apache,nginx,caddy
最后启动:
sudo systemctl start php-fpm.service
sudo systemctl enable php-fpm.service
mariadb
首先是正常安装 mariadb:
sudo dnf install mariadb-server
然后,我们需要配置数据库和用户。这里需要注意的是,我们需要和被迁移站的设置完全一致:
然后输入以下内容(需要修改):
CREATE DATABASE 数据库名;
CREATE USER 用户名@localhost;
SET PASSWORD FOR inorin@localhost= PASSWORD("密码");
GRANT ALL PRIVILEGES ON 数据库名.* TO 用户名@localhost IDENTIFIED BY '密码';
FLUSH PRIVILEGES;
exit
就此,mariadb 的配置就完成了。
数据恢复
站点数据
首先是站点数据,我们将 wordpress.tar.gz 解压:
tar -zxvf ./wordpress.tar.gz ./wordpress/
记住这个路径,之后会用到。
数据库
导入数据只要通过 source 就可以了:
sudo mysql
# 在 mysql 中
source db.sql
站点上线
Caddy
首先是要配置 Caddy。我们写入 Caddyfile:
# Blog
https://blog.mmf.moe {
tls {
dns godaddy
}
gzip
root /var/www/wordpress
fastcgi / /run/php-fpm/www.sock php
rewrite {
if {path} not_match ^\/wp-admin|log
to {path} {path}/ /index.php?{query}
}
}
然后重载 caddy:
sudo systemctl reload caddy
修改解析
我们需要修改解析为迁移后的 IP。不过我这里是用的 Cloudflare CNAME 接入(见之前文章),因此我只需要修改 CF 方面的 IP 就行了,对外的 DNS 解析是不变的。
配置防火墙
众所周知,CentOS 使用的是 firewalld,我们也需要这样一个防火墙来保护服务器的安全。配置的步骤很简单,如下所示:
sudo systemctl start firewalld # 开启防火墙
sudo systemctl enable firewalld # 开机自启防火墙
sudo firewall-cmd --set-default-zone=drop # 默认全部 drop
sudo firewall-cmd --add-service=http --permanent # 放行 http
sudo firewall-cmd --add-service=https --permanent # 放行 https
sudo firewall-cmd --add-service=ssh --permanent # 放行 ssh
sudo firewall-cmd --reload # 重载以应用配置
至此,全站迁移完成。