







After finishing my PCB design classes at UW-Madison, I wanted to keep doing PCB design on my own. It had also been a while since I did a cybersecurity project, so why not try and build a stealthy keylogger? These kinds of devices are built for a physical pentesting use case: an attacker would sneak this flash drive sized device behind a desktop PC, intercepting and logging USB signals sent between the keyboard and the PC. Then, the attacker either picks up the keylogger at a later date, or uses some wireless scheme to exfiltrate the keystroke data. Assuming the attacker has physical access, this is a pretty effective strategy: no keylogging program is actually running on the computer, so most antivirus programs won’t be able to see anything different than a USB keyboard plugged into the computer. There are certainly ways to counter against it, but first let’s go over how we can build our own.
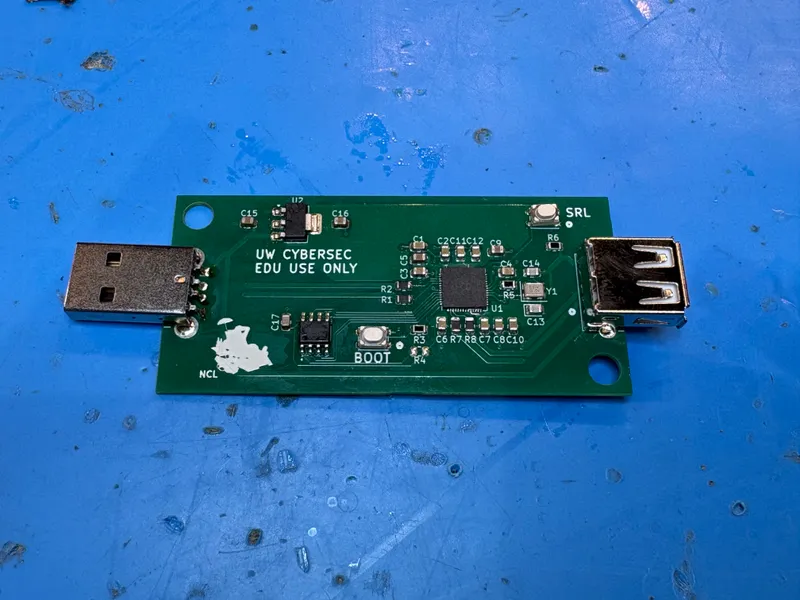
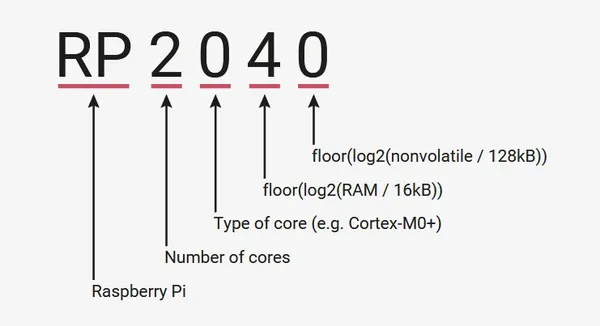
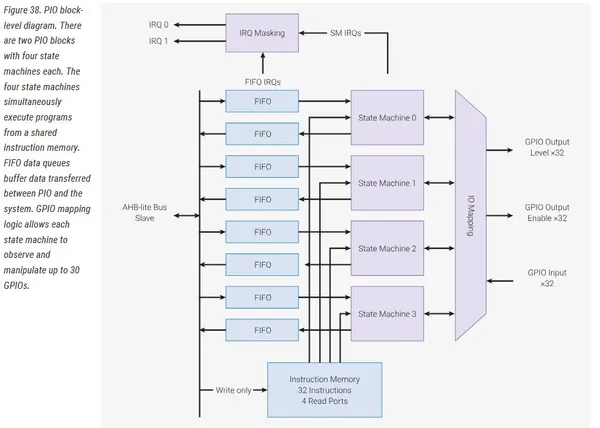
I built this project around the RP2040, which is the microcontroller at the heart of the Raspberry Pi Pico, and I was quite impressed by it. 133 MHz, dual core, 264kB SRAM and 16MB flash off chip, along with a bunch of other great stats (and all for $0.70 per chip). But most importantly for this project, a USB 1.1 controller, with host and device support, along with 8 PIO state machines. This allows the RP2040 to be very flexible with how it handles IO, and means that the chip can support both a USB host and device at the same time.
Let’s talk more about the specifics of “reading”, aka acting as a USB host, while “writing”, aka acting as a USB device, all at the same time. It’s pretty interesting the way it’s accomplished. The USB device is pretty simple, and the RP2040 would probably be overkill for it: you can see lots of USB keyboard emulator devices using chips like the attiny85. All it does is basically send keystroke data when requested by the host, no biggie. A USB host, however, is more complicated. It has to connect to the keyboard, request incoming keystrokes, and parse them out to figure out what to do with them. Basically the host initiates and controls all communication, while the device only responds.
One core controls the device side of the project, and the other core controls the host side (this is how they are able to run at the same time). The device core is connected to a male USB plug that plugs into the computer side, through the default USB_DP and USB_DM pins on the RP2040. This way, when you plug the device into a computer, you can use those pins for two functions: either to program the device, or to send keystrokes that were intercepted from the actual keyboard (toggled by the BOOTSEL button). The keyboard gets plugged into the female USB port, which then connects to the host core through the GPIO 0 and 1 pins.
But how can we do a USB host controller through GPIO pins? Because the PIO on the RP2040 allows you to “bit-bang” these two GPIO pins. This solution uses the programmable input outputs to define a state machine that can handle the USB logic, and then you can define those GPIO pins as inputs to that state machine! The PIOs are kind of like dumb, fast and configurable mini-processors that you can program with assembly to do lots of IO operations. This article goes a bit more into the PIOs, but they are super cool.
This is all written in C, by the way, and all of the PIO and HID logic was written by this guy on Github, which basically everyone seems to be using in all of the spinoff projects and libraries that handle adding another USB port to the Pico. We’ll use TinyUSB for the normal USB device emulation. For a full list of credits, check the end of the github README. But now that we’ve figured out how to add an extra USB port to the Pico with its existing USB controller, how do we actually store the keystrokes?
We can’t store it on the chip: there is no non-volatile memory on the RP2040 that we can write to while the program is running. So we can just write to flash instead. The QSPI protocol is super fast, and since we are only storing text we can actually get a cheaper flash chip than the one that usually comes with a Pico. However, we probably shouldn’t just choose an address to start writing chars to in the flash memory. Even if we modified the Pico SDK to tell it to not overwrite the section where we stored our text, the flash region around the hardcoded start point would start to wear down after many read/writes, and possibly fail. Plus there are other things to consider with file integrity, safety during power loss, permissions… Fortunately, there is already a great open source library for writing file systems on flash: LittleFS!
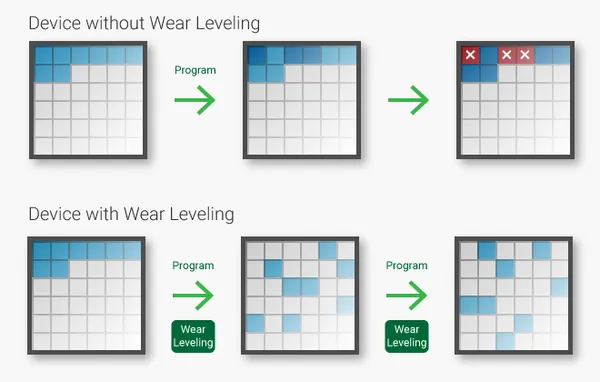
By using this library, we can create a POSIX-like file and directory, with atomic file operations even if power is lost. This means our system should be reliable in the case of it being yanked out of the USB slot while someone is typing on the other end. And it is also all written in C (although there are lots of ports), so it’s super easy to use in our project. We’ll just create a file called strings, and every time the host core detects a keystroke from the keyboard, it will append the character to the strings file, and transmit the character to the real host through the device core.
But how can the attacker using this device read the characters back, and figure out all your passwords? Well in the interest of keeping things easy (and safer to distribute), I didn’t design for any kind of wireless functions for this device. However, we can enable a CDC serial channel in the device core, in order to accept serial commands when the device is plugged into a computer! This way all you have to do to get all the logged text is open a serial monitor and tell the device to dump the strings file. It also lets me write a fun command parser in C.
Of course, this device wouldn’t be very stealthy if the serial connection was always active. It would be a bit suspicious for a normal workstation to have a new device like that appear. Fortunately, this can be fixed with a quick inclusion of an additional push button on a GPIO pin. The RP2040 can start with the CDC serial disabled, and when the button is pressed, disconnect from the device, re-enable the CDC serial on the device core, then reconnect. This maintains stealth because the button is on the PCB of the device, so it’s unlikely to be seen and of course invisible to the computer.
Ok, that’s all the software discussion done, but now we actually have to build this thing! I initially built this out on a breadboard, just cutting up a USB keyboard to get to the data pins, but if we want to produce these seriously we need to make a custom PCB. Fortunately, there is an entire guide on how to design hardware that uses the RP2040, and it’s super helpful. I followed this guide from the official Raspberry Pi foundation. This guide covers the critical aspects of making a PCB for an MCU: how many decoupling caps should be used, how to use the internal power regulator, how to place the crystal (which is needed for USB applications on the Pico), and what kind of impedance is expected on the USB pins.
The PCB I ended up building chose mostly standard Pico parts, except for a smaller flash chip (2MB), and I chose 0805 footprints since I wanted to solder this myself and not pay more for a pick and place job. I also placed through-hole connectors for the male and female USB components, which will give a strong mounting point for lots of plug/unplug cycles. And of course, I had to add some fun silkscreen pictures.

In terms of defending against this type of device, there are some possible countermeasures I can think of. The first is having good physical security: not allowing unauthorized access to computer peripherals, or always having peripheral connections in plain sight (and checked regularly). Another way would be to only allow certain USB devices to connect to managed computers, unless an attacker can perfectly replicate the HID descriptors of the keyboard that is authorized, the device won’t be able to relay the keystrokes to the computer, and the device would be noticed quickly. Another interesting thing would be trying to detect if there was an abnormally regular amount of time between each keystroke, although I don’t know if this could even be detected since there is very low latency with the Pico. But above all, people just being aware of this and knowing to look for hardware they don’t recognize being plugged into their computer is the best solution.
此内容由惯性聚合(RSS阅读器)自动聚合整理,仅供阅读参考。 原文来自 — 版权归原作者所有。