




基于 isoft-serveros-v4.2
本文参考以下链接:
Ambari-2.7.5 HDP-3.1.5 libtirpc-devel:
链接:https://pan.baidu.com/s/1eteZ2jGkSq4Pz5YFfHyJgQ
提取码:6hq3
| 主机名 | cpu | 内存 | 硬盘 | 系统版本 | ip 地址 |
|---|---|---|---|---|---|
| node001 | 4c | 10g | 50g | isoft-serveros-4.2 | 192.168.150.106 |
| node002 | 2c | 4g | 20g | isoft-serveros-4.2 | 192.168.150.107 |
sed -i 's/4/7/g' /etc/redhat-release
sed -i 's/4/7/g' /etc/os-release
2 台服务器的 hosts 都需要做如下修改
hostnamectl set-hostname node001
bash
vim /etc/hosts
127.0.0.1   localhost localhost.localdomain localhost4 localhost4.localdomain4
::1         localhost localhost.localdomain localhost6 localhost6.localdomain6
192.168.150.106 node001
192.168.150.107 node002
2 台服务器上分别执行以下操作,关闭防火墙并配置开机不自动启动
systemctl stop firewalld
systemctl disable firewalld
setenforce 0
为了重启后依然关闭,配置如下文件
vim /etc/sysconfig/selinux

# 修改
SELINUX=disabled
方法一
在每台服务器上执行如下操作,一直回车即可
ssh-keygen -t rsa
ssh-copy-id -i /root/.ssh/id_rsa.pub node001
ssh-copy-id -i /root/.ssh/id_rsa.pub node002
方法二
在每台服务器上执行如下操作,一直回车即可
在服务器 1 上将公钥(名为 id_rsa.pub 文件)追加到认证文件(名为 authorized_keys 文件)中:
cat ~/.ssh/id_rsa.pub >> ~/.ssh/authorized_keys
去其他服务器节点将 ~/.ssh/id_rsa.pub 中的内容拷贝到服务器 1 的 ~/.ssh/authorized_keys 中,查看文件中的内容
cat ~/.ssh/authorized_keys
ssh-rsa AAAAB3NzaC1yc2EAAAADAQABAAABAQC/eA09X4s5RIYvuYNxVvtOo6unY1mgipsFyoz/hy/Gwk0onfZvBi/Sl3TVRZO5aqcHccAGlLF7OPTKH1qUuKVtnUOQik0TouL5VKsOBDMHHRT9D5UwqaIE8tYDC8V6uwieFgscZcBjhrsJ/Iramo9ce7N9RTO3otRMRQxOs+Wd1F/ZOmpRtMGU2N4RH4i2quRU6m2lt/eJKpNupSHKoztTQRsEanilHVASnikAXH8JpG70iO7RXR/hLz+/Of3ISUrOMSO4/ZIIu4xnYN3jvsXOdK/qIhP/PI2s+uF22IvVE6xZYVadQFa4zAuhQmCBWkE7vMyI1UJkxP7OQYj72LUH root@node001
ssh-rsa AAAAB3NzaC1yc2EAAAADAQABAAABAQCnz8wHoytR2Xlnl04rQq4I2vgUVWbkKjv30pj+Toz4719ah4cY9pvZj0JsfhVzaaCsR14BLFVLkqKUhCWK3K6muT4iHb+N0WirpbwfJkztmQeco7Ha9xrPQ8v/I4xZujFoMVA0tkb/32zRTxOkPv9AUgB8V6Lin6LnB/AcnhnmoIs5PdbAdh/kBGpQGKIZkbyCUOYz9/PZuGJoJBblqfWiqzxYYLN9+cYMkmPnB1HdDewAepIsIC18U3ujE+1Su2UlmISPvvr1zG4XR4ZZoKQsOOJq3XRMGVkDvmFhl03JHZpd6BW0796CeYVZ41UomWXTOduQql+tYWUbegzGLmRZ root@node002
ssh-rsa AAAAB3NzaC1yc2EAAAADAQABAAABAQC8AFoGJHp2M45xLYNzXUHLWzRwHsgRPHjeErStq0tEy9bQv4OkN41j0FrxVAYJiGHdHGturriVgUEtL59RjcrJH6bAvhP54nM5YiQlNnWnSUR27Zuaodz4nhYUFq/Co5eDN6lTfL8pgYiEdpBOvE5t1w3bisdblP7YGQ2lF1zzCEGfQ79QbntEbyGNoR9sGHm11x9fOH+fape8TjQJrEAO4d1tAhMqVygQKwqwAPKeqhEum6BaLli83TsXzd7gyz9H7AAc1m04NaLB26xfynW6MVuk1j94awXKlGXjrbNTC/Kg6M8bd5PT/k3DOkx4b+nEs8xZ5x1j4D2OaO1X6rZx root@node003
设置认证文件的权限:
chmod 600 ~/.ssh/authorized_keys
将 ~/.ssh/authorized_keys 同步到其他节点
scp ~/.ssh/authorized_keys node002:~/.ssh/authorized_keys
注意:这里第一次使用同步还需要密码,之后就不需要了
验证免密是否配置成功
ssh 到不同服务器
选择一台服务器作为 NTP Server,这里选择 node001
将如下配置 vim /etc/ntp.conf
# Use public servers from the pool.ntp.org project.
# Please consider joining the pool (http://www.pool.ntp.org/join.html).
server 0.centos.pool.ntp.org iburst
server 1.centos.pool.ntp.org iburst
server 2.centos.pool.ntp.org iburst
server 3.centos.pool.ntp.org iburst
修改为
# Use public servers from the pool.ntp.org project.
# Please consider joining the pool (http://www.pool.ntp.org/join.html).
#server 0.centos.pool.ntp.org iburst
#server 1.centos.pool.ntp.org iburst
#server 2.centos.pool.ntp.org iburst
#server 3.centos.pool.ntp.org iburst
server 127.127.1.0
fudge 127.127.1.0 stratum 10
node002 节点做如下配置
将
# Use public servers from the pool.ntp.org project.
# Please consider joining the pool (http://www.pool.ntp.org/join.html).
server 0.centos.pool.ntp.org iburst
server 1.centos.pool.ntp.org iburst
server 2.centos.pool.ntp.org iburst
server 3.centos.pool.ntp.org iburst
修改为
# Use public servers from the pool.ntp.org project.
# Please consider joining the pool (http://www.pool.ntp.org/join.html).
#server 0.centos.pool.ntp.org iburst
#server 1.centos.pool.ntp.org iburst
#server 2.centos.pool.ntp.org iburst
#server 3.centos.pool.ntp.org iburst
server 192.168.150.106
在每台服务器上启动 ntpd 服务,并配置服务开机自启动
systemctl restart ntpd
systemctl enable ntpd
echo vm.swappiness = 1 >> /etc/sysctl.conf
sysctl vm.swappiness=1
sysctl -p
由于透明超大页面已知会导致意外的节点重新启动并导致 RAC 出现性能问题,因此 Oracle 强烈建议禁用
echo never > /sys/kernel/mm/transparent_hugepage/defrag
echo never > /sys/kernel/mm/transparent_hugepage/enabled
安装 apache 的 httpd 服务主要用于搭建 OS. Ambari 和 hdp 的 yum 源。在集群服务器中选择一台服务器来安装 httpd 服务,命令如下:
yum -y install httpd
systemctl start httpd
systemctl enable httpd.service
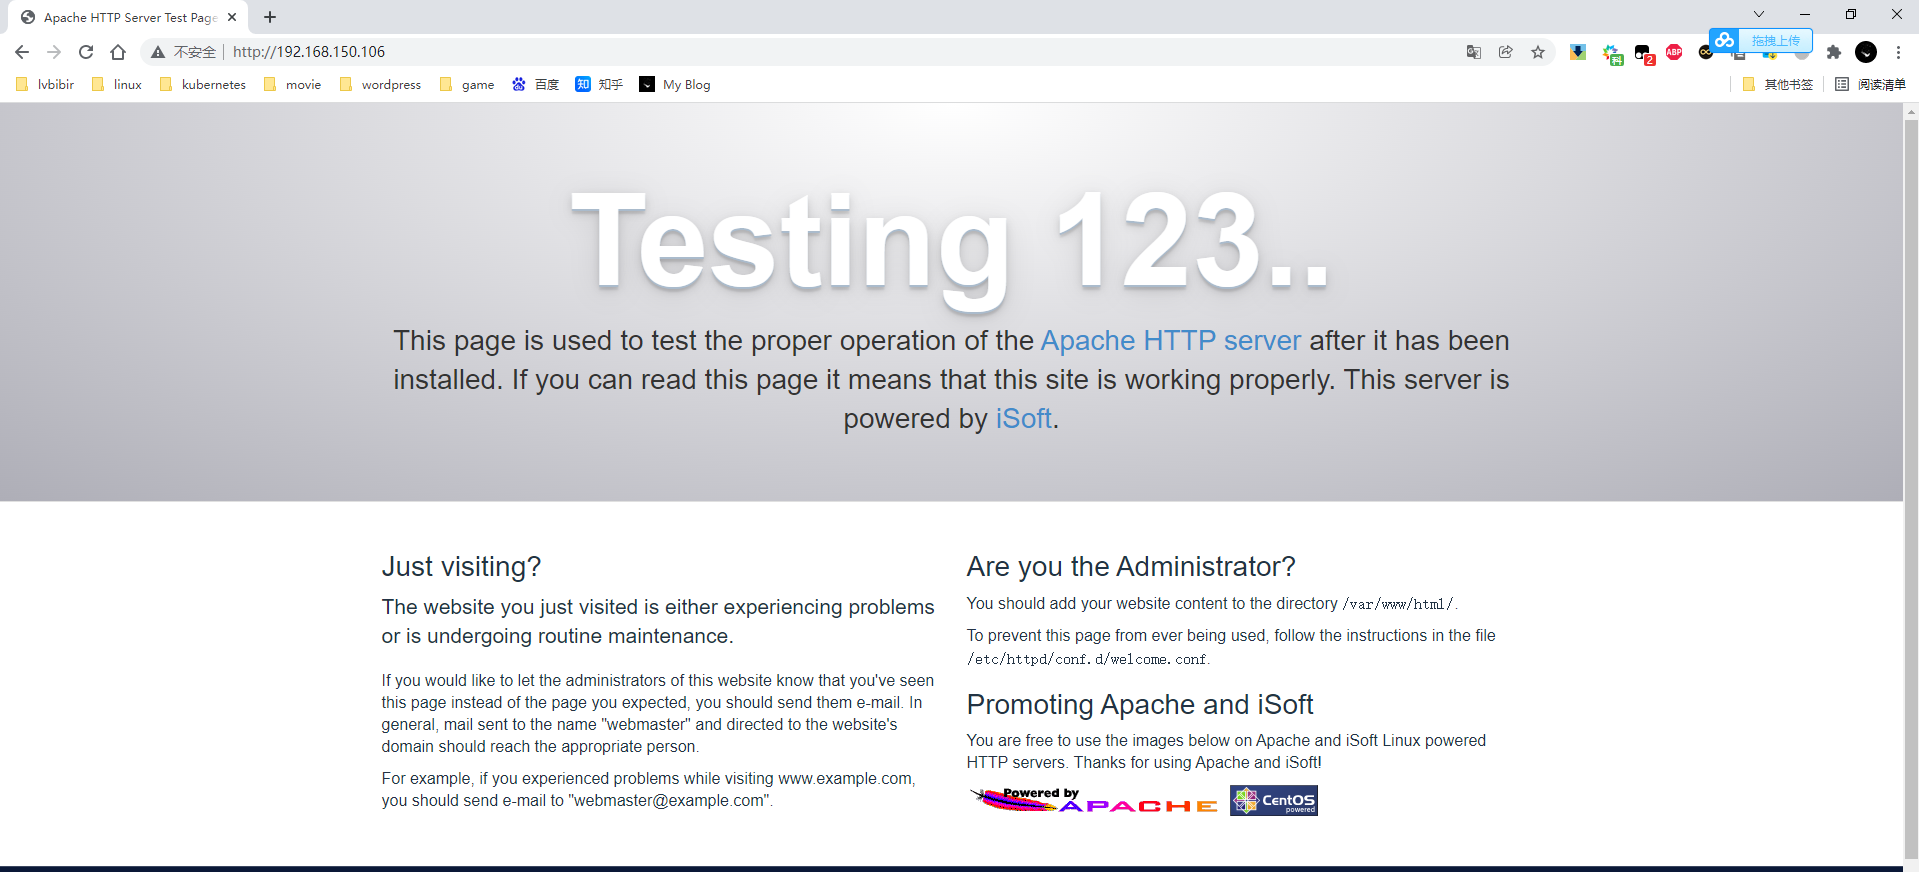
验证,在浏览器输入http://192.168.150.106看到如下截图则说明启动成功。
下载地址:https://www.oracle.com/java/technologies/javase/javase-jdk8-downloads.html
tar -zxvf jdk-8u271-linux-x64.tar.gz
mkdir /usr/local/java
mv jdk1.8.0_271/* /usr/local/java
配置环境变量
添加如下配置
export JAVA_HOME=/usr/local/java
export PATH=$PATH:$JAVA_HOME/bin
export CLASSPATH=.:$JAVA_HOME/lib/dt.jar:$JAVA_HOME/lib/tools.jar
export JRE_HOME=$JAVA_HOME/jre
激活配置
source /root/.bashrc
java -version
下载解压
tar -zxvf apache-maven-3.6.3-bin.tar.gz
mkdir -p /opt/src/maven
mv apache-maven-3.6.3/* /opt/src/maven
配置 maven 环境变量
vim /root/.bashrc
# set maven home
export PATH=$PATH:/opt/src/maven/bin
激活
解压
tar -zxvf  ambari-2.7.5.0-centos7.tar.gz -C /var/www/html/
tar -zxvf  HDP-3.1.5.0-centos7-rpm.tar.gz -C /var/www/html/
tar -zxvf  HDP-GPL-3.1.5.0-centos7-gpl.tar.gz -C /var/www/html/
tar -zxvf  HDP-UTILS-1.1.0.22-centos7.tar.gz -C /var/www/html/

ll /var/www/html/

总用量 0
drwxr-xr-x. 3 root root  21 11月 23 22:31 ambari
drwxr-xr-x. 3 1001 users 21 12月 18 2019 HDP
drwxr-xr-x. 3 1001 users 21 12月 18 2019 HDP-GPL
drwxr-xr-x. 3 1001 users 21 8月  13 2018 HDP-UTILS
设置设置用户组和授权
chown -R root:root /var/www/html/HDP
chown -R root:root /var/www/html/HDP-GPL
chown -R root:root /var/www/html/HDP-UTILS
chmod -R 755 /var/www/html/HDP
chmod -R 755 /var/www/html/HDP-GPL
chmod -R 755 /var/www/html/HDP-UTILS
创建 libtirpc-devel 本地源
mkdir /var/www/html/libtirpc
mv /root/libtirpc-* /var/www/html/libtirpc/
cd /var/www/html/libtirpc
createrepo .
制作本地源
配置 ambari.repo
vim /etc/yum.repos.d/ambari.repo
[Ambari-2.7.5.0]
name=Ambari-2.7.5.0
baseurl=http://192.168.150.106/ambari/centos7/2.7.5.0-72/
gpgcheck=0
enabled=1
priority=1
配置 HDP 和 HDP-TILS
vim /etc/yum.repos.d/HDP.repo
[HDP-3.1.5.0]
name=HDP Version - HDP-3.1.5.0
baseurl=http://192.168.150.106/HDP/centos7/3.1.5.0-152/
gpgcheck=0
enabled=1
priority=1

[HDP-UTILS-1.1.0.22]
name=HDP-UTILS Version - HDP-UTILS-1.1.0.22
baseurl=http://192.168.150.106/HDP-UTILS/centos7/1.1.0.22/
gpgcheck=0
enabled=1
priority=1

[HDP-GPL-3.1.5.0]
name=HDP-GPL Version - HDP-GPL-3.1.5.0
baseurl=http://192.168.150.106/HDP-GPL/centos7/3.1.5.0-152
gpgcheck=0
enabled=1
priority=1
配置 libtirpc.repo
vim /etc/yum.repos.d/libtirpc.repo
[libtirpc_repo]
name=libtirpc-0.2.4-0.16
baseurl=http://192.168.150.106/libtirpc/
gpgcheck=0
enabled=1
priority=1
拷贝到其他节点
scp /etc/yum.repos.d/* node002:/etc/yum.repos.d/
查看源
yum clean all
yum repolist
安装 MariaDB 服务器
yum install mariadb-server -y
启动并设置开机启动
systemctl enable mariadb
systemctl start mariadb
初始化
/usr/bin/mysql_secure_installation

[...]
Enter current password for root (enter for none):
OK, successfully used password, moving on...
[...]
Set root password? [Y/n] Y
New password:123456
Re-enter new password:123456
[...]
Remove anonymous users? [Y/n] Y
[...]
Disallow root login remotely? [Y/n] N
[...]
Remove test database and access to it [Y/n] Y
[...]
Reload privilege tables now? [Y/n] Y
[...]
All done! If you've completed all of the above steps, your MariaDB 18 installation should now be secure.
Thanks for using MariaDB!
为 MariaDB 安装 MySQL JDBC 驱动程序
tar zxf mysql-connector-java-5.1.40.tar.gz
mv mysql-connector-java-5.1.40/mysql-connector-java-5.1.40-bin.jar /usr/share/java/mysql-connector-java.jar
创建需要的数据库
如果需要 ranger,编辑以下⽂件: vim /etc/my.cnf 并添加以下⾏:
log_bin_trust_function_creators = 1
重启数据库并登录
systemctl restart mariadb
mysql -u root -p123456
安装 ambari-server
yum -y install ambari-server
复制 mysql jdbc 驱动到 /var/lib/ambari-server/resources/
cp /usr/share/java/mysql-connector-java.jar /var/lib/ambari-server/resources/
配置 /etc/ambari-server/conf/ambari.properties,添加如下行
vim /etc/ambari-server/conf/ambari.properties
server.jdbc.driver.path=/usr/share/java/mysql-connector-java.jar
执行
ambari-server setup --jdbc-db=mysql --jdbc-driver=/usr/share/java/mysql-connector-java.jar
初始化 ambari-server
ambari-server setup

1) 提示是否自定义设置。输入:y
Customize user account for ambari-server daemon [y/n] (n)? y
(2)ambari-server 账号。
Enter user account for ambari-server daemon (root):
如果直接回车就是默认选择root用户
如果输入已经创建的用户就会显示:
Enter user account for ambari-server daemon (root):ambari
Adjusting ambari-server permissions and ownership...
(3)设置JDK。输入:2
Checking JDK...
Do you want to change Oracle JDK [y/n] (n)? y
[1] Oracle JDK 1.8 + Java Cryptography Extension (JCE) Policy Files 8
[2] Custom JDK
==============================================================================
Enter choice (1): 2
如果上面选择3自定义JDK,则需要设置JAVA_HOME。输入:/usr/local/java
WARNING: JDK must be installed on all hosts and JAVA_HOME must be valid on all hosts.
WARNING: JCE Policy files are required for configuring Kerberos security. If you plan to use Kerberos,please make sure JCE Unlimited Strength Jurisdiction Policy Files are valid on all hosts.
Path to JAVA_HOME: /usr/local/java
Validating JDK on Ambari Server...done.
Completing setup...
(4)安装GPL,选择:y
Checking GPL software agreement...
GPL License for LZO: https://www.gnu.org/licenses/old-licenses/gpl-2.0.en.html
Enable Ambari Server to download and install GPL Licensed LZO packages [y/n] (n)? y
(5)数据库配置。选择:y
Configuring database...
Enter advanced database configuration [y/n] (n)? y
(6)选择数据库类型。输入:3
Configuring database...
==============================================================================
Choose one of the following options:
[1] - PostgreSQL (Embedded)
[2] - Oracle
[3] - MySQL/ MariaDB
[4] - PostgreSQL
[5] - Microsoft SQL Server (Tech Preview)
[6] - SQL Anywhere
==============================================================================
Enter choice (3): 3
(7)设置数据库的具体配置信息,根据实际情况输入,如果和括号内相同,则可以直接回车。如果想重命名,就输入。
Hostname (localhost):node001
Port (3306): 3306
Database name (ambari): ambari
Username (ambari): ambari
Enter Database Password (bigdata):ambari123
Re-Enter password: ambari123
(8)将Ambari数据库脚本导入到数据库
WARNING: Before starting Ambari Server, you must run the following DDL against the database to create the schema: /var/lib/ambari-server/resources/Ambari-DDL-MySQL-CREATE.sql 这个sql后面会用到,导入数据库
Proceed with configuring remote database connection properties [y/n] (y)? y
登录 mariadb 创建 ambari 安装所需要的库
设置的账号后面配置 ambari-server 的时候会用到
mysql -uroot -p123456

CREATE DATABASE ambari;
use ambari;
CREATE USER 'ambari'@'%' IDENTIFIED BY 'ambari123';
GRANT ALL PRIVILEGES ON *.* TO 'ambari'@'%';
CREATE USER 'ambari'@'localhost' IDENTIFIED BY 'ambari123';
GRANT ALL PRIVILEGES ON *.* TO 'ambari'@'localhost';
CREATE USER 'ambari'@'node001' IDENTIFIED BY 'ambari123';
GRANT ALL PRIVILEGES ON *.* TO 'ambari'@'node001';

source /var/lib/ambari-server/resources/Ambari-DDL-MySQL-CREATE.sql
show tables;
use mysql;
select host,user from user where user='ambari';
CREATE DATABASE hive;
use hive;
CREATE USER 'hive'@'%' IDENTIFIED BY 'hive';
GRANT ALL PRIVILEGES ON *.* TO 'hive'@'%';
CREATE USER 'hive'@'localhost' IDENTIFIED BY 'hive';
GRANT ALL PRIVILEGES ON *.* TO 'hive'@'localhost';
CREATE USER 'hive'@'node001' IDENTIFIED BY 'hive';
GRANT ALL PRIVILEGES ON *.* TO 'hive'@'node001';

CREATE DATABASE oozie;
use oozie;
CREATE USER 'oozie'@'%' IDENTIFIED BY 'oozie';
GRANT ALL PRIVILEGES ON *.* TO 'oozie'@'%';
CREATE USER 'oozie'@'localhost' IDENTIFIED BY 'oozie';
GRANT ALL PRIVILEGES ON *.* TO 'oozie'@'localhost';
CREATE USER 'oozie'@'node001' IDENTIFIED BY 'oozie';
GRANT ALL PRIVILEGES ON *.* TO 'oozie'@'node001';
FLUSH PRIVILEGES;
pssh -h /node.list -i 'yum -y install ambari-agent'
pssh -h /node.list -i 'systemctl start ambari-agent'
pssh -h /node.list -i 'yum -y install libtirpc-devel'
默认管理员账户登录, 账户:admin 密码:admin
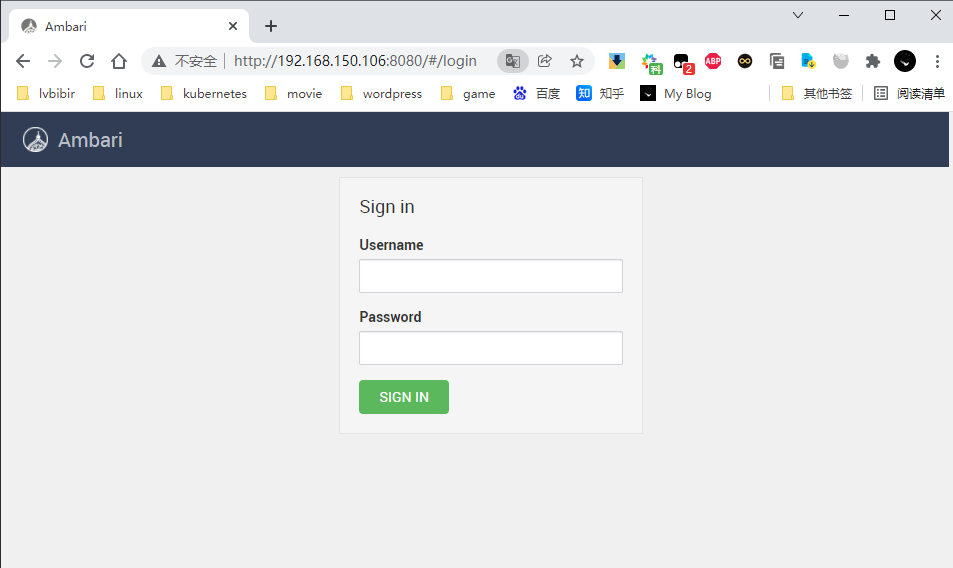
1)选择 Launch Install Wizard
2)配置集群名称
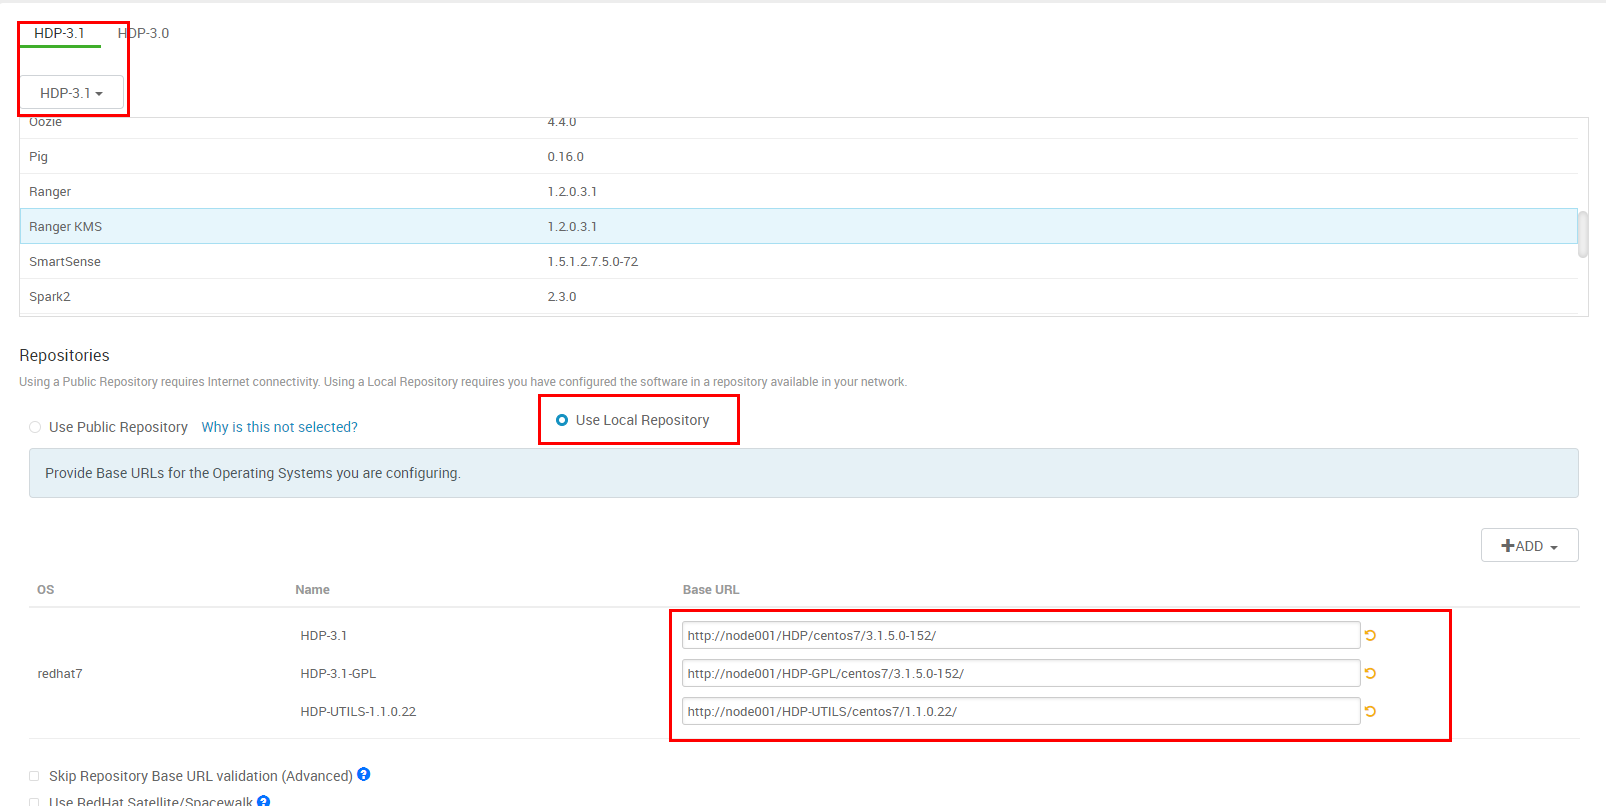
3)选择版本并修改本地源地址
选 HDP-3.1(Default Version Definition);
选 Use Local Repository;
选 redhat7:
HDP-3.1:http://node001/HDP/centos7/3.1.5.0-152/
HDP-3.1-GPL: http://node001/HDP-GPL/centos7/3.1.5.0-152/
HDP-UTILS-1.1.0.22: http://node001/HDP-UTILS/centos7/1.1.0.22/
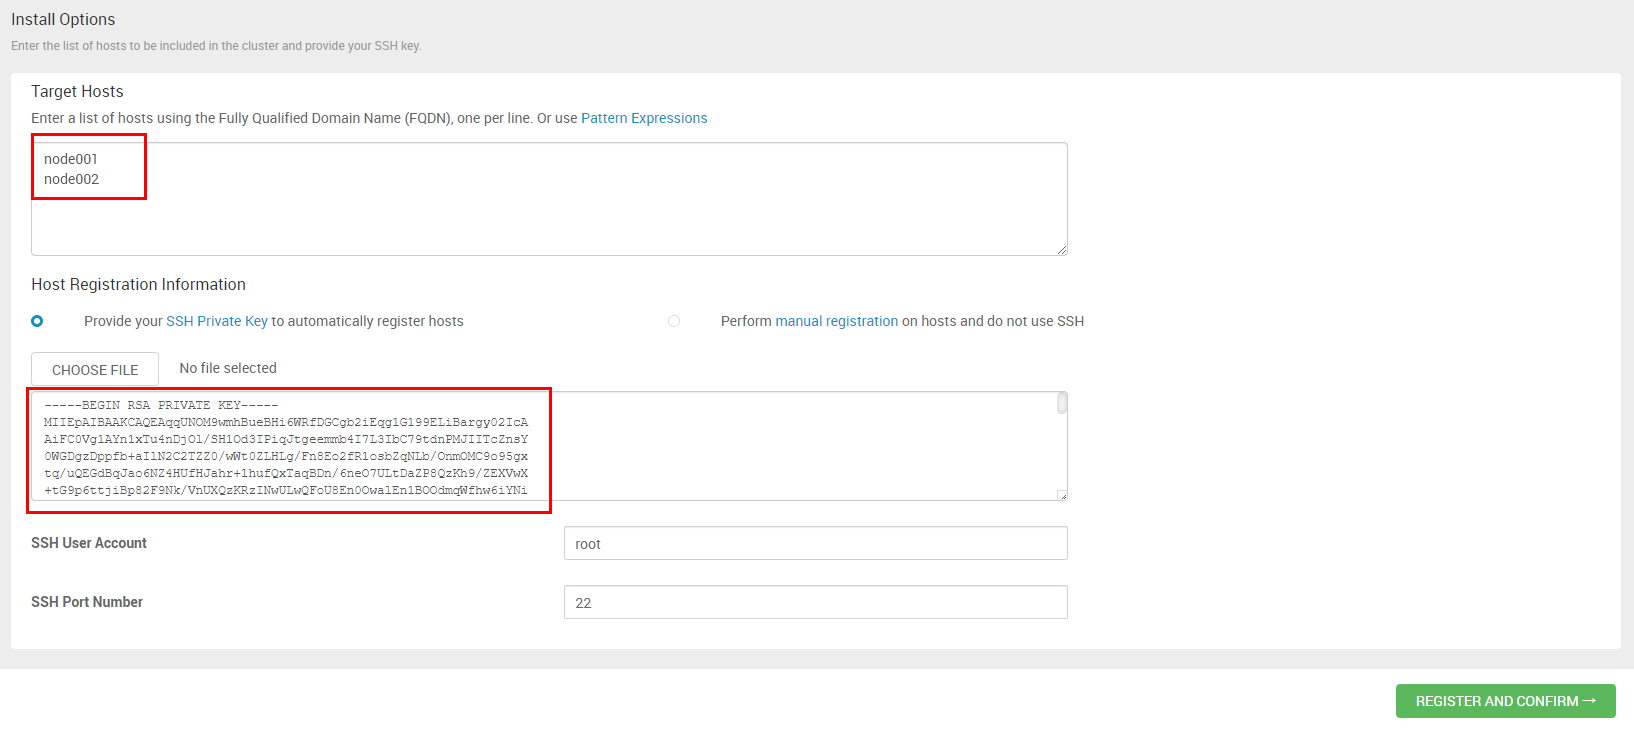
下载主节点的 /root/.ssh/id_rsa,并上传!点击下一步,进入确认主机界面
也可直接 cat /root/.ssh/id_rsa 粘贴即可
验证通过

由于资源有限,这里并没有选择所有服务
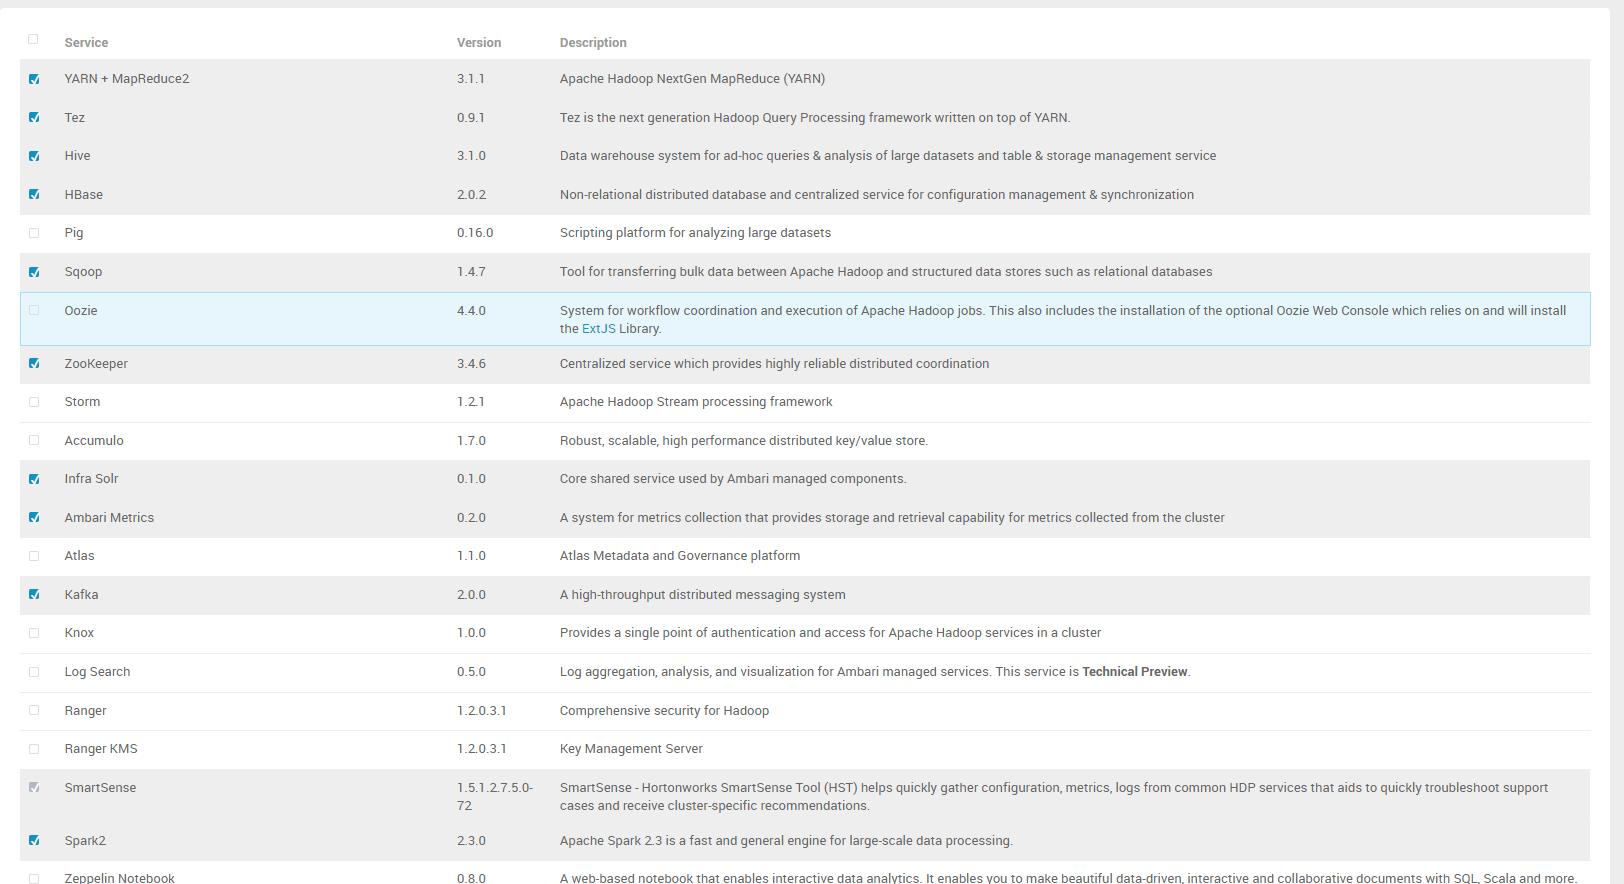
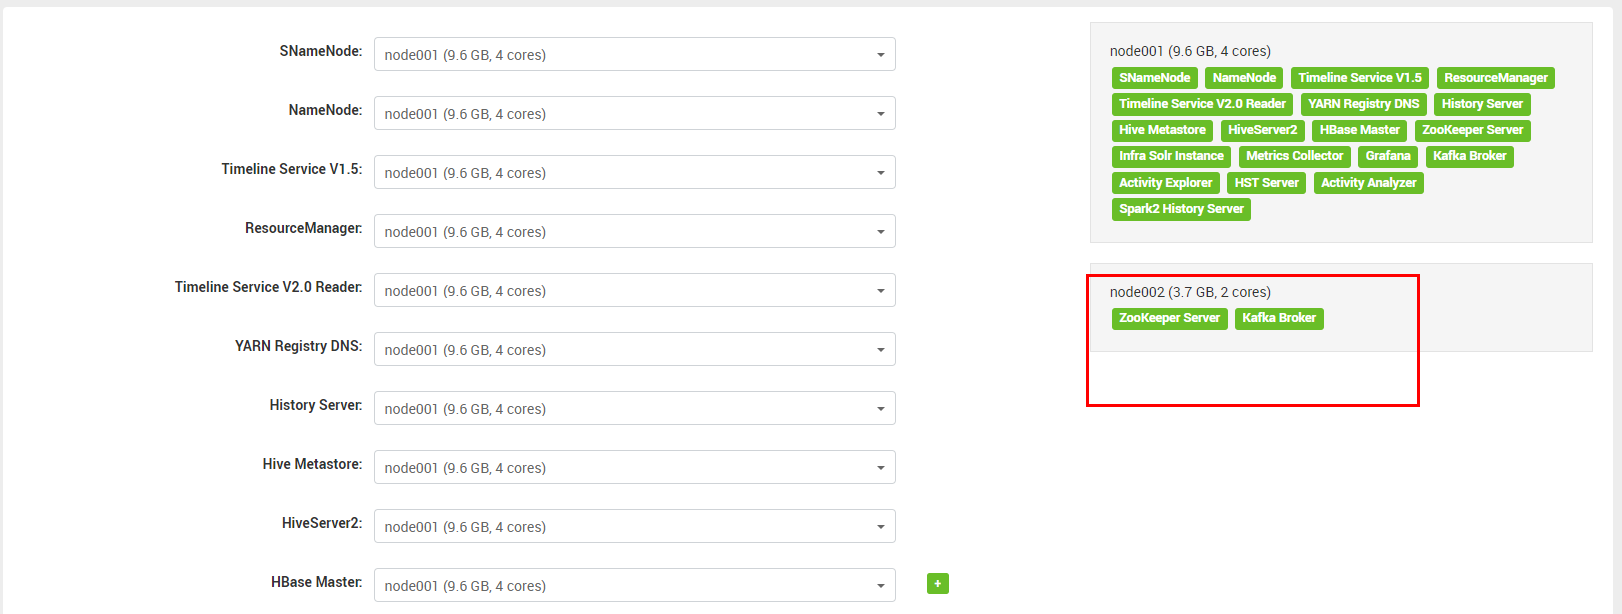

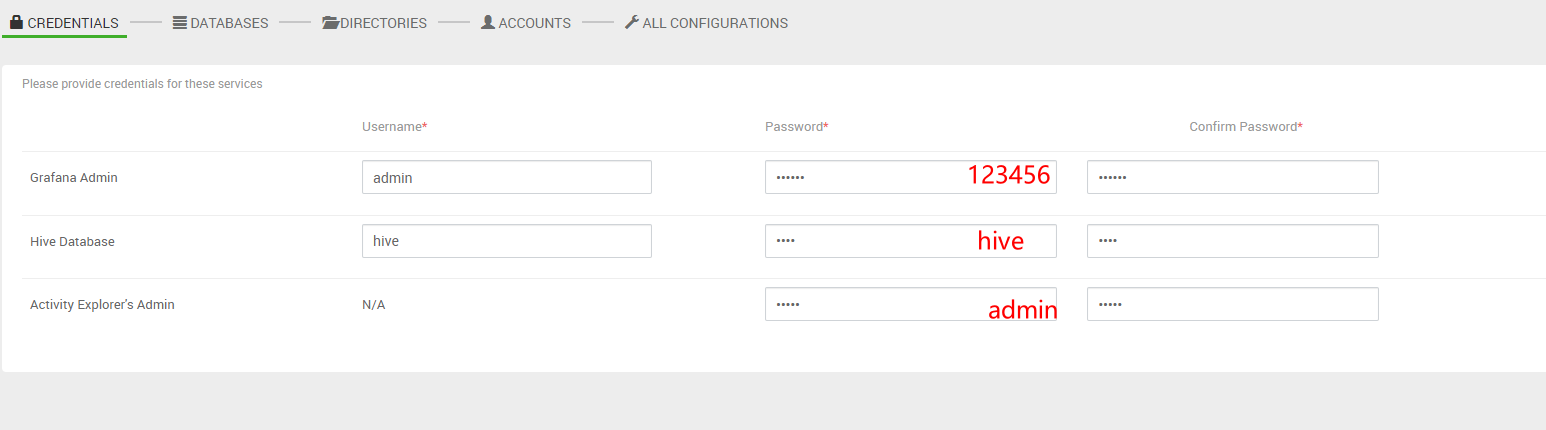
设置相关服务的密码
Grafana Admin: 123456
Hive Database: hive
Activity Explorer’s Admin: admin
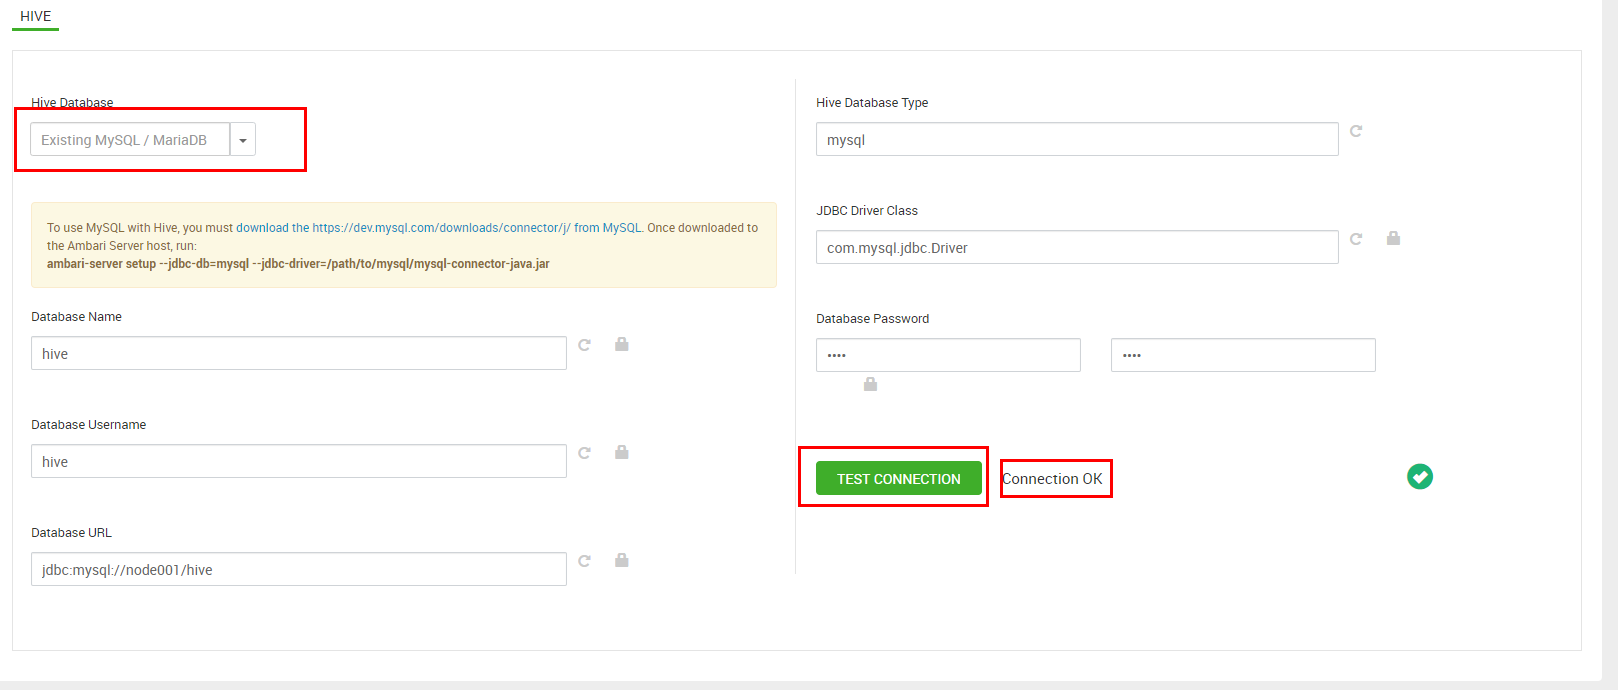
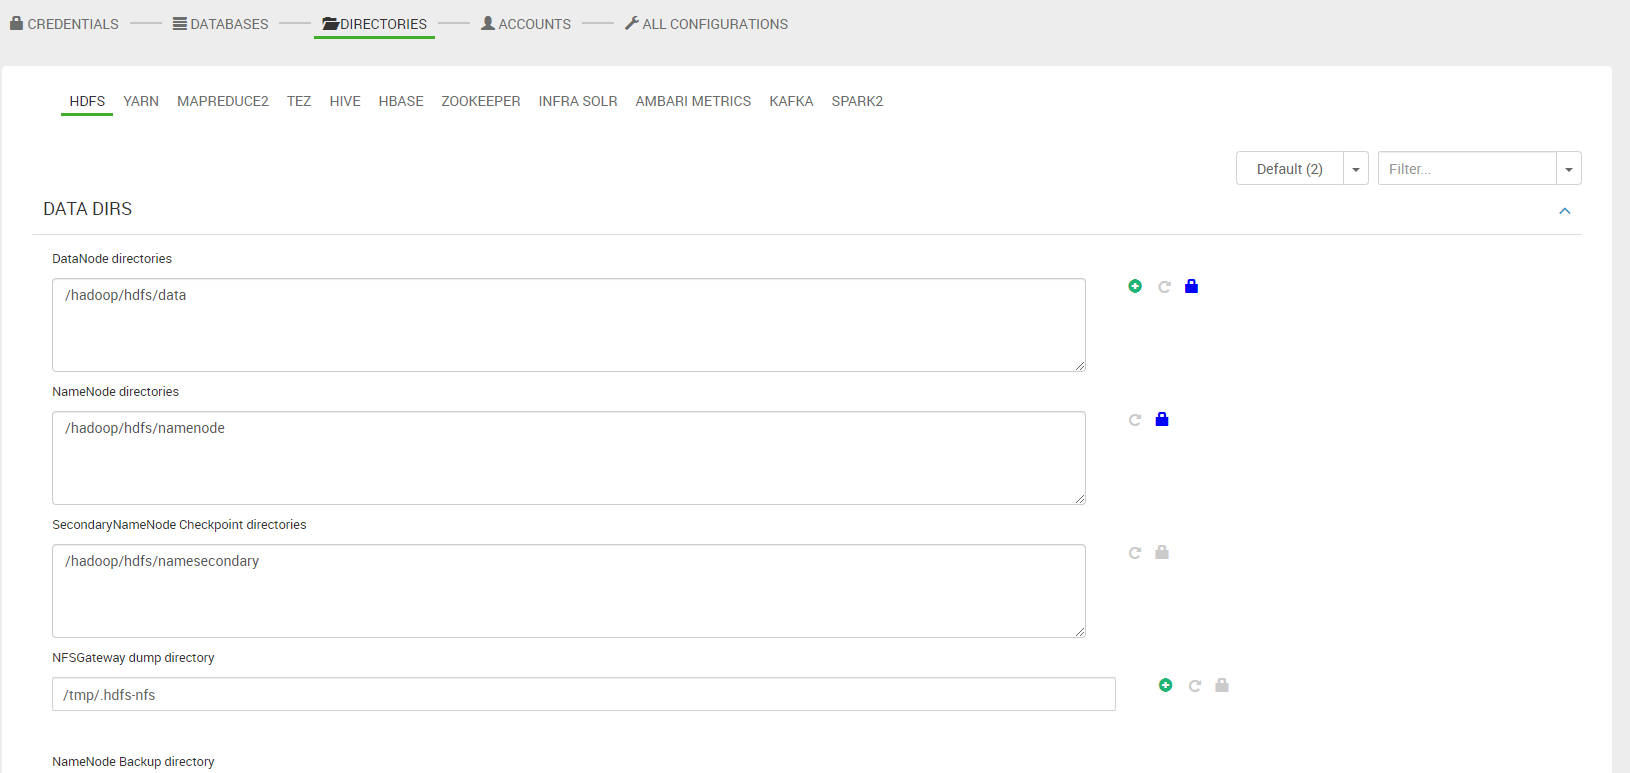
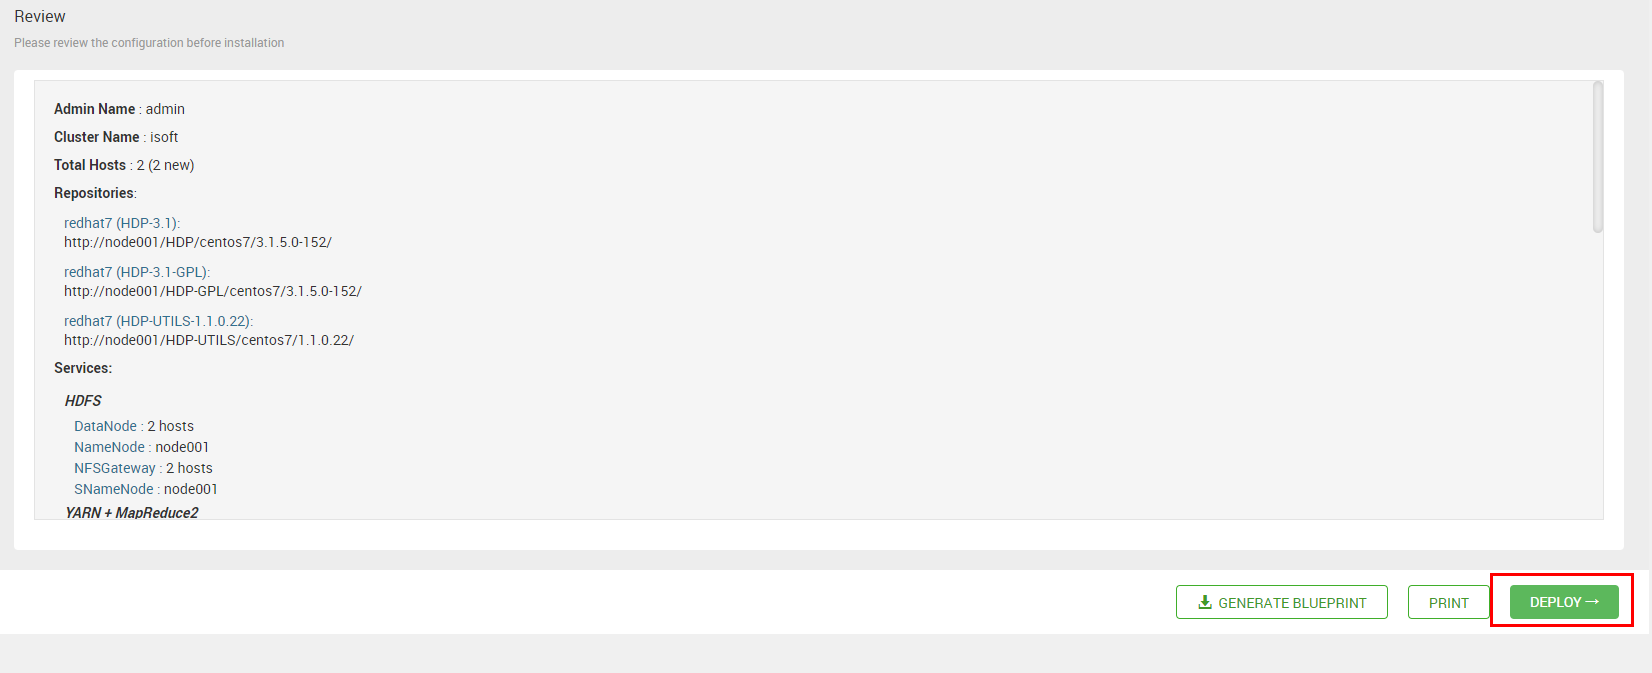
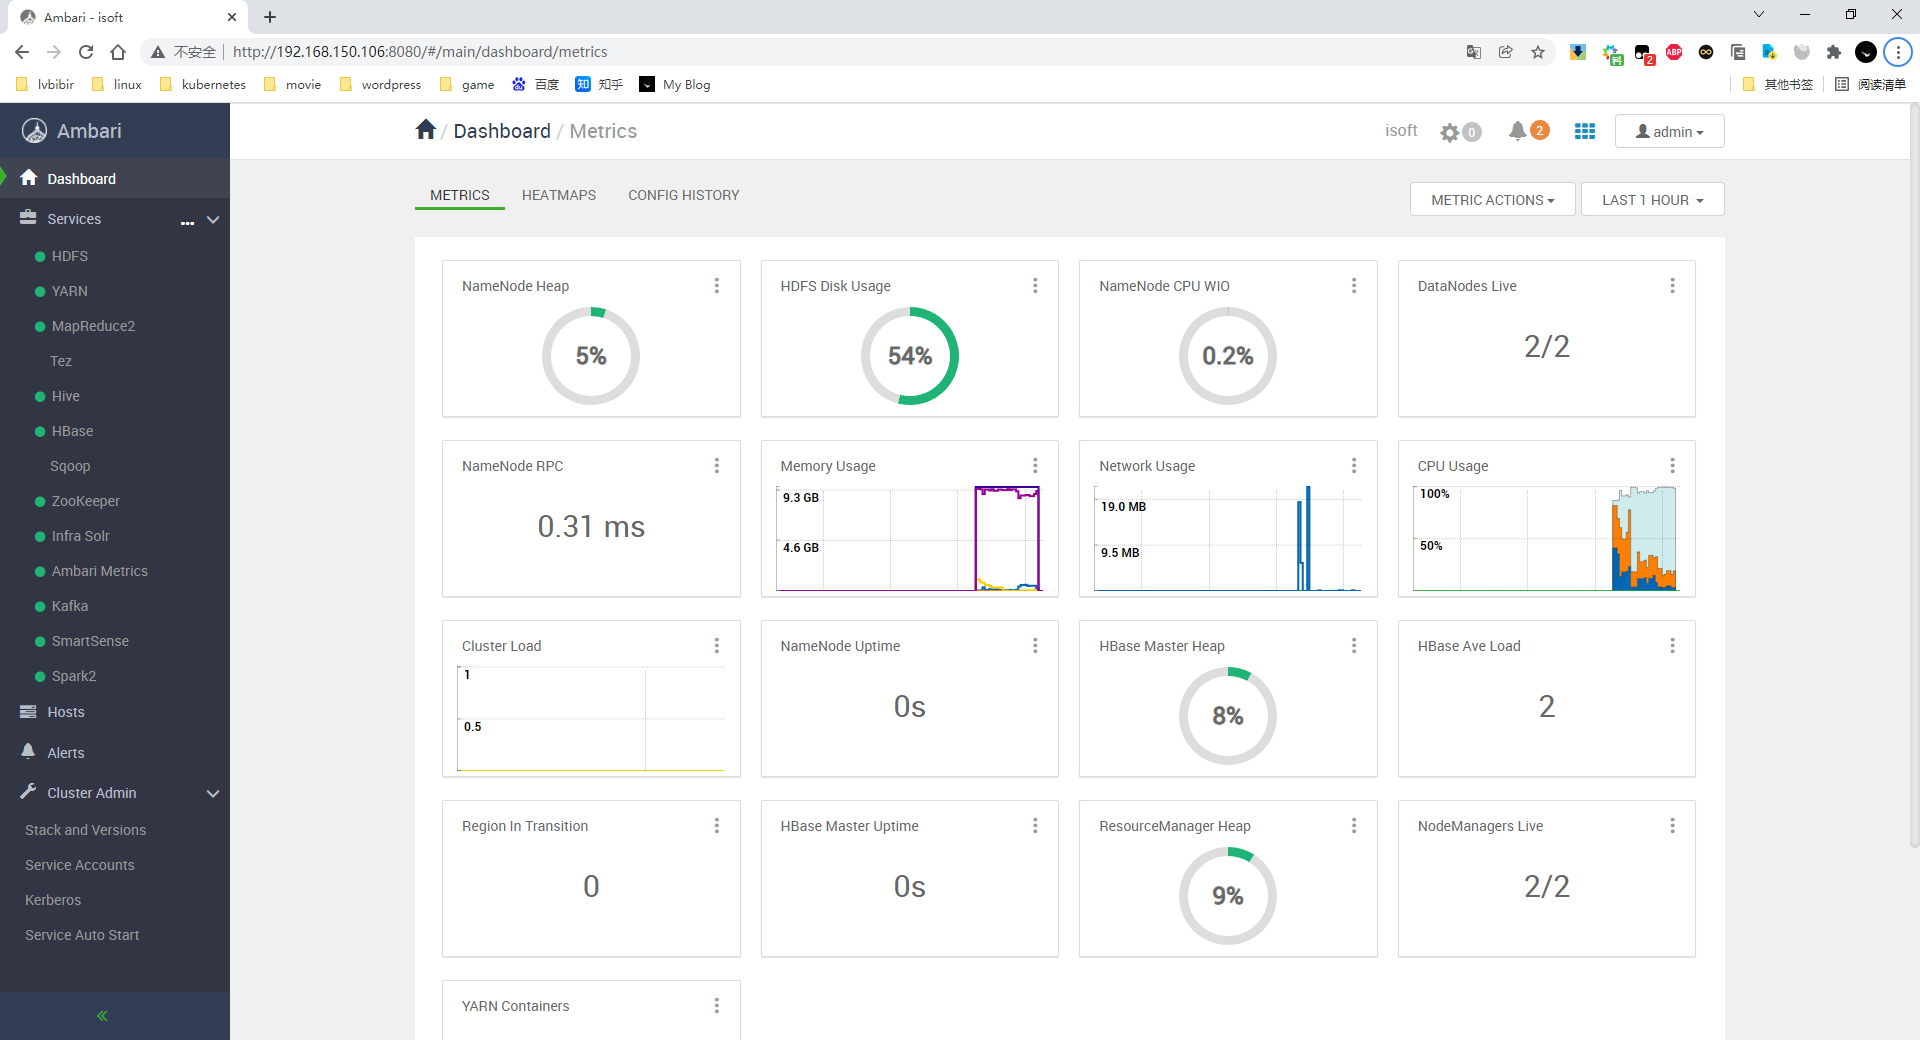
右上角两个警告是磁盘使用率警告,虚机分配的磁盘较小
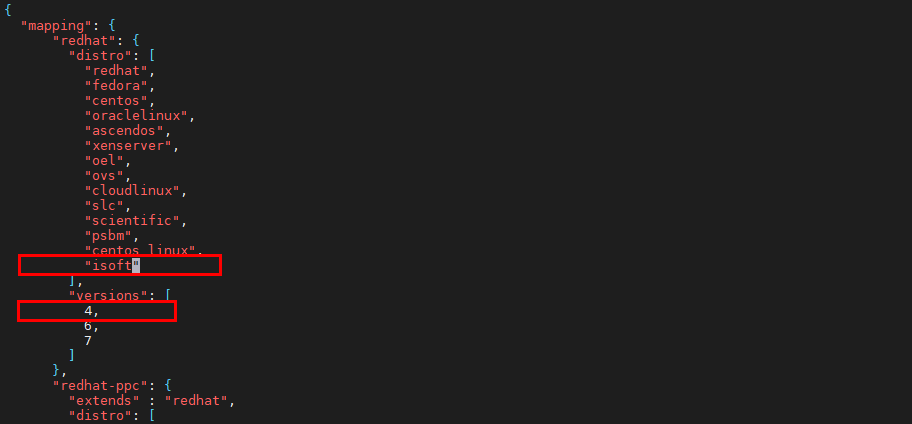
HDP 默认不支持安装到 isoft-serverosv4.2,需手动添加支持
vim /usr/lib/ambari-server/lib/ambari_commons/resources/os_family.json
添加如下两行,注意缩进和逗号
vim /etc/ambari-server/conf/ambari.properties
server.os_family=redhat7
server.os_type=redhat7
此内容由惯性聚合(RSS阅读器)自动聚合整理,仅供阅读参考。 原文来自 — 版权归原作者所有。