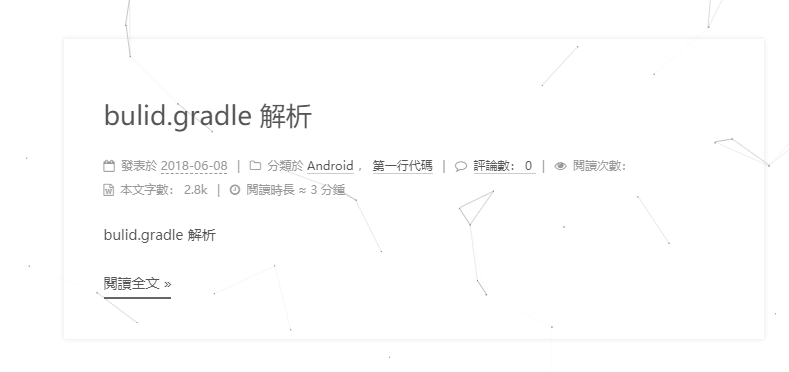
效果如圖
文章内
網頁頂部
1 npm install hexo-symbols-count-time --save
站點配置文件1 2 3 4 5 6 7 symbols_count_time: symbols: true time: true total_symbols: true total_time: true
主題配置文件1 2 3 4 5 6 7 8 9 10 11 12 symbols_count_time: separated_meta: true item_text_post: true item_text_total: false awl: 4 wpm: 275
效果如圖
修改 主題配置文件
1 2 3 4 post_copyright: enable: true license: <a href="https://creativecommons.org/licenses/by-nc-sa/4.0/" rel="external nofollow" target="_blank">CC BY-NC-SA 4.0 </a>
只需要把 主題配置文件的相關資料改爲false 就行
1 2 3 4 5 6 7 8 9 10 11 12 13 14 15 16 17 footer: since: 2018 icon: name: user animated: false color: "#808080" powered: enable: true version: true theme: enable: false version: false
效果如圖
修改custom.styl 文件,具體為themes/next/source/css/_custom/custom.styl
1 2 3 4 5 6 7 8 // 為文章添加陰影效果 .post { margin-top: 60px; margin-bottom: 60px; padding: 25px; -webkit-box-shadow: 0 0 5px rgba(202, 203, 203, .5); -moz-box-shadow: 0 0 5px rgba(202, 203, 204, .5); }
效果如圖
在站點根目錄,打開Git Bash,安裝hexo-helper-live2d
1 npm install --save hexo-helper-live2d
站點配置文件或者主題配置文件添加以下内容1 2 3 4 5 6 7 8 9 10 11 12 13 14 live2d: enable: true scriptFrom: local pluginRootPath: live2dw/ pluginJsPath: lib/ pluginModelPath: assets/ model: use: live2d-widget-model-wanko display: position: right width: 150 height: 300 mobile: show: true
1 npm install {packagename}
如效果圖所示的寵物名為haruto, 則為 npm install live2d-widget-model-haruto,其他寵物包點擊live2d-widget-models 。如果需要修改寵物的位置,可以在display下添加
1 2 3 4 hOffset: 0 vOffset: -20
詳細内容可參考hexo-helper-live2d
效果如圖
在themes/layout/_parrials/footer.swig 中添加
1 2 3 4 5 6 7 8 9 10 11 12 13 14 15 16 17 18 19 20 21 22 23 24 25 26 27 28 <span id="sitetime"></span> <script language=javascript> function siteTime(){ window.setTimeout("siteTime()", 1000); var seconds = 1000; var minutes = seconds * 60; var hours = minutes * 60; var days = hours * 24; var years = days * 365; var today = new Date(); var todayYear = today.getFullYear(); var todayMonth = today.getMonth()+1; var todayDate = today.getDate(); var todayHour = today.getHours(); var todayMinute = today.getMinutes(); var todaySecond = today.getSeconds(); var t1 = Date.UTC(2018,06,07,12,00,00); // 設置建立網站的時間 var t2 = Date.UTC(todayYear,todayMonth,todayDate,todayHour,todayMinute,todaySecond); var diff = t2-t1; var diffYears = Math.floor(diff/years); var diffDays = Math.floor((diff/days)-diffYears*365); var diffHours = Math.floor((diff-(diffYears*365+diffDays)*days)/hours); var diffMinutes = Math.floor((diff-(diffYears*365+diffDays)*days-diffHours*hours)/minutes); var diffSeconds = Math.floor((diff-(diffYears*365+diffDays)*days-diffHours*hours-diffMinutes*minutes)/seconds); document.getElementById("sitetime").innerHTML=" 已運行"+diffYears+" 年 "diffDays+" 天 "+diffHours+" 小時 "+diffMinutes+" 分鐘 "+diffSeconds+" 秒"; } siteTime(); </script>
把代碼放在你想要的位置,插入位置不同,效果顯示的位置也會不同。若想要顯示為簡體或者英文,只要把對應的文字修改就行。
效果如圖
在next/layout/page.swig中,找到
1 2 3 4 <div class="tag-cloud-tags"> {{ tagcloud({min_font: 12, max_font: 30, amount: 300, color: true, start_color: '#ccc', end_color: '#111'}) }} </div>
如果你想標籤頁先顯示標簽云,再顯示基本的標籤頁,可以在這段代碼之前添加
1 2 3 4 5 6 7 8 9 10 11 12 {% if site.tags.length > 1 %} <script type="text/javascript" charset="utf-8" src="/js/tagcloud.js"></script> <script type="text/javascript" charset="utf-8" src="/js/tagcanvas.js"></script> <div class="widget-wrap"> <h3 class="widget-title">Tag Cloud</h3> <div id="myCanvasContainer" class="widget tagcloud"> <canvas width="250" height="250" id="resCanvas" style="width=100%"> {{ list_tags() }} </canvas> </div> </div> {% endif %}
如果是先顯示預設的標籤頁,再顯示標簽云,則把上面代碼添加到後面。
如果你只想顯示標簽云就行,可以把
1 2 3 <div class="tag-cloud-tags"> {{ tagcloud({min_font: 12, max_font: 30, amount: 300, color: true, start_color: '#ccc', end_color: '#111'}) }} </div>
刪掉就行。
Next主題默認的設置,兩邊留白的區域很大。當然我們可以修改設置themes\next\source\css\_custom的custom.styl添加下面參數
1 2 3 4 5 // 屏幕寬度小於1600px $content-desktop = 700px // 屏幕寬度大於或等於 1600px $content-desktop-large = 900px
修改對應的參數就行,此方法不適用於Pisces主題。
找到博客根目錄,打開scripts文件夾(沒有的話,自己創建一個)。
創建一個JavaScript文件,可任意命名。
打開所創建的JavaScript文件,輸入以下内容
1 2 3 4 5 6 7 8 9 10 11 12 var spawn = require ('child_process' ).exec ;hexo.on ('new' , function (path ){ spawn ('start "" "markdown編輯器絕對路徑" ' + path);}); hexo.on ('new' , function (data ){ spawn ('start "" "markdown編輯器絕對路徑" ' + data.path ); });
注意: markdown編輯器絕對路徑 格式為(例如打開Typora)
1 C:\\Program Files\\Typora\\Typora.exe
一個在綫的聯係功能:DaoVoice
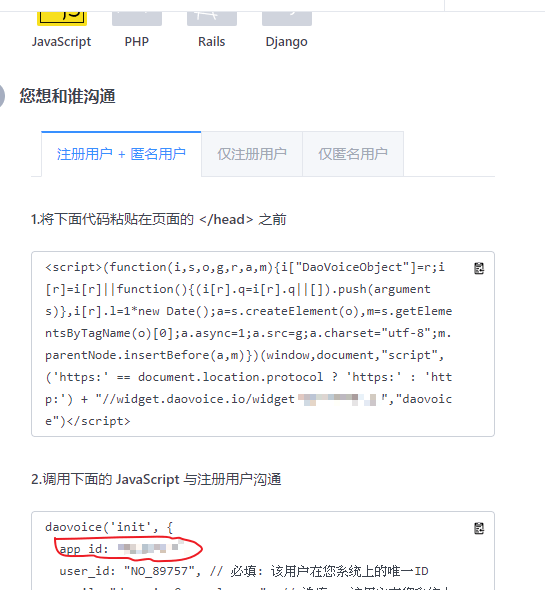
點擊 DaoVoice ,並點擊注冊。可以填入邀請碼:98657237
得到 app_id
修改next\layout_partials\head\head.swig 文件, 添加以下内容
1 2 3 4 5 6 7 8 9 {% if theme.daovoice %} <script> (function(i,s,o,g,r,a,m){i["DaoVoiceObject"]=r;i[r]=i[r]||function(){(i[r].q=i[r].q||[]).push(arguments)},i[r].l=1*new Date();a=s.createElement(o),m=s.getElementsByTagName(o)[0];a.async=1;a.src=g;a.charset="utf-8";m.parentNode.insertBefore(a,m)})(window,document,"script",('https:' == document.location.protocol ? 'https:' : 'http:') + "//widget.daovoice.io/widget/0f81ff2f.js","daovoice") daovoice('init', { app_id: "{{theme.daovoice_app_id}}" }); daovoice('update'); </script> {% endif %}
在主題配置文件中,添加以下内容
  # daovoice 配置
  daovoice: true
  daovoice_app_id:   # 填入剛才的app_id
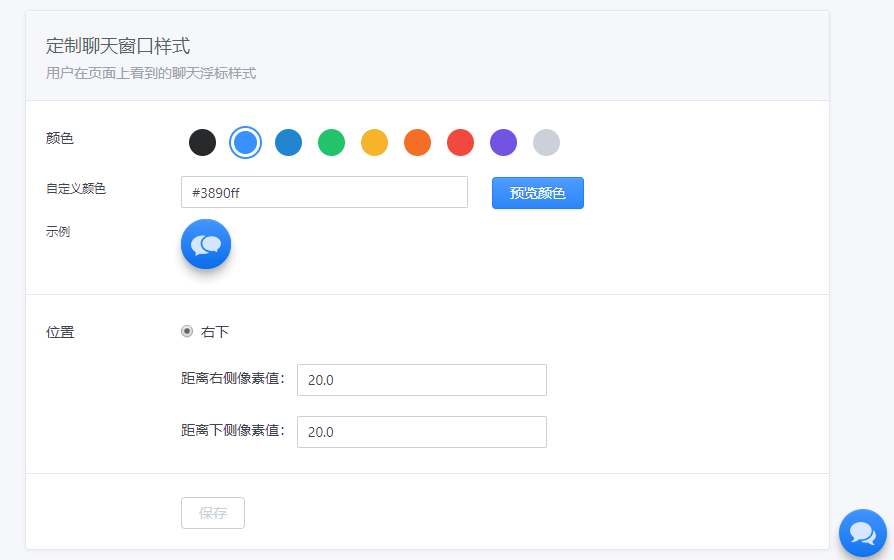
hexo clean && hexo g && hexo d 就能看到效果了,網頁右下角多了個 圖標
具體修改圖表的樣式,位置。可以在daovoice網頁中 應用設置-聊天設置 中配置