自定義控件 - 引入布局
常見控件和布局的繼承結構
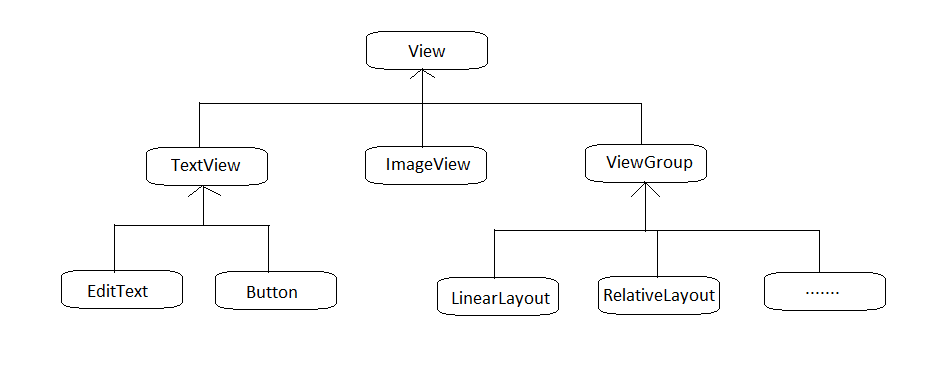
所有的控件都是直接或者間接繼承於 View
所有的布局都是直接或者間接繼承於 ViewGroup
View 是 Android 中最基本的一種 UI 控件,它可以在屏幕上繪製一塊矩形區域,並能響應這塊區域的各種事件。
ViewGroup 是特殊的一種 View,是一個用於放置控件和布局的容器
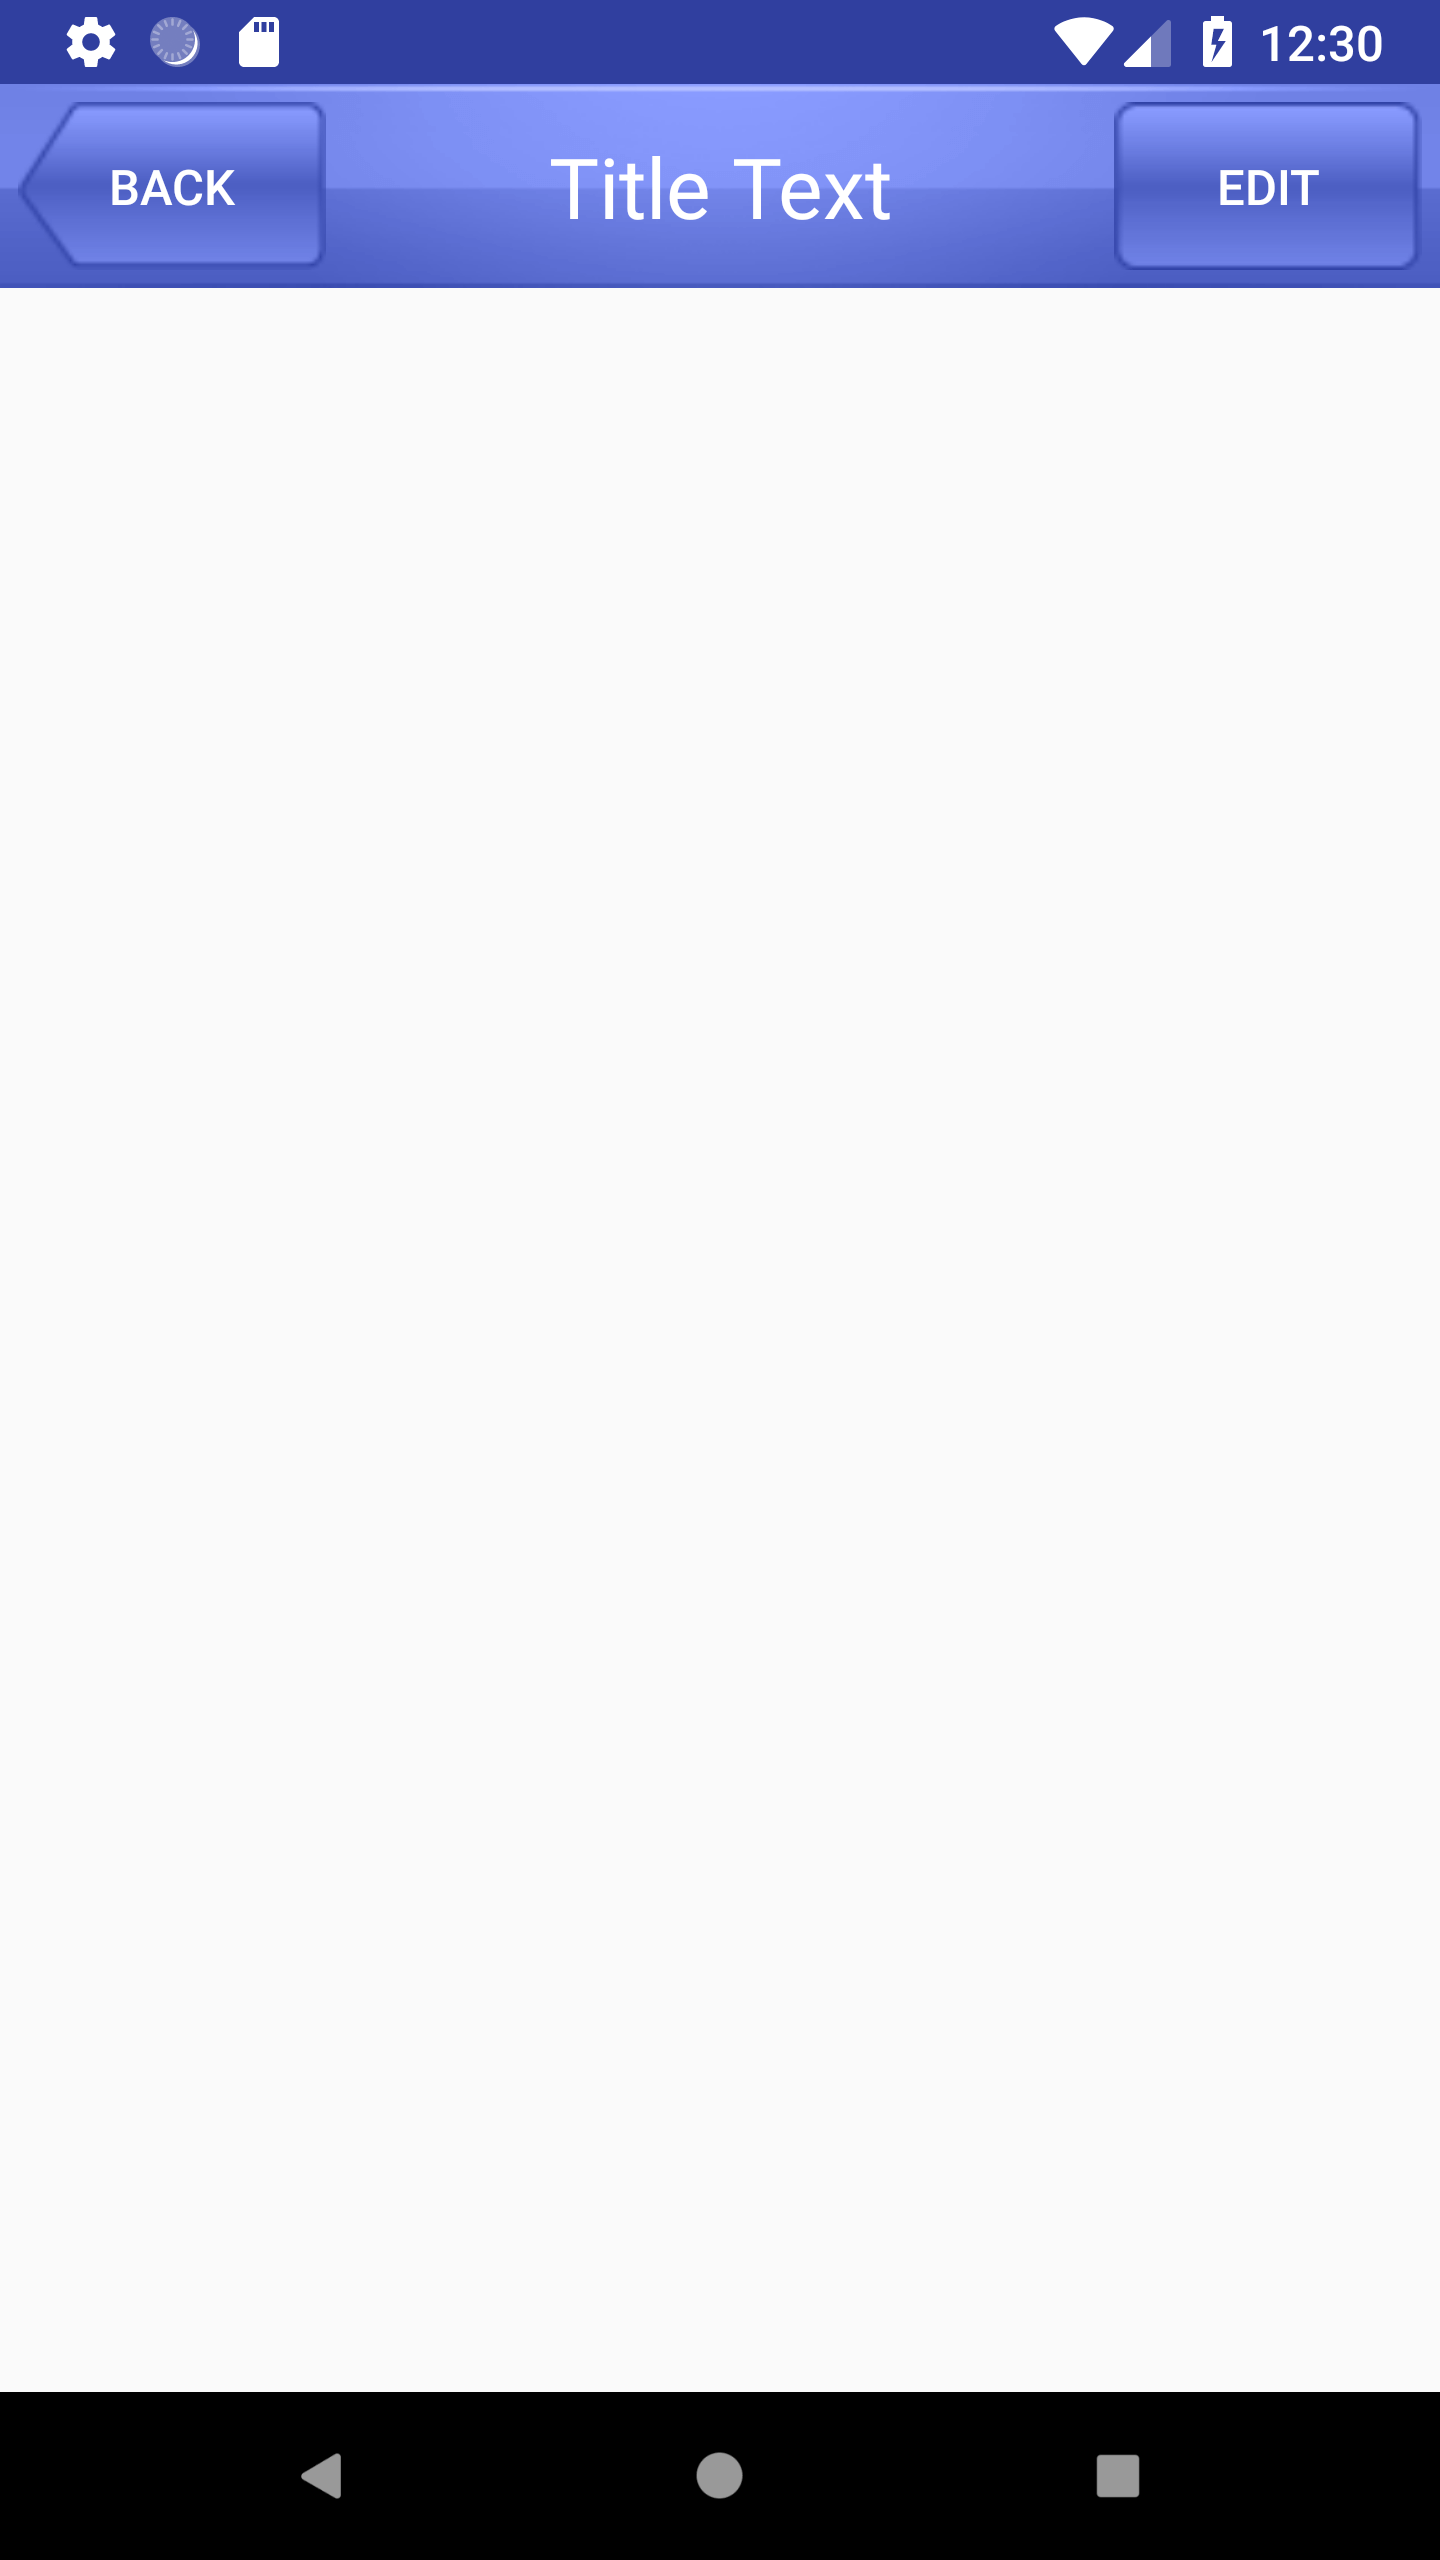
以添加 iPhone 風格的標題欄為例:
當多個活動界面都要使用這個標題欄時,我們可以通過引入布局的方式,這樣可以避免每個活動界面都要寫一遍同樣的標題代碼,減少代碼重複。
創建布局文件
新建一個 title.xml
1
2
3
4
5
6
7
8
9
10
11
12
13
14
15
16
17
18
19
20
21
22
23
24
25
26
27
28
29
30
31
32
33
34
35
36
37
| <?xml version="1.0" encoding="utf-8"?>
<LinearLayout xmlns:android="http://schemas.android.com/apk/res/android"
android:layout_width="match_parent"
android:layout_height="wrap_content"
android:background="@drawable/title_bg">
<Button
android:layout_width="wrap_content"
android:layout_height="wrap_content"
android:layout_gravity="center"
android:layout_margin="5dp"
android:background="@drawable/back_bg"
android:text="Back"
android:textColor="#fff"
android:id="@+id/title_back"/>
<TextView
android:layout_width="0dp"
android:layout_height="wrap_content"
android:text="Title Text"
android:id="@+id/title_text"
android:layout_gravity="center"
android:layout_weight="1"
android:gravity="center"
android:textColor="#fff"
android:textSize="24sp"/>
<Button
android:layout_width="wrap_content"
android:layout_height="wrap_content"
android:id="@+id/title_edit"
android:layout_gravity="center"
android:layout_margin="5dp"
android:background="@drawable/edit_bg"
android:text="Edit"
android:textColor="#fff"/>
</LinearLayout>
|
android:background 用於為控件或布局制定一個背景,可以使用顏色或者圖片
android:layout_margin 指定控件在上下左右方向上偏移的距離
引入布局
在創建了布局後,我們要引入布局。在需要引入界面的 Activity 界面布局中,添加<include layout="@layout/title"/>
1
2
3
4
5
6
7
| <LinearLayout xmlns:android="http://schemas.android.com/apk/res/android"
xmlns:app="http://schemas.android.com/apk/res-auto"
android:layout_width="match_parent"
android:layout_height="match_parent"
>
<include layout="@layout/title"/>
</LinearLayout>
|
隱藏系統自帶的標題欄
通過調用 getSupportActionBar()方法來獲得 ActionBar 的實例,然後再調用 ActionBar 的 hide()方法將標題欄隱藏。
1
2
3
4
5
6
7
8
9
10
11
12
| public class MainActivity extends AppCompatActivity {
@Override
protected void onCreate(Bundle savedInstanceState) {
super.onCreate(savedInstanceState);
setContentView(R.layout.activity_main);
ActionBar actionBar = getSupportActionBar();
if (actionBar != null){
actionBar.hide();
}
}
}
|
創建自定義控件
引入布局的方式雖然可以減少很多重複的布局代碼,但是當布局中的控件要求能夠響應事件,我們還是需要在每個活動中去為這些控件單獨編寫事件響應代碼。以標題欄為例,這些控件在每一個布局中所需的功能都是一樣的,這時我們可以使用自定義控件的方式,避免每個活動都要去編寫同樣的代碼。
新建 TitleLayout
新建 TitleLayout 並繼承 LinearLayout。
1
2
3
4
5
6
7
| public class TitleLayout extends LinearLayout {
public TitleLayout(Context context , AttributeSet attributeSet){
super(context,attributeSet);
LayoutInflater.from(context).inflate(R.layout.title,this);
}
}
|
重寫 LinearLayout 中帶有兩個參數的構造函數。
通過 LayoutInflater 來對標題欄進行動態加載。
LayoutInflater.from(context).inflate(R.layout.title,this);
- from()方法構建出一個 LayoutInflater 對象
- 調用 inflate()方法就可以動態加載一個布局文件。inflate 接受兩個參數
- 一個是加載的布局文件 id
- 另一個是給加載好的布局再添加一個父布局
修改活動布局.xml
1
2
3
4
5
6
7
8
9
10
11
12
| <LinearLayout xmlns:android="http://schemas.android.com/apk/res/android"
xmlns:app="http://schemas.android.com/apk/res-auto"
android:layout_width="match_parent"
android:layout_height="match_parent"
>
//完整類名
<com.example.hwy01.uicustomviews.TitleLayout
android:layout_width="match_parent"
android:layout_height="wrap_content"></com.example.hwy01.uicustomviews.TitleLayout>
</LinearLayout>
|
添加自定義控件需要先指明控件的完整類名,如代碼中的com.example.hwy01.uicustomviews.TitleLayout
添加按鈕註冊事件
修改 TitleLayout
1
2
3
4
5
6
7
8
9
10
11
12
13
14
15
16
17
18
19
20
21
22
23
24
25
| public class TitleLayout extends LinearLayout {
public TitleLayout(Context context , AttributeSet attributeSet){
super(context,attributeSet);
LayoutInflater.from(context).inflate(R.layout.title,this);
Button back = (Button) findViewById(R.id.title_back);
Button edit = (Button) findViewById(R.id.title_edit);
back.setOnClickListener(new OnClickListener() {
@Override
public void onClick(View view) {
((Activity)getContext()).finish();
}
});
edit.setOnClickListener(new OnClickListener() {
@Override
public void onClick(View view) {
Toast.makeText(getContext(),"You clicked Edit Button",Toast.LENGTH_SHORT).show();
}
});
}
}
|





