


Headless CMS (content management system) platforms are a great tool for developers and content creators that want to manage, deliver, and present digital assets across various channels and devices. If you are a Netlify user, you are probably already using a headless CMS platform like Contentful or Contentstack to streamline your workflow and improve your content management experience.
Our latest integration with Contentful in Labs provides a simpler and more polished workflow by allowing users to enable the integration more easily and removing unnecessary steps that were previously required during setup.
For instance, when you are first activating the integration, connecting your Contentful space to your Netlify site is an easy step supported by a simple authentication process. Once connected, your site will automatically redeploy whenever changes are made depending on the option you selected. Additionally, when you publish content like a blog post in the Contentful web app, you no longer have to manually create webhooks to trigger a build on the Netlify site to visualize the published updates. Instead, the Netlify sidebar app is installed on your Contentful space, which allows you to deploy your site from the Contentful UI whenever you update content. And perhaps the biggest update included as part of this integration is the new preview functionality for users!
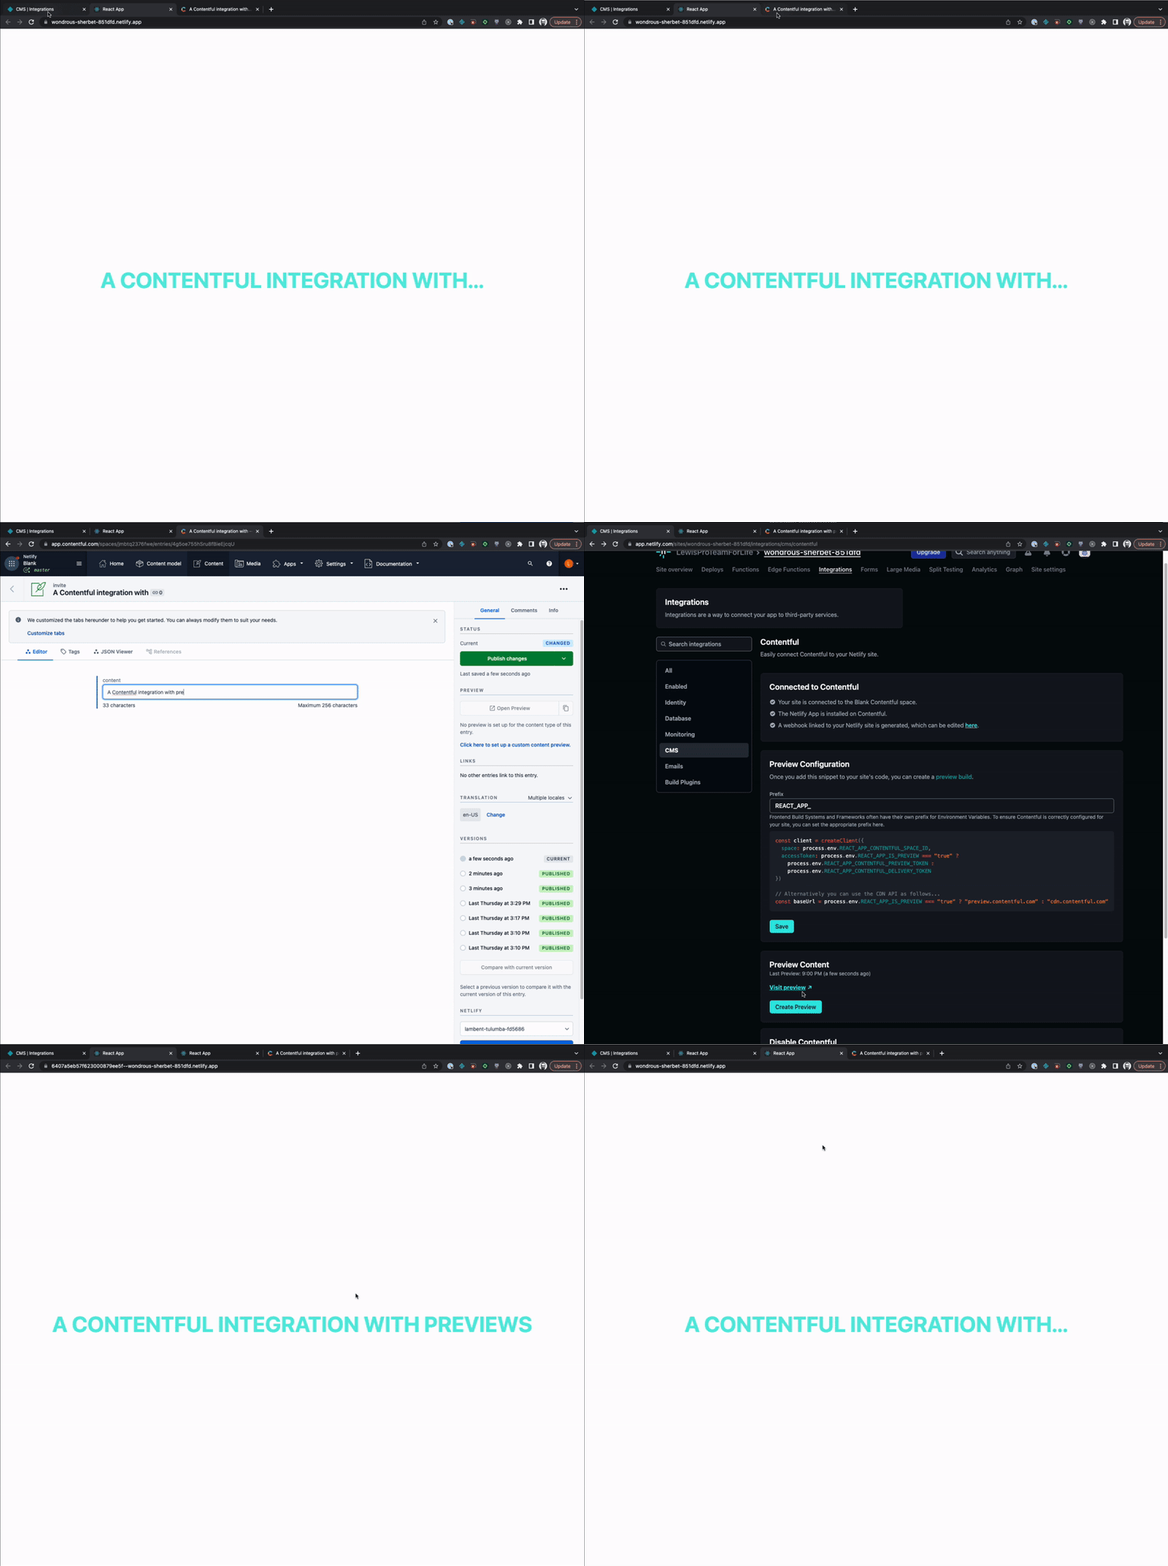
In the GIF above, you can see that the “Create Preview” button has been added to the Netlify UI, which allows you to visualize updates you are making to your site without affecting the production environment. This is a vast improvement to the content editing experience, since you can visualize changes instantly rather than guessing how the new output looks based on form field updates in Contentful.
Configuring Content Previews
Once you have created a Contentful account and connected your Contentful space to your Netlify site (for step-by-step instructions on getting started with the integration, refer to our docs page), you will be able to configure your preview
- Select Integrations > CMS > Contentful > View.
- We recommend fetching your Contentful data from a serverless function, however, if you need to fetch your content in client side code, the Preview Configuration section allows you to enter the prefix for the frontend build system or framework your site uses. For example, a site using Next.js would require the prefix
NEXT_PUBLIC. - Select Save to save your prefix.
Note that this updates the preview code snippet below the Prefix field.
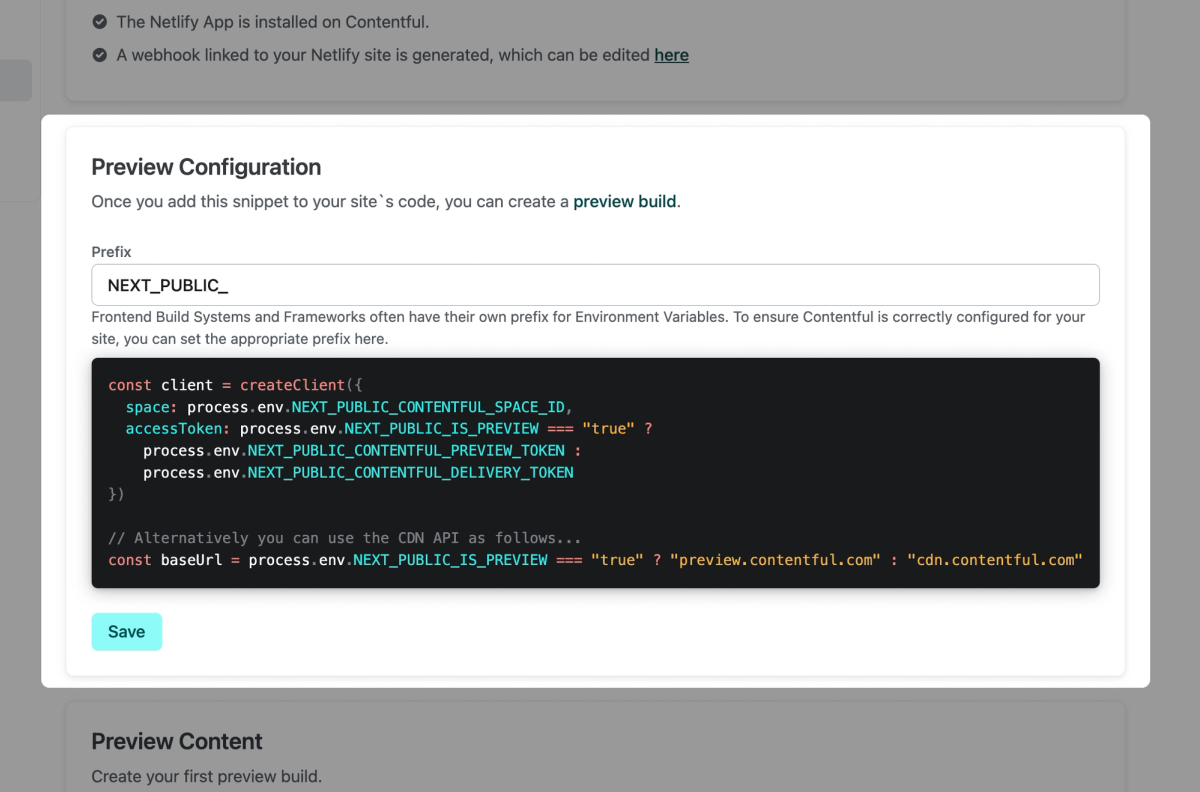
You can use this snippet in your own code wherever you’re pulling in Contentful content dynamically or at build time. This snippet conditionally renders either the preview or the production version of your site. Below is an example of a code snippet for a site that uses Next.js:
const client = createClient({
space: process.env.NEXT_PUBLIC_CONTENTFUL_SPACE_ID,
accessToken:
process.env.NEXT_PUBLIC_IS_PREVIEW === "true"
? process.env.NEXT_PUBLIC_CONTENTFUL_PREVIEW_TOKEN
: process.env.NEXT_PUBLIC_CONTENTFUL_DELIVERY_TOKEN,
});
// Alternatively you can use the CDN API as follows...
const baseUrl =
process.env.NEXT_PUBLIC_IS_PREVIEW === "true"
? "preview.contentful.com"
: "cdn.contentful.com";
Once you add this snippet to your site’s code, you can create a preview build from the Netlify UI. Select Create Preview to generate a preview of unpublished content, then select Visit Preview to navigate to the preview version of your site.
If you have any questions or feedback about this integration, feel free to post in our forums!