使用 Jenkins 总是离不开各种各样的插件,为了更好的实践 DevOps ,我们也应该具备开发插件的能力,使整个流程都能够在 Jenkins 中汇合。
1. Jenkins 插件
1.1 插件的生态
Jenkins 前身 Hudson 始于 2004 ,历经 16 年,依然作为主流的 CI/CD 引擎。除了,Jenkins 提供了 Master-Agent 分布式构建、Pipeline 编排的功能,另外一个很重要的原因就是强大的插件生态。
Jenkins 插件官网,显示目前插件数量达到 1500 +,涵盖拉取代码、构建、测试、部署、工具集成等方方面面。
这些开源的插件,基本能够满足功能需求。但为了对接某些定制的系统,我们又不得不开发新的插件。新的插件可以开源给 Jenkins 社区,提供给其他人使用。事实上,大部分的插件也是这么产生的。
1.2 插件的生命周期
Jenkins 的执行,具有自己的运行周期:
- checkout ,check out出源码
- Pre-build , 预编译
- Build wrapper , 准备构建的环境,设置环境变量等
- Builder runs , 执行构建,比如调用calling Ant, Make 等等
- Recording , 记录输出,如测试结果
- Notification , 通知成员
开发插件就是以 Jenkins 的运行周期为切入点,对其进行扩展。
具体到实现,首先根据需要扩展的功能,在 Jenkins Packages 文档中,找到扩展的类。然后,在插件的主类中 extends 扩展类:
1
2
3
4
5
6
7
8
9
| package mygroup.myauth;
import hudson.Extension;
import jenkins.security.BasicHeaderAuthenticator;
@Extension
public class MyAuthenticator extends BasicHeaderAuthenticator {
}
|
在 MyAuthenticator 中实现自己的业务逻辑即可。
在开发测试完成之后,需要将插件托管到线上。可以是私有的 Nexus Server ,也可以是 Jenkins 官方提供的公共仓库。如果希望托管到 Jenkins 官方仓库,需要按照 文档 进行操作,去 https://issues.jenkins-ci.org/browse/HOSTING 按照模板,创建 issue 。在开发过程中碰到的任何问题,可以在 jenkinsci-dev@googlegroups.com 邮件组中,进行交流。下面我们来了解一下插件的开发流程。
2. 基础环境搭建
大部分 Jenkins 插件使用 Maven 进行构建。Maven 3.3 以上需要 JDK 1.7 以上版本,下面以 CentOS 7 为例进行安装。
1
| yum install -y java-1.8.0-openjdk
|
Maven 下载页面 ,这里下载 3.6.3 版本。
1
2
| wget https://mirrors.tuna.tsinghua.edu.cn/apache/maven/maven-3/3.6.3/binaries/apache-maven-3.6.3-bin.tar.gz -P /tmp
tar xf /tmp/apache-maven-3.6.3-bin.tar.gz -C /opt
|
编辑 /etc/profile 新增如下内容:
1
2
3
4
5
6
7
8
9
| M2_HOME="/opt/apache-maven-3.6.3"
export M2_HOME
M2="$M2_HOME/bin"
MAVEN_OPTS="-Xms256m -Xmx512m"
export M2 MAVEN_OPTS
PATH=$M2:$PATH
export PATH
|
source 一下,使之生效。
1
2
| source /etc/profile
mvn -version
|
3. 生成插件框架
 1
 2
 3
 4
 5
 6
 7
 8
 9
10
11
12
13
14
15
16
17
18
19
20
21
22
23
24
25
26
27
28
29
| mvn -U archetype:generate -Dfilter="io.jenkins.archetypes:"
…
Choose archetype:
1: remote -> io.jenkins.archetypes:empty-plugin (Skeleton of a Jenkins plugin with a POM and an empty source tree.)
2: remote -> io.jenkins.archetypes:global-configuration-plugin (Skeleton of a Jenkins plugin with a POM and an example piece of global configuration.)
3: remote -> io.jenkins.archetypes:global-shared-library (Uses the Jenkins Pipeline Unit mock library to test the usage of a Global Shared Library)
4: remote -> io.jenkins.archetypes:hello-world-plugin (Skeleton of a Jenkins plugin with a POM and an example build step.)
5: remote -> io.jenkins.archetypes:scripted-pipeline (Uses the Jenkins Pipeline Unit mock library to test the logic inside a Pipeline script.)
Choose a number or apply filter (format: [groupId:]artifactId, case sensitive contains): : 4
Choose io.jenkins.archetypes:hello-world-plugin version:
1: 1.1
2: 1.2
3: 1.3
4: 1.4
5: 1.5
6: 1.6
Choose a number: 6: 6
…
[INFO] Using property: groupId = unused
Define value for property 'artifactId': demo
Define value for property 'version' 1.0-SNAPSHOT: :
[INFO] Using property: package = io.jenkins.plugins.sample
Confirm properties configuration:
groupId: unused
artifactId: demo
version: 1.0-SNAPSHOT
package: io.jenkins.plugins.sample
Y: : y
|
其中 package 、groupId 根据需要填写,artifactId 就是插件的 ID 。
最终会看到提示:
 1
 2
 3
 4
 5
 6
 7
 8
 9
10
11
12
13
14
15
16
| [INFO] ----------------------------------------------------------------------------
[INFO] Using following parameters for creating project from Archetype: hello-world-plugin:1.6
[INFO] ----------------------------------------------------------------------------
[INFO] Parameter: groupId, Value: unused
[INFO] Parameter: artifactId, Value: demo
[INFO] Parameter: version, Value: 1.0-SNAPSHOT
[INFO] Parameter: package, Value: io.jenkins.plugins.sample
[INFO] Parameter: packageInPathFormat, Value: io/jenkins/plugins/sample
[INFO] Parameter: package, Value: io.jenkins.plugins.sample
[INFO] Parameter: version, Value: 1.0-SNAPSHOT
[INFO] Parameter: groupId, Value: unused
[INFO] Parameter: artifactId, Value: demo
[INFO] Project created from Archetype in dir: /root/java/demo
[INFO] ------------------------------------------------------------------------
[INFO] BUILD SUCCESS
[INFO] ------------------------------------------------------------------------
|
根据交互提示,很容易创建一个插件框架。下面查看一下生成的文件:
 1
 2
 3
 4
 5
 6
 7
 8
 9
10
11
12
13
14
15
16
17
18
19
20
21
22
23
24
25
26
27
28
29
30
31
32
33
34
35
36
37
38
39
40
41
42
43
44
45
46
47
48
49
50
51
52
53
54
55
56
57
58
59
60
61
62
63
| tree demo/
demo/
├── pom.xml
└── src
├── main
│ ├── java
│ │ └── io
│ │ └── jenkins
│ │ └── plugins
│ │ └── sample
│ │ └── HelloWorldBuilder.java
│ └── resources
│ ├── index.jelly
│ └── io
│ └── jenkins
│ └── plugins
│ └── sample
│ ├── HelloWorldBuilder
│ │ ├── config_de.properties
│ │ ├── config_es.properties
│ │ ├── config_fr.properties
│ │ ├── config_it.properties
│ │ ├── config.jelly
│ │ ├── config.properties
│ │ ├── config_pt_BR.properties
│ │ ├── config_sv.properties
│ │ ├── config_tr.properties
│ │ ├── config_zh_CN.properties
│ │ ├── help-name_de.html
│ │ ├── help-name_es.html
│ │ ├── help-name_fr.html
│ │ ├── help-name.html
│ │ ├── help-name_it.html
│ │ ├── help-name_pt_BR.html
│ │ ├── help-name_sv.html
│ │ ├── help-name_tr.html
│ │ ├── help-name_zh_CN.html
│ │ ├── help-useFrench_de.html
│ │ ├── help-useFrench_es.html
│ │ ├── help-useFrench_fr.html
│ │ ├── help-useFrench.html
│ │ ├── help-useFrench_it.html
│ │ ├── help-useFrench_pt_BR.html
│ │ ├── help-useFrench_sv.html
│ │ ├── help-useFrench_tr.html
│ │ └── help-useFrench_zh_CN.html
│ ├── Messages_de.properties
│ ├── Messages_es.properties
│ ├── Messages_fr.properties
│ ├── Messages_it.properties
│ ├── Messages.properties
│ ├── Messages_pt_BR.properties
│ ├── Messages_sv.properties
│ ├── Messages_tr.properties
│ └── Messages_zh_CN.properties
└── test
└── java
└── io
└── jenkins
└── plugins
└── sample
└── HelloWorldBuilderTest.java
|
还可以执行 verify 命令进行插件的验证。
 1
 2
 3
 4
 5
 6
 7
 8
 9
10
11
12
13
14
15
16
17
18
| cd demo
mvn verify
[INFO] Fork Value is true
[INFO] Done SpotBugs Analysis....
[INFO]
[INFO] <<< spotbugs-maven-plugin:3.1.12.2:check (spotbugs) < :spotbugs @ demo <<<
[INFO]
[INFO]
[INFO] --- spotbugs-maven-plugin:3.1.12.2:check (spotbugs) @ demo ---
[INFO] BugInstance size is 0
[INFO] Error size is 0
[INFO] No errors/warnings found
[INFO] ------------------------------------------------------------------------
[INFO] BUILD SUCCESS
[INFO] ------------------------------------------------------------------------
[INFO] Total time: 05:10 min
[INFO] ------------------------------------------------------------------------
|
从 Java 类可以得知,这个 Hello World 插件针对 Builder 进行了扩展。在代码中,可以进一步得到验证:
1
2
3
4
5
| public class HelloWorldBuilder extends Builder implements SimpleBuildStep {
private final String name;
private boolean useFrench;
}
|
这里就不对 Hello World 插件做修改,直接运行看看。
4. 运行调试
Maven Hpi Plugin 提供了非常方便的调试方法,在 demo 目录中执行命令:
会运行一个带插件的 Jenkins 服务,访问地址为 http://127.0.0.1:8080/jenkins 。通过参数 -Djetty.port=1000 -Djenkins.version=2.176.2 -Djenkins.install.runSetupWizard=true 可以指定访问的端口、Jenkins 版本、是否需要安装插件的向导等。
如果需要断点调试,可以运行如下命令:
或
1
2
| export MAVEN_OPTS="-Xdebug -Xrunjdwp:transport=dt_socket,server=y,address=8000,suspend=n"
mvn hpi:run
|
这会在 8000 端口建立监听 ,可以在 IDE 中添加一个 8000 端口的调试会话进行 Debug。
最后就是生成 hpi 包,执行命令:
1
2
3
| mvn package
[INFO] Generating hpi /root/java/demo/target/demo.hpi
|
编译完成后会生成一个 hpi 文件,也就是插件,可以直接在 Jenkins 后台上传安装。
当然,也可以直接将插件安装在本地。
1
2
3
| mvn clean install
[INFO] Installing /root/java/demo/target/demo.hpi to /root/.m2/repository/io/jenkins/plugins/demo/1.0-SNAPSHOT/demo-1.0-SNAPSHOT.hpi
|
在 http://127.0.0.1:8080 页面上,
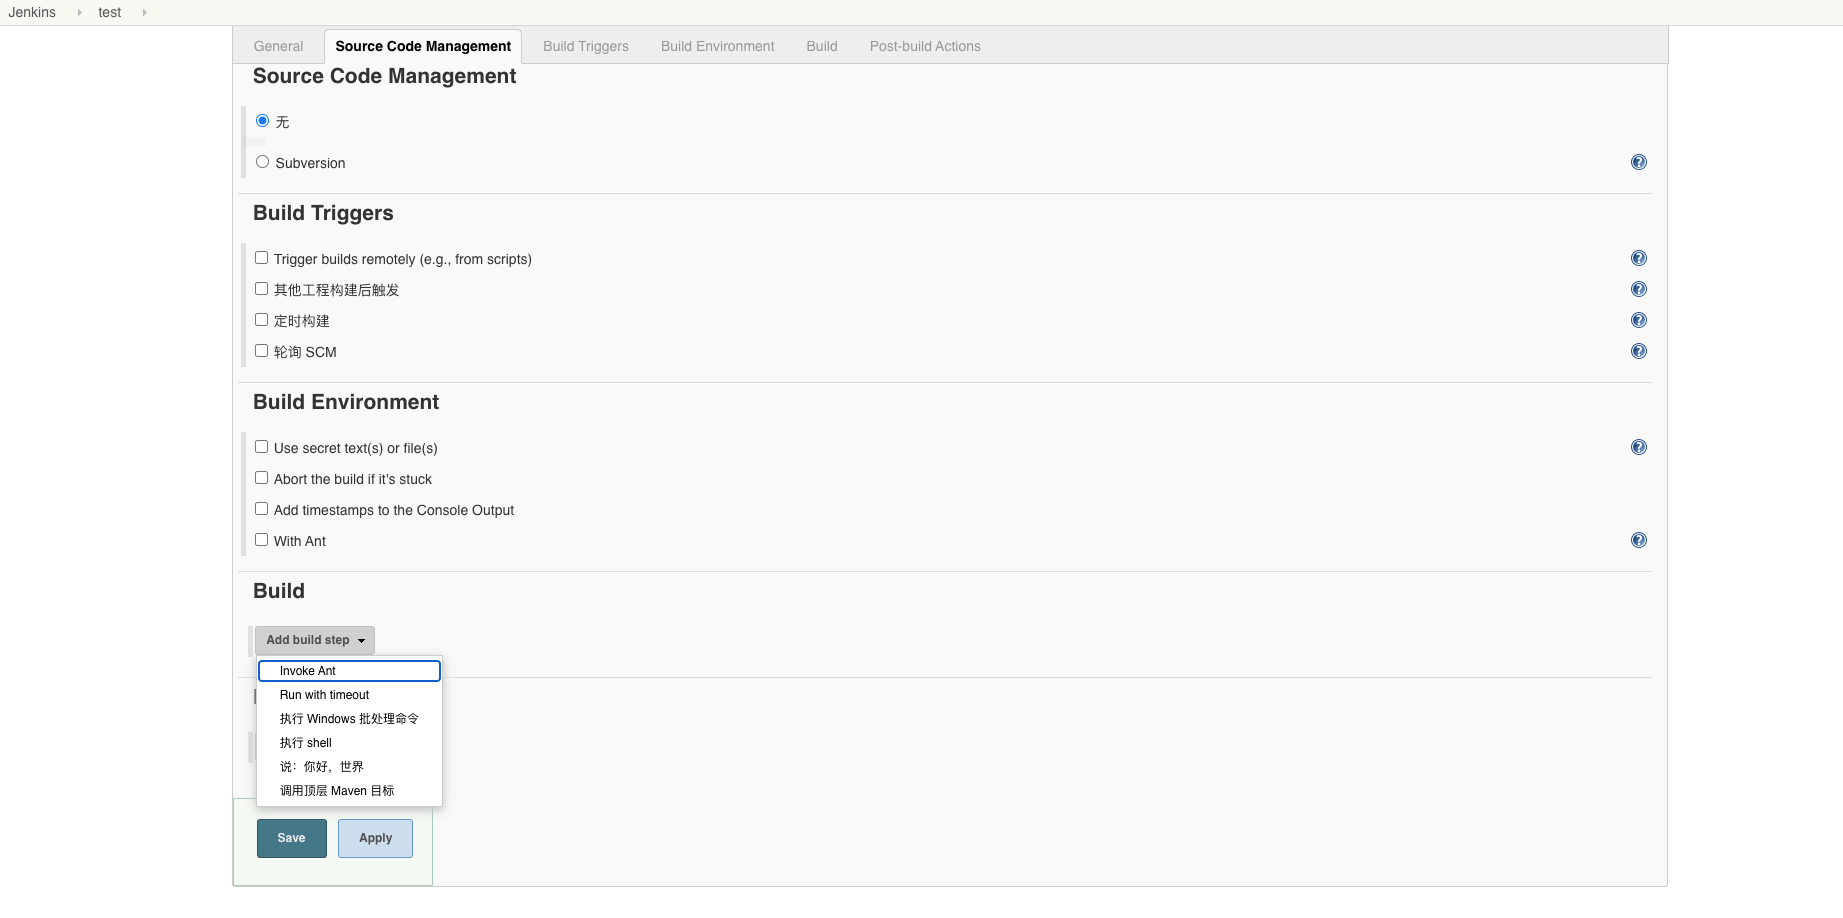
新建一个流水线,可以看到 Build 中,新增了一个 Step ,Hello World 。
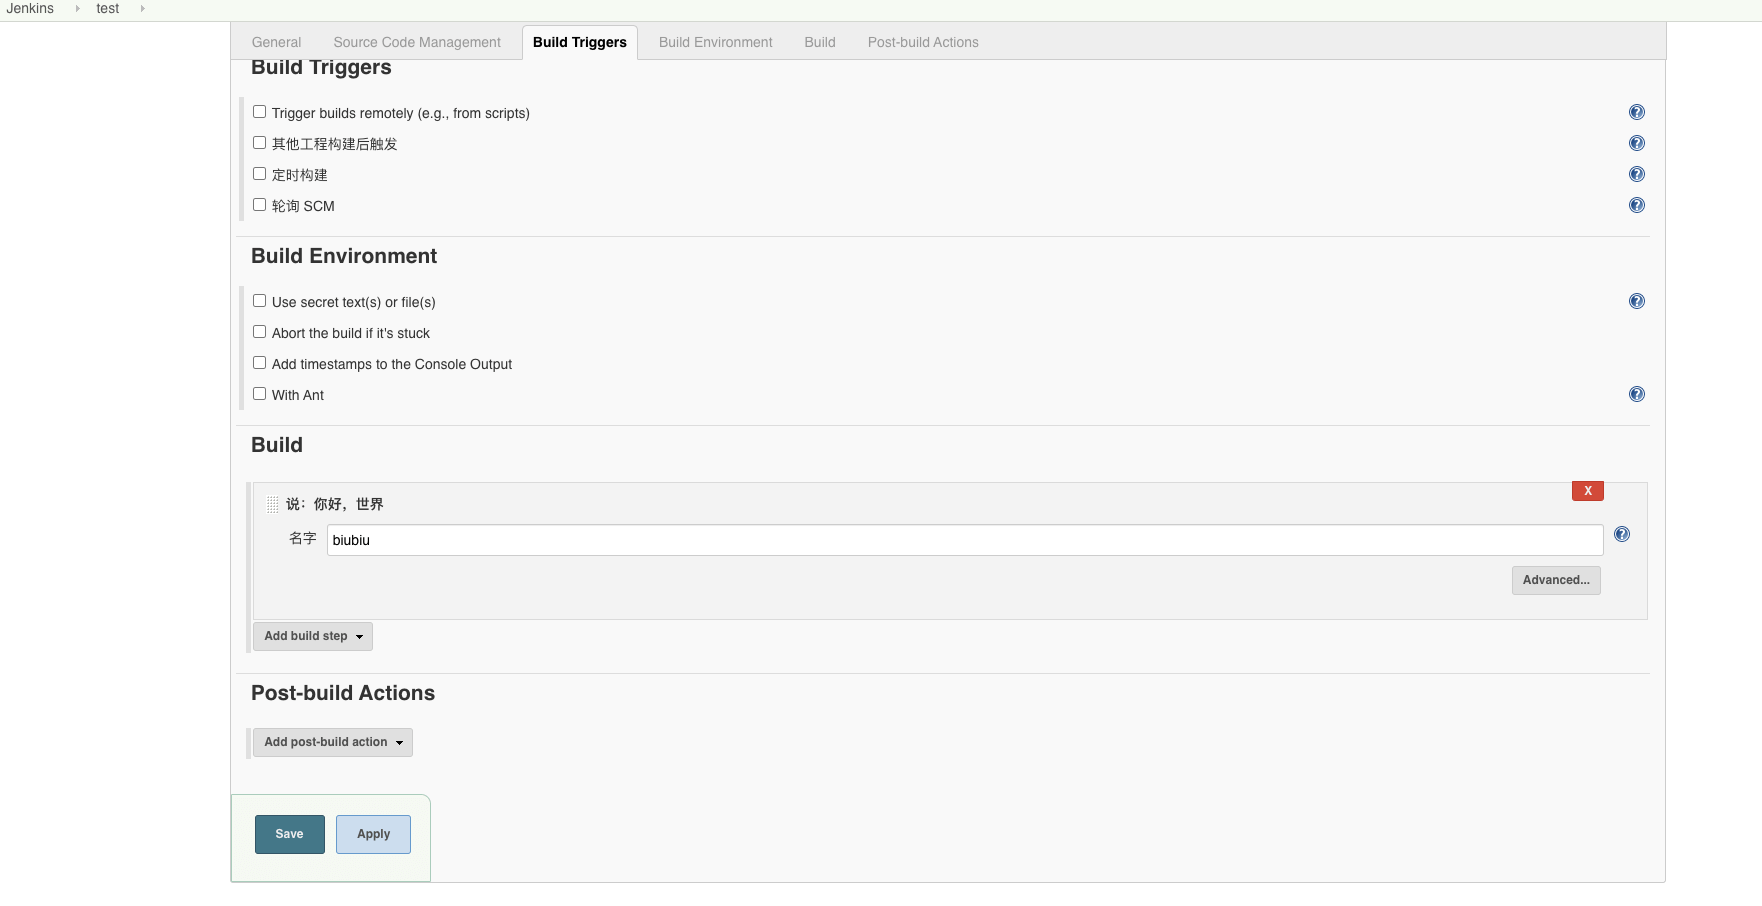
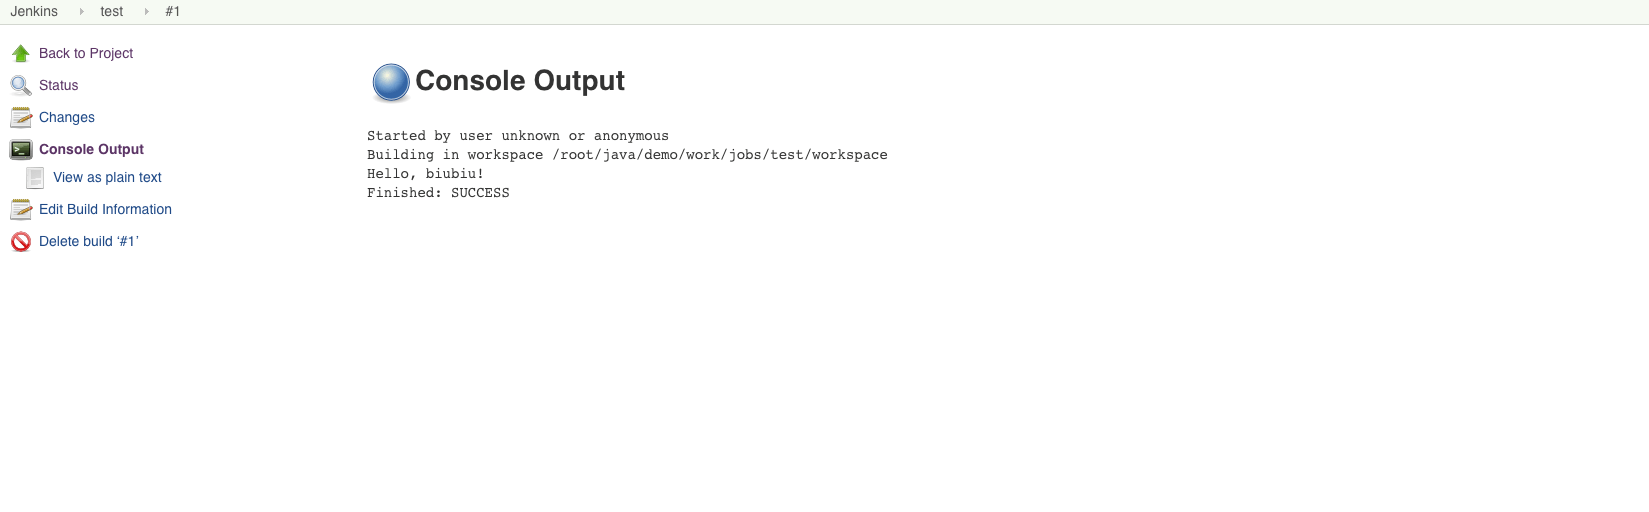
运行输出: Hello, biubiu!
5. 参考










