1. S2I 能解决什么问题
可以预见的是,未来大量的应用会以容器的方式进行部署。
容器平台关注的是镜像和容器,应用开发关注的是业务代码,而最终代码需要以镜像的方式进行部署。从代码到镜像,就是 Source To Image ,即 S2I 。
在前面的文章 PaaS 部署之 buildpack 中,描述到一个应用运行起来之前,需要进行一些必要的配置。这些配置包括运行依赖、环境变量、服务地址等。
S2I 提供 buildpack 类似的功能,但 S2I 提供的方式更加通用化、更加容器化。
2. S2I 的特点
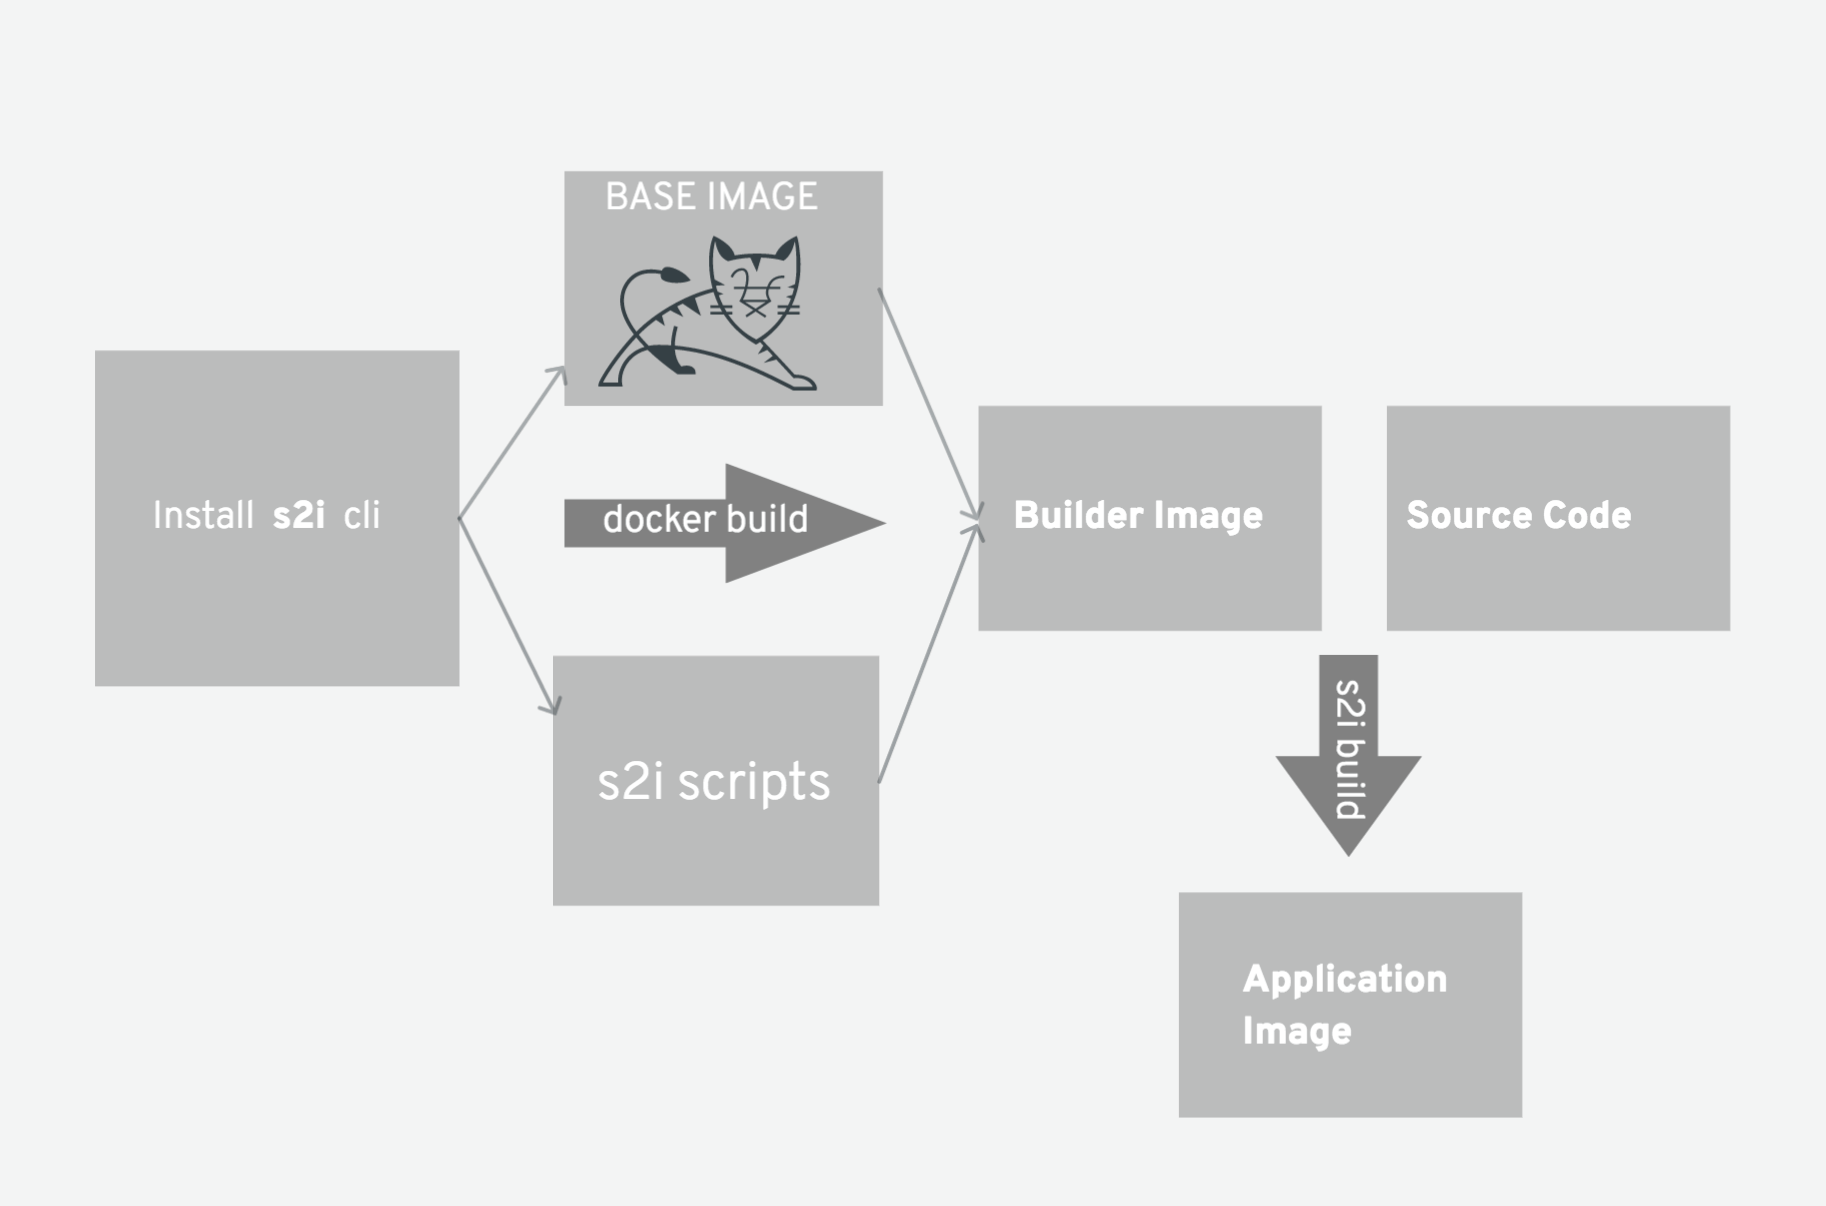
上图是 S2I 的工作流,S2I CLI 依赖于 Docker 环境。
主要分为两步:
- 通过 BASE IMAGE 、S2I Scripts 构建应用的基础镜像
- 将源码移动到应用的基础镜像,仅添加一层文件,得到最终的镜像文件
BASE IMAGE 是一些通用的镜像,例如,Python、CentOS、Nodejs 等。S2I Scripts 通常是一些固定的流程脚本,比如变更数据库、拷贝静态文件等。
S2I 的特点:
- 速度,S2I 可以实现很复杂的操作逻辑,而不会创建新的镜像层,所以运行起来很快。
- 打补丁,如果所依赖的镜像需要安全补丁,S2I 允许你一次性重新构建所有镜像。
- 高效,在构建过程中,S2I 不允许运行任意的
yum install 命令,以防止降低开发迭代速度 - 生态,S2I 鼓励一个共享镜像生态。从而你的应用可以实现最佳实践。
S2I 能够通过目录下的文件探测语言,如果有 Dockerfile 将会退化为非 S2I 的方式使用 Dockerfile 进行构建。
| 识别的语言 | 探测的文件 |
|---|
| java | pom.xml |
| nodejs | app.json, package.json |
| perl | cpanfile、index.pl |
| php | composer.json、index.php |
| python | requirements.txt、setup.py |
| ruby | Gemfile, Rakefile、config.ru |
| scala | build.sbt |
| golang | Godeps, main.go |
3. S2I 与 buildpack 区别
buildpack 是 CloudFoundry 提供的一种打包应用的工具。buildpack 对应用及其依赖进行构建、打包和更新,让开发人员更加专注在业务逻辑实现。
buildpack 最终会得到一个 droplet。droplet 是一个应用的可运行实例,运行在 dea(droplet execution agent)上。
S2I 是 OpenShift 推出的一种基于容器的应用镜像构建工具。S2I 面向容器,试图解决的问题更为通用。
S2I 最终会得到一个镜像,可以部署在任意容器平台。
4. 尝试使用 S2I
操作之前,请确保本地有可用的 Docker 环境。
- 创建一个 Django 工程
 1
 2
 3
 4
 5
 6
 7
 8
 9
10
11
12
13
| pip install django==1.11
django-admin startproject django_example
echo django==1.11 > ./django_example/requirements.txt
tree -L 3
.
└── django_example
├── django_example
│ ├── __init__.py
│ ├── settings.py
│ ├── urls.py
│ └── wsgi.py
├── manage.py
└── requirements.txt
|
添加 requirements.txt 是为了让脚本识别应用。
- 安装 S2I ,以 OS X 为例:
1
| brew install source-to-image
|
- 构建应用镜像
1
2
3
| s2i build -h
Usage:
s2i build <source> <image> [<tag>] [flags]
|
- source ,构建源码。可以是本地仓库,也可以是远程仓库
- image,基础镜像
- tag,生成的镜像
- flags,构建参数,比如添加证书、设置网络等
centos/python-35-centos7 是一个 Python 3.5 应用的 S2I 基础镜像,点击查看。
 1
 2
 3
 4
 5
 6
 7
 8
 9
10
11
12
13
14
15
16
17
18
| s2i build django_example centos/python-35-centos7 hello-django
---> Installing application source ...
---> Installing dependencies ...
Collecting django==1.11 (from -r requirements.txt (line 1))
Downloading https://files.pythonhosted.org/packages/47/a6/078ebcbd49b19e22fd560a2348cfc5cec9e5dcfe3c4fad8e
64c9865135bb/Django-1.11-py2.py3-none-any.whl (6.9MB)
Collecting pytz (from django==1.11->-r requirements.txt (line 1))
Downloading https://files.pythonhosted.org/packages/87/76/46d697698a143e05f77bec5a526bf4e56a0be
61d63425b68f4ba553b51f2/pytz-2019.2-py2.py3-none-any.whl (508kB)
Installing collected packages: pytz, django
Successfully installed django-1.11 pytz-2019.2
You are using pip version 7.1.2, however version 19.2.3 is available.
You should consider upgrading via the 'pip install --upgrade pip' command.
---> Collecting Django static files ...
WARNING: could not run 'manage.py collectstatic'. To debug, run:
python ./manage.py collectstatic --noinput
Ignore this warning if you're not serving static files with Django.
Build completed successfully
|
1
2
3
| docker images
REPOSITORY TAG IMAGE ID CREATED SIZE
hello-django latest 042c6143ecf9 50 seconds ago 669MB
|
 1
 2
 3
 4
 5
 6
 7
 8
 9
10
11
12
13
14
15
16
17
18
19
20
21
22
23
24
25
26
27
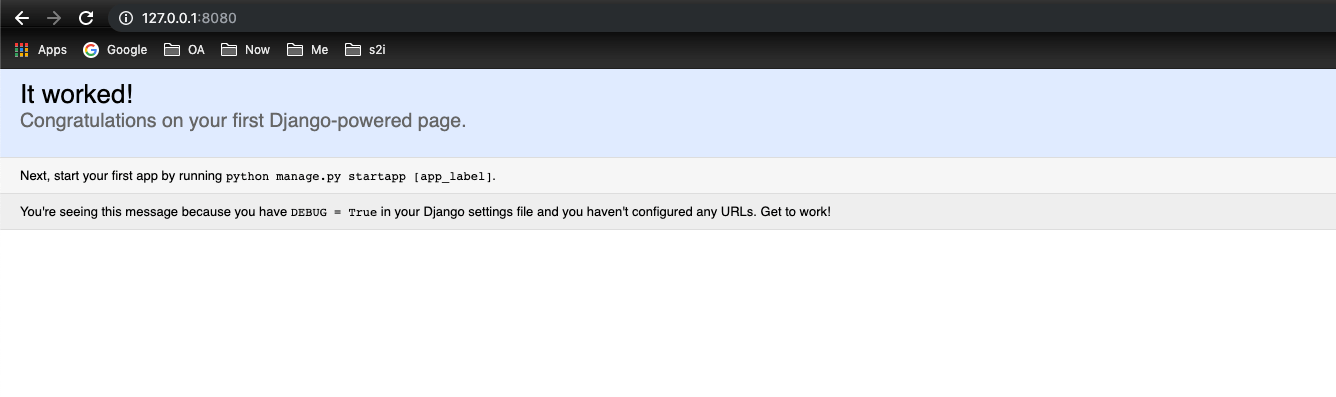
| docker run -p 8080:8080 hello-django
---> Migrating database ...
Operations to perform:
Apply all migrations: admin, auth, contenttypes, sessions
Running migrations:
Applying contenttypes.0001_initial... OK
Applying auth.0001_initial... OK
Applying admin.0001_initial... OK
Applying admin.0002_logentry_remove_auto_add... OK
Applying contenttypes.0002_remove_content_type_name... OK
Applying auth.0002_alter_permission_name_max_length... OK
Applying auth.0003_alter_user_email_max_length... OK
Applying auth.0004_alter_user_username_opts... OK
Applying auth.0005_alter_user_last_login_null... OK
Applying auth.0006_require_contenttypes_0002... OK
Applying auth.0007_alter_validators_add_error_messages... OK
Applying auth.0008_alter_user_username_max_length... OK
Applying sessions.0001_initial... OK
---> Serving application with 'manage.py runserver' ...
WARNING: this is NOT a recommended way to run you application in production!
Consider using gunicorn or some other production web server.
Performing system checks...
System check identified no issues (0 silenced).
August 26, 2019 - 08:08:36
Django version 1.11, using settings 'django_example.settings'
Starting development server at http://0.0.0.0:8080/
Quit the server with CONTROL-C.
|
5. 参考







