惯性聚合 高效追踪和阅读你感兴趣的博客、新闻、科技资讯
阅读原文 在惯性聚合中打开

推荐订阅源

博客园 - 【当耐特】
Help Net Security
Help Net Security
P
Proofpoint News Feed
J
Java Code Geeks
爱范儿
爱范儿
Last Week in AI
Last Week in AI
钛媒体:引领未来商业与生活新知
钛媒体:引领未来商业与生活新知
F
Full Disclosure
Google DeepMind News
H
Help Net Security
G
Google Developers Blog
Jina AI
Jina AI
Vercel News
Vercel News
cs.AI updates on arXiv.org
L
Lohrmann on Cybersecurity
S
Schneier on Security
Microsoft Azure Blog
IT之家
IT之家
Security Archives - TechRepublic
阮一峰的网络日志
阮一峰的网络日志
N
News and Events Feed by Topic
GbyAI
GbyAI
B
Blog
O
OpenAI News
博客园_首页
Cisco Talos Blog
Cisco Talos Blog
K
KPMG report finds enterprise disconnect between AI and its ROI | CIO
Hacker News: Ask HN
Hacker News: Ask HN
TaoSecurity Blog
TaoSecurity Blog
腾讯CDC
MongoDB | Blog
MongoDB | Blog
M
MIT News - Artificial intelligence
C
Cybersecurity and Infrastructure Security Agency CISA
Cyberwarzone
Cyberwarzone
Webroot Blog
Webroot Blog
Simon Willison's Weblog
Y
Y Combinator Blog
C
Cisco Blogs
A
Arctic Wolf
CTFtime.org: upcoming CTF events
T
The Exploit Database - CXSecurity.com
Security Latest
Security Latest
AI
AI
W
WeLiveSecurity
aimingoo的专栏
aimingoo的专栏
The Register - Security
Project Zero
Project Zero
H
Hackread – Cybersecurity News, Data Breaches, AI and More
N
Netflix TechBlog - Medium
Blog — PlanetScale
Blog — PlanetScale

GeekPlux

How to Sync Logseq Plugins, Themes and Settings Across Multiple Devices Enhance Your Internet Privacy in 2023 Refactor your blog comments system with Webmention.io Three Levels of Information Perception Legacy code best practice: how to take over an existing project smoothly How to use tailwindcss with AMP in a Next.js project netjsongraph.js – Google Summer of Code (GSoC) 2017 summary
Setting Up Umami as Your Google Analytics Alternative: A Step-by-Step Guide
GeekPlux · 2023-07-08 · via GeekPlux

Umami offers a user-friendly and privacy-focused alternative to the ubiquitous Google Analytics. As an open-source web analytics tool, it provides you with necessary insights about your website's traffic without compromising the privacy of your visitors. In this guide, we will walk you through the process of setting up Umami for your blog using PlanetScale, GitHub, and Vercel.

Step 1: Create an Umami Database on PlanetScale

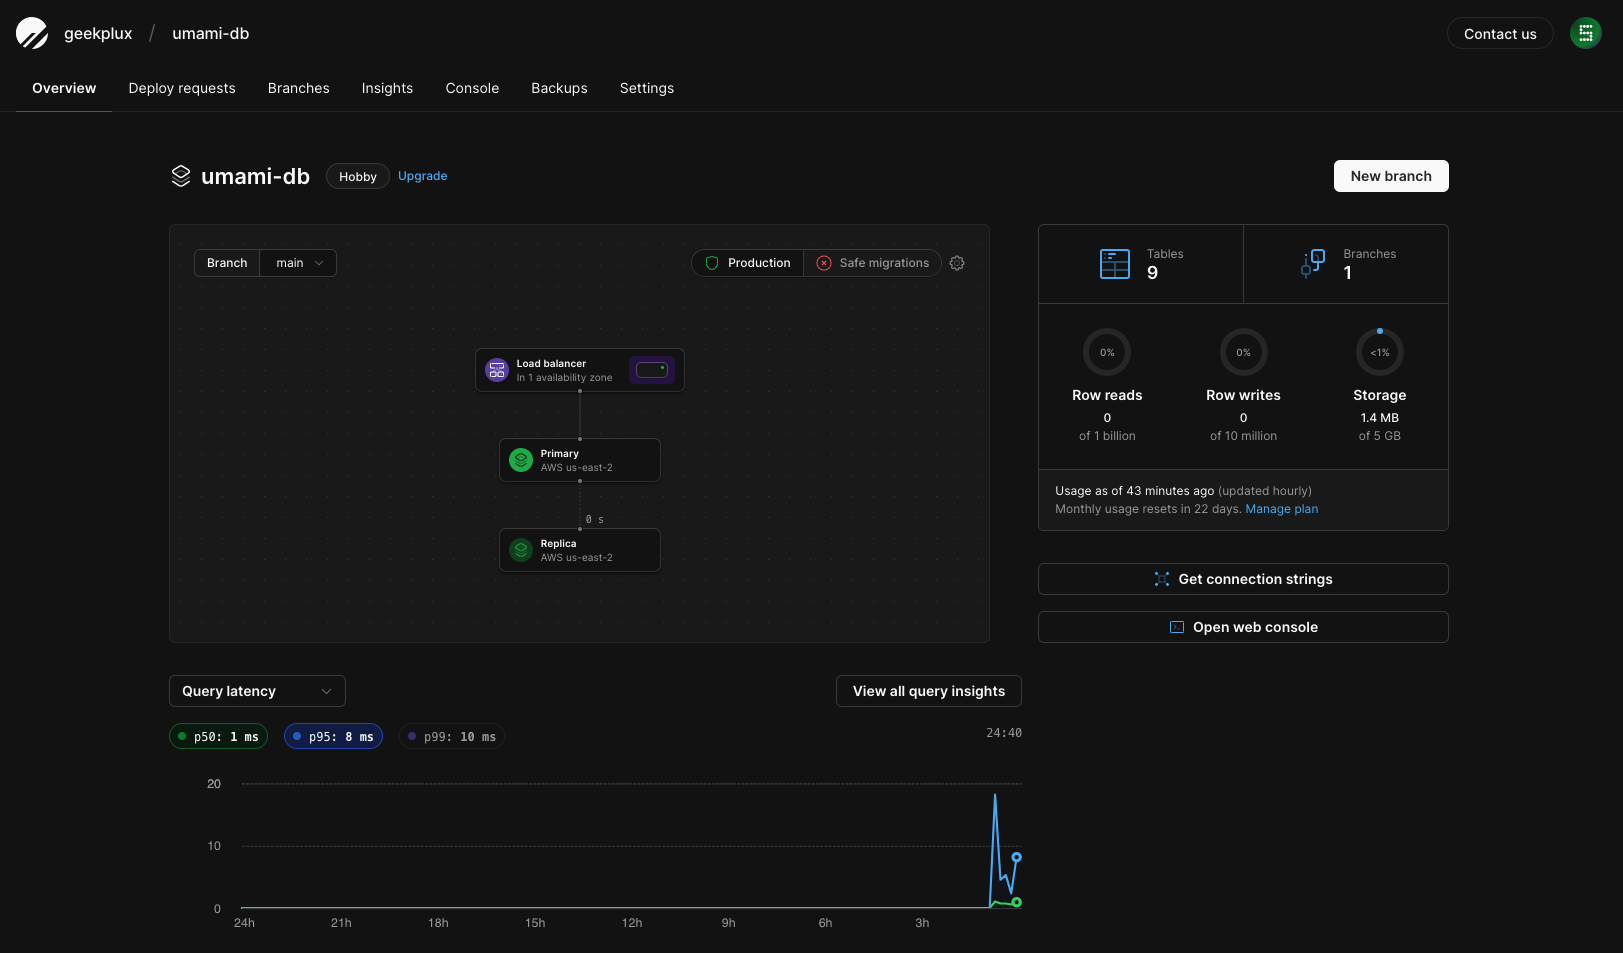
Before you start, you need to create an Umami database on PlanetScale. This will store your site's analytics data that Umami will collect.

  • Navigate to the PlanetScale dashboard.
  • Click on the 'Create Database' button and name it 'umami-db'.

The creation process may take a few moments. Upon completion, you will be able to see your new 'umami-db' listed on your PlanetScale dashboard.

Step 2: Fork the Umami Project on GitHub

Next, we will clone the Umami project to our own GitHub account.

The Umami project will now be copied into your GitHub account.

Step 3: Import Your Umami Project on Vercel

Vercel will be used to deploy our Umami analytics.

  • Head over to your Vercel dashboard.
  • Choose 'Import Project' and select the Umami project from your GitHub repositories.

Vercel will automatically start deploying the project.

Step 4: Configure PlanetScale Integration to Vercel

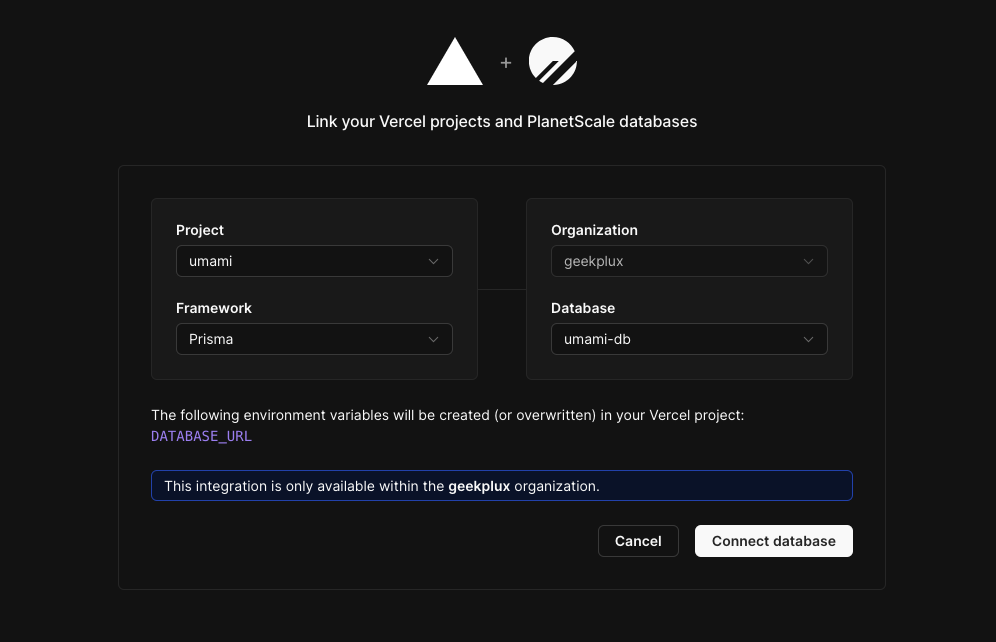
We will now integrate the 'umami-db' database with our Umami project on Vercel.

  • Return to your PlanetScale dashboard.
  • Navigate to the 'Integrations' section and select 'Vercel' as your choice.
  • Connect your 'umami' project with your 'umami-db' database.
  • Choose 'Prisma' as the connection method.

This process will automatically fill in the 'DATABASE_URL' environment variable in your Vercel project.

Step 5: Redeploy Umami on Vercel

With the database connected, we now need to redeploy our Umami project on Vercel.

  • Go back to your Vercel dashboard.
  • Navigate to your Umami project and click 'Redeploy'.

The deployment process will begin. After completion, you will be able to see the new deployment in your Vercel project dashboard.

Step 6: Configure Umami to Track Your Website

Finally, we will add our blog to Umami to start tracking.

  • Head over to your deployed Umami dashboard.
  • Click 'Add Website' and fill in the details of your blog.
  • Copy the generated tracking code.
  • Paste this tracking code into the HTML of your blog.

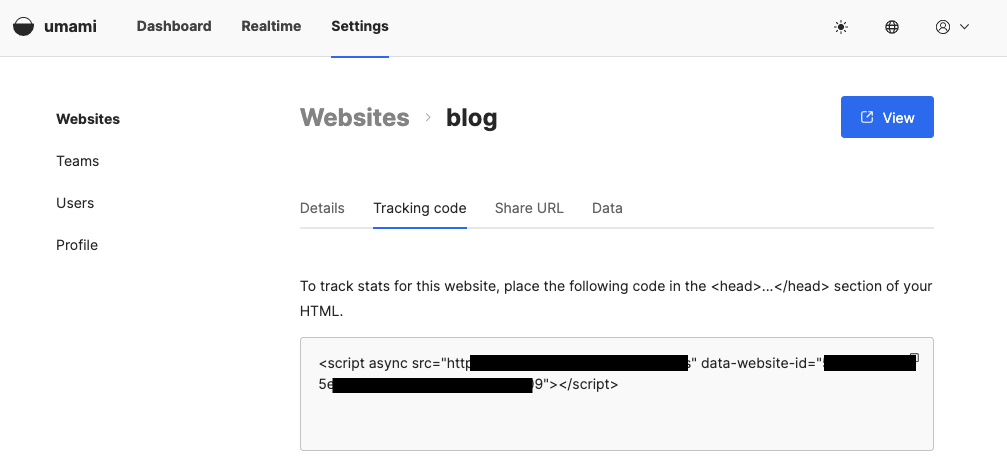
Congratulations, you've successfully set up Umami for your blog! Now, your website's performance and visitor behavior can be monitored right from your Umami dashboard.

However, if you'd rather not host this service yourself, consider purchasing services from alternatives such as Plausible or Fathom. These options offer excellent analytics capabilities without the need for self-hosting.

This whole process is surprisingly simple and only requires a few clicks of your mouse. Enjoy your newfound analytical power with Umami or its excellent alternatives!