





如何配置 nexus 私服,这个问题很早之前就已经研究过,博客也发表过此文章: 使用 nexus3 配置 maven 私有仓库 (opens new window) ,本文来介绍当我们私服配置完毕之后,如何将本地开发的依赖包,上传到 nexus 私服中。
这个跟 Python 私服有点类似:
其实用一句话来表述,就是 通过私服拉包的时候,走 group 的代理,从本地上传包的时候,要走 local 的仓库。 但 maven 在 local 仓库的基础上,又开拓出了两个子概念,releases 和 snapshots,简单讲就是,开发过程中用到的包,未达到稳定状态时,那么这个包应该放到 snapshots 当中,已经达到稳定生产可用状态的包,应该放到 releases 中,这两个区别不大,只是一个逻辑分组,下文会讲解到。
接下来就记录一下配置方法并用测试包来验证下。
创建私服的过程这里不详述了,已知现有 maven 私仓,物料信息如下:
本文将介绍一个通过本地上传的方式处理包依赖的流程。
要想通过私服拉取或者上传依赖,首先需要在 maven 的配置文件当中将配置指向我们的私服。
$ cat settings.xml
<?xml version="1.0" encoding="UTF-8"?>
<settings xmlns="http://maven.apache.org/SETTINGS/1.0.0" xmlns:xsi="http://www.w3.org/2001/XMLSchema-instance" xsi:schemaLocation="http://maven.apache.org/SETTINGS/1.0.0 http://maven.apache.org/xsd/settings-1.0.0.xsd">

    <!-- 设置本地仓库路径 -->
    <localRepository>~/.m2/prod-repository</localRepository>
    <!-- 设置发布 jar 包时的用户名及密码 -->
    <servers>
        <server>
            <id>releases</id>
            <username>admin</username>
            <password>admin</password>
        </server>

        <server>
            <id>snapshots</id>
            <username>admin</username>
            <password>admin</password>
        </server>
    </servers>

    <!-- 设置 maven 的远程仓库为 nexus -->
    <mirrors>
        <mirror>
            <id>public</id>
            <mirrorOf>*</mirrorOf>
            <name>public</name>
            <url>http://localhost:8931/repository/maven-public/</url>
        </mirror>
        <mirror>
            <id>releases</id>
            <mirrorOf>*</mirrorOf>
            <name>maven-releases</name>
            <url>http://localhost:8931/repository/maven-releases/</url>
        </mirror>
        <mirror>
            <id>snapshots</id>
            <mirrorOf>*</mirrorOf>
            <name>Local Repository</name>
            <url>http://localhost:8931/repository/maven-snapshots/</url>
        </mirror>
    </mirrors>

    <profiles>
        <profile>
            <id>central</id>
            <repositories>
                <repository>
                    <id>nexus</id>
                    <url>http://localhost:8931/repository/maven-public/</url>
                    <releases><enabled>true</enabled></releases>
                    <snapshots><enabled>true</enabled></snapshots>
                </repository>
            </repositories>
        </profile>
    </profiles>

    <activeProfiles>
        <activeProfile>central</activeProfile>
    </activeProfiles>

    <pluginGroups>
        <pluginGroup>org.mortbay.jetty</pluginGroup>
        <pluginGroup>org.codehaus.cargo</pluginGroup>
    </pluginGroups>
</settings>
1
2
3
4
5
6
7
8
9
10
11
12
13
14
15
16
17
18
19
20
21
22
23
24
25
26
27
28
29
30
31
32
33
34
35
36
37
38
39
40
41
42
43
44
45
46
47
48
49
50
51
52
53
54
55
56
57
58
59
60
61
62
63
64
65
66
67
这样我们在本地拉包的时候就能与私服进行交互了。
其实在 nexus 当中,也支持直接在 web 当中上传依赖包的,这里以 jenkins-client 包来举例。
在阿里的 maven 仓库中搜索,找到 0.3.6 版本。
在阿里搜索到的结果如下:
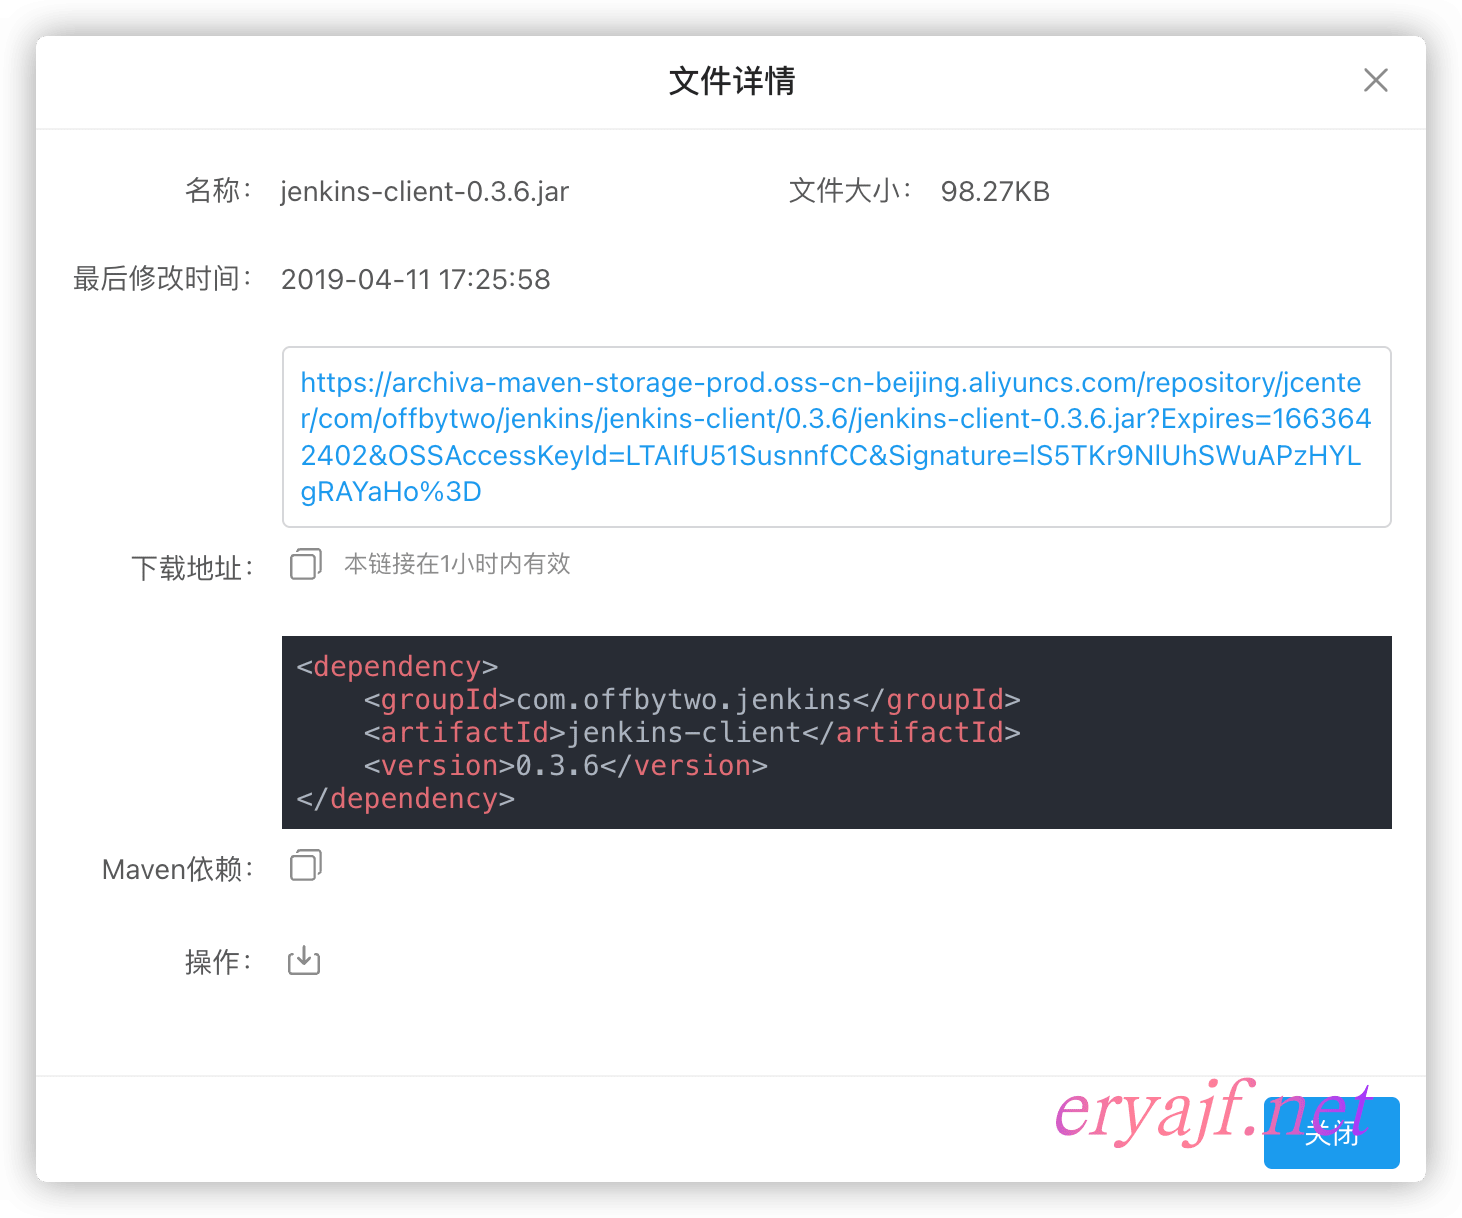
将包下载到本地,然后来到 nexus 私服当中,上传刚刚下载好的包,并把相关信息填写完整:

然后点击上传。
接着来到仓库中,可以看到对应的包已经成功上传到了仓库当中。
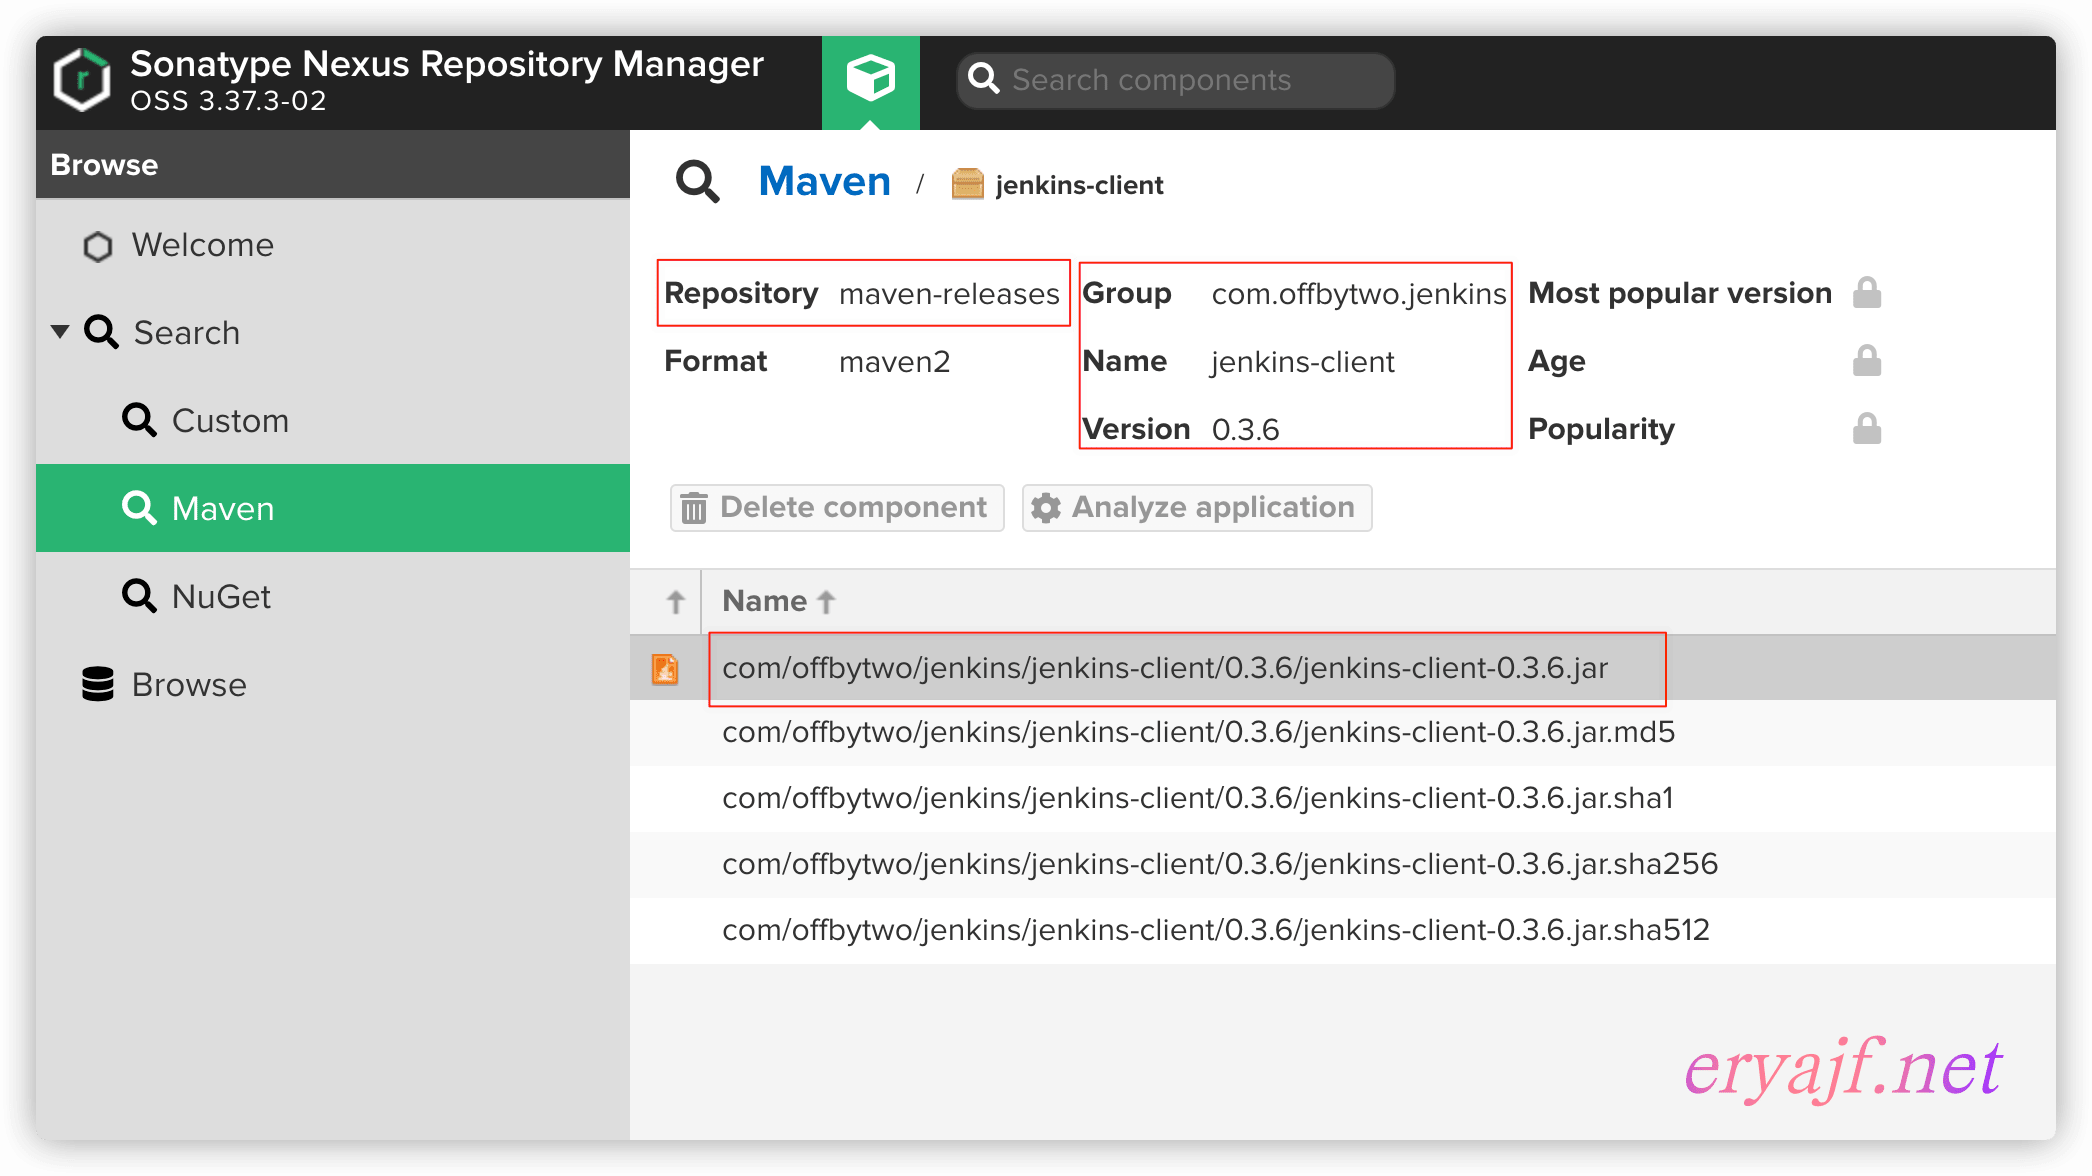
这里分两种,一种通过 pom 文件进行上传,一种是直接将 jar 文件上传,我们先来介绍基于 pom 文件的上传方式。
将如下内容添加到我们的 pom 文件当中,就可以通过命令行一键将依赖上传到 nexus 仓库中。
  <distributionManagement>
    <repository>
        <id>releases</id>
        <name>Nexus ReleaseRepository</name>
        <url>http://localhost:8931/repository/maven-releases/</url>
    </repository>
    <snapshotRepository>
        <id>snapshots</id>
        <name>Nexus SnapshotRepository</name>
        <url>http://localhost:8931/repository/maven-snapshots/</url>
    </snapshotRepository>
  </distributionManagement>
1
2
3
4
5
6
7
8
9
10
11
12
注意其中的 id 与 settings 当中的 id 是对应的。
一个标准的 pom 上传文件内容如下,这里示例将 jenkins-client-v0.3.7 版本的包传到私服:
<?xml version="1.0" encoding="UTF-8"?>

<project xmlns="http://maven.apache.org/POM/4.0.0" xmlns:xsi="http://www.w3.org/2001/XMLSchema-instance" xsi:schemaLocation="http://maven.apache.org/POM/4.0.0 http://maven.apache.org/xsd/maven-4.0.0.xsd">

    <modelVersion>4.0.0</modelVersion>
        <groupId>com.offbytwo.jenkins</groupId>
        <artifactId>jenkins-client</artifactId>
        <version>0.3.7</version>
    <name>jenkins-client</name>

    <distributionManagement>
        <repository>
            <id>releases</id>
            <url>http://localhost:8931/repository/maven-releases/</url>
        </repository>
        <snapshotRepository>
            <id>snapshots</id>
            <url>http://localhost:8931/repository/maven-snapshots/</url>
        </snapshotRepository>
      </distributionManagement>
</project>
1
2
3
4
5
6
7
8
9
10
11
12
13
14
15
16
17
18
19
20
21
注意:如果 version 内容为 <version>0.3.7-SNAPSHOT</version>,则这个包将会自动传到 snapshot 分区当中,而不会传到 release 分区,反之亦然。
配置完毕之后,执行如下命令进行上传:
$ mvn -s settings.xml deploy -Dmaven.test.skip -Dmaven.install.skip
[INFO] Scanning for projects...
[INFO]
[INFO] ----------------< com.offbytwo.jenkins:jenkins-client >-----------------
[INFO] Building jenkins-client 0.3.7
[INFO] --------------------------------[ jar ]---------------------------------
Downloading from public: http://localhost:8931/repository/maven-public/org/apache/maven/plugins/maven-resources-plugin/2.6/maven-resources-plugin-2.6.pom

---中间日志省略---

[INFO] ------------------------------------------------------------------------
[INFO] BUILD SUCCESS
[INFO] ------------------------------------------------------------------------
[INFO] Total time: 01:36 min
[INFO] Finished at: 2022-09-20T15:58:53+08:00
[INFO] ------------------------------------------------------------------------
1
2
3
4
5
6
7
8
9
10
11
12
13
14
15
16
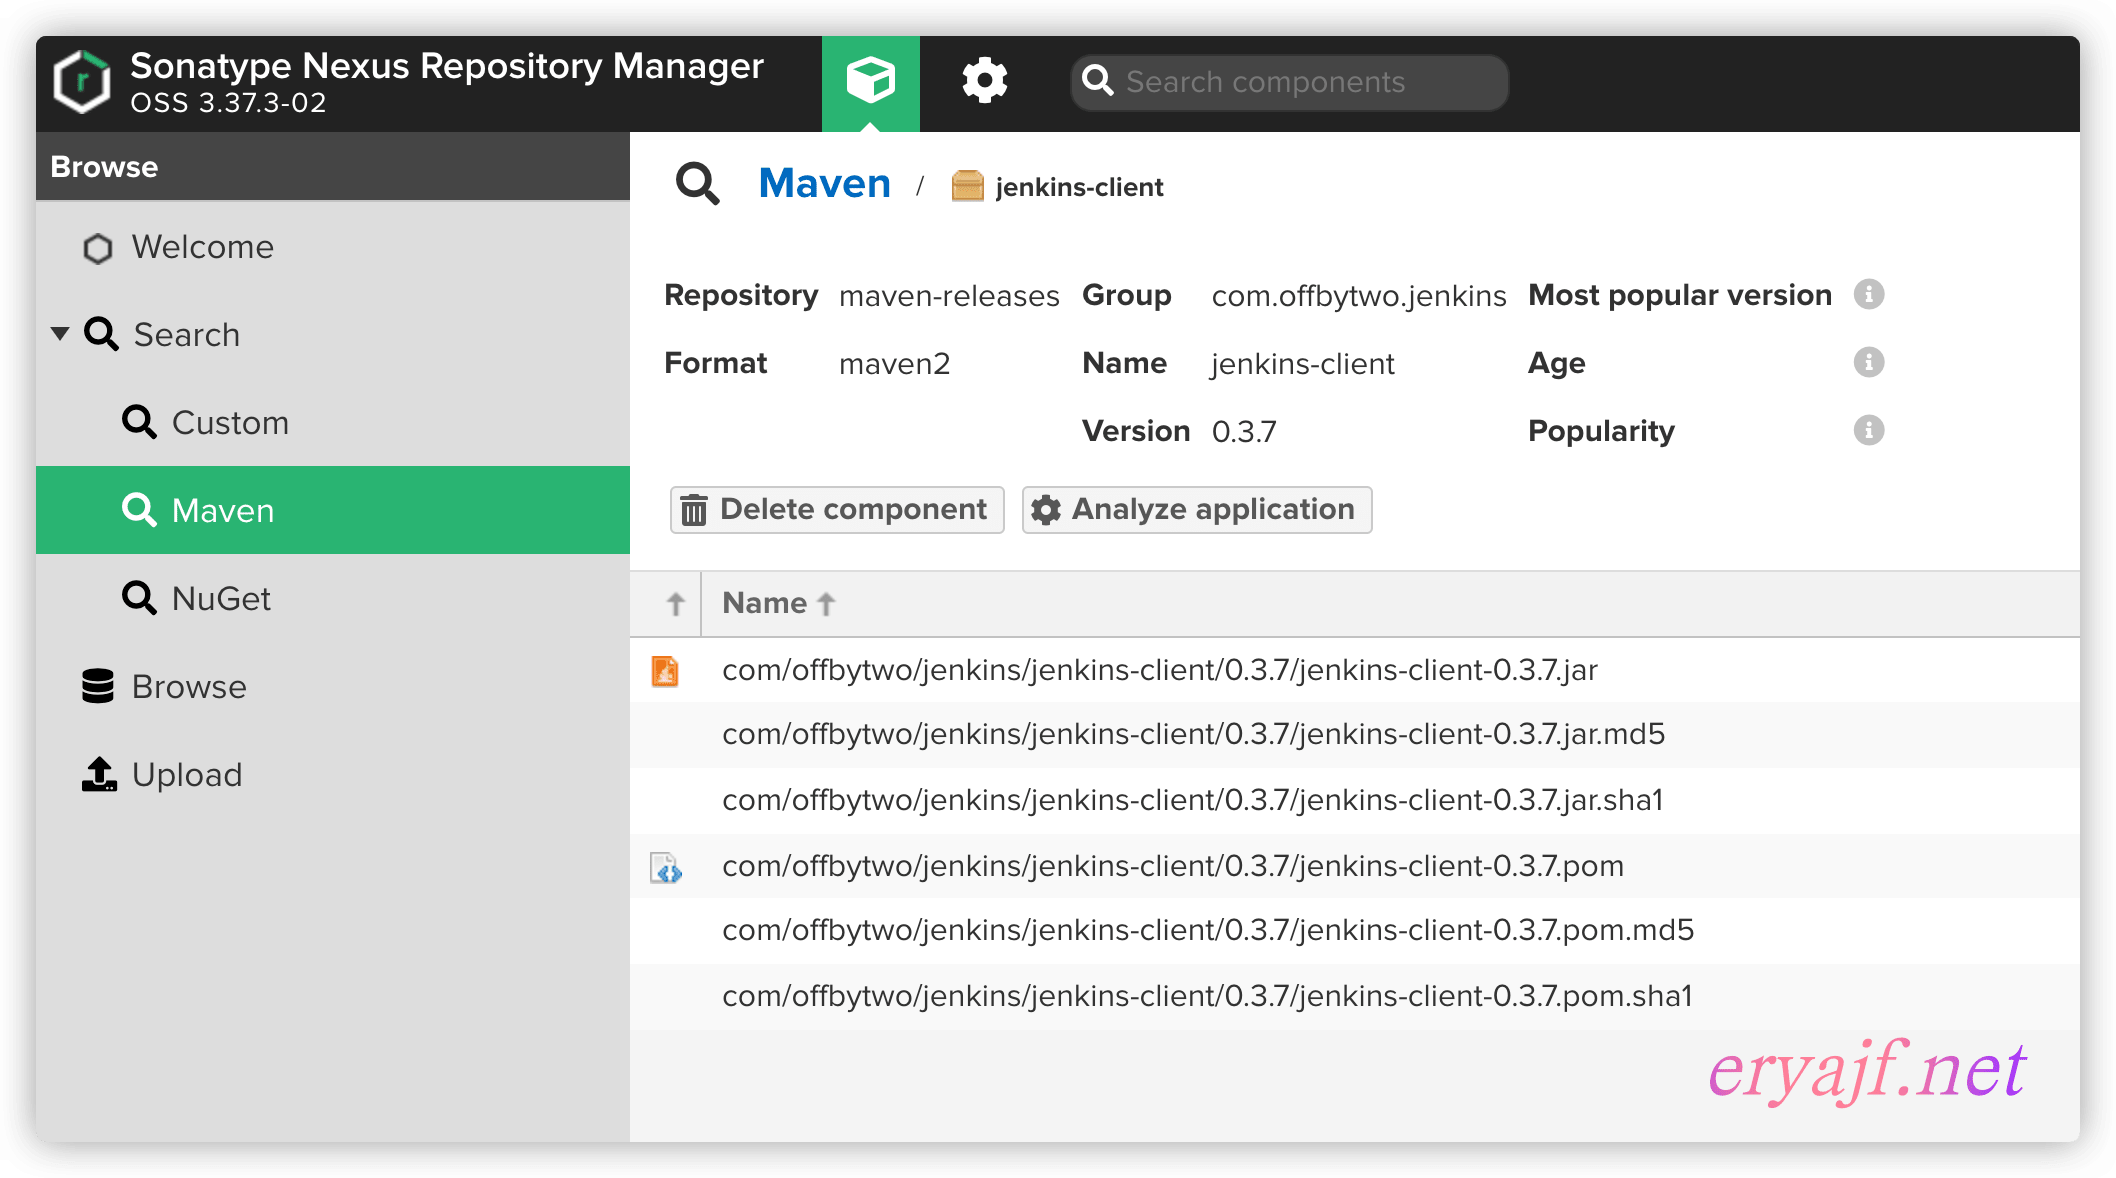
执行完毕之后,我们可以来到私服当中看到对应的依赖包:
申明
原创文章eryajf,未经授权,严禁转载,侵权必究!此乃文中随机水印,敬请读者谅解。
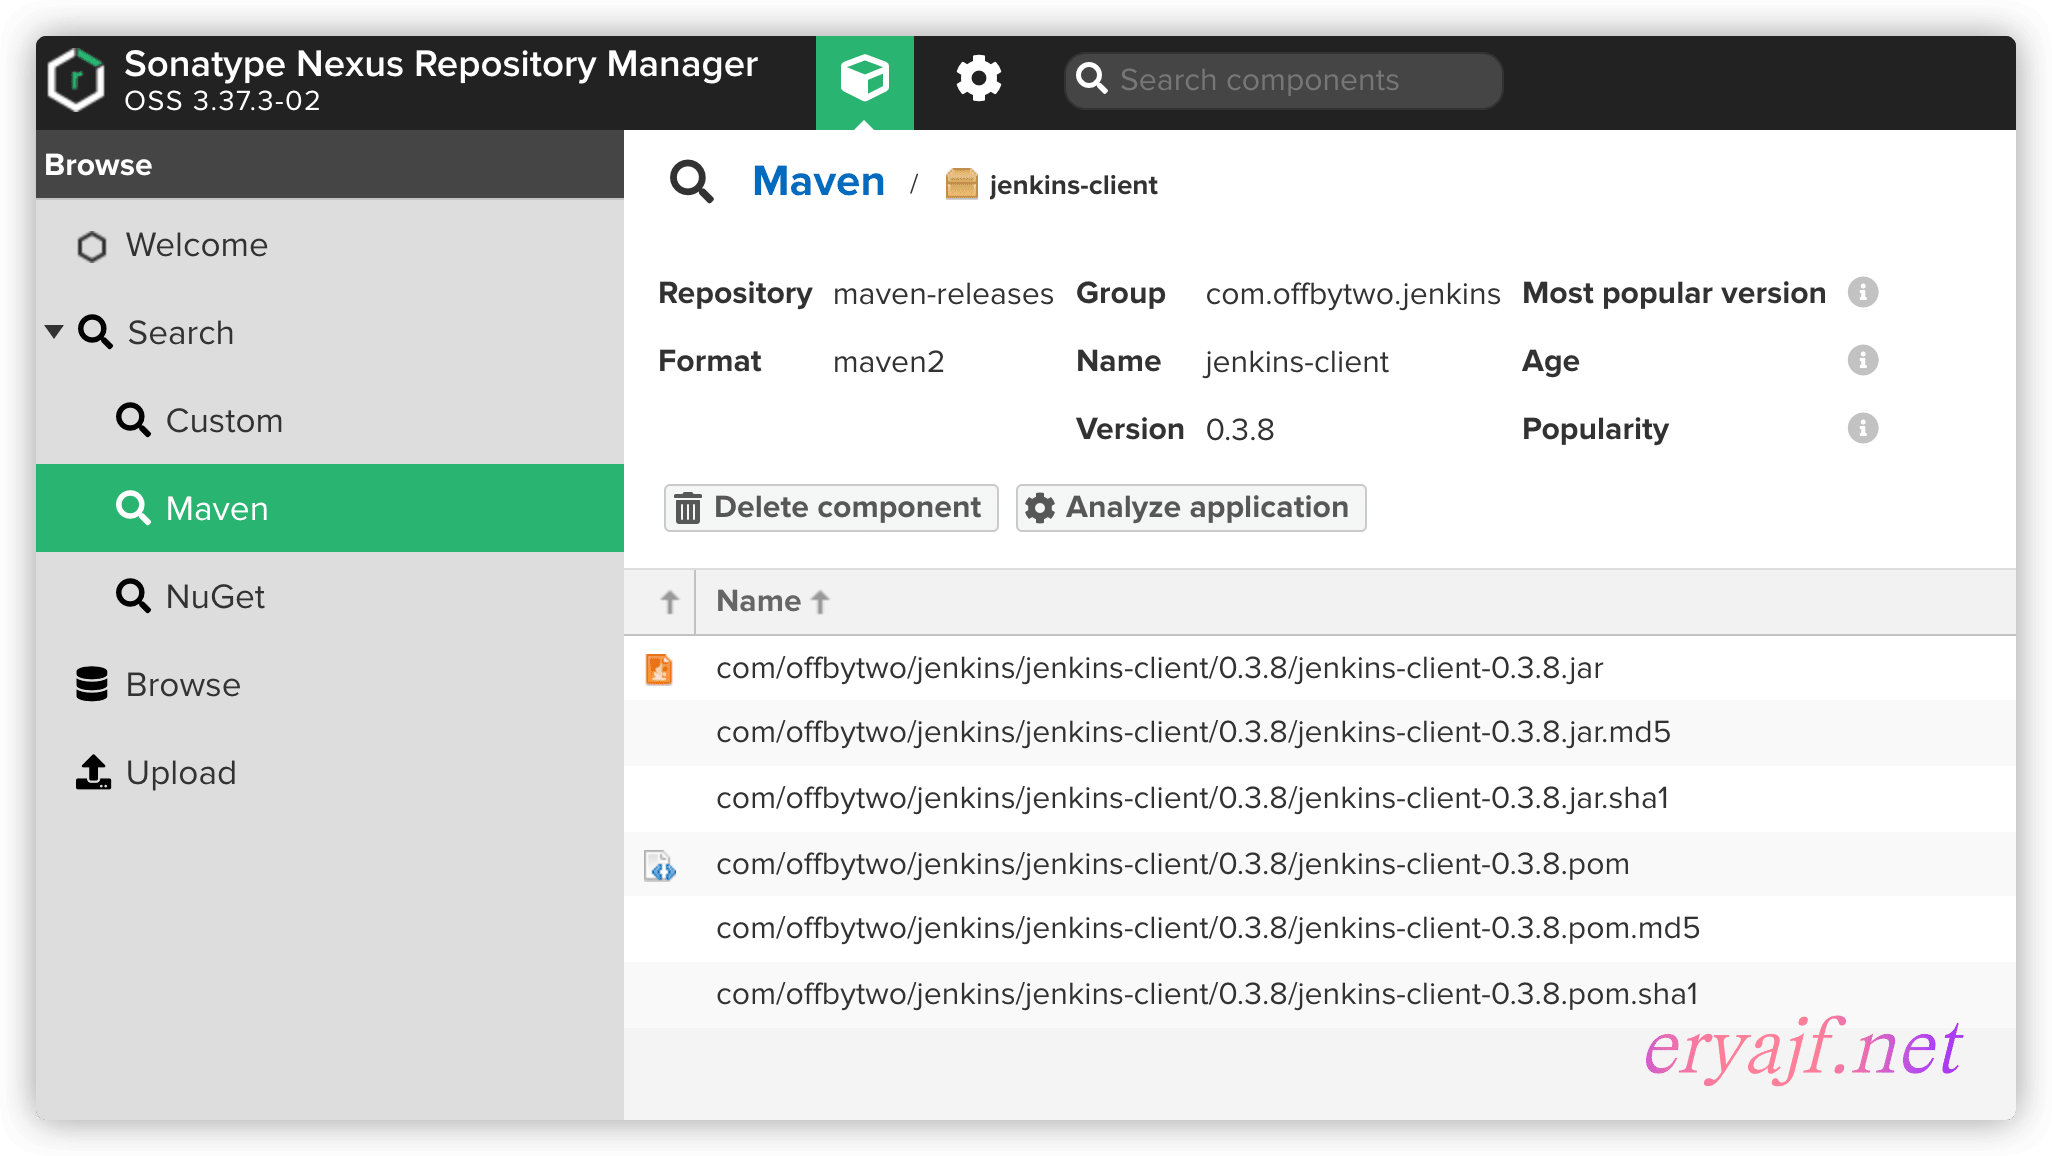
我们把 v0.3.8 的包下载到本地,然后执行如下命令进行上传:
mvn deploy:deploy-file \
    -DgroupId=com.offbytwo.jenkins \
    -DartifactId=jenkins-client \
    -Dversion=0.3.8 \
    -Dfile=/root/liql/jenkins-client-0.3.8.jar \
    -Durl=http://localhost:8931/repository/maven-releases/ \
    -DrepositoryId=releases \
    -s settings.xml
1
2
3
4
5
6
7
8
看到 BUILD SUCCESS 则说明上传成功。
来到仓库当中,也可以看到这个版本的依赖包了:
我在本地执行命令行直接上传的时候,始终无法正常上传,报错如下:
[ERROR] Could not find goal 'deploy-file ' in plugin org.apache.maven.plugins:maven-deploy-plugin:2.7 among available goals deploy-file, help, deploy -> [Help 1]
[ERROR]
[ERROR] To see the full stack trace of the errors, re-run Maven with the -e switch.
[ERROR] Re-run Maven using the -X switch to enable full debug logging.
[ERROR]
[ERROR] For more information about the errors and possible solutions, please read the following articles:
[ERROR] [Help 1] http://cwiki.apache.org/confluence/display/MAVEN/MojoNotFoundException
1
2
3
4
5
6
7
看到有地方说是 mvn 版本的问题,但据我测试下来,并不是版本的问题,大概可能是我电脑为 m1 版本的缘故,如上指令在 centos 上测试正常运行。
此内容由惯性聚合(RSS阅读器)自动聚合整理,仅供阅读参考。 原文来自 — 版权归原作者所有。