Key Points:
The Sidecar pattern decouples cross-cutting concerns from business logic components, thereby improving maintainability and reducing complexity.
A Sidecar can be built alongside a microservice, but it can also be implemented using a different technology stack than the microservice itself.
Sidecars can be reused across multiple services, providing out-of-the-box support for configuration, logging, tracing, and publish-subscribe messaging.
The Sidecar pattern reduces coupling between components without increasing complexity, and enhances the scalability, maintainability, and efficiency of microservice-based applications.
While Sidecars are well-suited for providing out-of-the-box support for implementing cross-cutting capabilities, you would typically avoid using them for extremely latency-sensitive workloads to prevent additional network hops and resource overhead.
Modern applications require capabilities such as monitoring, logging, and configuration management. Each of these concerns can be implemented as a component or service. These cross-cutting concerns can also be tightly integrated with the application. While such tight coupling ensures efficient utilization of shared resources, a failure in any one of these components can bring down the entire application. This is where the Sidecar design pattern comes into play.
The Sidecar design pattern helps dynamic services (i.e., microservices) continuously obtain the resources and data they need while remaining lightweight and avoiding the burden of carrying excessive internal logic. In this article, we will explore the Sidecar design pattern, its advantages, and how to implement it in microservices-based applications. We will also discuss common issues typically encountered when using Sidecars and how to mitigate them.
To run the code examples discussed in this article, your system should have Visual Studio, ASP.NET Core, and Docker installed. Note that when you install Visual Studio on your computer, you can also install ASP.NET Core simultaneously through the Visual Studio Installer.
Download Visual Studio and Docker Desktop. You will also need Elastic Search, which we will install via NuGet.
A microservice architecture consists of a set of services built using different languages and technologies. Managing the dependencies of these specific language interfaces often adds significant complexity. Additionally, due to its distributed nature, a microservice architecture brings various challenges.
When building applications based on distributed microservices, handling cross-cutting concerns such as logging, authentication, and authorization can be very difficult. This is where the Sidecar pattern comes into play.
The Sidecar pattern helps achieve component isolation and encapsulation by deploying application components into separate processes or containers. It is called "Sidecar" because this design pattern resembles a sidecar attached to a motorcycle. Essentially, the Sidecar design pattern helps you build applications composed of different components and technologies.
The Sidecar design pattern is typically implemented through containers, where an auxiliary container known as the "Sidecar" runs alongside the main application.
These Sidecar containers provide additional functionality to the application and handle tasks that do not need to be included in the main application, such as logging, monitoring, configuration, and security.
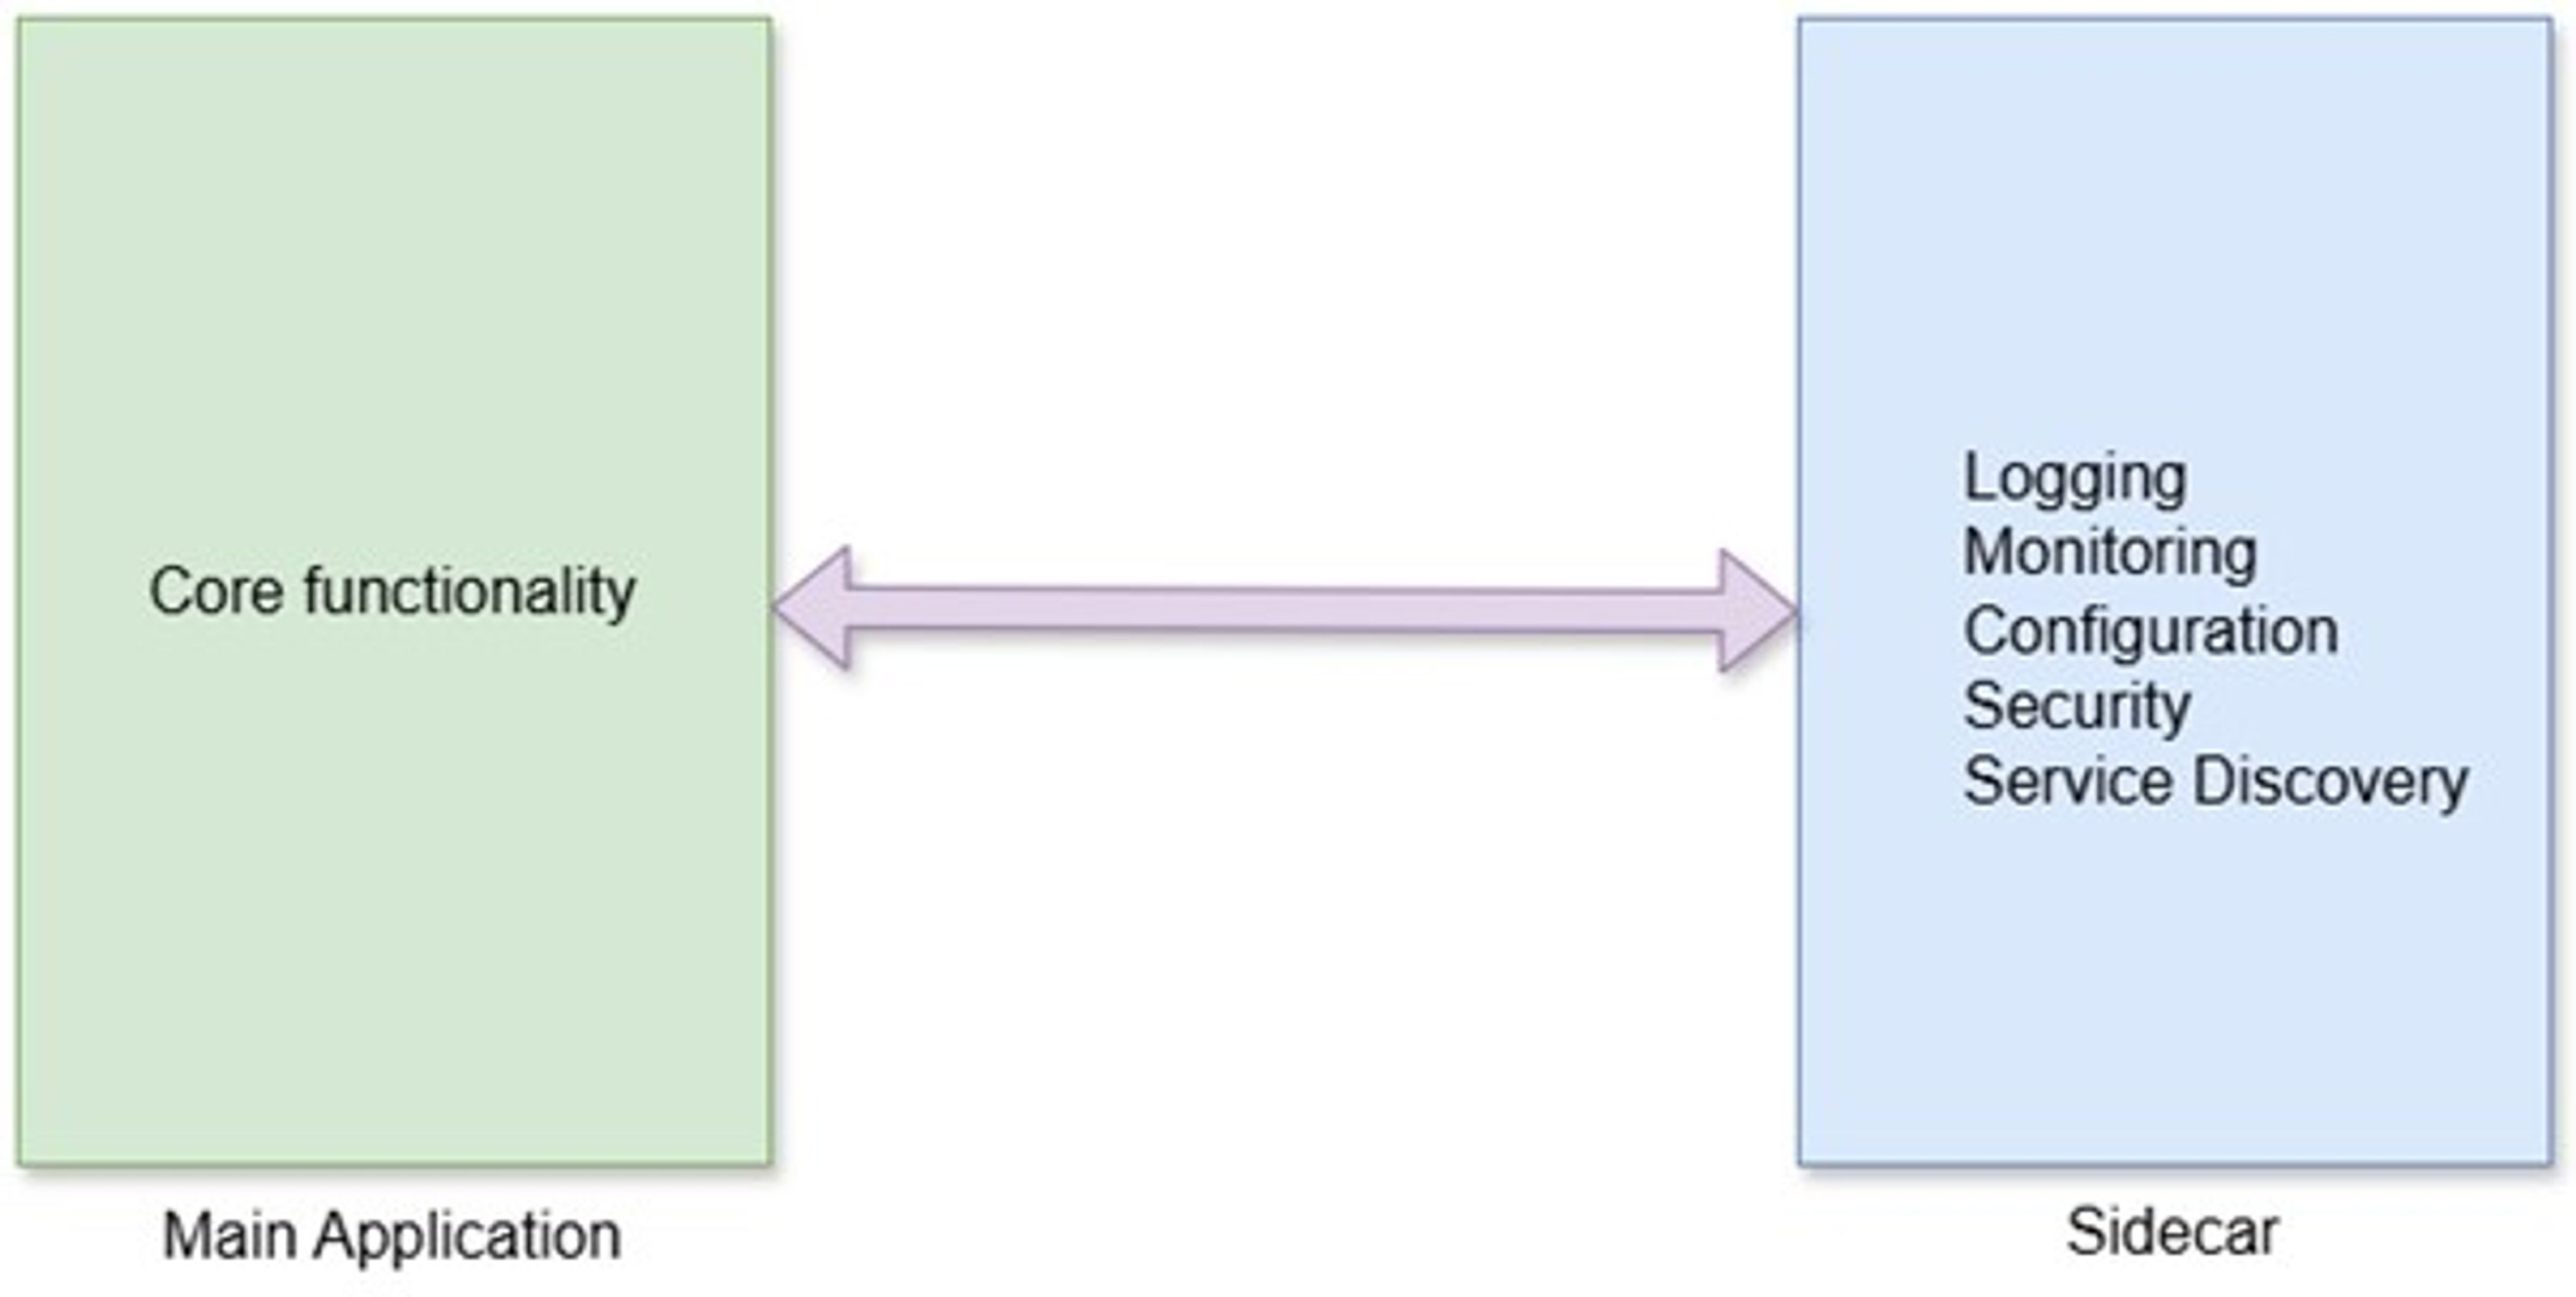
Figure 1. Sidecar Diagram
The Sidecar is tightly coupled with the parent application, sharing a similar lifecycle, and is built and destroyed together with the parent application. If you use a Sidecar container alongside the main container hosting an ASP.NET Core microservice, the main container will handle the core business functions of the application, while the Sidecar container will take on auxiliary responsibilities, such as:
Logging
Monitoring
Distributed Tracing
Security Policy Enforcement
Service Discovery
Traffic Routing
Communication
Here is a quick overview of the advantages of the Sidecar design pattern:
Reduces complexity by isolating cross-cutting concerns into independent components and running them separately from the main application.
Language-agnostic, allowing you to build it using multiple different programming languages.
Reduces code redundancy by including all necessary modules and running them alongside the microservice.
Reduces latency by using localhost/shared network (though compared to in-process solutions, the Sidecar may still introduce some latency).
Enhances scalability by attaching the Sidecar as an independent process to the same host or sub-container, allowing the application to scale as needed.
In this section, we will explore the challenges of logging in distributed applications and understand how the Sidecar design pattern can play a role here.
Logging is a cross-cutting concern commonly used to capture and store event records during application runtime. In distributed applications, logs are more often used to monitor runtime behavior, collect performance-related metadata, and locate issues.
However, in typical microservices-based applications, logging can introduce significant overhead. For example, due to the massive volume of log data in distributed services, as well as the additional consumption of resources such as CPU, memory, and network when collecting, aggregating, and transmitting logs to backend components.
As a result, application latency increases while throughput decreases. Additionally, because microservices are ephemeral, aggregating logs in a dynamic environment becomes more difficult. You need to use Correlation IDs to correlate distributed microservices, but this introduces additional processing overhead.
The Sidecar design pattern can help alleviate the above challenges. It enables concern isolation, formats data according to application requirements, and reduces complexity and code redundancy. You can leverage the Sidecar design pattern to unify logging methods, collect metrics, and monitor application health without modifying the main application codebase.
In this section, we will explore how to implement distributed logging in a microservices-based application and how Sidecar containers can help collect and consolidate logs for each microservice. To build this application, we will use the following technologies and tools:
Visual Studio (IDE)
ASP.NET Core (Web application development framework)
C# (Programming language)
Docker Desktop for Windows (Containerization tool)
Elasticsearch (Installed via NuGet)
This application simulates a typical inventory management system, consisting of two microservices (i.e., Transactions API and Sidecar API). The former acts as a producer sending log messages, while the latter is responsible for consuming these messages and sending them to Elasticsearch.
It is important to note that the Transactions API does not directly call the Sidecar API. Instead, the Create action method in the Transactions controller sends log messages to a concurrent queue, which then stores the messages in a text file within a shared directory on the local file system. The Sidecar API reads these stored messages from the shared directory, processes them, and then sends them to Elasticsearch.
Below is an overview of the complete flow of this application:
The client calls the HTTP Post endpoint represented by the Create action method in the TransactionsController.
The Create operation method does not write directly to disk or send messages directly to Elasticsearch; instead, it adds messages to a custom concurrent queue.
The controller immediately returns an HTTP response; log persistence is offloaded to a background service for processing.
The background service in TransactionsAPI uses a thread-safe file logger to persist these messages to text files in a shared directory.
In SidecarAPI, another background service reads these log messages from the local file system.
Finally, the background service in SidecarAPI sends the log messages to Elasticsearch.
In this application, we will create the following types:
TransactionsAPI
TransactionRequest record
LogLevels enum
TransactionType enum
TransactionsController class
ISidecarMessageQueue interface
SidecarMessageQueue class
ThreadSafeFileLogger class
IThreadSafeFileLogger interface
TransactionsBackgroundService class
SidecarAPI
LogMessage record
LogsController class
IElasticSearchClientService interface
ElasticSearchClientService class
SidecarBackgroundService class
SidecarSettings class
A typical inventory management system usually includes the following entities: Product, Stock, Transactions, Supplier, Customer, and Orders. To simplify the example and keep the content concise, we will only use the Transaction entity in this case. To implement this application, we will proceed with the following steps:
Create a blank solution in Visual Studio
Create a TransactionsAPI ASP.NET Core Web API project and add it to the solution
Create a SidecarAPI ASP.NET Core Web API project and add it to the solution
Create Dockerfiles for the two microservices
Create a Docker Compose file for running the microservices
Build and run the Docker Compose stack
Launch the Visual Studio IDE, select "Blank Solution" as the project template, and create a new blank solution without any projects. You can name the blank solution "InventoryManagementSystem".
Since this example uses two microservices (TransactionsAPI and SidecarAPI), you should create separate projects for each microservice. Now, follow these steps to create new projects corresponding to these two microservices in the solution:
Right-click the solution in the Solution Explorer window and select Add - > New project….
In the Add a new project window, select ASP.NET Core Web API as the project template.
Click Next. In the Configure your new project window, specify the project name as TransactionsAPI and set the save path for the project on the local computer.
Click Next. In the Additional Information dialog, specify the framework version to use.
Check the "Enable container support" checkbox and specify Container OS as Linux. Finally, click Create.
Repeat the same steps to create the SidecarAPI microservice. Figure 2 shows the final result of Solution Explorer:
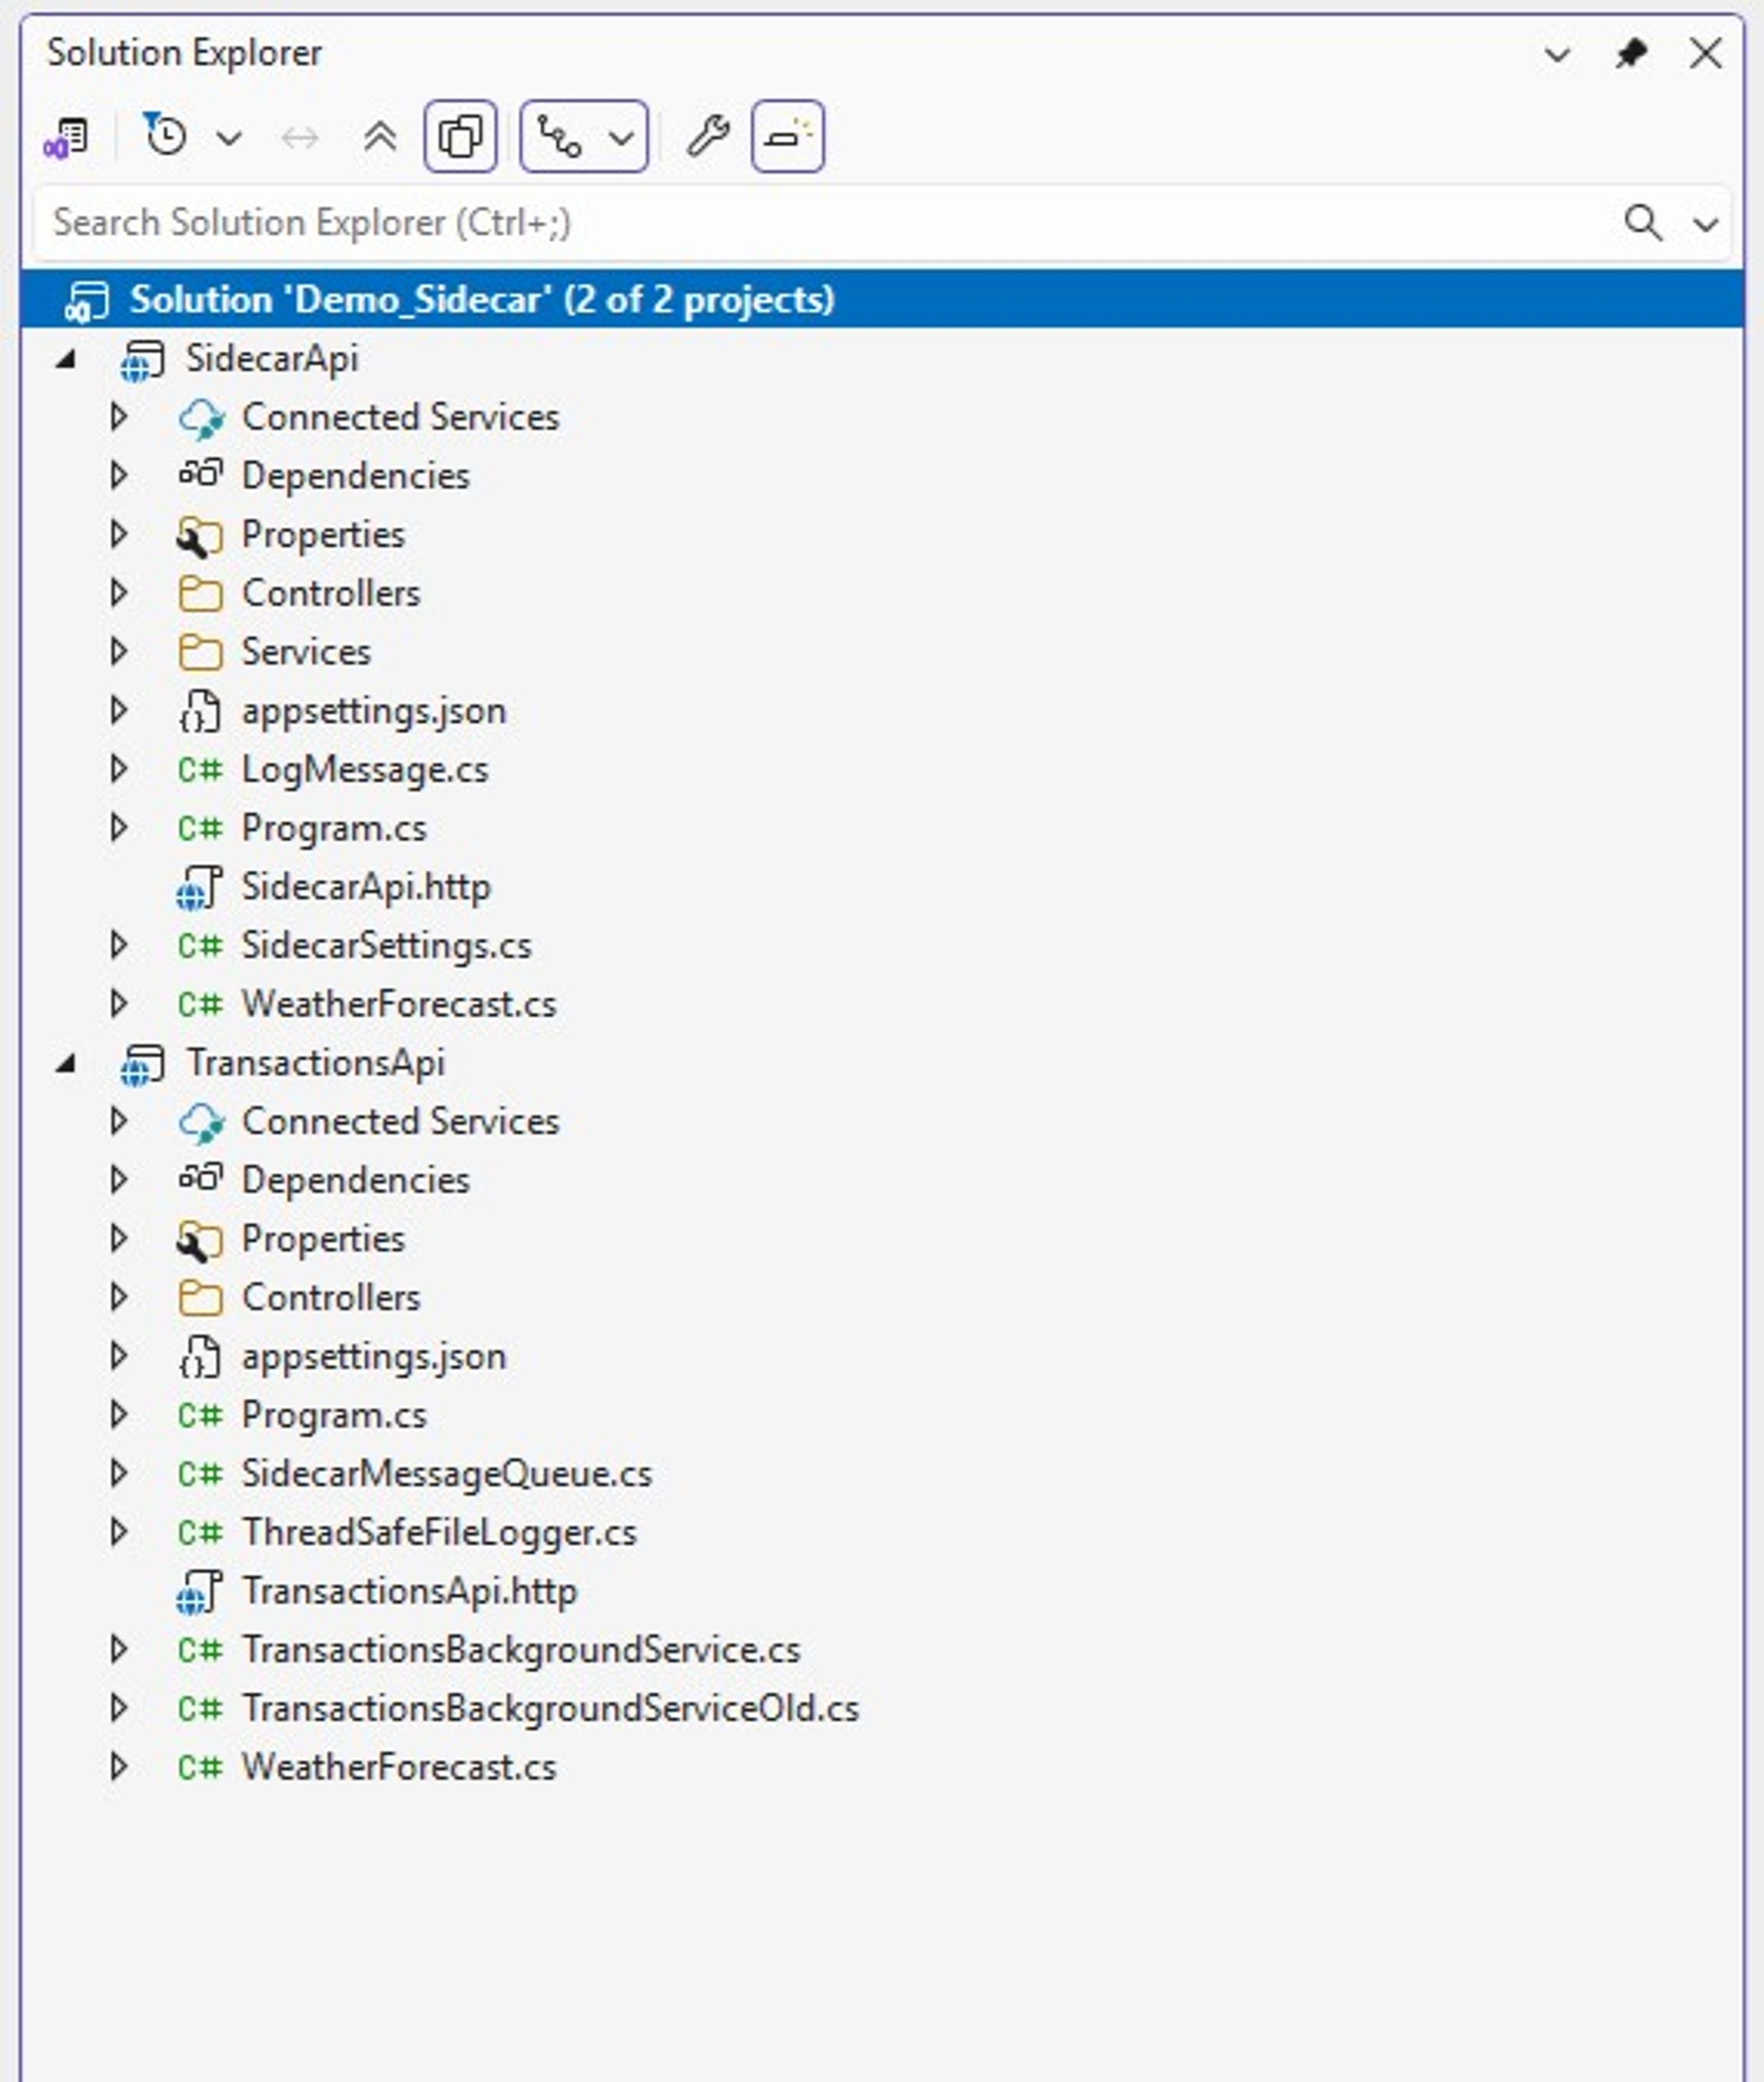
Figure 2: Solution Explorer displaying two projects
In the TransactionsAPI project, create a file named TransactionRequest.cs, and within it, create a record type named TransactionRequest. This type will be used to store transaction data in memory. Replace the default generated code with the following:
public record TransactionRequest{ public required int TransactionId { get; init; } [JsonConverter(typeof(JsonStringEnumConverter))] public required TransactionType TransactionType { get; init; } public required DateTime TransactionDate { get; init; } public required int TransactionQuantity { get; init; }}Copy code
public enum TransactionType{ Pending, Dispatched, Shipped, Delivered, Cancelled}Copy code
TransactionsAPI corresponds to the microservice that handles business transactions and generates logs. To simplify the example, business processing logic is not provided here.
The workflow of TransactionsAPI is as follows:
The client calls the HTTP POST /api/transactions endpoint and passes the required transaction data.
The action method corresponding to this endpoint sends or adds the transaction message to an in-memory queue.
TransactionBackgroundService runs at fixed intervals, retrieves these messages from the queue, and stores them in a text file in a shared directory.
In the TransactionsAPI microservice, we will create a file logger to store messages in a text file. To achieve this, we need to create two types: an interface named IThreadSafeFileLogger and a class named ThreadSafeLogger that implements the methods of the interface.
The following code demonstrates the IThreadSafeFileLogger interface:
public interface IThreadSafeFileLogger{ Task SendMessageAsync(string message); Task SendMessageAsync(string level, string message);} Copy code
The following code demonstrates how the ThreadSafeFileLogger class uses a semaphore to ensure that file write operations are thread-safe, meaning that no two threads can simultaneously access the critical section in the SendMessageAsync method.
public class ThreadSafeFileLogger: IThreadSafeFileLogger{ private static readonly SemaphoreSlim _semaphore = new(1, 1); private readonly IConfiguration _configuration; private readonly string _filePath; public ThreadSafeFileLogger(IConfiguration configuration) { _configuration = configuration; _filePath = _configuration["ApiKeys:FilePath"] ?? throw new InvalidOperationException("Path to file missing ..."); } public async Task SendMessageAsync(string message) { await _semaphore.WaitAsync(); try { await File.AppendAllTextAsync(_filePath, $"{Guid.NewGuid().ToString()} | {message}{Environment.NewLine}"); } finally { _semaphore.Release(); } } public async Task SendMessageAsync(string level, string message) { await _semaphore.WaitAsync(); try { await File.AppendAllTextAsync(_filePath, $"{Guid.NewGuid().ToString()} | {level} | {message}{Environment.NewLine}"); } finally { _semaphore.Release(); } }} Copy code
In the TransactionsAPI microservice, the TransactionBackgroundService class inherits from the BackgroundService class and implements the ExecuteAsync method. This method is called at fixed intervals, as shown below
public class TransactionsBackgroundService : BackgroundService { private readonly TimeSpan _period = TimeSpan.FromSeconds(5); private readonly ILogger<TransactionsBackgroundService> _logger; private readonly IServiceProvider _serviceProvider; public TransactionsBackgroundService(ILogger<TransactionsBackgroundService> logger, IServiceProvider serviceProvider) { _logger = logger; _serviceProvider = serviceProvider; } protected override async Task ExecuteAsync(CancellationToken stoppingToken) { using PeriodicTimer timer = new PeriodicTimer(_period); using IServiceScope scope = _serviceProvider.CreateScope(); var _transactionsMessageQueue = scope.ServiceProvider.GetRequiredService<ISidecarMessageQueue>(); var threadSafeFileLogger = scope.ServiceProvider.GetRequiredService<IThreadSafeFileLogger>(); while (!stoppingToken.IsCancellationRequested && await timer.WaitForNextTickAsync(stoppingToken)) { _logger.LogInformation("Executing PeriodicBackgroundTask"); while (_transactionsMessageQueue.Count > 0) { string message = await _transactionsMessageQueue.Dequeue(); await threadSafeFileLogger.SendMessageAsync(message); } } } }Copy code
We will also create a custom message queue in the TransactionsAPI microservice project to store log messages generated by the Transactions Controller. The following code shows the ISidecarMessageQueue interface, which includes the declarations of the Enqueue and Dequeue methods.
public interface ISidecarMessageQueue{ int Count { get; } Task Enqueue(string level, string message); Task<string> Dequeue(); Task ClearAsync();}Copy code
The SidecarMessageQueue class implements this interface, as shown below:
public sealed class SidecarMessageQueue: ISidecarMessageQueue{ private readonly ConcurrentQueue<string> queue = new ConcurrentQueue<string>(); public async Task Enqueue(string level, string message) { string str = await BuildMessage(level, message); queue.Enqueue(str); } public async Task<string> Dequeue() { if(queue.TryDequeue(out string? message)) { return message; } return string.Empty;}private async Task<string> BuildMessage(string level, string message){ return $"{level} | {message}{Environment.NewLine}";} public int Count => queue.Count; public async Task ClearAsync() { while (queue.TryDequeue(out _)) { } } }Copy code
Please note that in the previous code, although the BuildMessage method does not perform any asynchronous operations, the async keyword is intentionally used here for future extensibility.
Next, add a new API Controller named TransactionsController and replace the auto-generated code with the following:
[ApiController] [Route("api/[controller]")] public class TransactionsController : ControllerBase { private readonly ISidecarMessageQueue _transactionsMessageQueue; public TransactionsController(ISidecarMessageQueue transactionsMessageQueue) { _transactionsMessageQueue = transactionsMessageQueue; } [HttpPost] public async Task<ActionResult> Create([FromBody] TransactionRequest transactionRequest) { if (transactionRequest.TransactionId <= 0) { await _transactionsMessageQueue.Enqueue(LogLevel.Error.ToString(), "Transaction Id must be > 0."); return BadRequest(); } if (transactionRequest.TransactionQuantity <= 0) { await _transactionsMessageQueue.Enqueue(LogLevel.Error.ToString(), "Transaction Quantity must be > 0."); return BadRequest(); } bool isTransactionTypeValid = Enum.IsDefined(typeof(TransactionType), transactionRequest.TransactionType); if (!isTransactionTypeValid) { await _transactionsMessageQueue.Enqueue(LogLevel.Error.ToString(), $"{transactionRequest.TransactionType} " + $"is an invalid transaction type"); return BadRequest(); } await _transactionsMessageQueue.Enqueue(LogLevel.Information.ToString(), $"Created a new transaction record having transaction Id: " + $"{transactionRequest.TransactionId}"); return Ok(new { success = true, data = transactionRequest, id = transactionRequest.TransactionId }); } }Copy code
As shown in the previous code snippet, the TransactionsController class contains an HttpPost action method. This HttpPost action method receives a reference parameter of a TransactionRequest record type instance from the request body and is used to create a new transaction record. The method also validates the incoming data and sends log messages to the message queue.
The complete source code for the TransactionsController class is available in the source repository.
The SidecarAPI microservice reads application logs stored in a shared directory and forwards them to Elasticsearch. Additionally, SidecarAPI provides an HTTP GET endpoint for querying logs stored in Elasticsearch.
The workflow of SidecarAPI is as follows:
SidecarBackgroundService polls the log file at fixed intervals (configured as every five seconds in this example).
SidecarBackgroundService parses the log text line by line.
SidecarBackgroundService uses ElasticSearchClientService to send these logs to Elasticsearch.
In addition to this Sidecar pattern implementation, you can also use the Distributed Application Runtime (Dapr) to handle cross-cutting concerns. Dapr is an open-source, event-driven runtime that can be used to implement the Sidecar pattern for distributed cloud-native applications in any language and runtime environment.
In the SidecarAPI project, create a file named LogMessage.cs and create a record type named LogMessage within it to store log metadata, such as log messages, log levels, and timestamps, as shown below:
public record LogMessage{ public required string Id { get; init; } public required DateTime Timestamp { get; init; } public required string Message { get; init; }}Copy code
Next, create an API Controller named LogsController and replace the auto-generated code with the following:
using Microsoft.AspNetCore.Mvc;using SidecarApi.Services;[ApiController][Route("api/[controller]")]public class LogsController : ControllerBase{ private readonly IElasticSearchClientService _elasticSearchClientService; private readonly ILogger<LogsController> _logger; public LogsController(IElasticSearchClientService elasticSearchClientService, ILogger<LogsController> logger) { _elasticSearchClientService = elasticSearchClientService; _logger = logger; } [HttpGet] public async Task<ActionResult<List<LogMessage>>> Get() { try { var logs = await _elasticSearchClientService.GetAllLogsAsync(); return Ok(logs.ToList()); } catch (Exception ex) { _logger.LogError(ex, "Failed to fetch logs from Elasticsearch"); return StatusCode(500); } }}Copy code
In this example, we use a custom file logger to record data into a text file. A better alternative is to use Serilog—an open-source framework for implementing structured logging. By implementing structured logging in this application, the data query process can be simplified. You can also combine OpenTelemetry to achieve observability by outputting traces and metrics, and sending them to Elasticsearch via a collector.
The LogsController contains only one HTTP GET action method. This action method can be used to retrieve all log records stored in Elasticsearch. The complete source code for the LogsController class is available in the source repository.
In the SidecarAPI microservice, we will consume messages stored in a shared directory. The following code demonstrates the SidecarBackgroundService class, which inherits from the BackgroundService class and implements the ExecuteAsync method. This method executes at a predefined interval (every five seconds in this example).
The following code shows the SidecarBackgroundService class:
public class SidecarBackgroundService : BackgroundService { private readonly TimeSpan _period = TimeSpan.FromSeconds(5); private readonly IServiceProvider _serviceProvider; private readonly ILogger<SidecarBackgroundService> _logger; private readonly IOptions<SidecarSettings> _settings; private readonly ConcurrentQueue<string> logs = new ConcurrentQueue<string>(); private readonly int _maxBatchSize; private readonly int _maxCacheDurationInMinutes; private readonly IMemoryCache _cache; public SidecarBackgroundService( ILogger<SidecarBackgroundService> logger, IServiceProvider serviceProvider, IOptions<SidecarSettings> settings, IMemoryCache cache) { _logger = logger; _serviceProvider = serviceProvider; _settings = settings; _maxBatchSize = settings.Value.MaxBatchSize; _maxCacheDurationInMinutes = settings.Value.MaxCacheDurationInMinutes; _cache = cache; } protected override async Task ExecuteAsync(CancellationToken stoppingToken) { using var timer = new PeriodicTimer(_period); _logger.LogInformation($"LogShipper started. Monitoring {_settings.Value.LogDirectory}"); while (!stoppingToken.IsCancellationRequested && await timer.WaitForNextTickAsync(stoppingToken)) { await SendMessagesToElasticAsync(stoppingToken); } } private async Task SendMessagesToElasticAsync(CancellationToken cancellationToken) { var directory = _settings.Value.LogDirectory; var logFilePattern = _settings.Value.LogFilePattern; if (string.IsNullOrWhiteSpace(directory) || string.IsNullOrWhiteSpace(logFilePattern)) return; if (!Directory.Exists(directory)) return; var files = Directory.GetFiles(directory, logFilePattern); foreach (var fileName in files) { await using var stream = new FileStream(fileName, FileMode.Open, FileAccess.Read, FileShare.ReadWrite); using var reader = new StreamReader(stream); string? text; using IServiceScope scope = _serviceProvider.CreateScope(); var _elasticSearchClient = scope.ServiceProvider.GetRequiredService<IElasticSearchClientService>(); while ((text = await reader.ReadLineAsync(cancellationToken)) != null) { if (string.IsNullOrWhiteSpace(text)) continue; string[] message = text.Split('|'); string messageKey = message[0].Trim();if (!_cache.TryGetValue(messageKey, out _)) { logs.Enqueue(text); if (logs.Count > _maxBatchSize) { while (logs.TryDequeue(out string? str)) { string[] data = str.Split('|'); string key = data[0].Trim(); LogMessage logMessage = new LogMessage() { Id = data[0].Trim(), Timestamp = DateTime.UtcNow, Message = str.Substring(data[0].Length + 1).Trim() }; await _elasticSearchClient.IndexAsync (logMessage, cancellationToken);var cacheEntryOptions = new MemoryCacheEntryOptions() .SetSlidingExpiration(TimeSpan.FromMinutes(_maxCacheDurationInMinutes));_cache.Set(messageKey, true, cacheEntryOptions); } } } } } } }Copy code
To enable memory cache support in SidecarAPI, add the following code to the Program.cs file:
builder.Services.AddMemoryCache(); Copy code
In the SidecarAPI project, the IElasticSearchClientService interface defines a clear abstraction for all Elasticsearch-related operations, such as indexing and querying documents. The ElasticSearchClientService class implements this interface and encapsulates the application's interaction with Elasticsearch.
Create a new interface named IElasticSearchClientService and place it in a file with the same name. Then, replace the default generated code with the following:
public interface IElasticSearchClientService{ Task IndexAsync(LogMessage logMessage, CancellationToken ct); Task IndexBatchAsync(List<LogMessage> entries, CancellationToken ct); Task<List<LogMessage>> GetAllLogsAsync(); Task DeleteAsyncRequest();}Copy code
Next, create a new class named ElasticSearchClientService and implement the IElasticSearchClientService interface as shown in the code below:
public class ElasticSearchClientService: IElasticSearchClientService{ private readonly ILogger<ElasticSearchClientService> _logger; private readonly ElasticsearchClient _elasticSearchClient; private readonly ElasticsearchClientSettings _elasticSearchClientSettings; public ElasticSearchClientService( ILogger<ElasticSearchClientService> logger, IOptions<SidecarSettings> settings) { _logger = logger; _elasticSearchClientSettings = new ElasticsearchClientSettings( new Uri(settings.Value.Elasticsearch.Url)) .Authentication( new BasicAuthentication( settings.Value.Elasticsearch.Username, settings.Value.Elasticsearch.Password)); _elasticSearchClient = new ElasticsearchClient(_elasticSearchClientSettings); } public async Task DeleteAsyncRequest() { var today = DateTime.UtcNow.ToString("yyyy.MM.dd"); var indexName = $"application-logs-{today}"; var response = await _elasticSearchClient.Indices.DeleteAsync(indexName); } public async Task<List<LogMessage>> GetAllLogsAsync() { var today = DateTime.UtcNow.ToString("yyyy.MM.dd"); var indexName = $"application-logs-{today}"; var searchResponse = await _elasticSearchClient.SearchAsync<LogMessage>( s => s.Indices(indexName).Query(q => q.MatchAll())); return searchResponse.IsValidResponse ? searchResponse.Documents?.ToList() ?? new List<LogMessage>() : new List<LogMessage>(); } public async Task IndexAsync(LogMessage logMessage, CancellationToken ct) { var today = DateTime.UtcNow.ToString("yyyy.MM.dd"); var indexName = $"application-logs-{today}"; var existsResponse = await _elasticSearchClient.Indices.ExistsAsync(indexName, ct); if (!existsResponse.Exists) { var createResponse = await _elasticSearchClient.Indices.CreateAsync(indexName); if (!createResponse.IsValidResponse) { _logger.LogError("Failed to create index: {Error}", createResponse.DebugInformation); throw new Exception(createResponse.DebugInformation); } } var indexResponse = await _elasticSearchClient.IndexAsync(logMessage, idx => idx.Index(indexName)); if (!indexResponse.IsValidResponse) { throw new Exception(indexResponse.DebugInformation); } } public async Task IndexBatchAsync(List<LogMessage> entries, CancellationToken ct) { if (entries.Count == 0) return; var today = DateTime.UtcNow.ToString("yyyy.MM.dd"); var indexName = $"application-logs-{today}"; var bulkRequest = new BulkRequest(indexName) { Operations = new List<IBulkOperation>() }; foreach (var entry in entries) { bulkRequest.Operations.Add(new BulkIndexOperation<LogMessage>(entry)); } var response = await _elasticSearchClient.BulkAsync(bulkRequest, ct); if (!response.IsValidResponse) { _logger.LogError("Failed to index logs: {Error}", response.DebugInformation); throw new Exception($"Elasticsearch error: {response.DebugInformation}"); } _logger.LogInformation("Indexed {Count} logs to {Index}", entries.Count, indexName); }}Copy code
You should register the dependencies of TransactionsAPI in the Program.cs file, as shown in the following code snippet:
using System.Text.Json.Serialization;using TransactionsAPI;var builder = WebApplication.CreateBuilder(args);builder.Services.AddSingleton<IThreadSafeFileLogger, ThreadSafeFileLogger>();builder.Services.AddSingleton<ISidecarMessageQueue, SidecarMessageQueue>();builder.Services.AddHostedService<TransactionsBackgroundService>();builder.Services.AddControllers().AddJsonOptions(options =>{ options.JsonSerializerOptions.Converters.Add(new JsonStringEnumConverter());});var app = builder.Build();app.MapControllers();app.Run();Copy code
The following code snippet demonstrates how to specify the Sidecar configuration metadata in the appsettings.json file of the SidecarAPI project:
"Sidecar": {"LogDirectory": "/app/logs","LogFilePattern": "xapi.log","MaxBatchSize": 5,"MaxCacheEntries": 5,"Elasticsearch": { "Url": "http://elasticsearch:9200", "Username": "elastic", "Password": "changeme" } }Copy code
Below is the complete source code of the Program.cs file for SidecarAPI:
using SidecarApi;using SidecarApi.Services;var builder = WebApplication.CreateBuilder(args);builder.Services.AddMemoryCache(); builder.Services.Configure<SidecarSettings>( builder.Configuration.GetSection("Sidecar"));builder.Services.AddScoped <IElasticSearchClientService, ElasticSearchClientService>();builder.Services.AddHostedService<SidecarBackgroundService>();builder.Services.AddControllers();var app = builder.Build();app.MapControllers();app.Run();Copy code
When implementing the Sidecar design, you should fully leverage containers to achieve better isolation, modularity, and reusability. Although the application container and the Sidecar container are isolated from each other, they share the same lifecycle, network, and often the same storage.
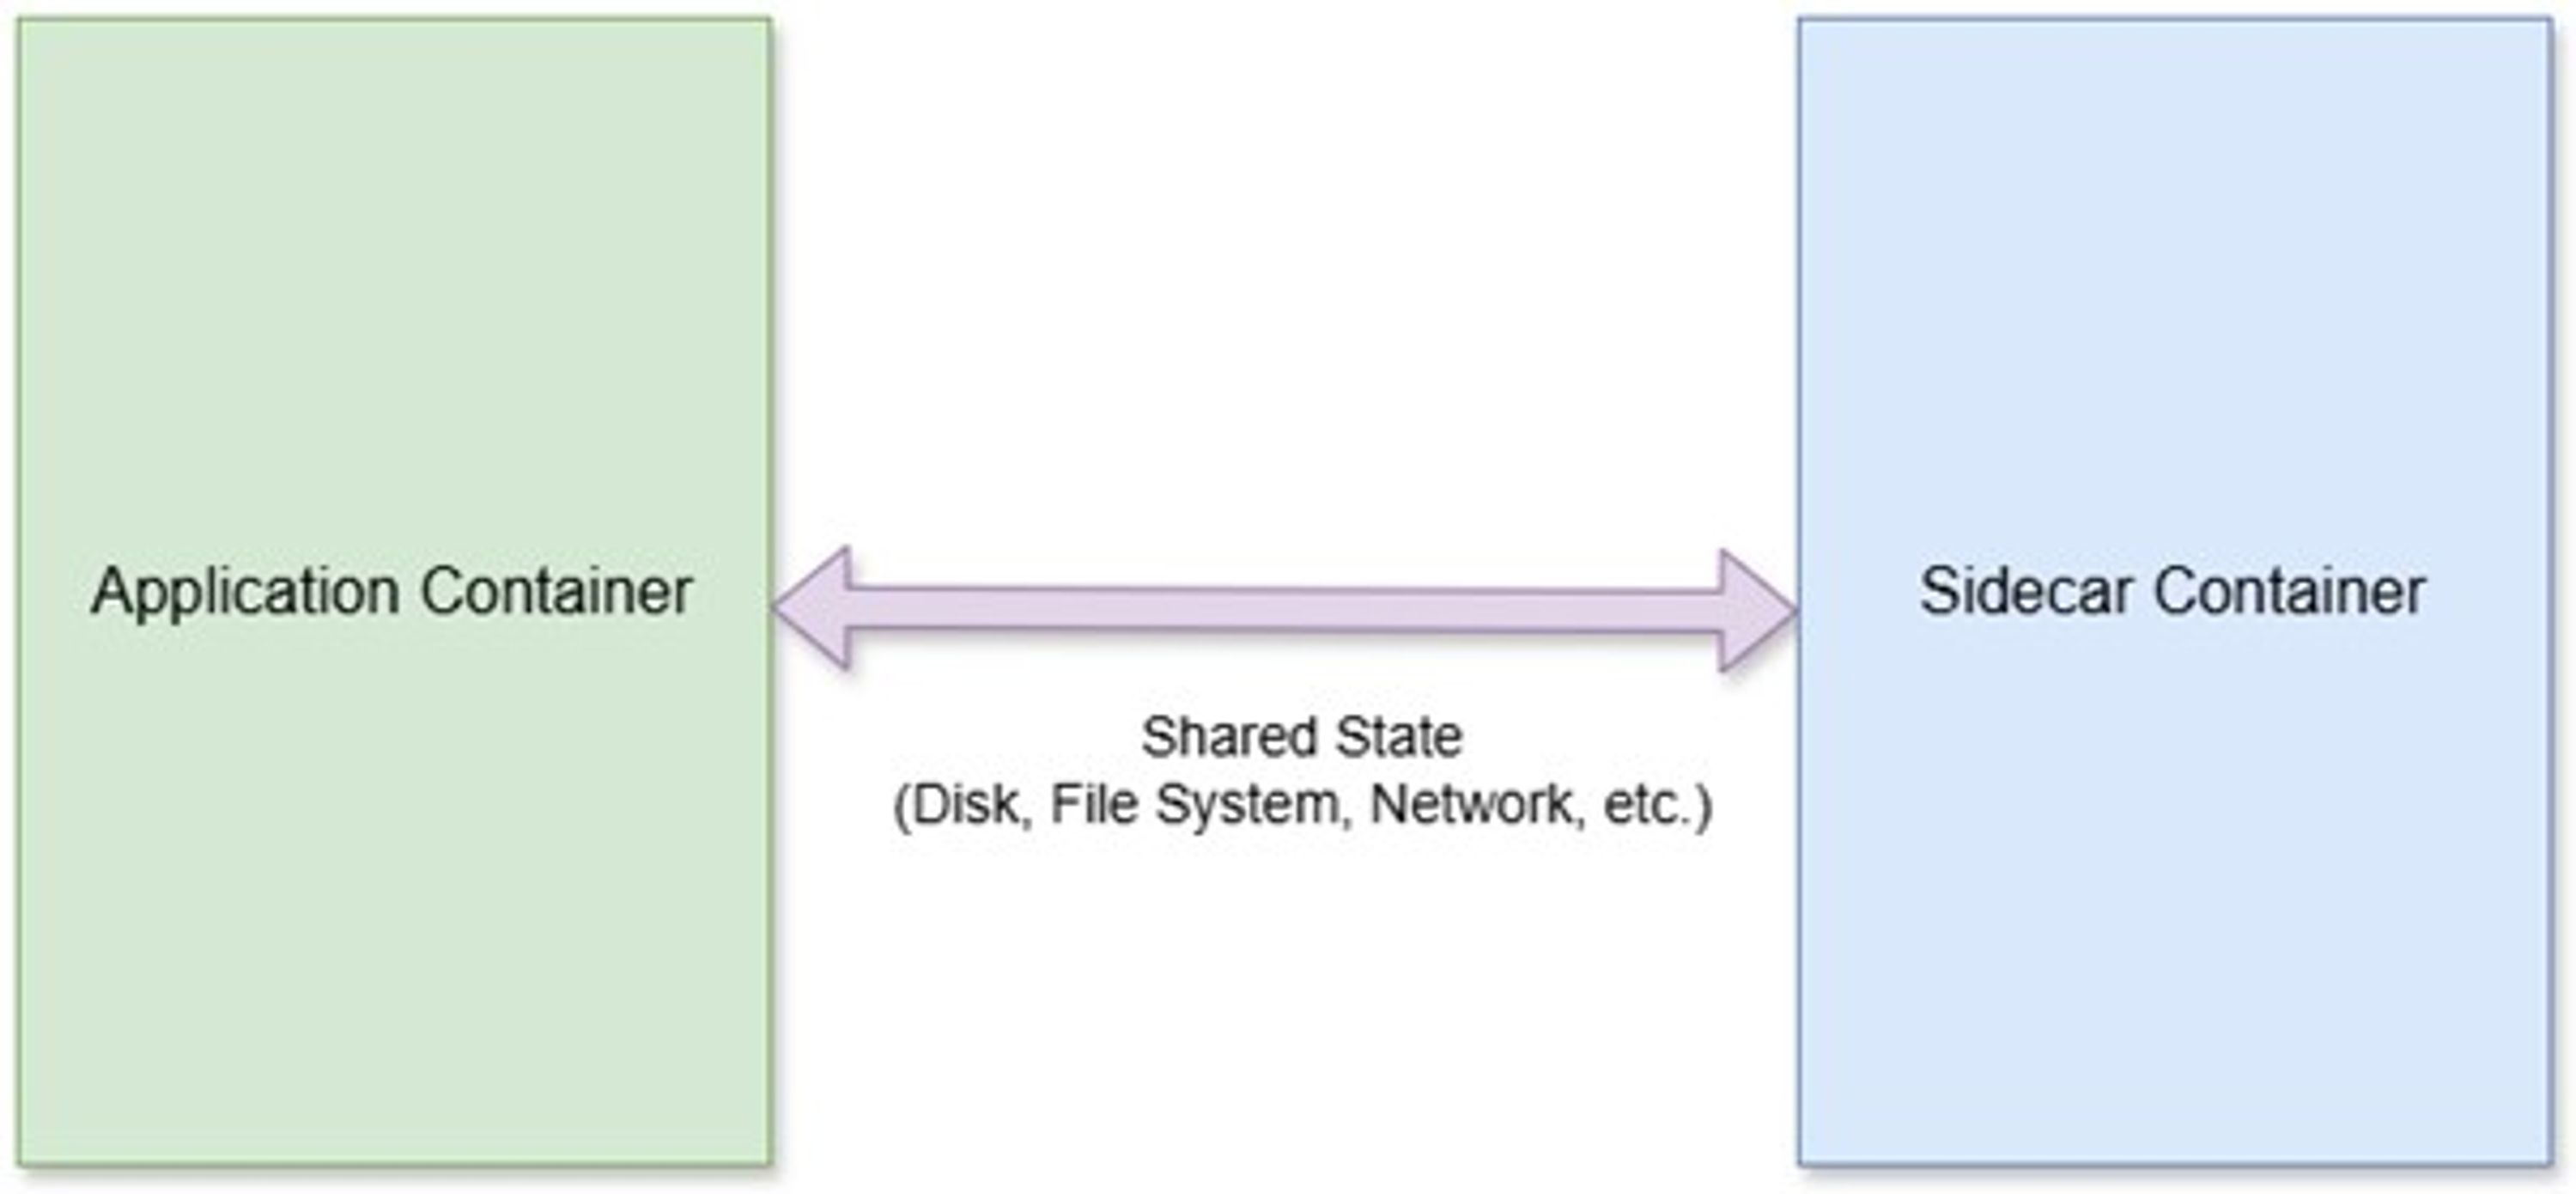
Figure 3: Schematic diagram of application container and Sidecar container operation
You should Dockerize the two services by creating Dockerfiles in the two previously created projects, namely TransactionsAPI and SidecarAPI. Since container support was enabled when you created these two projects, the system will automatically generate Dockerfiles in each project by default.
Below is the Dockerfile source code for the SidecarAPI service (i.e., the Sidecar).
FROM mcr.microsoft.com/dotnet/aspnet:10.0 AS baseRUN mkdir -p /app/logs && chmod 750 /app/logsUSER $APP_UIDWORKDIR /appEXPOSE 8081# This stage is used to build the service projectFROM mcr.microsoft.com/dotnet/sdk:10.0 AS buildARG BUILD_CONFIGURATION=ReleaseWORKDIR /srcCOPY ["SidecarApi/SidecarApi.csproj", "SidecarApi/"]RUN dotnet restore "./SidecarApi/SidecarApi.csproj"COPY . .WORKDIR "/src/SidecarApi"RUN dotnet build "./SidecarApi.csproj" -c $BUILD_CONFIGURATION -o /app/build# This stage is used to publish the service project to be copied to the final stageFROM build AS publishARG BUILD_CONFIGURATION=ReleaseRUN dotnet publish "./SidecarApi.csproj" -c $BUILD_CONFIGURATION -o /app/publish /p:UseAppHost=false# This stage is used in production or when running from VS in regular mode (Default when not using the Debug configuration)FROM base AS finalWORKDIR /appCOPY --from=publish /app/publish .ENTRYPOINT ["dotnet", "SidecarApi.dll"]Copy code
The Dockerfile for the Transactions microservice should contain the following code:
FROM mcr.microsoft.com/dotnet/aspnet:10.0 AS baseRUN mkdir -p /app/logs && chmod 750 /app/logs # Linux permissionUSER $APP_UIDWORKDIR /appEXPOSE 8080# This stage is used to build the service projectFROM mcr.microsoft.com/dotnet/sdk:10.0 AS buildRUN mkdir -p /app/logs && chmod 750 /app/logsARG BUILD_CONFIGURATION=ReleaseWORKDIR /srcCOPY ["TransactionsApi/TransactionsApi.csproj", "TransactionsApi/"]RUN dotnet restore "./TransactionsApi/TransactionsApi.csproj"COPY . .WORKDIR "/src/TransactionsApi"RUN dotnet build "./TransactionsApi.csproj" -c $BUILD_CONFIGURATION -o /app/build# This stage is used to publish the service project to be copied to the final stageFROM build AS publishARG BUILD_CONFIGURATION=ReleaseRUN dotnet publish "./TransactionsApi.csproj" -c $BUILD_CONFIGURATION -o /app/publish /p:UseAppHost=false# This stage is used in production or when running from VS in regular mode (Default when not using the Debug configuration)FROM base AS finalWORKDIR /appCOPY --from=publish /app/publish .ENTRYPOINT ["dotnet", "TransactionsApi.dll"]Copy code
A Docker Compose file is a YAML-based configuration file that allows you to declaratively define how multiple containers work together. You can use it to configure all services, networks, and volumes in a single file, without needing to run multiple Docker commands to start each container individually.
A Dockerfile is used to configure and build a single image within an application, whereas a Docker Compose file defines how multiple images work together as services to form a multi-container application. Docker Compose helps simplify the management of containerized applications. It not only allows you to control containers in a more granular and simpler way but also enhances collaboration and development efficiency, enabling applications to run easily in any environment you need. Essentially, Docker Compose is an excellent way to uniformly configure the services that an application depends on, such as databases, message queues, caches, Web Service APIs, and more. Then, you only need to use the Docker Compose command-line tool to execute a single command to start one or more containers.
To deploy both containers simultaneously, you should create a docker-compose.yml file and include the following content:
services: elasticsearch: image: docker.elastic.co/elasticsearch/elasticsearch:8.15.1 container_name: elasticsearch environment: - discovery.type=single-node - xpack.security.enabled=false - "ES_JAVA_OPTS=-Xms1g -Xmx1g" ports: - "9200:9200" volumes: - esdata:/usr/share/elasticsearch/data networks: - app-network healthcheck: test: ["CMD-SHELL", "curl -f http://localhost:9200/_cluster/health || exit 1"] interval: 30s timeout: 10s retries: 5 start_period: 40s transactions-api: build: context: . dockerfile: TransactionsApi/Dockerfile container_name: transactions-api ports: - "8080:8080" environment: - ASPNETCORE_ENVIRONMENT=Development - ASPNETCORE_URLS=http://+:8080 volumes: - ./logs:/app/logs networks: - app-network depends_on: elasticsearch: condition: service_healthy sidecar-api: build: context: . dockerfile: SidecarApi/Dockerfile container_name: sidecar-api ports: - "8081:8081" environment: - ASPNETCORE_ENVIRONMENT=Development - ASPNETCORE_URLS=http://+:8081 volumes: - ./logs:/app/logs networks: - app-network depends_on: elasticsearch: condition: service_healthynetworks: app-network: driver: bridgevolumes: esdata:Copy code
The following code snippet demonstrates how to add health checks for Elasticsearch in the Program.cs file:
builder.Services.AddHealthChecks() .AddCheck<ElasticHealthCheck>("elasticsearch");You can also use the authentication and authorization provided by the ASP.NET Core to secure the endpoints, as shown below. [Authorize(Policy = "ReadOnly")][HttpGet]public async Task<ActionResult<List<LogMessage>>> Get() { //Code omitted for brevity}[Authorize(Policy = "CanDelete")][HttpDelete]public async Task Delete() { //Code omitted for brevity}Copy code
Due to space constraints and the need to simplify the example, we have omitted these details in this article.
Finally, use the following code to run the Docker Compose file:
docker-compose up --buildCopy code
Figure 4 shows the effect when the Docker Compose command is executed.
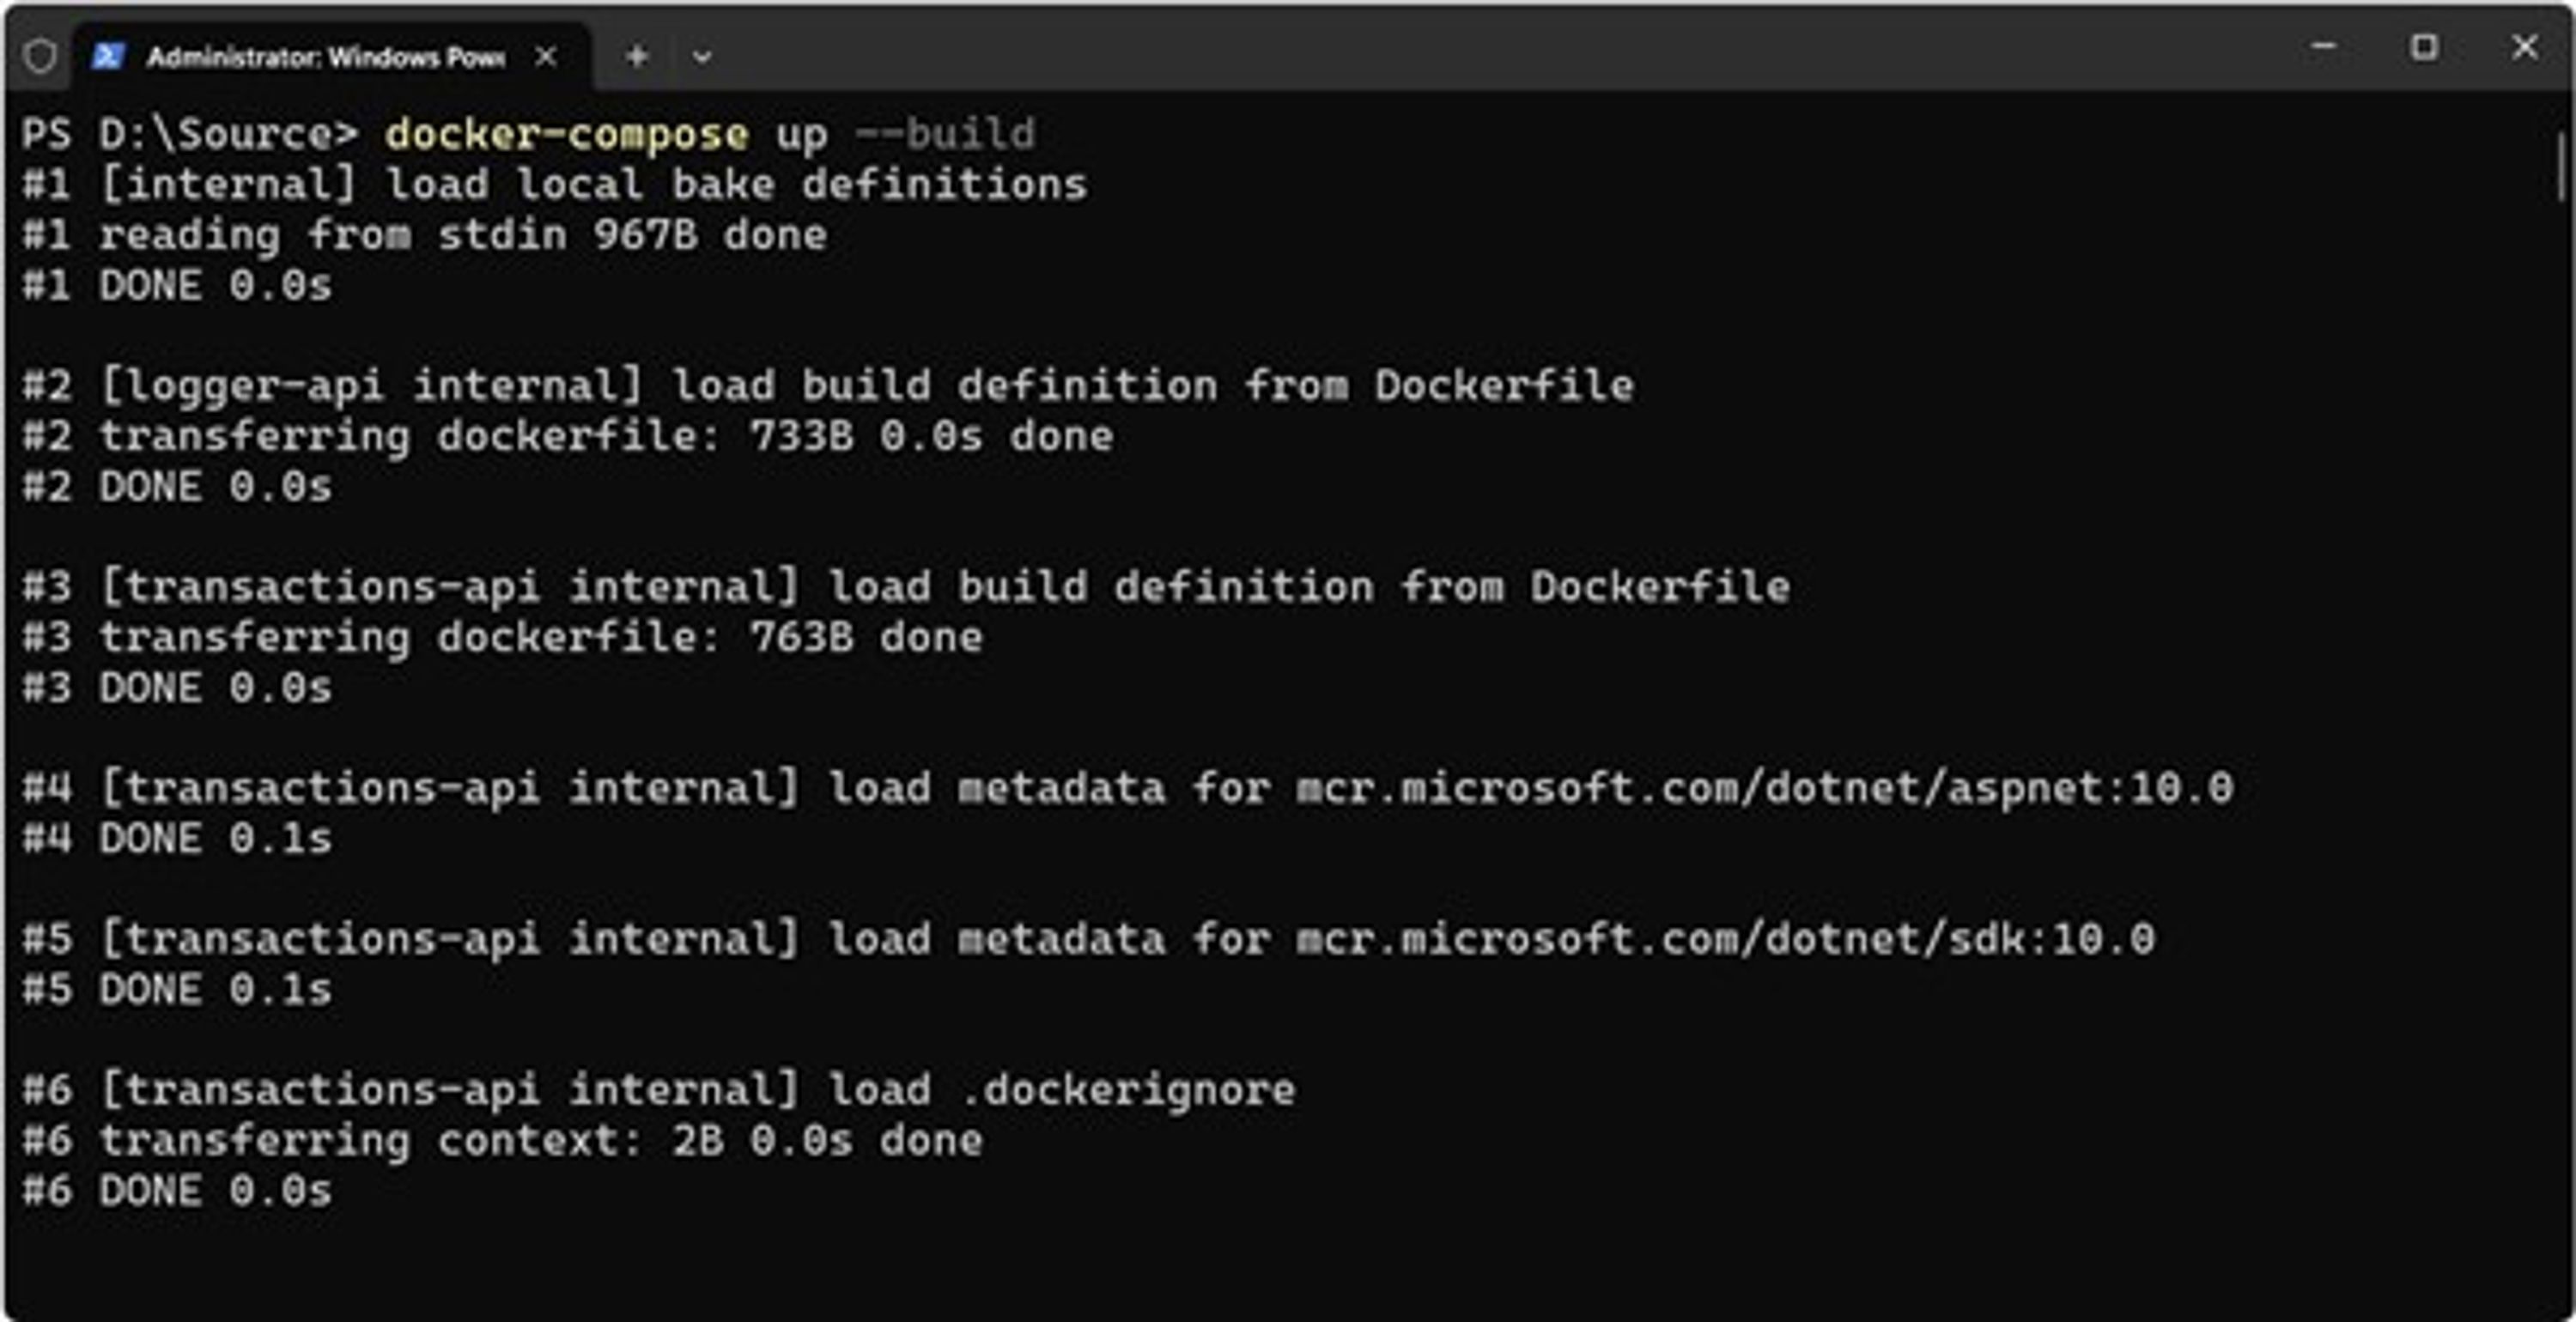
Figure 4: Docker Compose command execution process
When the TransactionsAPI microservice runs, it generates log messages and sends them to an in-memory collection. Subsequently, a background service stores these messages in a text file within a shared folder. Figure 5 demonstrates how to use Postman to invoke the Transactions microservice.
By the way, Postman is a very popular API platform for building, testing, and managing APIs.
![]()
Figure 5: Using Postman to invoke the Create endpoint of the Transactions microservice
Subsequently, the Sidecar microservice reads the log messages from the text file in the shared folder and sends them to Elasticsearch.
You can retrieve the logs stored in Elasticsearch by calling the HTTP GET endpoint of the Logs controller in the Sidecar microservice, as shown in Figure 6.
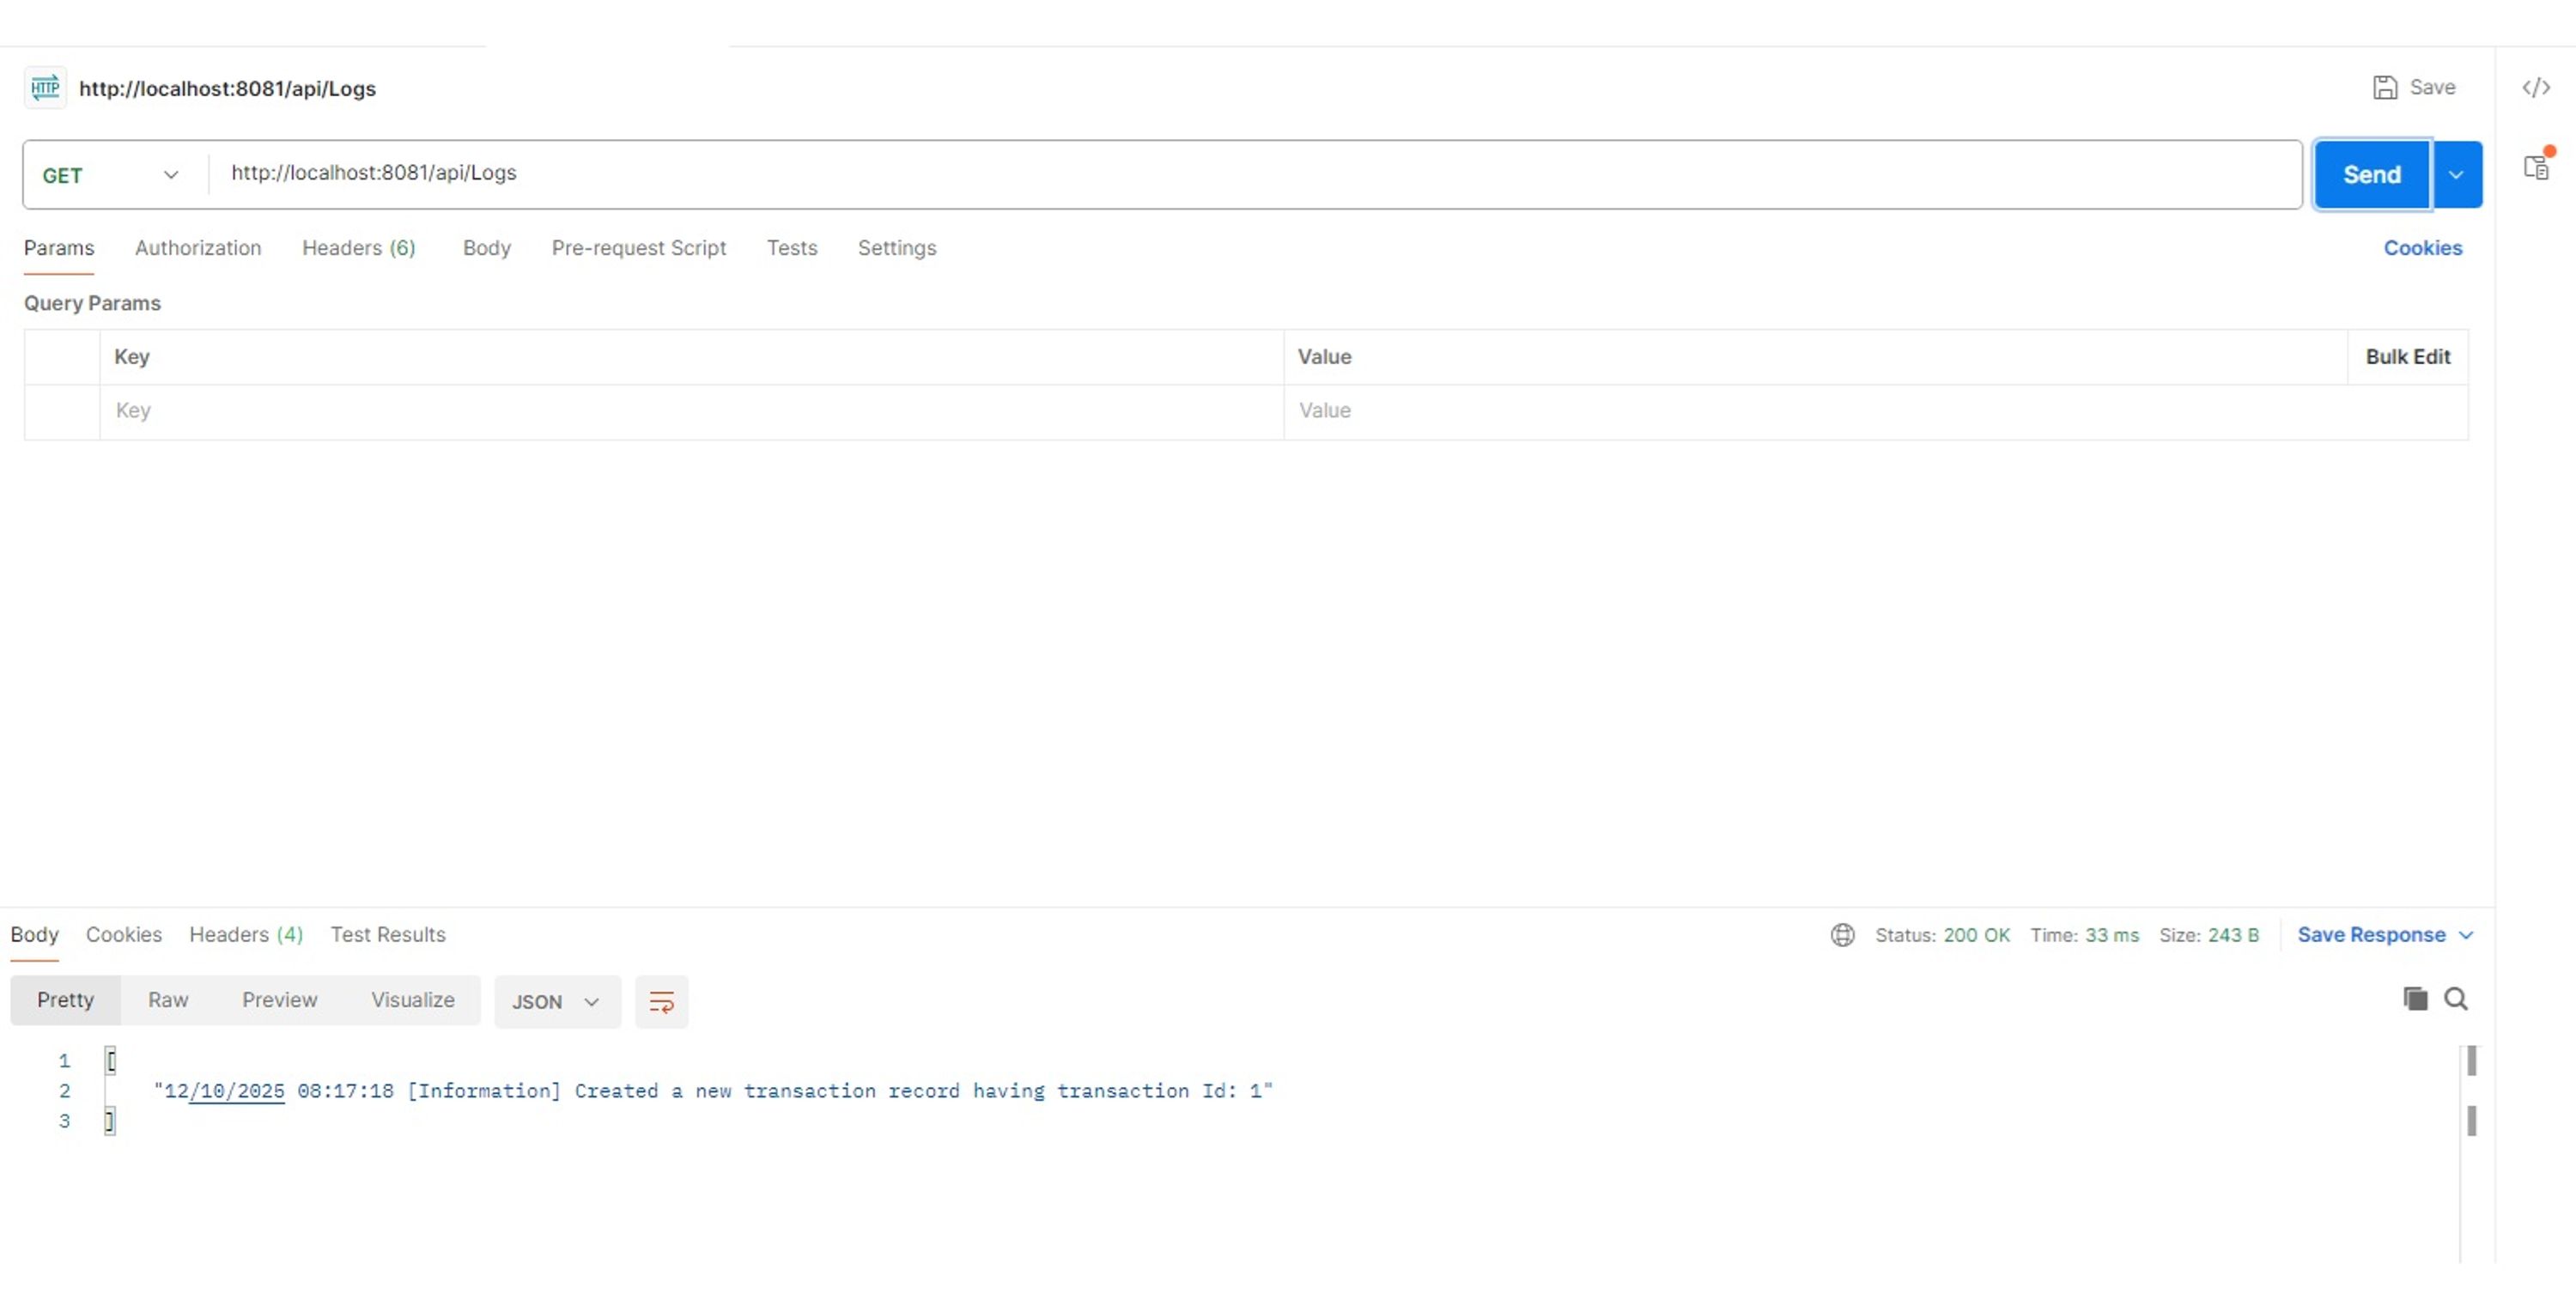
Figure 6: Displaying saved messages in Elasticsearch
You can improve this implementation by using Kubernetes. Kubernetes can serve as a "runtime infrastructure," enabling distributed cloud-native applications to achieve scalability, resilience, and production-grade operability. In this implementation, the TransactionsAPI and SidecarAPI microservices run on different containers within the same network. They communicate via network addresses and share volumes through bind mounts.
While this approach works, a more ideal solution is to use a Kubernetes Pod to implement the Sidecar pattern. It is important to note that a true Sidecar pattern typically runs within a Kubernetes Pod, where containers in the same Pod share localhost networking and storage volumes.
It is worth noting that this implementation introduces certain performance and latency overhead. For example, file I/O operations in the TransactionsAPI service incur additional overhead due to disk reads and writes. You should also avoid recreating indexes every time.
Instead, you can create the index once at startup. You can also improve overall performance by sending logs in batches to Elasticsearch using IndexBatchAsync to write logs in batch mode. Finally, you can use OpenTelemetry in this application to more actively collect metrics for subsequent analysis.
You can implement the Sidecar pattern in multiple ways:
Custom
When you want a simple solution with full control and flexibility over the Sidecar implementation, without relying on any external components, a custom Sidecar is a good choice.
Dapr
The Distributed Application Runtime (Dapr) can help you implement the Sidecar pattern, providing capabilities such as inter-service communication, state management, and event handling in distributed applications. This approach reduces the need for writing custom code, allowing you to focus on delivering business value rather than writing repetitive infrastructure code.
Serilog + Elasticsearch sink
If your application is based on .NET and you want direct control over the log structure and format while writing logs directly to Elasticsearch without relying on an intermediate log aggregation agent, this is a good choice.
stdout + Kubernetes DaemonSet
You can also implement the Sidecar pattern using stdout and a Kubernetes DaemonSet. This is a simple and resource-efficient solution for small to medium-sized cluster environments. The DaemonSet ensures that a specific Pod runs on every node in the Kubernetes cluster.
The Sidecar pattern is essentially a native concept in Kubernetes, where containers share the same Pod, localhost, and lifecycle. The Docker Compose example is merely an approximation for local development, while Kubernetes is the standard implementation method for the Sidecar pattern; Docker Compose is only used for local development scenarios.
Although the Sidecar design pattern offers many advantages, like all software patterns, it is only truly valuable when implemented correctly. You can extend the application example in this article to enable the Sidecar container to collect and consolidate logs and monitoring metrics for each microservice, thereby improving the maintainability, availability, performance, and functionality of the microservice system, and more effectively locating and troubleshooting runtime issues.
Original link:
This content is automatically aggregated by InertiaRSS (RSS Reader) for reading reference only. Original from — Copyright belongs to the original author.