本文接上文, http://www.cnblogs.com/suyuan/archive/2009/04/17/1438064.html
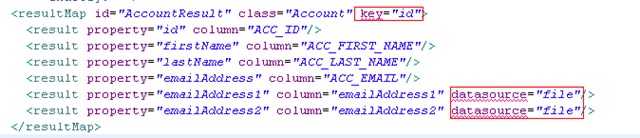
这篇文章我要介绍的是给rusultMap的xml段中增加节点,具体效果如下:
或许你会问为什么要这样做?
首先我来说说key ,key的作用是指定用于生成hash路径所依赖的对象属性.这里要注意的是你指定的这个属性的值必须是唯一的. 而数据库中的id作为主键必须是唯一值,所以我们一般以 id 来生成我们所需的hash路径.
然后来说明下 datasource ,这里的datasource可以有两个选择 file 或者 db 如果是选择file的话 则对应列根据hash路径存储在文件系统中,如果选择db 则存储在数据库中 ,默认是db 可以省略.
明白了以上添加的节点的作用 ,接下来我们来一步步修改程序使之达到我们的目标:
第一步,修改dtd验证文件:
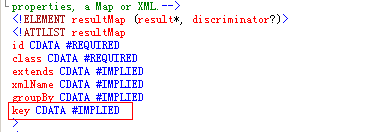
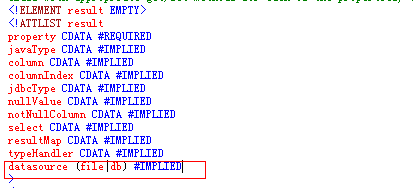
这里必须修改 我在上一篇已经介绍过了,这里不再过多解释.请参考上图.
对SqlMap 进行解析是通过com.ibatis.sqlmap.engine.builder.xml.SqlMapParser.java 进行的,这里要说明的是由于我们并没有增加新的node,而是仅仅增加了属性,所以我们仅仅在原有的解析的方法上增加对属性的解析就好了
Example Source Code [http://www.cnblogs.com/suyuan/]
parser.addNodelet("/sqlMap/resultMap", new Nodelet() {
      public void process(Node node) throws Exception {
        Properties attributes = NodeletUtils.parseAttributes(node, state.getGlobalProps());
        String id = state.applyNamespace(attributes.getProperty("id"));
        String resultClassName = attributes.getProperty("class");
        String extended = state.applyNamespace(attributes.getProperty("extends"));
        String xmlName = attributes.getProperty("xmlName");
        String groupBy = attributes.getProperty("groupBy");
        //解析key
        String key = attributes.getProperty("key");

        resultClassName = state.getConfig().getTypeHandlerFactory().resolveAlias(resultClassName);
        Class resultClass;
        try {
          state.getConfig().getErrorContext().setMoreInfo("Check the result class.");
          resultClass = Resources.classForName(resultClassName);
        } catch (Exception e) {
          throw new RuntimeException("Error configuring Result.  Could not set ResultClass.  Cause: " + e, e);
        }
        ResultMapConfig resultConf = state
                                     .getConfig()
                                     .newResultMapConfig(id, resultClass, groupBy, extended, xmlName,key);
        state.setResultConfig(resultConf);
      }
    });
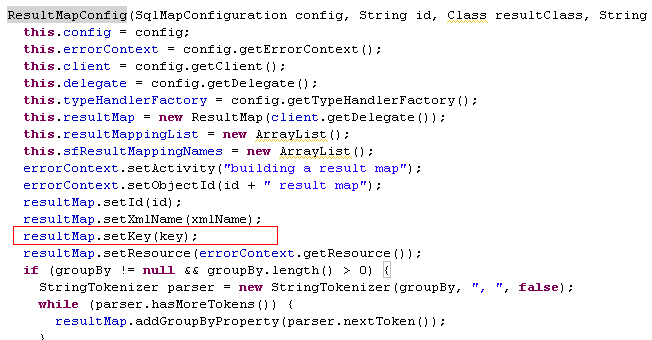
注意代码的最后调用了 newResultMapConfig ,这个也要增加key,像一串,我们只要根据程序一步步跟下去逐步增加key就ok了
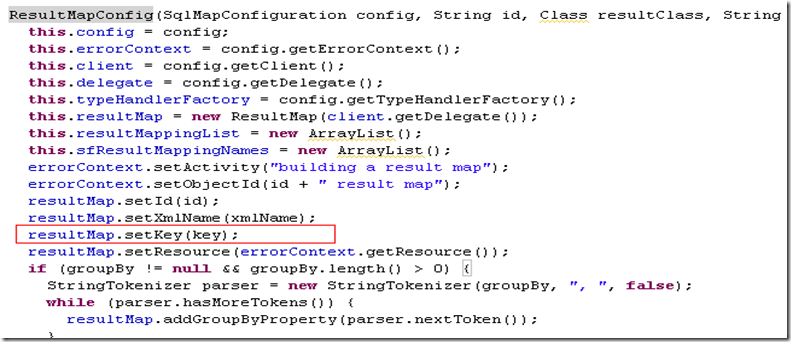
当我们跟到下面这个地方的时候key必须有一个归宿,他的归宿就是ResultMap对象
请看下图:
然后我们跳转到ResultMap类,继续看
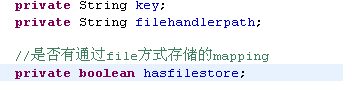
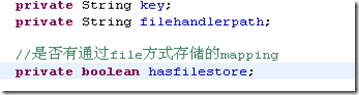 这里我在ResultMap类中增加了三个属性,key就不用解释了 ,
filehandlerpath其实就是指我一直在说的hash路径.下图展示了生成hash路径的方式.
Example Source Code [http://www.cnblogs.com/suyuan/]
 //生成hash路径
  public void setFilehandlerpath(Object key) {
	  if(key!=null)
	  {
		 filehandlerpath = delegate.getBaseDirectory() + this.resultClass.getSimpleName();
		 String hashkey = String.valueOf(key.hashCode());
		 String  split = "/";
		 StringBuilder sb = new StringBuilder();
	     for(int i=0;i<hashkey.length();i=i+2){
	    	if((i+2)<=hashkey.length()){
	    		sb.append(split).append(hashkey.substring(i,i+2));
	    	}
	    	else
	    	{
	    		sb.append(split).append("0"+hashkey.charAt(i));
	    	}
	     }
	     sb.append(split).append(hashkey).append(".data");
		 filehandlerpath +=  String.format("%s", new Object[] { sb.toString() });
	  }
  }
还有一个属性是hasfilestore 用于表示这个map是否有result存储在文件系统中.
以上就是我们增加key这个属性的过程.
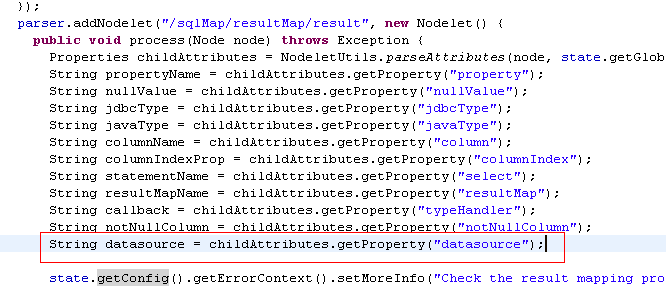
下面我们继续讲解在rusult中增加datasource属性
解析的方式和key类似
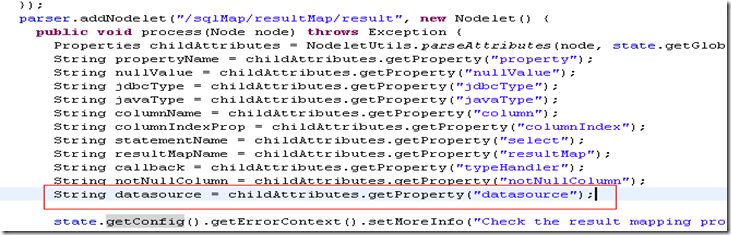
result在Ibatis中对应的对象是ResultMapping ,所以datasource最终的归宿在ResultMapping对象
我们来看ResultMapping对象 ,这里我增加了三个属性,这三个属性的作用请看注释.

而对这几个属性的利用请参考下面的代码.
Example Source Code [http://www.cnblogs.com/suyuan/]
public void addResultMapping(String propertyName, String columnName, Integer columnIndex, Class javaClass, String jdbcType, String nullValue, String notNullColumn, String statementName, String resultMapName, Object impl ,String datasource) {
    errorContext.setObjectId(propertyName + " mapping of the " + resultMap.getId() + " result map");
    TypeHandler handler;
    if (impl != null) {
      if (impl instanceof TypeHandlerCallback) {
        handler = new CustomTypeHandler((TypeHandlerCallback) impl);
      } else if (impl instanceof TypeHandler) {
        handler = (TypeHandler) impl;
      } else {
        throw new RuntimeException("The class '" + impl + "' is not a valid implementation of TypeHandler
                                   or TypeHandlerCallback");
      }
    } else {
      handler = config.resolveTypeHandler(client.getDelegate().getTypeHandlerFactory(),
                                   resultMap.getResultClass(), propertyName, javaClass, jdbcType, true);
    }
    ResultMapping mapping = new ResultMapping();
    mapping.setPropertyName(propertyName);
    mapping.setColumnName(columnName);
    mapping.setJdbcTypeName(jdbcType);
    mapping.setTypeHandler(handler);
    mapping.setNullValue(nullValue);
    mapping.setNotNullColumn(notNullColumn);
    mapping.setStatementName(statementName);
    mapping.setNestedResultMapName(resultMapName);
    mapping.setDatasource(datasource);
    if(resultMap.getKey()!=null&&resultMap.getKey().equals(propertyName))
    {
    	mapping.setFilehandler(true);
    }
    if (resultMapName != null && resultMapName.length() > 0) {
      resultMap.addNestedResultMappings(mapping);
    }
    mapping.setJavaType(javaClass);
    if (columnIndex != null) {
      mapping.setColumnIndex(columnIndex.intValue());
    } else {
      resultMappingIndex++;
      mapping.setColumnIndex(resultMappingIndex);
    }
    resultMappingList.add(mapping);
    //如果是保存在文件中 则将ResultMap对象中的hasfilestore 置成 true
    if(mapping.isFromfile()){
    	this.sfResultMappingNames.add(mapping.getPropertyName());
    	if(!resultMap.isHasfilestore()){
    		resultMap.setHasfilestore(true);
    	}
    }
    resultMap.setSfResultMappingNames(sfResultMappingNames);
    resultMap.setResultMappingList(resultMappingList);
  }
ok,本章就介绍到这里,不知道你是否看的明白了.没有关系,如果有兴趣就下载一份代码,我们一起来边学边做边讨论吧.
接下来我们将学习 这个节点的解析和作用.
此内容由惯性聚合(RSS阅读器)自动聚合整理,仅供阅读参考。 原文来自 — 版权归原作者所有。