We all would have used snap shots (screen shots) to illustrate bugs or behavior or something that others could understand by seeing them. For taking snap shots we just hit the "Print Screen" key and copy it to Ms Paint and save it. Ever wondered how to programmatically take a snap shot? Then this article is for you.
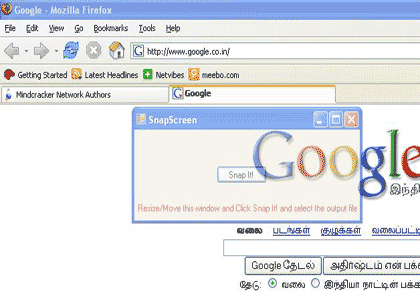
Image-1 This is how the application looks
GDI classes we need to know
Lets see what we need to know before we do coding. We need to have a little knowledge about GDI and graphics classes. The Graphics class provides methods for drawing objects to the display device. A Graphics object is associated with a specific device context. This class is used as a canvas to draw images. In order to display anything in a window, you have to obtain a reference to the window's Graphics object.
Next comes the Bitmap class. A Bitmap object is an object used to work with images defined by pixel data. A bitmap consists of the pixel data for a graphics image and its attributes.
// Check user clicked OK button
// Get the filename and put in the textbox and property
if (saveFileDialog1.ShowDialog() != DialogResult.Cancel)
{
filename = saveFileDialog1.FileName;
}Before taking the snap shot we hide our application because we don't want our application in the snap shot image. Sometimes even after hiding the application, the snap shot pictures our application, this is because the application takes few extra milliseconds to hide, so we make our application to wait for some milliseconds.
this.Hide();
// Slow the thread to hide the application before taking the snap
Thread.Sleep(200);
How to Snap It?
Now we create a Bitmap object to set the size of the screen. We use the width and height of the application screen to capture the snap shot. So the user can place our application screen on any area of the screen, move/resize to get the snap shot. To make the user more comfortable in selecting the snap shot area we make the application screen semi-transparent by setting the opacity of the form to 50%.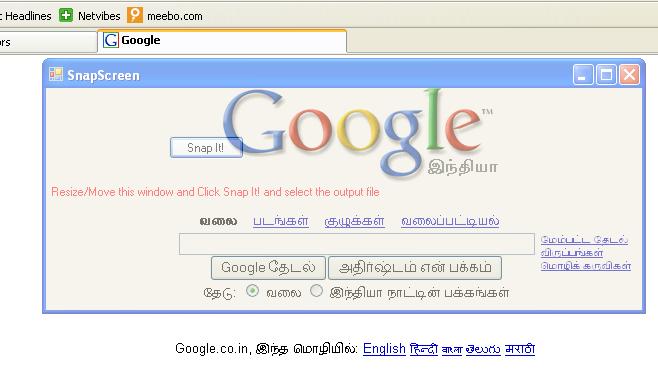
// Setting the size of the screen for the bitmap
Bitmap bmp = new Bitmap(this.Width, this.Height, PixelFormat.Format32bppArgb);
A Graphics object is required to get the image bounds and create the actual picture. So we initialize a Graphics object and get the image bounds from the Bitmap that we have already created. CopyFromScreen method is used to get the snap shot from the screen. Based on the user selection of the file type in the savefiledialog box, we use different image formats to save the file using Bitmap.Save function.
// Saving file in the selected image format
bmp.Save(filename, ImageFormat.Jpeg);After saving the picture we show the application back by using the following statement :
// Showing the application again
Now the screen is captured and the picture is saved. We need to view the snap shot. There is an option available to see how your snap shot has come up, just right after saving the file. We use Process class of System.Diagnostic namespace to view the image file.
// Viewing the image
Process pr = new Process();
pr.StartInfo.FileName = filename;
pr.Start();
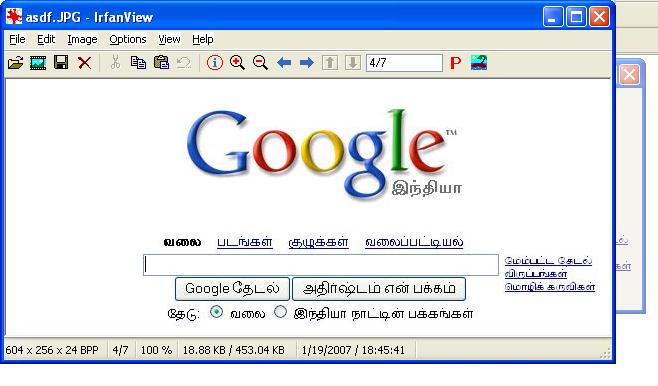
Image - 3 Viewing the saved image file
When the Start method is executed the image file is opened in the respective application configured in the system.
Thats all folks.
附上完整的snap代码:
![]() Code
Code
此内容由惯性聚合(RSS阅读器)自动聚合整理,仅供阅读参考。 原文来自 — 版权归原作者所有。