







Docker Agent is an open-source framework from Docker for building and running multi-agent AI systems. It lets developers define teams of AI agents using YAML configuration, with no Python orchestration code required. Each agent can use its own model (cloud APIs like OpenAI and Anthropic, or local models through Docker Model Runner), along with specialized instructions and tools such as filesystem access, web search, and custom MCP integrations. Docker Agent also supports distributing agents as OCI artifacts through Docker Hub, so teams can share and deploy agent configurations instantly.
This tutorial walks you through spinning up a DigitalOcean Droplet with Docker Agent pre-installed using the Docker Agent 1-Click App from the DigitalOcean Marketplace. After creating your Droplet, you will build a Bug Investigator: a multi-agent system where specialized agents collaborate to analyze errors, research solutions, fix code, and generate tests. You will also learn how to configure both cloud API and local model inference. Since this 1-Click Droplet is based on a standard Ubuntu 24.04 Droplet, you can follow any DigitalOcean Docker tutorials after you finish this guide.
Note: The 1-Click image ships Docker Agent v1.9.10 under its previous name cagent. Starting with Docker Desktop 4.63 and Docker Agent v2. x, the CLI was renamed from cagent to docker agent. All commands in this tutorial use cagent because that is the version pre-installed on the Marketplace image. The concepts, YAML configuration, and multi-agent architecture are identical across both versions.
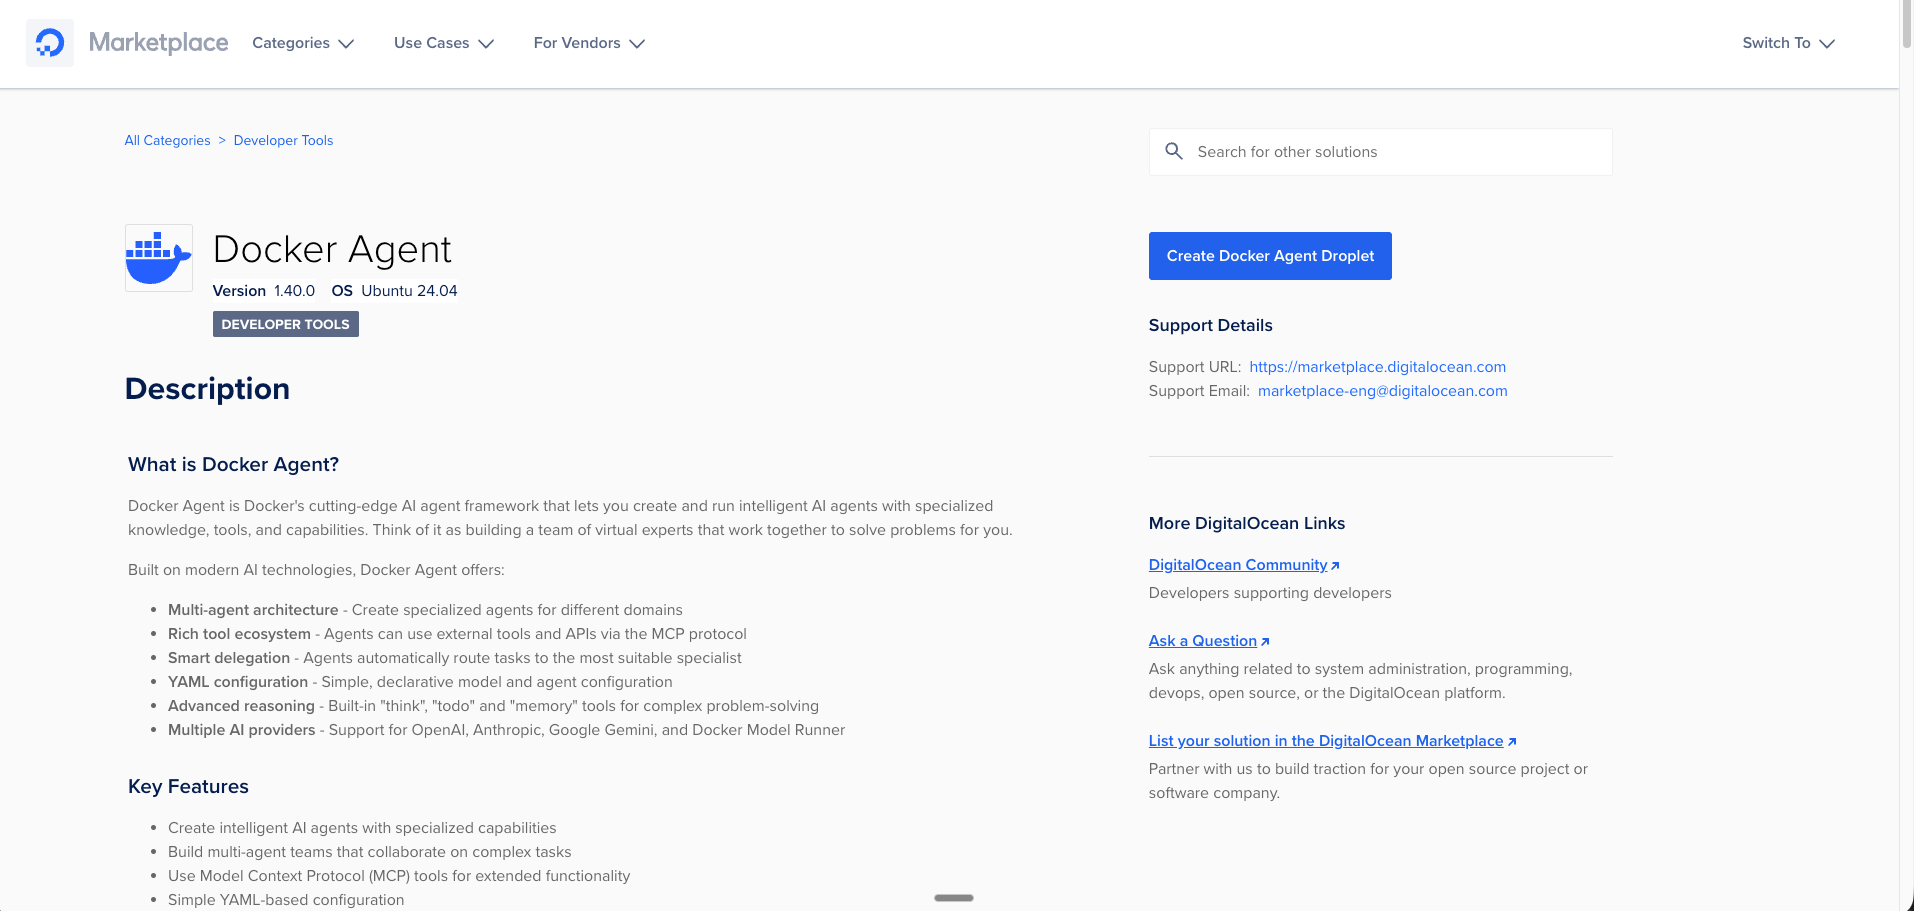
You can access the Docker Agent 1-Click App from the DigitalOcean Marketplace.
Traditional AI interactions are simple request-response exchanges: you ask a question, the model answers. Agentic AI workflows are different. An AI agent can take actions autonomously: reading files, searching the web, writing code, and deciding what to do next based on results. Instead of just answering “here is how to fix that bug,” an agent can actually fix it.
Multi-agent systems take this further. Rather than one agent trying to do everything, specialized agents collaborate on complex tasks. Think of it like a development team: one person investigates issues, another researches solutions, another writes code, and another tests. Each brings focused expertise, and together they solve problems more effectively than a single generalist would.
A multi-agent system (MAS) consists of multiple AI agents working collectively to perform tasks on behalf of a user or another system. MAS is a system of autonomous agents that cooperate and coordinate through structured communication. Docker Agent handles this coordination layer through YAML-defined agent hierarchies.
For this tutorial, you will build a multi-agent debugging system with four specialists:
┌─────────────────────────────────────────┐
│         BUG INVESTIGATOR (Root)         │
│         Analyzes & Coordinates          │
└───────────────┬─────────────────────────┘
                │
      ┌─────────┼─────────┐
      ▼         ▼         ▼
┌───────────┐ ┌───────┐ ┌───────────┐
│ RESEARCHER│ │ FIXER │ │  TESTER   │
│ Web Search│ │ Writes│ │ Validates │
│ Find Docs │ │ Code  │ │ & Tests   │
└───────────┘ └───────┘ └───────────┘
The Investigator coordinates everything. It analyzes errors, delegates research, gets fixes written, and validates with tests. Each agent has its own model and toolset defined in YAML, with no orchestration code required.
Before starting this tutorial, make sure you have the following:
Optional for local model inference:
Navigate to the DigitalOcean Marketplace Docker Agent page and click Create Docker Agent Droplet.
Start with the $6/month tier (1GB RAM). That is plenty for cloud API agents since the actual AI inference runs on OpenAI or Anthropic servers, not your Droplet.
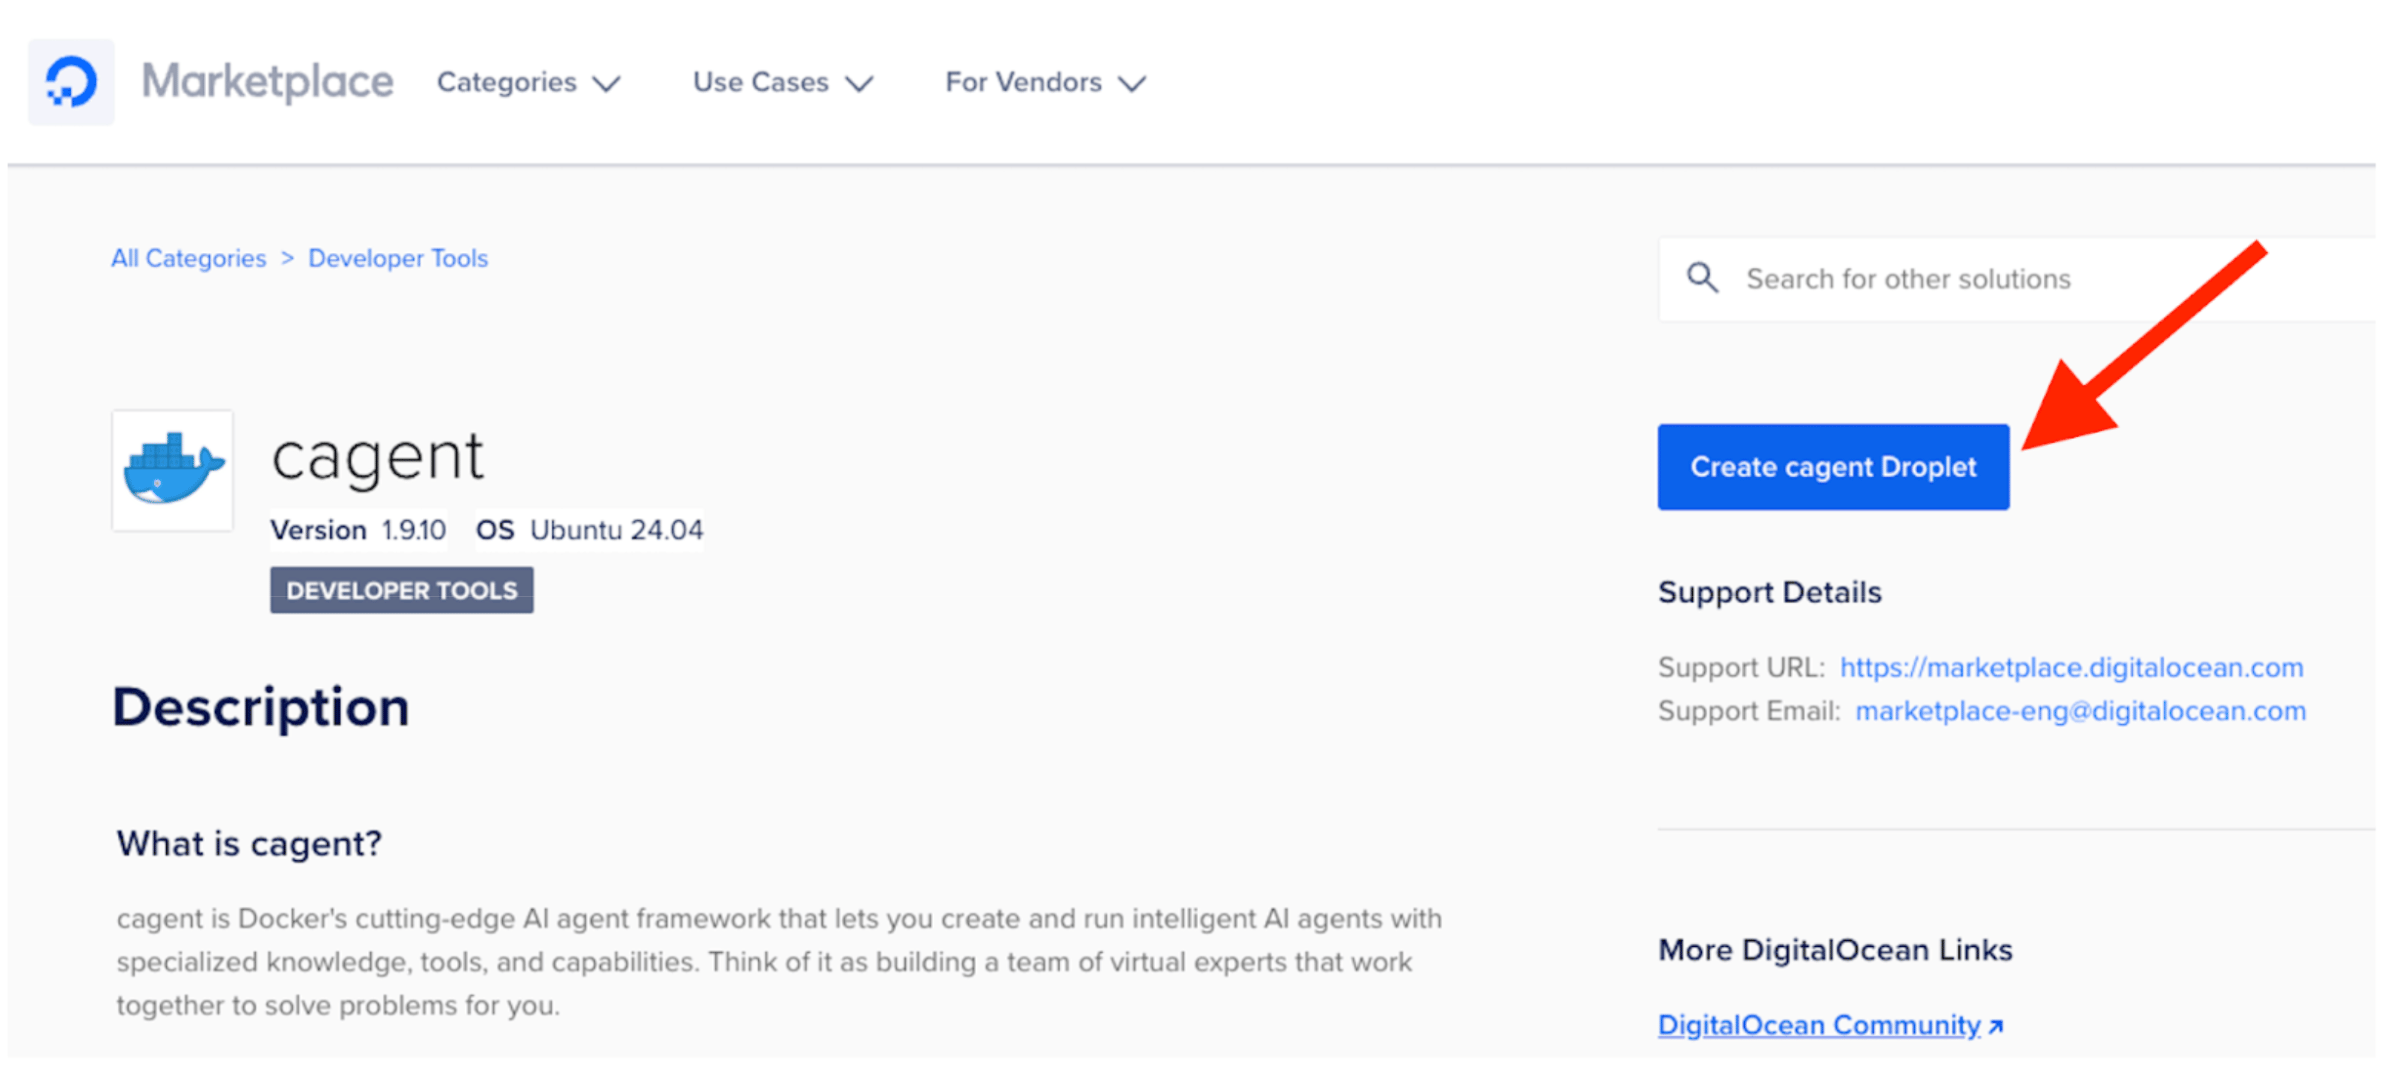
Figure 1: Navigate to the DigitalOcean Marketplace and select the Docker Agent 1-Click App
Select a datacenter region closest to your users or your location for reduced latency.
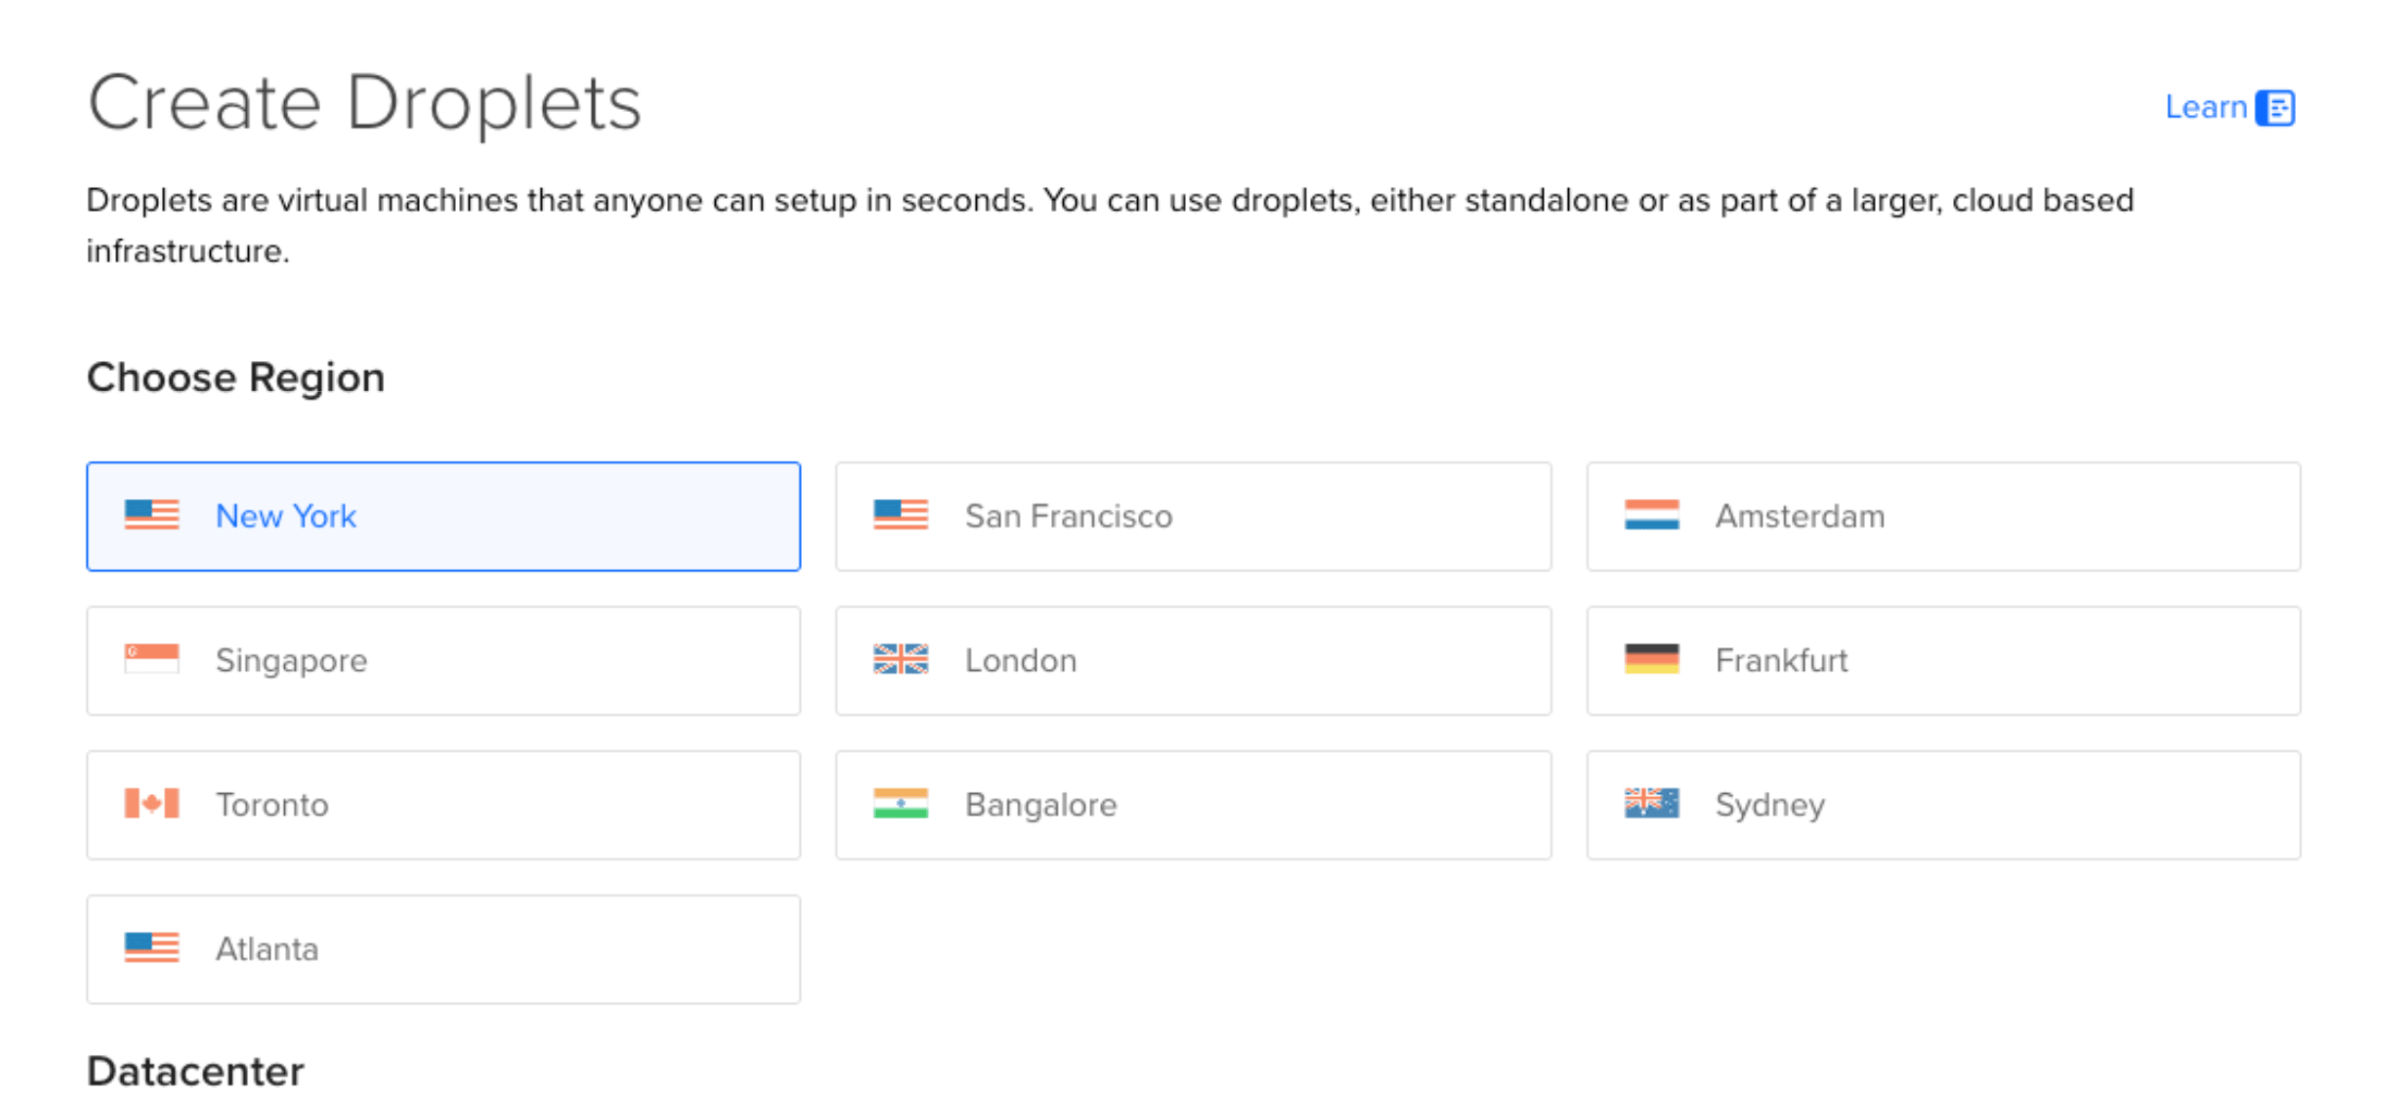
Figure 2: Select a datacenter region closest to your location for reduced latency
In the Choose an image section, select the Marketplace tab and search for “Docker Agent.”
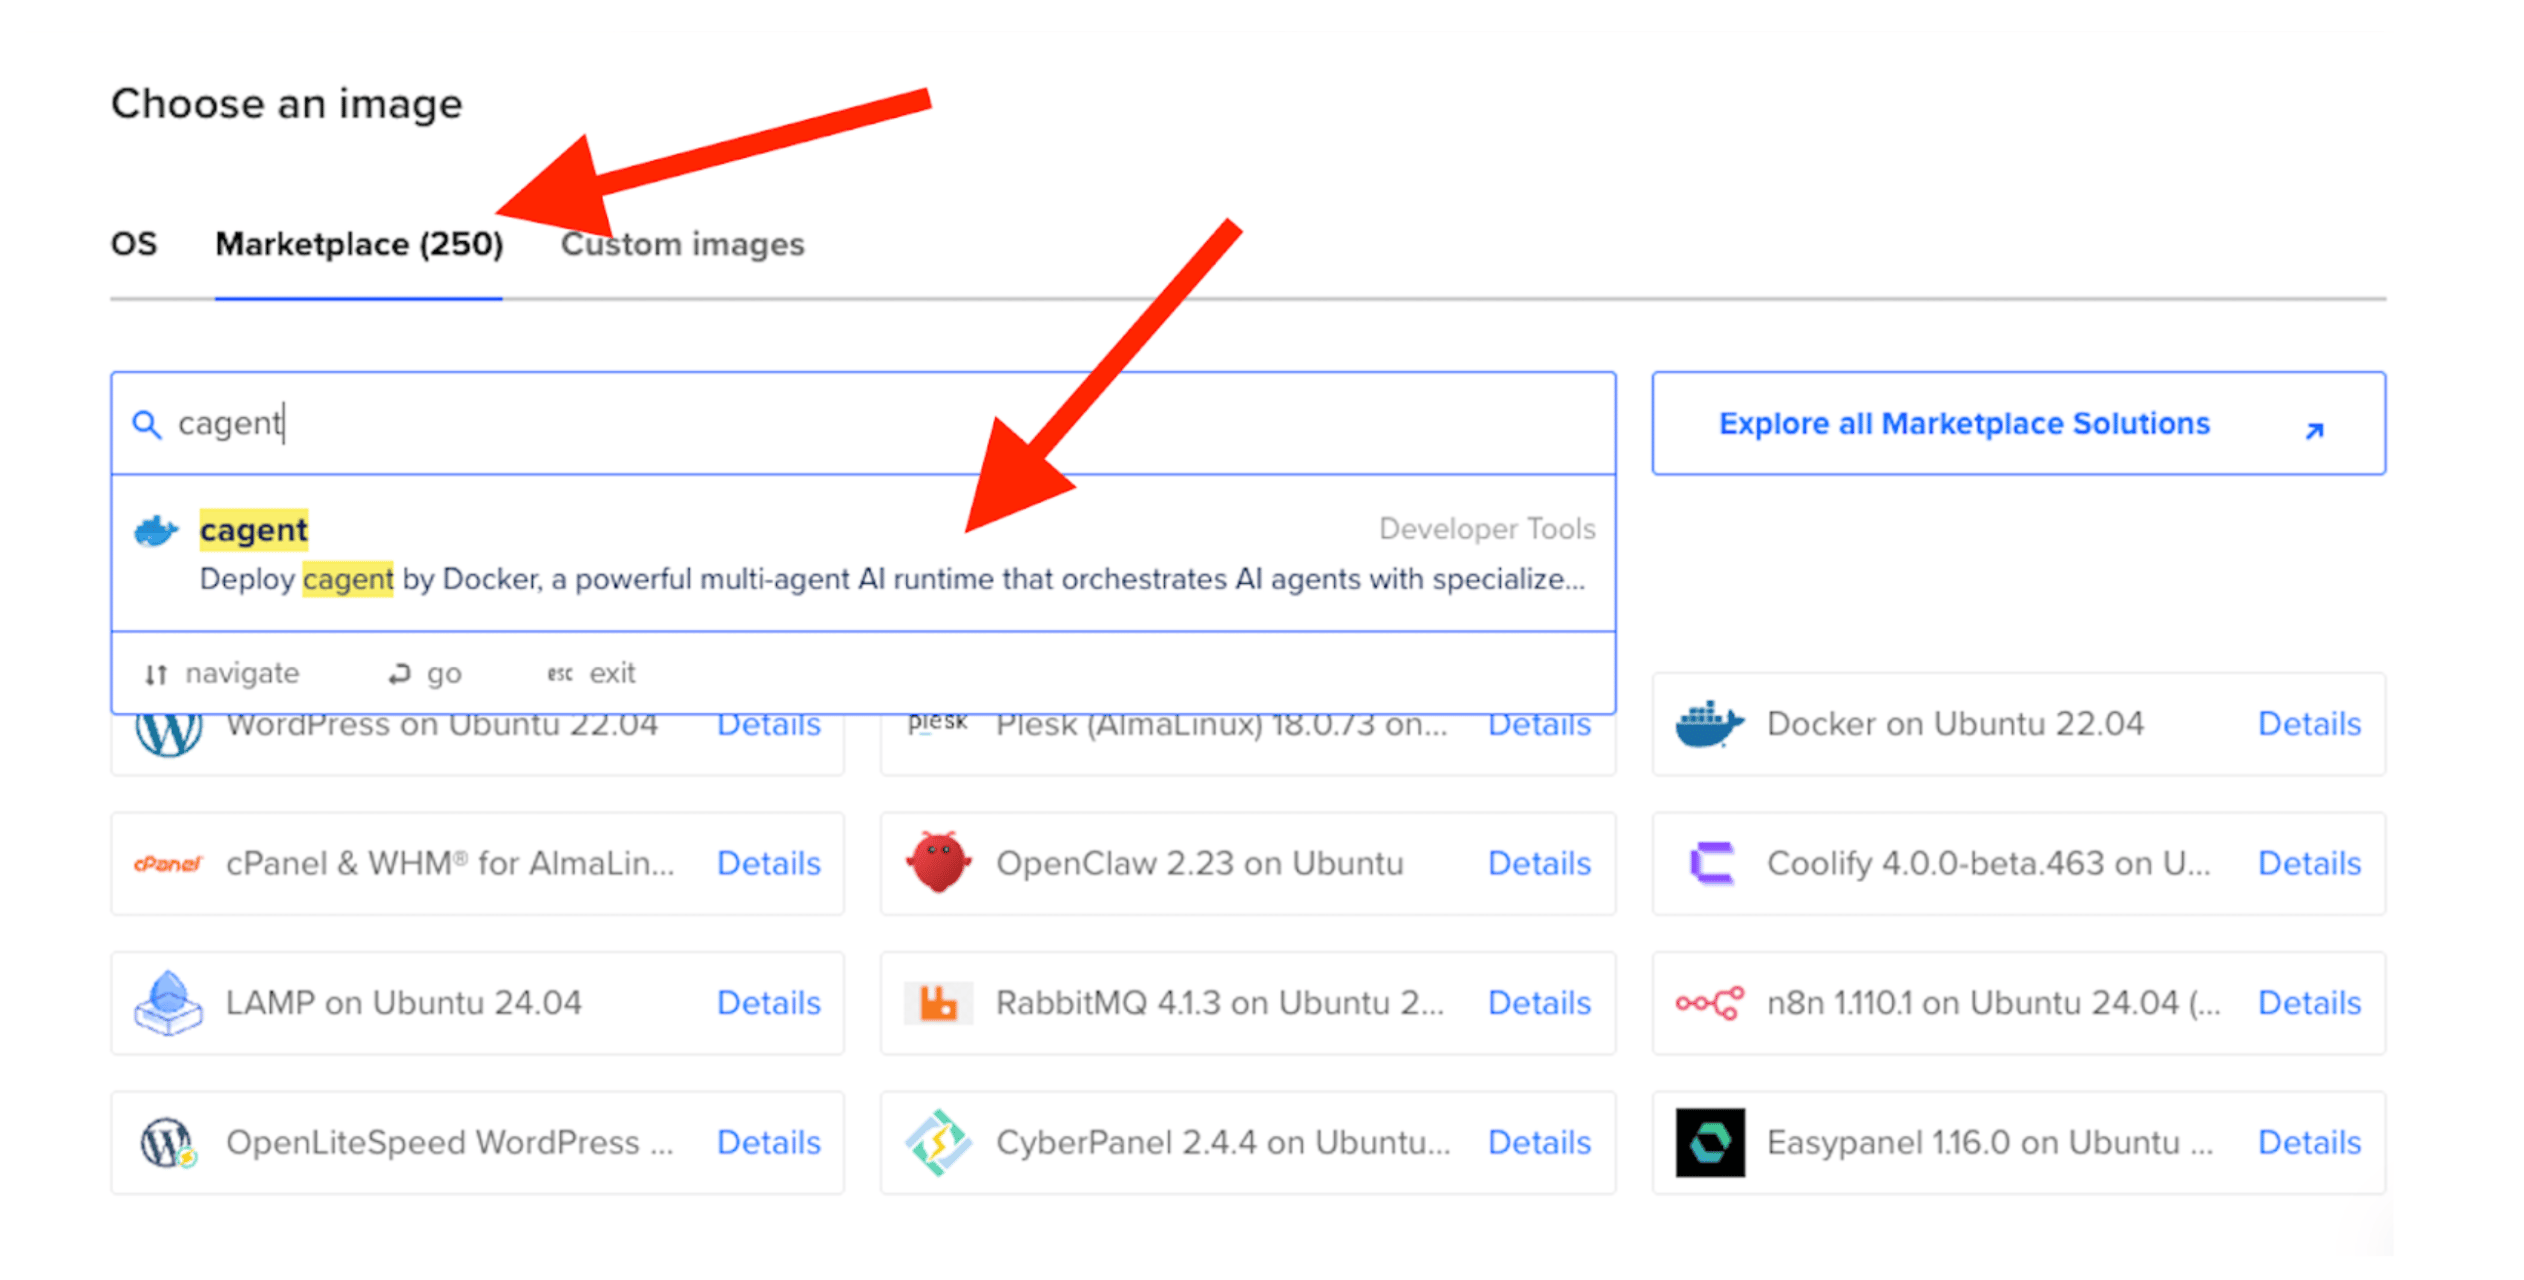
Figure 3: Search for “Docker Agent” in the Marketplace tab
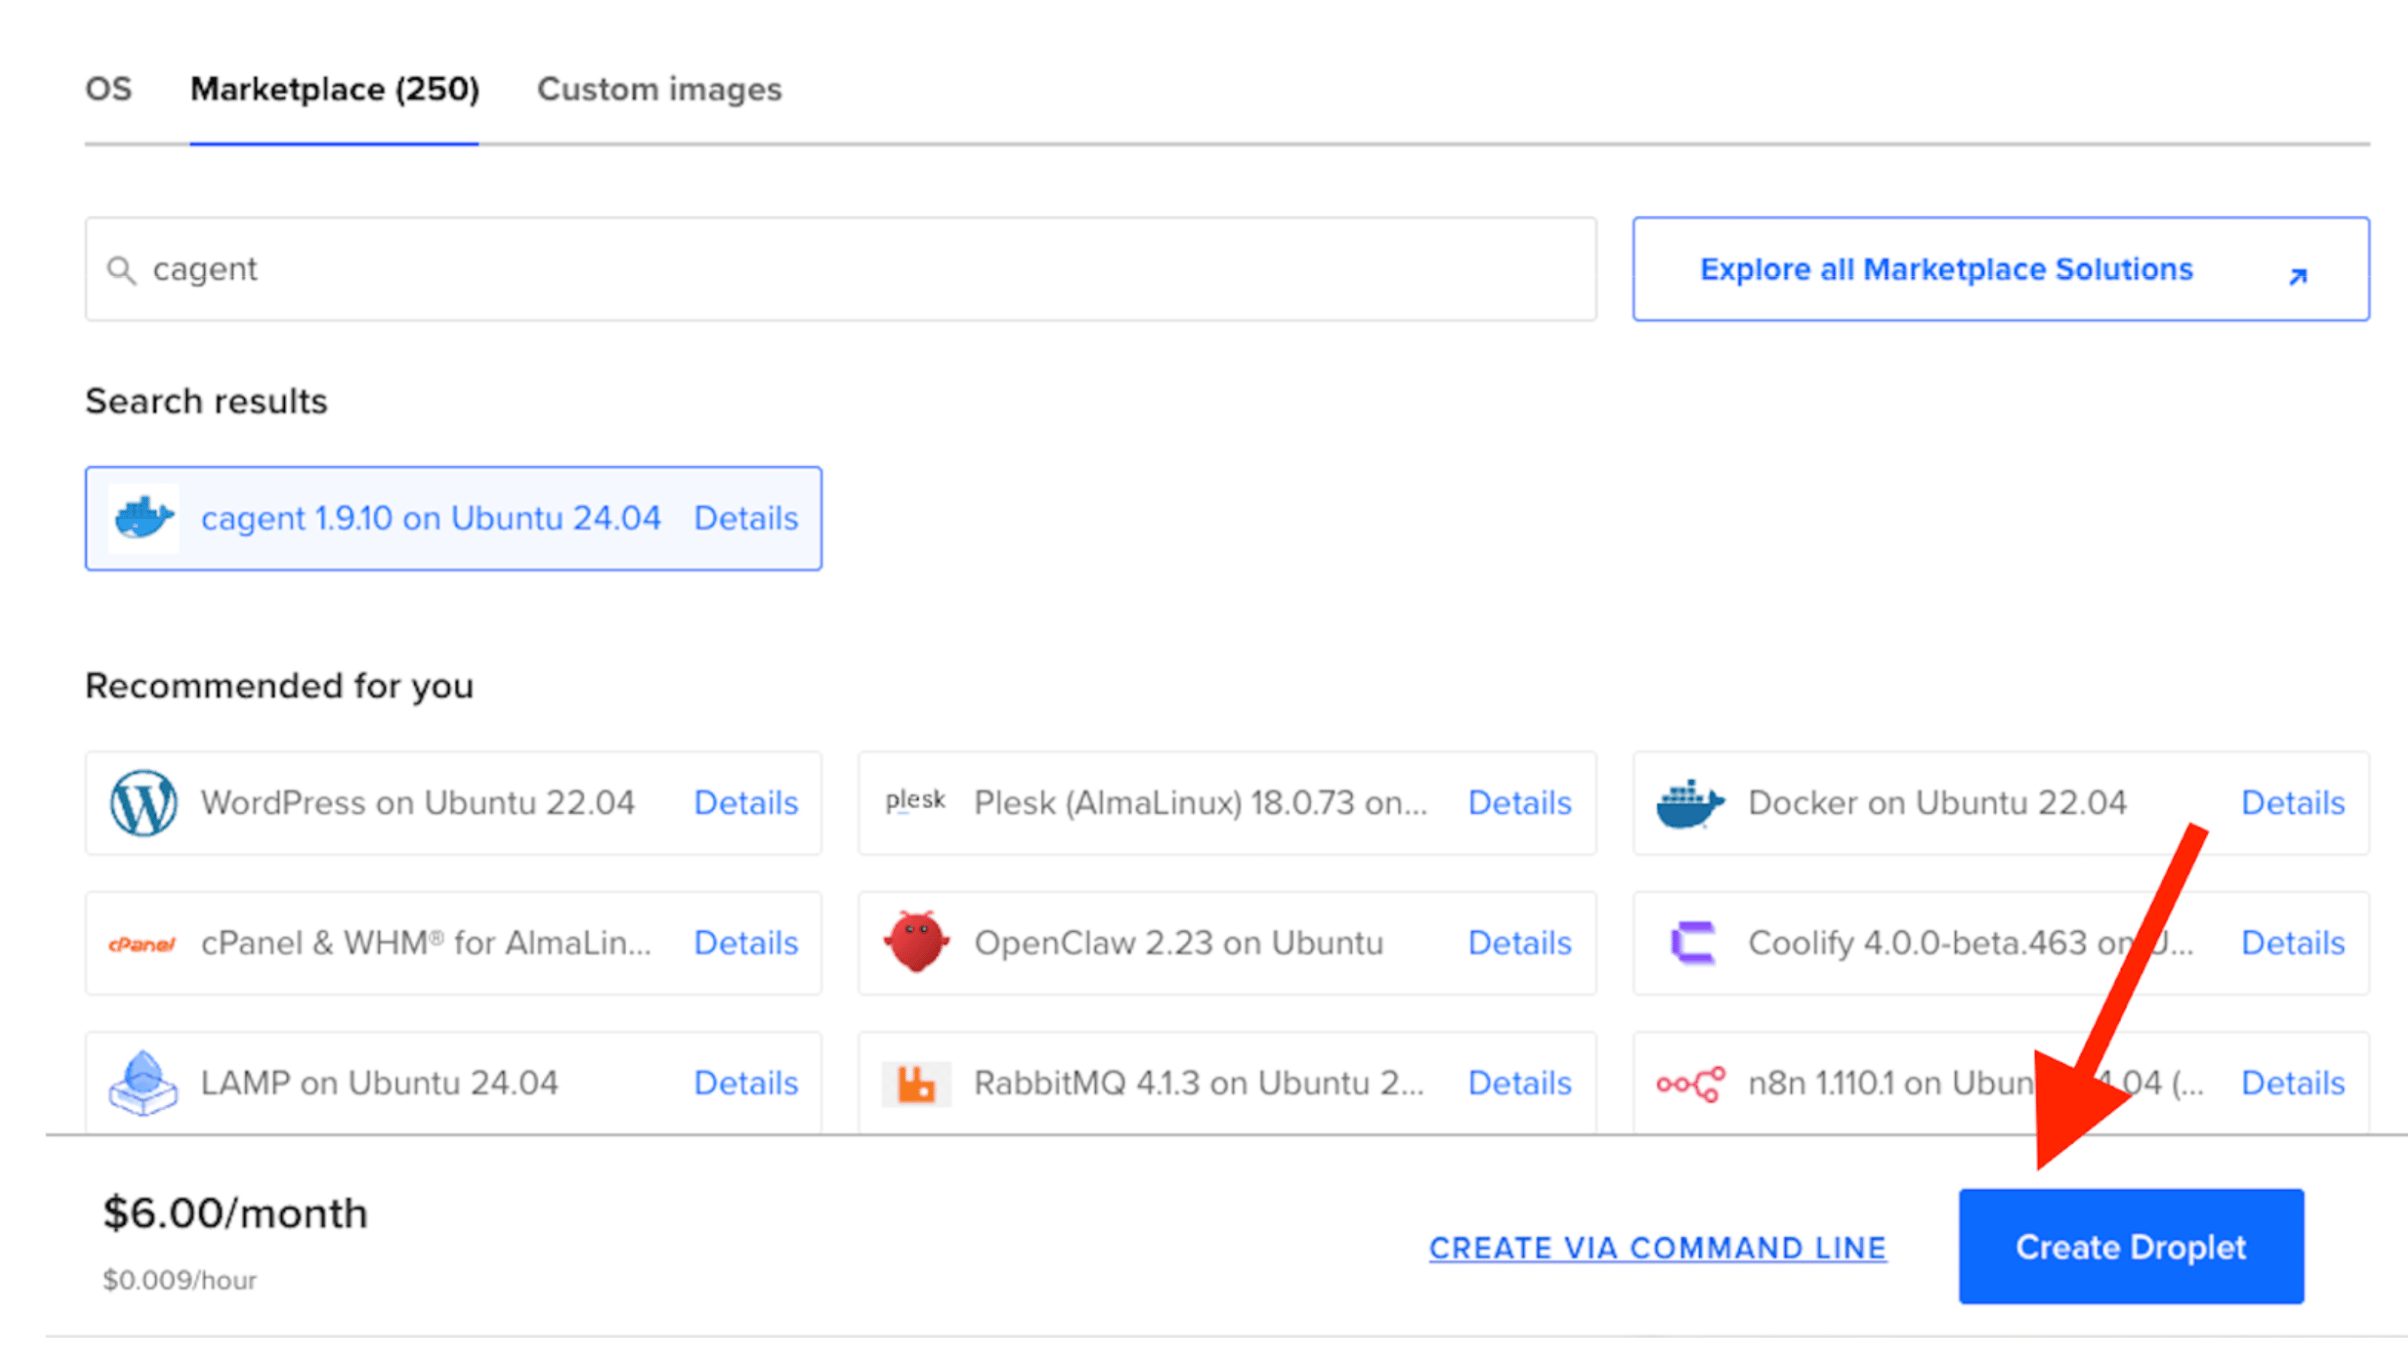
Review the Droplet size, add your SSH key, and click Create Droplet.
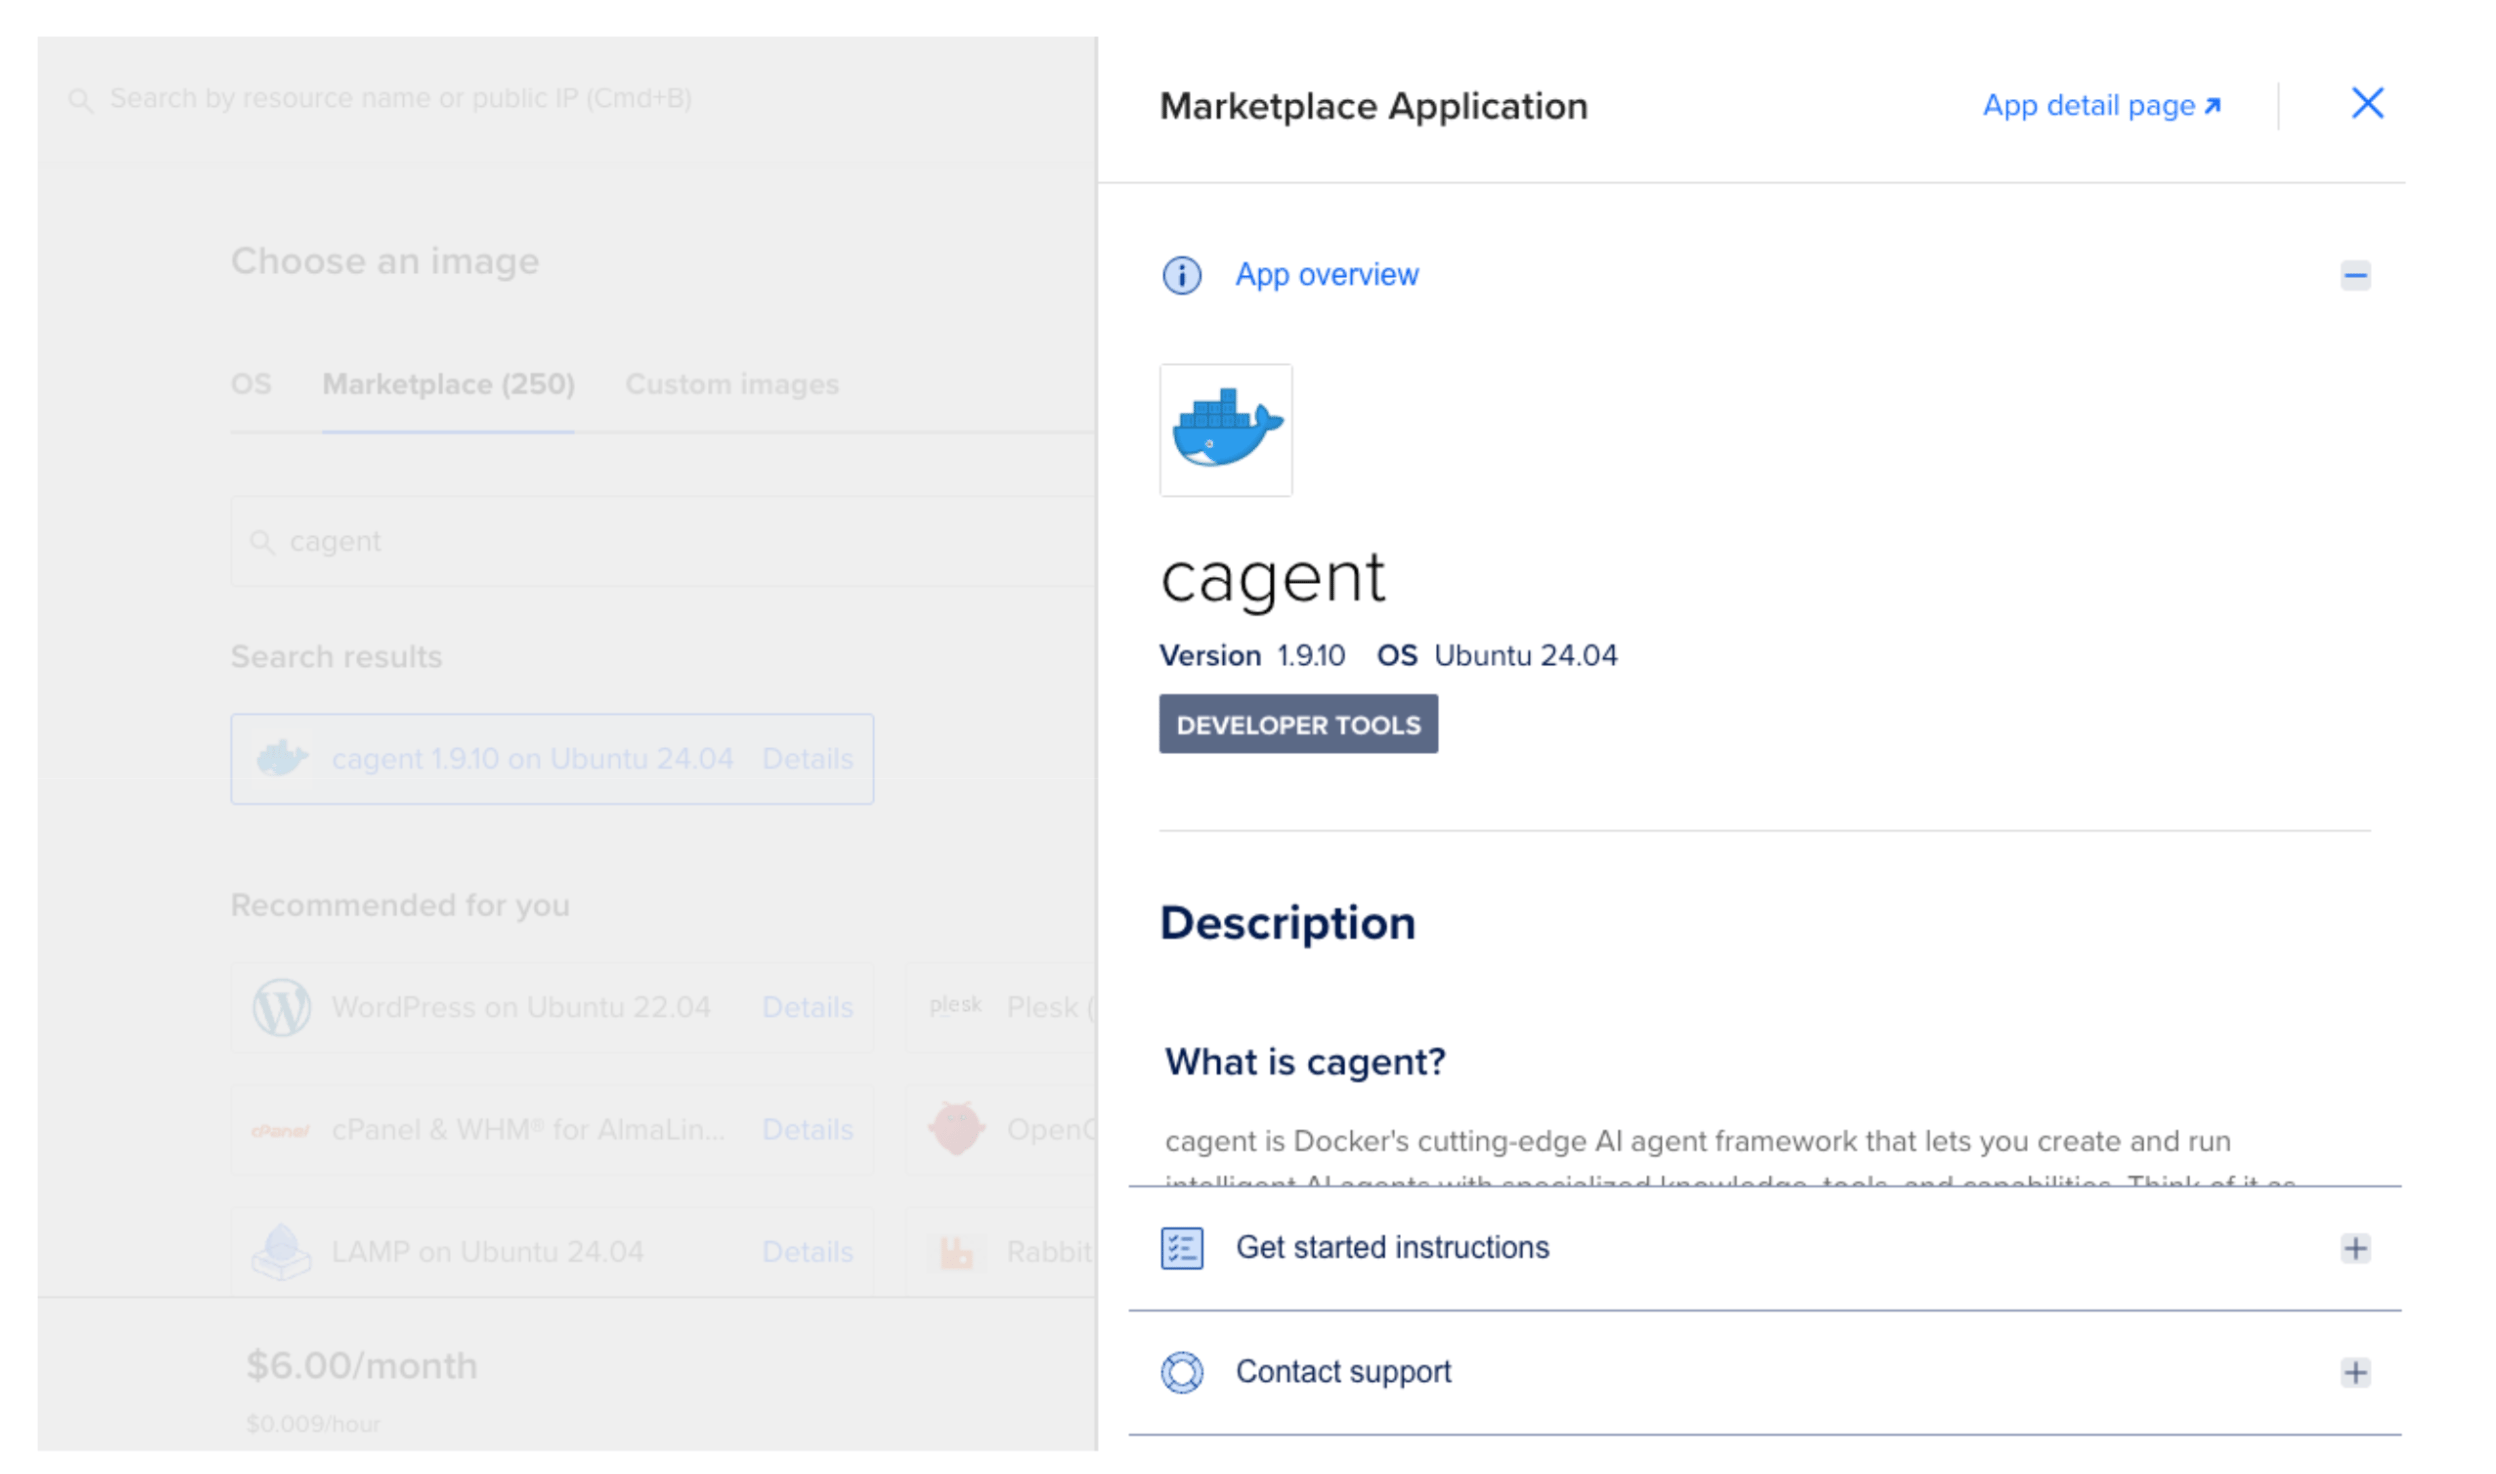
Figure 4: The Docker Agent 1-Click App page with the Create Droplet button
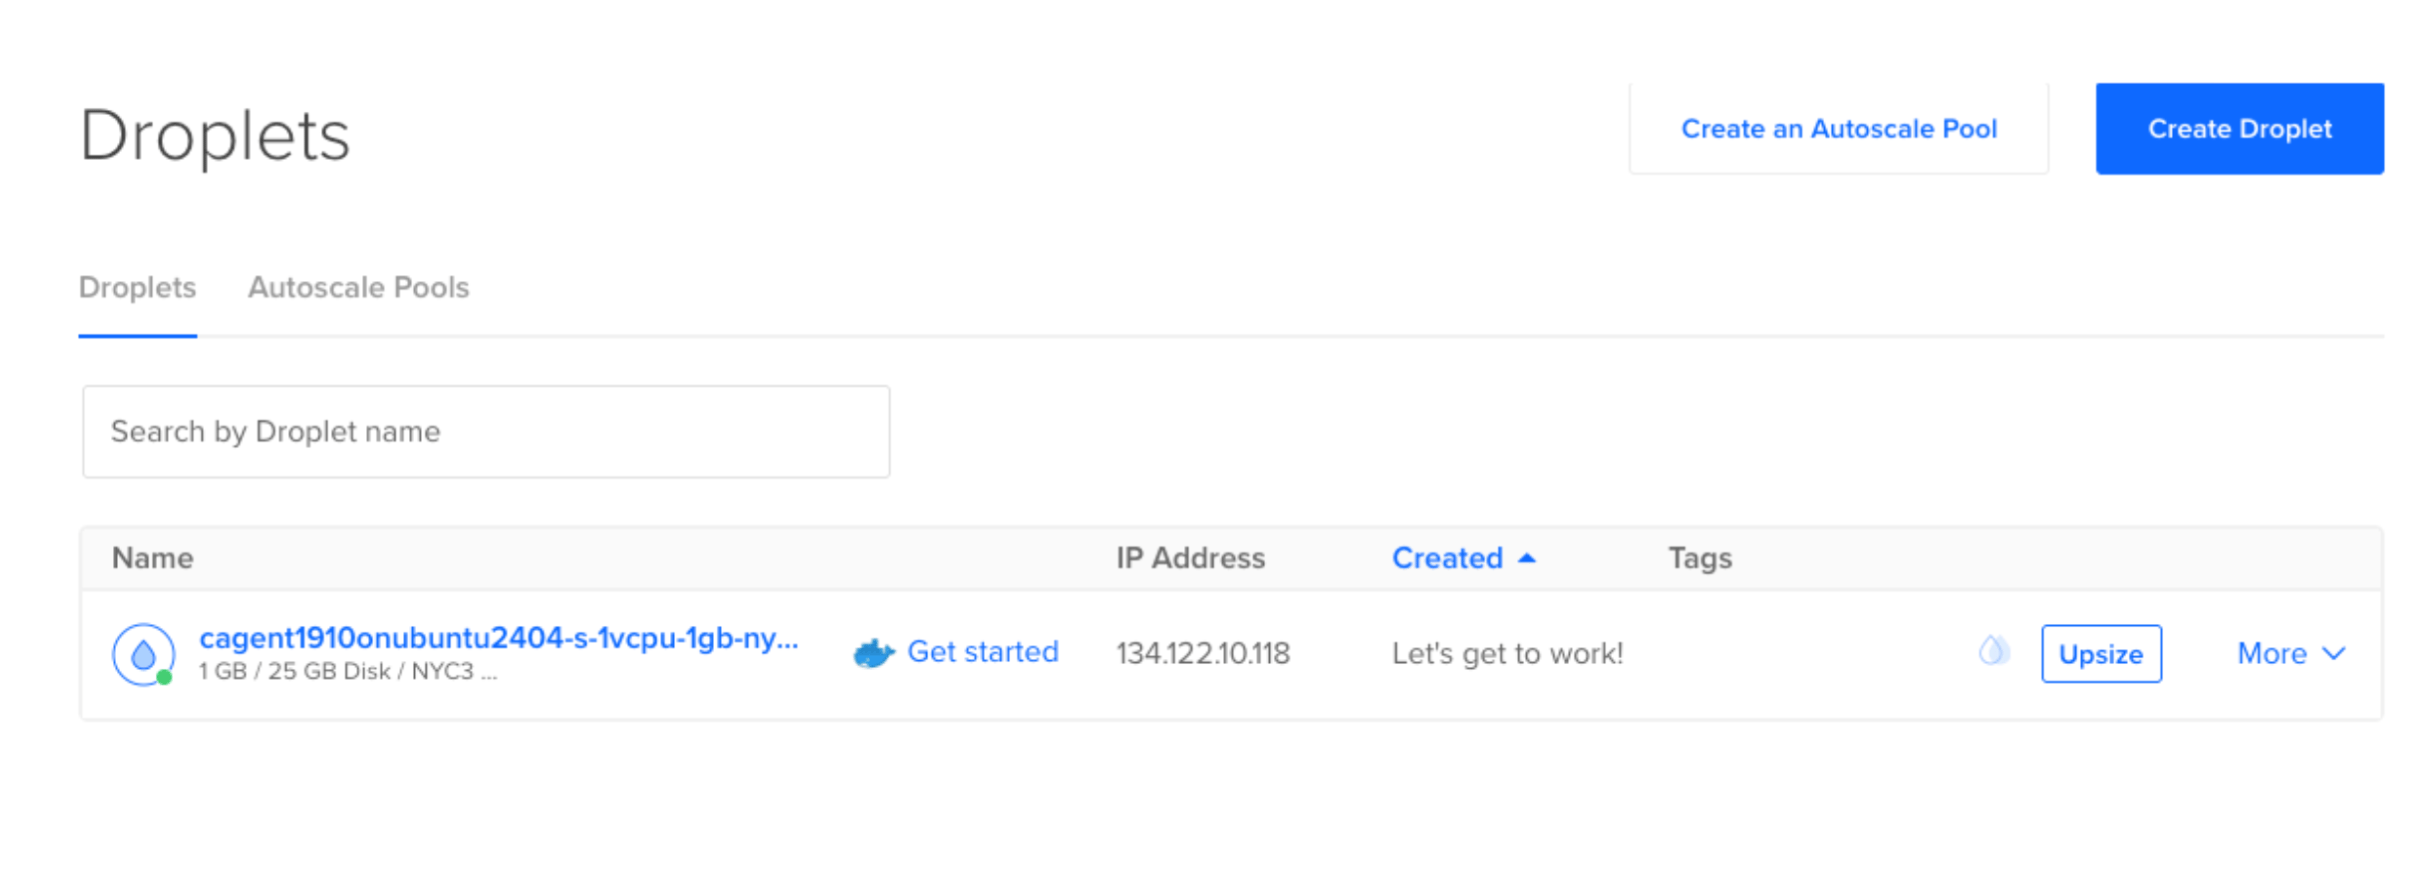
Your Docker Agent Droplet is now running.
Example output:
134.122.10.118That is the $6/month tier, which works fine for cloud API agents.
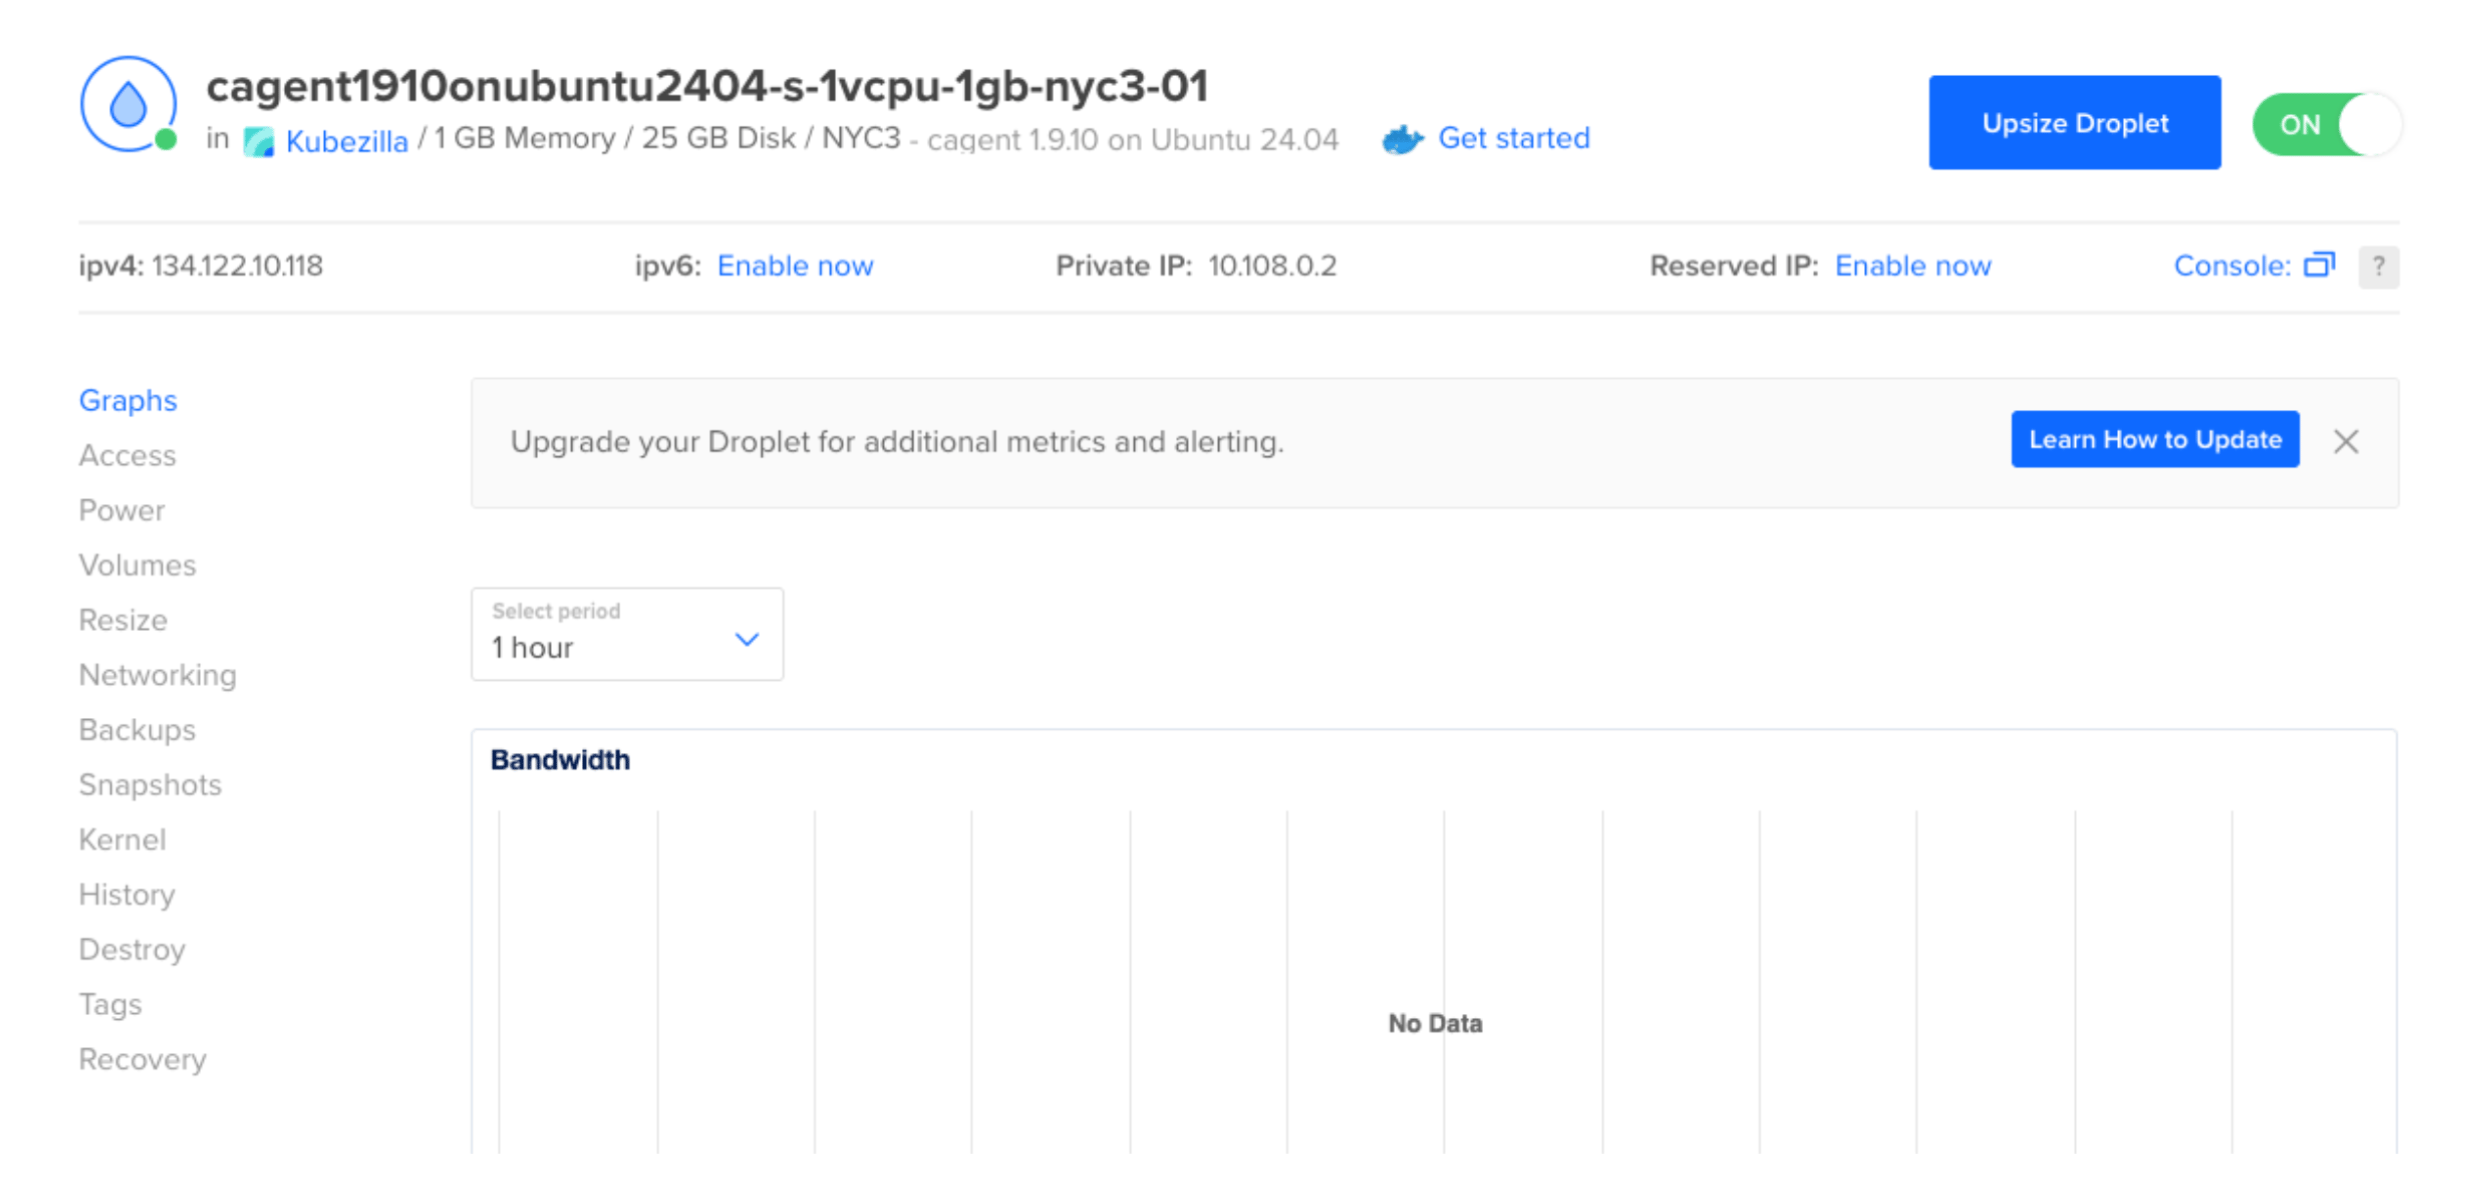
Figure 5: Your new Docker Agent Droplet with IP address and specifications
This opens a browser-based terminal with no SSH key needed.
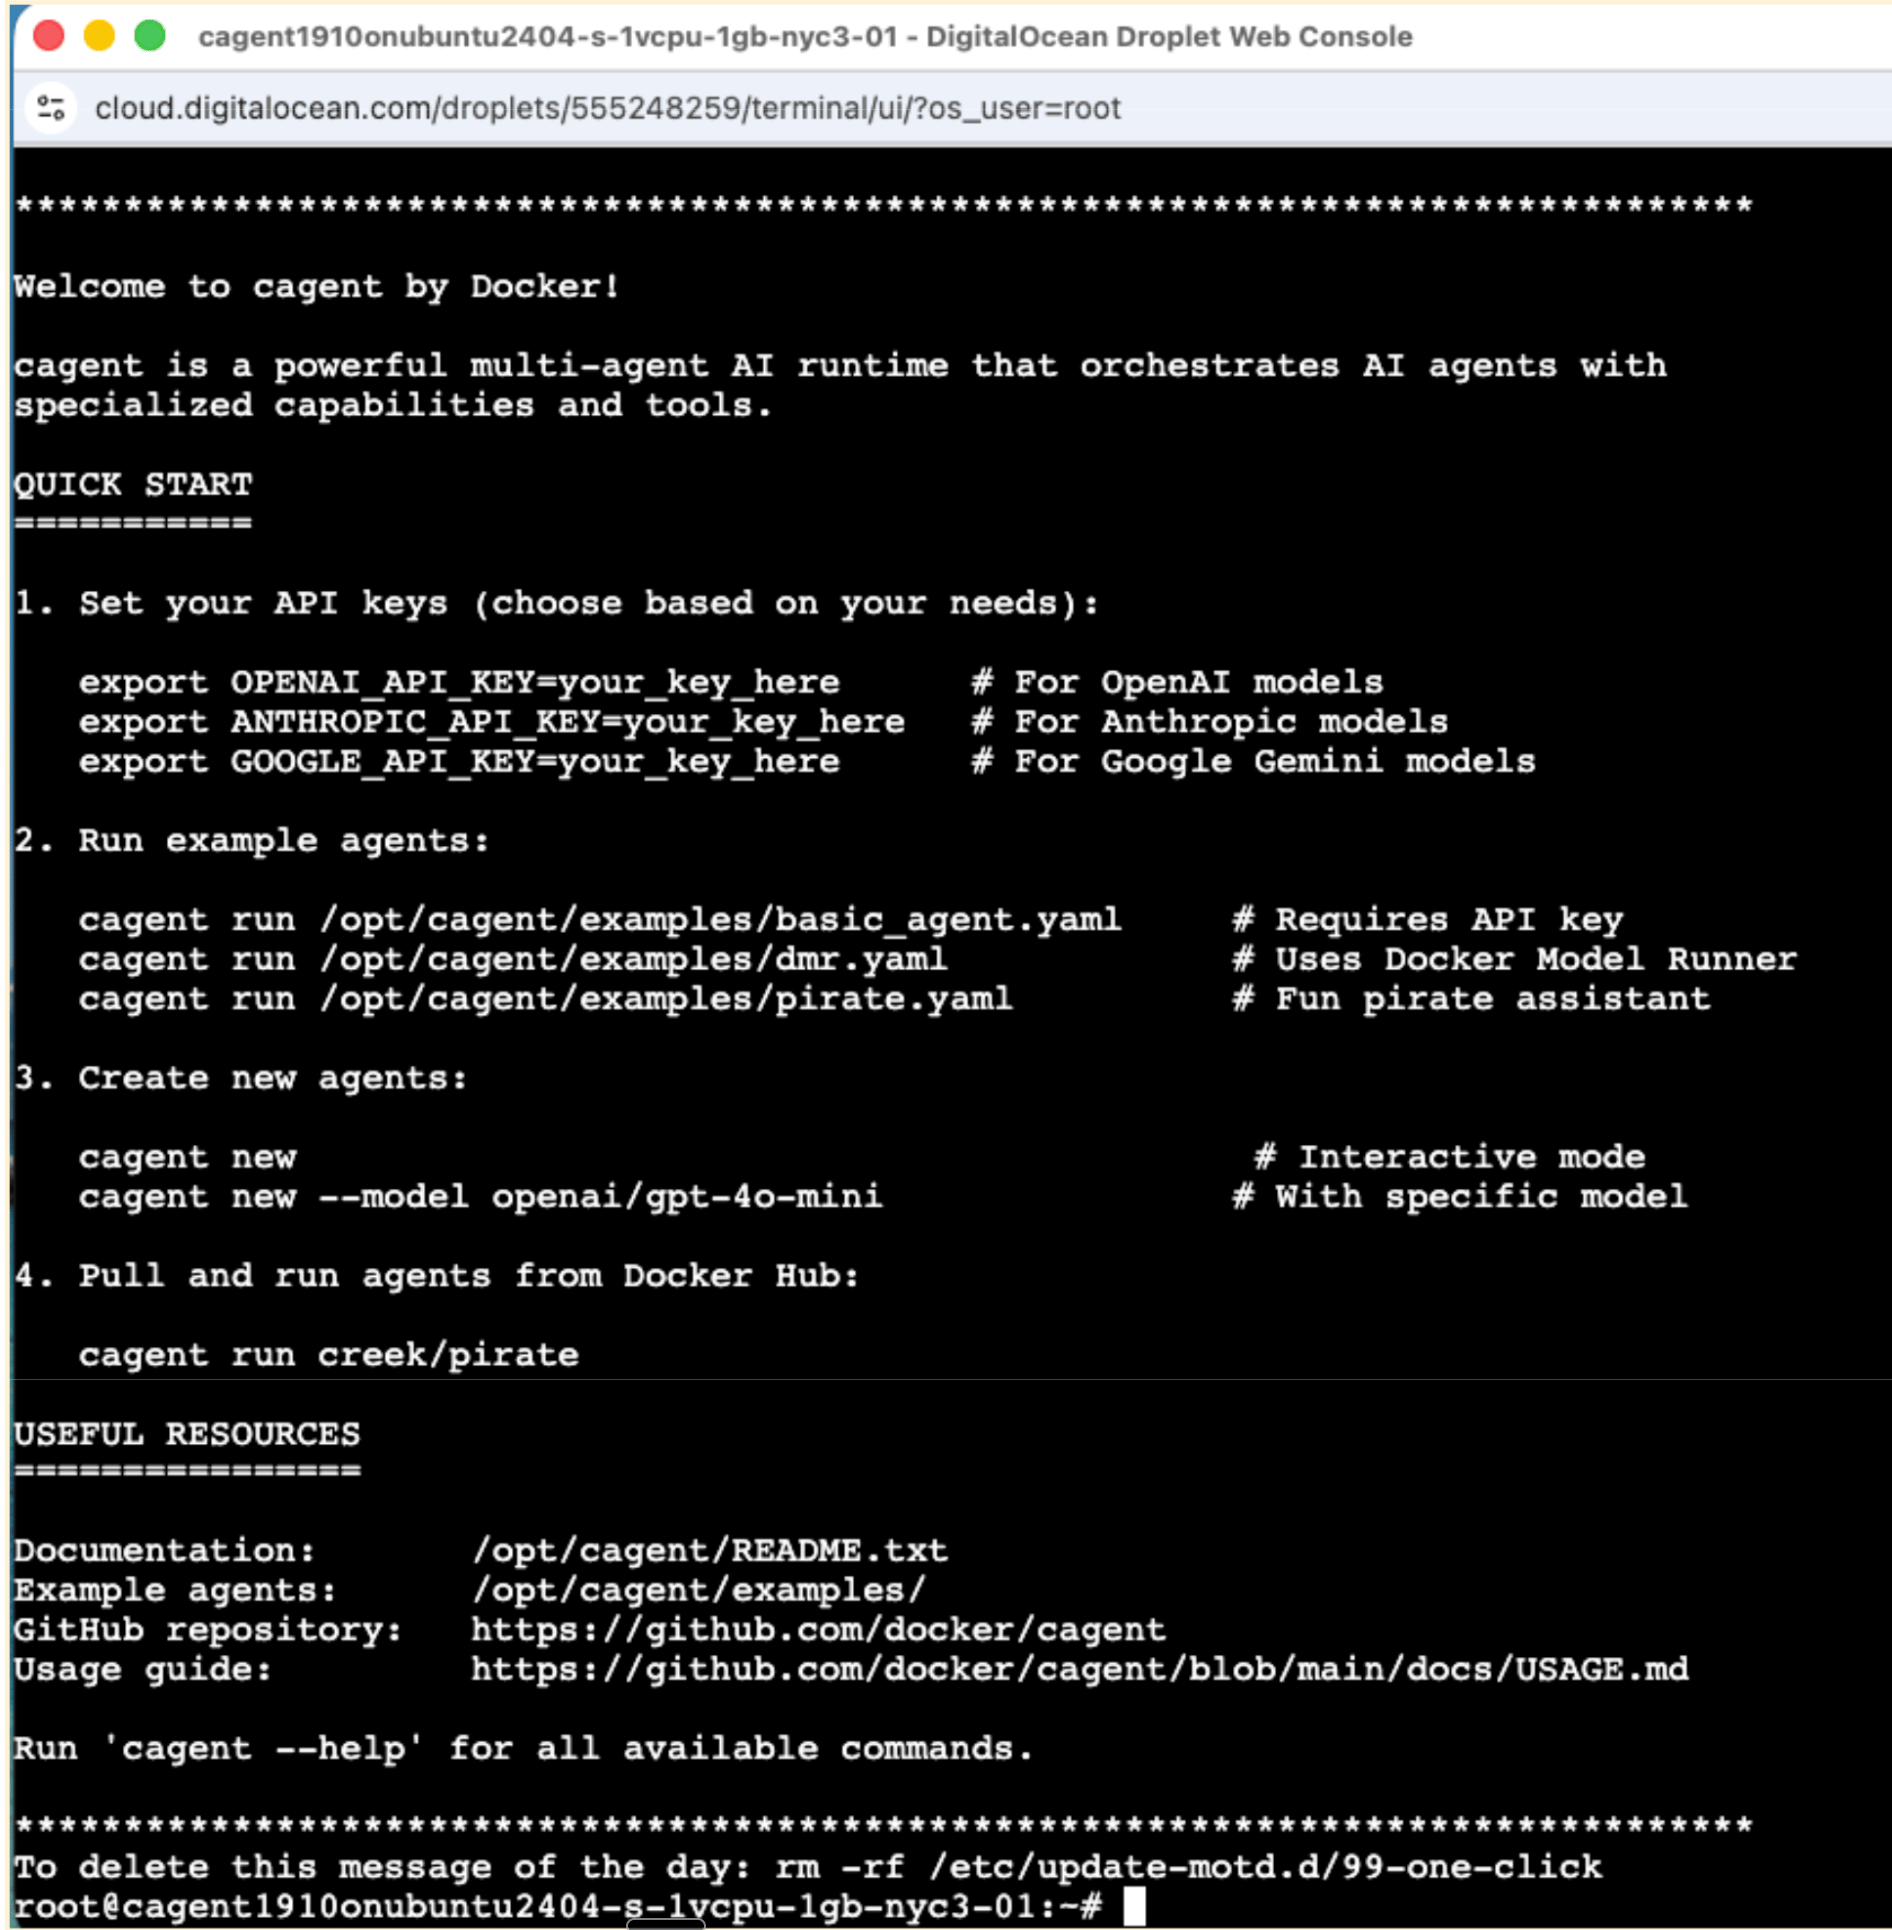
Figure 6: Access the Droplet Console from the Access tab in your Droplet settings
If you prefer SSH, you can reset the root password or use your SSH key:
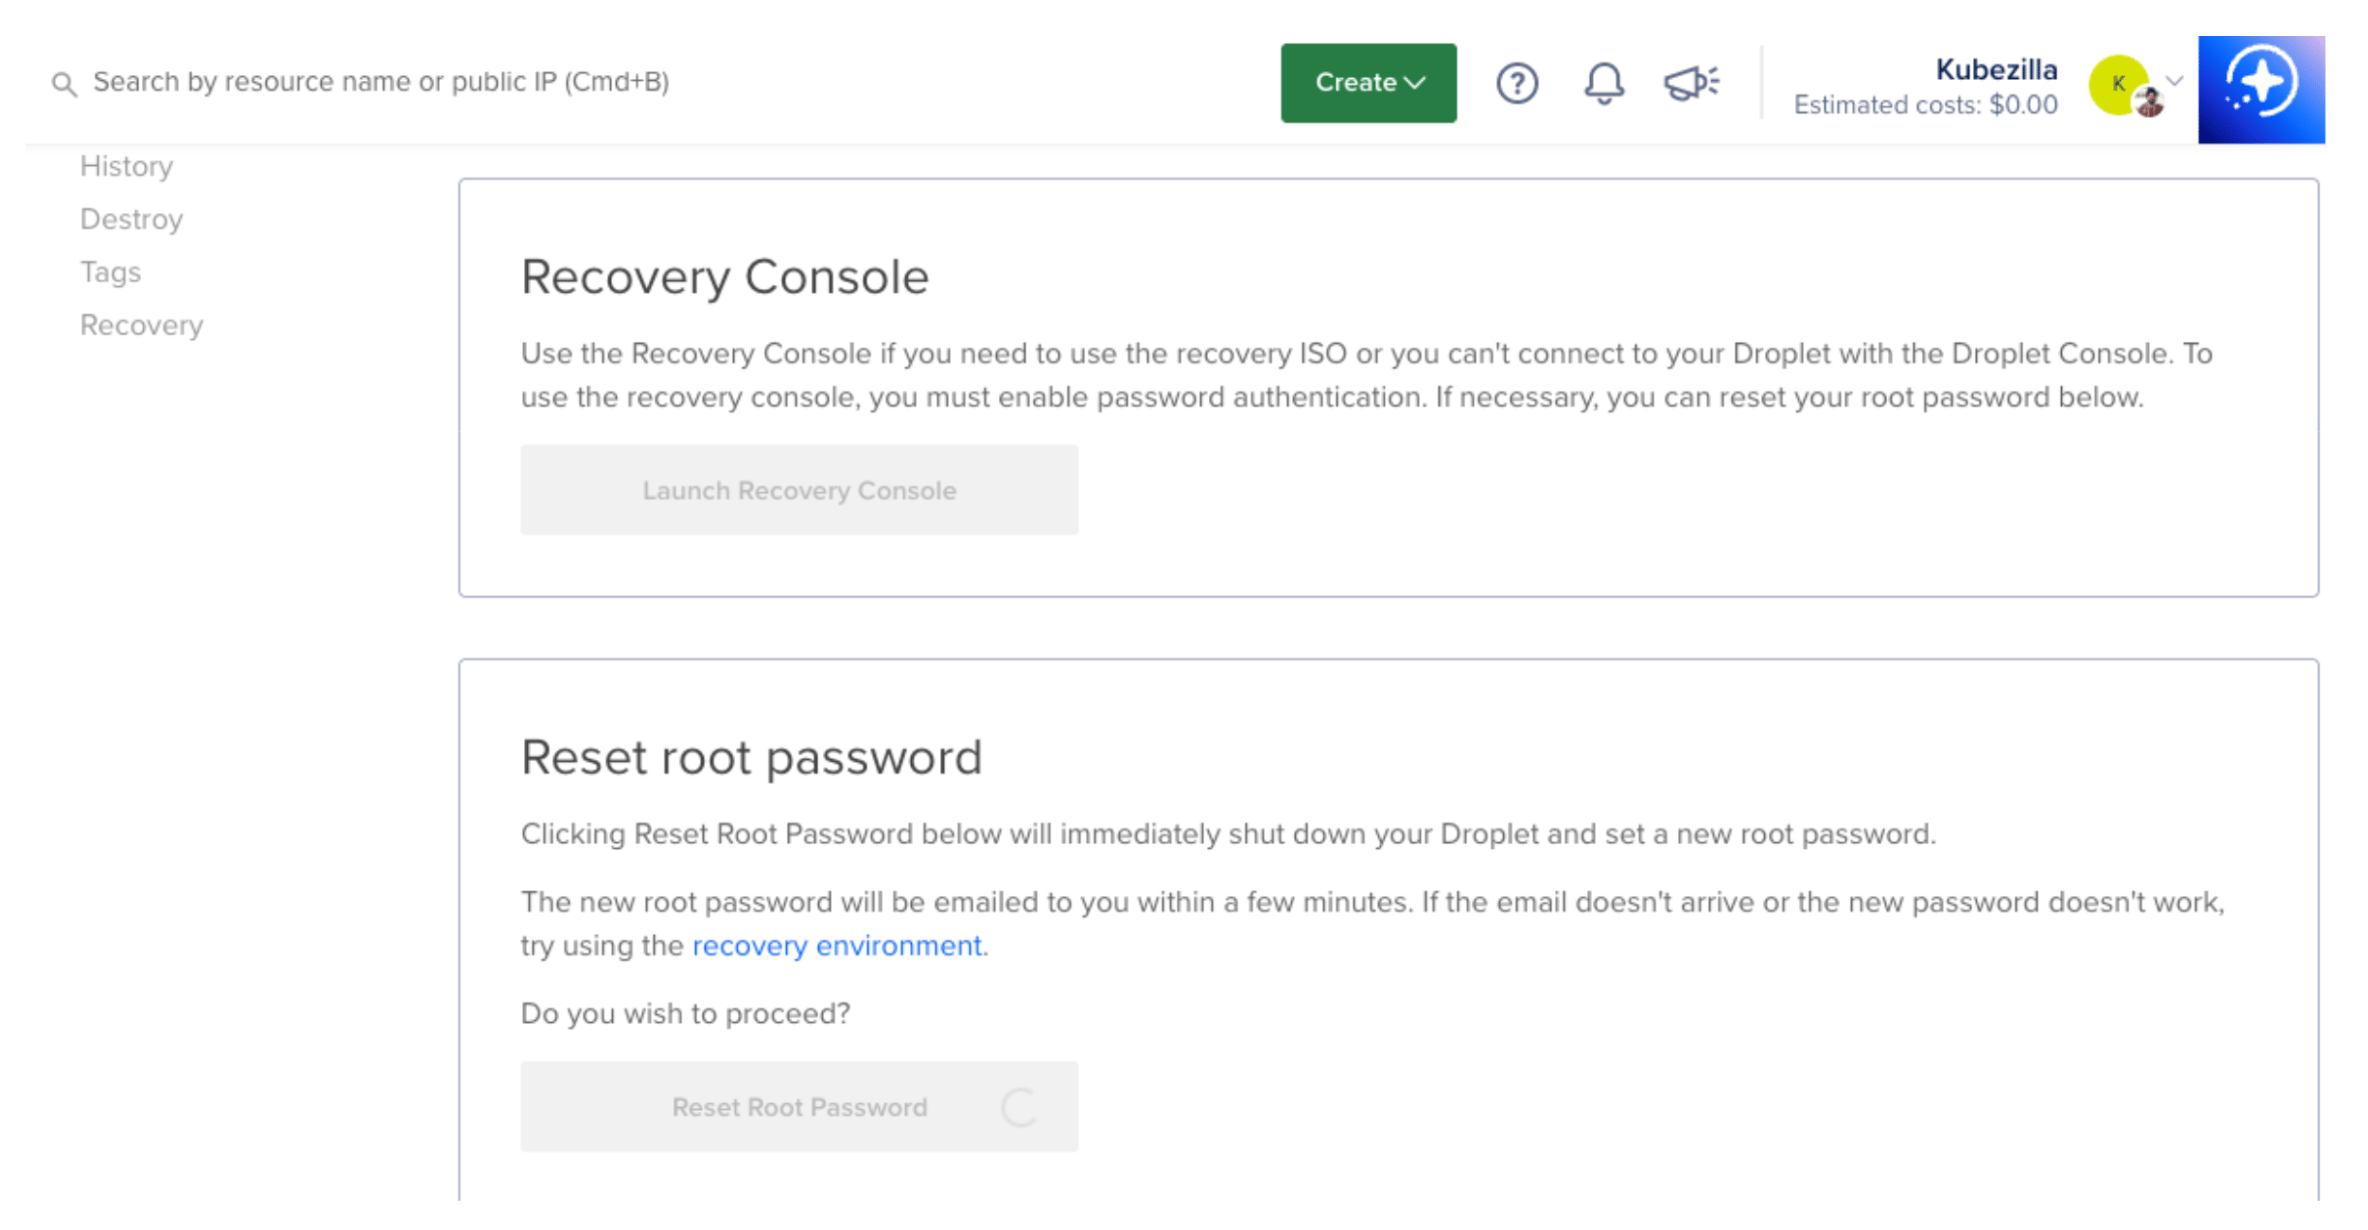
ssh root@YOUR_DROPLET_IP
Replace YOUR_DROPLET_IP with your Droplet’s actual IP address.
Verify that Docker Agent (cagent) is pre-installed:
cagent version
Expected output:
cagent version v1.9.10
Commit: 1782337c60dadcb39643f7c9e1a9798ea784c7aa
git clone https://github.com/ajeetraina/bug-investigator-agent.git
cd bug-investigator-agent
Review the project structure:
tree
.
├── LICENSE
├── README.md
├── bug.txt
├── cagent-anthropic.yaml
├── cagent-local.yaml
├── cagent-openai.yaml
├── cagent.yaml
├── examples
│   └── bug-scenarios.md
├── scripts
│   └── deploy.sh
└── test-code
    ├── Dockerfile
    ├── app.py
    ├── deployment.yaml
    ├── index.js
    └── main.go

4 directories, 14 files
The repository includes YAML configurations for three model providers: OpenAI, Anthropic, and local (Docker Model Runner). Each configuration defines the same multi-agent architecture, but targets a different inference backend.
Set the OpenAI API key:
export OPENAI_API_KEY=sk-proj-XXXXXXXXXXX
The repository includes cagent-openai.yaml configured for GPT-4o and GPT-4o-mini. Launch the agent:
cagent run ./cagent-openai.yaml
The cagent chat interface opens, ready to use the multi-agent Bug Investigator architecture. You are now in the agent’s interactive chat.
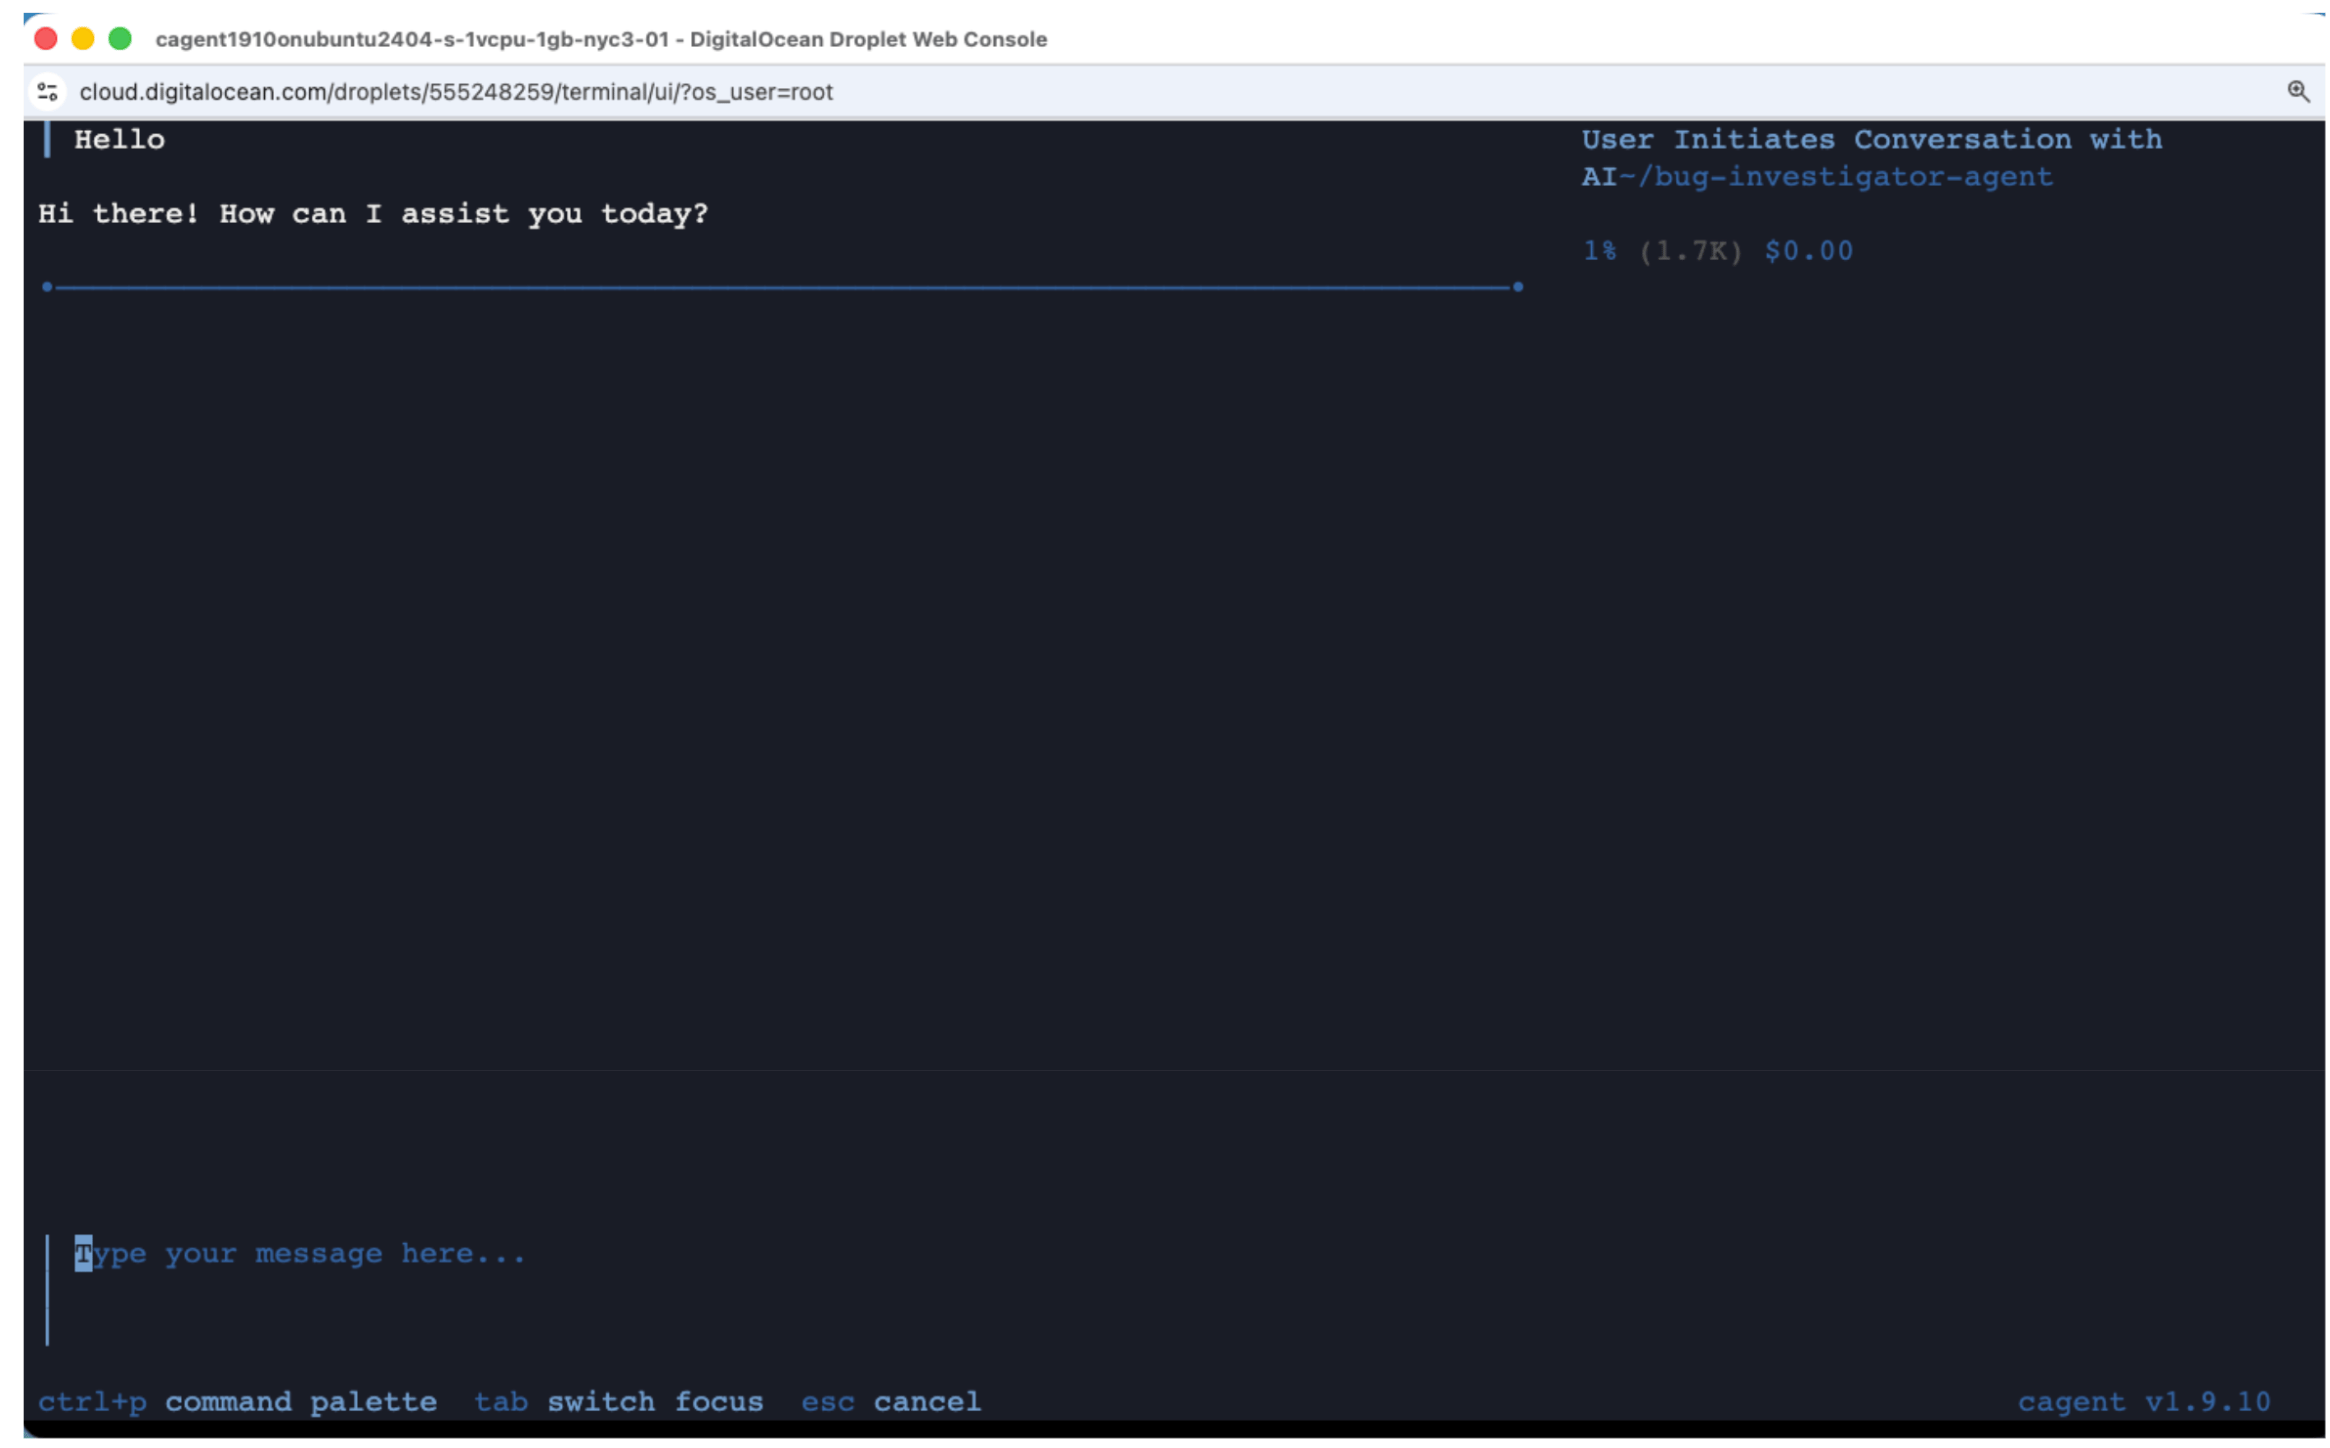
Paste the following buggy code into the agent chat:
I have this Python code that's crashingPoint.:

def calculate_average(numbers):
    total = 0
    for num in numbers:
        total += num
    return total / len(numbers)

result = calculate_average([])
print(result)

Error: ZeroDivisionError: division by zero
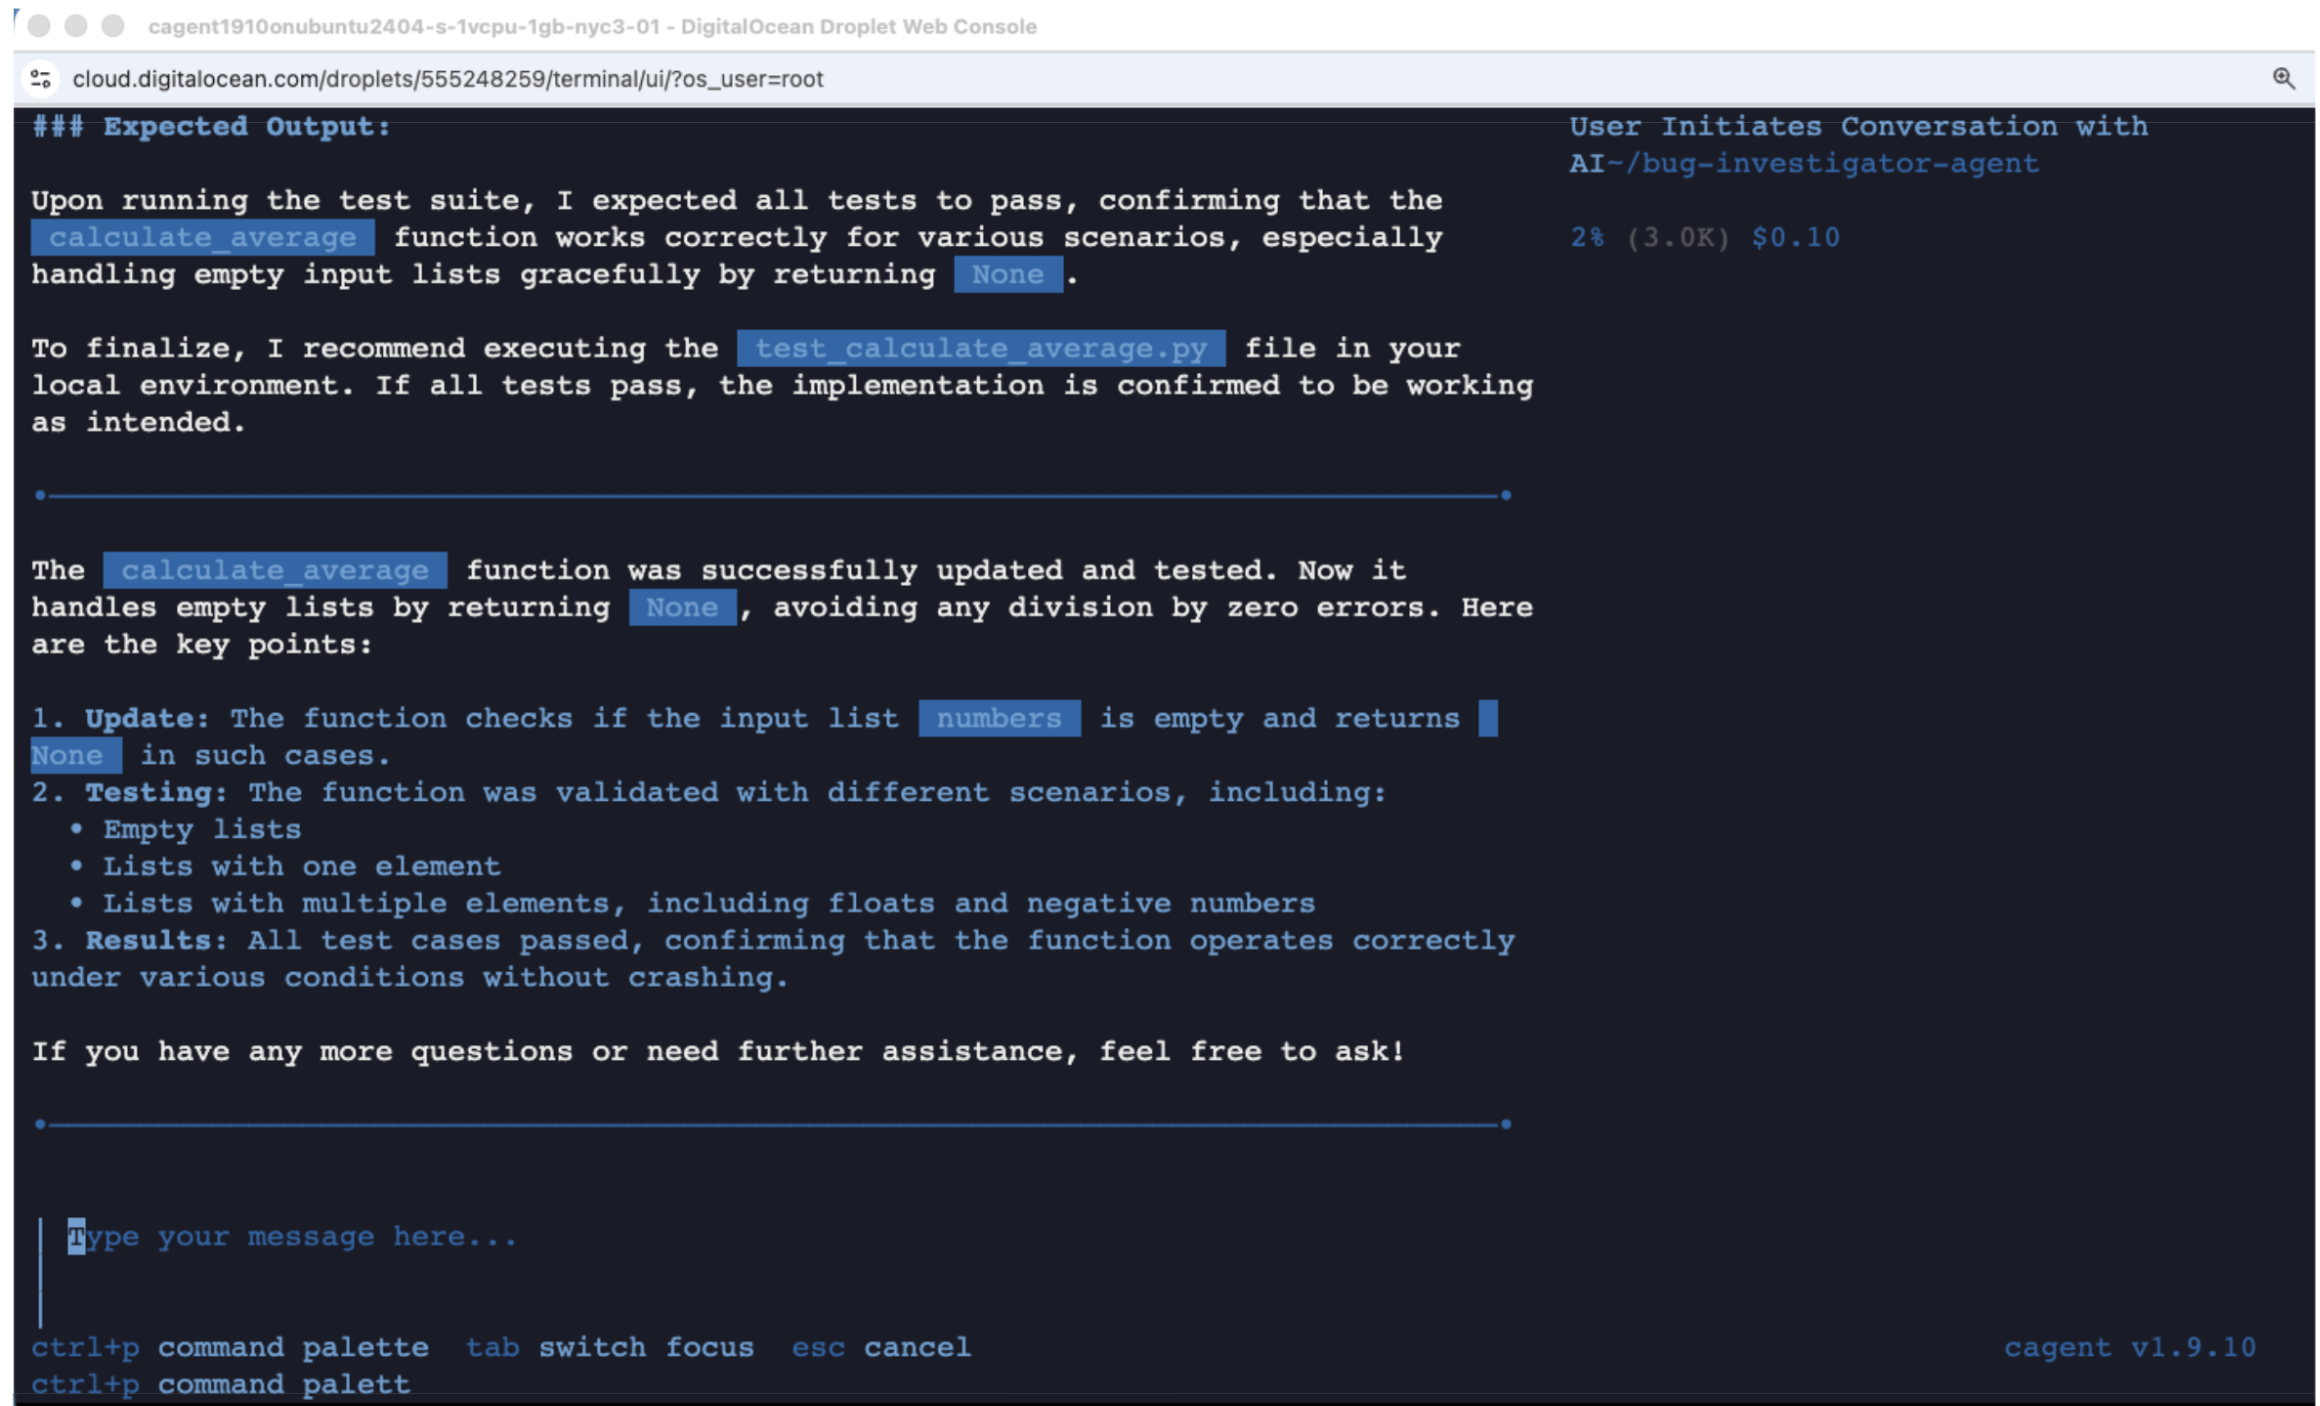
The agent processes this through its multi-agent workflow:
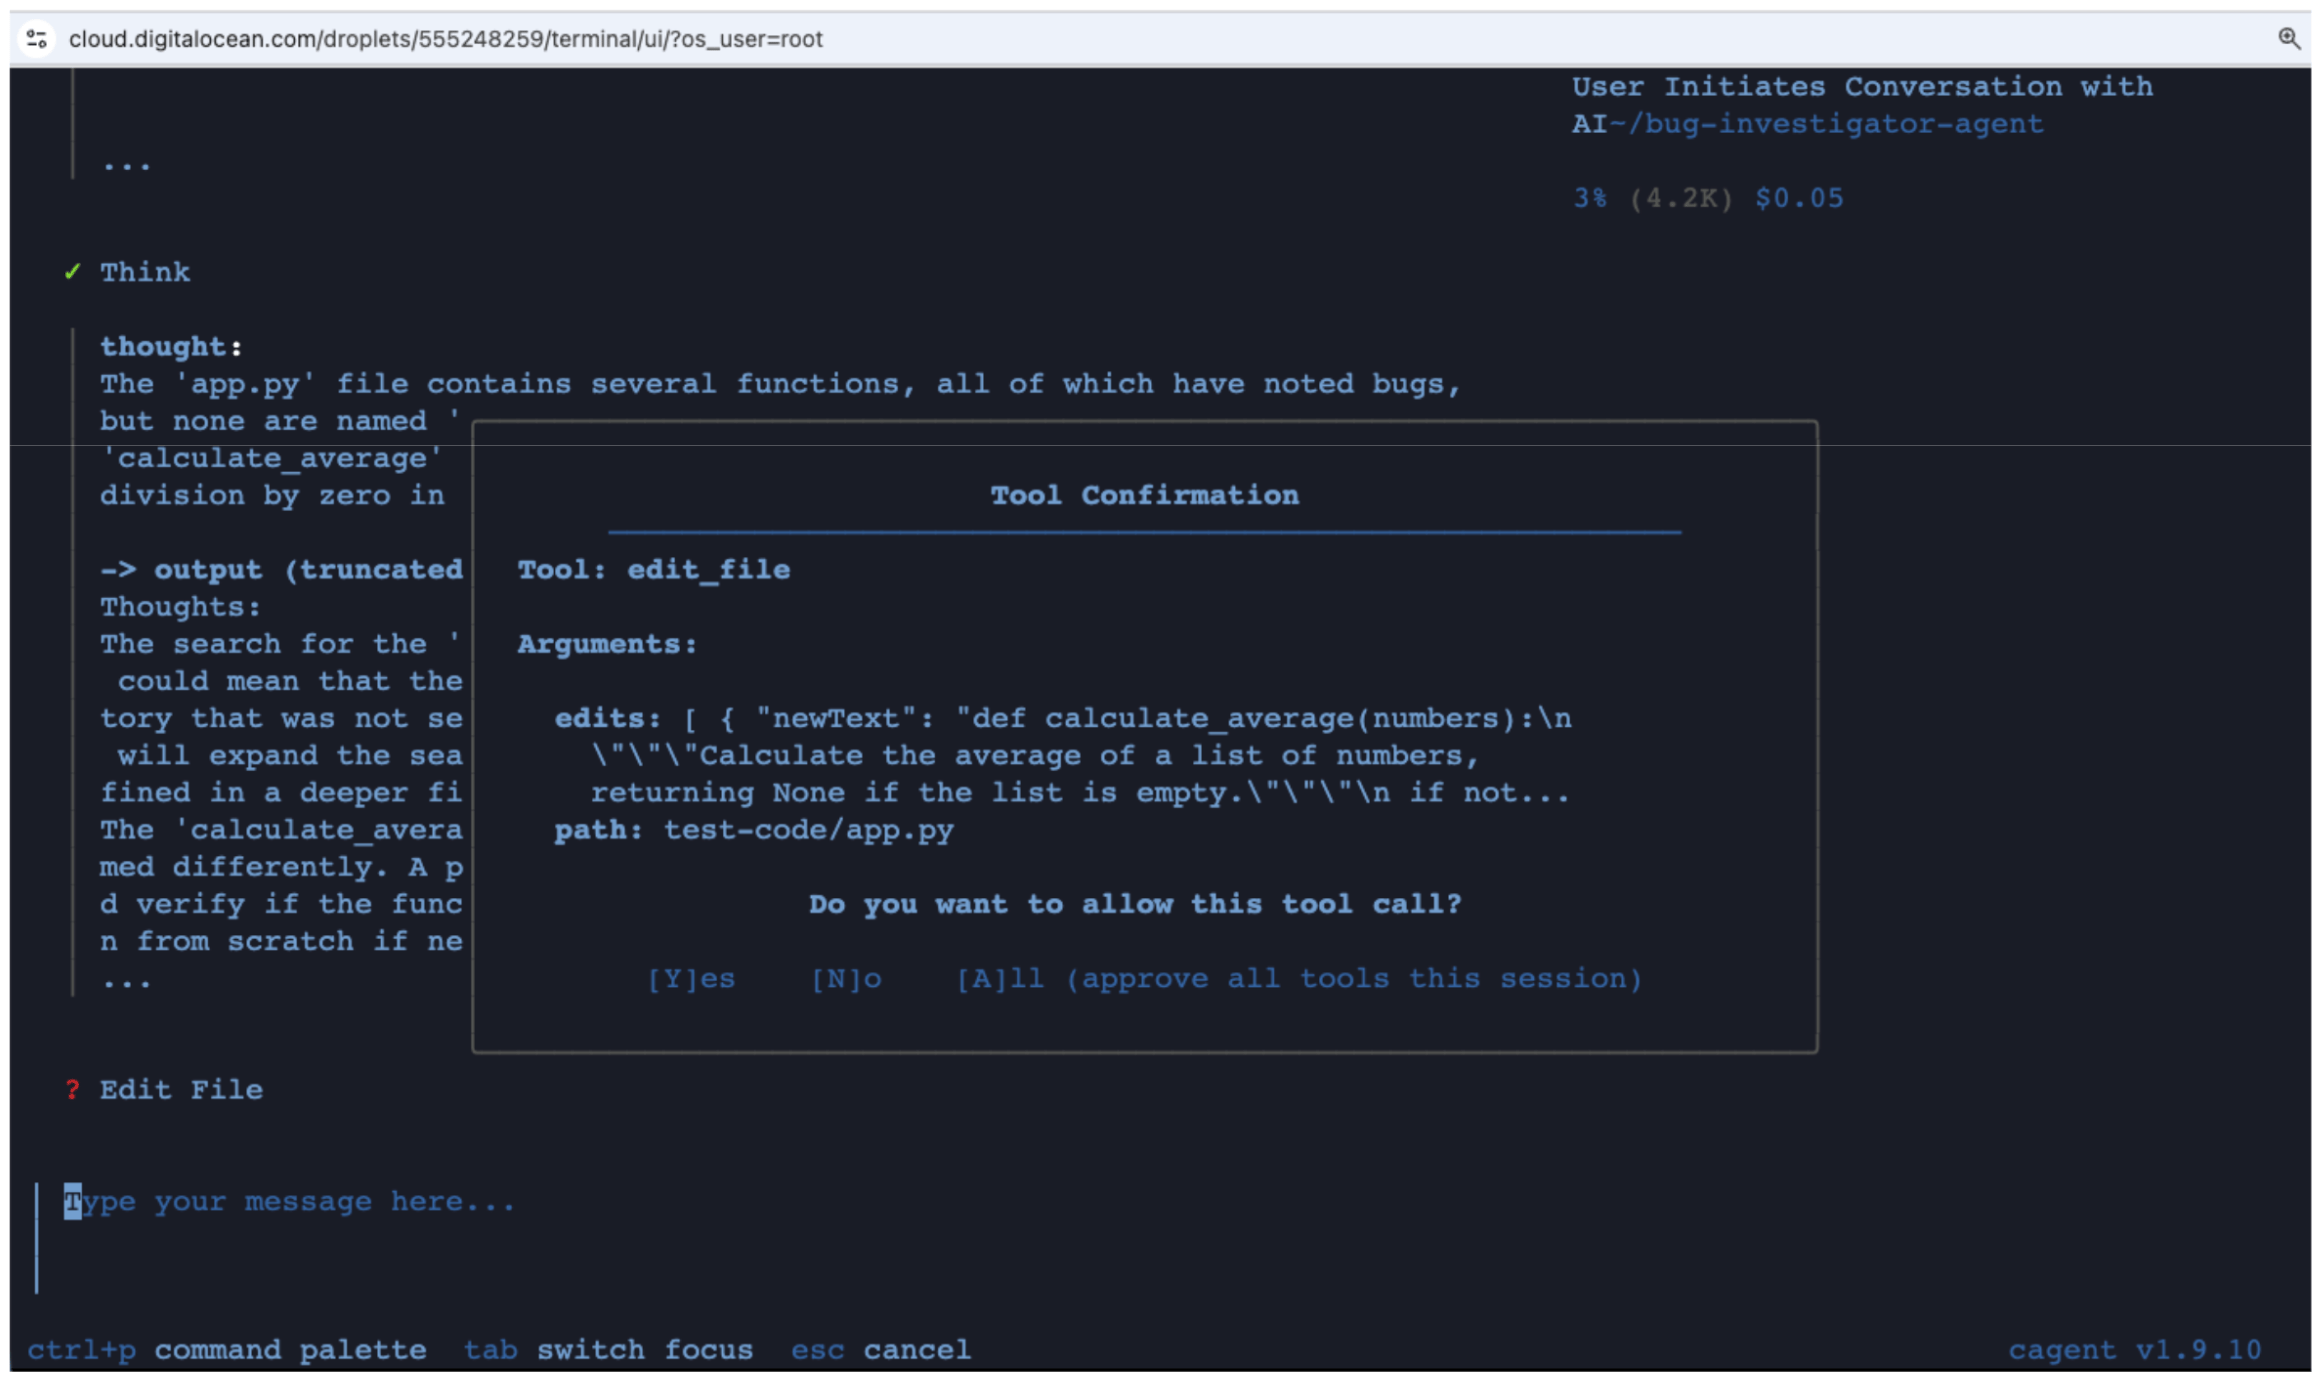
Figure 8: The Bug Investigator agent analyzing the ZeroDivisionError
Press Ctrl+p to open the command palette.
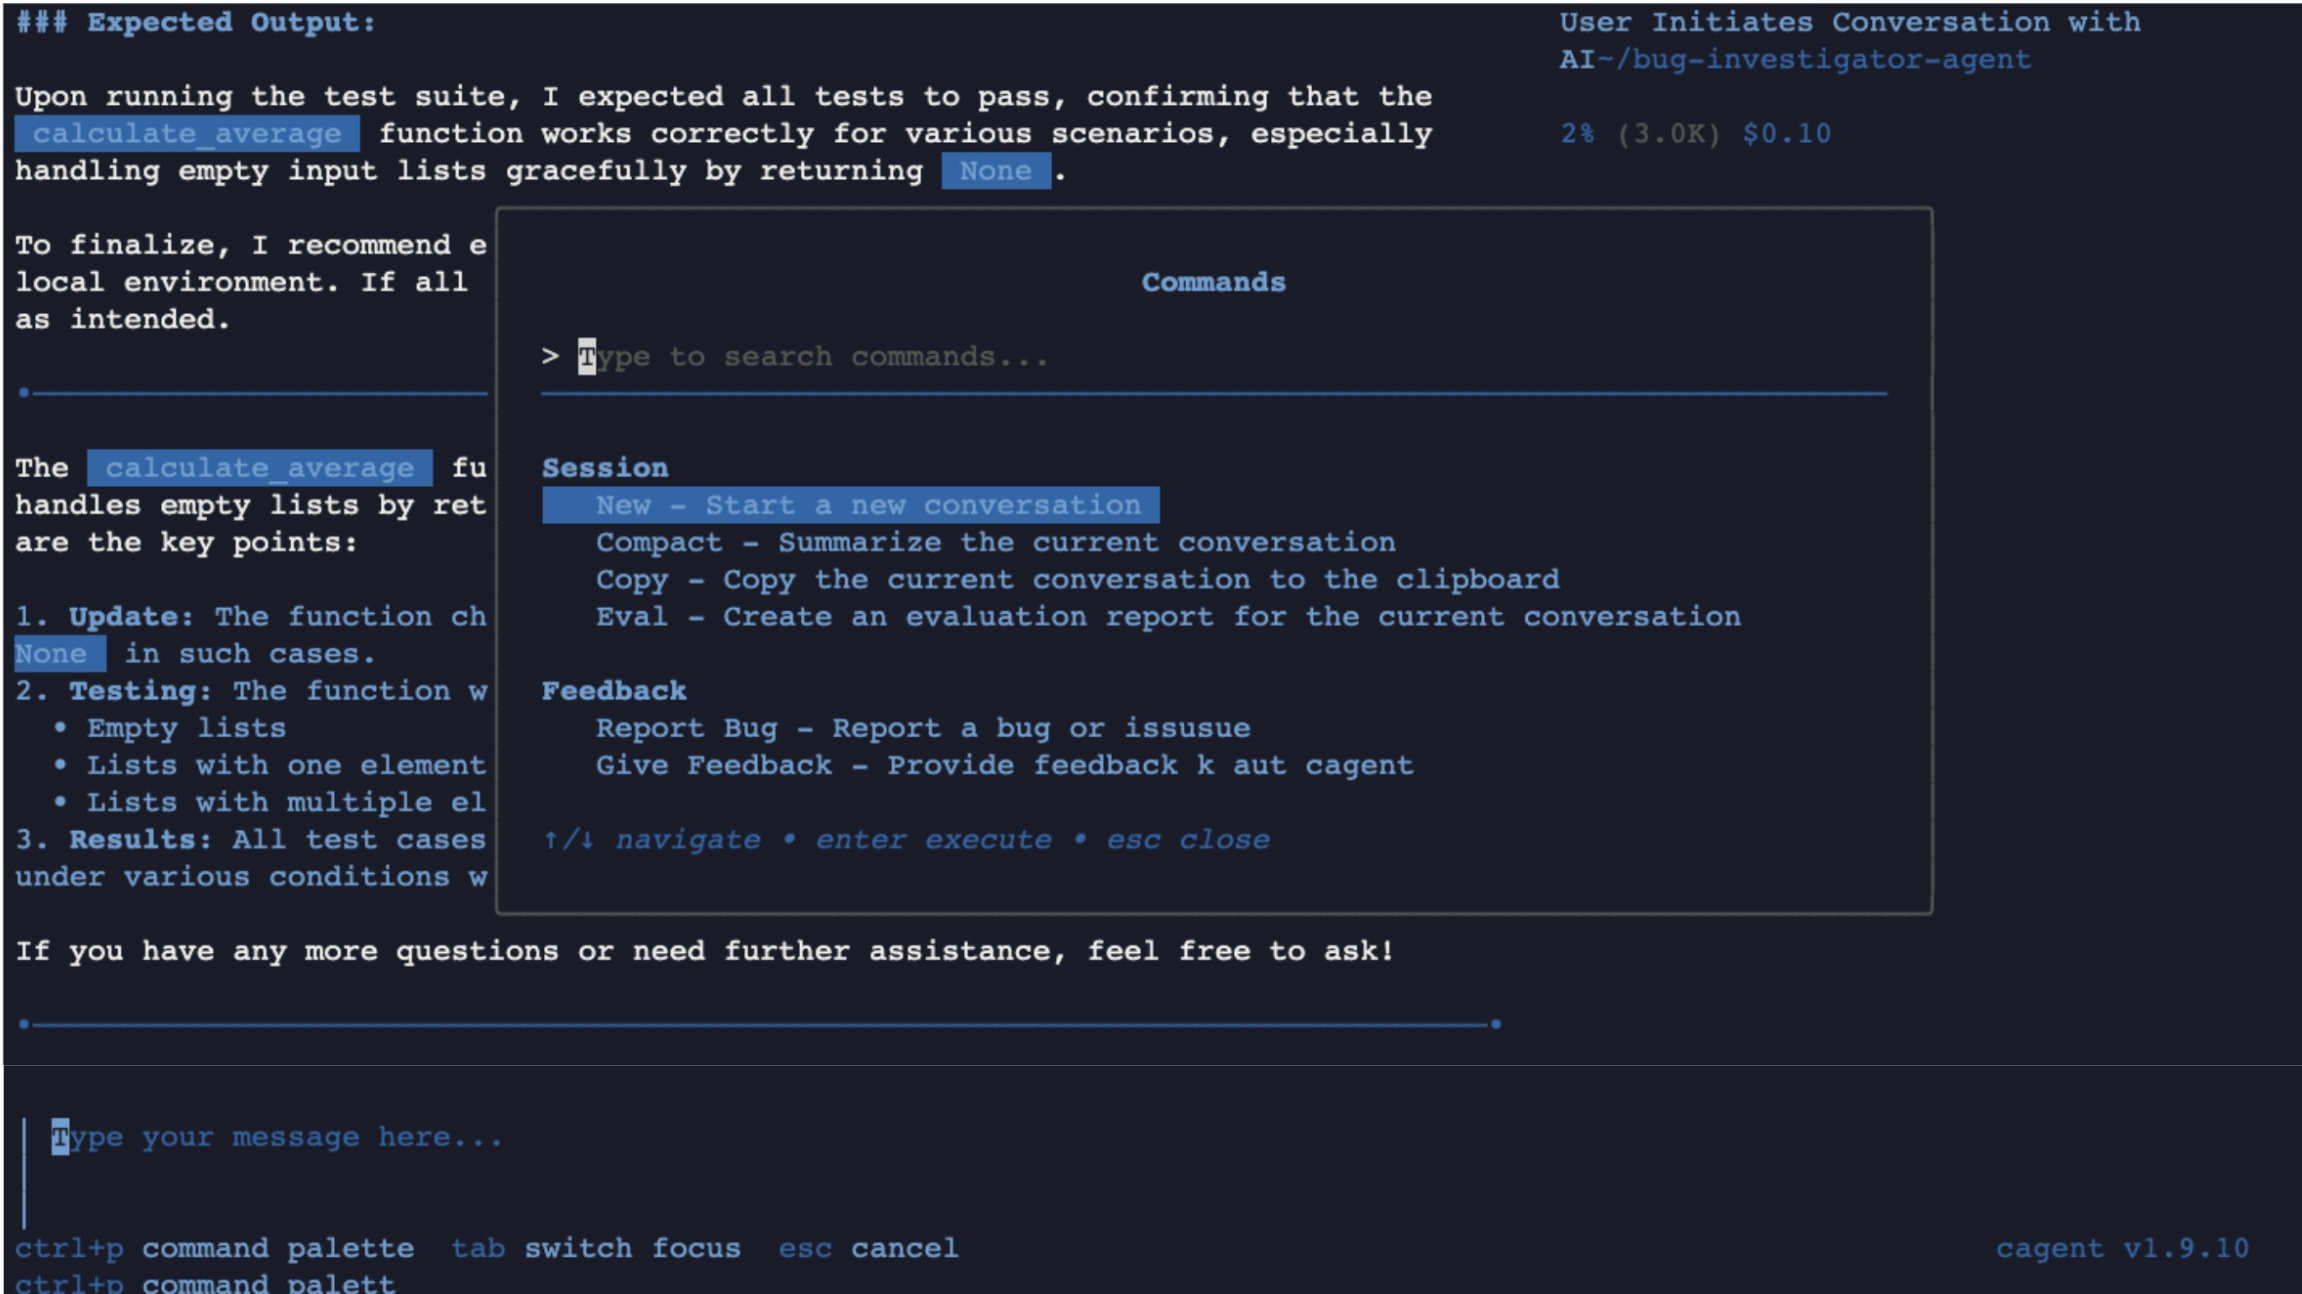
Figure 9: The Docker Agent command palette for additional actions
The agent created a tests/ directory with test_calculate_average.py.
After processing completes, verify the generated test file:
cat tests/test_calculate_average.py
Expected output:
import unittest

def calculate_average(numbers):
    if not numbers:
        return None
    return sum(numbers) / len(numbers)

class TestCalculateAverage(unittest.TestCase):

    def test_empty_list(self):
        self.assertIsNone(calculate_average([]))

    def test_single_element(self):
        self.assertEqual(calculate_average([5]), 5)

    def test_multiple_elements(self):
        self.assertEqual(calculate_average([3, 5, 7]), 5.0)

    def test_floats(self):
        self.assertAlmostEqual(calculate_average([1.5, 2.5, 3.5]), 2.5)

    def test_negative_numbers(self):
        self.assertEqual(calculate_average([-1, -2, -3]), -2.0)

if __name__ == '__main__':
    unittest.main()
The agent:
if not numbers: return NoneNonepython3 tests/test_calculate_average.py
Expected output:
.....
----------------------------------------------------------------------
Ran 5 tests in 0.000s

OK
Here is a summary of what happened:
Before diving into local model setup, here is how the two approaches compare for the same debugging task:
| Metric | Cloud API (GPT-4o) | Local Model (Qwen3 8B) |
|---|---|---|
| Response time | About 5 seconds | About 3 minutes (CPU) |
| Accuracy | Correct diagnosis and fix | Correct diagnosis and fix |
| Multi-agent coordination | Full support (all 4 agents) | Root agent only (simplified config) |
| Cost per request | $0.01 to $0.10 | $0.00 (Droplet cost only) |
| Data privacy | Code sent to external API | Code stays on your server |
| Minimum Droplet size | 1GB RAM ($6/month) | 8GB RAM ($48/month) |
Cloud APIs are fast and support the full multi-agent workflow. Local models keep your code private and cost nothing per request, but require more Droplet resources and run slower on CPU. For faster local inference, GPU Droplets provide significant speedups.
Cloud APIs are fast but send your code to external servers. For sensitive codebases or air-gapped environments, local inference keeps everything on your Droplet.
Your current Droplet is 1GB RAM. Local models need at least 4GB.
Resize the Droplet:
For detailed instructions, see How To Resize Droplets.
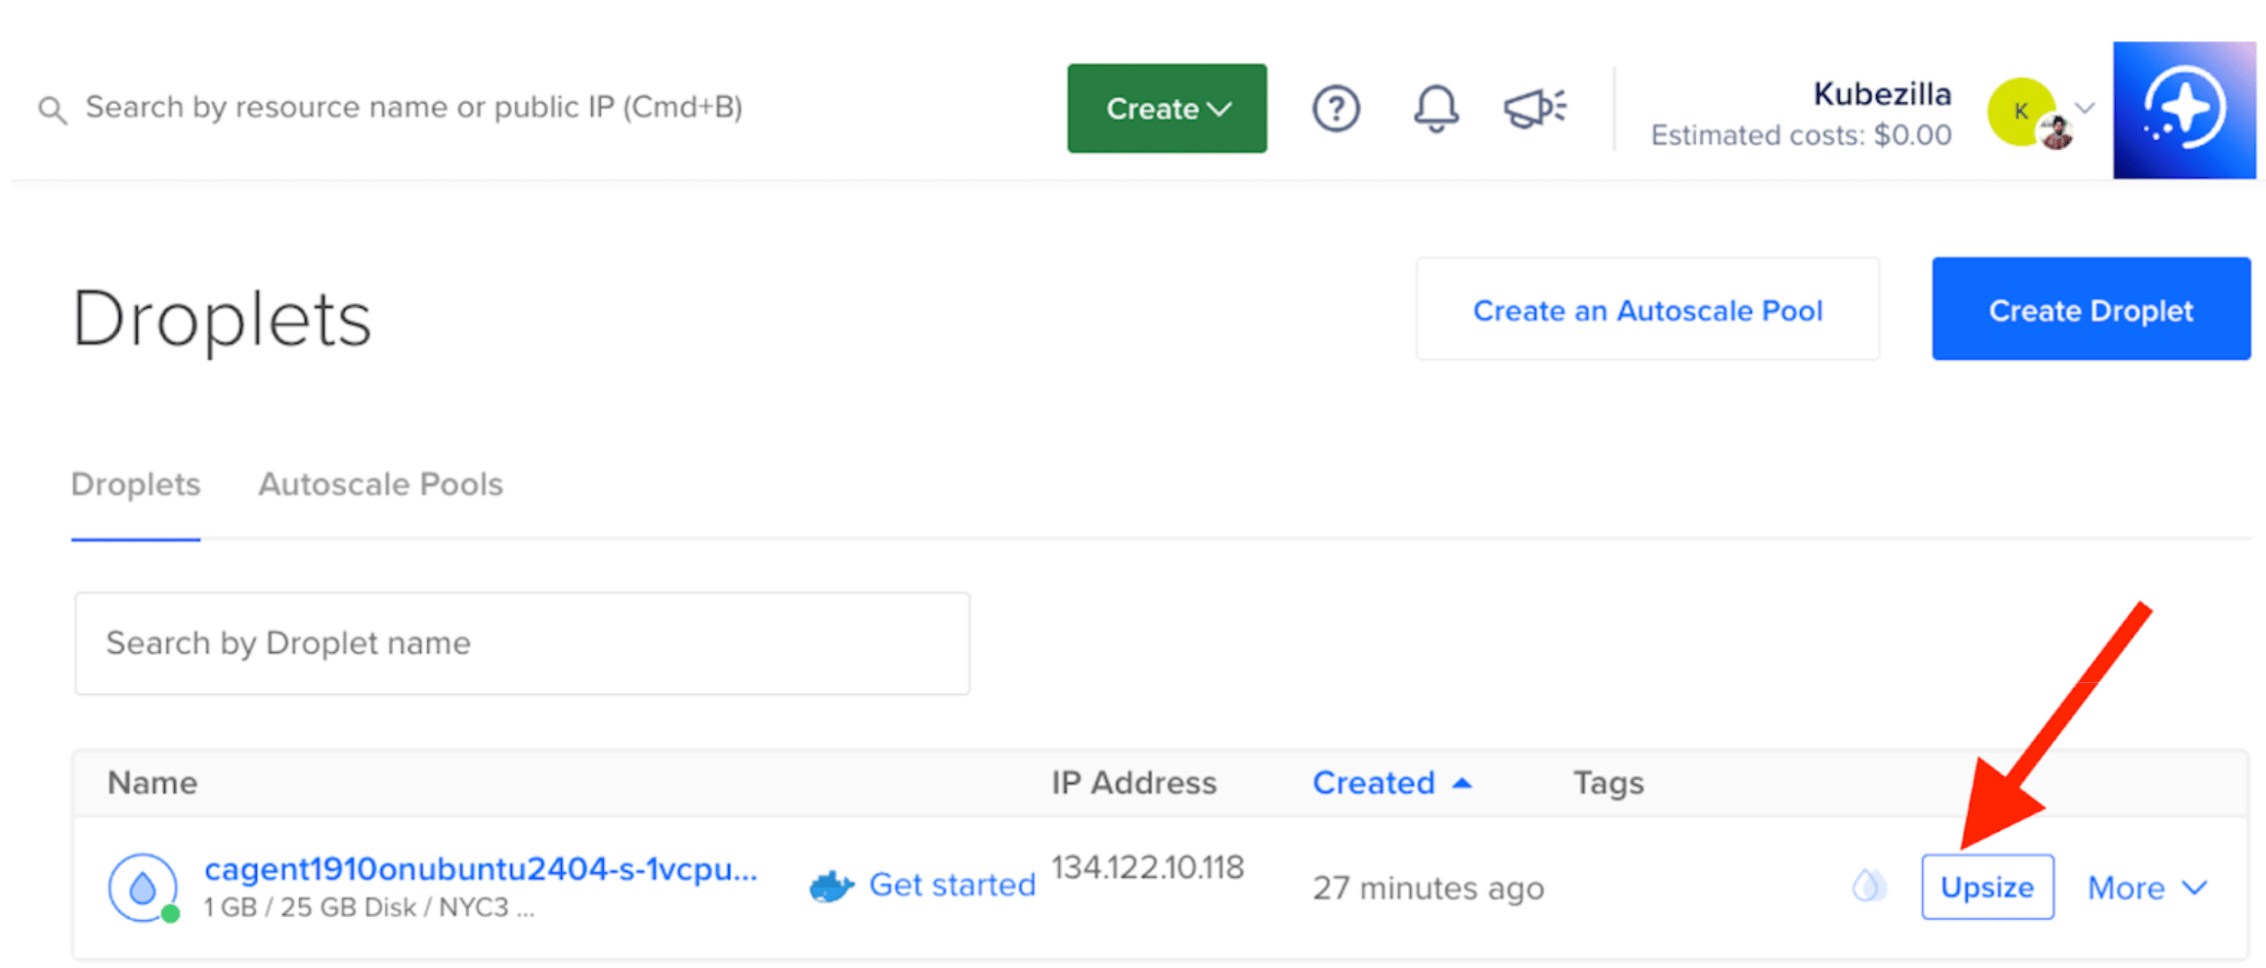
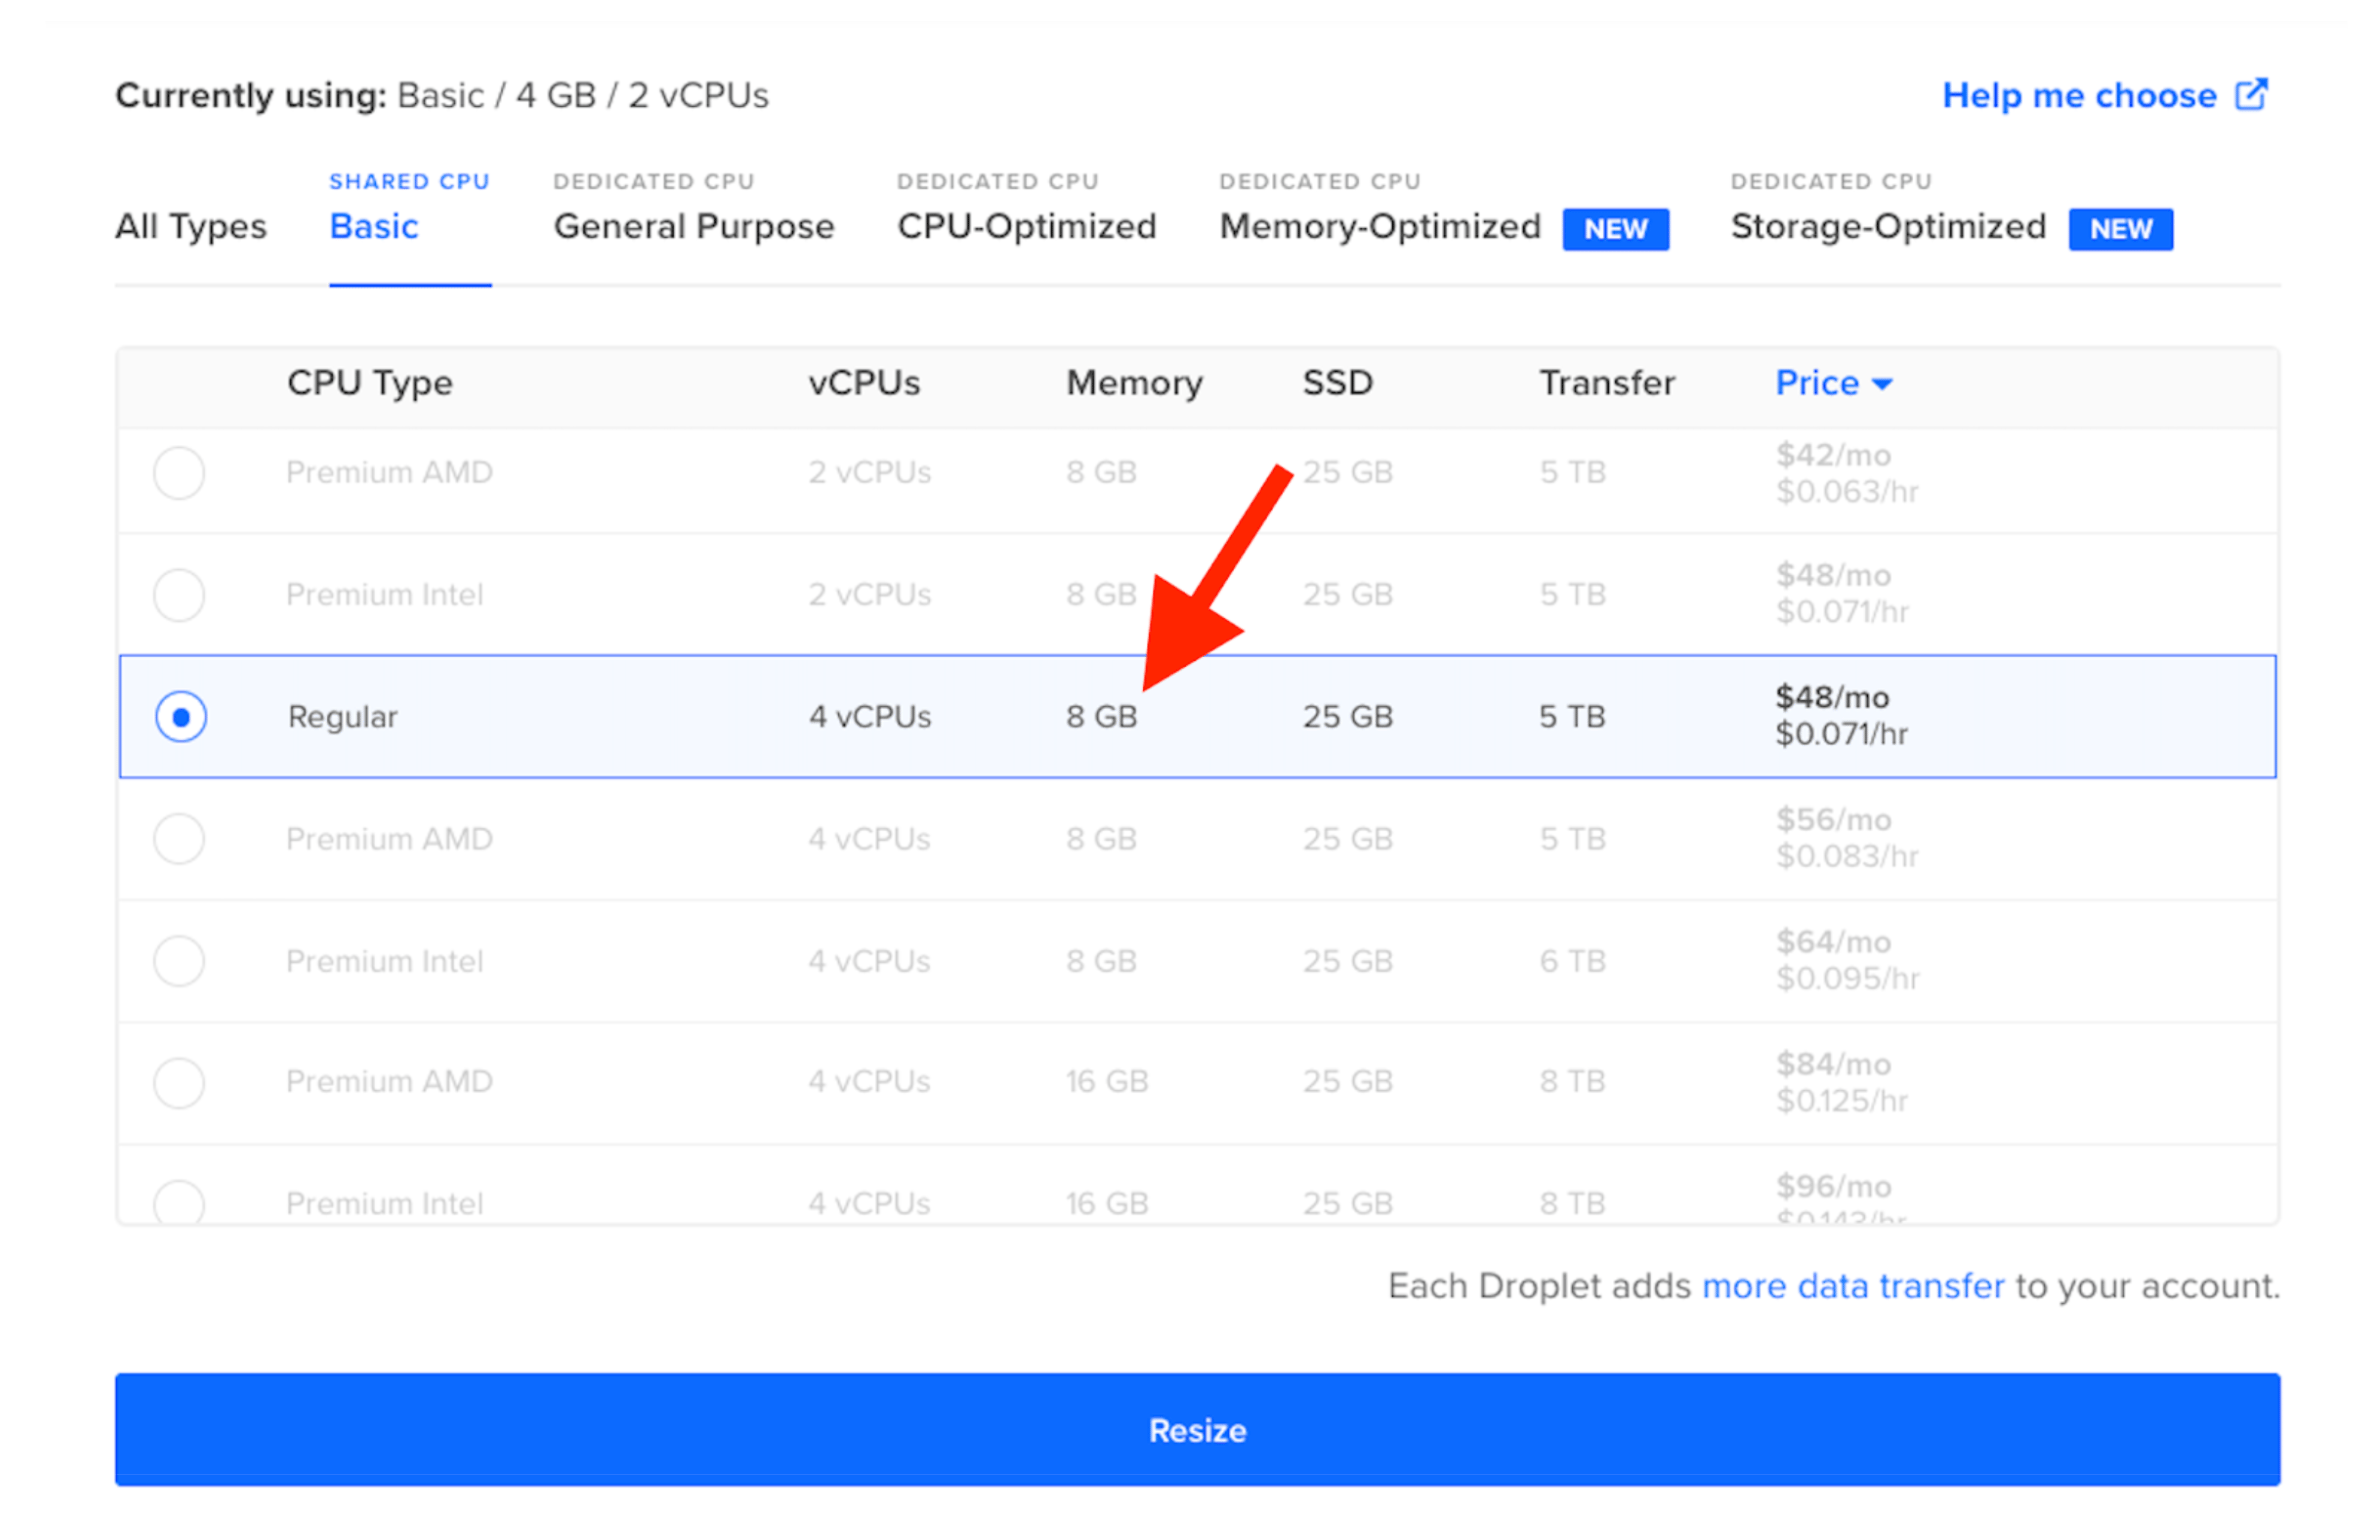
Figure 10: Select the 8GB RAM plan for local model inference
Click the row, scroll down, and click Resize Droplet.
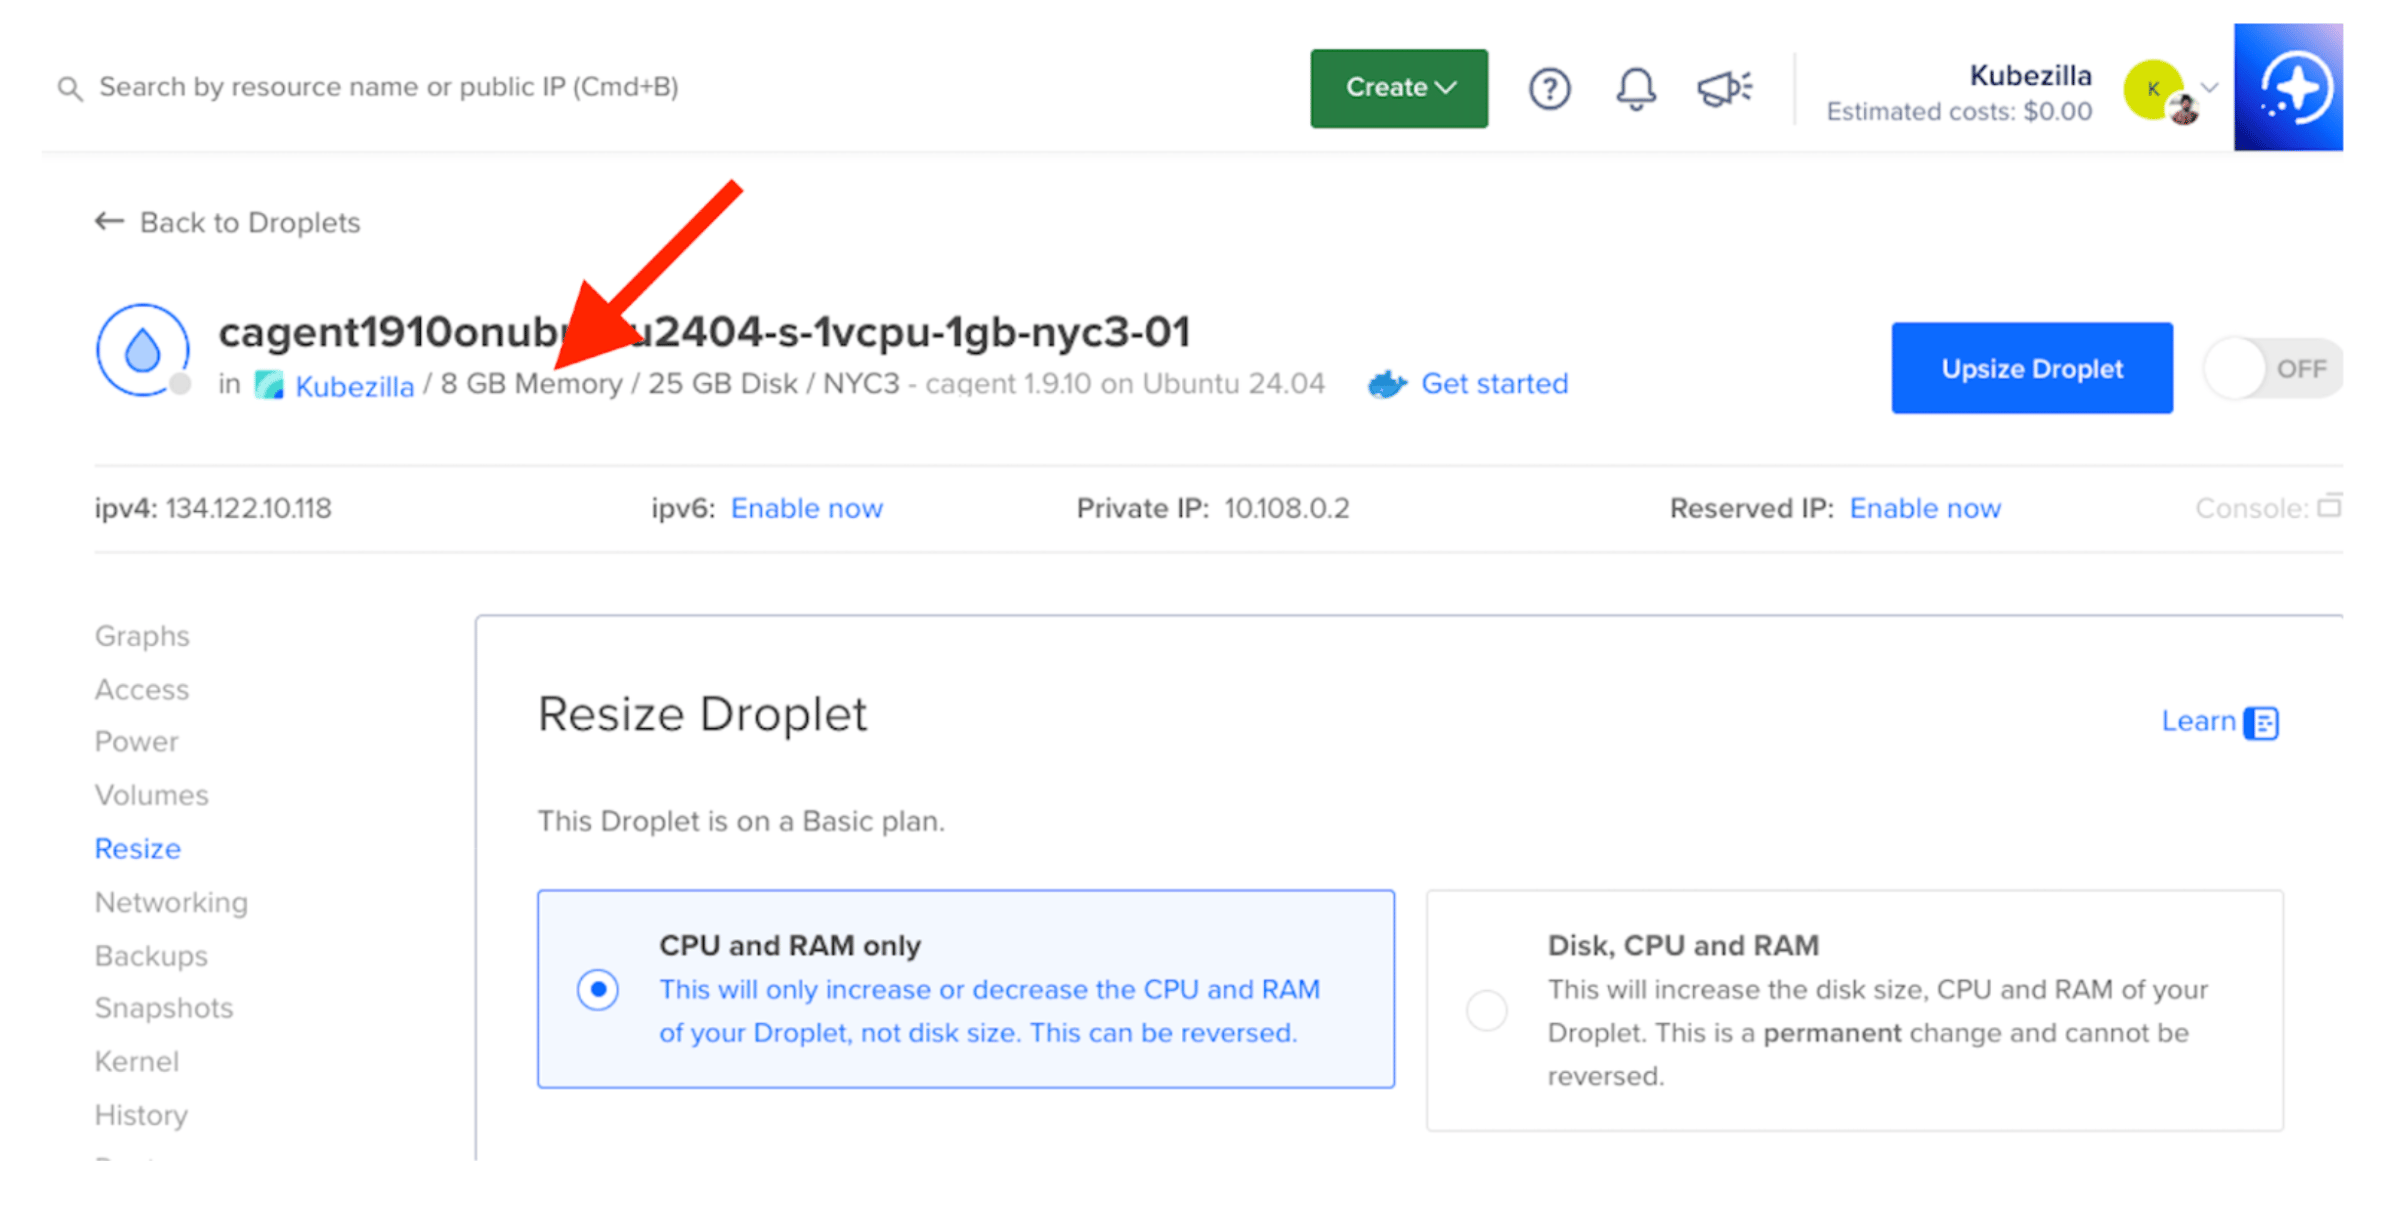
Figure 11: Confirm the Droplet resize operation
Power the Droplet back on and verify the new memory:
free -m
Expected output:
               total        used        free      shared  buff/cache   available
Mem:            7941         512        7189           4         477        7429
Swap:              0           0           0
Docker Model Runner lets you run AI models locally as part of the Docker ecosystem. Install it:
sudo apt-get update
sudo apt-get install -y docker-model-plugin
Verify the installation by listing available models:
docker model ls
Docker Model Runner downloads its runtime on first use. You will see output similar to:
latest: Pulling from docker/model-runner
...
Status: Downloaded newer image for docker/model-runner:latest
Creating model storage volume docker-model-runner-models...
Starting model runner container docker-model-runner...
MODEL NAME  PARAMETERS  QUANTIZATION  ARCHITECTURE  MODEL ID  CREATED  CONTEXT  SIZE
The empty model list confirms that Docker Model Runner is installed and running. Next, you will pull a model.
Model selection significantly impacts agentic task performance. Based on Docker’s tool-calling evaluation, here is how popular models compare:
| Model | Tool Calling F1 Score | Recommendation |
|---|---|---|
| GPT-4 | 0.974 | Best overall (cloud) |
| Qwen3 8B | 0.919 | Best local option |
| Gemma3 4B | 0.733 | Insufficient for reliable tool use |
Pull Qwen3 8B:
docker model pull ai/qwen3:8B-Q4_K_M
Verify the download:
docker model ls
Expected output:
MODEL NAME       PARAMETERS  QUANTIZATION    ARCHITECTURE  MODEL ID      CREATED        CONTEXT  SIZE
qwen3:8B-Q4_K_M  8.19 B      IQ2_XXS/Q4_K_M  qwen3         79fa56c07429  10 months ago           4.68 GiB
TCP support is enabled by default for Docker Engine on port 12434.
The default cagent-local.yaml may reference a different model. Update it to use the Qwen3 model you pulled:
sed -i 's/ai\/gemma3:2B-Q4_0/ai\/qwen3:8B-Q4_K_M/g' cagent-local.yaml
Verify the change:
grep model cagent-local.yaml
Expected output:
#   docker model pull ai/qwen3:8B-Q4_K_M
models:
  local-model:
    model: ai/qwen3:8B-Q4_K_M
    model: local-model
Review the full configuration:
version: "2"

models:
  local-model:
    provider: dmr
    model: ai/qwen3:8B-Q4_K_M
    max_tokens: 4096

agents:
  root:
    model: local-model
    description: Debugging assistant that helps fix code issues
    instruction: |
      You are a helpful debugging assistant. When a developer shares an error:

      1. **Analyze** the error message and stack trace
      2. **Identify** the root cause
      3. **Explain** what went wrong in simple terms
      4. **Provide** a working fix with code

      Be concise. Focus on actionable solutions.

    toolsets:
      - type: filesystem
      - type: think
      - type: todo
The local configuration uses a single root agent (rather than the multi-agent setup used with cloud APIs) because local models on CPU work best with focused, single-agent tasks.
cagent run ./cagent-local.yaml
Try this JavaScript async bug:
I have this Node.js code that's not working correctly:

async function fetchUserData(userId) {
    const response = await fetch(`/api/users/${userId}`);
    const data = response.json();
    return data;
}

const user = fetchUserData(123);
console.log(user.name);

Error: Cannot read property 'name' of undefined
The local model correctly identifies the issue:
“The function
fetchUserDatais async, but when they call it, they are not using await. So the code is doingconst user = fetchUserData(123);which returns a Promise… Since the Promise has not resolved yet, user is undefined, leading to the error.”
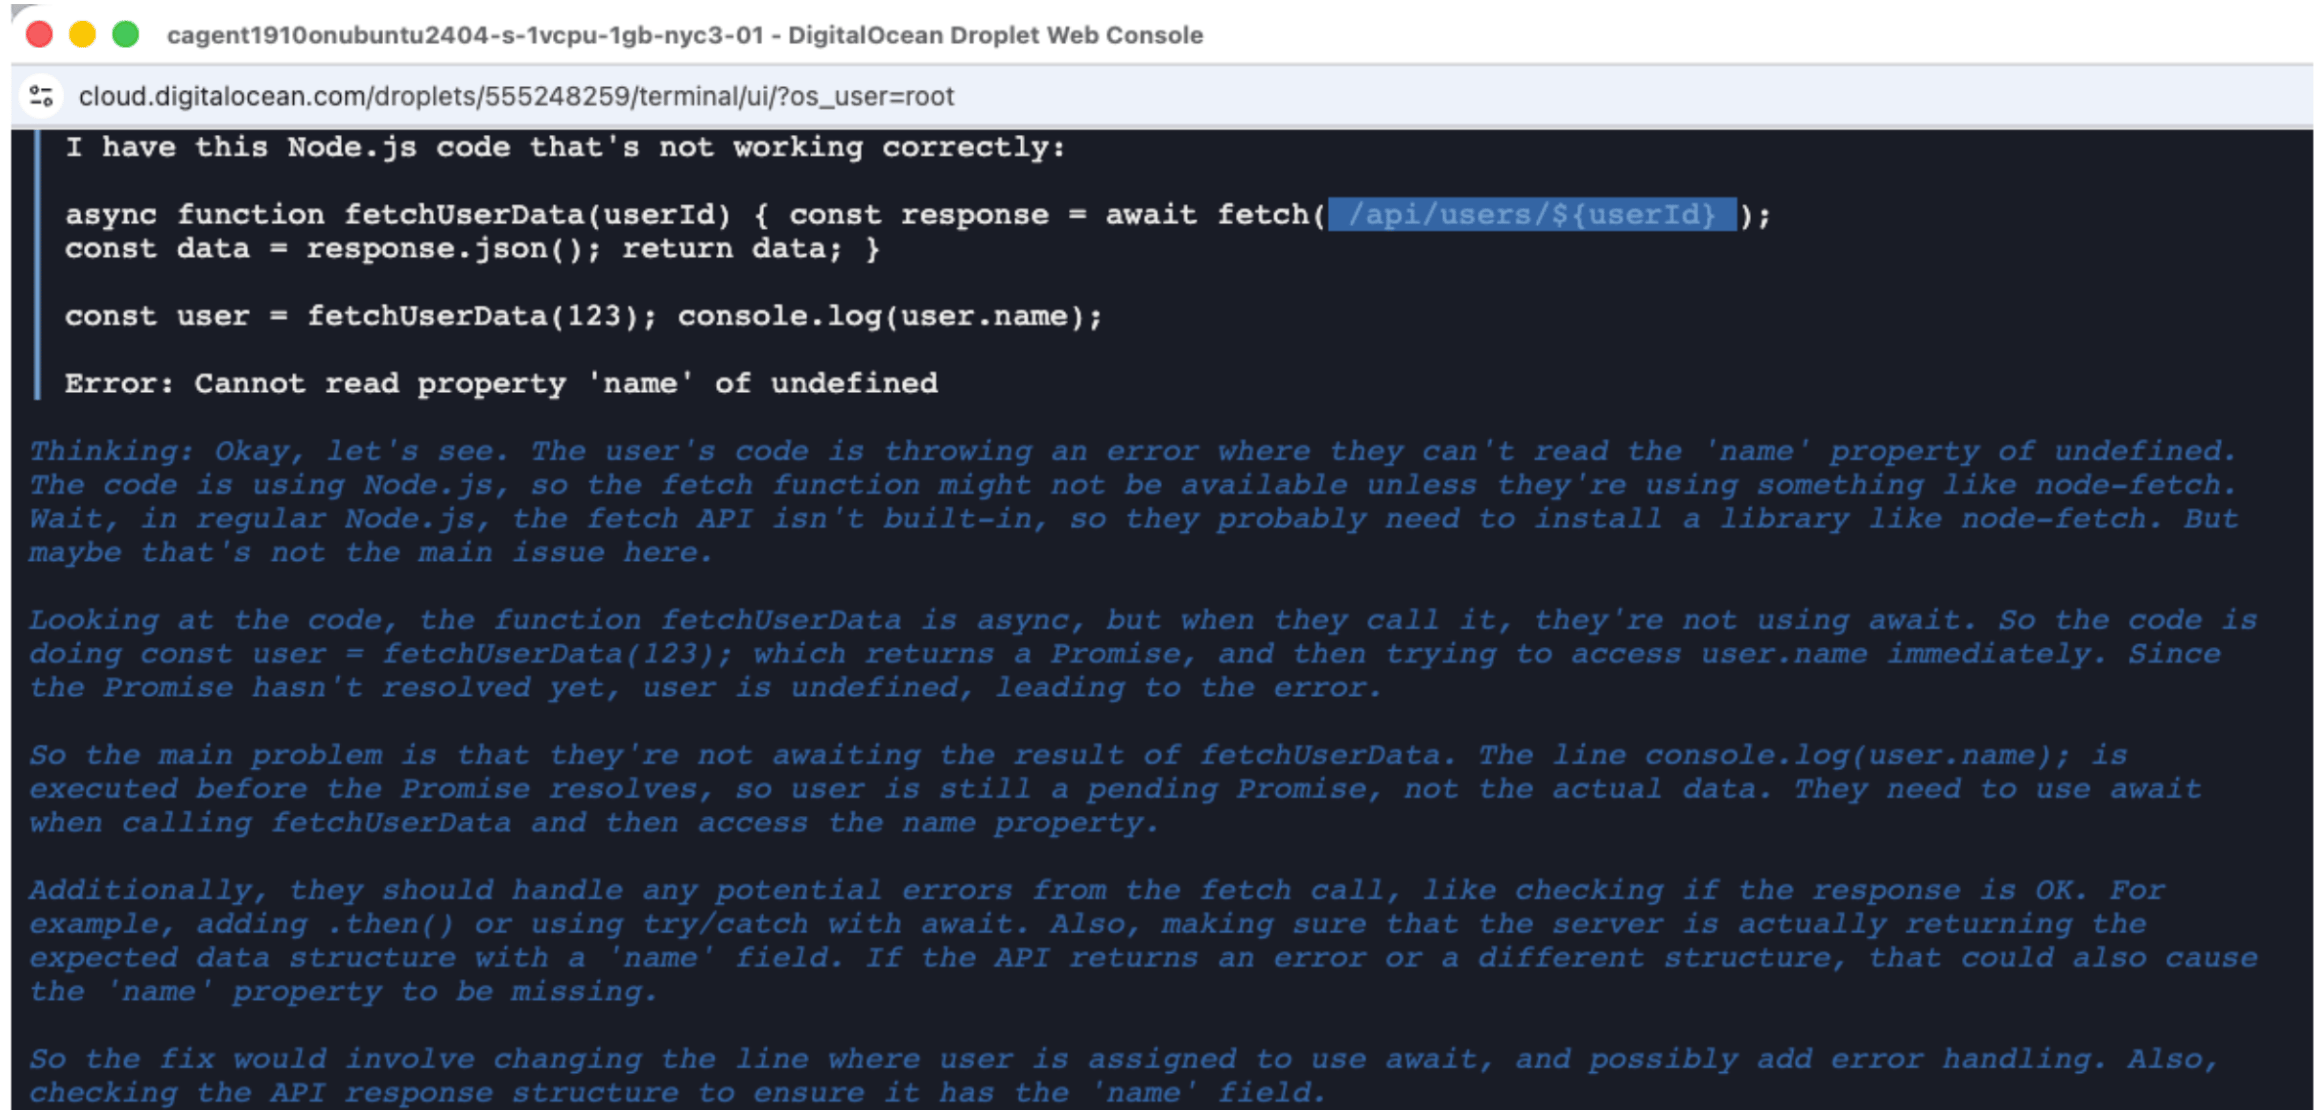
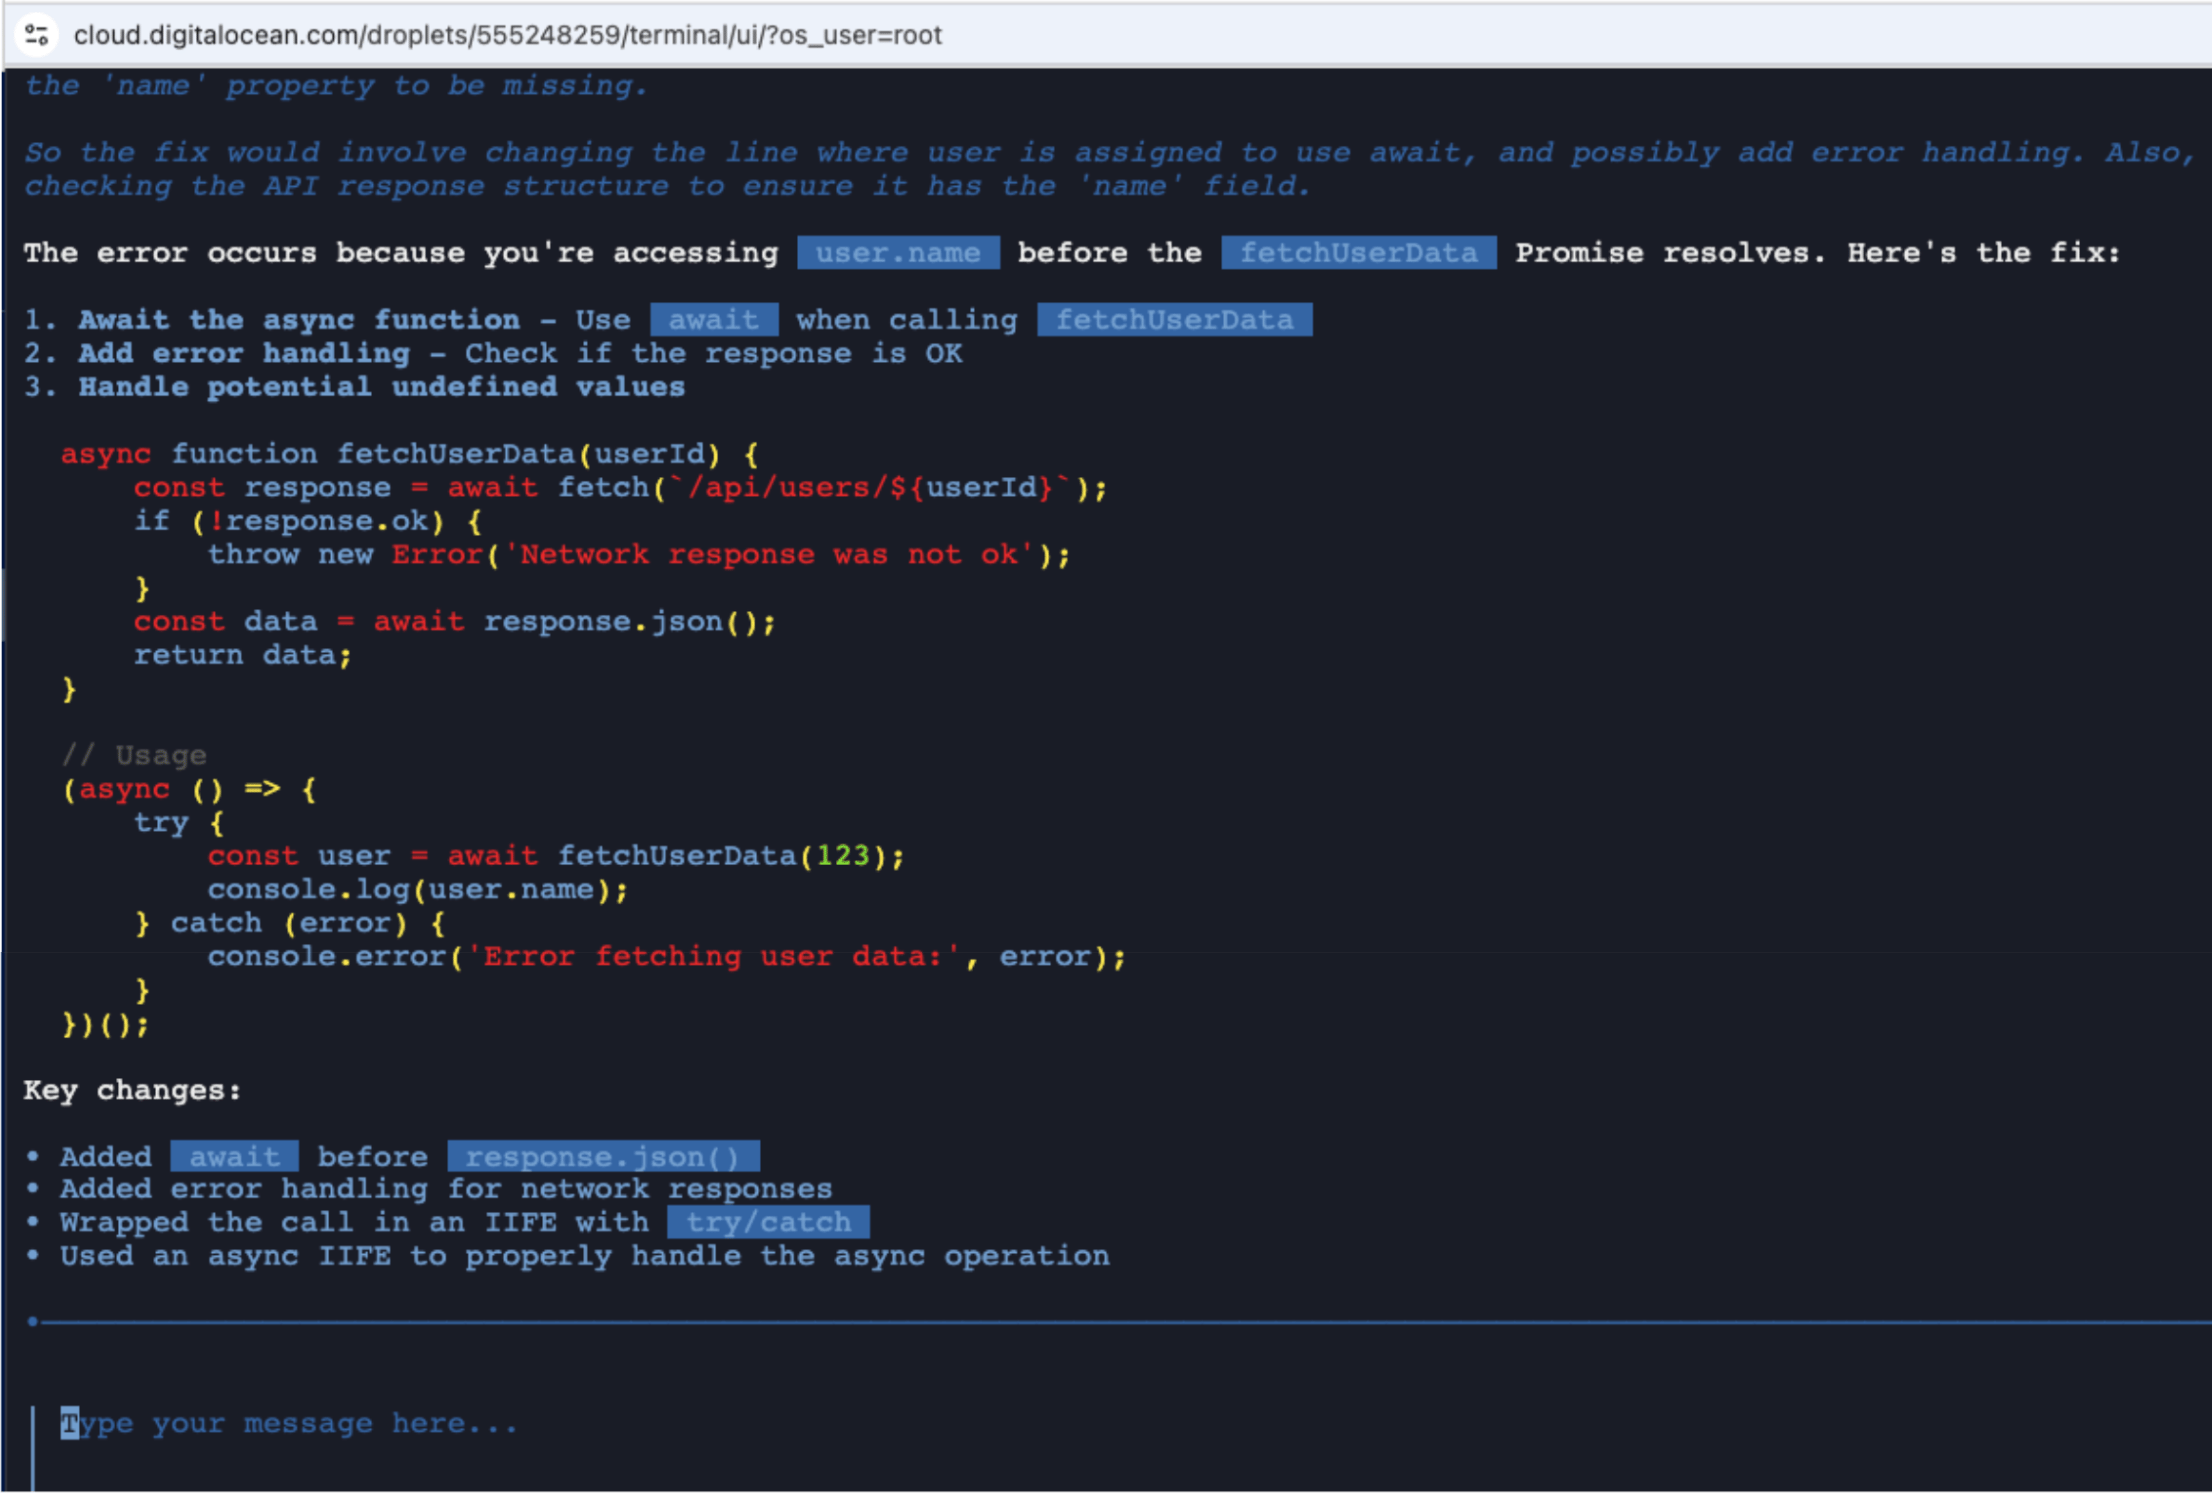
Figure 12: Local model correctly diagnosing the missing await keywords
The local model’s diagnosis: the error occurs because user.name is accessed before the fetchUserData Promise resolves.
The agent suggested these key changes:
await before response.json()try/catchCost: $0.00 (local model, no API charges)
Note: Local models on CPU work correctly but are slow (roughly two to five minutes per response). For production speed, use GPU Droplets or cloud APIs. For privacy-sensitive tasks where speed is not the top priority, CPU inference is a viable option.
Share your agent configuration by publishing it as an OCI artifact:
docker login
cagent push ./cagent-openai.yaml docker.io/YOUR_DOCKERHUB_USERNAME/bug-investigator:latest
Replace YOUR_DOCKERHUB_USERNAME with your Docker Hub username. Follow the browser-based authentication flow when prompted.
Expected output:
Pushing agent ./cagent-openai.yaml to docker.io/YOUR_DOCKERHUB_USERNAME/bug-investigator:latest
Successfully pushed artifact to docker.io/YOUR_DOCKERHUB_USERNAME/bug-investigator:latest
Your Bug Investigator Agent is now live on Docker Hub.
Anyone with Docker Agent installed can pull and run it:
cagent run docker.io/YOUR_DOCKERHUB_USERNAME/bug-investigator:latest
The YAML-based configuration is what makes Docker Agent different from other agent frameworks that require Python or JavaScript orchestration code. Here is the structure of the OpenAI configuration used in this tutorial:
version: "2"

models:
  openai-main:
    provider: openai
    model: gpt-4o
    max_tokens: 4096
  openai-mini:
    provider: openai
    model: gpt-4o-mini
    max_tokens: 4096

agents:
  root:
    model: openai-main
    description: Bug investigator that analyzes errors and coordinates fixes
    instruction: |
      You are an expert bug investigator. When given an error:
      1. Analyze the error message and stack trace
      2. Identify the root cause
      3. Delegate to researcher for documentation lookup
      4. Delegate to fixer for code correction
      5. Delegate to tester for test generation
    sub_agents: [researcher, fixer, tester]
    toolsets:
      - type: filesystem
      - type: think

  researcher:
    model: openai-mini
    description: Searches documentation and finds solutions
    instruction: |
      Search for relevant documentation and similar issues.
      Provide links and context for the fix.
    toolsets:
      - type: mcp
        ref: docker:duckduckgo

  fixer:
    model: openai-main
    description: Writes corrected code
    instruction: |
      Write minimal, targeted fixes for diagnosed bugs.
      Include proper error handling.
    toolsets:
      - type: filesystem
      - type: shell

  tester:
    model: openai-mini
    description: Generates test cases
    instruction: |
      Generate comprehensive test cases for the fix.
      Cover edge cases, positive cases, and negative cases.
    toolsets:
      - type: filesystem
Key points in this configuration:
gpt-4o for complex reasoning, while the researcher and tester use gpt-4o-mini to reduce costs.sub_agents field on the root agent defines which agents it can delegate to.The Model Context Protocol (MCP) is a standard for connecting AI models to external tools and data sources. Docker Agent integrates with MCP servers, letting you extend agent capabilities beyond the built-in toolsets.
For example, you can add GitHub integration to your bug investigator so it can read issues and create pull requests:
toolsets:
  - type: mcp
    ref: docker:github
    config:
      env:
        GITHUB_TOKEN: ${GITHUB_TOKEN}
Or add a database tool so agents can query logs:
toolsets:
  - type: mcp
    ref: docker:postgres
    config:
      env:
        DATABASE_URL: ${DATABASE_URL}
The Docker MCP Catalog provides pre-built MCP servers for common integrations including Slack, Jira, and various databases.
A multi-agent AI system consists of multiple AI agents working collectively to perform tasks. Each agent has a specialized role and set of tools, and a coordinator (the root agent) delegates work to the right specialist. In Docker Agent, you define this structure in YAML: the root agent receives the task, analyzes it, and routes subtasks to agents like a researcher, fixer, or tester. This is more effective than a single-agent approach for complex tasks because each agent stays focused on what it does best.
For internal team tooling and developer workflows, yes. The 1-Click Droplet on DigitalOcean provides a stable, reproducible environment for running agent teams. For customer-facing applications, add rate limiting, error handling, and human review of suggested fixes. The agent occasionally produces incorrect fixes, so treat it as a fast assistant that requires code review rather than a fully autonomous system.
Yes. The bug-investigator-agent repository includes cagent-anthropic.yaml pre-configured for Claude models. Set the ANTHROPIC_API_KEY environment variable and run:
export ANTHROPIC_API_KEY=sk-ant-XXXXXXXXXXX
cagent run ./cagent-anthropic.yaml
Docker Agent supports multiple providers, including OpenAI, Anthropic, Google Gemini, and local models through Docker Model Runner.
Docker Agent takes a declarative, YAML-first approach. Frameworks like LangGraph, CrewAI, and AutoGen require Python or JavaScript code to define agent workflows. Docker Agent does not need any programming language to define agents, their tools, or their coordination. The tradeoff is flexibility: code-based frameworks offer more control over agent logic, while Docker Agent prioritizes simplicity and portability. If your agents follow standard patterns (delegation, tool use, sub-agent coordination), the YAML approach is faster to set up and easier to share.
The costs break down as follows:
For teams running many debugging sessions per day, local models on a larger Droplet can be more cost-effective than cloud API charges. For occasional use, the $6/month Droplet with cloud APIs is the most economical option.
In this tutorial, you deployed a Docker Agent Droplet on DigitalOcean using the 1-Click Marketplace image, built a multi-agent bug investigator, tested it with real Python and JavaScript bugs, configured local model inference with Docker Model Runner, and published your agent to Docker Hub as a shareable OCI artifact.
The multi-agent architecture demonstrated here (investigator, researcher, fixer, and tester) is a pattern you can adapt to many workflows beyond debugging. The same YAML-based configuration works for code review pipelines, documentation generators, security scanners, or any task where specialized agents outperform a single generalist.
Docker Agent’s declarative approach to agent configuration means you can version control, share, and iterate on agent designs the same way you manage Docker Compose files or Kubernetes manifests. Combined with DigitalOcean’s Droplet infrastructure, you get a reproducible and portable environment for building agentic AI workflows.
After completing this tutorial, consider these extensions:
agents section of your YAML configurationsystemd to run the agent continuously on your Dropletcagent-anthropic.yaml for Claude modelsReady to build your own multi-agent AI system? DigitalOcean Droplets provide a fast, affordable starting point. Deploy the Docker Agent 1-Click App in under five minutes, or explore GPU Droplets for accelerated local inference. Browse the full DigitalOcean Marketplace for more 1-Click Apps that simplify deployment.
 This work is licensed under a Creative Commons Attribution-NonCommercial- ShareAlike 4.0 International License.
此内容由惯性聚合(RSS阅读器)自动聚合整理,仅供阅读参考。 原文来自 — 版权归原作者所有。