








Building an AI-powered reading list with DigitalOcean Functions, the Mistral AI API, and a managed MongoDB database gives you a serverless system that summarizes articles automatically and stores them for later review.
Since I started browsing the Internet I’ve used many different services, applications and browser plugins (even the good old bookmarks) to mark articles and posts that seemed interesting at the time and that I wanted to read. I’ll read them later, I promise, but not now, I’m too busy.
And then, over time, you hoard a bunch of links in one place (or even worse, more than one). So when you finally go back to actually read them, you find yourself re-opening those links just to remember what that post was about and why you stored it in the first place…
Fast forward to today and I haven’t changed much how I interact with articles I want to read later. But nowadays we can use LLMs almost for free… and they are really good at writing text summaries. So, why not create a system that, given a link, creates a summary and then stores both the link and said summary in a fast database that I can use to build my own UI later?
Before you begin this guide you’ll need the following:
A serverless function lets you run backend code on demand without provisioning or maintaining a server. Let’s start by creating the backbone of our system. We can write a backend app using Node.js, Spring Boot, or any other web framework. But then we need to host it on a server, write the code, correctly size the server, update the operating system and dependencies, etc. Using a serverless function we can focus on the task at hand. In this case: getting a URL via a parameter, producing a summary of the page, and storing the data in the database.
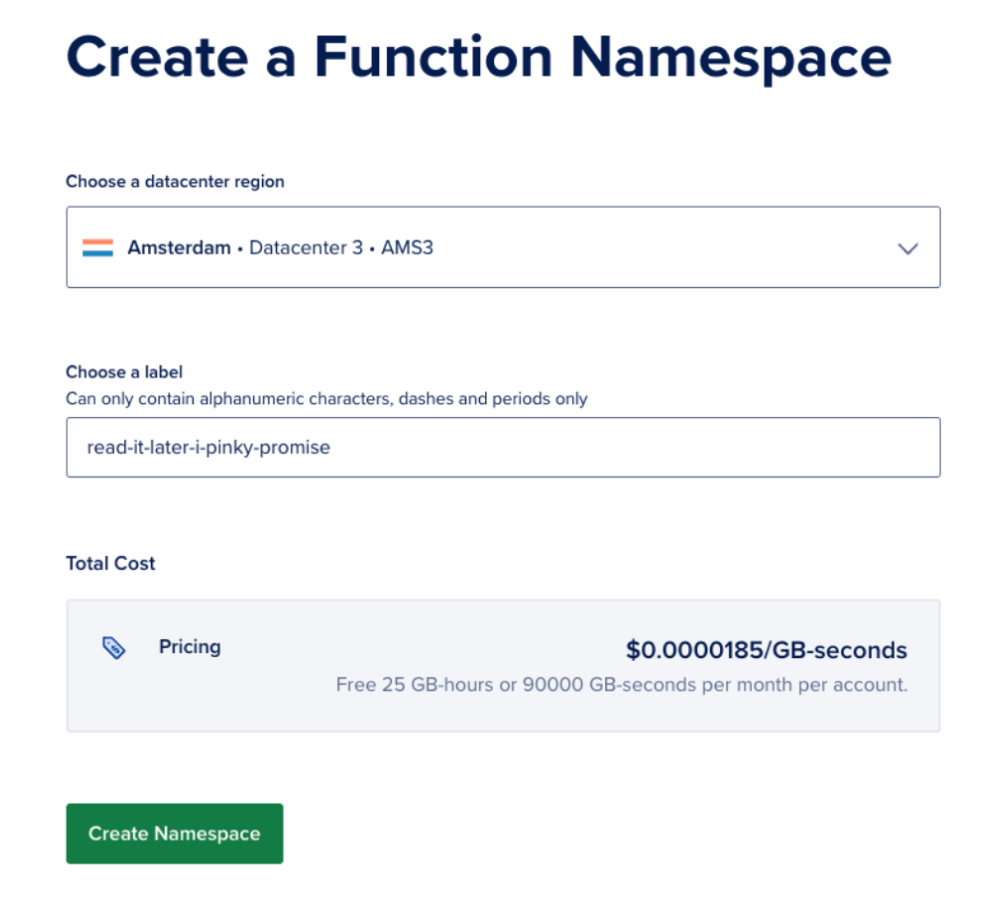
So head over to Functions and click on Create > Functions. First we need to choose where our serverless function will be hosted. Although it’s a serverless function, our code will need a real server to run. Only we don’t have to provision said server. Choose a data center close to your location (or close to where the users of your function will be). Then give it a name by choosing a label. In my case it will be read-it-later-i-pinky-promise.
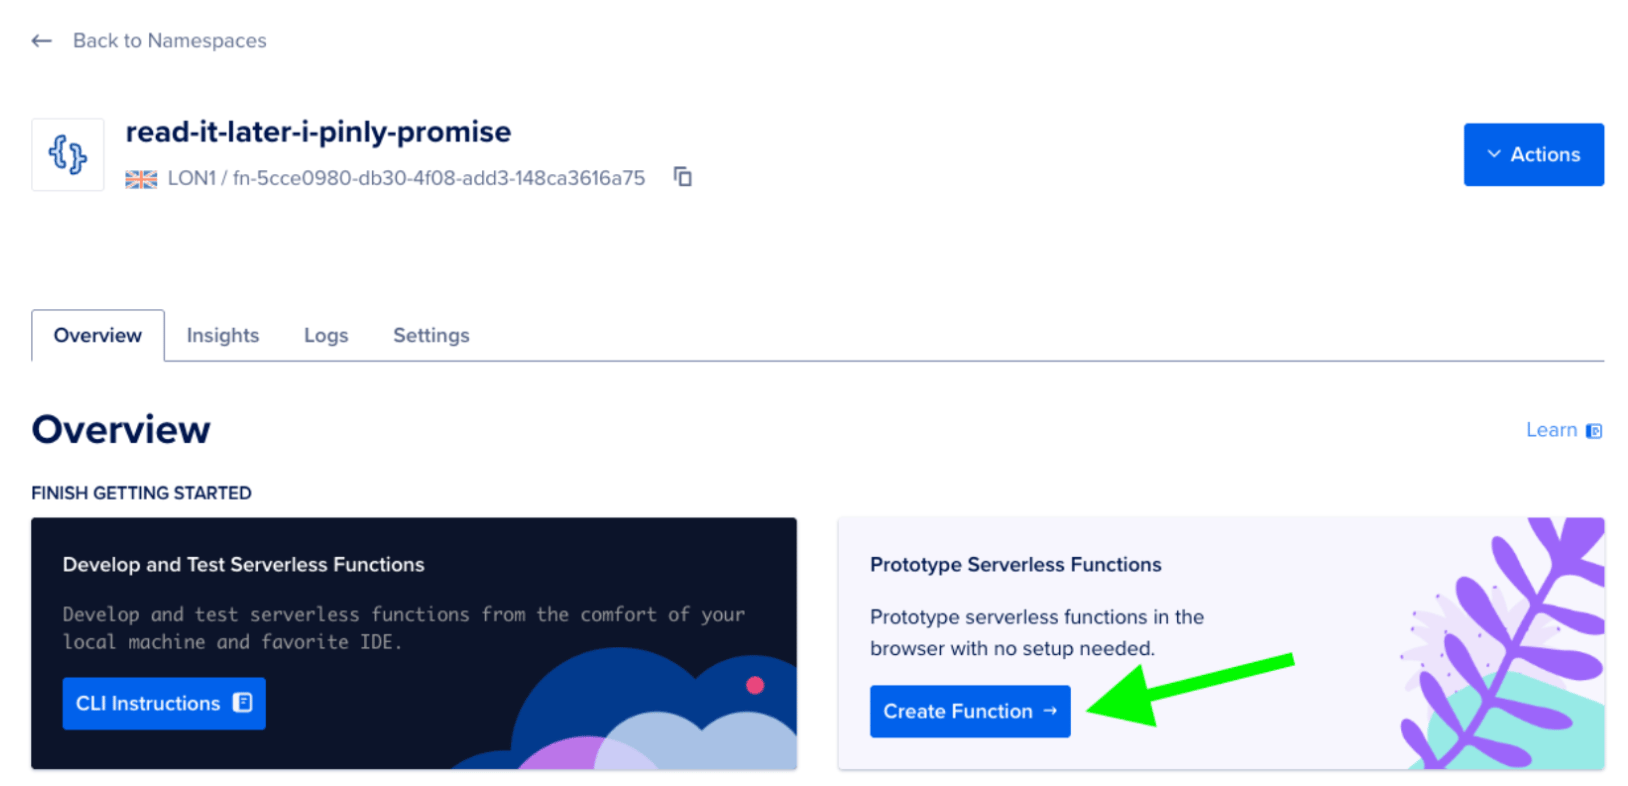
After creating the namespace you’ll be in the Overview tab. Let’s add some basic code to test our function. Just click on the Create Function button.
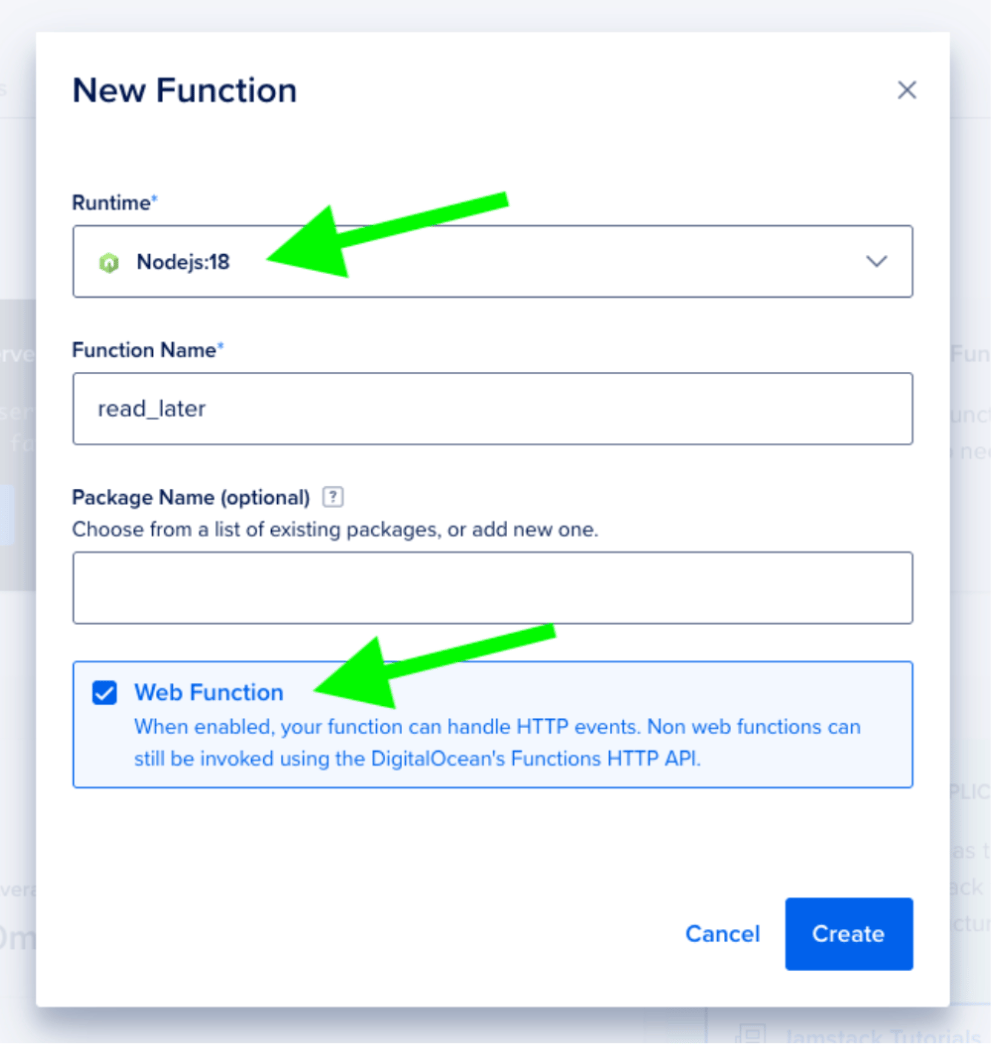
We need to select one of the supported runtimes (in our case, Node.js 18) and we’ll give the function a name: read_later. It’s important to keep the Web Function checkbox marked as we want to call this function directly using HTTP.
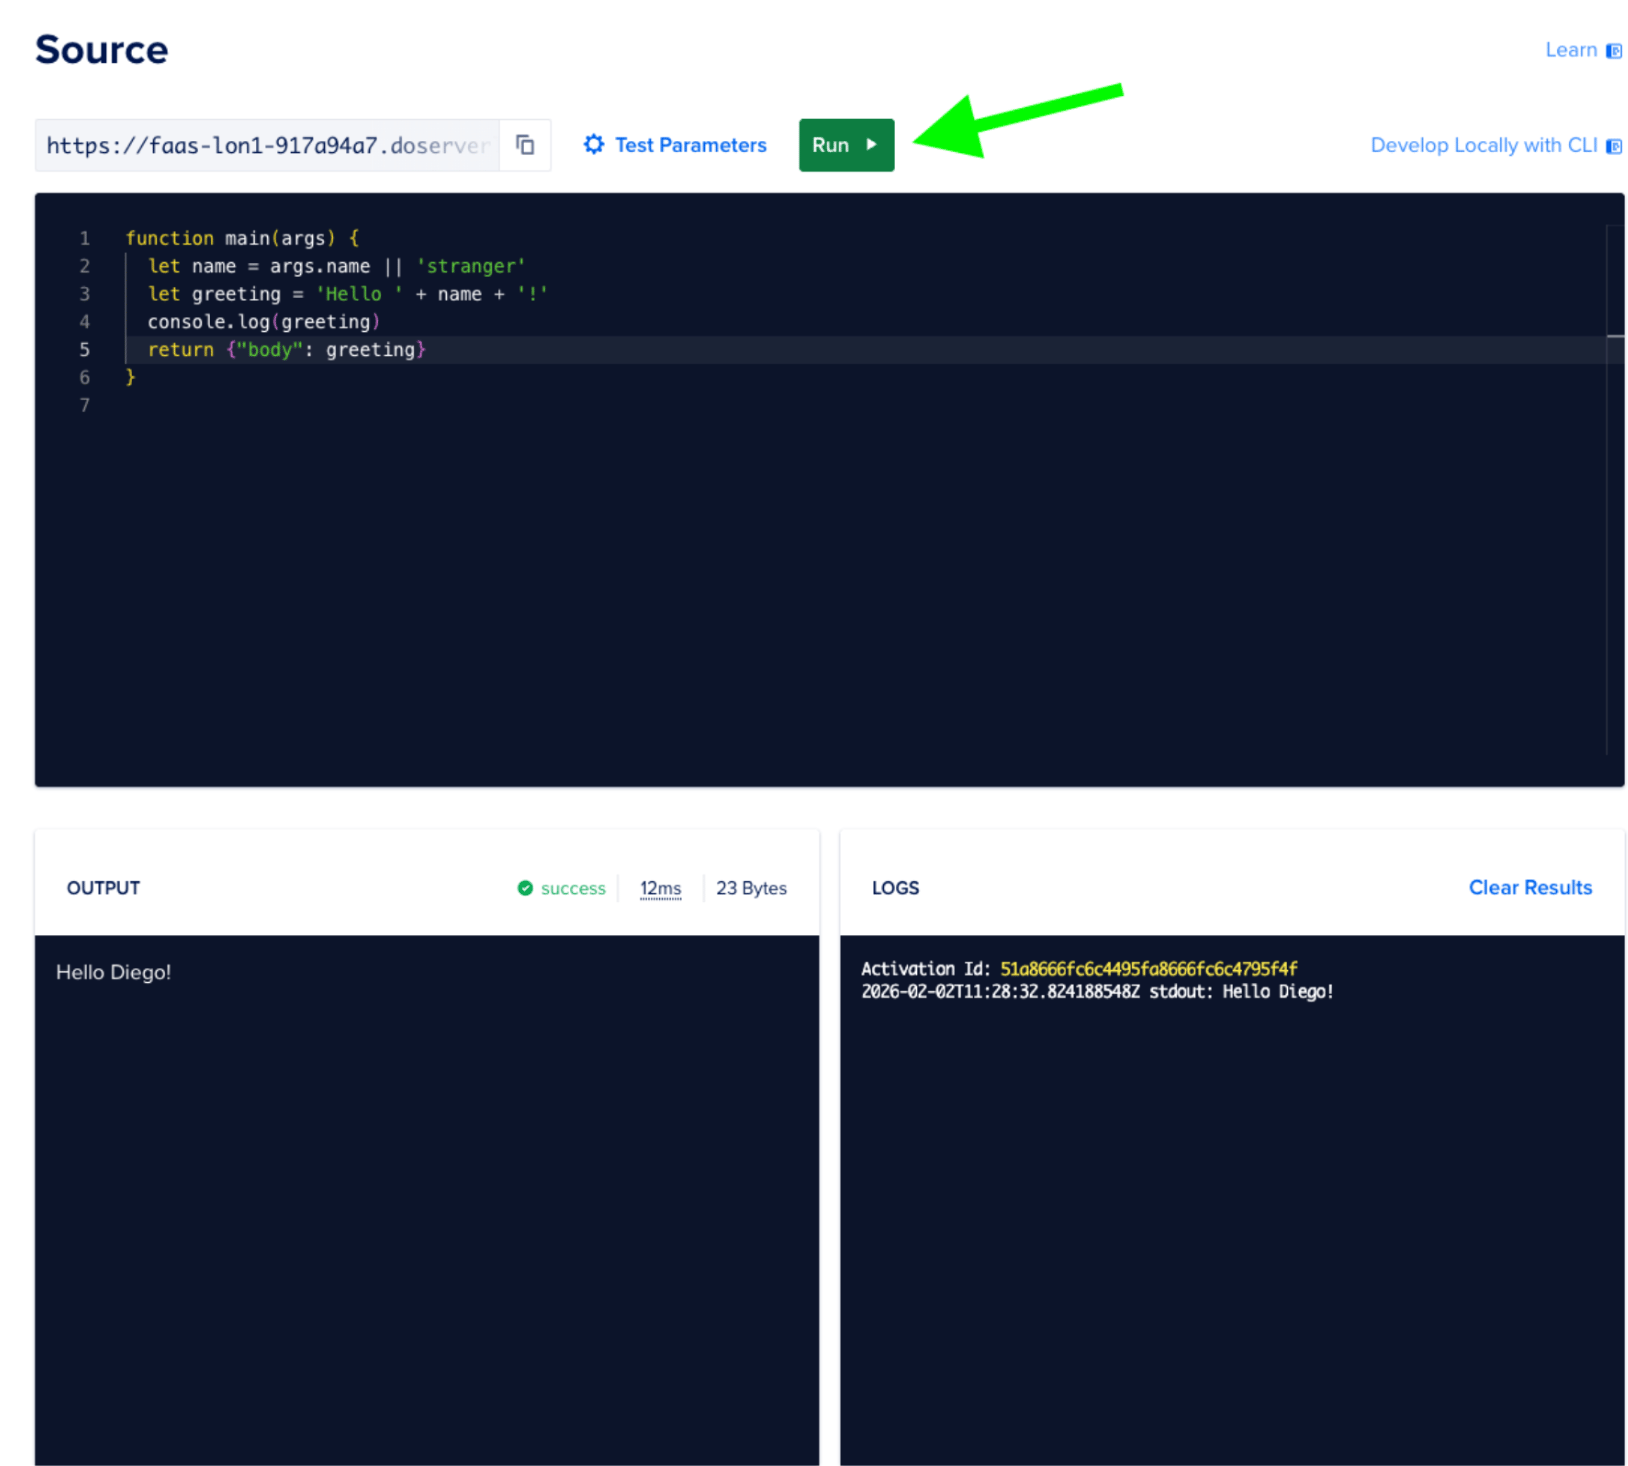
Now you should see the default source code of the newly created function. This just gets an argument name from the URL and returns it back. Since we’re not configuring a web page or a JSON response, this will be printed as plain text by our web browser.
function main(args) {
  let name = args.name || 'stranger'
  let greeting = 'Hello ' + name + '!'
  console.log(greeting)
  return {"body": greeting}
}
In the main function we receive a JSON object with all the arguments passed in the function call, we search for name and use it. If not found we use stranger as name. Then we compose and print out a greeting which we also return from our function.
As this is accessible via HTTP calls, we have several different options to test our function.
If your system includes curl (Microsoft Windows 10/11 and most UNIX systems like Linux and macOS come with cURL preinstalled), you can copy the URL of your function and add the name parameter at the end. Then call curl with:
- curl https://<redacted>.doserverless.co/api/v1/web/<redacted>/default/read_later?name=Diego
In your case, instead of <redacted> you’ll see the IDs of your function. If you call the function from a terminal you’ll see the response from our function:
- curl https://<redacted>.doserverless.co/api/v1/web/<redacted>/default/read_later?name=Diego
- Hello Diego!%
Try changing the name and the code in your function and experiment with it.
If you don’t want to test your function from a terminal, you can also test it directly in your browser. Click on Test Parameters and add a JSON object with our test data, in this case:
{ "name": "Diego" }
Then, we can hit the Run button and see the results in the Output and Logs windows.
First, we will change our variable names to reflect what we’re doing: generating summaries from links. Instead of name we’ll use a link variable. Also, we’ll return a proper HTTP response, with statusCode 200 in case we got a link.
export async function main(args) {
  const link = args.link;
  if (!link) {
    return {
      statusCode: 400,
      headers: { "Content-Type": "application/json" },
      body: { error: "Please send a link" }
    };
  }

  const body = { URL: link };

  return {
    statusCode: 200,
    headers: { "Content-Type": "application/json" },
    body: body
  };
}
As you can see, our function is designed to take a link from args (returning a 400 error if no link is passed) and in this case just returning the same link back.
After changing the code, hit the “Save” button to avoid losing your changes. You can now re-run your function and check the results.
While we’re at it, let’s also change the Test Parameters (if you’re testing directly from the browser) to:
{
    "link": "https://en.wikipedia.org/wiki/Seville"
}
Seems like we want to know more about Seville!
Now it’s time to add the code to interact with our LLM, in this case Mistral. We need to send a POST request with the prompt to their chat completions endpoint. For this, we’ll need an API key from Mistral AI (see prerequisites). Add the following code below our existing function and save it, but don’t run the function yet as we need to add a secret first.
const API_KEY = process.env.MISTRAL_API_KEY;
const API_URL = 'https://api.mistral.ai/v1/chat/completions';

async function chatWithLeChat(prompt) {
  try {
    const res = await fetch(API_URL, {
      method: 'POST',
      headers: {
        'Authorization': `Bearer ${API_KEY}`,
        'Content-Type': 'application/json',
      },
      body: JSON.stringify({
        model: 'mistral-small-latest',
        messages: [{ role: 'user', content: prompt }],
      }),
    });

    const data = await res.json();
    console.log(res.status, data);
    return data?.choices?.[0]?.message?.content || null;
  } catch (error) {
    console.error('Error:', error?.message || error);
    return null;
  }
}
We can have more than one JavaScript function in our serverless function. Instead of putting all the code in one long piece of code, we break it down for clarity, reusability, and testability. The chatWithLeChat function takes a prompt and calls the LLM using the mistral-small-latest model, which is Mistral’s current cost-effective model for general-purpose tasks. To send the prompt we inform the LLM that this is a user asking something. When we get data back we extract the contents of the message.
Note: The
mistral-tinymodel that was available in earlier versions of the Mistral API has been deprecated. The recommended replacement for cost-effective workloads ismistral-small-latest. You can find the full list of available models in the Mistral models documentation.
Storing API keys and other credentials as environment variables is a security best practice. In our code we don’t embed the secrets directly. Instead we use the Functions environment to provide these:
const API_KEY = process.env.MISTRAL_API_KEY;
To add this secret MISTRAL_API_KEY we click on Settings. Then, we scroll down to Environment Variables. There, we can click on Edit.
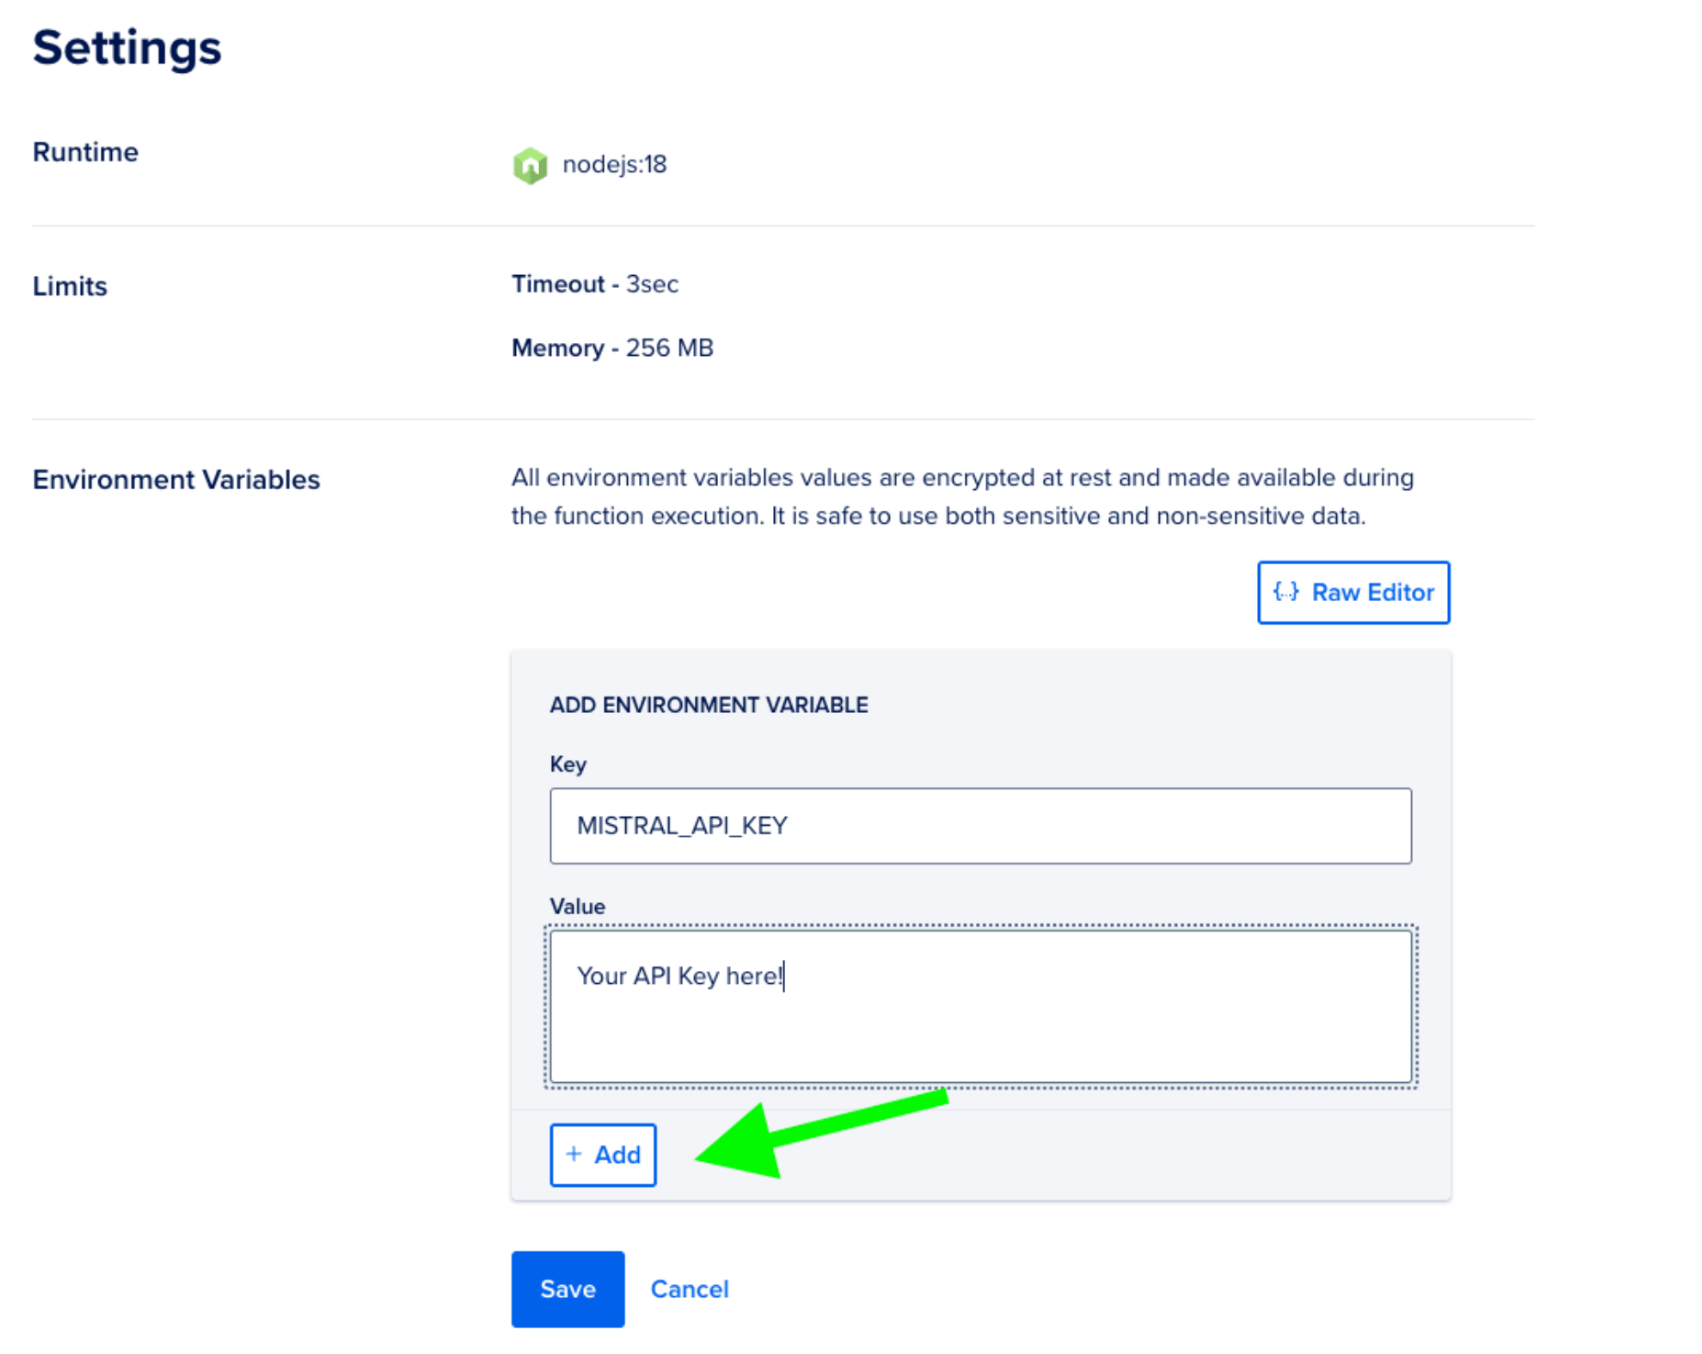
Now, click on Add, type your secret and then Save. You should see your new environment variable now.
It’s time to call our chatWithLeChat function from main. To do that, we’ll first create a prompt that includes the link we received, instructing the LLM what to do. Then, we’ll call Mistral:
  const prompt = 'I need a summary of this page: ' + link;

  const summary = await chatWithLeChat(prompt);
In our case we just want a summary of the link, but you can get creative with the prompt.
We will extend our body to include the summary:
  const body = {
    URL: link,
    summary: summary
  };
This is all our code in our DigitalOcean Function right now:
export async function main(args) {
  const link = args.link;
  if (!link) {
    return {
      statusCode: 400,
      headers: { "Content-Type": "application/json" },
      body: { error: "Please send a link" }
    };
  }

  const prompt = 'I need a summary of this page: ' + link;

  const summary = await chatWithLeChat(prompt);

  const body = {
    URL: link,
    summary: summary
  };

  return {
    statusCode: 200,
    headers: { "Content-Type": "application/json" },
    body: body
  };
}

const API_KEY = process.env.MISTRAL_API_KEY;
const API_URL = 'https://api.mistral.ai/v1/chat/completions';

async function chatWithLeChat(prompt) {
  try {
    const res = await fetch(API_URL, {
      method: 'POST',
      headers: {
        'Authorization': `Bearer ${API_KEY}`,
        'Content-Type': 'application/json',
      },
      body: JSON.stringify({
        model: 'mistral-small-latest',
        messages: [{ role: 'user', content: prompt }],
      }),
    });

    const data = await res.json();
    console.log(res.status, data);
    return data?.choices?.[0]?.message?.content || null;
  } catch (error) {
    console.error('Error:', error?.message || error);
    return null;
  }
}
If you save your function and run it, you’ll most probably get an error message in LOGS:
2026-02-02T12:14:17.299547912Z stderr: The function exceeded its time limits of 3000 milliseconds. Logs might be missing.
We need to give our function a little more time to wait for the LLM to answer. Turns out LLMs are not the fastest.
Head to Settings again, and click Edit on Limits. By default you have 3 seconds (3000 milliseconds) to run your function before you get a timeout. We’ll set that to 10 seconds. The maximum timeout for DigitalOcean Functions is 15 minutes, so 10 seconds gives the LLM plenty of room to respond. Save the change, go back to Source, and run the function again.
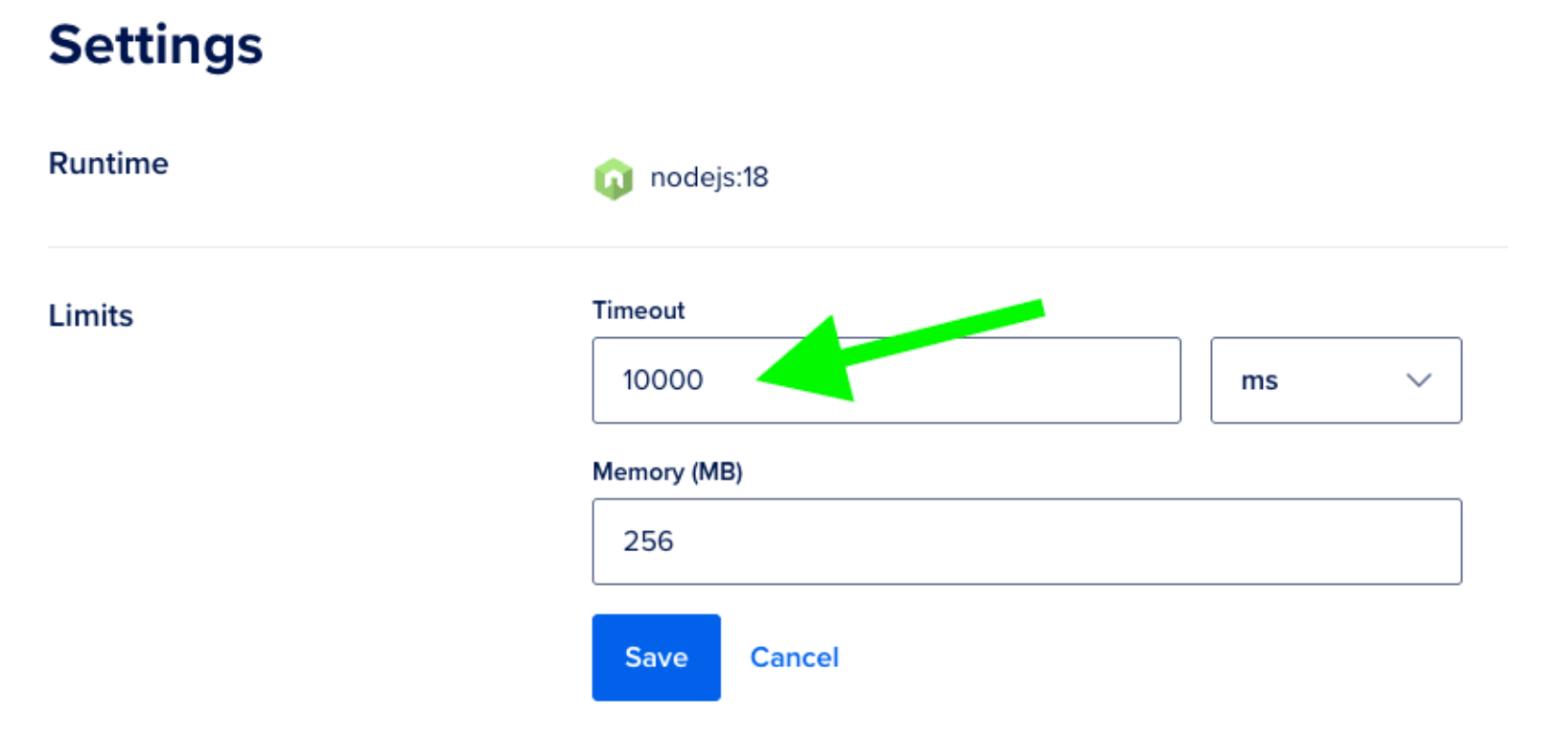
After that change, you should get a summary of the page.
Let’s create our database. Head over to the Databases option in the side menu, then in MongoDB click on Create. For more on getting started, see the DigitalOcean Managed MongoDB documentation.
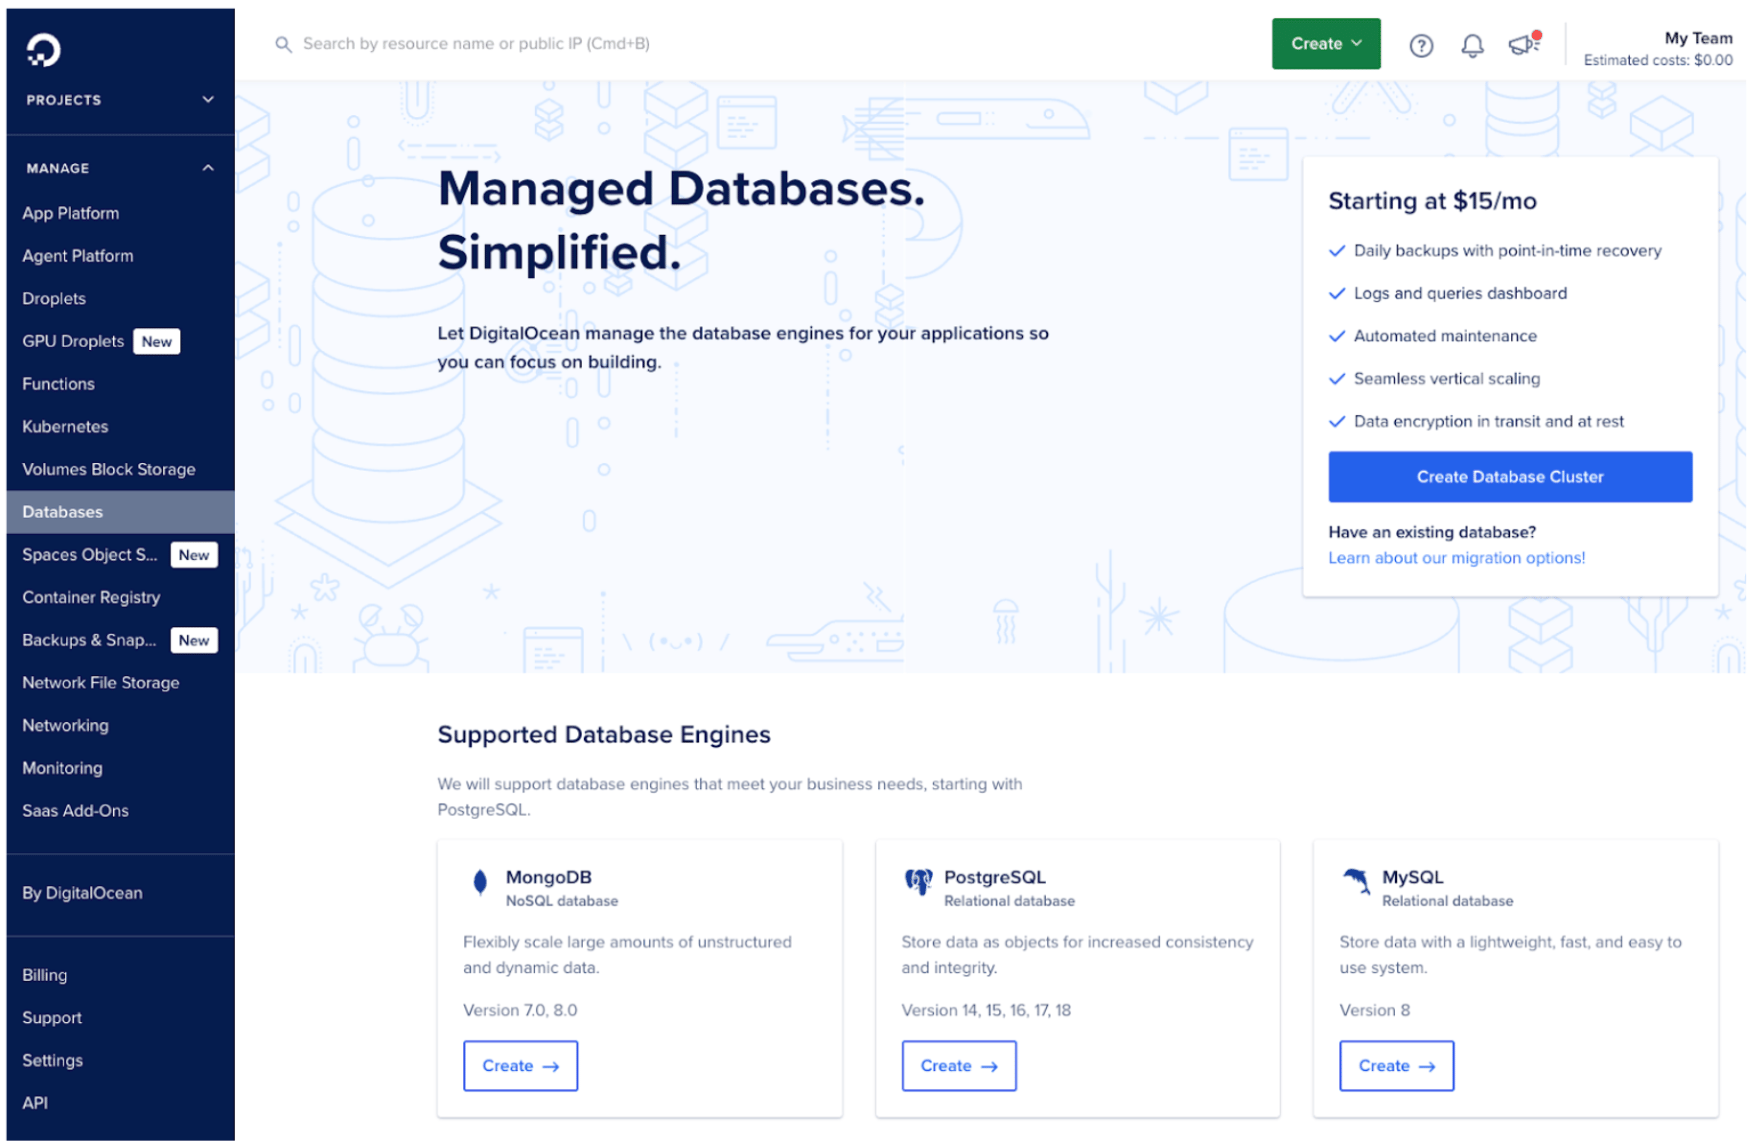
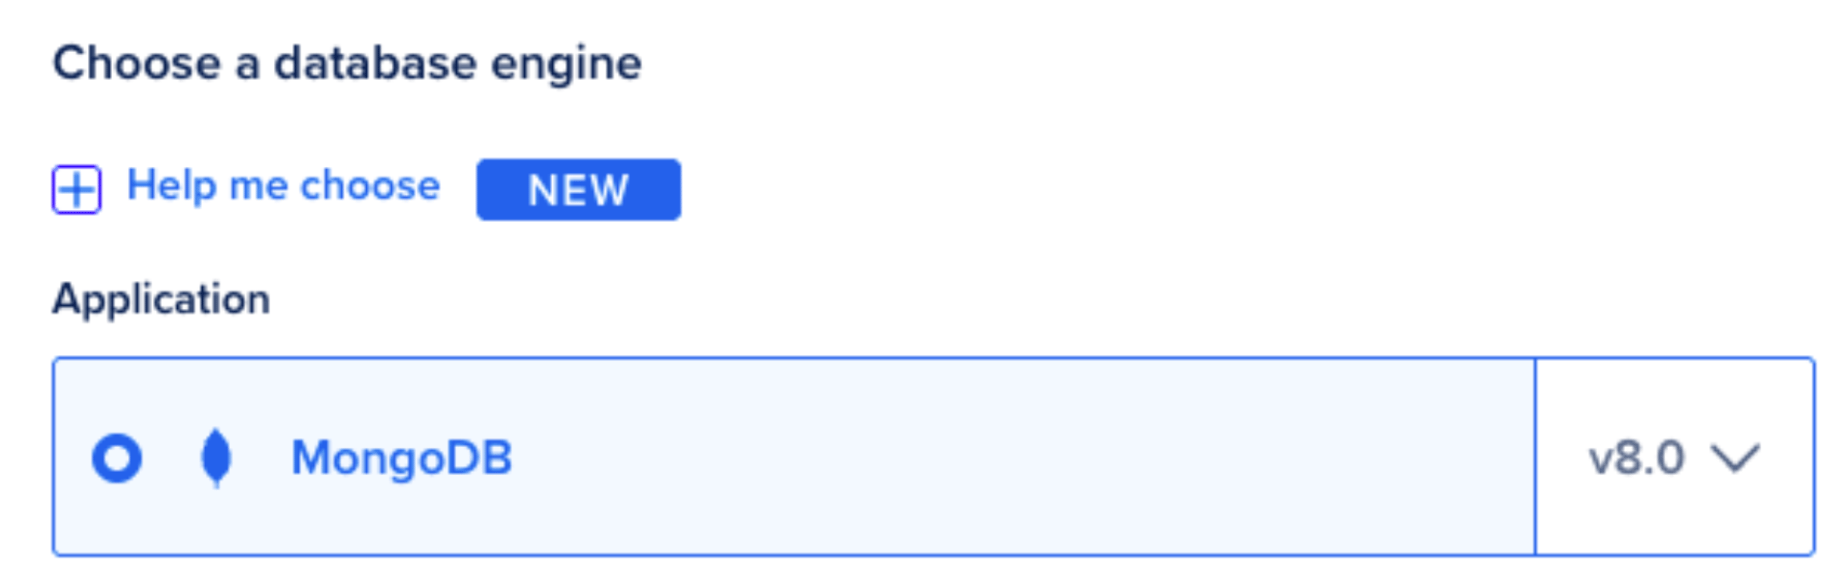
In our case, we’ll start a MongoDB database, v8.0, using the Basic plan with a Shared CPU (we are not going to store that many links, are we?), with the default 15GiB.
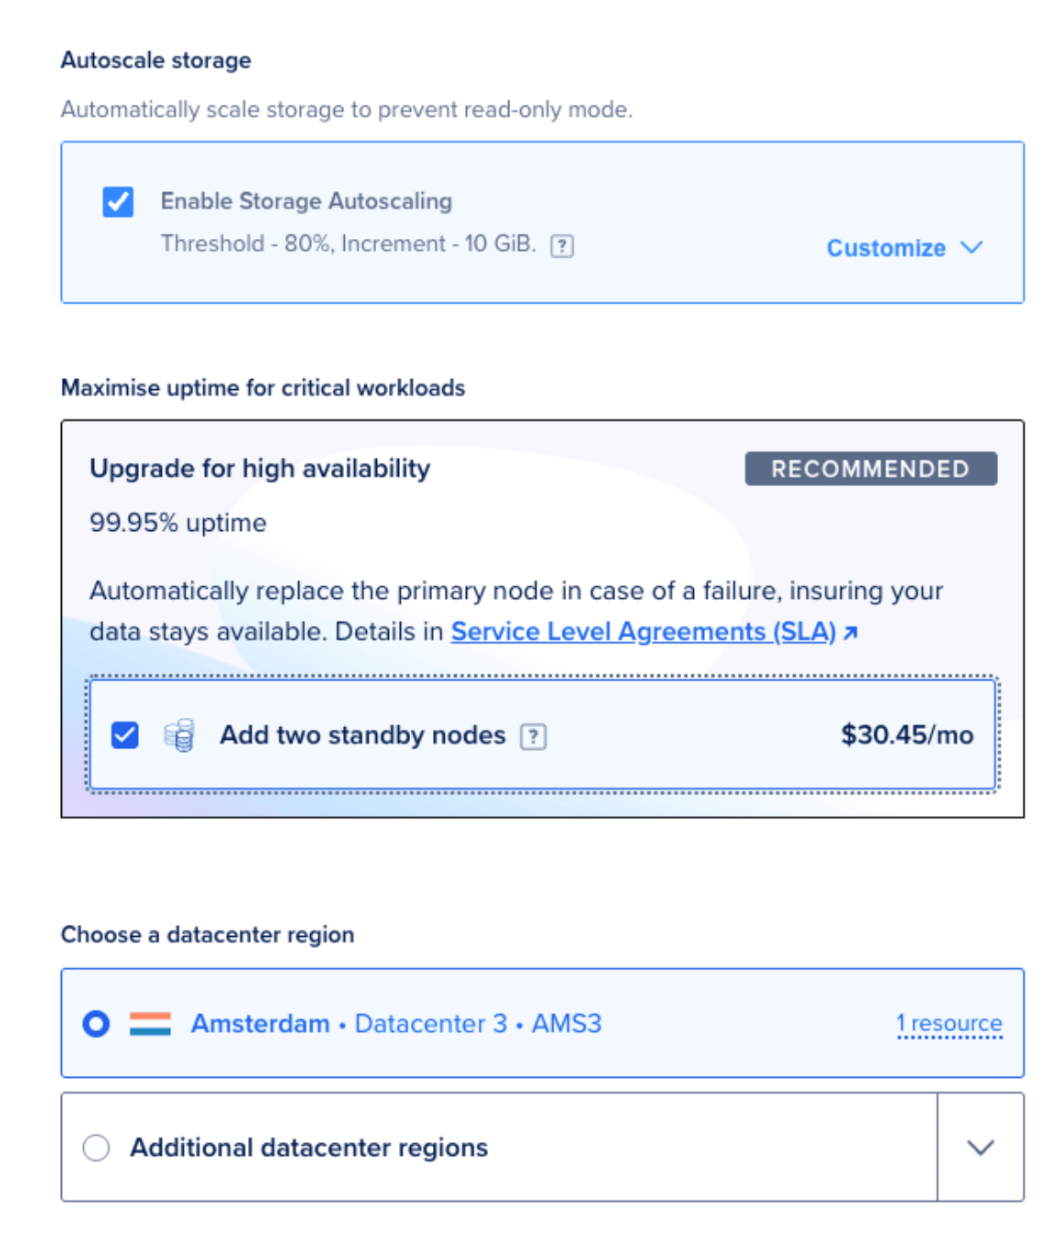
This is a single node running our database, but we do love having High Availability so let’s add two secondary nodes that will replicate the data from the primary at all times.
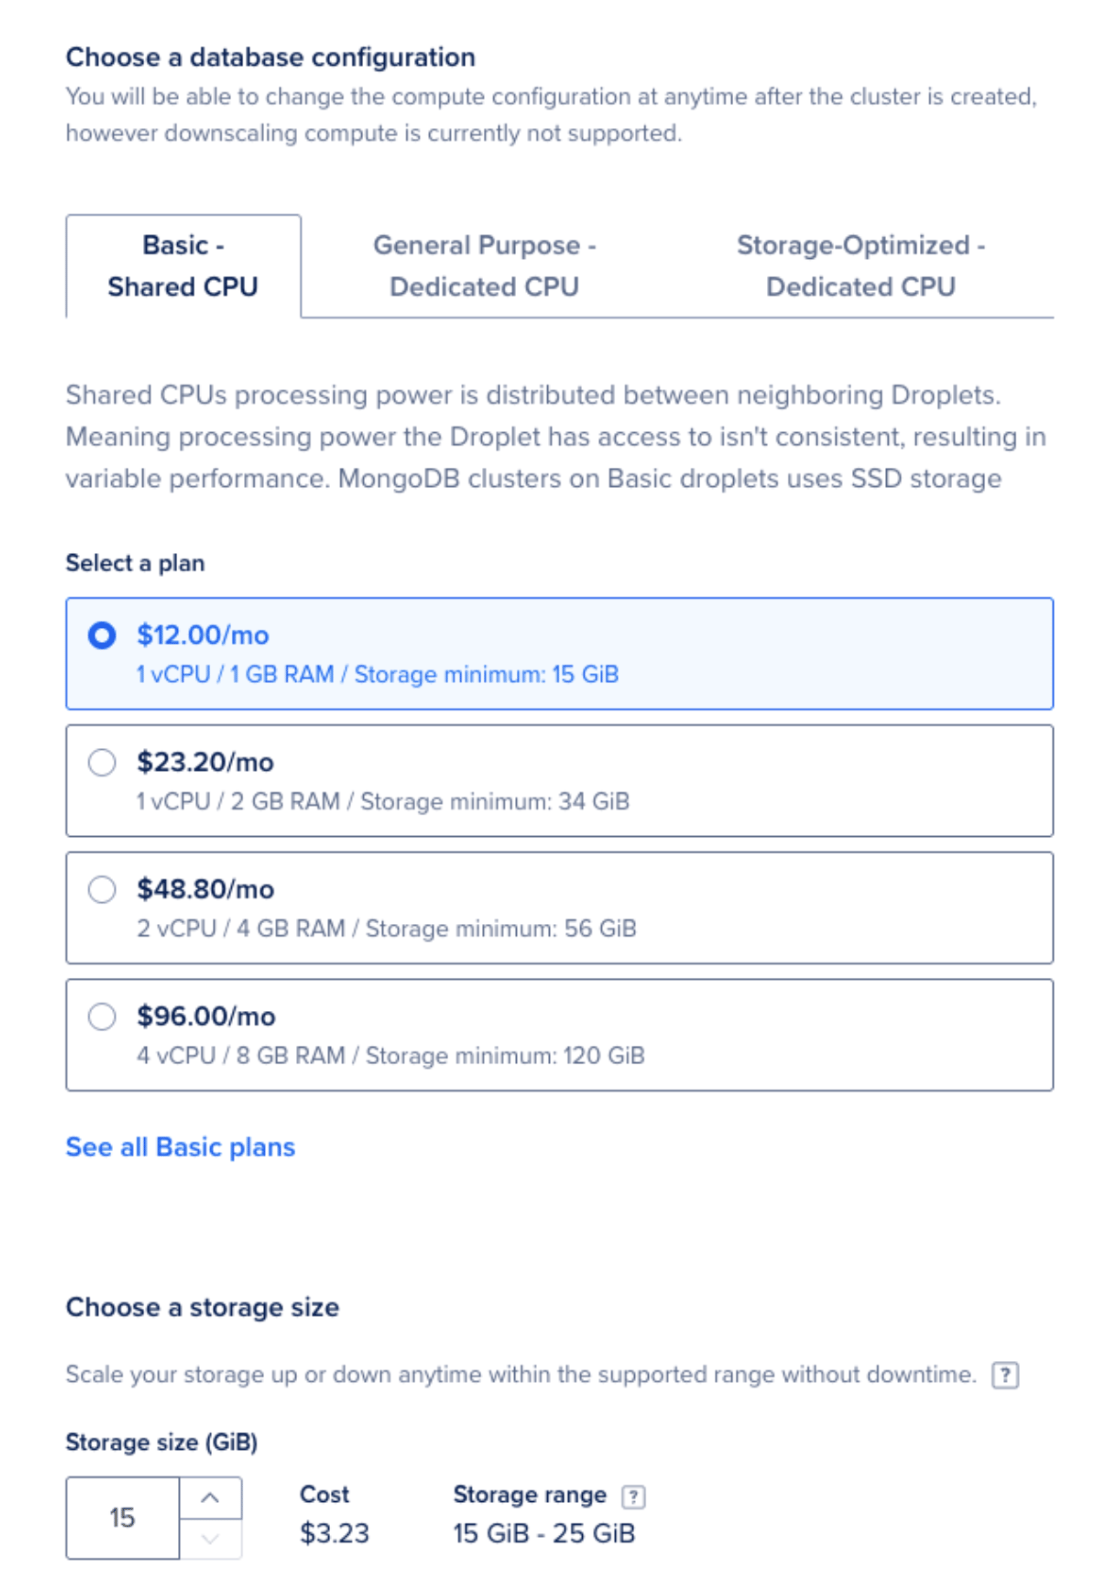
I’ll choose a datacenter close to my DigitalOcean Function. This way, not only will everything run faster, but I also avoid possible future problems (like egress data and possible associated costs).
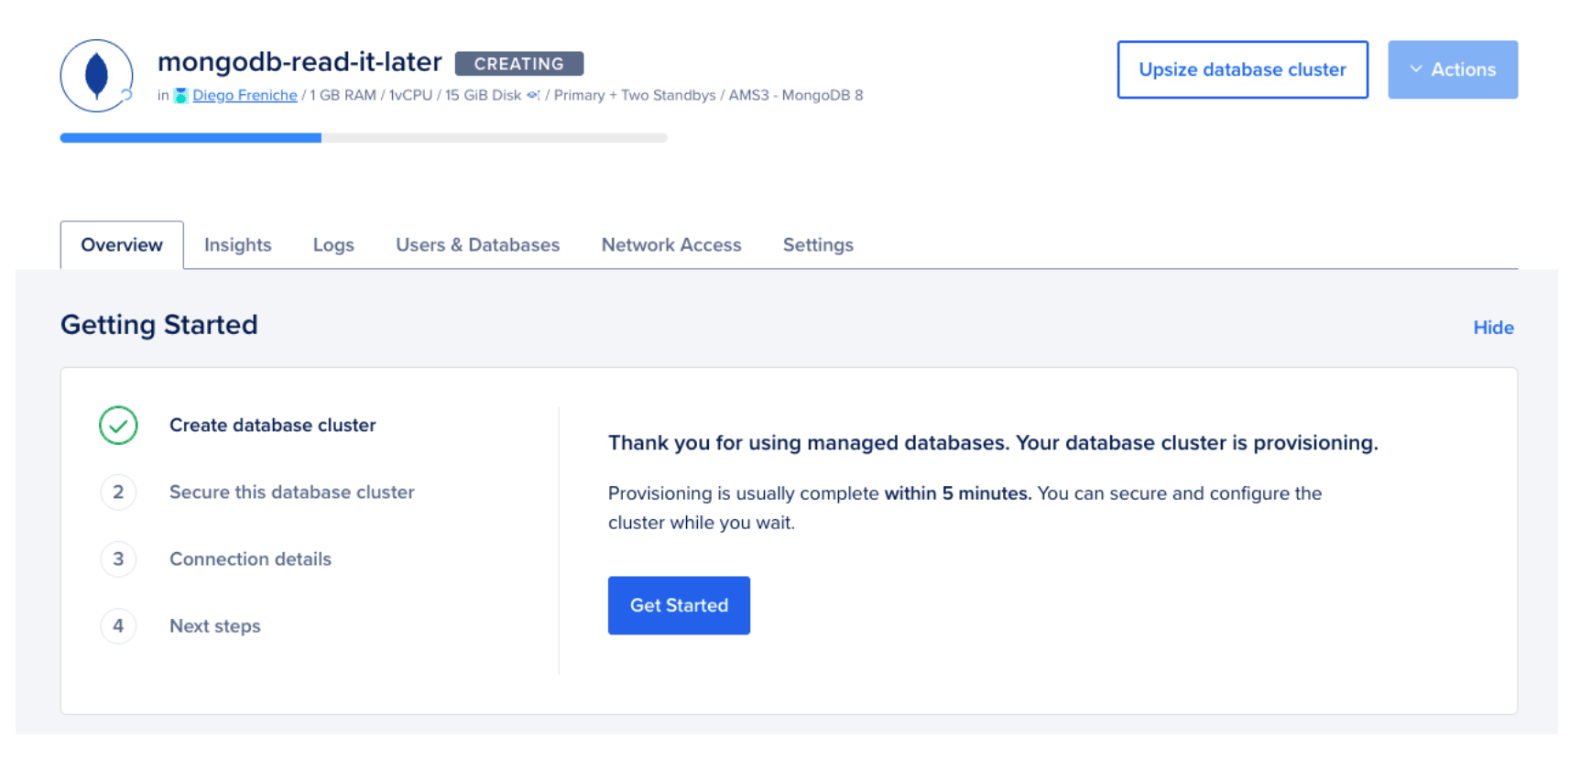
For my cluster name I’ll choose mongodb-read-it-later. Click on Create database cluster and wait until it’s ready. You’ll see the “CREATING” message to the right of your new databas e cluster.
Right now our database is public, so it can be accessed from anywhere on the Internet. This is not the best option from a security perspective. For testing purposes (and to simplify the setup) we’re going to use this public-facing database. Again: this is not a best practice. The recommended approach is to create a private network inside DigitalOcean (a VPC) and then add to that network our database and a Droplet that runs our server code. But as we’re using a serverless function this is not yet supported. You can learn more about securing your database in How to Secure MongoDB Managed Database Clusters.
To get the connection string, under Connection Details you’ll see the user, password (click on the show button to unhide it) and the connection string itself. In the Connection parameters menu you can select Connection string and just click on Copy to copy the Connection String to the clipboard.
It will look like:
mongodb+srv://admin-user:admin-password@mongodb-read-it-later-id.mongo.ondigitalocean.com/admin?authSource=admin&replicaSet=mongodb-read-it-later&tls=true
We’re now ready to store our body object in a MongoDB collection. One of the nicest things about MongoDB is that you can work directly with your application objects and send them to the database using the Node.js driver (a library that interacts directly with the database). No need for ORMs or complicated frameworks in this case.
We’ll start by importing the MongoDB driver:
import { MongoClient } from "mongodb";
After that, we’ll write a simple function that will:
page.MongoClient instance and the connect method.insertOne.async function store_in_mongodb(page) {
const mongodb_URI = process.env.MONGODB_URI;
const client = new MongoClient(mongodb_URI);
try {
await client.connect();
const database = client.db('read_it_later');
const collection = database.collection('pages');
const result = await collection.insertOne(page);
return result;
} finally {
await client.close();
}
}
As we did previously with our environment variable MISTRAL_API_KEY, we’ll need to add a new environment variable in Settings called MONGODB_URI with the URI of our MongoDB installation. Get the URI from Step 7 and add it to this env variable.
The last step will be to call this new function in main:
await store_in_mongodb(body);
Once this is done, save your function and send some links to your function and see how the collection pages gets created and populated.
A serverless function is a block of code that runs on demand in the cloud without requiring you to provision or manage a server. In this project, DigitalOcean Functions handles the infrastructure, so you only write the logic that fetches a URL, calls the Mistral AI API for a summary, and stores the result in MongoDB. This approach reduces operational overhead and lets you pay only for the compute time your function actually uses.
For cost-effective text summarization, mistral-small-latest is the recommended model as of 2026. The older mistral-tiny model has been deprecated. If you need higher-quality summaries or support for longer documents, you can upgrade to mistral-medium-latest or mistral-large-latest. See the Mistral models documentation for a full comparison.
Store all secrets as environment variables in the Functions settings panel rather than hardcoding them in your source code. Navigate to your function’s Settings page, scroll to Environment Variables, and add entries for MISTRAL_API_KEY and MONGODB_URI. The runtime makes these values available through process.env, and they are never exposed in your function’s source. For more details, see the guide on how to configure Functions.
As of 2026, DigitalOcean Functions does not yet support connecting to resources inside a VPC (Virtual Private Cloud). For production workloads, restrict access to your managed MongoDB cluster by whitelisting specific IP addresses and enabling TLS. You can learn more about securing your database in How to Secure MongoDB Managed Database Clusters.
DigitalOcean Functions default to a 3-second timeout, which is often too short for LLM API calls. You can increase this to up to 15 minutes through the function’s Settings > Limits panel. For this tutorial, 10 seconds is a good starting point. See the full list of Functions limits for details on memory, payload size, and concurrency.
In this tutorial we explored how to build a serverless function that interacts with the Mistral AI API and stores results in a managed MongoDB database on DigitalOcean. Not so long ago, building something similar required days of effort to set up web servers, database servers, hosting, and deployment pipelines. With DigitalOcean’s integrated suite of managed services, you focus on what matters most: your application code.
Here is the final, complete code listing for the function:
import { MongoClient } from "mongodb";

export async function main(args) {
  const link = args.link;
  if (!link) {
    return {
      statusCode: 400,
      headers: { "Content-Type": "application/json" },
      body: { error: "Please send a link" }
    };
  }

  const prompt = 'I need a summary of this page: ' + link;

  const summary = await chatWithLeChat(prompt);

  const body = {
    URL: link,
    summary: summary
  };

  await store_in_mongodb(body);

  return {
    statusCode: 200,
    headers: { "Content-Type": "application/json" },
    body: body
  };
}

const API_KEY = process.env.MISTRAL_API_KEY;
const API_URL = 'https://api.mistral.ai/v1/chat/completions';

async function chatWithLeChat(prompt) {
  try {
    const res = await fetch(API_URL, {
      method: 'POST',
      headers: {
        'Authorization': `Bearer ${API_KEY}`,
        'Content-Type': 'application/json',
      },
      body: JSON.stringify({
        model: 'mistral-small-latest',
        messages: [{ role: 'user', content: prompt }],
      }),
    });

    const data = await res.json();
    console.log(res.status, data);
    return data?.choices?.[0]?.message?.content || null;
  } catch (error) {
    console.error('Error:', error?.message || error);
    return null;
  }
}

async function store_in_mongodb(page) {
  const mongodb_URI = process.env.MONGODB_URI;

  const client = new MongoClient(mongodb_URI, {
    appName: "devrel-tutorial-digitalocean-functions"
  });

  try {
    await client.connect();
    const database = client.db('read_it_later');
    const collection = database.collection('pages');

    const result = await collection.insertOne(page);
    return result;
  } finally {
    await client.close();
  }
}
As a next step, you could build a second function to read from MongoDB using find, which would serve as the backend for a reading list UI. You could also add semantic search using MongoDB’s Vector Search capabilities to find articles by meaning rather than by exact keywords.
If you want to keep building with the tools covered in this tutorial, here are some resources to help you go further:
doctl CLI. This work is licensed under a Creative Commons Attribution-NonCommercial- ShareAlike 4.0 International License.
此内容由惯性聚合(RSS阅读器)自动聚合整理,仅供阅读参考。 原文来自 — 版权归原作者所有。