


Submitting AJAX forms with jQuery lets you send form data to a server asynchronously without reloading the page. Instead of the default browser behavior that triggers a full page refresh on every form submission, jQuery’s $.ajax() method sends the data in the background and processes the server’s JSON response in a callback function. This gives users instant feedback on validation errors or success messages while they stay on the same page.
In this tutorial, you will build a sample form that sends data to a PHP backend using jQuery AJAX. You will learn how to intercept the form’s submit event with event.preventDefault(), serialize form fields, handle JSON responses, display validation errors, and manage server connection failures. The tutorial also covers how to use serialize() and serializeArray() for encoding form data, how to submit forms with file uploads using the FormData object, how to include CSRF tokens for security, and how to add client-side validation before an AJAX request fires. A comparison of $.ajax(), $.post(), and the native Fetch API is included so you can choose the right tool for your project.
Deploy your frontend applications from GitHub using DigitalOcean App Platform. Let DigitalOcean focus on scaling your app.
$.ajax() method sends form data to a server without triggering a full page reload, providing a smoother user experience.event.preventDefault() inside the submit() handler stops the browser from performing its default form submission.serialize() to encode form fields into a URL-encoded string, or serializeArray() when you need an array of objects for more control over the data..done(), .fail(), and .always() callbacks give you full control over success responses, HTTP errors, and cleanup tasks after the request completes.FormData object with processData: false and contentType: false so jQuery does not transform the multipart data.AJAX (Asynchronous JavaScript and XML) form submission sends form data to a server in the background using JavaScript. The browser does not reload the page, so users can continue interacting with the UI while the request is in flight. The server processes the data and returns a response, typically as JSON, which your JavaScript code then uses to update the page.
Standard HTML form submission works differently. When a user clicks the submit button, the browser sends the form data as an HTTP request and loads the server’s response as a brand-new page. This causes a visible flash, resets scroll position, and can feel slow on pages with complex layouts.
AJAX form submission solves these problems. It keeps the user on the same page, allows you to show inline validation messages next to each field, and reduces bandwidth because only the form data and JSON response travel over the network instead of an entire HTML document.
If your project already includes jQuery as a dependency, using $.ajax() keeps your codebase consistent and gives you built-in features like global AJAX event handlers (ajaxStart, ajaxStop), automatic JSON parsing with dataType: "json", and straightforward serialization with serialize().
For new projects that do not already use jQuery, the native Fetch API is the better choice. It is built into all modern browsers (Chrome, Firefox, Safari, Edge), requires no external library, and returns Promises natively. There is no need to add a ~30KB dependency for AJAX alone.
A comparison table covering $.ajax(), $.post(), and fetch() is provided later in this tutorial in the Comparing jQuery AJAX, $.post(), and the Fetch API section.
To complete this tutorial, you will need:
This tutorial uses jQuery v3.7.1 and Bootstrap v5.3.8. jQuery 4.0.0 was released in January 2026 with several breaking changes; this tutorial uses the 3.x branch for broad compatibility. If you are starting a new project, review the jQuery 4.0 Upgrade Guide to decide which version fits your needs.
For the purposes of this tutorial, the backend will be written in PHP. The PHP script reads POST data, validates it, and returns a JSON response.
First, open a terminal window and create a new project directory:
- mkdir jquery-form-validation
Navigate to this new project directory:
- cd jquery-form-validation
Then, use your code editor to create a new process.php file:
process.php
<?php

header('Content-Type: application/json');

$errors = [];
$data = [];

if (empty($_POST['name'])) {
    $errors['name'] = 'Name is required.';
}

if (empty($_POST['email'])) {
    $errors['email'] = 'Email is required.';
} elseif (!filter_var($_POST['email'], FILTER_VALIDATE_EMAIL)) {
    $errors['email'] = 'A valid email address is required.';
}

if (empty($_POST['superheroAlias'])) {
    $errors['superheroAlias'] = 'Superhero alias is required.';
}

if (!empty($errors)) {
    $data['success'] = false;
    $data['errors'] = $errors;
} else {
    $data['success'] = true;
    $data['message'] = 'Success!';
}

echo json_encode($data);
This script validates three fields: name, email, and superheroAlias. If any field is empty, the script adds an error to the $errors array. The email field also checks for a valid format using PHP’s filter_var() function. If all fields pass validation, a success message is returned. The Content-Type: application/json header tells the browser that the response is JSON.
Note: In a production application, the backend would also handle tasks like saving data to a database, creating a session, or sending an email. You should also sanitize all input using functions like htmlspecialchars() or a validation library.
For the purposes of this tutorial, Bootstrap is used for styling the form layout.
In your project directory, use your code editor to create an index.html file:
index.html
<!DOCTYPE html>
<html lang="en">
  <head>
    <meta charset="utf-8" />
    <meta name="viewport" content="width=device-width, initial-scale=1" />
    <title>jQuery AJAX Form Example</title>
    <link
      href="https://cdn.jsdelivr.net/npm/bootstrap@5.3.8/dist/css/bootstrap.min.css"
      rel="stylesheet"
    />
    <script src="https://code.jquery.com/jquery-3.7.1.min.js"></script>
  </head>
  <body>
    <div class="container mt-5">
      <div class="row justify-content-center">
        <div class="col-md-6">
          <h1>Processing an AJAX Form</h1>

          <form action="process.php" method="POST" id="ajax-form">
            <div id="name-group" class="mb-3">
              <label for="name" class="form-label">Name</label>
              <input
                type="text"
                class="form-control"
                id="name"
                name="name"
                placeholder="Full Name"
              />
            </div>

            <div id="email-group" class="mb-3">
              <label for="email" class="form-label">Email</label>
              <input
                type="email"
                class="form-control"
                id="email"
                name="email"
                placeholder="email@example.com"
              />
            </div>

            <div id="superhero-group" class="mb-3">
              <label for="superheroAlias" class="form-label">Superhero Alias</label>
              <input
                type="text"
                class="form-control"
                id="superheroAlias"
                name="superheroAlias"
                placeholder="Ant Man, Wonder Woman, Black Panther"
              />
            </div>

            <button type="submit" class="btn btn-success">
              Submit
            </button>
          </form>
        </div>
      </div>
    </div>
  </body>
</html>
This page loads Bootstrap 5.3.8 from the jsDelivr CDN and jQuery 3.7.1 from the jQuery CDN. The form’s action points to the process.php script. Each input field sits inside a wrapper div with an id that the JavaScript code will target when displaying validation errors. To learn more about adding JavaScript to HTML pages, see How to Add JavaScript to HTML.
Open a terminal window, navigate to the project directory, and run the PHP built-in server:
- php -S localhost:8000
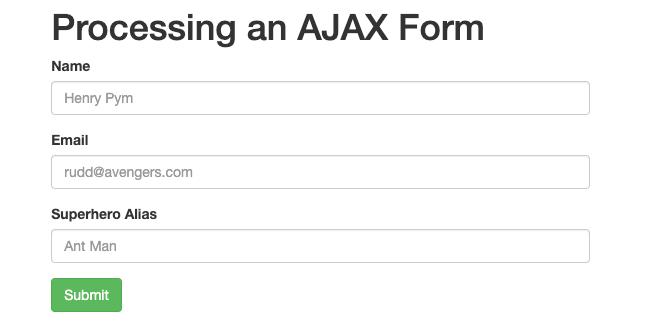
Visit localhost:8000 in your web browser and you will see the form:
To submit a form via AJAX, your script needs to do four things:
$.ajax().In your project directory, use your code editor to create a new form.js file:
form.js
$(document).ready(function () {
  $("#ajax-form").submit(function (event) {
    var formData = {
      name: $("#name").val(),
      email: $("#email").val(),
      superheroAlias: $("#superheroAlias").val(),
    };

    $.ajax({
      type: "POST",
      url: "process.php",
      data: formData,
      dataType: "json",
      encode: true,
    }).done(function (data) {
      console.log(data);
    });

    event.preventDefault();
  });
});
This code runs when the DOM is ready. It binds a submit event handler to the form. Inside the handler, it reads the values from each input field and stores them in the formData object. The $.ajax() call sends a POST request to process.php with formData as the payload. Setting dataType: "json" tells jQuery to parse the response as JSON automatically. The .done() callback runs when the server returns a successful response. Finally, event.preventDefault() stops the browser from performing the default form submission, which would reload the page.
After saving form.js, add a reference to it in index.html just before the closing </body> tag:
index.html
    <!-- ... existing form HTML ... -->
    <script src="form.js"></script>
  </body>
</html>
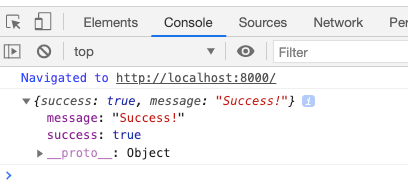
When a user presses the Submit button, the JavaScript code collects the input values and sends them as a POST request to process.php. Open your browser’s developer console (F12 or Ctrl+Shift+I) and submit the form. You will see the JSON response logged:
Instead of manually reading each field, you can use jQuery’s serialize() method to collect all form data at once. The method encodes the form fields into a URL-encoded string like name=John&email=john%40example.com&superheroAlias=Batman:
$(document).ready(function () {
  $("#ajax-form").submit(function (event) {
    $.ajax({
      type: "POST",
      url: "process.php",
      data: $(this).serialize(),
      dataType: "json",
    }).done(function (data) {
      console.log(data);
    });

    event.preventDefault();
  });
});
The serialize() method only includes form elements with a name attribute, and it skips disabled fields. This makes it convenient for forms with many fields because you do not have to reference each one individually.
If you need to inspect or modify the form data before sending it, serializeArray() returns an array of objects where each object has name and value properties:
var fields = $("#ajax-form").serializeArray();
console.log(fields);
// [
//   { name: "name", value: "John" },
//   { name: "email", value: "john@example.com" },
//   { name: "superheroAlias", value: "Batman" }
// ]
You can add extra fields to this array before passing it to $.ajax():
fields.push({ name: "timestamp", value: Date.now() });
For a deeper understanding of JSON response handling, see How To Work with JSON in JavaScript.
The PHP script returns specific error messages for each missing or invalid field. The JavaScript code needs to check the response and display those errors next to the relevant inputs.
Revisit form.js and update it with the full validation display logic:
form.js
$(document).ready(function () {
  $("#ajax-form").submit(function (event) {
    $(".mb-3").removeClass("has-error");
    $(".invalid-feedback").remove();

    var formData = {
      name: $("#name").val(),
      email: $("#email").val(),
      superheroAlias: $("#superheroAlias").val(),
    };

    $.ajax({
      type: "POST",
      url: "process.php",
      data: formData,
      dataType: "json",
      encode: true,
    }).done(function (data) {
      console.log(data);

      if (!data.success) {
        if (data.errors.name) {
          $("#name-group").addClass("has-error");
          $("#name-group").append(
            '<div class="invalid-feedback d-block">' + data.errors.name + "</div>"
          );
        }

        if (data.errors.email) {
          $("#email-group").addClass("has-error");
          $("#email-group").append(
            '<div class="invalid-feedback d-block">' + data.errors.email + "</div>"
          );
        }

        if (data.errors.superheroAlias) {
          $("#superhero-group").addClass("has-error");
          $("#superhero-group").append(
            '<div class="invalid-feedback d-block">' +
              data.errors.superheroAlias +
              "</div>"
          );
        }
      } else {
        $("#ajax-form").html(
          '<div class="alert alert-success">' + data.message + "</div>"
        );
      }
    });

    event.preventDefault();
  });
});
At the top of the submit handler, the code removes any previously displayed errors by stripping the has-error class and removing .invalid-feedback elements. This prevents error messages from stacking up on repeated submissions.
Inside the .done() callback, the code checks data.success. If it is false, the code looks for error messages on each field and appends a div with the Bootstrap invalid-feedback class to the matching group. The d-block class forces Bootstrap to display the feedback message since it is not tied to a native HTML5 validation state.
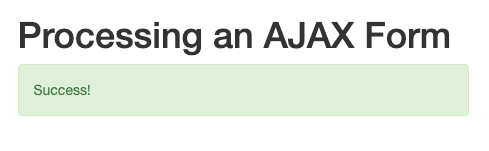
If all fields pass validation, the form is replaced with a success message inside an alert-success div.
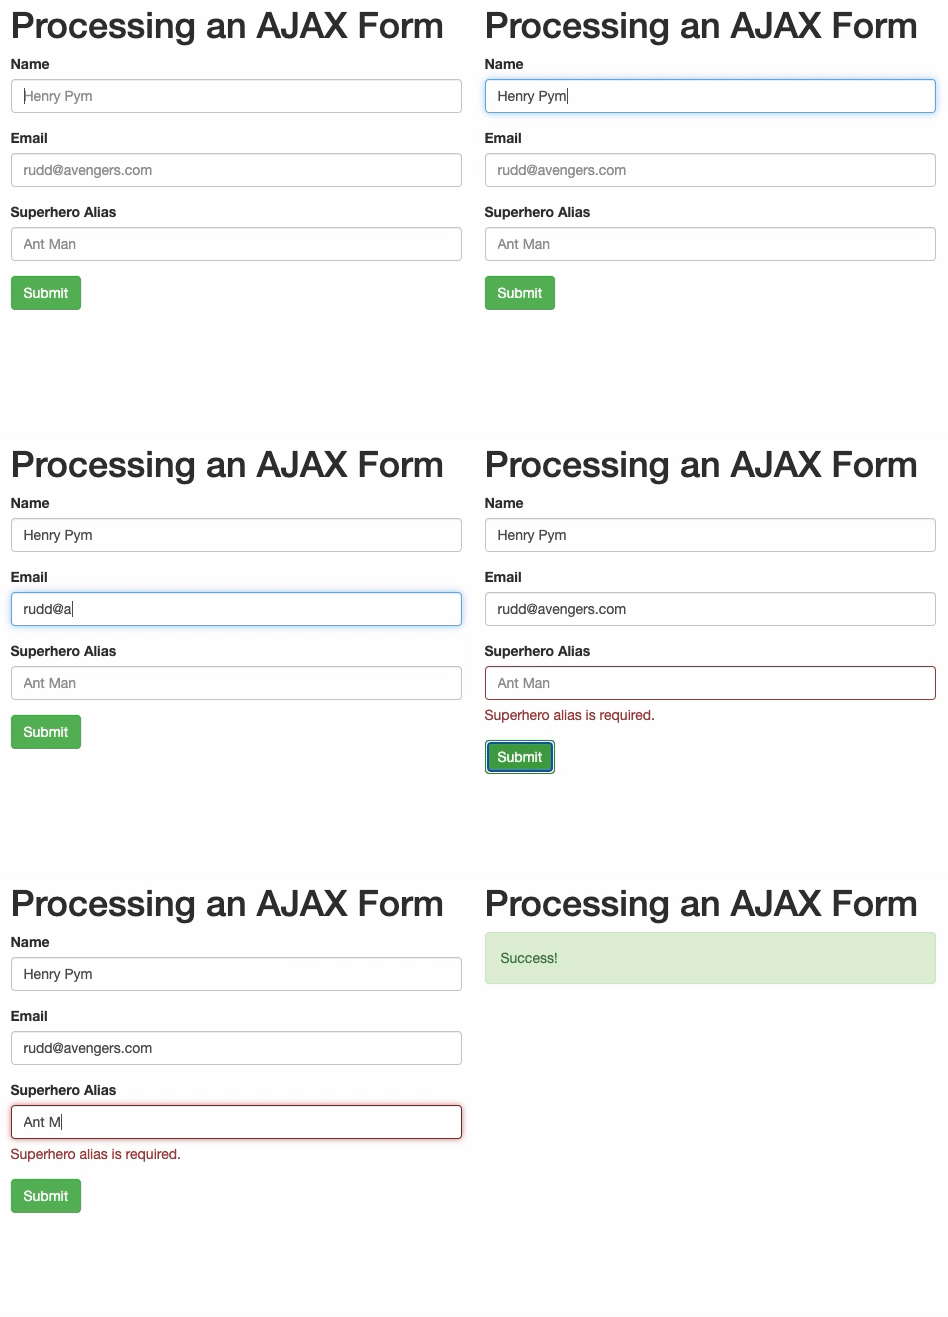
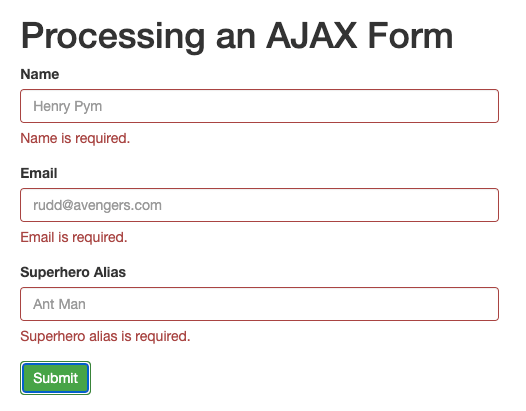
Submit the form with empty fields to see the validation errors:
Fill in all fields and submit again to see the success message:
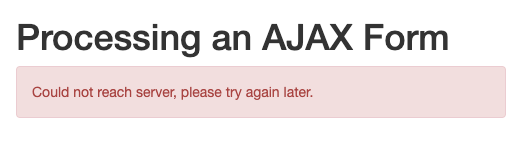
If the server is unreachable or returns an HTTP error like 500, the .done() callback will not fire. Without handling this scenario, users would wait indefinitely with no feedback.
jQuery’s .fail() callback runs when the AJAX request fails. It receives three arguments: the jqXHR object, a text status string (such as "timeout", "error", or "abort"), and an error message.
Add the .fail() callback to the AJAX chain in form.js:
form.js
    $.ajax({
      type: "POST",
      url: "process.php",
      data: formData,
      dataType: "json",
      encode: true,
    })
      .done(function (data) {
        // ... validation display logic ...
      })
      .fail(function (jqXHR, textStatus, errorThrown) {
        $("#ajax-form").html(
          '<div class="alert alert-danger">' +
            "Could not reach the server. Please try again later." +
            "</div>"
        );
      });
You can also use .always() to run code after every request regardless of success or failure. This is useful for hiding loading spinners or re-enabling the submit button:
    $.ajax({
      // ... settings ...
    })
      .done(function (data) {
        // handle success
      })
      .fail(function (jqXHR, textStatus, errorThrown) {
        // handle failure
      })
      .always(function () {
        $("#submit-btn").prop("disabled", false);
        $(".spinner").hide();
      });
If the PHP server is stopped and a user submits the form, they will see the error message:
Server-side validation is required for security, but client-side validation provides instant feedback without a network round trip. The approach here uses jQuery to check the fields before the $.ajax() call fires.
Add a validation function to form.js that runs before the AJAX request:
form.js
$(document).ready(function () {
  function validateForm() {
    var isValid = true;

    $(".mb-3").removeClass("has-error");
    $(".invalid-feedback").remove();

    if ($.trim($("#name").val()) === "") {
      $("#name-group").addClass("has-error");
      $("#name-group").append(
        '<div class="invalid-feedback d-block">Name is required.</div>'
      );
      isValid = false;
    }

    var email = $.trim($("#email").val());
    var emailPattern = /^[^\s@]+@[^\s@]+\.[^\s@]+$/;
    if (email === "") {
      $("#email-group").addClass("has-error");
      $("#email-group").append(
        '<div class="invalid-feedback d-block">Email is required.</div>'
      );
      isValid = false;
    } else if (!emailPattern.test(email)) {
      $("#email-group").addClass("has-error");
      $("#email-group").append(
        '<div class="invalid-feedback d-block">Enter a valid email address.</div>'
      );
      isValid = false;
    }

    if ($.trim($("#superheroAlias").val()) === "") {
      $("#superhero-group").addClass("has-error");
      $("#superhero-group").append(
        '<div class="invalid-feedback d-block">Superhero alias is required.</div>'
      );
      isValid = false;
    }

    return isValid;
  }

  $("#ajax-form").submit(function (event) {
    event.preventDefault();

    if (!validateForm()) {
      return;
    }

    var formData = $(this).serialize();

    $.ajax({
      type: "POST",
      url: "process.php",
      data: formData,
      dataType: "json",
    })
      .done(function (data) {
        if (!data.success) {
          // display server-side errors (same as Step 4)
        } else {
          $("#ajax-form").html(
            '<div class="alert alert-success">' + data.message + "</div>"
          );
        }
      })
      .fail(function () {
        $("#ajax-form").html(
          '<div class="alert alert-danger">Could not reach the server. Please try again later.</div>'
        );
      });
  });
});
The validateForm() function checks each field. For the email field, it uses a regular expression pattern to verify the format. If any check fails, the function returns false and the AJAX request does not fire. Users see the error messages immediately without waiting for a server response.
You can also use the HTML5 Constraint Validation API by adding required attributes to your inputs and checking form.checkValidity() in your handler. The jQuery approach shown here gives you more control over the error message placement and styling.
Standard jQuery serialization methods (serialize() and serializeArray()) do not handle file inputs. To upload files through AJAX, use the browser’s built-in FormData object. FormData collects all form fields including file inputs and sends them as multipart/form-data.
First, add a file input to the HTML form:
<div id="avatar-group" class="mb-3">
  <label for="avatar" class="form-label">Avatar</label>
  <input
    type="file"
    class="form-control"
    id="avatar"
    name="avatar"
  />
</div>
Then update the JavaScript to use FormData:
$("#ajax-form").submit(function (event) {
  event.preventDefault();

  var formData = new FormData(this);

  $.ajax({
    type: "POST",
    url: "process.php",
    data: formData,
    dataType: "json",
    processData: false,
    contentType: false,
  })
    .done(function (data) {
      console.log(data);
    })
    .fail(function () {
      console.log("Request failed.");
    });
});
Two settings are required when using FormData with $.ajax():
processData: false prevents jQuery from converting the FormData object into a URL-encoded string. FormData must be sent as-is.contentType: false prevents jQuery from setting the Content-Type header. The browser sets it automatically to multipart/form-data with the correct boundary string.On the PHP side, access uploaded files through the $_FILES superglobal:
if (isset($_FILES['avatar']) && $_FILES['avatar']['error'] === UPLOAD_ERR_OK) {
    $uploadDir = 'uploads/';
    $uploadFile = $uploadDir . basename($_FILES['avatar']['name']);
    move_uploaded_file($_FILES['avatar']['tmp_name'], $uploadFile);
}
Warning: Always validate uploaded files on the server. Check the file size, MIME type, and extension. Never trust the file name sent by the client. Use a generated file name and store uploads outside the web root when possible.
Cross-Site Request Forgery (CSRF) is an attack where a malicious website tricks a user’s browser into submitting a form to your server. CSRF tokens prevent this by requiring a secret, per-session value that only your application knows.
Most server-side frameworks (Laravel, Django, Rails, Symfony) generate CSRF tokens automatically. The token is typically placed in a <meta> tag or a hidden form field.
Add a meta tag with the CSRF token in your HTML <head>:
<meta name="csrf-token" content="<?php echo $_SESSION['csrf_token']; ?>" />
Then configure jQuery to send the token with every AJAX request using $.ajaxSetup():
$.ajaxSetup({
  headers: {
    "X-CSRF-TOKEN": $('meta[name="csrf-token"]').attr("content"),
  },
});
This sets the X-CSRF-TOKEN header on all subsequent AJAX requests. Your server-side code should validate this header against the token stored in the user’s session.
To generate a CSRF token in PHP, add this to the top of your page before any output:
session_start();
if (empty($_SESSION['csrf_token'])) {
    $_SESSION['csrf_token'] = bin2hex(random_bytes(32));
}
And validate the token in your process.php:
session_start();

$headers = getallheaders();
$token = isset($headers['X-CSRF-TOKEN']) ? $headers['X-CSRF-TOKEN'] : '';

if (!hash_equals($_SESSION['csrf_token'], $token)) {
    http_response_code(403);
    echo json_encode(['success' => false, 'message' => 'Invalid CSRF token.']);
    exit;
}
The hash_equals() function performs a timing-safe comparison to prevent timing attacks against the token value.
The following table compares three common approaches for submitting form data asynchronously. Use this to decide which method fits your project.
| Feature | $.ajax() |
$.post() |
fetch() |
|---|---|---|---|
| Library required | jQuery | jQuery | None (built-in) |
| Configuration | Full control over method, headers, timeout, and callbacks | Shorthand for POST; fewer options | Full control; uses Request/Response objects |
| Promise support | jQuery Deferred (.done(), .fail(), .always()) |
jQuery Deferred | Native Promises (.then(), .catch(), .finally()) |
| JSON parsing | Automatic with dataType: "json" |
Automatic with data type argument | Manual: response.json() |
| File upload support | Yes, with FormData + processData: false |
Yes, with FormData + manual settings |
Yes, with FormData natively |
| Error handling | .fail() fires on HTTP errors and network failures |
.fail() fires on HTTP errors and network failures |
Only rejects on network failures; HTTP errors (404, 500) resolve normally |
| Browser support | All browsers jQuery supports | All browsers jQuery supports | All modern browsers; IE requires a polyfill |
| Global event hooks | Yes (ajaxStart, ajaxStop, ajaxError) |
Yes (inherits from $.ajax) |
No |
| Bundle size impact | ~30KB min+gzip (full jQuery) | ~30KB min+gzip (full jQuery) | 0KB (native) |
jQuery’s $.post() method is a shorthand for $.ajax() with type: "POST" already set:
$.post("process.php", $("#ajax-form").serialize(), function (data) {
  if (data.success) {
    $("#ajax-form").html(
      '<div class="alert alert-success">' + data.message + "</div>"
    );
  }
}, "json")
  .fail(function () {
    $("#ajax-form").html(
      '<div class="alert alert-danger">Could not reach the server.</div>'
    );
  });
The advantage of $.post() is that it requires less configuration. The trade-off is that you cannot set custom headers, change the content type, or configure a timeout without falling back to $.ajax().
For comparison, here is the same form submission using the native Fetch API:
document.getElementById("ajax-form").addEventListener("submit", function (event) {
  event.preventDefault();

  fetch("process.php", {
    method: "POST",
    headers: { "Content-Type": "application/x-www-form-urlencoded" },
    body: new URLSearchParams(new FormData(this)),
  })
    .then(function (response) {
      if (!response.ok) {
        throw new Error("Server error: " + response.status);
      }
      return response.json();
    })
    .then(function (data) {
      if (data.success) {
        console.log(data.message);
      }
    })
    .catch(function (error) {
      console.error("Request failed:", error);
    });
});
A key difference: fetch() does not reject on HTTP error status codes (404, 500). You need to check response.ok manually and throw an error to trigger the .catch() handler. jQuery’s $.ajax() and $.post() automatically route HTTP errors to the .fail() callback.
event.preventDefault() do in a jQuery AJAX form submission?event.preventDefault() stops the browser from performing the default form submission, which would send an HTTP request and reload the page. Without it, the page reloads before the AJAX call can complete, and the user never sees the JSON response.
serialize() and serializeArray() in jQuery?serialize() returns a single URL-encoded string of form field name-value pairs, such as name=John&email=john%40example.com. This format is ready to send directly as POST data. serializeArray() returns a JavaScript array of objects, where each object has name and value properties, giving you the ability to inspect or modify individual fields before sending.
Use the FormData object to collect all form fields including file inputs. Pass it as the data property in $.ajax() and set processData: false and contentType: false to prevent jQuery from transforming the data or overriding the multipart/form-data content type header. See Step 7 for a working example.
Use the .fail() callback chained after $.ajax(). It receives the jqXHR object, a text status string, and an error message. For validation errors returned in the JSON response body (with an HTTP 200 status), check the response data inside the .done() callback, as shown in Step 4.
For new projects that do not already include jQuery, the native Fetch API is the preferred choice. It requires no external dependency, is supported in all modern browsers, and returns Promises natively. jQuery AJAX remains a practical choice for projects that already use jQuery, or for legacy codebases where adding fetch() polyfills would introduce more complexity than keeping jQuery.
In this tutorial, you built a form that sends data to a PHP backend using jQuery AJAX without reloading the page. You learned how to intercept the submit event with event.preventDefault(), serialize form data, display validation errors from the server, and handle connection failures. You also covered client-side validation, file uploads with FormData, CSRF token handling, and the differences between $.ajax(), $.post(), and the Fetch API.
As a next step, consider adding more advanced validation rules like password strength checks, date format validation, or conditional field requirements. For production forms, always pair client-side validation with server-side validation and include CSRF protection.
If you would like to learn more about JavaScript and front-end development, visit the DigitalOcean JavaScript tutorials for more guides and projects.
Try DigitalOcean App Platform: Deploy your jQuery and PHP projects directly from a GitHub repository with automatic builds, managed infrastructure, and built-in HTTPS. Get started with App Platform today.
 This work is licensed under a Creative Commons Attribution-NonCommercial- ShareAlike 4.0 International License.
此内容由惯性聚合(RSS阅读器)自动聚合整理,仅供阅读参考。 原文来自 — 版权归原作者所有。