





The author selected Open Sourcing Mental Illness Ltd to receive a donation as part of the Write for DOnations program.
PHP is a popular server scripting language known for creating dynamic and interactive web pages. Getting up and running with your language of choice is the first step in learning to program.
This tutorial will guide you through installing PHP 7.4 on Ubuntu and setting up a local programming environment via the command line. You will also install a dependency manager, Composer, and test your installation by running a script.
Note: This tutorial covers installing PHP 7.4 on Ubuntu 20.04 and was written when that version was widely used. Since then, newer versions of PHP and Ubuntu have been released, and PHP 7.4 and Ubuntu 20.04 has reached end-of-life and is no longer actively supported.
If you are setting up a new development environment, we recommend following our more recent guide that uses a supported PHP version and a current Ubuntu release.
Please refer to the newer tutorial for updated instructions and best practices.
To complete this tutorial, you will need a local or virtual machine with Ubuntu 20.04 installed and have administrative access and an internet connection to that machine. You can download this operating system via the Ubuntu releases page.
You’ll be completing your installation and setup on the command line, which is a non-graphical way to interact with your computer. That is, instead of clicking on buttons, you’ll be typing in text and receiving feedback from your computer through text as well.
The command line, also known as a shell or terminal, can help you modify and automate many of the tasks you do on a computer every day and is an essential tool for software developers. There are many terminal commands to learn that can enable you to do more powerful things. The article An Introduction to the Linux Terminal can get you better oriented with the terminal.
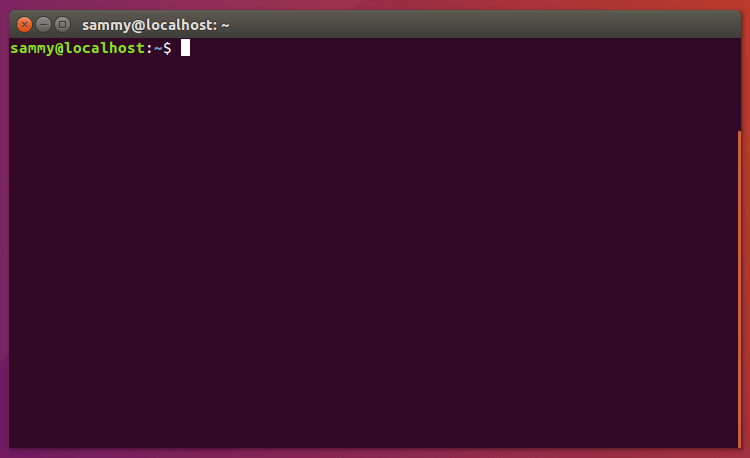
On Ubuntu, you can find the Terminal application by clicking on the Ubuntu icon in the upper-left-hand corner of your screen and typing terminal into the search bar. Click on the Terminal application icon to open it. Alternatively, you can hit the CTRL, ALT, and T keys on your keyboard at the same time to open the Terminal application automatically.
Note: Ubuntu 20.04 ships with PHP 7.4 in its upstream repositories. This means that if you attempt to install PHP without a specified version, it will use 7.4.
You will want to avoid relying on the default version of PHP because that default version could change depending on where you are running your code. You may also wish to install a different version to match an application you are using or to upgrade to a newer version, such as PHP 8.
Run the following command to update apt-get itself, which ensures that you have access to the latest versions of anything you want to install:
- sudo apt-get update
Next, install software-properties-common, which adds management for additional software sources:
- sudo apt -y install software-properties-common
The -y flag will automatically agree to the installation. Without that, you would receive a prompt in your terminal window for each installation.
Next, install the repository ppa:ondrej/php, which will give you all your versions of PHP:
- sudo add-apt-repository ppa:ondrej/php
Finally, you update apt-get again so your package manager can see the newly listed packages:
- sudo apt-get update
Now you’re ready to install PHP 7.4 using the following command:
- sudo apt -y install php7.4
Check the version installed:
- php -v
You will receive something similar to the following:
Output
PHP 7.4.0beta4 (cli) (built: Aug 28 2019 11:41:49) ( NTS )
Copyright (c) The PHP Group
Zend Engine v3.4.0-dev, Copyright (c) Zend Technologies
with Zend OPcache v7.4.0beta4, Copyright (c), by Zend Technologies
Besides PHP itself, you will likely want to install some additional PHP modules. You can use this command to install additional modules, replacing PACKAGE_NAME with the package you wish to install:
- sudo apt-get install php7.4-PACKAGE_NAME
You can also install more than one package at a time. Here are a few suggestions of the most common modules you will most likely want to install:
- sudo apt-get install -y php7.4-cli php7.4-json php7.4-common php7.4-mysql php7.4-zip php7.4-gd php7.4-mbstring php7.4-curl php7.4-xml php7.4-bcmath
This command will install the following modules:
php7.4-cli - command interpreter, useful for testing PHP scripts from a shell or performing general shell scripting tasksphp7.4-json - for working with JSON dataphp7.4-common - documentation, examples, and common modules for PHPphp7.4-mysql - for working with MySQL databasesphp7.4-zip - for working with compressed filesphp7.4-gd - for working with imagesphp7.4-mbstring - used to manage non-ASCII stringsphp7.4-curl - lets you make HTTP requests in PHPphp7.4-xml - for working with XML dataphp7.4-bcmath - used when working with precision floatsPHP configurations related to Apache are stored in /etc/php/7.4/apache2/php.ini. You can list all loaded PHP modules with the following command:
- php -m
You have installed PHP and verified the version you have running. You also installed any required PHP modules and were able to list the modules that you have loaded.
You could start using PHP right now, but you will likely want to use various libraries to build PHP applications quickly. Before you test your PHP environment, first set up a dependency manager for your projects.
Libraries are a collection of code that can help you solve common problems without needing to write everything yourself. Since there are many libraries available, using a dependency manager will help you manage multiple libraries as you become more experienced in writing PHP.
Composer is a tool for dependency management in PHP. It allows you to declare the libraries your project depends on and will manage installing and updating these packages.
Although similar, Composer is not a package manager in the same sense as yum or apt. It deals with “packages” or libraries, but it manages them on a per-project basis, installing them in a directory (e.g. vendor) inside your project. By default, it does not install anything globally. Thus, it is a dependency manager. It does, however, support a global project for convenience via the global command.
This idea is not new, and Composer is strongly inspired by Node’s npm and Ruby’s bundler.
Suppose:
Composer:
There are, in short, two ways to install Composer: locally as part of your project or globally as a system-wide executable. Either way, you will start with the local install.
To quickly install Composer in the current directory, run this script in your terminal:
- php -r "copy('https://getcomposer.org/installer', 'composer-setup.php');"
- php -r "if (hash_file('sha384', 'composer-setup.php') === '756890a4488ce9024fc62c56153228907f1545c228516cbf63f885e036d37e9a59d27d63f46af1d4d07ee0f76181c7d3') { echo 'Installer verified'; } else { echo 'Installer corrupt'; unlink('composer-setup.php'); } echo PHP_EOL;"
- php composer-setup.php
- php -r "unlink('composer-setup.php');"
This installer script will check some php.ini settings, warn you if they are set incorrectly, and then download the latest composer.phar in the current directory. The four lines will, in order:
The installer will check a few PHP settings and then download composer.phar to your working directory. This file is the Composer binary. It is a PHAR (PHP archive), which is an archive format for PHP that can be run on the command line, amongst other things.
In order to run Composer, you use php composer.phar. As an example, run this command to see the version of Composer you have installed:
- php composer.phar --version
To use Composer locally, you will want your composer.phar file to be in your project’s root directory. You can start in your project directory before installing Composer. You can also move the file after installation. You can also install Composer to a specific directory by using the --install-dir option and additionally (re)name it using the --filename option.
Since Composer is something used across projects, it’s recommended that you continue to the next portion and set Composer to run globally.
You can place the Composer PHAR anywhere you wish. If you put it in a directory that is part of your $PATH, you can access it globally. You can even make it executable on Ubuntu (and other Unix systems) and invoke it without directly using the PHP interpreter.
After installing locally, run this command to move composer.phar to a directory that is in your path:
- sudo mv composer.phar /usr/local/bin/composer
If you’d like to install it only for your user and avoid requiring root permissions, you can use ~/.local/bin instead, which is available by default on some Linux distributions:
- mv composer.phar ~/.local/bin/composer
Now to run Composer, use composer instead of php composer.phar. To check for your Composer version, run:
- composer --version
As a final step, you may optionally initialize your project with composer init. This will create the composer.json file that will manage your project dependencies. Initializing the project will also let you define project details such as Author and License, and use Composer’s autoload functionality. You can define dependencies now or add them later.
Run this command to initialize a project:
- composer init
Running this command will start the setup wizard. Details that you enter in the wizard can be updated later, so feel free to leave the defaults and just press ENTER. If you aren’t ready to install any dependencies, you can choose no. Enter in your details at each prompt:
Output
This command will guide you through creating your composer.json config.
Package name (sammy/php_install): sammy/project1
Description []:
Author [Sammy <sammy@digitalocean.com>, n to skip]:
Minimum Stability []:
Package Type (e.g. library, project, metapackage, composer-plugin) []: project
License []:
Define your dependencies.
Would you like to define your dependencies (require) interactively [yes]? no
Would you like to define your dev dependencies (require-dev) interactively [yes]? no
{
"name": "sammy/project1",
"type": "project",
"authors": [
{
"name": "Sammy",
"email": "sammy@digitalocean.com"
}
],
"require": {}
}
Do you confirm generation [yes]? yes
Before you confirm the generation, you will see a sample of the composer.json file that the wizard will create. If it all looks good, you can confirm the default of yes. If you need to start over, choose no.
The first time you define any dependency, Composer will create a vendor folder. All dependencies install into this vendor folder. Composer also creates a composer.lock file. This file specifies the exact version of each dependency and subdependency used in your project. This assures that any machine on which your program is run, will be using the exact same version of each packages.
Note: The vendor folder should never be committed to your version control system (VCS). The vendor folder only contains packages you have installed from other vendors. Those individual vendors will maintain their own code in their own version control systems. You should only be tracking the code you write. Instead of committing the vendor folder, you only need to commit your composer.json and composer.lock files. You can learn more about ignoring specific files in How To Use Git: A Reference Guide.
Now that you have PHP installed and a way to manage your project dependencies using Composer, you’re ready to test your environment.
To test that your system is configured correctly for PHP, you can create and run a basic PHP script. Call this script hello.php:
- sudo nano hello.php
This will open a blank file. Put the following text, which is valid PHP code, inside the file:
hello.php
<?php
echo 'Hello World!';
?>
Once you’ve added the text, save and close the file. You can do this by holding down the CTRL key and pressing the x key. Then choose y and press ENTER.
Now you can test to make sure that PHP processes your script correctly. Type php to tell PHP to process the file, followed by the name of the file:
- php hello.php
If the PHP is processed properly, you will see only the characters within the quotes:
Output
Hello World!
PHP has successfully processed the script, meaning that your PHP environment is successfully installed and you’re ready to continue your programming journey.
At this point, you have a PHP 7.4 programming environment set up on your local Ubuntu machine and can begin a coding project.
Before you start coding, you may want to set up an Integrated Development Environment (IDE). While there are many IDEs to choose from, VS Code is a popular choice as it offers many powerful features such as a graphical interface, syntax highlighting, and debugging.
With your local machine ready for software development, you can continue to learn more about coding in PHP by following How To Work With Strings in PHP.
 This work is licensed under a Creative Commons Attribution-NonCommercial- ShareAlike 4.0 International License.
此内容由惯性聚合(RSS阅读器)自动聚合整理,仅供阅读参考。 原文来自 — 版权归原作者所有。