





When you build a Node.js application with Express, you often need a way to generate HTML pages without copying and pasting the same markup into every route. A template engine helps you keep your HTML organized while still rendering dynamic content.
Express supports multiple template engines. One popular option is Embedded JavaScript templates (EJS), which lets you embed JavaScript directly in HTML templates so your server can render complete pages before sending them to the browser.
In this tutorial, you will learn how to set up EJS with Express, create and render EJS views, reuse markup with partials, and pass data from your routes into templates to render variables and lists.
Deploy your frontend applications from GitHub using DigitalOcean App Platform. Let DigitalOcean focus on scaling your app.
Key Takeaways:
view engine setting. After installing EJS, you can configure Express to use it by calling app.set('view engine', 'ejs'), which enables routes to render .ejs templates using res.render().views directory by default. Express automatically looks for template files inside a views folder, which helps organize templates, partials, and page-specific views in a consistent project structure.include() directive.res.render() method accepts an object containing variables, arrays, or objects that can then be accessed inside templates.<% %> executes JavaScript logic, <%= %> outputs escaped HTML for safety, and <%- %> outputs raw HTML for trusted content such as partial templates.If you would like to follow along with this article, you will need:
This tutorial has been verified with Node v24.14.0, npm v11.9.0, express v5.1.0, and ejs v5.0.1.
First, open your terminal window and create a new project directory:
- mkdir ejs-demo
Then, navigate to the newly created directory:
- cd ejs-demo
At this point, you can initialize a new npm project:
- npm init -y
Next, you will need to install the express package:
- npm install express
Then install the ejs package:
- npm install ejs
At this point, you have a new project ready to use Express and EJS.
server.jsWith all of the dependencies installed, let’s configure the application to use EJS and set up the routes for the Index page and the About page.
Create a new server.js file and open it with your code editor and add the following lines of code:
server.js
const express = require('express');
const app = express();

// set the view engine to ejs
app.set('view engine', 'ejs');

// use res.render to load up an ejs view file

// index page
app.get('/', function(req, res) => {
  res.render('pages/index');
});

// about page
app.get('/about', function(req, res) => {
  res.render('pages/about');
});

app.listen(8080, () => console.log('Server is listening on port 8080'));
This code defines the application and listens on port 8080.
This code also sets EJS as the view engine for the Express application using:
app.set('view engine', 'ejs');
Notice how the code sends a view to the user by using res.render(). It is important to note that res.render() will look in a views folder for the view. So you only have to define pages/index since the full path is views/pages/index.
Next, you will create the views using EJS.
Like a lot of the applications you build, there will be a lot of code that is reused. These are considered partials. In this example, there will be three partials that will be reused on the Index page and About page: head.ejs, header.ejs, and footer.ejs. Let’s make those files now.
Create a new views directory:
- mkdir views
Then, create a new partials subdirectory:
- mkdir views/partials
In this directory, create a new head.ejs file and open it with your code editor. Add the following lines of code:
views/partials/head.ejs
<meta charset="UTF-8">
<meta name="viewport" content="width=device-width, initial-scale=1">
<title>EJS Is Fun</title>

<!-- CSS (load bootstrap from a CDN) -->
<link rel="stylesheet" href="https://cdn.jsdelivr.net/npm/bootstrap@5.3.8/dist/css/bootstrap.min.css">
<style>
  body { padding-top:50px; }
</style>
This code contains metadata for the head for an HTML document. It also includes Bootstrap styles.
Next, create a new header.ejs file and open it with your code editor. Add the following lines of code:
views/partials/header.ejs
<nav class="navbar navbar-expand-lg navbar-light bg-light">
  <a class="navbar-brand" href="/">EJS Is Fun</a>
  <ul class="navbar-nav me-auto">
    <li class="nav-item">
      <a class="nav-link" href="/">Home</a>
    </li>
    <li class="nav-item">
      <a class="nav-link" href="/about">About</a>
    </li>
  </ul>
</nav>
This code contains navigation for an HTML document and uses several classes from Bootstrap for styling.
Next, create a new footer.ejs file and open it with your code editor. Add the following lines of code:
views/partials/footer.ejs
<p class="text-center text-muted">© Copyright 2026 The Awesome People</p>
This code contains copyright information and uses several classes from Bootstrap for styling.
In server-rendered applications, both partials and layouts help you avoid repeating markup, but they solve slightly different problems.
A partial is a small, reusable template fragment. For example, you might create a partial for a header, a footer, or a navigation bar, and then include that partial anywhere you need it so you only have to maintain the markup in one place.
A layout is a page-level wrapper that defines shared structure for multiple pages. A typical layout includes the overall HTML skeleton (like <!doctype html>, a shared <head>, and a consistent header and footer), and it leaves a space for each page to supply its own main content.
EJS supports sub-template includes, which is what you are using for head.ejs, header.ejs, and footer.ejs. Per the EJS documentation, includes are relative to the current template, and you’ll typically use the raw output tag (<%-) when including other templates to avoid double-escaping the included HTML output.
EJS also calls out that it does not specifically support “blocks,” but you can still implement a layout pattern by composing a page from shared includes. For example, you can include a header at the top and a footer at the bottom of every page, and keep each page’s unique content in the middle.
In this tutorial, you’re using partials in a way that also gives you a layout-like result: each page (index.ejs and about.ejs) includes the same head, header, and footer, which creates consistent page structure.
If you want a stronger “single layout file” approach later, you can explore Express middleware or third-party helpers that implement layout/block behavior on top of EJS. For background on how Express integrates template engines via app.set('view engine', ...) and res.render(), refer to the Express guide on using template engines.
Next, you will use these partials in index.ejs and about.ejs.
You have three partials defined. Now you can include them in your views.
Use <%- include('RELATIVE/PATH/TO/FILE') %> to embed an EJS partial in another file.
<%- instead of <% when you want EJS to output unescaped content.<%= (escaped output) for user-controlled data in your templates, and reserve <%- (unescaped output) for content you explicitly trust.Then, create a new pages subdirectory:
- mkdir views/pages
In this directory, create a new index.ejs file and open it with your code editor. Add the following lines of code:
views/pages/index.ejs
<!DOCTYPE html>
<html lang="en">
<head>
  <%- include('../partials/head'); %>
</head>
<body class="container">

<header>
  <%- include('../partials/header'); %>
</header>

<main>
  <div class="p-5 mb-4 bg-light rounded-3">
    <h1>This is great</h1>
    <p>Welcome to templating using EJS</p>
  </div>
</main>

<footer>
  <%- include('../partials/footer'); %>
</footer>

</body>
</html>
Save the changes to this file and then run the application:
- node server.js
If you visit http://localhost:8080/ in a web browser, you can observe the Index page:
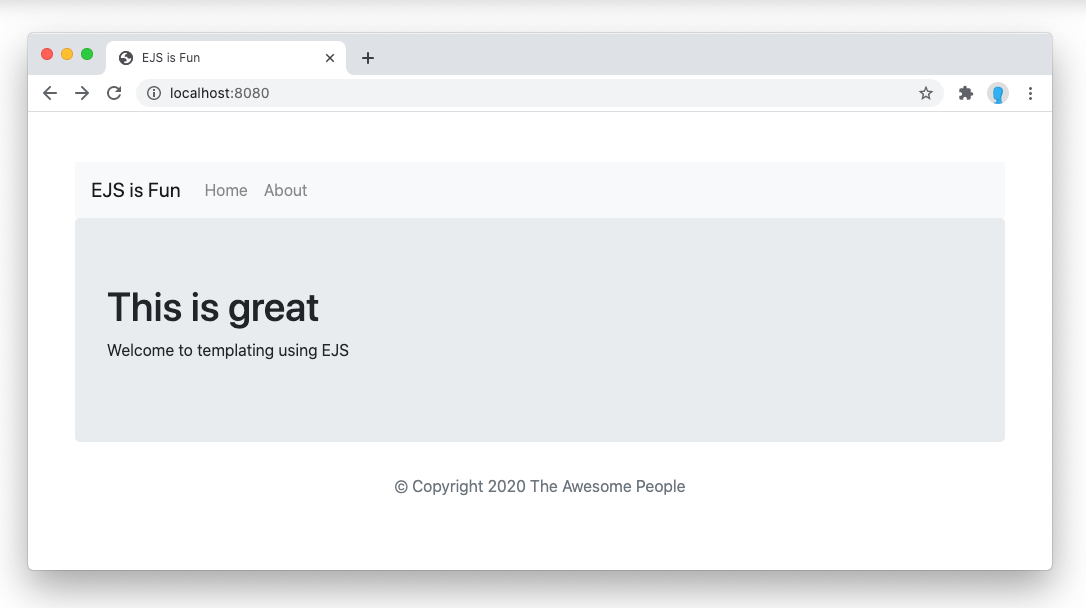
Next, create a new about.ejs file and open it with your code editor. Add the following lines of code:
views/pages/about.ejs
<!DOCTYPE html>
<html lang="en">
<head>
  <%- include('../partials/head'); %>
</head>
<body class="container">

<header>
  <%- include('../partials/header'); %>
</header>

<main>
<div class="row">
  <div class="col-sm-8">
    <div class="p-5 mb-4 bg-light rounded-3">
      <h1>This is great</h1>
      <p>Welcome to templating using EJS</p>
    </div>
  </div>

  <div class="col-sm-4">
    <div class="card p-3">
      <h3>Look I'm A Sidebar!</h3>
    </div>
  </div>
</div>
</main>

<footer>
  <%- include('../partials/footer'); %>
</footer>

</body>
</html>
This code adds a Bootstrap sidebar to demonstrate how partials can be structured to reuse across different templates and pages.
Save the changes to this file and then run the application:
- node server.js
If you visit http://localhost:8080/about in a web browser, you can observe the About page with a sidebar:
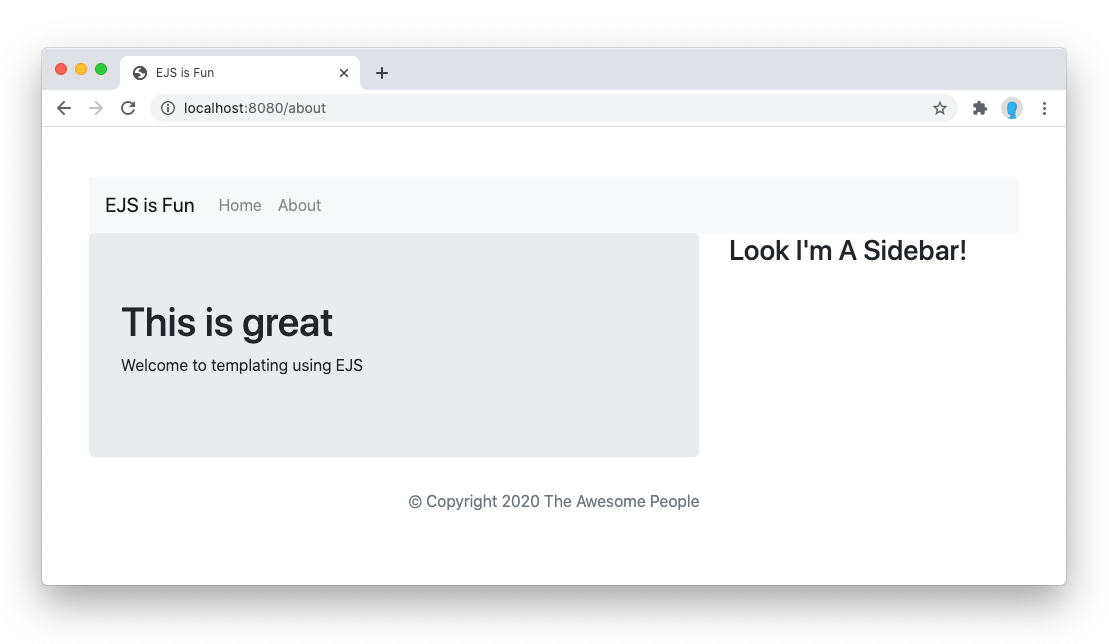
Now you can start using EJS for passing data from the Node application to the views.
Let’s define some basic variables and a list to pass to the Index page.
Revisit server.js in your code editor and add the following lines of code inside the app.get('/') route:
server.js
const express = require('express');
const app = express();

// set the view engine to ejs
app.set('view engine', 'ejs');

// use res.render to load up an ejs view file

// index page
app.get('/', function(req, res) => {
  const mascots = [
    { name: 'Sammy', organization: "DigitalOcean", birth_year: 2012},
    { name: 'Tux', organization: "Linux", birth_year: 1996},
    { name: 'Moby Dock', organization: "Docker", birth_year: 2013}
  ];
  const tagline = "No programming concept is complete without a cute animal mascot.";

  res.render('pages/index', {
    mascots: mascots,
    tagline: tagline
  });
});

// about page
app.get('/about', function(req, res) => {
  res.render('pages/about');
});

app.listen(8080, () => console.log('Server is listening on port 8080'));
This code defines an array called mascots and a string called tagline. Next, let’s use them in index.ejs.
To echo a single variable, you can use <%= tagline %>.
Revisit index.ejs in your code editor and add the following lines of code:
views/pages/index.ejs
<!DOCTYPE html>
<html lang="en">
<head>
  <%- include('../partials/head'); %>
</head>
<body class="container">

<header>
  <%- include('../partials/header'); %>
</header>

<main>
  <div class="p-5 mb-4 bg-light rounded-3">
    <h1>This is great</h1>
    <p>Welcome to templating using EJS</p>

    <h2>Variable</h2>
    <p><%= tagline %></p>
  </div>
</main>

<footer>
  <%- include('../partials/footer'); %>
</footer>

</body>
</html>
This code will display the tagline value on the Index page.
When you render dynamic values into HTML, you should consider cross-site scripting (XSS). XSS happens when untrusted data is interpreted by the browser as code instead of text.
EJS provides two output tags that behave differently:
<%= outputs a value with EJS’s escaping applied (EJS documents this as escaping XML/HTML special characters by default).<%- outputs a value unescaped, which means it is inserted into the response as raw markup.In practice, this means you should use <%= for any value that could come from a user, a URL parameter, a database, or another external system:
<p><%= tagline %></p>
If you use <%-, you are telling EJS to treat the value as trusted HTML:
<p><%- tagline %></p>
Only use <%- ... %> when you intend to render raw HTML and you trust (or have safely sanitized) the string you are inserting. For example, the EJS documentation recommends using <%- include(...) %> for includes so the included template’s HTML isn’t escaped again.
Also keep in mind that escaping is context-dependent. HTML escaping is the right starting point when you are inserting values into normal HTML content, but it is not a universal solution for every context (for example, URLs, inline JavaScript, or inline CSS). OWASP’s XSS guidance recommends using output encoding that matches the context where the data is inserted, and avoiding “dangerous contexts” like injecting untrusted data directly into <script> blocks.
Finally, note the EJS project’s security guidance: EJS executes JavaScript, so if you pass untrusted inputs directly into rendering, you are responsible for the results. Avoid patterns like passing everything from a request directly into rendering:
app.get('/', (req, res) => {
  res.render('index', req.query);
});
Instead, explicitly pass only the values you expect (and validate them as needed):
app.get('/', (req, res) => {
  res.render('index', {
    tagline: String(req.query.tagline || '')
  });
});
Converting a value to a string is not a substitute for validation. If this data is user-controlled, consider validating it (for example, by enforcing a maximum length or using an allow list) before rendering.
For more details, see the EJS documentation on tags and the EJS project’s security guidance on their GitHub page.
For broader, framework-agnostic guidance on XSS and context-specific output encoding, see the OWASP Cross Site Scripting Prevention Cheat Sheet.
To loop over data, you can use .forEach.
Revisit index.ejs in your code editor and add the following lines of code:
views/pages/index.ejs
<!DOCTYPE html>
<html lang="en">
<head>
  <%- include('../partials/head'); %>
</head>
<body class="container">

<header>
  <%- include('../partials/header'); %>
</header>

<main>
  <div class="p-5 mb-4 bg-light rounded-3">
    <h1>This is great</h1>
    <p>Welcome to templating using EJS</p>

    <h2>Variable</h2>
    <p><%= tagline %></p>

    <ul>
      <% mascots.forEach(function(mascot) { %>
        <li>
          <strong><%= mascot.name %></strong>
          representing <%= mascot.organization %>,
          born <%= mascot.birth_year %>
        </li>
      <% }); %>
    </ul>
  </div>
</main>

<footer>
  <%- include('../partials/footer'); %>
</footer>

</body>
</html>
Save the changes to this file and then run the application:
- node server.js
If you visit http://localhost:8080/ in a web browser, you can observe the Index page with the mascots:
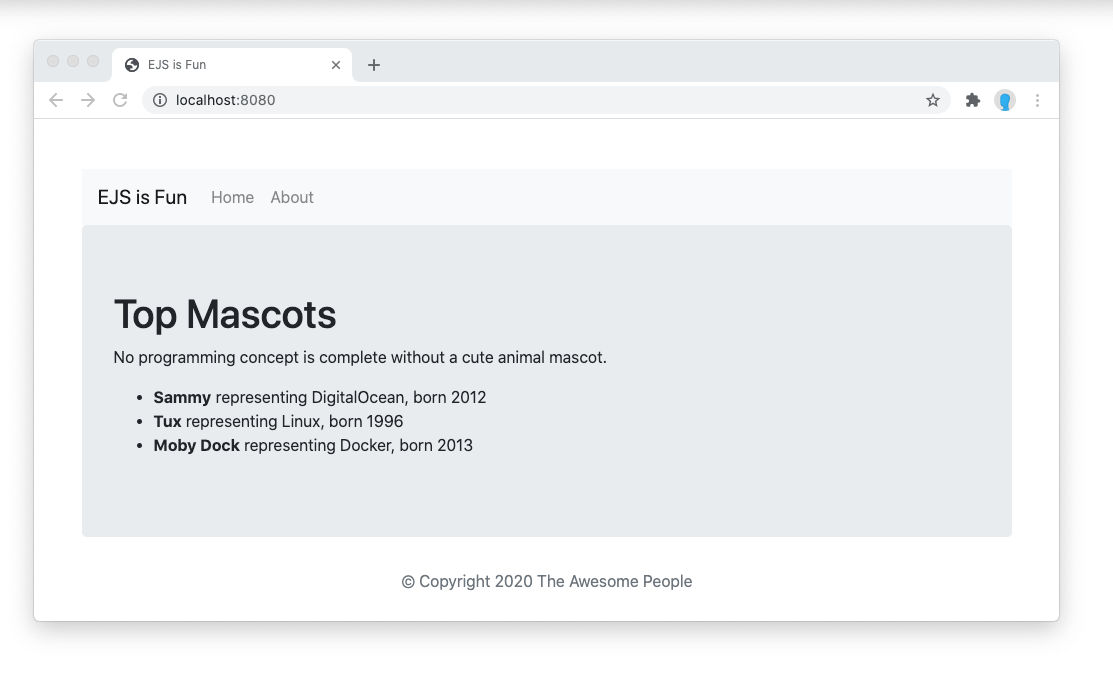
The EJS partial has access to all the same data as the parent view. But be careful. If you are referencing a variable in a partial, it needs to be defined in every view that uses the partial or it will throw an error.
You can also define and pass variables to an EJS partial in the include syntax like this:
views/pages/about.ejs
...
<header>
  <%- include('../partials/header', {variant: 'compact'}); %>
</header>
...
But you need to again be careful about assuming a variable has been defined.
If you want to reference a variable in a partial that may not always be defined, and give it a default value, you can do so like this:
views/partials/header.ejs
...
<em>Variant: <%= typeof variant != 'undefined' ? variant : 'default' %></em>
...
In the line above, the EJS code is rendering the value of variant if it’s defined, and default if not.
EJS is a template engine that helps you generate HTML on the server (for example, from an Express route handler using res.render()). Modern frontend frameworks like React and Vue are JavaScript frameworks for building user interfaces, and they encourage a component-based model where the UI is described as a function of data and state.
These tools can overlap, but they’re usually used for different kinds of projects. To decide what fits your app, it helps to compare them across a few practical dimensions.
Where rendering happens: With EJS + Express, the server renders an HTML document and sends it to the browser, usually on every request. With React and Vue, you build UI out of components and render based on JavaScript state. React components are JavaScript functions that return markup, and Vue combines declarative templates with a reactivity system that updates the UI when state changes.
How interactivity is managed: EJS is focused on producing HTML, and it does not give you a built-in reactive UI layer. If you need interactive behavior, you typically write client-side JavaScript yourself (for example, adding event listeners, fetching data, and updating the DOM). In React and Vue, interactivity is built in: you update state, and the framework updates what the user sees.
Routing and page structure: EJS is commonly used in multi-page applications where each route returns a full HTML response. In contrast, many React/Vue applications are built as single-page applications (SPAs) where routing can happen on the client and the page updates without full reloads. (These frameworks can also be used in server-rendered setups, but the component model remains the same.)
Tooling and build pipeline: You can use EJS with minimal tooling because the server renders templates at runtime. React and Vue are often used with build tooling (for example, to bundle JavaScript and compile framework-specific syntax like JSX or Vue Single-File Components). That adds complexity, but it also supports larger applications with many components.
Performance and delivery trade-offs: Server-rendered EJS pages can be straightforward to deliver quickly because the browser receives HTML immediately. Client-heavy React/Vue apps may ship more JavaScript to enable rich interactivity, which can be a worthwhile trade-off for highly dynamic interfaces. In practice, you choose based on what your app needs, how interactive it is, and how you want to balance work between the server and the browser.
When EJS is a good fit: EJS tends to work well for server-rendered pages, content-heavy sites, admin dashboards with modest interactivity, prototypes, and applications where you want to keep the frontend simple and rely on standard HTML, CSS, and JavaScript.
When React or Vue is a good fit: React and Vue tend to be a better fit for highly interactive applications with complex UI state, rich client-side behavior, and component-driven interfaces where many parts of the page update in response to user input.
You can also mix approaches. For example, you can render most of a page with EJS and then add a small amount of client-side JavaScript (or embed a framework component in one part of the page) only where you need richer interactivity.
If you want to go deeper, refer to the Express guide on template engines, the React docs, and the Vue introduction.
When working with EJS in an Express application, you may encounter errors related to template paths, syntax mistakes, or undefined variables. Understanding these common issues and how to resolve them can help you quickly debug problems during development.
Failed to lookup viewOne of the most common errors occurs when Express cannot find the template file you are trying to render.
A typical error message may look like this:
Error: Failed to lookup view "pages/index" in views directory
This usually happens for one of the following reasons:
views directory is misconfigured.By default, Express looks for templates inside a directory named views. When you render a template like this:
res.render('pages/index');
Express searches for the file at:
views/pages/index.ejs
To fix this issue:
.ejs.views directory.If your templates are stored in a different directory, you can configure Express to use a custom path:
app.set('views', path.join(__dirname, 'templates'));
This tells Express to look for templates inside the templates directory instead of views.
Unexpected token or Template Syntax ErrorsEJS templates allow you to embed JavaScript inside HTML. If the JavaScript syntax inside a template is invalid, EJS will throw a syntax error.
For example, this template contains a mistake:
<ul>
  <% mascots.forEach(function(mascot) { %>
    <li><%= mascot.name %></li>
</ul>
The loop is missing a closing tag.
The correct version should include the closing statement:
<ul>
  <% mascots.forEach(function(mascot) { %>
    <li><%= mascot.name %></li>
  <% }); %>
</ul>
When debugging syntax errors:
<% tag has a matching %>.Because EJS evaluates JavaScript inside templates, syntax errors behave similarly to normal JavaScript errors.
Cannot read property of undefinedAnother common issue occurs when a template tries to access a variable that was not passed to the view.
For example, this template expects a variable called tagline:
<p><%= tagline %></p>
If the route does not provide the variable:
res.render('pages/index');
EJS will throw an error because tagline is undefined.
To fix this issue, ensure that the variable is passed when rendering the template:
res.render('pages/index', {
  tagline: "Welcome to my site"
});
You can also provide a fallback value inside the template:
<p><%= typeof tagline !== 'undefined' ? tagline : 'Default message' %></p>
This prevents errors if the variable is missing.
When using partials, the path provided to include() must be relative to the current template file.
For example:
<%- include('../partials/header') %>
If the path is incorrect, EJS will fail to load the template.
Common mistakes include:
If your project structure looks like this:
views/
 ├── pages/
 │   └── index.ejs
 └── partials/
     └── header.ejs
The correct include path from index.ejs would be:
<%- include('../partials/header') %>
Double-check the relative path if an include fails.
Sometimes templates render unexpected HTML because the wrong EJS output tag is used.
EJS provides two common output tags:
| Tag | Behavior |
|---|---|
<%= %> |
Escapes HTML |
<%- %> |
Outputs raw HTML |
If you render HTML using <%=, the HTML will be escaped and displayed as text.
Example:
<p><%= "<strong>Hello</strong>" %></p>
This produces:
<strong>Hello</strong>
To render the HTML correctly, use <%- %>:
<p><%- "<strong>Hello</strong>" %></p>
However, only use <%- %> with trusted content to avoid cross-site scripting (XSS) vulnerabilities.
During development, you may update a template but not see the changes reflected in the browser.
This can happen due to:
To resolve this:
app.set('view cache', false);
You may also want to use tools such as nodemon to automatically restart the server when files change.
Embedded JavaScript templates (EJS) are used to generate dynamic HTML on the server in Node.js applications. EJS allows developers to embed JavaScript directly within HTML templates using special tags such as <% %>, <%= %>, and <%- %>.
In a typical Express application, the server renders an EJS template by combining it with data and sending the resulting HTML to the browser. For example, an Express route can pass variables to a template and render a complete webpage:
res.render('pages/index', { title: 'Home Page' });
This approach is known as server-side rendering (SSR) and is commonly used for:
Because EJS templates are processed on the server, the browser receives fully rendered HTML.
Yes, EJS can be used in production applications. It is a lightweight templating engine that integrates well with Express and other Node.js frameworks.
EJS is commonly used in:
Because EJS uses plain JavaScript and HTML, it is easy to learn and maintain. However, for very large applications with highly interactive interfaces, developers often use frontend frameworks such as React or Vue in combination with API-based backends.
Even in those environments, EJS can still be useful for rendering server-side pages such as login screens, admin panels, or initial HTML templates.
Data is passed to an EJS template through the res.render() function in Express.
The second argument to res.render() is an object containing variables that will be available inside the template:
app.get('/', (req, res) => {
  const message = "Welcome to my site";

  res.render('pages/index', {
    message: message
  });
});
Inside the EJS template, the variable can be accessed using the <%= %> tag:
<p><%= message %></p>
You can pass any JavaScript data type to templates, including:
Templates can then iterate over arrays or access object properties using standard JavaScript syntax.
EJS and Pug are both templating engines used with Node.js and Express, but they differ in syntax and design philosophy.
EJS uses standard HTML with embedded JavaScript, while Pug uses a custom indentation-based syntax that replaces traditional HTML tags.
For example, a simple heading looks like this in EJS:
<h1><%= title %></h1>
The same element in Pug would look like this:
h1= title
Few of the key differences are:
| Feature | EJS | Pug |
|---|---|---|
| Syntax | Standard HTML | Custom indentation-based syntax |
| Learning curve | Easier for HTML developers | Requires learning new syntax |
| Flexibility | Uses normal JavaScript | Uses Pug-specific syntax |
| Readability | Familiar HTML structure | More concise but less explicit |
Developers who prefer working directly with HTML often choose EJS, while others prefer Pug’s concise syntax and built-in templating features.
Yes. EJS can be used independently of Express.
Although EJS is commonly used as a view engine in Express applications, it can also render templates directly using the EJS library:
const ejs = require('ejs');

ejs.render('<h1>Hello <%= name %></h1>', { name: 'Sammy' }, (err, html) => {
  console.log(html);
});
This flexibility allows EJS to be used in:
Express simply provides convenient integration through the res.render() method.
EJS helps reduce the risk of cross-site scripting (XSS) by escaping output when using the <%= %> tag. Escaping converts special characters into HTML entities so they cannot be interpreted as executable code by the browser.
For example:
<p><%= userInput %></p>
If userInput contains HTML or JavaScript, it will be safely escaped before being rendered.
However, EJS also provides the <%- %> tag, which outputs unescaped HTML:
<%- htmlContent %>
This tag should only be used with trusted content. Rendering untrusted input without escaping can introduce XSS vulnerabilities.
To maintain secure applications, developers should:
<%= %> for most template variablesSecurity ultimately depends on how templates are used, so careful handling of user data is essential.
In this article, you learned how to set up EJS with Express, render views with res.render(), and organize reusable page elements using partials and include().
You also learned how to pass data from your routes into templates so you can render variables and lists, and how to choose the right EJS output tag (<%= %> vs <%- %>) when you need to balance flexibility and safety. This will help you build more maintainable Express apps by keeping your views consistent, reducing duplicated markup, and making it easier to add new pages and features as your project grows.
For more such Node.js-related tutorials, check out the following articles:
 This work is licensed under a Creative Commons Attribution-NonCommercial- ShareAlike 4.0 International License.
此内容由惯性聚合(RSS阅读器)自动聚合整理,仅供阅读参考。 原文来自 — 版权归原作者所有。