



Reading Time: 10 minutes
Podcasting can be an expensive hobby, so naturally we’re always looking to cut unnecessary costs. We often get asked for recommendations of free options for both editing and recording, in this article we evaluate GarageBand for podcasters, which is a popular free tool, helping you to decide if it’s the right tool for you.
GarageBand is a free, iOS exclusive Digital Audio Workstation (DAW, for short) primarily used and designed for music production. At its core, it’s all about recording and editing, so it works perfectly well for podcasting too – you just have to ignore some time signatures (more on this later).
It’s known in the industry as a beginner DAW, and it comes as standard with every Apple mac that is sold, which could account for its popularity.
"*" indicates required fields
100% secure. We never share your email
Is GarageBand good for podcasting? There are plenty of DAWs tailored specifically for podcasting, many of which we’ve already evaluated for you in this article, but GarageBand has two main considerations which make it a top contender for certain podcasters:
Making a podcast in GarageBand is easy, especially if you are familiar with other software and devices from Apple. GarageBand can help with editing and recording your podcast, you’ll still need to use a podcast hosting company, like us, to distribute your podcast to Spotify, Amazon Music, Apple Podcasts etc. Sign up for a free Captivate trial today!
We’ve split this article into two parts. In the first part we explain how to record using Garageband, and in the second section we cover editing.
Using GarageBand for podcasting is fairly simple, without the bells and whistles boasted by paid alternatives like Descript, but it does the basics as well as any other DAW. It’s good for podcasting as it has a very streamlined User Interface (UI) which allows for simple recording and editing of audio files.
As it’s not built specifially for podcasters, there are a lot of features you’ll just need to ignore as a podcaster – time signatures, bpm and digital instruments are all super useful to bedroom musicians, but not so much for podcasters.
Whilst they don’t get in the way or cause problems, the trick is to not to get confused by them and try to run your vocals through one of their digital amps.
Recording in GarageBand is nice and simple – here’s a step by step!
Step 1: Set up your station
You can only do so much in the edit, so make sure the audio you’re working with is the best quality possible. Don’t record facing into a wall, and try and speak in a well insulated room with lots of cushions. Check your microphone settings and levels are good and use a pop filter. Check out our podcast recording tips article for more information about how to record a great sounding podcast.
Step 2: Select a new project
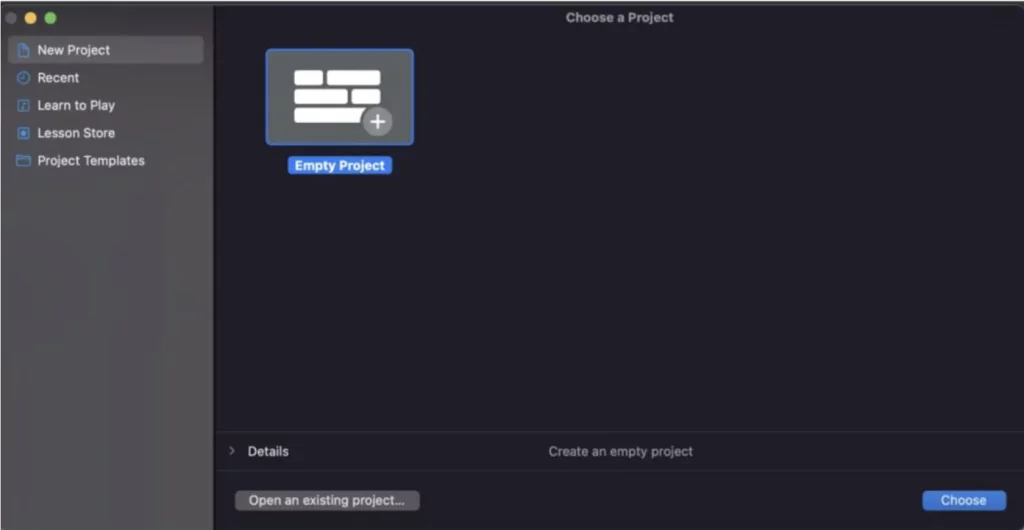
Open up the dashboard and select ‘Empty Project’ which is under ‘New Project’.
Step 3: Select the option to record with a microphone
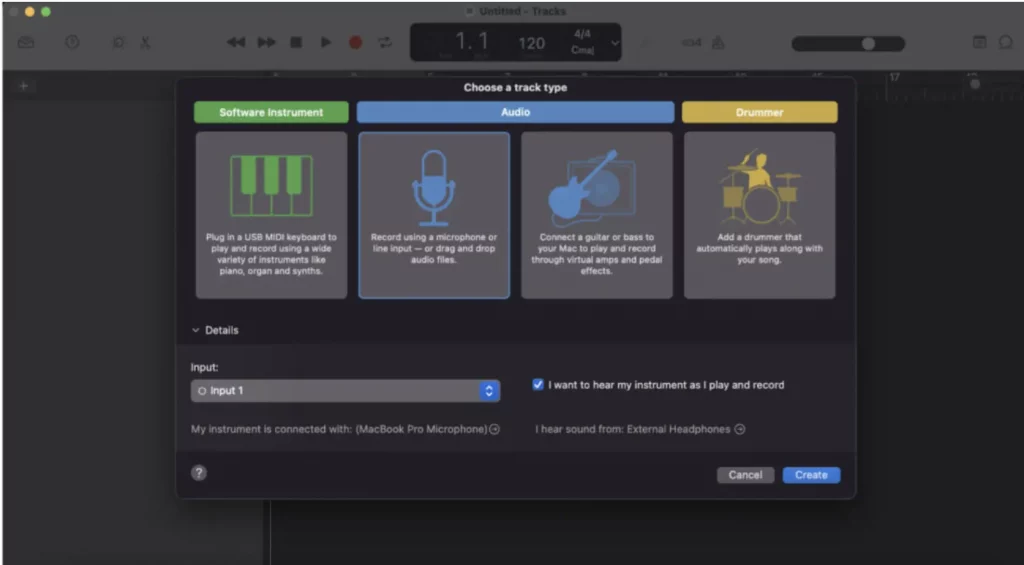
You can ignore all of the others – they’re for those using GarageBand to create music.
Step 4: Make sure the metronome & count-in are turned off

This is important as you don’t want a click track in the background of your audio! You can ignore the tempo, time signature and musical key – just make sure the two on the right are disabled.
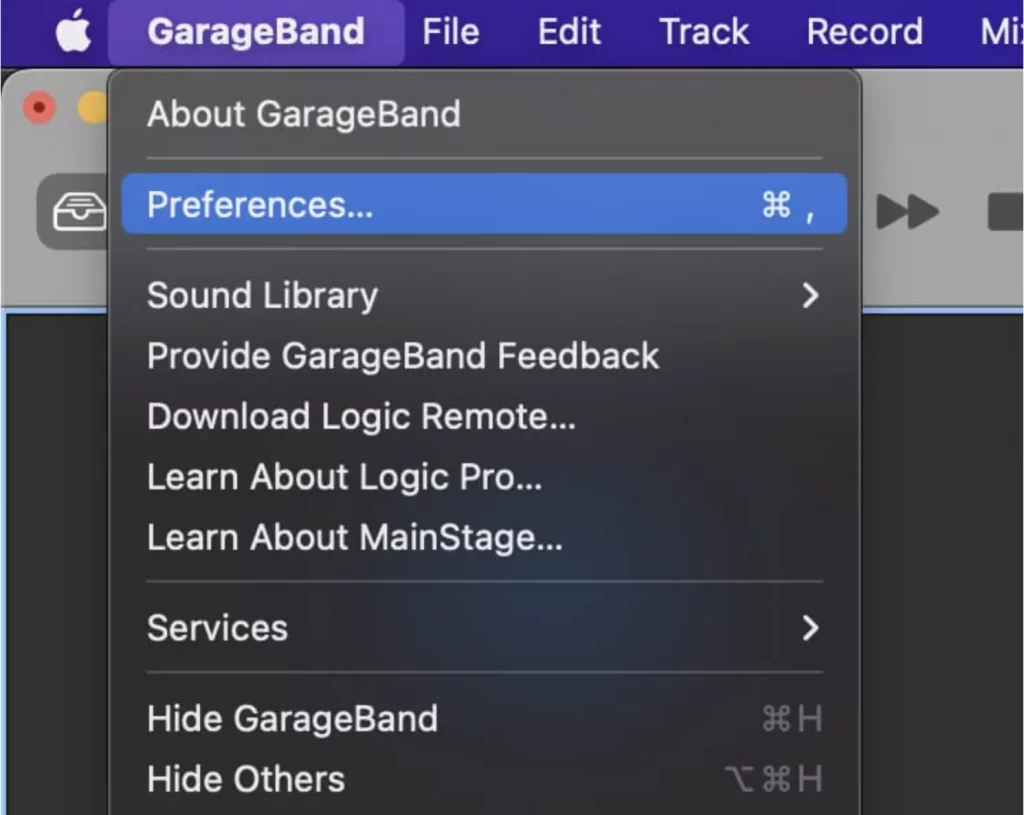
Step 5: Select the correct preferences
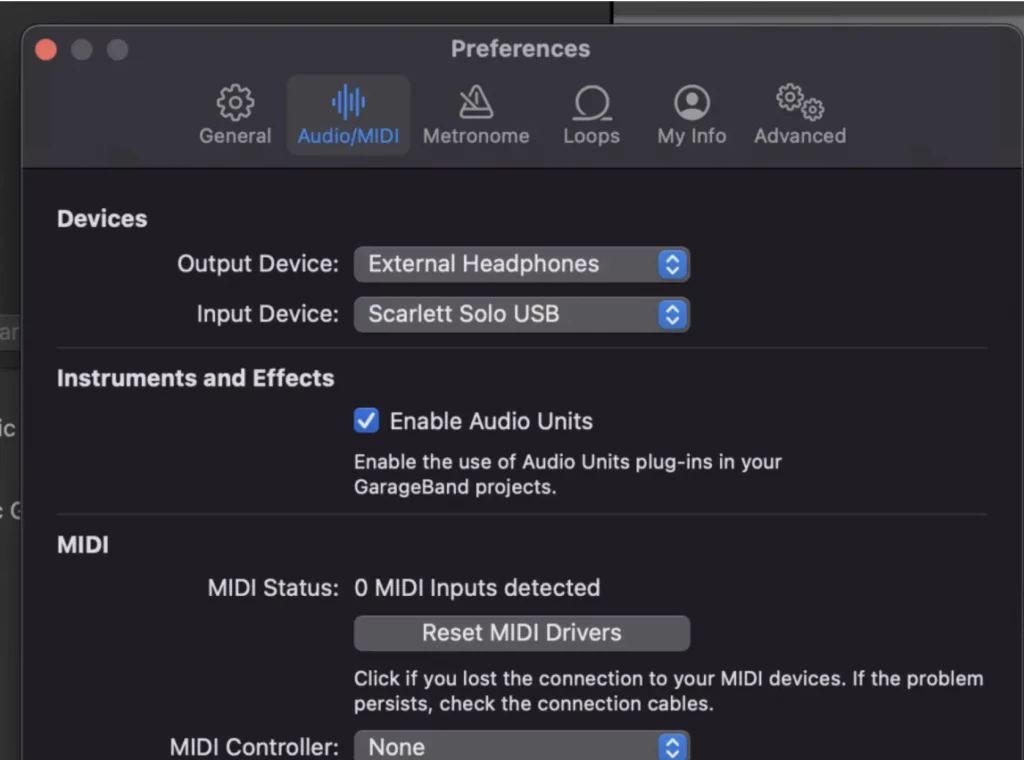
Go to GarageBand > Preferences > Audio & Midi and make sure it’s set up correctly. The output device is what you’ll be listening on (headphones) and the input is your microphone. If you don’t have an external microphone or interface, just use the one on your computer.
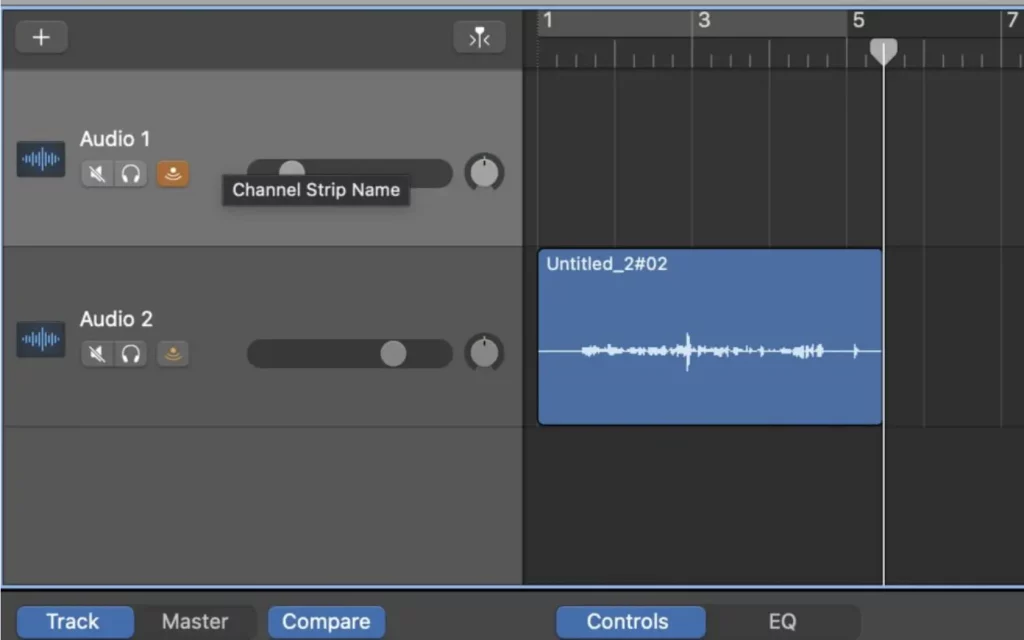
Step 6: Add new tracks with the plus sign
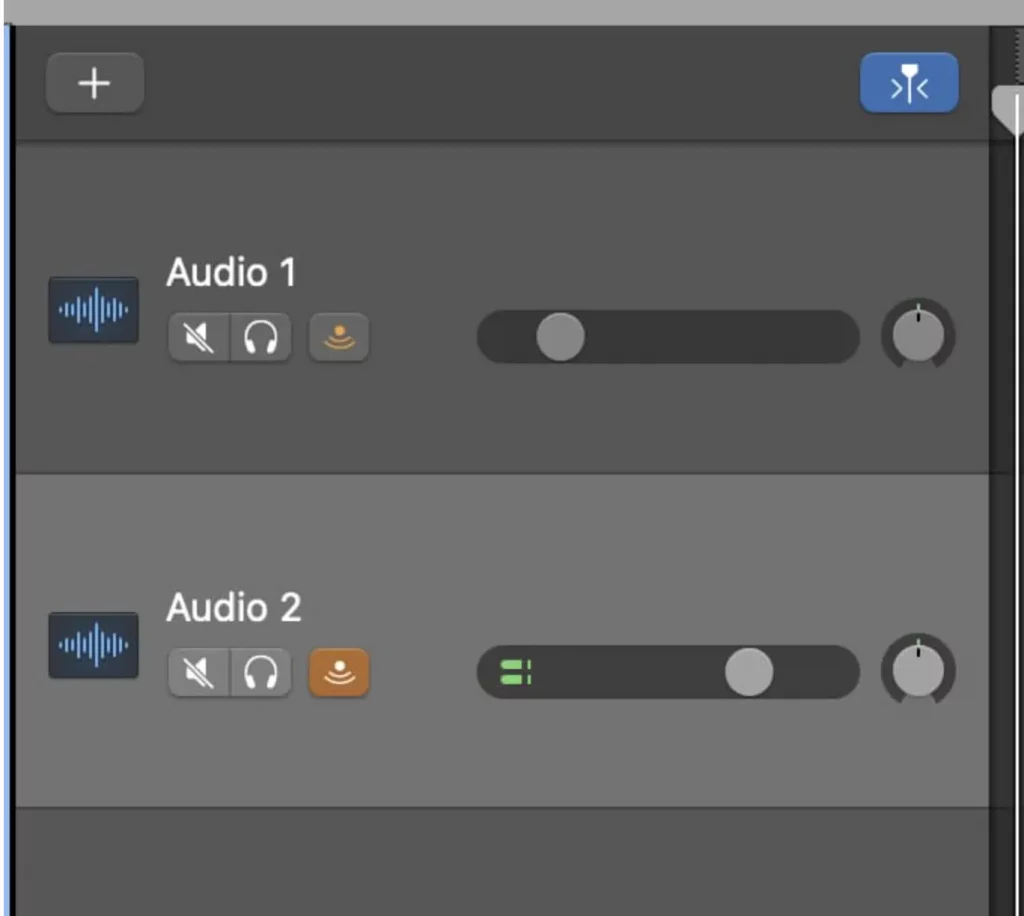
Guests, music or your other host’s audio file can all live on separate tracks – though you can only record one at a time locally.
You can adjust the audio levels for each track in the Garageband UI itself, by moving the fader left or right, or you can do it on your interface, reducing or increasing the volume Garageband actually receives. You’ll find the best EQ settings by listening back on a good pair of headphones.
Step 7: Hit record
Reading Time: 9 minutes We break down the best podcast apps available on the market now for podcasters including listening, recording and editing.
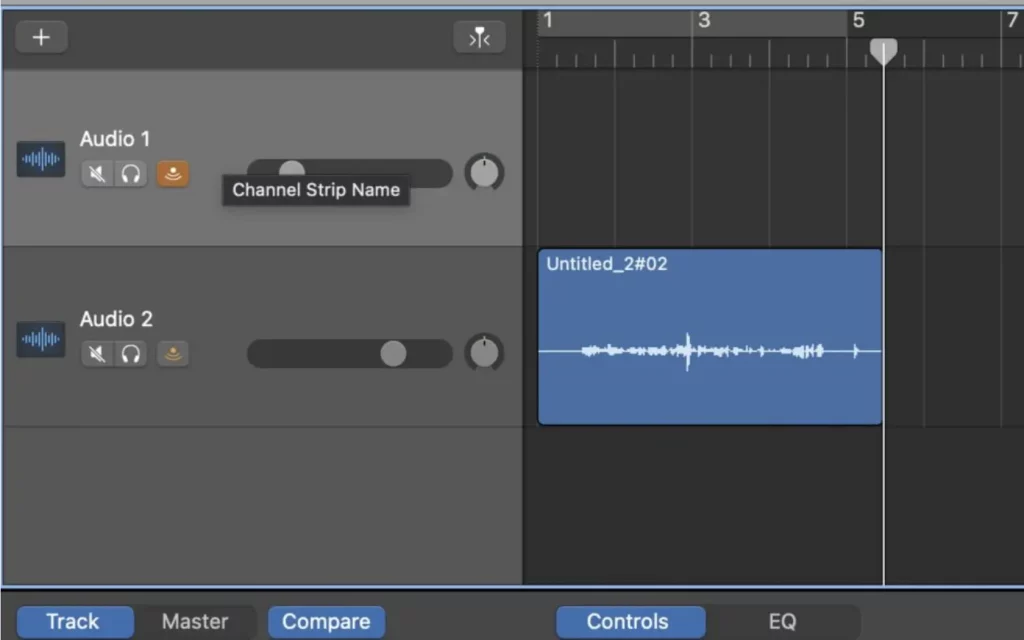
Get some audio down! Make sure to record a test and listen back before you record your hour long episode – you don’t want to get to the end and realise your levels were wrong.
Step 8: Save ready for editing
Go to File and then select Save or Save As…
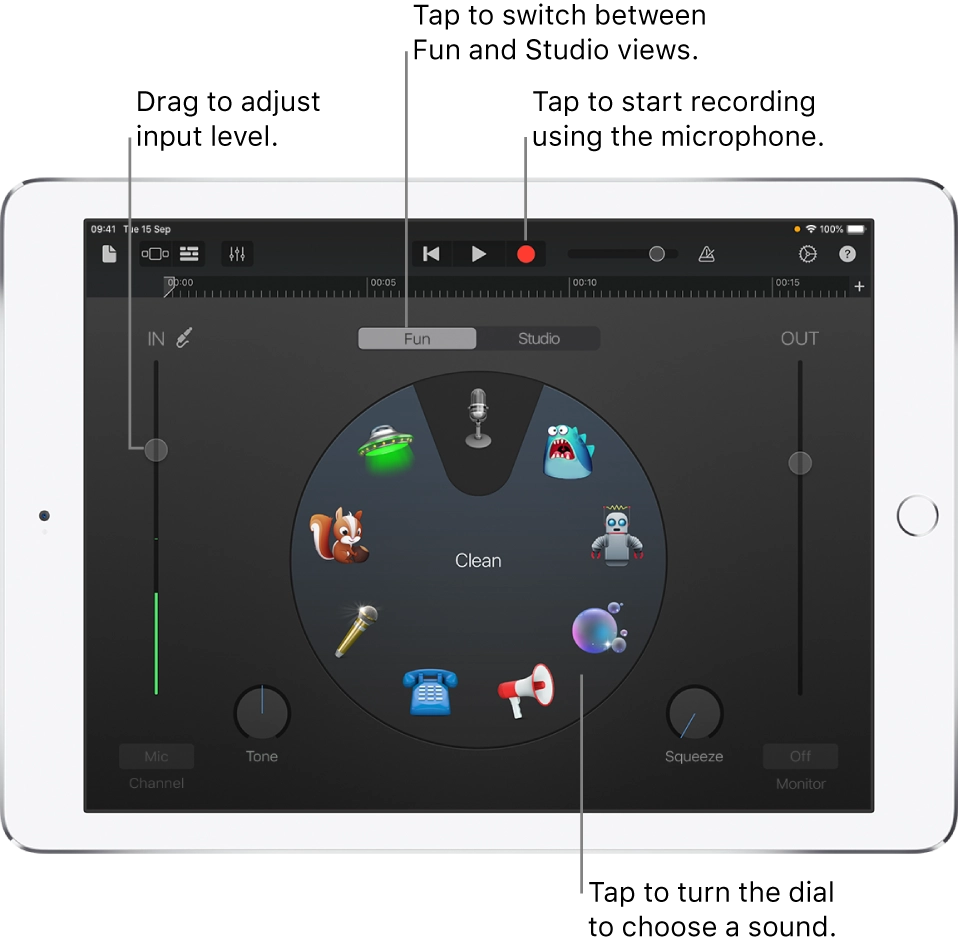
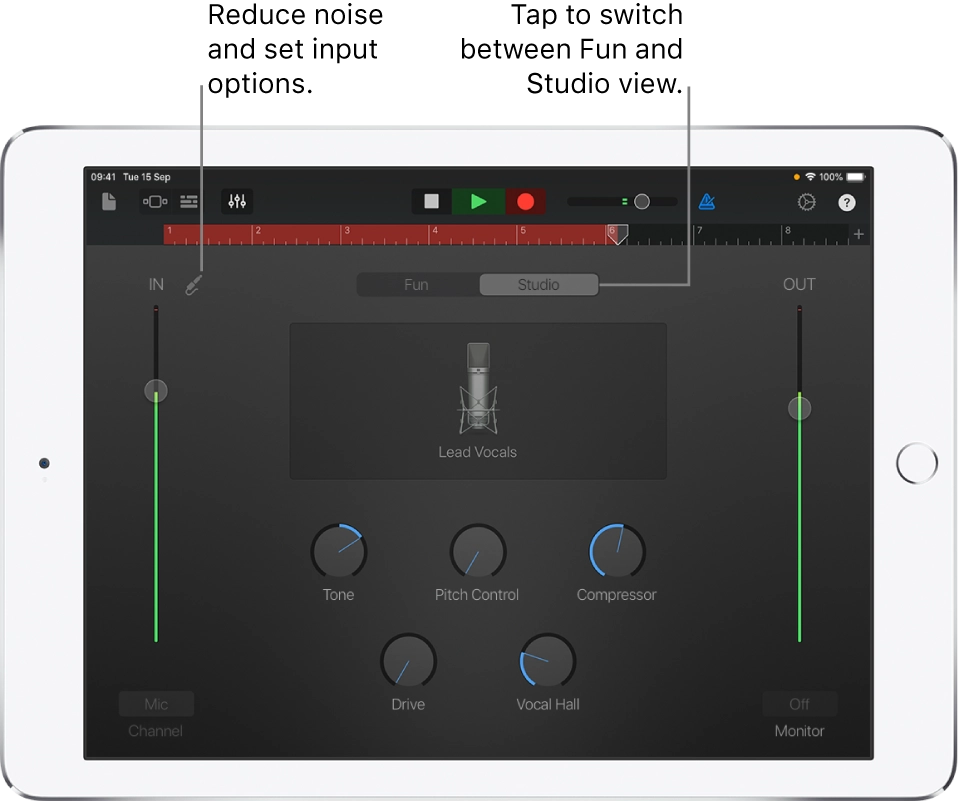
You can set your input level and tweak the settings to your liking – make sure to listen back to a test recording before you do a full hour’s recording with reverb all the way up. It’s worth noting that most of these settings are for musicians, so it’d be best to leave well alone.
All that’s left to do now is hit ‘record‘ at the top!
"*" indicates required fields
100% secure. We never share your email
GarageBand isn’t as fancy as some podcast DAWs, but it still has some nice editing features to get your head around.
Step 1: Open up your audio to edit
Open up GarageBand and click Open an existing Project instead of New Project. Find the Project you would like to edit and click Open.
Move on to the next step if you are editing straight after recording.
Step 2: Trim your audio
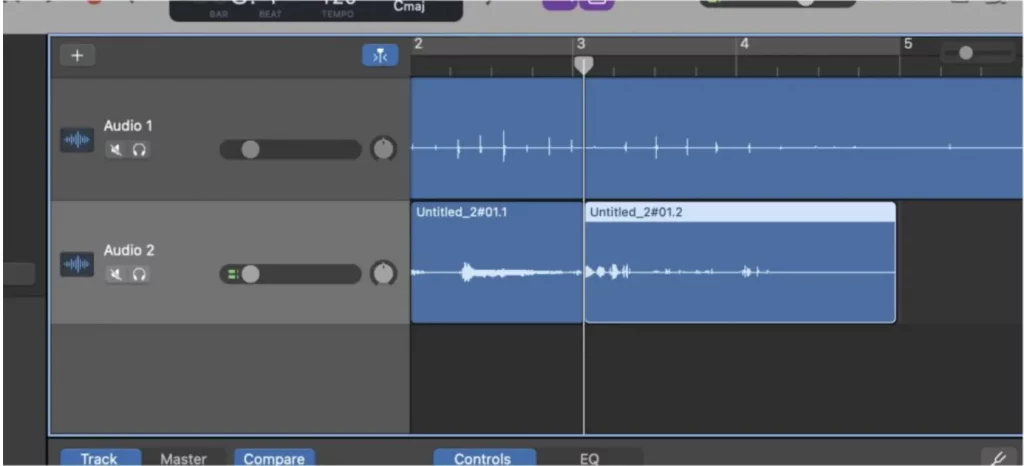
Move the selector with the mouse and then use ‘Command’+’T’ to slice a recorded segment into two pieces – this is useful for cutting out unwanted bits or chopping files to be used over multiple tracks.
Step 3: Listen to a track on solo mode
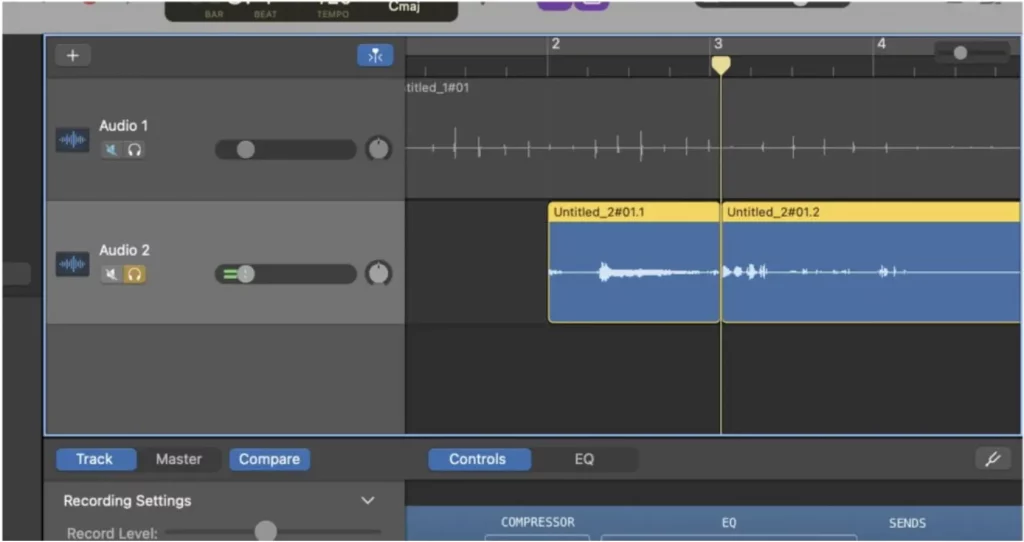
Want to listen over a track without interference from your other tracks? Click the little headphones icon to listen to a given track in isolation, giving you the ability to get nice and in depth to cut out coughs or false starts.
Step 4: Adjust the volume level of different tracks

This is super useful if someone speaks quieter or has their mic set at a lower level than you would have liked.
Step 5: Add in intro or outro music or other external files

On a new track, hit ‘Control’+’Click’ & then select ‘Add audio file’, and you’ll be able to import audio files you have on your computer directly into the Garageband project.
If you’re using any music at all, make sure it’s fully licensed to you or copyright free – you don’t want episodes removed from streaming services with copyright strikes.
Step 6: Export your finished project
GarageBand doesn’t integrate directly with with any podcasting hosts, so it’s just a case of exporting the finished project and then manually uploading it to your host.
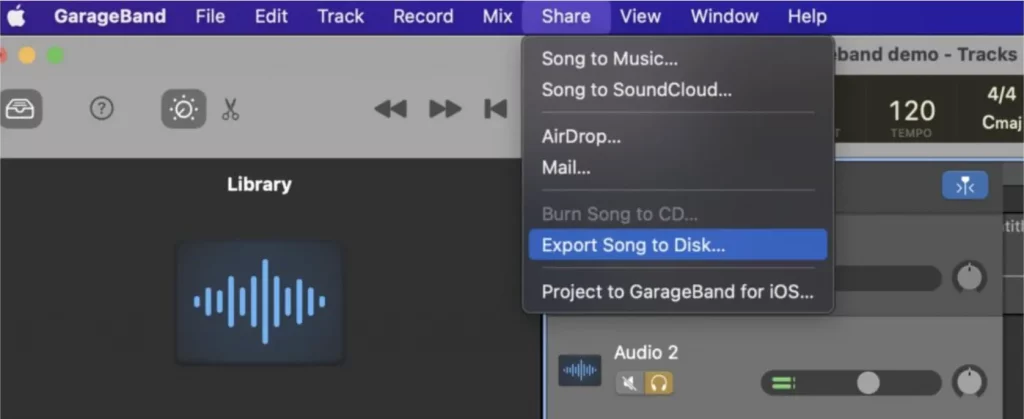
In the top menu bar, go to Share > Export Song to Disk
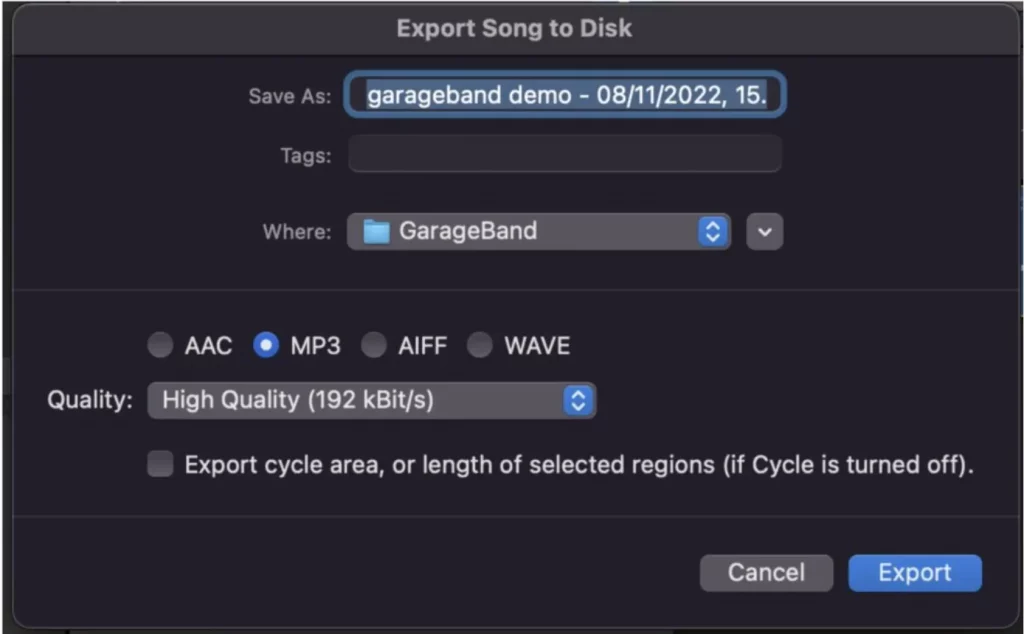
Then simply title your project, format it as an mp3 file (most hosts, including Captivate, and podcast directories require the audio file to be mp3, so this saves trouble down the line) and then hit export! It is then ready to be uploaded to your podcast host.
Audacity and GarageBand are broadly similar, and a natural comparison for one another as they’re both free and simple recording options. There’s truly very little difference between them, but let’s evaluate them to help you decide which one is better for you.
GarageBand is iOS exclusive, meaning you can’t use it if you’re an Windows user. If you are an Apple user, though, you can use their great app to record and edit your show on your iPad or even your phone. Audacity is available for both iOS and Windows, but doesn’t have mobile options.
Audacity is built primarily for podcasts, so there aren’t any software instruments or other music-centric features to ignore as there are with GarageBand.
Reading Time: 11 minutes Choosing a podcast host is a tough decision. In this guide, we make it easy to see why Captivate is the best Simplecast alternative – and choice – for hosting your podcast.
Aside from that, it’s just personal preference – if you’re an Apple user who is familiar with how they design editing software, GarageBand is the obvious choice. If not, you’d probably be better with Audacity.

“Audacity is a very solid bit of software that’s been around for a long time and is still used by many podcasters. For free software the feature set is reasonable and you can get your audio sounding decent with a fairly small learning curve. It’s an attractive offering for any user due its multi-platform availability and it’s a tool I recommend to newbies who’s passion isn’t in post-production but does want something to get their episodes out the door.
GarageBand is Apple’s music studio bundled with all Mac’s is a good option for Mac users who want a native MacOS bit of software. Primarily thought of a music creation tool, it’s also a reasonable choice for podcasters due to its easy to use multitrack interface and mastering tools. Record your vocals, add music, backing tracks all with your own material or its library of assets along with supporting a vast array of plugins.
Overall both pieces of software offer a great starting point to a good sounding podcast episode before progressing to more in-depth DAWs.”
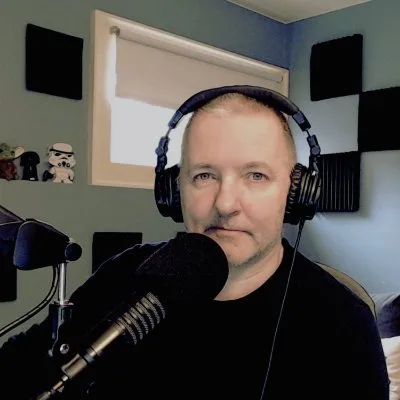
“GarageBand is an excellent and underrated DAW, especially since it’s free for all Mac users. It’s a pretty easy editor to start using right away, with a ton of resources online to help you use more advanced features. It also supports VST plugins, so you can add extra audio optimization and repair plugins to it. Recommended for beginners.
Audacity is another highly recommended free platform, that can have a bit of a higher learning curve than GarageBand due to its less intuitive UI and terminology. Again, though, there are lots of resources available to get you started, and it also supports multiple third-party plugins for additional editing options.
I started with Audacity when I was on PC, then moved to GarageBand when I switched to Mac, and used it for a good couple of years. But I switched to Hindenburg Pro after being recommended it for a while by a lot of podcasters and editors I follow and respect, and it’s made a huge difference to my editing workflow. Auto sound levels, super clean interface, auto export at the correct LUFS levels, VST plugin support, and more make this my go-to DAW for both beginners and intermediate editors.”
GarageBand is an extremely usable option for recording and editing your show if you’re looking to save a bit of money or simply don’t use the advanced features offered by other DAWs. It doesn’t have any bells and whistles, but it makes editing your audio super simple, as well as allowing you to import files for background music or sound effects.
After you’ve recorded and edited your audio, Captivate can help you grow and market your show. We have a huge range of free courses in our Growth Labs, and our support team are on hand 24/7 to answer any questions you may have.
"*" indicates required fields
100% secure. We never share your email
Ben is a content writer and podcast support expert for Captivate, and has been with the team since 2021. He has a first-class degree in Journalism, and uses these skills to help new and veteran podcasters alike level up their content: reviewing tech, crafting product guides and sharing cutting edge podcasting news. Ben is always on hand to help Captivate podcasters with anything they run into, from when they first import their show to advanced questions like how to grow your audience or where to start with monetization. He loves what he does, and is committed to helping podcasters grow their show using Captivate. He’s always been a podcast fan - current favourites include Steven West’s ‘Philosophize This’ and Bob Mortimer’s ‘Athletico Mince’.
此内容由惯性聚合(RSS阅读器)自动聚合整理,仅供阅读参考。 原文来自 — 版权归原作者所有。
