惯性聚合 高效追踪和阅读你感兴趣的博客、新闻、科技资讯
阅读原文 在惯性聚合中打开

推荐订阅源

罗磊的独立博客
Forbes - Security
Forbes - Security
Blog — PlanetScale
Blog — PlanetScale
P
Proofpoint News Feed
Apple Machine Learning Research
Google DeepMind News
MyScale Blog
MyScale Blog
GbyAI
GbyAI
B
Blog RSS Feed
S
SegmentFault 最新的问题
freeCodeCamp Programming Tutorials: Python, JavaScript, Git & More
cs.AI updates on arXiv.org
CTFtime.org: upcoming CTF events
小众软件
小众软件
The Last Watchdog
The Last Watchdog
W
WeLiveSecurity
Webroot Blog
Webroot Blog
S
Security @ Cisco Blogs
Hugging Face - Blog
Hugging Face - Blog
Microsoft Security Blog
月光博客
月光博客
博客园 - 聂微东
F
Fortinet All Blogs
H
Hacker News: Front Page
A
About on SuperTechFans
Application and Cybersecurity Blog
C
Check Point Blog
V
V2EX
Threat Intelligence Blog | Flashpoint
Y
Y Combinator Blog
酷 壳 – CoolShell
酷 壳 – CoolShell
N
News | PayPal Newsroom
Cisco Talos Blog
Cisco Talos Blog
Exploit-DB.com RSS Feed
The Cloudflare Blog
P
Privacy & Cybersecurity Law Blog
N
Netflix TechBlog - Medium
C
CXSECURITY Database RSS Feed - CXSecurity.com
Recorded Future
Recorded Future
Cyber Security Advisories - MS-ISAC
Google DeepMind News
大猫的无限游戏
大猫的无限游戏
美团技术团队
Security Latest
Security Latest
钛媒体:引领未来商业与生活新知
钛媒体:引领未来商业与生活新知
I
InfoQ
Recent Announcements
The GitHub Blog
The GitHub Blog
Google Online Security Blog
T
The Exploit Database - CXSecurity.com

博客园 - 白虎

软件架构设计的六大原则 Linux 安装npm 下载ECharts Linux 安装WebStorm Linux配置开机自启动执行脚本 Linux挂载第二块硬盘 Linux 安装Nginx Linux个性终端Oh my zsh Linux 第一个脚本程序 Linux 8开启FTP功能服务 Jigloo 下载 安装 GUI Linux应用开发入门(转) NET(C#)连接各类数据库-集锦 C# 编写最小化时隐藏为任务栏图标的Window appllication 管理型交换机IEEE 802.1Q VLAN设置应用实例 多网卡的7种bond模式原理 For Linux Eplan中电缆源和目标的确定规则 Eplan 2D安装版布局,部件、端子竖放 EPLAN Electric P8 2.0即将到来,着实令人期待-转caodaping 关于STM32 CAN回环可用,正常不可用情况分析
Windows Server 2012如何实现双网卡绑定
白虎 · 2018-05-08 · via 博客园 - 白虎

在windows server 2012 之前我们在服务器上如果要实现双网卡绑定则需要向服务器厂家所要相应的软件,但是现在强大的windows server 2012的到来使我们省去了所有的麻烦,因为操作系统本身就具有双网卡绑定的功能,具体这个功能如何实现呢,下面我们就用实验来为大家说明:

双网卡绑定主要有以下两点好处:

1、实现网络容错:主主模式和主被模式

2、带宽绑定

实验准备:

1、两台windows server 2012服务器。

2、其中一个服务器又两块网卡

3、确保两个服务器网络相通

首先我们开始配置server01的网络:

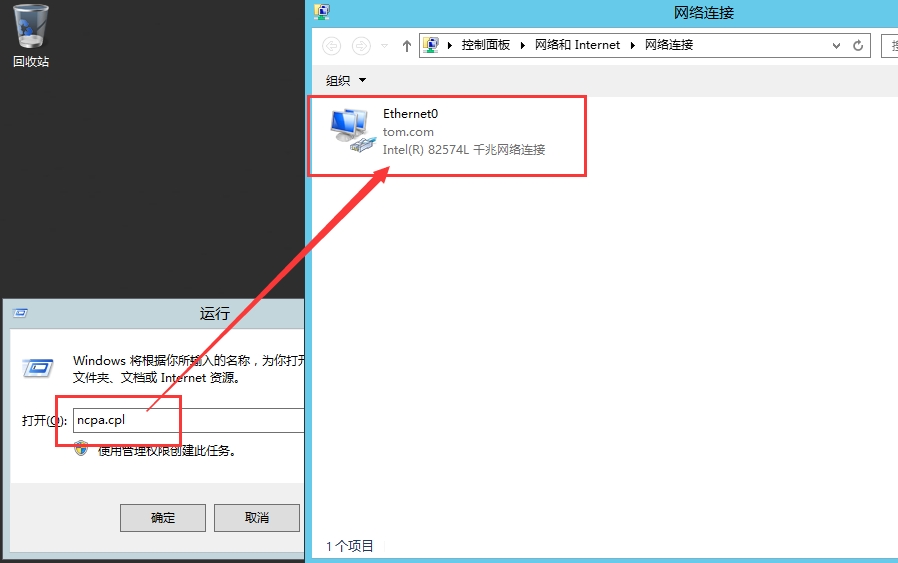
打开server01的网络适配器:

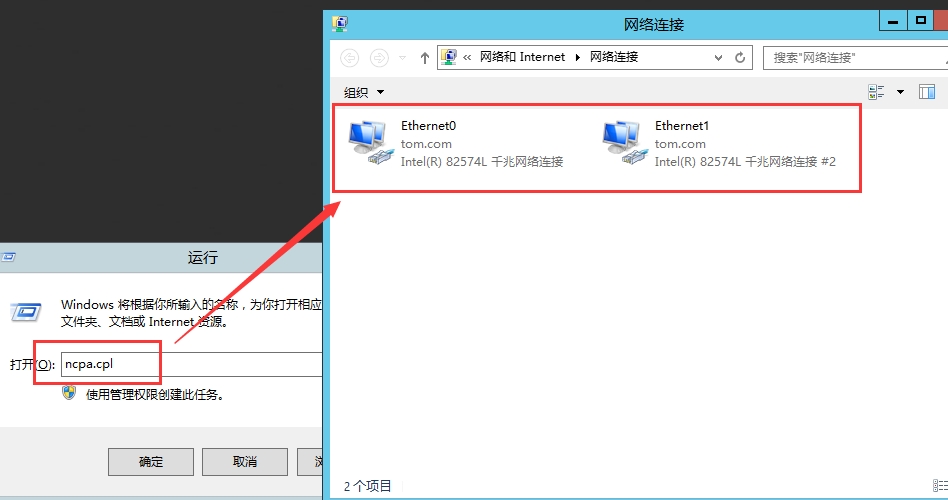
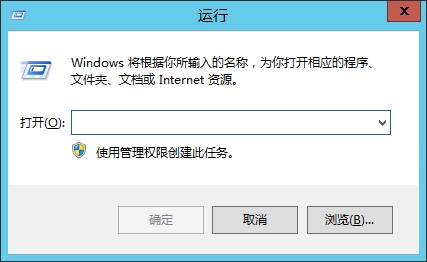
win+R打开运行命令:
image

输入ncpa.cpl,点击确定:

image

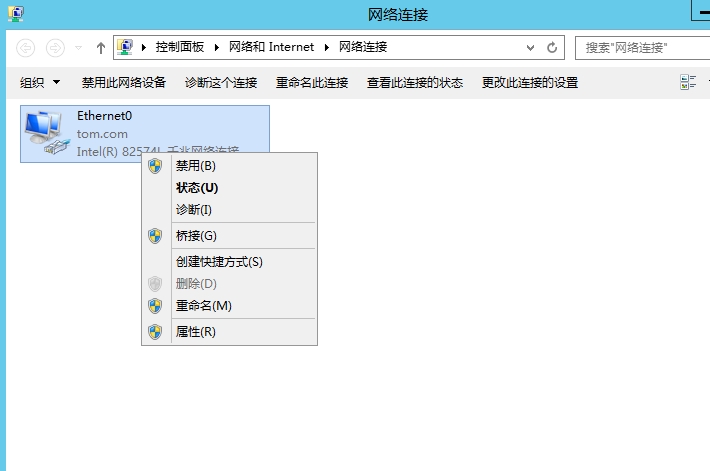
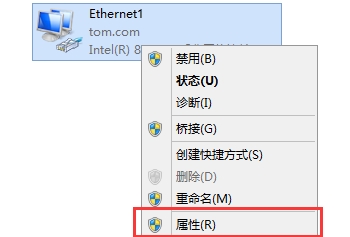
鼠标右键我们所框选的Ethernet0,如下图所示:

image

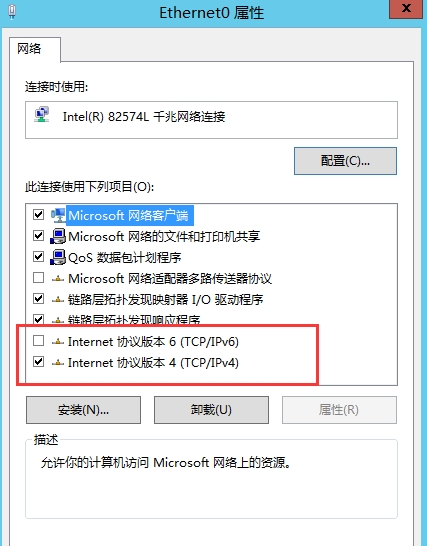
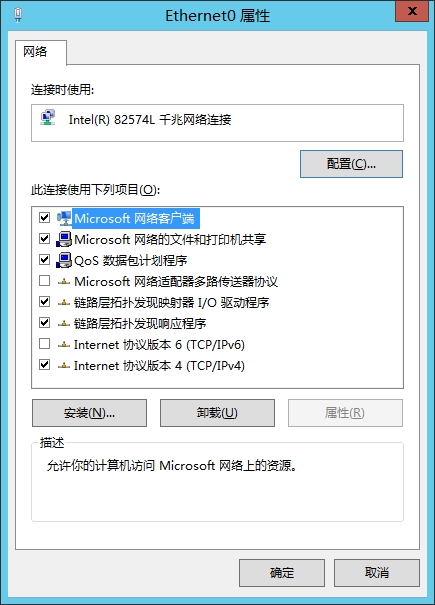
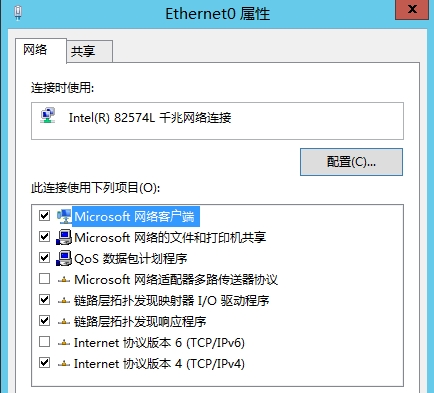
点击属性,如下图:

image

OK,在这里可以看到网卡的一些属性,我们取消IPv4的勾选,然后双击IPv4,如下图:

image

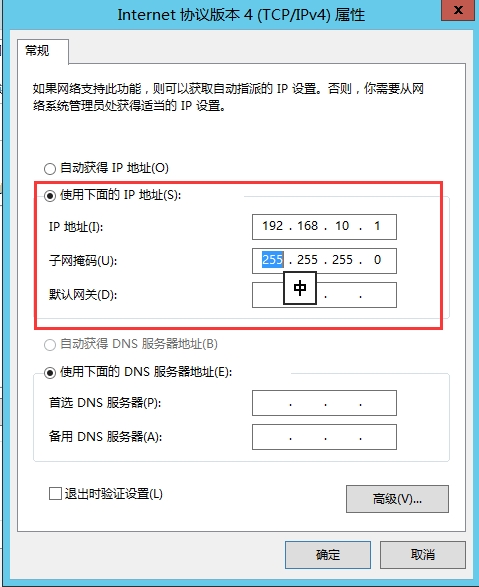
在这里我们勾选使用下面的IP地址,然后输入我们要使用得当IP地址,在这里我使用192.168.10网段的,如下图:
image

点击确定,如下图:

image

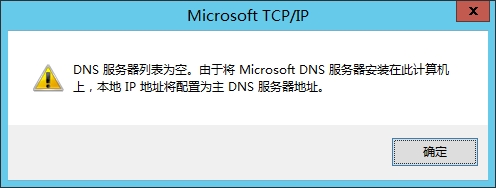
系统弹出这个错误是因为我们没有指定DNS服务器,在这里我们点击是:

image

点击确定,我们在server01端的配置就结束了,下面我们开始配置server02

首先要确保server02有两块网卡:

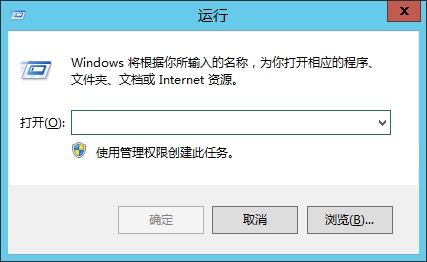
我们同时按下win+R键:
image

输入ncpa.cpl,点击确定:

image

有上面这张图片可以看到我们的server02已经有两块网卡,在这里要注意:做双网卡绑定的两块网卡要清楚所有的配置。

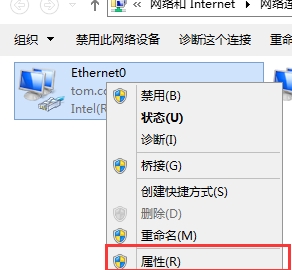
在两块网卡上分别鼠标右键:
imageimage

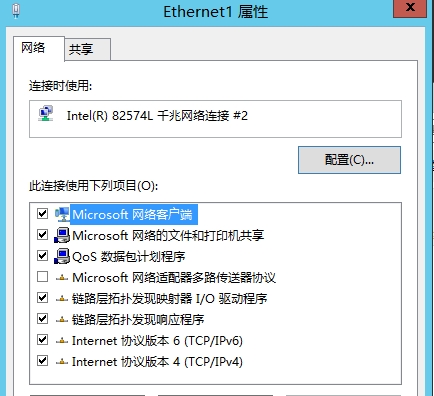
点击属性:

imageimage

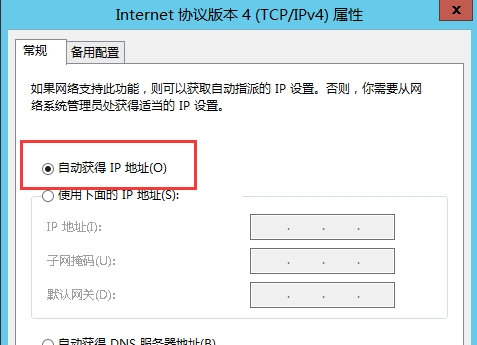
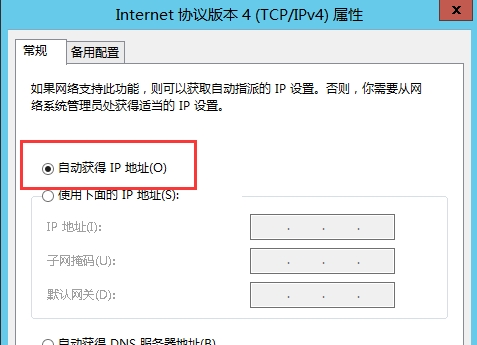
在这里我们取消IPv6的勾选,然后双击打开IPv4,如下图:

imageimage

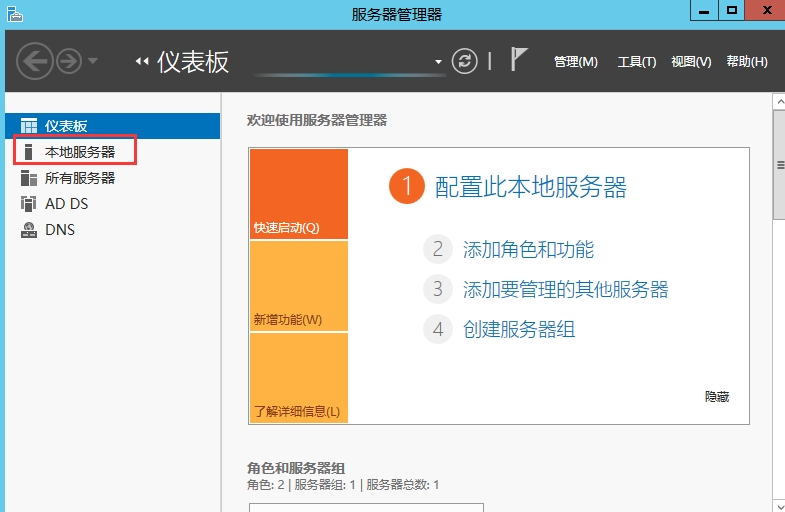
这里一定要确定选择自动获得IP地址,下面我们打开服务器管理器:

image

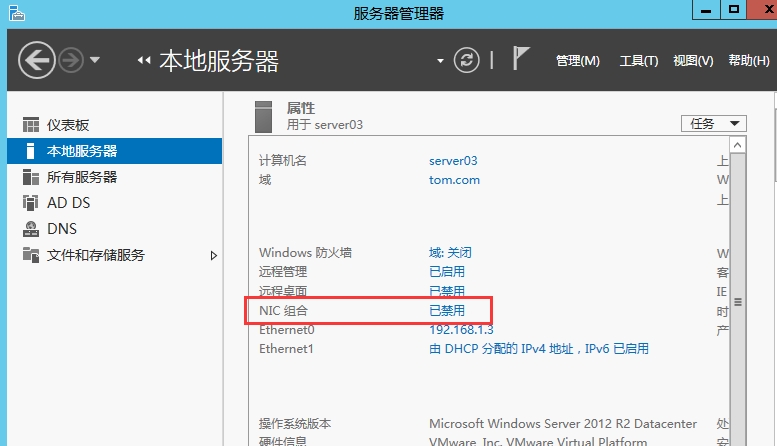
点击本地服务器:

image

点击NIC组合,NIC默认是禁用,我们手动来启用它:

image

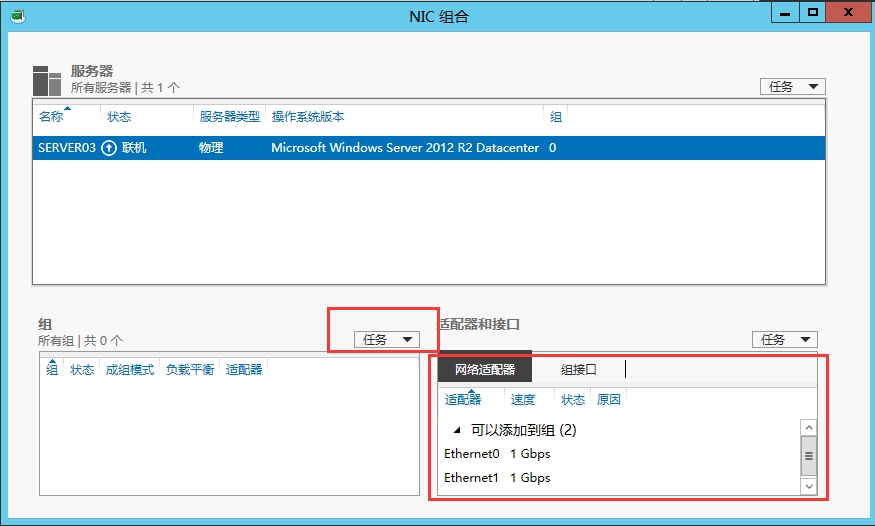
打开NIC组合之后我们可以看到我们的两块网卡,然后我们点击任务:

image

点击新建组:

image

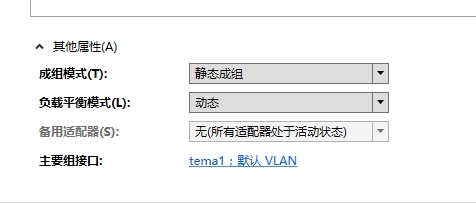
在这里我们给组起名,并选中我们的两块网卡,然后点击其他属性:

image

因为我们没有交换机,所以在成组模式这里我们选择静态成组,然后点击确定:

image

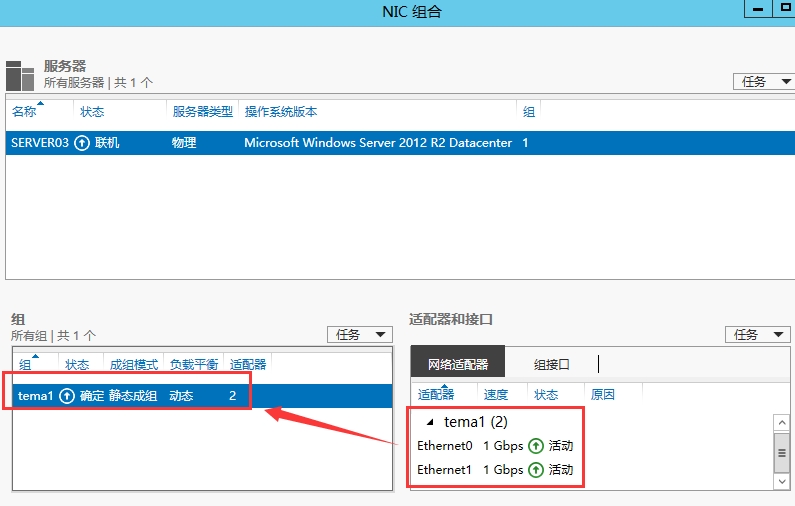
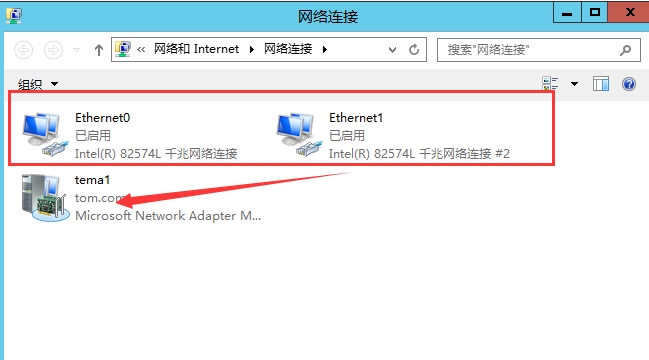
OK,可以看到我们的两块网卡以及组合成一个,下面我们就打开网络链接:

image

从上图也可以看出我们的两块网卡已经成功组合成一块网卡,下面我们就配置一下我们组合的网卡tema1的IP :

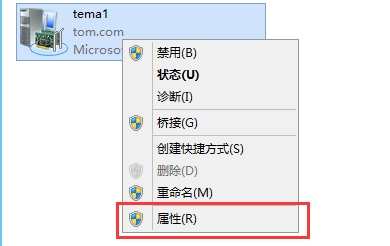
鼠标右键tema1:
image

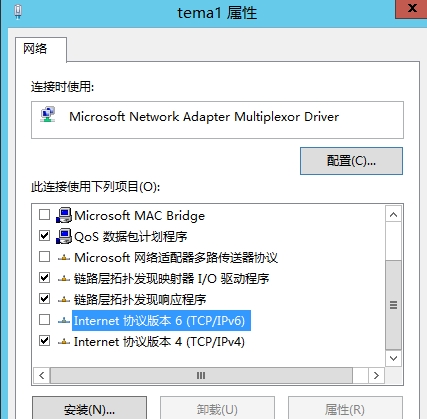
点击属性:

image

这里我们勾选IPv6,然后双击IPv4:

image

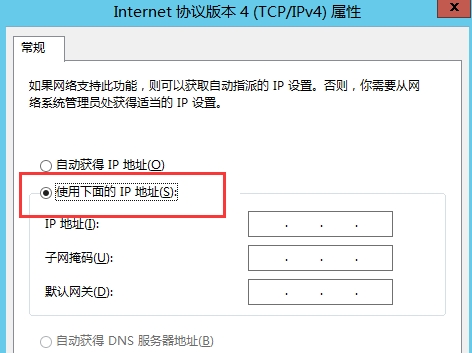
这里我们要选择使用下面的IP地址:

注意:这里输入的IP地址一定要和server01的IP地址在同一网段,否则网络不会通:

这里我输入192.168.10.20:

image

点击确定

OK ,我们的配置就到此结束了,下面我们测试一下我们的双网卡绑定:

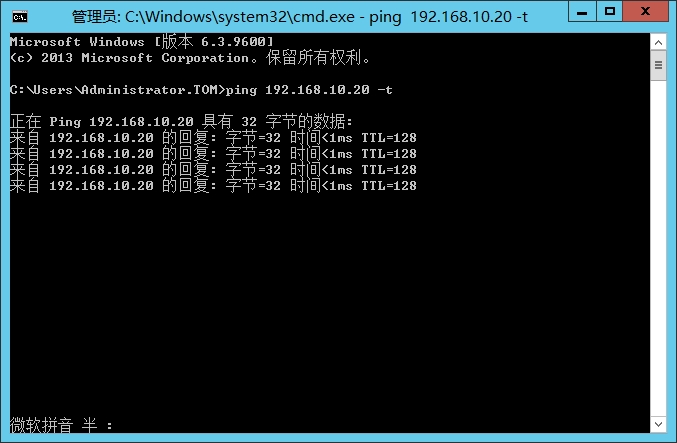
在server01上ping 192.168.10.20 -t:
image

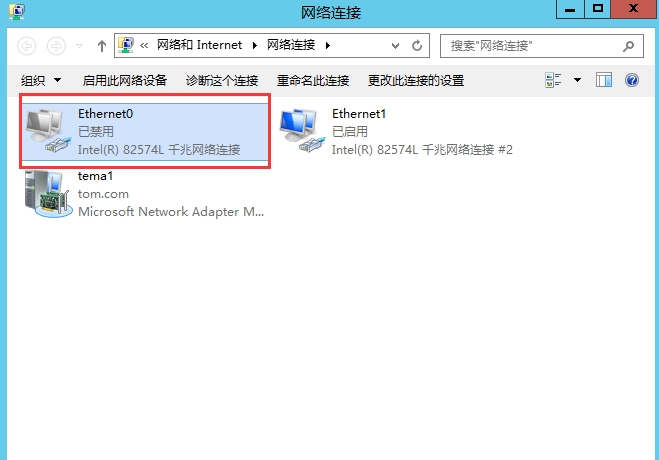
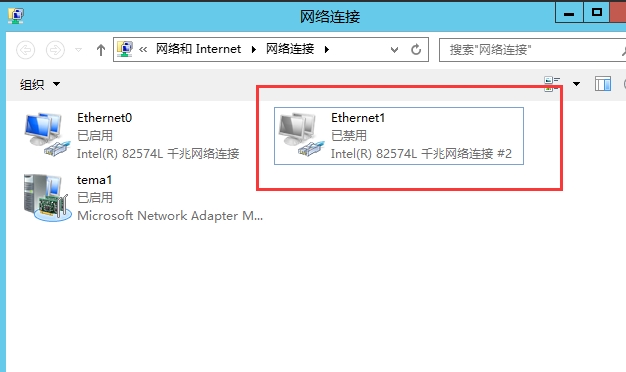
可以看到是通的。下面我们禁用server02上的一块网卡:

image

在查看我们的PING命令:

image

可以看到我们的ping命令依旧通:

下面我们打开我们所禁用的网卡,然后禁用另一块网卡:
image

然后查看PING命令:

image

可以看到我们的网络依旧是通的。