


在前后端分离的架构中,前端需要通过 API 接口的方式获取数据,但 API 是无状态的,没有办法知道每次请求的身份,也就没有办法做权限的控制。如果不做控制,API 就对任何人敞开了大门,只要拿到了接口地址就可以进行调用,这是非常危险的。本文主要介绍下在 dotNET Core Web API 中使用 Jwt 来实现接口的认证。
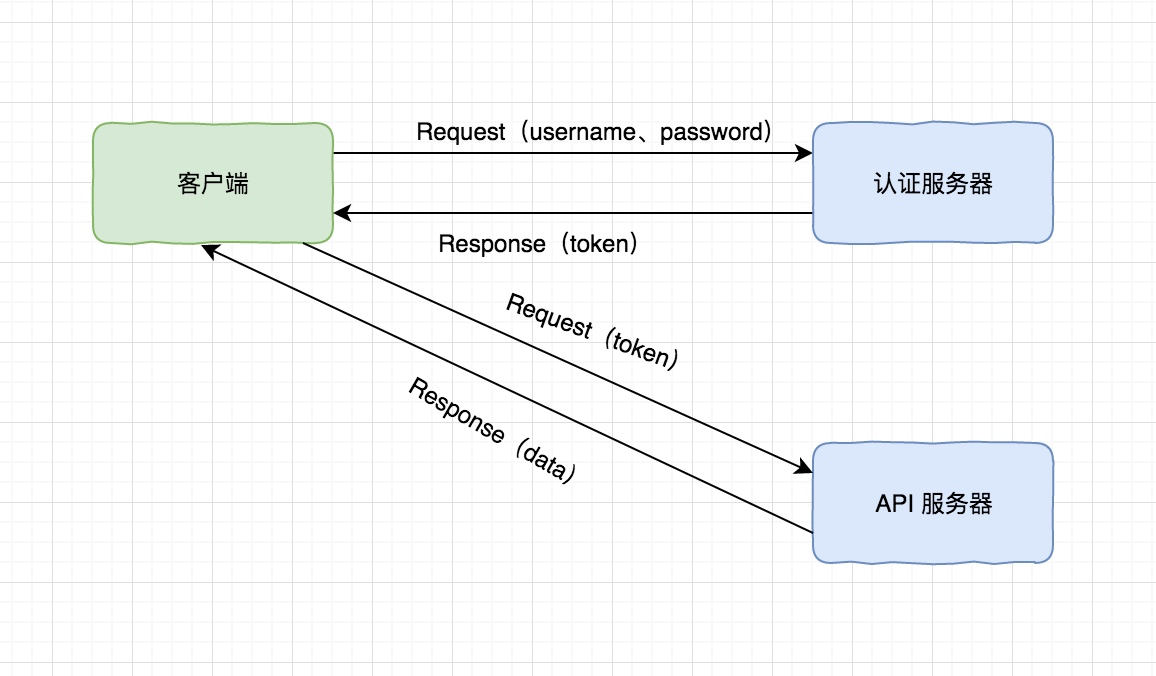
Jwt 的全称是 JSON Web Token,是目前比较流行的接口认证解决方案。有了 Jwt 后,从客户端请求接口的流程如下图:
有一个网站叫:https://jwt.io/ ,我们在这个站点上对 Jwt 产生的 token 做验证:
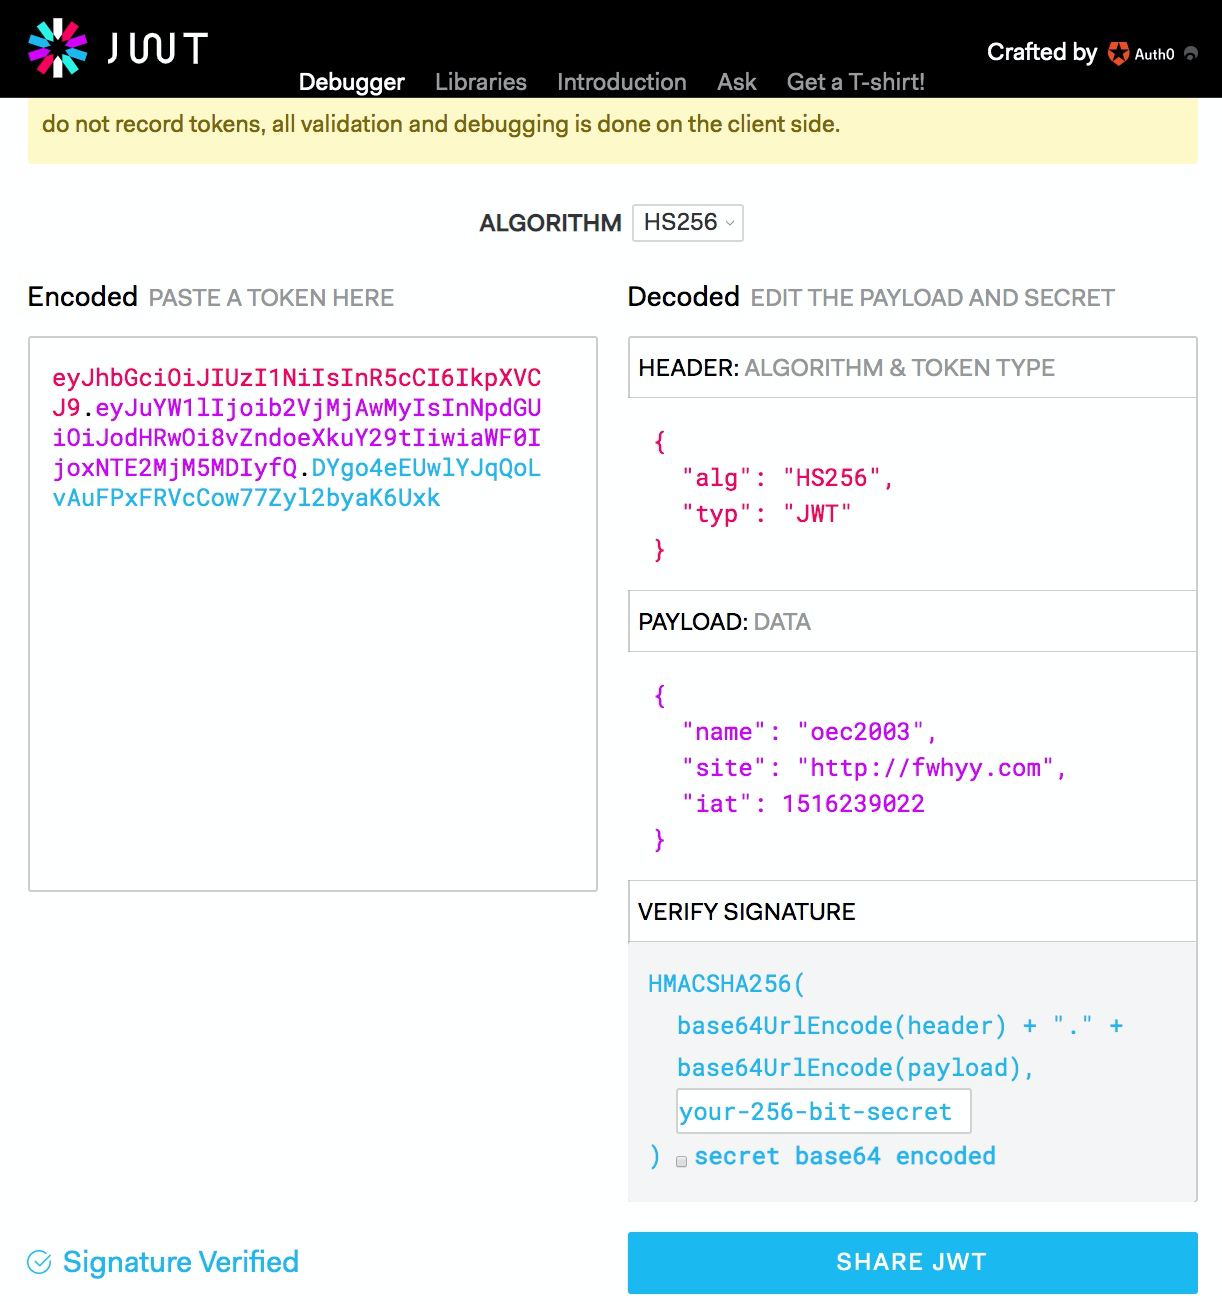
从上图可以看出 Jwt 生产的 token 由三个部分组成:
这三个部分由英文的点进行分隔开
eyJhbGciOiJIUzI1NiIsInR5cCI6IkpXVCJ9.eyJuYW1lIjoib2VjMjAwMyIsInNpdGUiOiJodHRwOi8vZndoeXkuY29tIiwiaWF0IjoxNTE2MjM5MDIyfQ.DYgo4eEUwlYJqQoLvAuFPxFRVcCow77Zyl2byaK6Uxk
头信息是一个 Json 格式的数据
{
  "alg": "HS256",
  "typ": "JWT"
}
Playload 是 token 的主体内容部分,我们可以用来传递一些信息给客户端,比如过期时间就是通过 Playload 来进行传递的。 但因为默认情况下 Playload 的数据是明文的,所以敏感信息不要放在这里。
Verify Sigantuer 是对前面两个部分的签名,防止数据篡改。
下面一步步介绍在 dotNET Core Web API 项目中使用 Jwt:
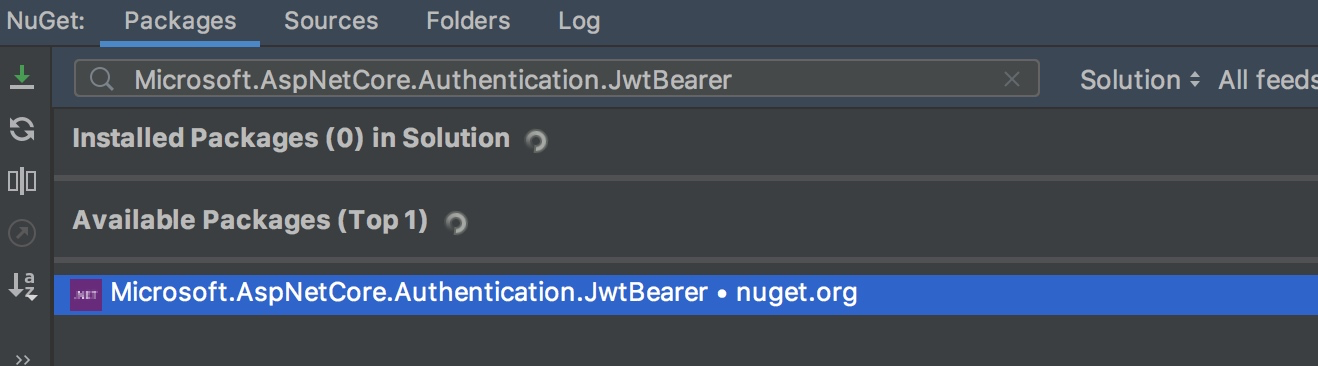
在 Web API 项目中添加对 Microsoft.AspNetCore.Authentication.JwtBearer 包的引用
1、在 ConfigureServices 方法中添加服务注册。
// jwt 认证
JwtSettings jwtSettings = new JwtSettings();
services.Configure<JwtSettings>(Configuration.GetSection("JwtSettings"));
Configuration.GetSection("JwtSettings").Bind(jwtSettings);

services.AddAuthentication(JwtBearerDefaults.AuthenticationScheme)
    .AddJwtBearer(o=>
    {
        o.TokenValidationParameters = new Microsoft.IdentityModel.Tokens.TokenValidationParameters()
        {
            ValidateIssuerSigningKey = true,
            ValidIssuer = jwtSettings.Issuer,
            ValidAudience = jwtSettings.Audience,
            //用于签名验证
            IssuerSigningKey = new SymmetricSecurityKey(Encoding.ASCII.GetBytes(jwtSettings.SecretKey)),
            ValidateIssuer = false,
            ValidateAudience = false
        };
    });
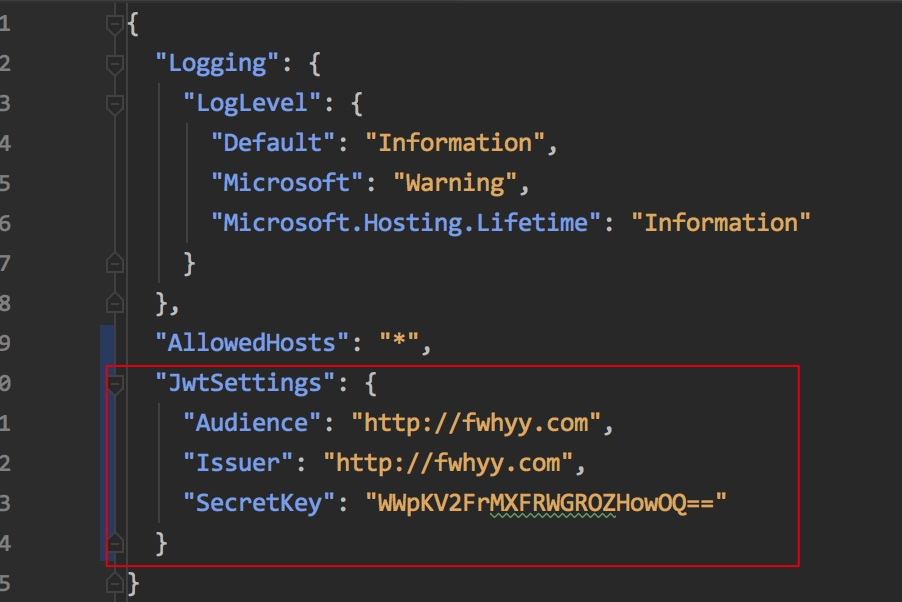
JwtSettings 的配置设置在 appsettings.json 配置文件中:
2、在 Configure 方法中添加对中间件的使用。
app.UseAuthentication();
app.UseAuthorization();
添加 AuthorizeController 控制器:
[ApiController]
public class AuthorizeController: BaseController
{
    private readonly IUserService _userService;
    private readonly JwtSettings _jwtSettings;

    public AuthorizeController(IMapper mapper,
        IUserService userService,
        IOptions<JwtSettings> options) : base(mapper)
    {
        _userService = userService;
        _jwtSettings = options.Value;
    }

    /// <summary>
    ///  获取 token
    /// </summary>
    /// <param name="request"></param>
    /// <returns></returns>
    [HttpPost]
    public string Token(TokenDto request)
    {
        bool isValidate = _userService.ValidatePassword(request.UserName, request.Password);

        if(!isValidate) return string.Empty;

        var claims = new Claim[]{
            new Claim(ClaimTypes.Name,request.UserName)
        };

        var key = new SymmetricSecurityKey(Encoding.UTF8.GetBytes(_jwtSettings.SecretKey));
        var creds = new SigningCredentials(key, SecurityAlgorithms.HmacSha256);

        var token = new JwtSecurityToken(_jwtSettings.Issuer,
            _jwtSettings.Audience,
            claims,
            DateTime.Now,
            DateTime.Now.AddSeconds(10),
            creds);

        return new JwtSecurityTokenHandler().WriteToken(token);
    }
}
上面代码中使用 IOptions 来做强类型配置,将 JwtSettings 配置类注入到该控制器中使用,关于更多配置内容可以参考:《dotNET Core 配置》。
1、在需要进行认证的控制器或接口方法上添加 [Authorize] 标记。

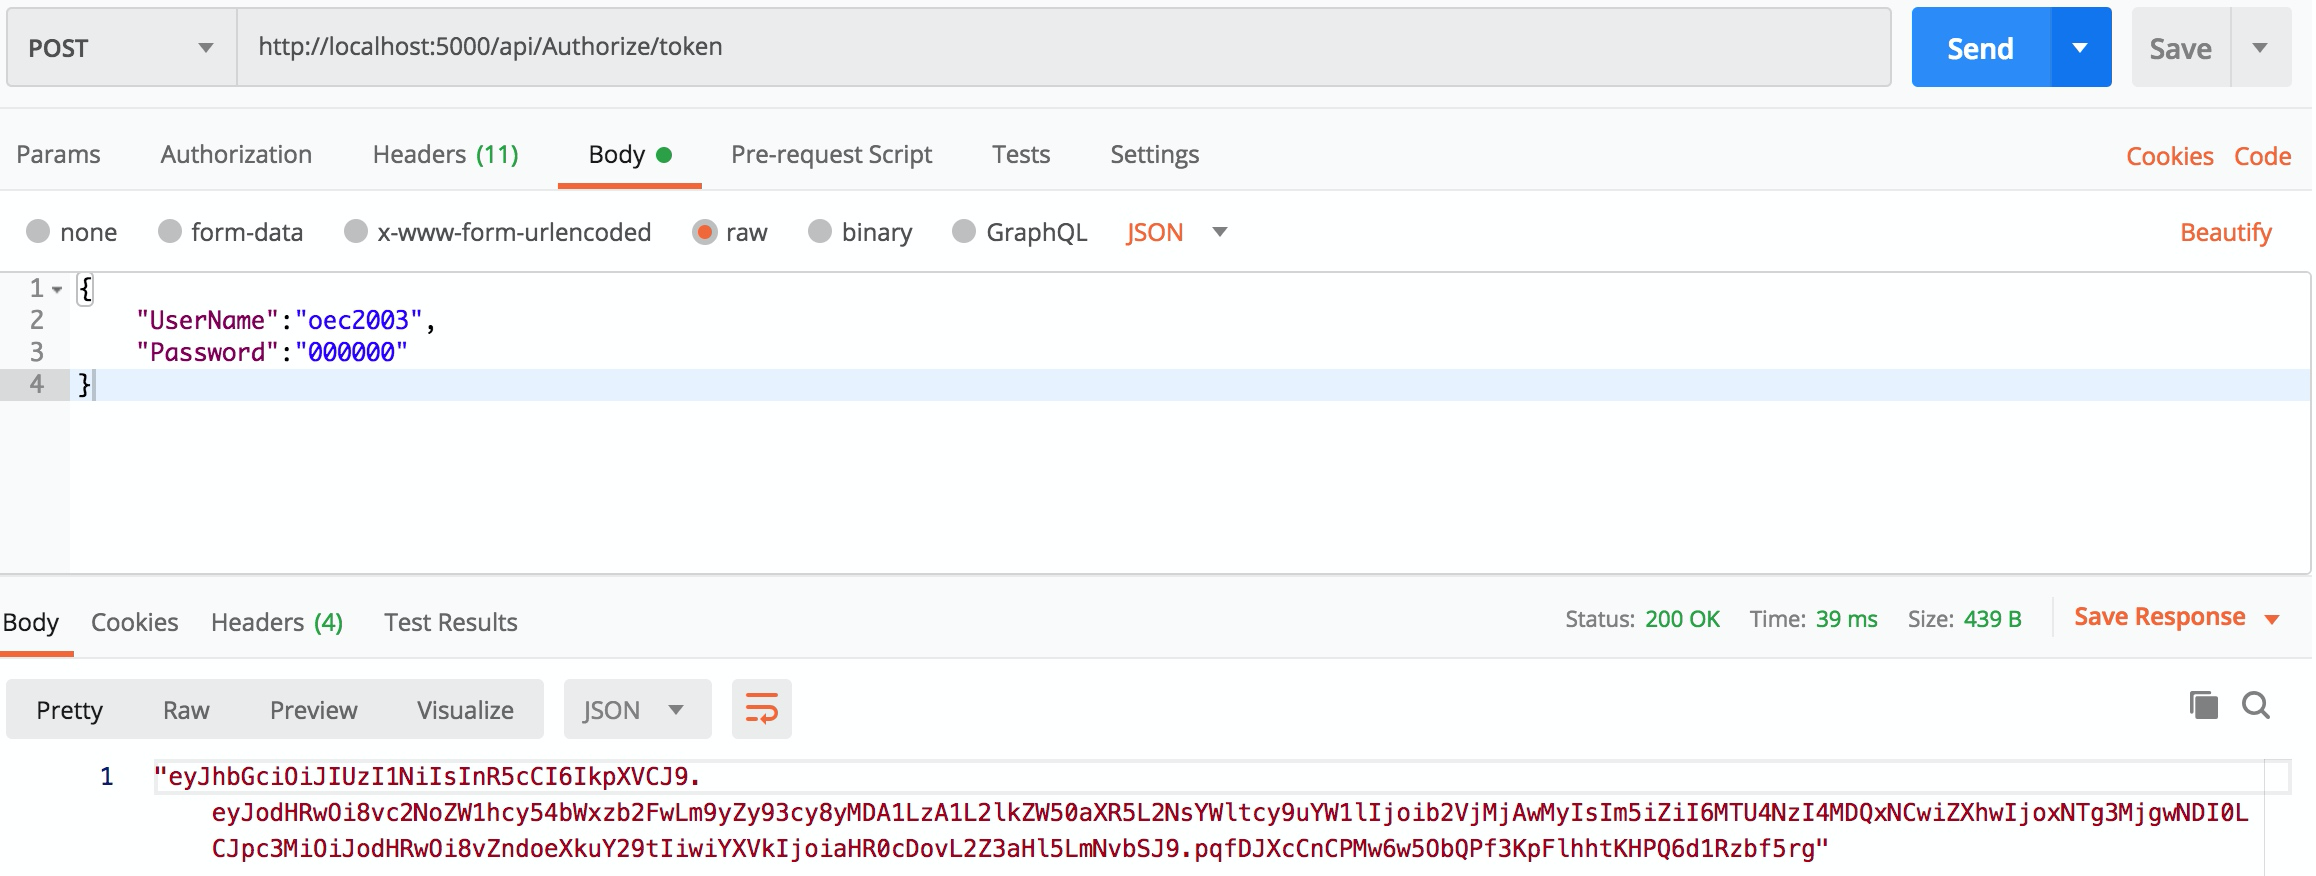
2、调用接口 http://localhost:5000/api/Authorize/token 获取 token。
3、在请求接口时使用 Authorization 的方式使用 token,token 的类型为 Bearer Token ,可以看到带上 token 后,数据正常返回。

前端技术有很多种,在这里以 Vue 为例,Vue 中处理 Jwt 有以下几个步骤:
1、请求接口时判断 localStorage 中是否有 token 数据,没有 token 数据或者 token 已经过期,需要重新调用接口获取新的 token;
2、使用 axios 的拦截器,在所有请求的 Header 中都添加 Authorization。
示例代码:
希望本文对您有所帮助。
此内容由惯性聚合(RSS阅读器)自动聚合整理,仅供阅读参考。 原文来自 — 版权归原作者所有。