最近因为项目关系,收朋友之托,想制作秀场网站,但是因为之前一直没有涉及到这方面的东西,没有什么感觉可言;搜索了一些资料以后,虽然有开业的实现方式,但是大家都没有完成的说明的,或者说我还没有更深入的研究到。不过让我找到了关于假设流媒体播放器的资料,不过是基于centos的操作,那我就试做成ubuntu的step by step吧。
step1准备ubuntu的环境:
sudo apt-get update
期间遇到了一些ubuntu的问题,总之就是倒腾ubuntu的依赖包。
一些指导:
sudo apt-get -f dist-upgrade
sudo apt-get update
sudo apt-get install -f
apt-cache depends linux-{image,headers}-generic
apt-cache rdepend linux-image-3.16.0-41-generic:i386
do-release-upgrade 又提示 ubuntu boot空间不足
然后就是手动的mv 一个 文件到其他地方,腾出boot的空间,然后重新启动reboot,然后再次 apt-get update 就可以了
step2 安装必要的一些libs:
sudo apt-get install build-essential libpcre3 libpcre3-dev libssl-dev
sudo apt-get install gcc make automake bzip2 unzip patch subversion libjpeg62-dev
我使用的是root用户
cd ~
mkdir working
wget http://www.tortall.net/projects/yasm/releases/yasm-1.2.0.tar.gz
tar zxvf yasm-1.2.0.tar.gz
cd yasm-1.2.0
./configure
make && make install
cd ~/working
step3 卸载系统原有的ffmgeg和x.264,没有则跳过:
apt-get remove ffmpeg x264
step4 先安装一些Mplayer编码库(仅限于64位系统):
wget -c http://www2.mplayerhq.hu/MPlayer/releases/codecs/essential-amd64-20071007.tar.bz2
tar xvjf essential-amd64-20071007.tar.bz2
mkdir /usr/local/lib/codecs
cp -Rvp essential-amd64-20071007/* /usr/local/lib/codecs/
编辑下面文件
vim /etc/ld.so.conf
添加以下两行到上面的文件里
/usr/lib
/usr/local/lib
step5 再安装一些格式转换常用的编码库:
sudo apt-get install amrnb opencore-amr amrwb libvorbis libtheora xvidcore
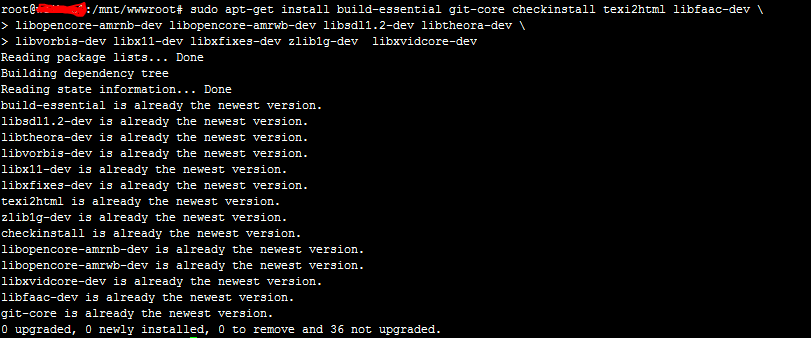
sudo apt-get install build-essential git-core checkinstall texi2html libfaac-dev
libopencore-amrnb-dev libopencore-amrwb-dev libsdl1.2-dev libtheora-dev
libvorbis-dev libx11-dev libxfixes-dev zlib1g-dev libxvidcore-dev
setp6 安装x.264:
wget ftp://ftp.videolan.org/pub/videolan/x264/snapshots/last_stable_x264.tar.bz2
tar xvjf last_stable_x264.tar.bz2
cd x264-snapshot-20150803-2245-stable/
./configure –enable-shared –enable-pic
make && make install
cd ~/working
setp7 安装libvpx:
tar xvjf libvpx-v1.4.0.tar.bz2
cd libvpx-v1.4.0
./configure –enable-shared –enable-pic
make && make install
cd ~/working
step8 安装FFmpeg
tar xvjf ffmpeg-2.7.2.tar.bz2
cd ffmpeg-2.7.2
./configure --enable-gpl --enable-version3 --enable-shared --enable-nonfree --enable-postproc --enable-libfaac --enable-libmp3lame --enable-libopencore-amrnb --enable-libopencore-amrwb --enable-libtheora --enable-libvorbis --enable-libvpx --enable-libx264 --enable-libxvid
make && make install
cd ~/working
让动态链接库被系统共享
ldconfig
step9 安装mplayer and mencoder
apt-get install libmp3lame-dev
svn checkout svn://svn.mplayerhq.hu/mplayer/trunk mplayer (使用最新的代码可以编译安装,否则使用http://www.mplayerhq.hu/MPlayer/releases/mplayer-checkout-snapshot.tar.bz2 的话出错,)
cd mplayer/
./configure
make && make install
step 10 安装flvtool2:
sudo apt-get install ruby
gem -v
gem souce -l
https://rubygems.org/
gem sources --remove https://rubygems.org/
gem sources -a https://ruby.taobao.org/
gem sources -l
因为网络的原因,切换为淘宝的服务器
ll /usr/local/bin/flvtool2
step11 查看一下已经安装好的音频和视频编码器
查看所有所支持的音频编码
mencoder -oac help
查看所有所支持的视频编码
mencoder -ovc help
setp12 安装配置Nginx:
sudo apt-get install gcc g++ libssl-dev zlib1g-dev libpcre3-dev yamdi
下载所需的nginx模块
第一个是nginx_mod_h264_streaming,让nginx支持flv/mp4流播放
wget http://h264.code-shop.com/download/nginx_mod_h264_streaming-2.2.7.tar.gz
tar zxvf nginx_mod_h264_streaming-2.2.7.tar.gz
注意:先要修改一下这家伙的源码,注释掉nginx_mod_h264_streaming-2.2.7/src/ngx_http_streaming_module.c的158到161行
/* TODO: Win32 */
//if (r->zero_in_uri)
// {
// return NGX_DECLINED;
// }
第二个是nginx-rtmp-module,让nginx支持rtmp/hls协议
wget -O nginx-rtmp-module.zip https://github.com/arut/nginx-rtmp-module/archive/master.zip
unzip nginx-rtmp-module.zip
下载清缓存的模块
wget -O ngx_cache_purge.zip https://github.com/FRiCKLE/ngx_cache_purge/archive/master.zip
unzip ngx_cache_purge.zip
下载安装nginx:
wget http://nginx.org/download/nginx-1.8.0.tar.gz
tar zxvf nginx-1.8.0.tar.gz
cd nginx-1.8.0
./configure --user=daemon --group=daemon --prefix=/usr/local/nginx/ --add-module=../nginx-rtmp-module-master --add-module=../ngx_cache_purge-master --add-module=../nginx_mod_h264_streaming-2.2.7 --with-http_stub_status_module --with-http_ssl_module --with-http_sub_module --with-http_gzip_static_module --with-http_flv_module
make && make install
编译过程中出错:
make[1]: *** [objs/addon/src/mp4_reader.o] 错误 1
解决方法:
vim objs/Makefile (修改objs/Makefile文件, 去掉其中的"-Werror"), 然后就能够正常编译了.
step13 设置nginx为系统服务
sudo wget https://raw.github.com/JasonGiedymin/nginx-init-ubuntu/master/nginx -O /etc/init.d/nginx
sudo chmod +x /etc/init.d/nginx
sudo update-rc.d nginx defaults
sudo service nginx start
sudo service nginx stop
然后用浏览器你的服务器IP,看到welcome就对了
或者到nginx的sbin目录下,运行一下nginx -V,看看列表出来的modules对不对
step14 各种配置nginx:
编辑/usr/local/nginx/conf/nginx.conf文件,最好用sftp软件(如windows下的flashfxp/Mac下的tramnsmit)下载过来本地编辑。
worker_processes 1;
error_log logs/error.log;
#error_log logs/error.log notice;
#error_log logs/error.log info;
pid logs/nginx.pid;
events {
use epoll;
worker_connections 1024;
}
rtmp {
server {
listen 1935;
chunk_size 4000;
application vod {
play /mnt/media/vod;
}
application hls {
hls on;
hls_path /mnt/media/app;
hls_fragment 10s;
}
}
}
http {
include mime.types;
default_type application/octet-stream;
sendfile on;
keepalive_timeout 65;
gzip on;
log_format access ‘$remote_addr – $remote_user [$time_local] “$request” ‘
‘$status $body_bytes_sent “$http_referer” ‘
‘”$http_user_agent” $http_x_forwarded_for’;
limit_conn_zone $binary_remote_addr zone=addr:10m;
server {
listen 8080;
server_name localhost;
location /stat {
rtmp_stat all;
rtmp_stat_stylesheet stat.xsl;
}
location /stat.xsl {
root /mnt/soft/nginx-rtmp-module-master;
}
location /control {
rtmp_control all;
}
location / {
root /mnt/soft/nginx-rtmp-module-master/test/rtmp-publisher;
}
}
server {
listen 80;
server_name localhost;
location / {
root /mnt/wwwroot;
index index.html;
}
location ~ .flv$ {
root /mnt/media/vod;
flv;
limit_conn addr 20;
limit_rate 200k;
}
location ~ .mp4$ {
root /mnt/media/video;
mp4;
limit_conn addr 20;
limit_rate 200k;
}
location /hls {
# Serve HLS fragments
alias /mnt/media/app;
}
access_log logs/nginxflv_access.log access;
}
}
step14 把自己的电影转换成mp4和flv格式来测试nginx搭的环境:
准备两部电影,硬盘上随便找,我找了“谍影重重A.mp4”和“鹿鼎记033.rmvb”,尽量找小一点十来分钟的,等下我们还要看完测试一下转换的结果有没有音影不同步的情况。
我把两部电影重命名为 movie1.mp4和 movie2.rmvb,并上传到服务器/mnt/media/video下面,这里目录用来存放我们的原始视频。还有一个目录是/mnt/media/vod 用来存放转换后的视频。
我这里的具体目录结构为:
/mnt/media/video -> 存放原始视频
/mnt/media/app -> 存放转成m3u8的视频,供http访问(HLS)
/mnt/media/vod -> 存放转换后的flv和mp4视频,供http或rtmp访问
用ffmpeg转换mp4文件(ffmpeg不支持rmvb)
cd /mnt/media/video/
ffmpeg -y -i movie1.mp4 -vcodec copy -acodec copy ../vod/movie1.flv
cd ../vod
mv movie1.flv movie1-src.flv
yamdi -i movie1-src.flv -o movie1.flv
rm -rf movie1-src.flv
step15 安装flv web播放器:
ckplayer播放器安装简单。就拿这个做实例吧。
cd /mnt
mkidr wwwroot
下载 ckplayer6.7
解压,将所以文件上传到wwwroot下面
step16 制作页面播放流媒体:
cd /mnt/wwwroot
touch a.html
vi a.html
输入以下内容:
具体配置的含义,可以参考再见配置工作,这里
step 17 结束:

欢迎各位批评指正!
如有问题,欢迎与我联系!
参考页面:
https://www.vultr.com/docs/setup-nginx-rtmp-on-ubuntu-14-04
https://www.vimp.com/en/web/faq-installation/items/how-to-install-the-transcoding-tools-on-ubuntu-1404.html
http://hdu104.com/294
baidu.com
google.com
等等.
此内容由惯性聚合(RSS阅读器)自动聚合整理,仅供阅读参考。 原文来自 — 版权归原作者所有。