







在SharePoint 2010中提供了两种身份认证方式:基于声明的身份认证方式和经典身份认证方式。 关于这两种认证方式的区别,已经有很多相关的资料,这里就不详述了。经典身份认证方式只支持windows用户或者域用户访问,基于声明的身份认证可以支持windows认证和表单认证,也就是说既支持windows用户或域用户,又支持存储在数据库里用户。
我们在SharePoint 2010 里创建web 应用的时候,默认是使用经典身份认证的,这种主要适合于企业内网使用,如果需要在外网上使用,则建议使用基于声明的认证方式。但是,一旦在创建应用时使用了经典认证方式,想要改成基于声明的认证方式,是不能在身份认证提供程序弹出的页面页面里修改的,如下图所示:
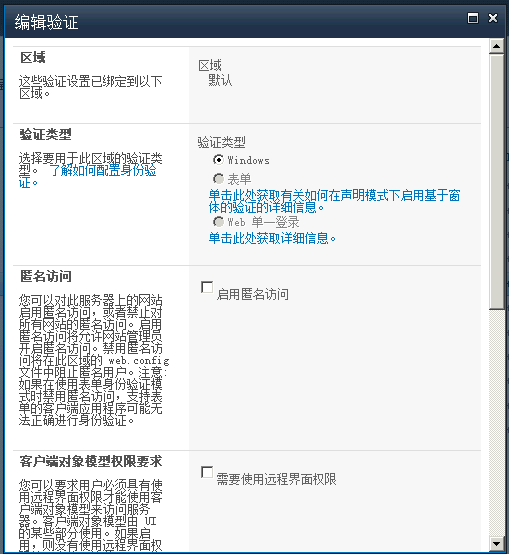
这时候修改认证方式就需要SharePoint 2010 Management Shell来大显神威了,使用的脚本如下:
方法1:
 View Code
1 PS C:\Users\Administrator> $app = Get-SPWebApplication "http://itweb:8005"
2 PS C:\Users\Administrator> $app.UseClaimsAuthentication
3 False
4 PS C:\Users\Administrator> $app.UserClaimsAuthentication = "true"
5 PS C:\Users\Administrator> $app.UseClaimsAuthentication = "true"
6 PS C:\Users\Administrator> $app.UseClaimsAuthentication
7 True
8 PS C:\Users\Administrator> $app.Update()
9 PS C:\Users\Administrator>
命令解释:
%app = Get-SPWebApplication "url" ,获取WebApplication对象,并保存到变量$app中
%app.UseClaimsAuthentication,回车后可以看到 当前是否使用了 [声明的身份验证]
%app. UseClaimsAuthentication = "True",指定使用声明的身份验证,注意True要加引号
%app.Update(), 提交更改。
方法2:
View Code
1 $WebAppName = "http://yourWebAppUrl"
2 $account = "yourDomain\yourUser"
3 $wa = get-SPWebApplication $WebAppName
4
5 Set-SPwebApplication $wa -AuthenticationProvider (New-SPAuthenticationProvider) -Zone Default
6 #This causes a prompt about migration. Click Yes and continue.
7
8 #The following step sets the user as an administrator for the site.
9 $wa = get-SPWebApplication $WebAppName
10 $account = (New-SPClaimsPrincipal -identity $account -identitytype 1).ToEncodedString()
11
12 #After the user is added as an administrator, we set the policy so that the user can have the correct access.
13 $zp = $wa.ZonePolicies("Default")
14 $p = $zp.Add($account,"PSPolicy")
15 $fc=$wa.PolicyRoles.GetSpecialRole("FullControl")
16 $p.PolicyRoleBindings.Add($fc)
17 $wa.Update()
18
19 #The final step is to trigger the user-migration process.
20 $wa = get-SPWebApplication $WebAppName
21 $wa.MigrateUsers($true)
修改完成后,打开管理中心|web 应用程序管理|身份验证提供程序,就可以看到认证方式已经改成了基于声明的验证方式。
PS:改成基于声明的验证方式以后,如果只需要Form认证,则在编辑验证页面把启用Windows 验证勾掉就可以了,而且可以自定义登陆页面(说实话,自带的登陆页面实在是不好看)。这样就能提供一个很漂亮的登陆页面了。
参考:
此内容由惯性聚合(RSS阅读器)自动聚合整理,仅供阅读参考。 原文来自 — 版权归原作者所有。