


See how easy it is to install Pepperdata in this 4-minute step-by-step video.
Many organizations struggle to control their cloud costs, and that arises from difficulties in managing Kubernetes resources. Of the $419 billion spent on cloud infrastructure in 2025 , an estimated 27% of that spend is wasted due to overprovisioned resources.
As finance teams take a larger interest in their company’s cloud investments, optimizing cluster efficiency – specifically cores, memory, and instance details – is key to identifying waste and achieving substantial savings.
The Common Challenge: Slow and Complex Installs
Even if there is a CEO/CFO-level mandate to reduce cloud costs, cloud cost optimization can be a massive headache to implement.
Time spent installing software, uncertainty of application failures, performance decreases, tedium of configuring clusters: These are just a few of the many daunting realities engineers face when it comes to optimizing their cloud infrastructure, clusters, and applications.
The Easy, Quick, and Proven Solution That’s Completely Self-Service
Pepperdata offers a truly self-service trial experience that allows you to realize up to 75% cost savings on your Kubernetes infrastructure with a single-command bash script, putting you on the fast track to optimization without needing to read a bunch of complicated documentation or even talk to anyone.
Pepperdata works continuously and automatically in real time to free engineers from tasks like manual application tuning, applying recommendations, or making application code changes.
Here’s how to get started:
The Self-Service Trial Workflow
Step 1: Sign up and download
Go to the Pepperdata Capacity Optimizer free trial page and fill out the form to receive an email with further instructions and a link to download a single-command install script (just a basic bash script).
Step 2: Prerequisites and preparation
Before running the install script, ensure you have the following cleared:
- AWS CLI installed
- An Amazon ECR registry
- Kubectl, regctl, Helm, and curl commands
Ensure you have the node capacity as well with one node large enough to host the custom-built Prometheus server, which requires 16 GB of memory with a 32 GB limit. Once that’s squared away, authenticate your registry before executing the script.
Step 3: Script execution and installation
When you run the install script itself, it’s going to prompt you for your:
- Email address
- EKS cluster name
- ECR registry address
When the script runs, it will do the following five steps automatically:
- Generate a Pepperdata license file
- Authenticate to Pepperdata's registry
- Copy the software from our registry into yours
- Add a Pepperdata Helm repository
- Run the install
And with that, congratulations! You have officially installed Pepperdata in your environment.
Step 4: Validation and baseline period
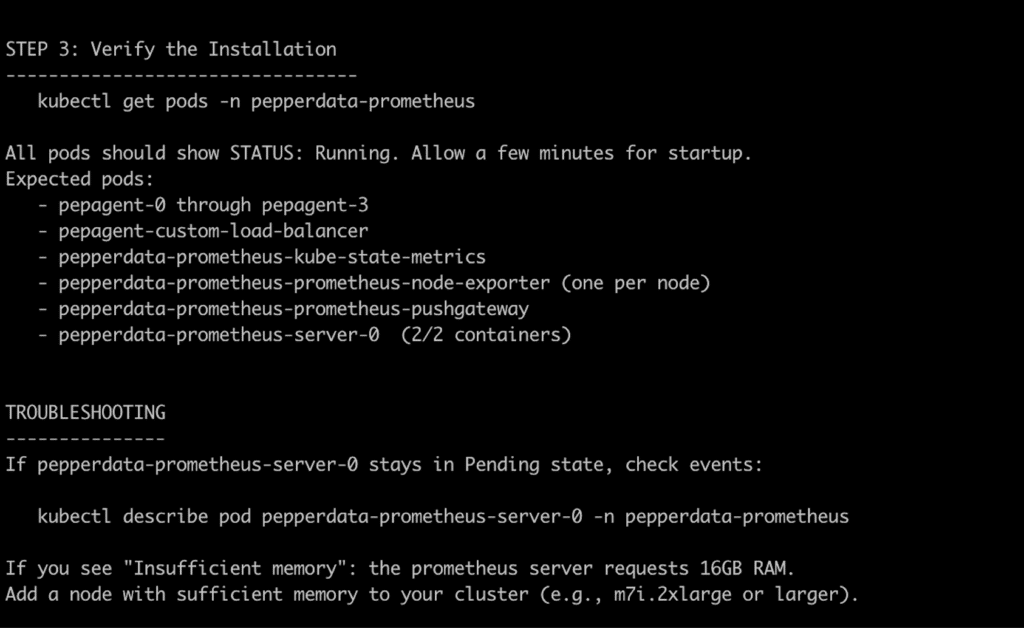
To validate the installation, you run get pods. You'll be able to see the Pepperdata agents running, the custom load balancer, and the Prometheus servers. If you run into any problems, you can scrutinize with describe pods – oor if you’d prefer guidance from a Pepperdata optimization expert, you can book a time right here as well.
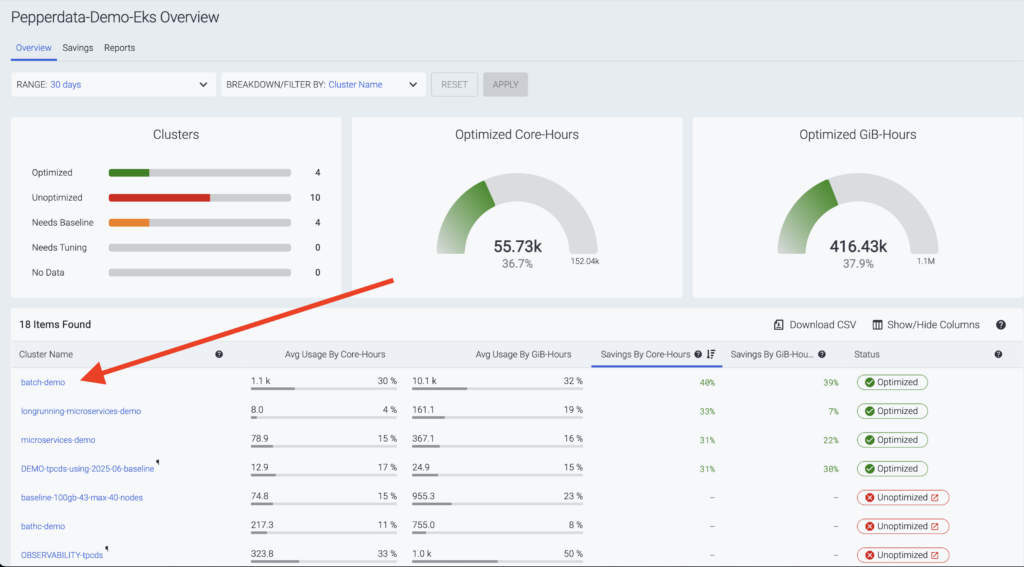
Once you're installed and we start to receive data, we'll send you a link to your dashboard. In the dashboard, you'll see your cluster and performance metrics.
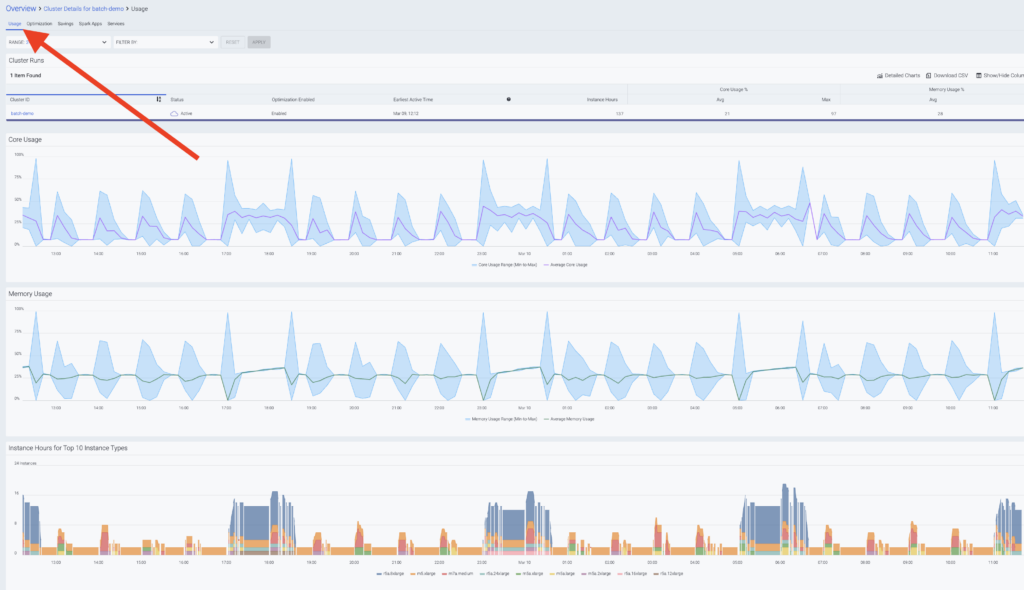
If you click on your cluster name, you'll see the performance data we'll use to scrutinize the efficiency, including cores, memory, and instance details. From there, you'll start a baseline period which lasts for a few days.
Step 5: Optimization and Savings
Once we see how performant your cluster is, you'll receive a second YAML file. You'll then just run the Helm command again with the new parameters that will enable optimization.
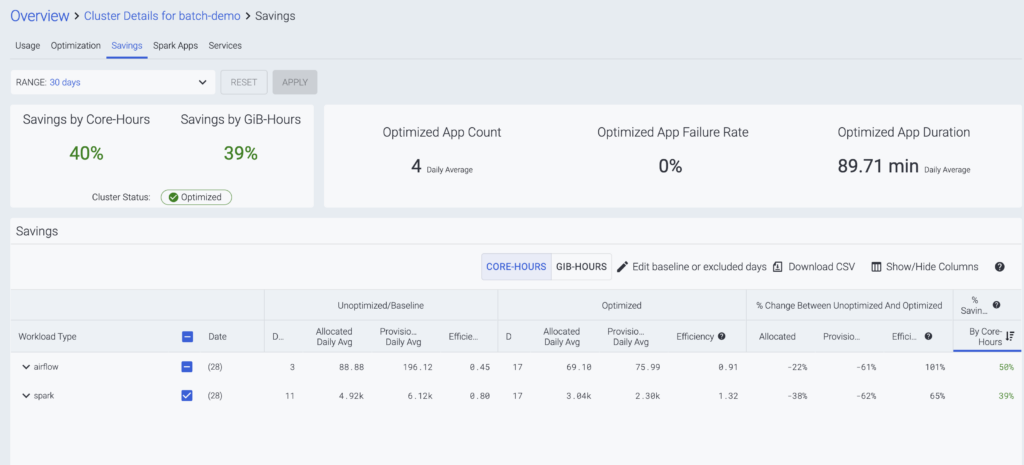
When optimization is enabled, you can click on the savings link on the dashboard, which will take you to a dedicated page showing you the effect of the optimization and how much is being saved in terms of cores and memory.
Conclusion: Fully Optimized and Self-Sufficient
The process to get up and running with Pepperdata is simple:
Sign up → Install → Baseline → Optimize.
It’s truly self-service, allowing you to achieve optimization and realize up to 75% cost savings today on Kubernetes!